Sekiro walkthrough part 12 - Mibu Village, Corrupted Monk Spirit, Screen Monkeys
With the Hidden Forest looking decidedly less misty, the way is now clear to take on the cursed Mibu Village and its terrible residents. It’s an interesting place and opens up some very interesting battles.
There’s plenty to see and find here, and it’s one of the best places to grind up Skill XP and Sen if you need to grab an item from a merchant or learn a skill.
From the Mibu Village Shrine, take a look to the right down the hill below you. There’s a Memorial Mob merchant here that sells loads of great items, including Carp Scales, and a multiple-use Gourd that reduces Terror status, great for fighting the Headless and similar bosses.
Downstream to the right of the Mob is a rock-hard Shinobi dude. He’s guarding another precious Carp Scale, which you can nab without killing him if you lead him away then sprint in and grab the item while he’s chasing you.
Mibu Village
To advance properly, run forward from the Mibu Village Shrine upstream. You’ll see some zombie farmers collecting in the river, either run past them, of slash them once or twice to take them out - they’ll only respawn in a few seconds.
Follow the steam until you see a path that leads around to the left. Walk along it and you’ll meet a big group of zombie farmers. Either Whirlwind Strike to take them out or jump up and grapple to the tree branch behind them.
Jump onto the thatched roof in front of you, then jump down into the hole. You can talk to a friendly NPC here, then when you’re done grapple out and grapple across to the second roof.
There’s an area over to the left where you can collect a couple of good upgrade items, but down in front of you, there’s an open graveyard-like area.
Take out the chicken on the roof with you, then get ready to attack the graveyard.
As you make your way through this small area, little dudes will burst out of the ground and grab you, so you’ll want to be quick. Under the big tree in the top left of the fenced graveyard is a Gourd Seed, which you’ll definitely want to pick up.
On the other side of the yard, make your way around to the left before grappling up behind the big bell dude, and deathblow the farmer waiting for you at the top.
Walk forward and there’s another zombie collector digging in the ground. Take them out then look to your left. There are two old lady enemies here that are very, very dangerous.
If you get caught in their grab attack they’ll destroy most of your health, if not kill you outright, so back off heavily as they advance, then sprint and strike back when they stop. They’re weak when unguarded so finish them quickly.
Behind you, across the small bridge, there’s a Sculptor’s Idol where you can rest, called the Water Mill.
From the Water Mill, continue up the path next to you.
You’ll hear music playing as you progress, and eventually see a woman crying. She’s a pretty tough optional boss - O’Rin of the Water. She’s also very, very optional, since you can just run past her across the bridge to the left.
If you do want to fight her, equip some Divine Confetti to deal extra damage and parry her strikes. Whirlwind Strike works well against her guard, but otherwise you’re trying to bait out the end of her combos to counterstrike.
Once you’re on the other side of the bridge, over to your right you’ll see a load of enemies in front of a house that you can Eavesdrop on.
Sneak up and deathblow the big boi, then set to taking on the zombies. Pay special mind to the thrower enemies, their grey projectiles inflict Terror status which will kill you instantly if your bar gets filled.
Try not to get stuck in the middle of the group, otherwise you can get caught out by the grabby old lady enemies. Back off when they try to get you, and sprint in when their combo finishes.
Once they’re down, crouch and go underneath the house. Under here, you’ll find a revolving door that lets you inside the house.
You can talk to an NPC here, then go out through the ruined walls to grab items outside.
Over to the right, as you’re coming back in, you can grapple to the second floor where you can find a Prayer Bead.
Jump onto the roof and back out to where you fought the enemies.
If you lost any health or consumed any items, go back to the Water Mill Shrine and restock.
Retrace your steps to here and continue on the path up to the left. You’ll come face-to-face with a difficult boss.
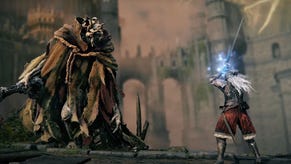
Corrupted Spirit Monk
This is a mechanically tough fight, and requires intense concentration for a long time. She might only have one health bar, but it takes a heck of a long time to get down.
At the start of the fight, she’ll be vulnerable to a few hits right at the start.
Over the course of the battle, you can also use Snap Seeds to stun her up to three times. This leaves her open to a couple of slashes or a Shinobi Axe swing.
Her main combo is a five strike long circular sweep. Sprint backwards to get out of the way of the first three of four swipes, then parry the fifth. This will leave you in a strong position to retaliate with a counterstrike.
When she does her unblockable sweep attack, you can try to jump on her head if you want, but the followup swing makes it difficult. The best thing to do is stand back from both of these strikes then nip in at the end of the combo to deal some quick damage.
A lot of her moves are quite slow and deliberate, so a lot of this fight is about step dodging out of the hitbox of her attack, then sprinting back in to chip her health away.
When she jumps in the air towards you, jump back at her and parry her strike while you’re in the air - this also leaves you in a great counter position.
Remember, you can block a lot of her basic attacks. If you get stuck in a sticky spot, hold block and try to put some distance between the two of you.
You can interrupt her thrust attack by hitting her while she’s winding it up.
Defeating the Monk gets you not only a Memory attack boost, but the ability to swim underwater as well.
Go and rest at the shrine that’s appeared on the battlefield, then go through the cave opening to the left. Inside you’ll find the Shelter Stone, one of the items Kuro needs.
Travel back to his room and tell him, and after a conversation, he’ll tell you to talk to Emma.
Speak to her, then talk to Kuro again.
All this talk of Immortal Severance will lead you to a new main objective: obtain the Mortal Blade.
It was last seen a Senpou Temple on Mt. Kongo, which luckily, you’ve already cleared to the end. Travel to the Main Hall Shrine at Senpou Temple, then go over to where the elderly monk was sat in front of the statue earlier.
On the altar, there’s a bell that you can interact with. Ringing it transports you to a new realm and a fresh challenge.
Folding Screen Monkeys
This set-piece boss battle is different from any other that you’ve faced so far. It’s more of an action puzzle than a straight up fight, which will test your strategy more than mechanical skill.
Your goal is to kill the four Folding Screen Monkeys that’re hiding the Divine Child.
You have to take each one out very specifically, or you’re going to be in for a bad time. Roaming the arena are packs of deadly ghost monkeys (yes, really), who inflict Terror status and can overwhelm and kill you very quickly. You’ll want to keep a beady eye out for them as you go about your business.
At the start of the fight, you’ll get a bell in your inventory. Ringing it will reset the position of all of the monkeys, so be sure to make use of it if you’re stuck.
To start the encounter properly, from your starting position, do a complete 180 and look behind you. Take a step or two forward then slash. There’s an invisible monkey here, trolling you mercilessly with his mere presence. One down.
Next you’re after the green monkey. Turn back to face the way you started, then grapple up onto the structure in front of you. You’ll see a big tree with two of the monkeys in it in front of you, grapple down to it and they’ll flee.
Follow the green monkey straight forward, grappling onto the wooden walkway on the other side of the tree. There’s a giant bell here that you can interact with, and you’ll see the green monkey just above you.
Interact with the giant bell to ring it and it’ll stun the monkey. Now grapple up to him and kill him while he’s stunned. Two down.
Turn back around to face the tree. Your next target is the red monkey, who is invisible while you’re more than a few feet away from him. The only way to track him is to follow the trail of flames that he leaves behind.
After you’ve scared him from the tree in the centre, he’s probably wandering around the perimeter wall. From where you defeated the green monkey, grapple to the roof behind you and see if you can spot the flames. He’s probably on the other side of the tree, so grapple across.
When you catch up to his flame trail, crouch and sneak up behind him, otherwise he’ll run off.
Around now is probably where the Terror ghost monkeys will come into play. If they start to give you a hard time, break off from following the red monkey for a minute, deal with the ghosts, then resume your hunt so you don’t scare him off.
Once you’re in range of a stealth blow, take the red monkey down.
The final monkey is the most finicky.
He’s found in the top left tower of the area - looking at it from your starting position (see around 27:14 in the walkthrough video).
Make your way across the rooftops from the red monkey, either killing or running from the ghost monkeys along the way.
Once you’ve reached the roof of the tower, jump up onto the gap in the ceiling. Make sure you do this on the bottom side rather than the right, since the monkey will see you otherwise.
You then need to drop onto the monkey and air assassinate him. This isn’t completely straightforward though.
If you miss him, go to the far door in the temple he was hiding in and interact with it. This will make it dark in the room so he won’t spot you on the roof.
Ring your mini-bell to reset positions, then return to the roof and get the drop on him.
With all four down, a cutscene will play.
When you regain control, you’ll be in a new area with a new NPC to meet - The Divine Child.
Go and speak to her in the temple, and another cutscene will play.
After the cutscene, speak to her again and exhaust your conversation options. To leave, go out of her temple and turn right, up the wooden stairs.
At the top you can open a door which leads back to the Main Hall Shrine. From here, travel to Kuro’s room and speak to him.
After your conversation, interact with the incense burner, then go and talk to Kuro again. Following this conversation your only way to advance will be to seek the second item you seek.
Sekiro guides
- Sekiro walkthroughs
- Sekiro walkthrough Part 1 - Yamauchi, General Naomori Kawarada
- Sekiro walkthrough Part 2 - Chained Ogre
- Sekiro walkthrough Part 3 - Find the Flame vent, Shinobi Axe and fight General Tenzen Yamauchi
- Sekiro walkthrough Part 4 - Find the Shinobi Firecracker and fight the horse-rider
- Sekiro walkthrough Part 5 - How to reach Ashina Castle
- Sekiro walkthrough Part 6 – finishing the Hirata Estate
- Sekiro walkthrough Part 7 – Ashina Reservoir
- Sekiro walkthrough Part 8 - Senpou Temple, Long-Armed Centipede Sen'un
- Sekiro walkthrough Part 9 - Ashina Castle Upper Tower
- Sekiro walkthrough Part 10 – Where to find Lord Isshin
- Sekiro walkthrough Part 11 – Ashina Depths and Hidden Forest
- Sekiro walkthrough Part 12 – Mibu Village, Corrupted Monk Spirit, Screen Monkeys
- Sekiro walkthrough Part 13 – Sunken Valley, Gun Fort and Bodhisattva Valley
- Sekiro walkthrough Part 14 – Owl and Fountainhead Monk Cheese
- Sekiro walkthrough Part 15 – Finding a Persimmon and collecting the Frozen Tears
- Sekiro walkthrough Part 16 – Mibu Manor, Fountainhead Pot Noble and Dragon
- Sekiro walkthrough Part 17 – Clean up and Isshin Sword Saint Cheese
- Sekiro - best ending guide
- Sekiro skills and combat
- Sekiro - top combat tips
- Sekiro - best skills
- Sekiro - Boss guide
- Sekiro crafting and items
- Sekiro - how to remove Rot Essence and cure the Dragonrot
- Sekiro - crafting and upgrade materials guide
- Sekiro - Gourd Seeds and Prayer Beads locations
- Sekiro - Treasure Carp Scales Guide
- Sekiro - Mask Fragment Guide
- Sekiro - where to find more Divine Confetti and Snapseeds
