Sekiro walkthrough part 17 - Clean up and Isshin Sword Saint Cheese
Now you’ve got the Dragon’s Tears, the end is truly in sight. You’ll need to gather as many resources as possible for your final battle, so now’s your chance to clean up any bosses you’ve left.
I’d recommend getting as many Prayer Beads for health upgrades as possible, as well as defeating the secret boss the Twin Guardian Apes for an attack boost, and O’Rin of the Water in Mibu Village for the deathblow health regen buff she drops.
Double Large Bois
You find the Twin Guardian Apes past the Poison Pool in the Ashina Depths.
It’s a tough fight, but after the horror of the Great Shinobi - Owl everything should feel possible in this game.
The first phase should be easy to predict for you now, simply deflect the third and fourth hits of his basic combo, then block his overhead slam to make him fall over.
You can also punish his sliding slash by jumping over it.
In the second phase, you have to fight both forms of the Ape at once, which is overwhelming at first, but can be exploited. The first thing to consider is that if you beat the Headless Ape, the other disappears too, so focus on it. Secondly, you can use the bulky body of the Headless Ape to block off the quick Brown Ape. Try and position yourself with the Headless Ape between you and the brown one, then just follow the same blueprint as the first phase.
Defeating the double trouble lands you a valuable attack boosting memory.
O’Rin of the Water
O’Rin is exploitable using items. Coat your blade in Divine Confetti, then use Whirlwind Slash to deal big damage through her guard. She’s a deceptively powerful enemy, and can’t be hit when she turns see-through, so wait for your openings without trying to force the issue.
There’s not much more to say about this fight other than keep your wits about you and be ready to block her quick flurries. Grind down her health with Divine Confetti-infused Whirlwind Strikes and you’ll be done in no time.
To the secret passage
With those two down, you should be close to having everything you need to take on the last boss. So travel back to Kuro’s room to continue the story.
Next to the Shrine speak to Emma and Lord Isshin, who’s succumbed to his mysterious illness and died in her arms. She’ll tell you that Genichiro has once again taken the Divine Heir and is holding him at the Silvergrass Field where you fought at the start of the game.
Jump out of the window next to Emma, then drop down the rooftops until you reach the castle stairs walls. Grapple across to the other side and go down to the end of the wall. Turn right and you’ll see a shinobi and samurai fighting, go through the door behind them and turn immediately left, dropping down and going through the open door to the Ashina Reservoir.
Rest at the Shrine to reactivate it, then just high-tail it past the Ashina Spears dude and his samurai friend around to the left. At the bottom of the moat you’ll find another Shrine, and the entrance to the Silvergrass Field.
If you want to take out the Seven Spears member before the underground passage, it’s very cheese-able. To even the odds with his samurai friend, run over and aggro them, then run up towards the Reservoir Shrine so they follow you.
Then run back past them, grapple around to the left and hide around the corner until you see the health bar disappear in the top left. You can sneak back into the fight area and stealth attack them while they walk back to their position.
Try to kill the samurai friend first, then stealthblow the main spear guy to take out one of his health bars. He’s now a much easier proposition because you can deflect his regular blows and retaliate, while also jumping on his sweeps without another tough enemy to worry about.
Once they’re done, return to the moat Shrine and get ready for pain.
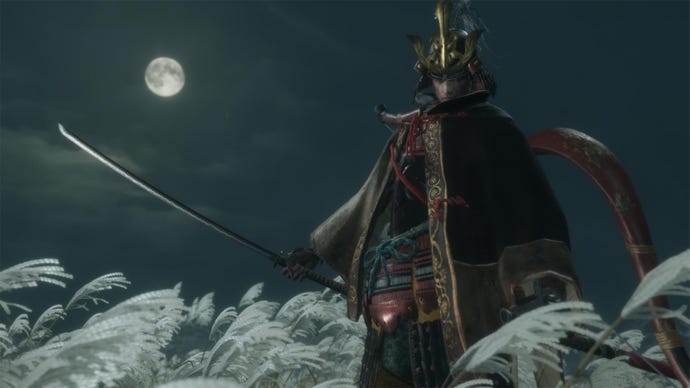
Isshin Sword Saint Cheese
One thing I’ll say before we start is that you likely have more healing items than just your Gourd and Pellets. If you’re close to victory but run out of healing, be sure to eat any Rice or Divine Grass you’ve been hoarding up to now.
Additionally, if you’ve unlocked either the Lady Butterfly thrown weapon or the Lazulite Shuriken, save them until near the end of the fight - the chip damage through guard could make the difference between rousing success and abject failure.
This battle has four phases, and takes upwards of twenty full minutes, so settle in for a long session of concentration.
First up after the cutscene you have to fight Genichiro’s second form again, just this time he has a new Mortal Blade attack in his arsenal.
As soon as you gain control, run around to his back and hack away, either with your sword, axe, or favourite combat ability. The rest of the fight is similar to the first time you met. Deflect his five-hit combo and retaliate, jump on his sweeps, and Mikiri Counter his thrusts. When he jumps in the air, step to the left or right then wail on him as he falls.
He should stagger easily, but the worst is yet to come. Out of his broken body bursts a regenerated Isshin, and he means business.
Frankly, his moveset is ridiculous. Isshin’s attacks are incredibly fast, hit super hard, and are barely telegraphed, so the best strategy is to not engage with him at all.
In the first phase, sprint around him in a clockwise circle and bait him into doing exploitable combos. Keep a safe distance, wait for his attack to finish, rush in, attack him once, then get the heck out of there.
This first part is very cagey, and you have to resist the temptation to force the issue when he just stands there. But wait your turn and he’ll eventually be open to a deathblow.
In the second phase, he’ll pull out a spear and this is where the fun really begins. Your plan is basically the same, but things are much more intense.
It’s very, very important that you now switch to running in an anti-clockwise circle, or it’s very hard to dodge his attacks.
Now you’re trying to bait out his jumping slam attack, which he seems to alternate between using and just trying to straight pop you with a semi-auto. When he jumps into the air, keep running your circle, but run towards him a bit. This should leave you behind him when he lands, ready to hit him on the counter.
Hit him once every time he does this and you’ll eventually win.
The third health bar is exactly the same as this, except every now and then he’ll throw a random lightning attack in there just for funsies. Continue with your strategy of getting in behind and landing a single hit.
This might sound quite straightforward but is still very difficult. You will be hit, you will take damage, and you will need to heal.
When you do need to take a swig from your gourd, don’t try and do it as soon as you’re hit. He’ll just rush up to and keep on swinging, inevitably leading to your swift death. Sprint away as fast as you can and try and put some distance between the two of you, then when he’s locked into a combo at a safe distance, reach for the heals.
As he falls and you deliver the final deathblow, walk over to the Young Lord and you’ll be given the choice of giving him just the Dragon’s Tears, or both the Dragon’s Tears and the Frozen Tears you collected from the Divine Child to set up the “Return” ending.
Select the Frozen Tears option and the final cutscene will play, followed by the credits - you’ve just achieved the best ending in Sekiro!
If you bought the physical disc version of the game, there’s one final treat in store. Eject it from your game system of choice, open the nearest window, and spin it out as far as you can - just like a shuriken. Breathe a sigh of relief. You’re free. You never have to experience the anguish of playing Sekiro ever again.
Sekiro guides
- Sekiro walkthroughs
- Sekiro walkthrough Part 1 - Yamauchi, General Naomori Kawarada
- Sekiro walkthrough Part 2 - Chained Ogre
- Sekiro walkthrough Part 3 - Find the Flame vent, Shinobi Axe and fight General Tenzen Yamauchi
- Sekiro walkthrough Part 4 - Find the Shinobi Firecracker and fight the horse-rider
- Sekiro walkthrough Part 5 - How to reach Ashina Castle
- Sekiro walkthrough Part 6 – finishing the Hirata Estate
- Sekiro walkthrough Part 7 – Ashina Reservoir
- Sekiro walkthrough Part 8 - Senpou Temple, Long-Armed Centipede Sen'un
- Sekiro walkthrough Part 9 - Ashina Castle Upper Tower
- Sekiro walkthrough Part 10 – Where to find Lord Isshin
- Sekiro walkthrough Part 11 – Ashina Depths and Hidden Forest
- Sekiro walkthrough Part 12 – Mibu Village, Corrupted Monk Spirit, Screen Monkeys
- Sekiro walkthrough Part 13 – Sunken Valley, Gun Fort and Bodhisattva Valley
- Sekiro walkthrough Part 14 – Owl and Fountainhead Monk Cheese
- Sekiro walkthrough Part 15 – Finding a Persimmon and collecting the Frozen Tears
- Sekiro walkthrough Part 16 – Mibu Manor, Fountainhead Pot Noble and Dragon
- Sekiro walkthrough Part 17 – Clean up and Isshin Sword Saint Cheese
- Sekiro - best ending guide
- Sekiro skills and combat
- Sekiro - top combat tips
- Sekiro - best skills
- Sekiro - Boss guide
- Sekiro crafting and items
- Sekiro - how to remove Rot Essence and cure the Dragonrot
- Sekiro - crafting and upgrade materials guide
- Sekiro - Gourd Seeds and Prayer Beads locations
- Sekiro - Treasure Carp Scales Guide
- Sekiro - Mask Fragment Guide
- Sekiro - where to find more Divine Confetti and Snapseeds
