Blair Witch Game: All Red Tape Puzzle Solutions
Here's how to beat every found footage puzzle in the game.
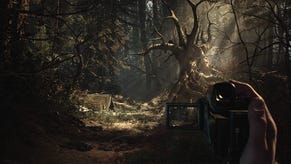
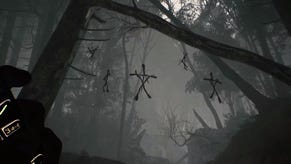
Blair Witch offers a pretty faithful mimicry of the original film, right down to the emphasis on handheld camera footage. The difference is that here we're finding these red tapes, not making them - and in keeping with the game's peculiar time-hopping plot, they offer unique puzzles which you must beat to continue the game.
- What Do the Red Tapes Do?
- How to Use Red Tapes
- Tape 1: Clue (Toy Police Car)
- Tape 2: Breadcrumb Trail (Baseball)
- Tape 3: Breadcrumb Trail (Fallen Tree)
- Tape 4: Amicicide (Shovel/ Sheriff Lanning)
- Tape 5: The Burial (Fallen Rock)
- Tape 6: The Machine (Steam Donkey/Sawmill)
- Tape 7: The Chase (Carver's Sawmill)
- Tape 8: The Ruin (Painted Door)
- Tape 9: The Ruin (Collapsed Roof)
- Tape 10: The Corner (The Blair Witch)
What Do the Red Tapes Do?
Early on in the game you find a small camcorder with the first tape already inside it. As the game progresses, you find more tapes which you can watch and rewatch. But in keeping with the mystic shenanigans that permeate throughout the game, stopping the tapes at certain points has effects on the game world around you. For example, a dropped item that is then picked up in the footage can be brought back, provided you stop the tape after it was dropped, but before it's picked up. It's as though the point at which you stop the tape ensures that nothing else happened after that point.
Well, mostly, at least. What tangible elements are controlled by the tapes is pretty selective and not always consistent from puzzle to puzzle. For example, if you see somebody being murdered on camera (and you will) you can't save their life by stopping the footage early, you can just make sure the murder weapon or crucial evidence ends up at a certain place in the process.
It's also worth mentioning a key difference between blue and red tapes - only the red ones affect reality. Blue tapes can be watched like the red ones and sometimes give plot-essential information, but you can't change the world through them.

How to Use Red Tapes
Tapes are automatically installed in the camera once you find them, and the camera itself can be accessed on the item wheel with RB. Once in the camera, you can switch between tapes with the up and down on the D-Pad. Press A to toggle pause and play, and use the triggers to fast-forward or rewind. Once you reach a point in the tape you think is likely to have an effect on the world, put the camera away and check your surroundings to see if you were right.
Tape 1: Clue (Toy Police Car)
You find this tape early on in an abandoned campsite. The footage shows a boy playing with a toy car with flashing lights. Stop the camera at five seconds in, when the toy is placed by the campfire. The car should now be next to the campfire in real life for you to pick up.

Tape 2: Breadcrumb Trail (Baseball)
This tape actually has two functions at two different points early on. Once you have it, you want to head back to the damaged bunker/trench area you found earlier. The key element here is the baseball that the kid drops - play the video until about ten or 11 seconds in, then pause the tape, after the baseball is dropped but before the kidnapper picks it up again. It should now be in the same place, close to the bunker entrance, whereupon you can give it to Bullet to sniff out a trail.
#
Tape 3: Breadcrumb Trail (Fallen Tree)
We're using the same tape as before to a different effect now. Shortly after fighting (or running away from) your first shadow monster, you'll come across a small derailed train cart and a fallen tree behind it, blocking the path. Take out your camcorder again and replay the Breadcrumb Trail video, this time stopping it barely a second in, before the tree falls over. Hey presto, the tree is now standing tall once more!

Tape 4: Amicicide (Shovel/ Sheriff Lanning)
This one appears when you find Lanning murdered, and indeed shows him being hideously butchered soon before you arrive. There's no way to save him, but you can track the killer with the broken shovel. Pause the video at the 13 second mark, when the handle is in the foreground, and lower the camera to see the shovel lying close to the small log. Again, give this to Bullet for him to get the killer's scent.

Tape 5: The Burial (Fallen Rock)
This one is fairly simple, involving a large flat boulder which the killer uses to cover something up. You'll find the tape a few minutes before you find the rock in question, but once you do simply stop the tape before the killer pulls it over. Once you lower the camera, you'll see the rock is now standing back up, with a prompt on the dirt beneath it for Bullet. Press Right Trigger to get him to dig up a fabric patch.

Tape 6: The Machine (Steam Donkey/Sawmill)
This one is part of a larger puzzle you can find explained here, involving a large steam-powered machine and two different sawmills.

Tape 7: The Chase (Carver's Sawmill)
This tape is found in the small side house next to the killer's lair. It shows, appropriately, somebody being chased through the house you can't get into. Pause at 25 seconds in to ensure that both sealed doors are unlocked and opened - if you do it before then you'll only open the first door.

Tape 8: The Ruin (Painted Door)
Once inside the final Blair Witch house, the tape is found in a small passageway you have to crouch to get into. Rewind the tape to 00:19, which will open the door with mystic symbols and a circle painted around it, allowing you to proceed.

Tape 9: The Ruin (Collapsed Roof)
Going back to the same tape, this one has a second function some time later when you find a room with chairs hanging from the ceiling. The path ahead is collapsed and can't be climbed through. Wind it back to 00:08 to clear the debris, then walk through and to the left to a small alcove.

The debris has cleared, but now the door is intact and locked. However, now that you're past where it would land, forward the tape to 00:14, so that the roof collapses again. It'll destroy the door in the process, letting you past.

Tape 10: The Corner (The Blair Witch)
This is a bit different, instead just providing a clue as to your next action. Found in a red box in the Blair Witch House, it shows Ellis quickly running to a corner of that room and staring at the wall. The moment he looks away from the corner, something murders him. Do like Ellis does: run to that same corner and stare at the wall when a scary red light bursts into the room. The game will try to pull you towards the light, but fight it! Once Ellis pulls out his camera again, it's safe to continue.

Congratulations on making it through the game! However, did you know that there are several endings, depending on your actions? You can find them and the way to unlock them here, or click here to find out how to enter the bunker and discover the secrets within.


