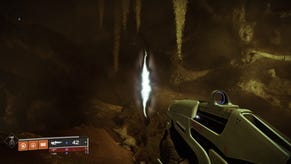
Destiny guide: how to beat Atheon and Templar in the Vault of Glass
Destiny guide: how to beat the Vault of Glass bosses
Destiny has been patched, making the raid bosses much harder than before. Here's how to smack them down.
Destiny's first raid, the Vault of Glass, can be hard. If you're good at shooters, communicate well, prepare and have good teammates, you won't have too much difficulty - but that's a big if.
Up until recently, some players used "cheese" strategies to take down the Templar and Atheon, the two major bosses. Bungie has been gradually plugging these holes, though, and the latest hot fix will really shake things up.
Don't worry - we're here for you. We won't spoil the raid by giving a blow-by-blow solution to completing its many puzzles and encounters (unless you want that? let us know!) but we can tell you how to lay the smack down on the Templar and Atheon post-update.
Vault of Glass boss: Templar
This section only concerns the battle with the actual Templar. There are several phase of encounter in the the Templar boss arena during which the souped-up Hydra floats about, completely immune to damage, and we're bypassing those. The boss fight kicks off for real when you first pick up the Relic that appears in the centre of the room.
Until someone grabs the Relic you're completely safe, so spend a little time sorting out your strategy. As in an earlier phase, you'll need to keep an eye out for Oracles. They spawn in the same places, so spread out your team to ensure at least two Guardians are within reach of any spawn point. There'll only be one at a time, with reasonable gaps in between, so it's not so bad.
At time of writing, you can leave a few Guardians up on the spawn point to snipe oracles and call them out to players on the ground; in fact, you can keep all but one player up here and just send the Relic holder down. You'll need to wipe to get everyone up there initially, though, and we're expecting Bungie to patch this out. With that in mind: two Guardians on the left, two on the right, and one "floating" in the centre works well.
The player holding the Relic has the most important job as they'll have multiple roles; see the boxout for control information. Their first and highest priority is to stay alive - if the Relic is dropped, you only have a few seconds to pick it up, and this can disrupt your entire team even if you make it. You'll want to choose a less-squishy class to hold the Relic - or put it in the hands of your most skilled player.
The second task the Relic holder must focus on is taking down the Templar's shield. This is achieved by using the Relic's super when it charges. You can charge your super by taking down Harpies as fast as possible. The Relic holder needs to let the rest of the team know this is about to happen - preferably just after dispatching an Oracle - so as many as possible can damage the Templar while it's vulnerable.
The Relic holder's third task is to cleanse players afflicted by a mark. You'll only be marked if an oracle is left alive, which should not happen - but if it does, the Relic holder should quickly cleanse as many Guardians as they can with a quick tap of the left bumper - they can probably get to two or three in time at least. This will be enough to survive until the rest of the team can be revived, avoiding a wipe.
Finally, the Relic holder can revive players - but if you have organised your team well, everyone should have at least one player within reach at all times. The Relic holder can also take down Oracles, but if everyone is doing their job correctly they won't need to.
There are two major threats during the encounter - the Templar itself, which behaves very similarly to the Nexus, and buttloads of Harpies. The Relic holder will likely be taking down Harpies much more efficiently than other Guardians, but they can only be in one place at a time, and Harpies spawn on both sides of the map. Players should be aware of where the Relic holder is at all times, tracking the icon that shows through walls, and if the Relic Holder is on the opposite side of the map, they should work hard to clear Harpies on their side. Harpies go down quickly to precision shots from powerful hand cannons and scout rifles, so gear up appropriately.
When an Oracle chimes, forget Harpies - take it down. If you have a good audio set up you should be able to tell vaguely where the Oracle is by the direction of its song.
The Templar will be firing wildly at all times during the fight, and you'll need to take shelter while still covering Oracle spawn points, keeping a cap on Harpies, reviving downed teammates and hitting the Templar with everything you have when the Relic holder drops its shield. Prioritising non-Relic tasks is the most difficult part of the Raid. I suggest:
- Take shelter from the Templar
- Kill Oracles
- Revive team mates
- Damage the Templar
- Kill Harpies
... but it's the unpredictable moment-to-moment decision making that differentiates a skilled player from a rookie. If you're struggling, take a short break and turn the volume down a little - it'll help you stay calm.
You need to make a decision about how to handle the Templar when the Relic holder drops the shield. The Templar will attempt to teleport to a new location. It can make the fight much harder if he camps right where a bunch of Oracles spawn. You can block the Templar's teleport by having one Guardian run over to the new location - a marker will appear in the arena (but not your radar) showing the new location, and if you're quick you can get onto it before he moves.
If you decide to pursue this tactic, you'll need to nominate one Guardian to be the camper, and back ups in case that Guardian is down at the time. It's tempting to choose the Guardian with the lowest DPS. Be warned, though: blocking the Templar's teleport will cause a Minotaur to spawn, and it will absolutely smash an unprepared fireteam.
If you have decent guns, you can knock the Templar down before he hits his enrage cycle. If not, and if you're not confident facing an angry Templar, just wait it out, picking off Oracles and Harpies until he calms down again.
There is one other nasty mechanic in this fight: when his shield is dropped, the Templar will summon cages to detain three of the party. You need to shoot (or as the Relic holder, melee) your way out of this cage before you can shoot anything else. While the shield is up you can still take damage from outside, and you can't move. If you step out of the cage, you will die. Do not fire a rocket or grenade at the cage; the splash will hit you.
In the end, it really boils down to: knock down the Oracles. Hit the Templar when the Relic holder drops its shields. Don't be killed by Harpies. You can do it!
Vault of Glass boss: Atheon
By the time you get to the very last checkpoint of the Vault of Glass, you should be familiar with most of its tricks. You've been through timegates; you've used a Relic; you've faced off against powerful foes.
The final boss is actually pretty easy to beat once everyone knows what they're doing and falls into the rhythm of it, but it'll probably take you a couple of wipes on your first run while you figure out how to cope with all the roles you may have to handle.
The basic flow of the fight is this: Three Guardians will be teleported to another world, where they'll collect a Relic, take down some enemies and kill off a set of Oracles. As soon as the last Oracle is dead, a status called Time's Vengeance is applied to the whole party, allowing them to do extra damage to Atheon. The Relic party will return through the gate and everyone smacks Atheon.
What makes this part tricky is that Atheon will select the Relic team at random. Now, everyone needs to be know what to do.
While the Relic team is away, the remaining three Guardians must survive Atheon's attacks and keep a cap on Supplicants, a very nasty Harpy variant. They must also ensure one player stays alive on the sync plate for the timegate appropriate to the Relic team's current location, so that the Relic team can get back as soon as the Oracles are down.
What makes this part tricky is that Atheon will, post-patch, select the Relic team at random; previously, you could arrange yourself in such a way that the same team went away every time. Now, everyone needs to be know what to do, and it can be very disorienting travelling through the gates.
Let's start with the home team. As soon as the Relic team has been transported away, the three Guardians left behind should split up. Have two Guardians on the side of the arena with the active gate, one holding it open and the other actively defending against Supplicants. Facing Atheon from the entrance, Mars is on the left and Venus is on the right. The third Guardian should focus solely on killing Supplicants, following them from side to side.
Being on the home team isn't hard, but if you're below level 28 you may struggle to damage the Supplicants sufficiently, and will be squishier than anyone would like. The Supplicants have a kamikaze attack and explode when destroyed, so you have to keep your distance.
You really only need one excellent player on the home team and you'll be absolutely fine. If you have players who are good with a hand cannon they will shine against the Supplicants, so have them make the most of their skills.
Now for the Relic team. If this is your first time being teleported one key tip is don't automatically hold the interact button down when prompted; you'll grab the Relic and be stuck with it, which may not suit you.
Ideally, everyone will be able to pick up the Relic and use it well, but in most teams you'll have some players who are better at it than others. In a team of six, you should aim to have four players absolutely prepared to use the Relic, so that one is always in the Relic team.These players should pick up the Relic immediately; it doesn't matter who gets it.
Once you have the Relic, things move fast. Call out to the home team and let them know if you're on Mars (dust, red) or Venus (green, leafy) so they know which gate to guard.
There are several enemies in the arena who need to go down fast. The Relic holder makes the call here: they may want help, or they may prefer for the other two Guardians (the Oracle team) not to mess with their aggro.
Here's how my clan does it: the Oracle team rush forward and get into cover behind a pillar on the left hand side of the arena, just before the steps down. The Relic holder runs forward and makes a jumping right trigger attack on the mobs. Then one of the Oracle team members starts helping with the mobs. This ensures the Hobgoblins aren't shielded when the Relic holder strikes, and that the Minotaur hasn't been agrro'd out of the area of effect.
Once the enemies are dead - or when there's only one left, if it's taken too long - the Relic holder rushes back and cleanses the Oracle team, who will be going blind (remember, you only need to tap cleanse). You can't do this immediately because the cooldown will still be in effect; that's why the Relic holder has to grab the Relic ASAP. The blindness will continue to build at all times while inside the timegate and also hit once more on the other side, so the Relic holder should cleanse on the regular, ensuring the Oracle team is cleansed once they pass out of the gate.
The Oracle team need to stand close together so that they can be cleansed. Luckily, the Oracles appear in the same places each time - a linear sequence trailing across the arena to the timegate. Walk forward steadily shooting them down - there should be no mobs to trouble you - and climb onto the timegate platform before you shoot the final one (or even two, if you're efficient) so you can get through the gate as soon as you "make your own fate".
Taking down the Oracles is easy if you have hunters; have them use Gunslinger class and Golden Gun. Thanks to Time's Vengeance, everyone should have their super up when they get teleported. When you've used up Golden Gun (make sure your Oracle team partner knows you're using it so they don't waste ammo!) on the first three or four Oracles, or if you don't have a Hunter, switch to your best weapons. You can either take turns taking down Oracles (Guardian A does one, Guardian B does the next) or work together, but make sure you're not both pumping bullets into Oracles that are already dead.
One good tip here is that Oracles will go down to two shots from reasonably good fusion rifles, so if both Oracle team members take one shot each you'll wipe them out in no time.
When all the Oracles are dead, let the home team know you're coming so they can capitalise on Time's Vengeance (I like to say "we made our own fate", as per the onscreen prompt). Pass through the gate - walk, don't sprint, as you could otherwise be trapped. Make sure the Relic holder goes last and quickly cleanses the Oracle team on the other side.
You only have 20 seconds of Time's Vengeance from the moment the last Oracle dies, so don't hang about. It's easy to be disoriented, but from Mars, turn left, and from venus, take a sharp right, and you'll be facing the centre of the room.
Time’s Vengeance provides a huge boost to weapon damage, so if you are in a position to put bullets in Atheon’s weak spot – the glowing gem at his waist – you’ll usually do much more damage that way than by using supers or grenades.
What you do next is up to you: basically you want everyone to wail on Atheon. If there are any Supplicants up this can be very hard, so the home team needs to let the Relic team know where the threat is.
Time's Vengeance provides a huge boost to weapon damage, so if you are in a position to put bullets in Atheon's weak spot - the glowing gem at his waist - you'll usually do much more damage that way than by using supers or grenades (with some exceptions). Atheon can not be knocked off ledges, post-hot fix, so don't bother trying.
My clan likes to gather on the central platform as soon as the Relic team gets back. The Relic holder then holds the left bumper to shield the party from damage, and everyone unloads at Atheon in peace and comfort. The Relic holder watches the time's vengeance timer, and when it gets down to five, starts a count down. Everyone jumps away at four, three or even two seconds, depending on their proficiency, and the cycle begins again.
One caveat for this tactic is that Atheon's attacks do splash damage, so depending on where you are standing in the bubble you may still take damage. try not to get close to the pillar on the left side of the platform.
Skilled and powerful players who co-ordinate ought to find this section of the raid a cakewalk. Don't be afraid of Atheon; practice makes perfect.
Do you have any tips and tricks for the Vault of Glass? Are there any questions we haven't answered? Let us know.


.jpg?width=291&height=164&fit=crop&quality=80&format=jpg&auto=webp)


