Destiny guide: Moon Dead Ghost locations
Destiny guide: Moon Dead Ghost locations
Destiny offers collectors the chance to score extra Grimoire Points by tracking down Dead Ghosts. Our guide makes it easy.
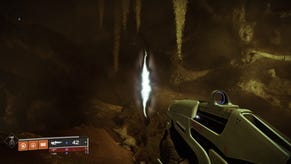
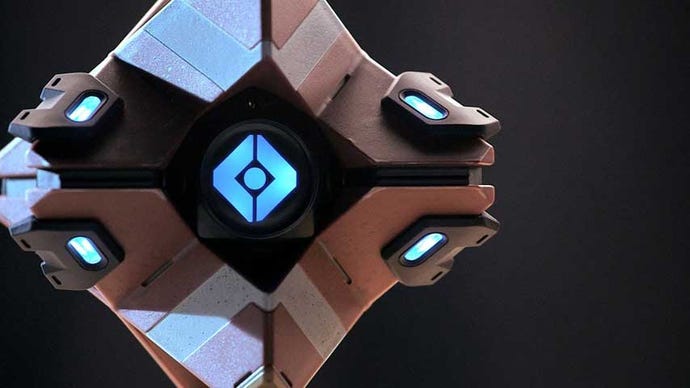
Destiny’s Dead Ghosts are found scattered around the environment in out of the way places. They’re easily spotted in the dark by their distinctive pale blue glow.
Should you stumble across a Dead Ghost, you can revive it by holding Square (PlayStation) or X (Xbox) when prompted. Doing so will reward you with a Grimoire Card and the accompanying Grimoire Points. Visit Bungie.net or the Destiny Companion app to peruse your unlocked lore and show off your amazing collection of points.
Note that you can only collect Ghosts once per account, so if you’ve picked one up with one character, you won’t find it with another.
There are several Ghosts to be found on the Moon. The numbering here matches our Destiny Walkthrough.
- Dead Ghost #1
On a railing on the Accelerator in Archer's Line. Stand with the road to the Hellmouth behind you and the road to the cracked dome ahead, looking down along the Accelerator's length. From this orientation, look for a free-standing building on the left side of the Accelerator, quite close to the mess of buildings where you deploy your Ghost in the first Moon mission. Jump on the roof and scan the section of "track" just above you. It's easiest to retrieve by holding the relevant button is as you jump past it. - Dead Ghost #2
Visit the cracked dome leading to The World's Grave. Nearby, on the Archer's Line side, there's a glowing crevasse bordered by yellow barriers. Peer over the edge and you'll see the Ghost on a small ledge on the far side, to your left. Jumping out is harder than jumping in. - Dead Ghost #3
Travel to the Anchor of Light and look for the building with the tallest communications tower. There's a multi-story structure around the base of this tower. Jump up into the top story, then jump further up to the thick girders which surround the tower. The Ghost is sitting on one of these girders, on a join on the open side of the structure. - Dead Ghost #4
Enter the Hall of Wisdom from the Circle of Bones and immediately turn right. Hug the right wall and stop at the edge of a bottomless pit. The Ghost is resting on a ledge on the opposite wall. Jumping back is easier than it looks. - Dead Ghost #5
Enter the Circle of Bones from the Hall of Wisdom, and then immediately turn left and hug the left wall. You'll find a path guarded by two level 12 Hallowed Knights. They're standing on a section of balcony which you can just see extending around the room, encircling it completely. You need to access the next section of balcony, which is blocked off by gates at both ends. Jump up onto the narrow fence, walk nearly to the end in a clockwise direction (where the clock face is the enormous great hole in front of you), then double jump and steer onto the balcony below. Travel along the balcony quite a way to find the Ghost on the railing, in plain view. The only way to exit this area is to perform a similar bout of platforming at the other end. - Dead Ghost #6
Take the road from the Accelerator to the Hellmouth. Immediately upon entering the huge open area where you can see the Hellmouth itself, turn right and hug the wall until you find a narrow gap in the rocks leading to a cluster of buildings, populated by Fallen. The Ghost is in the most central building, resting on a lit computer terminal. - Dead Ghost #7
Enter the Gatehouse from the Hellmouth. Turn left immediately and walk to the edge of the 'mouth itself. The Ghist is just over the edge, on a ledge, slightly below ground level. You can see it clearly from the edge. - Dead Ghost #8
Enter the Hellmouth and fight your way down to the Shrine of Oryx. Just before you reach the final chamber where you fought Sardok, look for a tubular corridor lined with six "ribs" - the Ghost is on a pile of Hive offcasts on one side. You'll know it's the right one if you are attacked by a Knight and several Thralls. - Dead Ghost #9
This is the most difficult Ghost to find and reach so far. Enter the Temple of Crota and descend to the room with the Hive Seeder; if you can't remember, play the Chamber of Night mission again, as your Ghost will comment on it. From the entrance look way, way up and to your right - there's a platform up there in nosebleed territory. How you proceed form here depends on your mobility ability. Here's a method we've found works for Hunters and Titans, if not Warlocks:Find a small area with three waist-high boxes. Nearby you'll see a slightly raised platform, accessed by a short flight of stairs. Stand on this facing the Hive Seeder, and look left; see that rocky pillar covered in glowing blue spikes? Look for a flattish outcrop and double jump to it. Back as close to the edge as you can and double jump straight up , aiming for just past the next set of blue spikes. From here you should be able to reach the circular railings around the borders of the room, and hop across to the platform. The Ghost is in plain sight, the little bastard. Here's a video of me making my way to it - badly, with a long pause where you can stare at my gear - using a Hunter.
Destiny's first expansion, The Dark Below, adds six new Dead Ghosts. If you picked up the DLC, you can find three of them on the Moon, during the mission The Wakening Dead. All three Ghosts are found in the Chamber of Night area.
Destiny: The Dark Below - The Wakening Dead - Moon - Dead Ghost locations
- Dead Ghost #10
Enter the Chamber of Night and pass to the left of the first glowing green sigil on the ground. Continue on until you see the second sigil, then head up the nearby stairs. A little further on, past a large pillar, the Dead Ghost can be found at your feet to the left. - Dead Ghost #11
When the environment opens up again after passing through the area with the sigils, look ahead for a tall, spiky rock. You'll need to make several jumps to reach the top of the spire and grab the Ghost from its peak. You'll be immediately attacked when you first enter here, so be mindful of that. - Dead Ghost #12
Ugh, this one's a bit tough. When you pass through a huge door (it's closed when you first approach, and then opens) you'll need to look around for a doorframe you can (with difficulty) jump on top of. From this vantage point you can both see and leap to the Ghost's resting place, a large geometric pillar-thing.
Be sure to check the rest of our Destiny guide for more tips and info.





.jpg?width=291&height=164&fit=crop&quality=80&format=jpg&auto=webp)
