Super Mario Odyssey Sand Kingdom Moon Locations - All Secrets, Boss Fights, Power Moon Walkthrough
Here's where to find all the Power Moons in Mario Odyssey.

Super Mario Odyssey is huge, and you'll want helping finding all the power moons. In this Super Mario Odyssey Sand Kingdom power moons guide we'll give you just that. In this guide to the power moon locations on Sand Kingdom we'll detail how to find the power moons. Follow our step by step guides and you'll get all the moons and know how to defeat the Sand Kingdom bosses thanks to this walkthrough.
For more Super Mario Odyssey help, check out our Super Mario Odyssey Collectibles guide hub and our array of power moon location guides.
Super Mario Odyssey Sand Kingdom Power Moon Locations
Here is our guide to all the Sand Kingdom Power Moons we've found so far. Keep checking back for more details on all the remaining power moons. Numbers match with those on your Power Moon list in the game. If you want all the moons use this Mario Odyssey walkthrough.
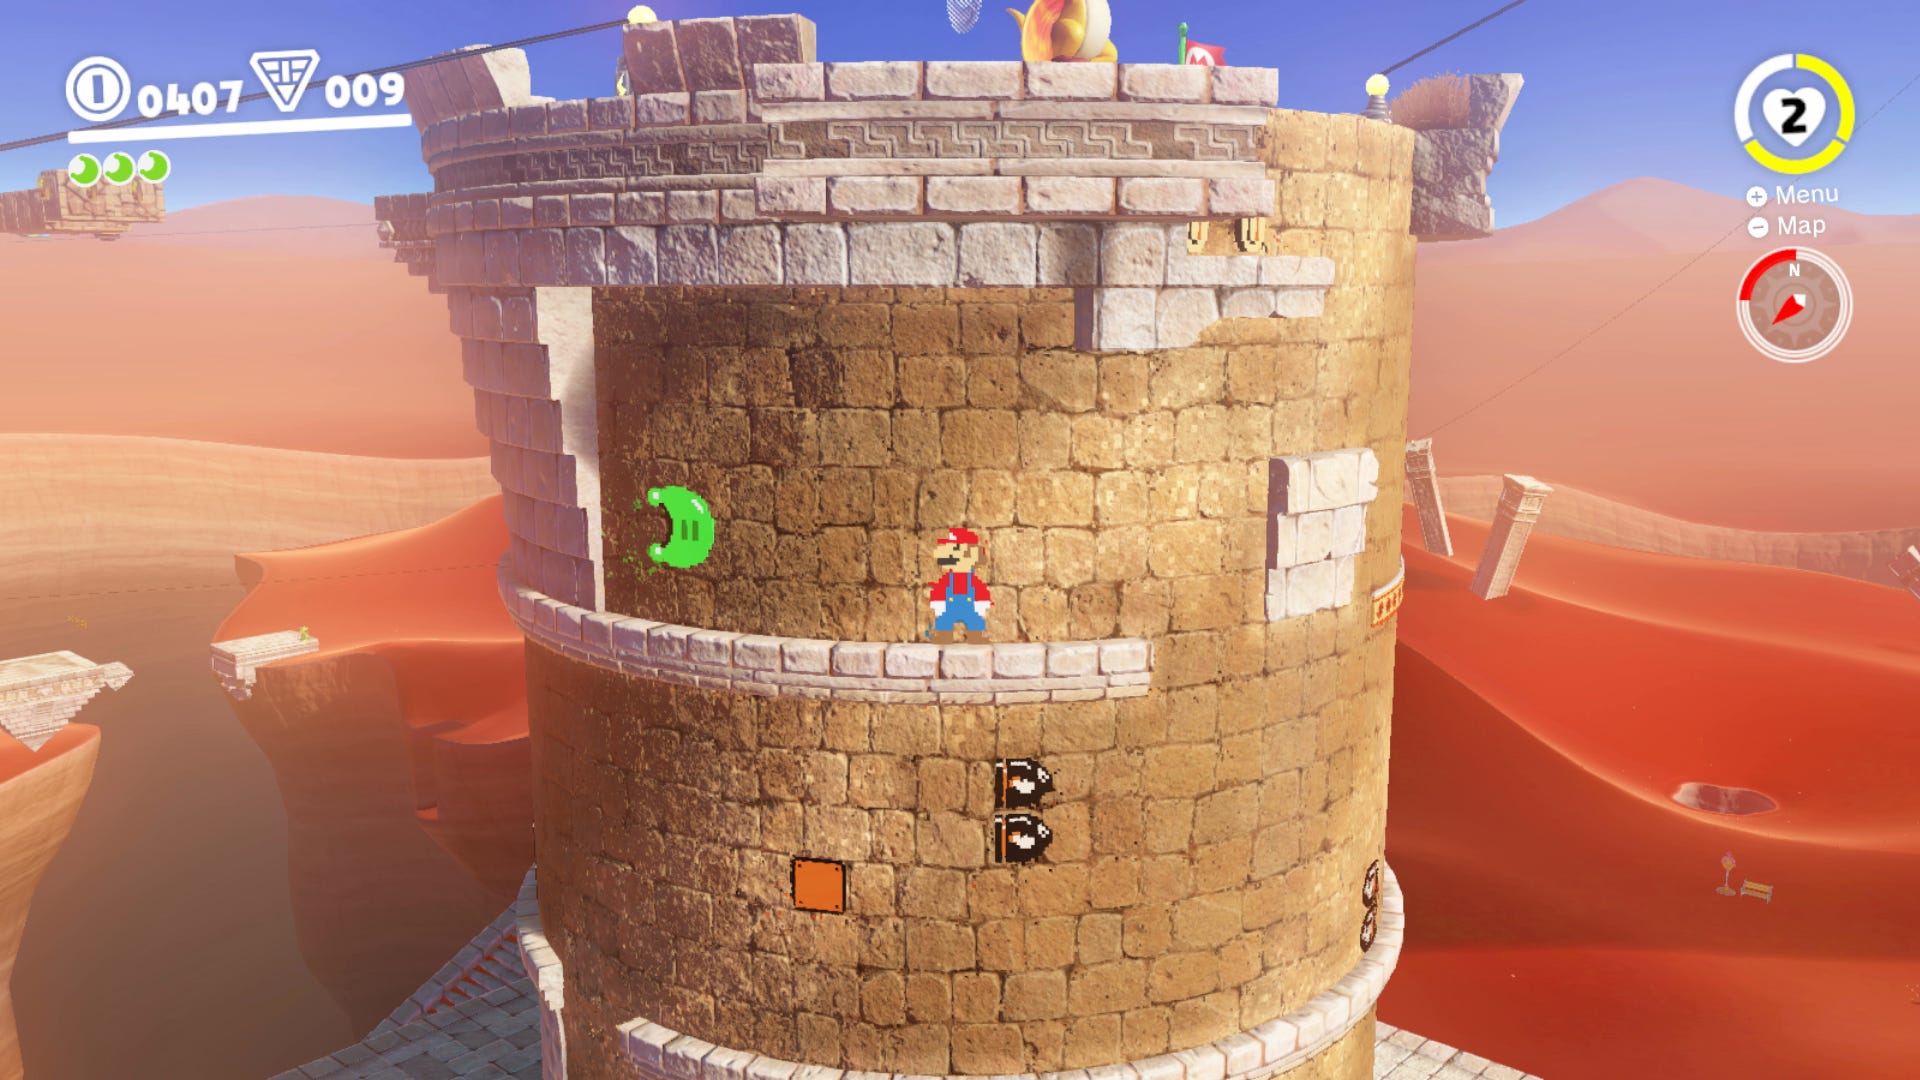
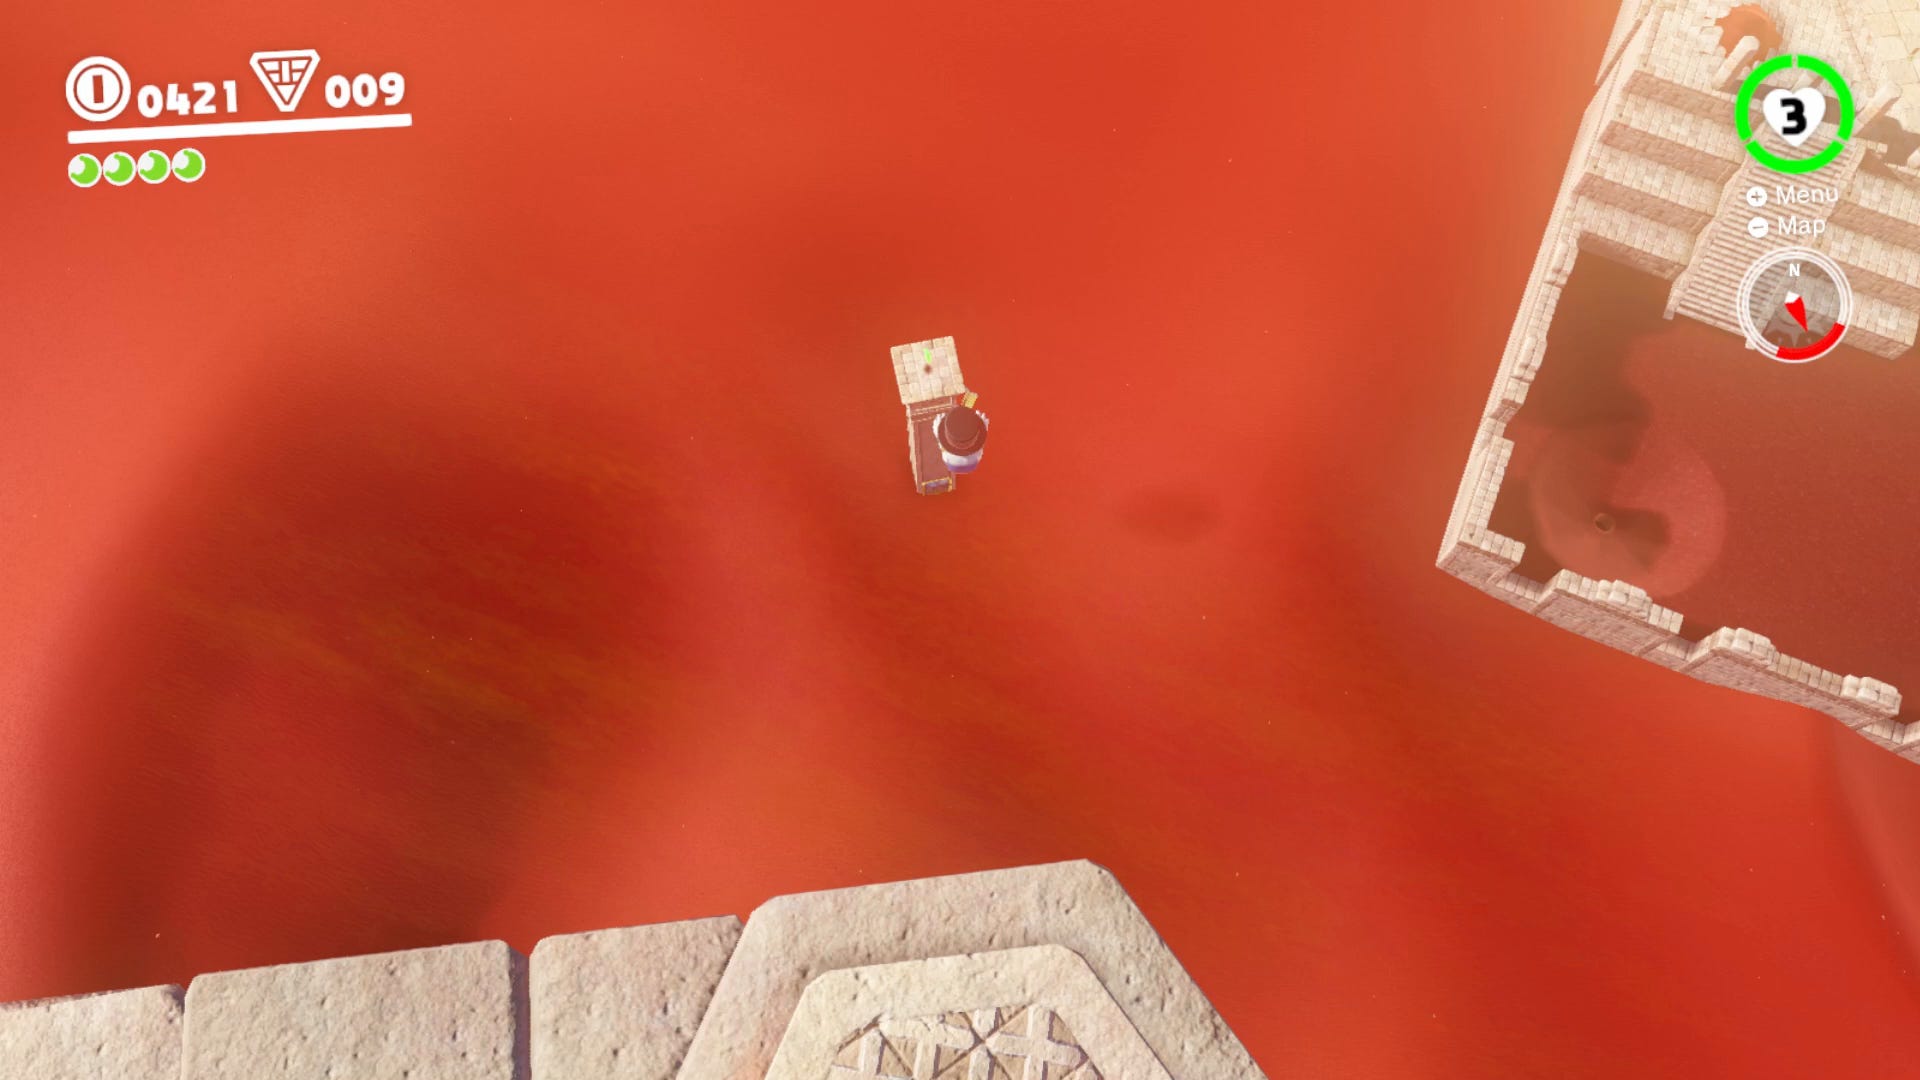
Sand Kingdom Power Moon 1. Atop The Highest Tower - Tostarena Ruins Round Tower Power Moon
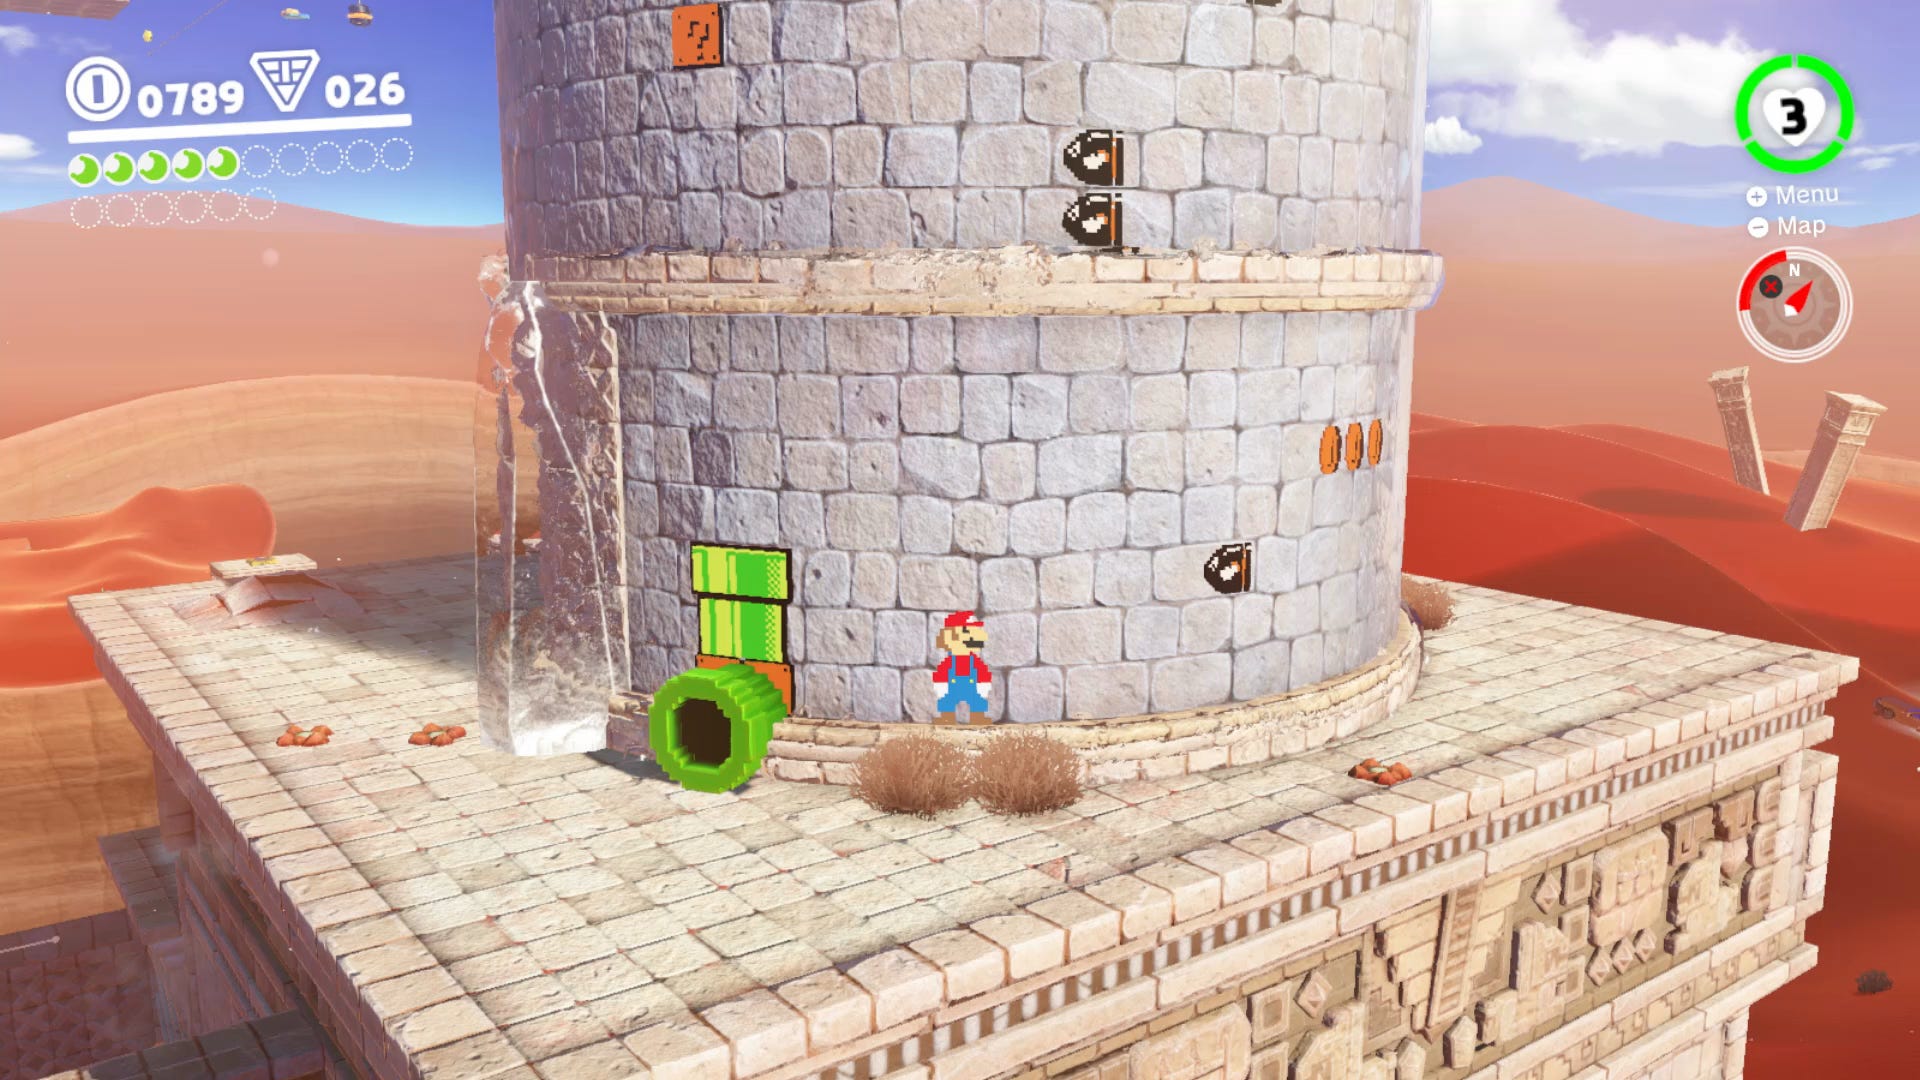
Head up to the tall round tower. Enter the warp pipe and complete the retro mario level to reach the top and claim the power star.
Sand Kingdom Power Moon 2. Moon Shards in the Sand Power Moon
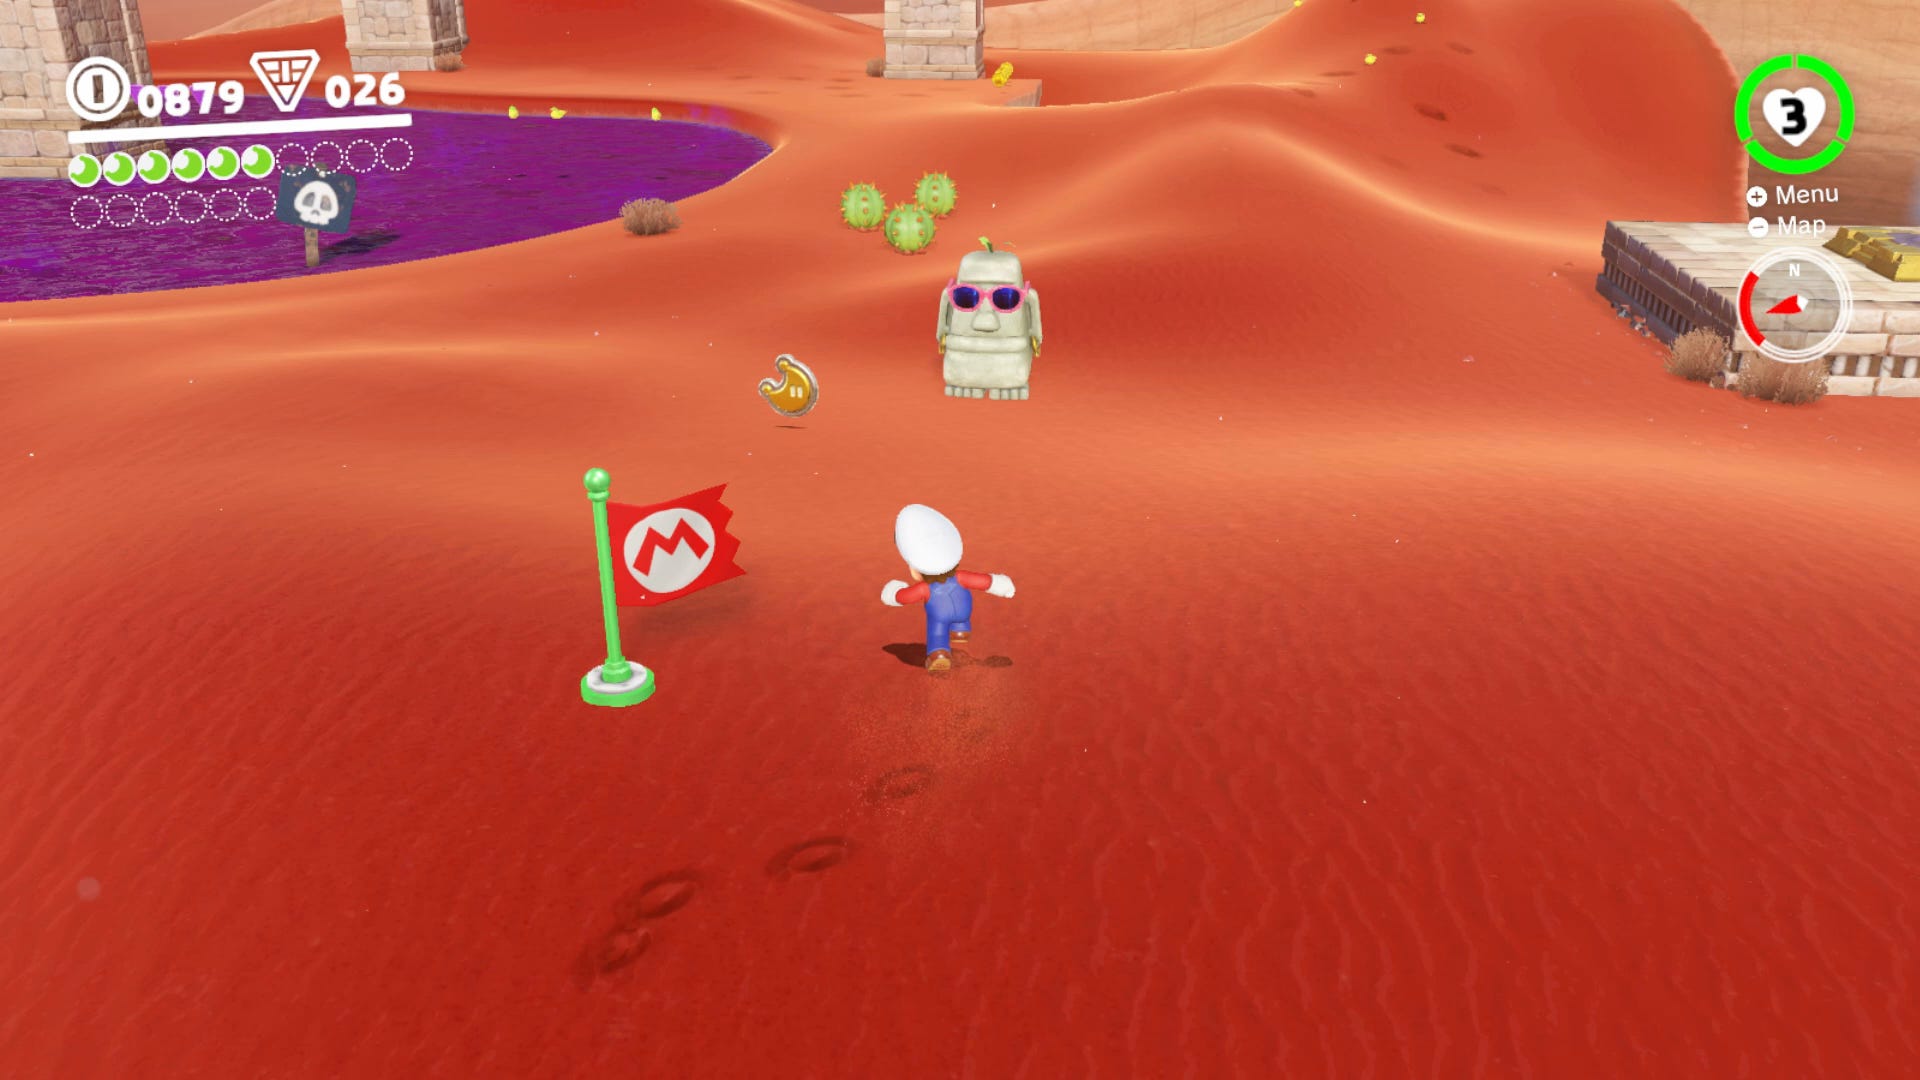
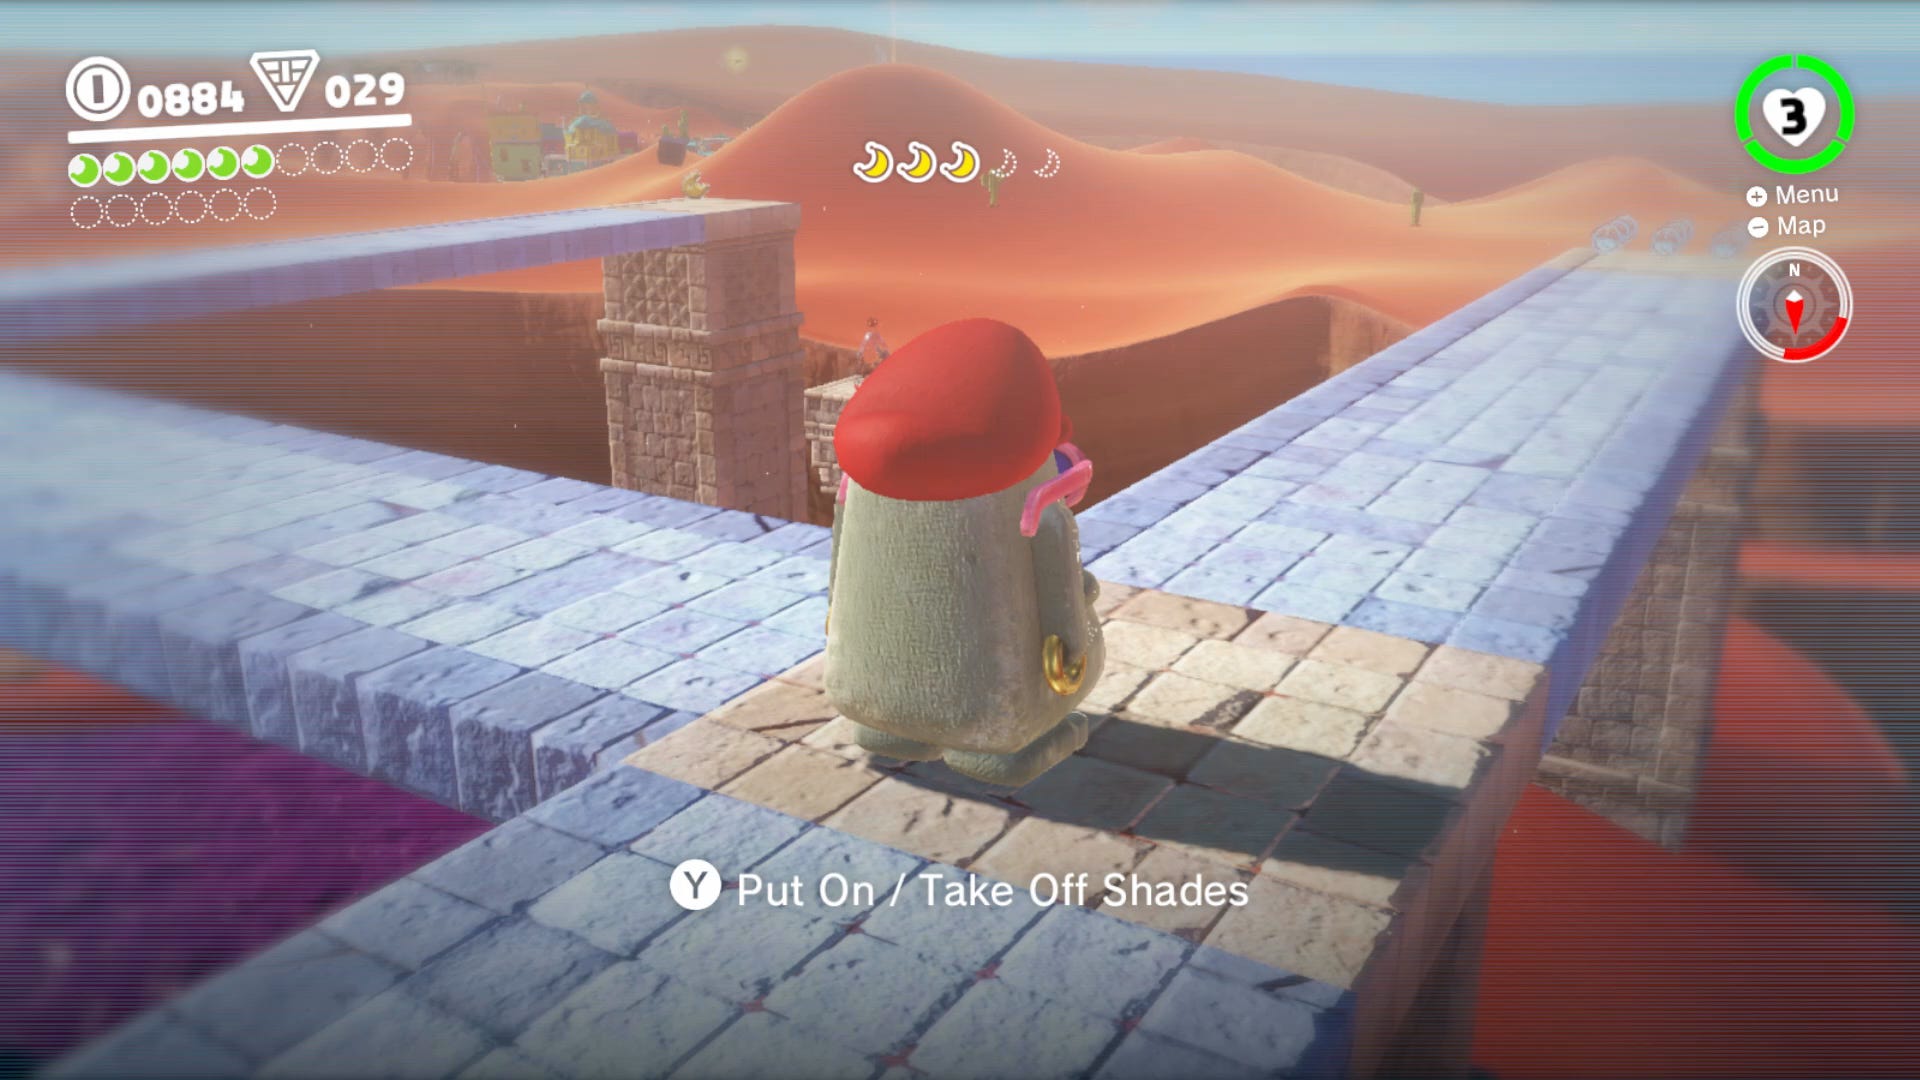
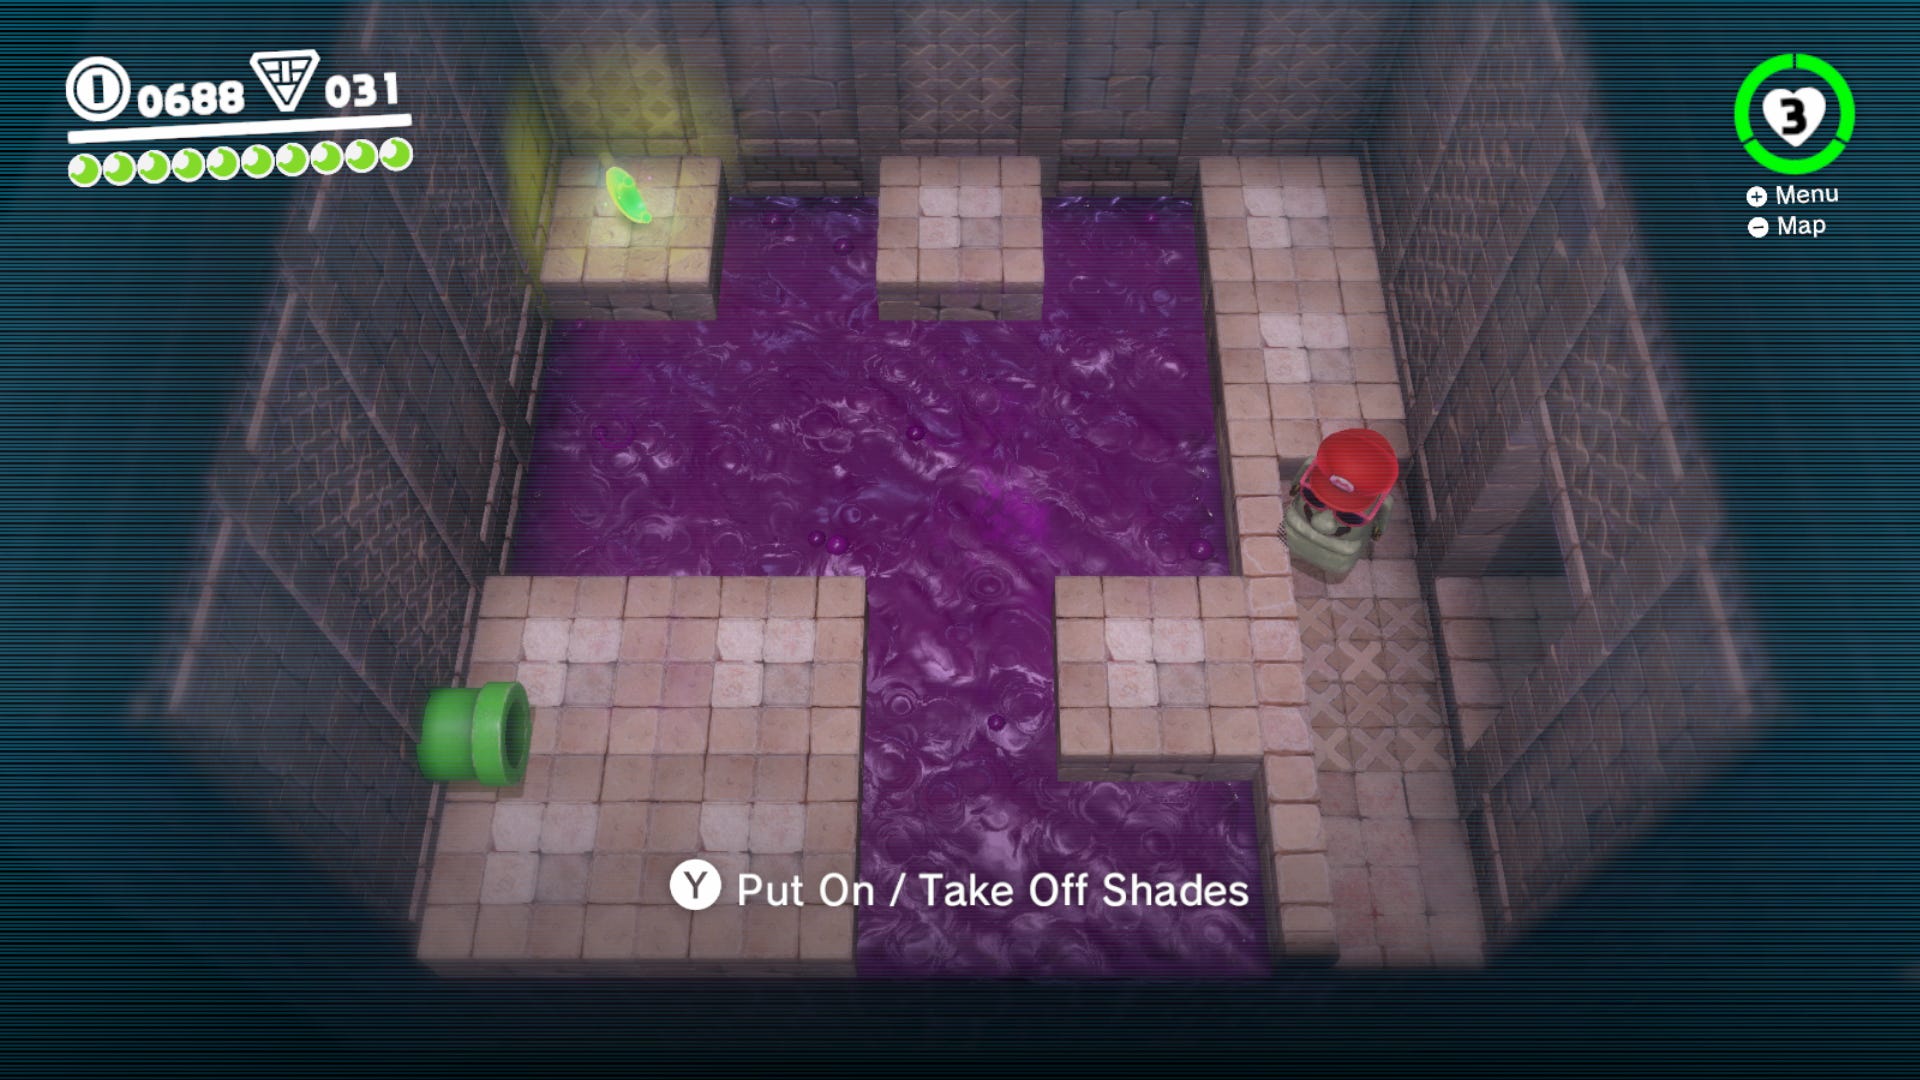
Once you’ve got the Tostarena Ruins power moon a series of platforms will emerge that will take you into the desert. Cross these and you’ll come across a funny character with shades. Use him to find the pieces of a power moon. Get them all and the full power moon is yours. When he’s wearing shades you can see things that Mario can’t see.
The first moon piece is directly in front of the shaded character.
The second shard is on a mound near a cactus.
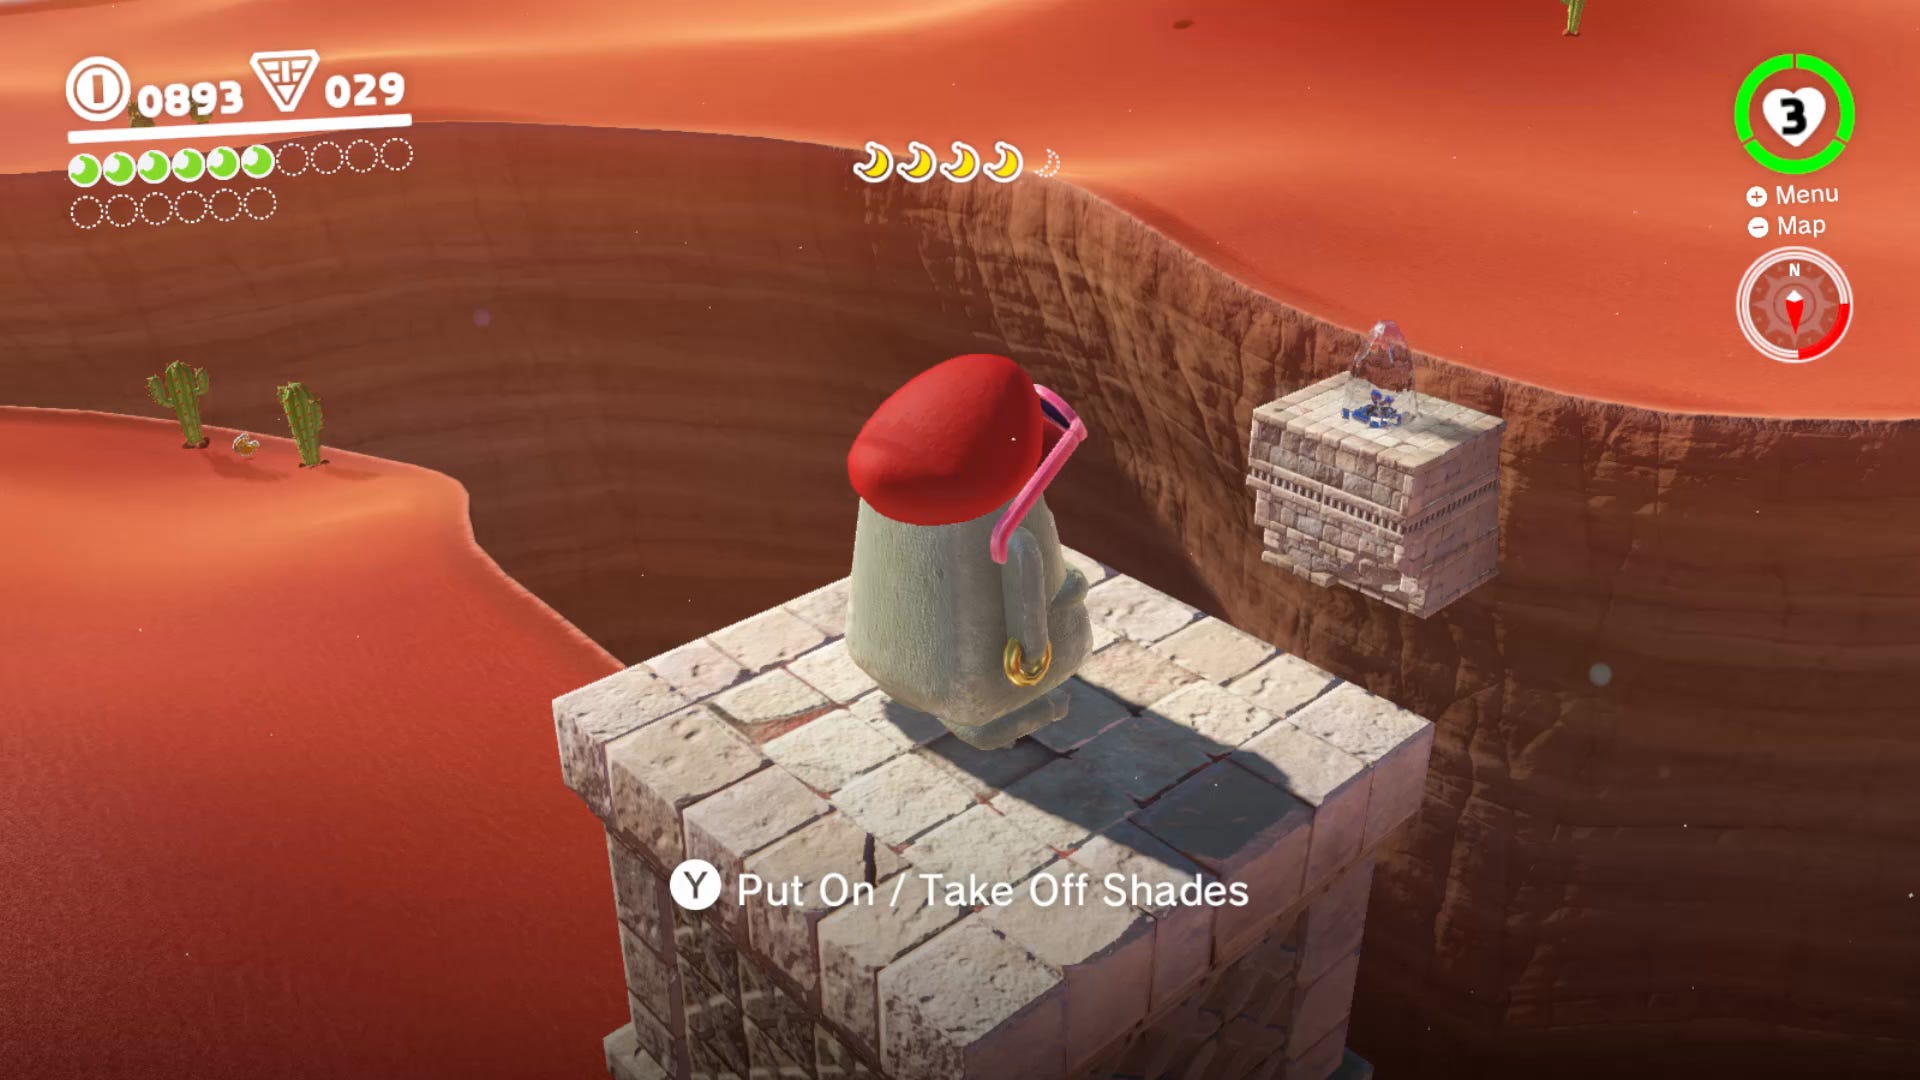
The third moon piece is on the end of the platform you can only see with shades on.
The fourth moon piece is up the lift and across the invisible bridges.
The final moon piece is on the edge of the area between two cacti.
Sand Kingdom Power Moon 3. Broodal Boss Fight in Sand Kingdom Power Moons - Showdown on the Inverted Pyramid
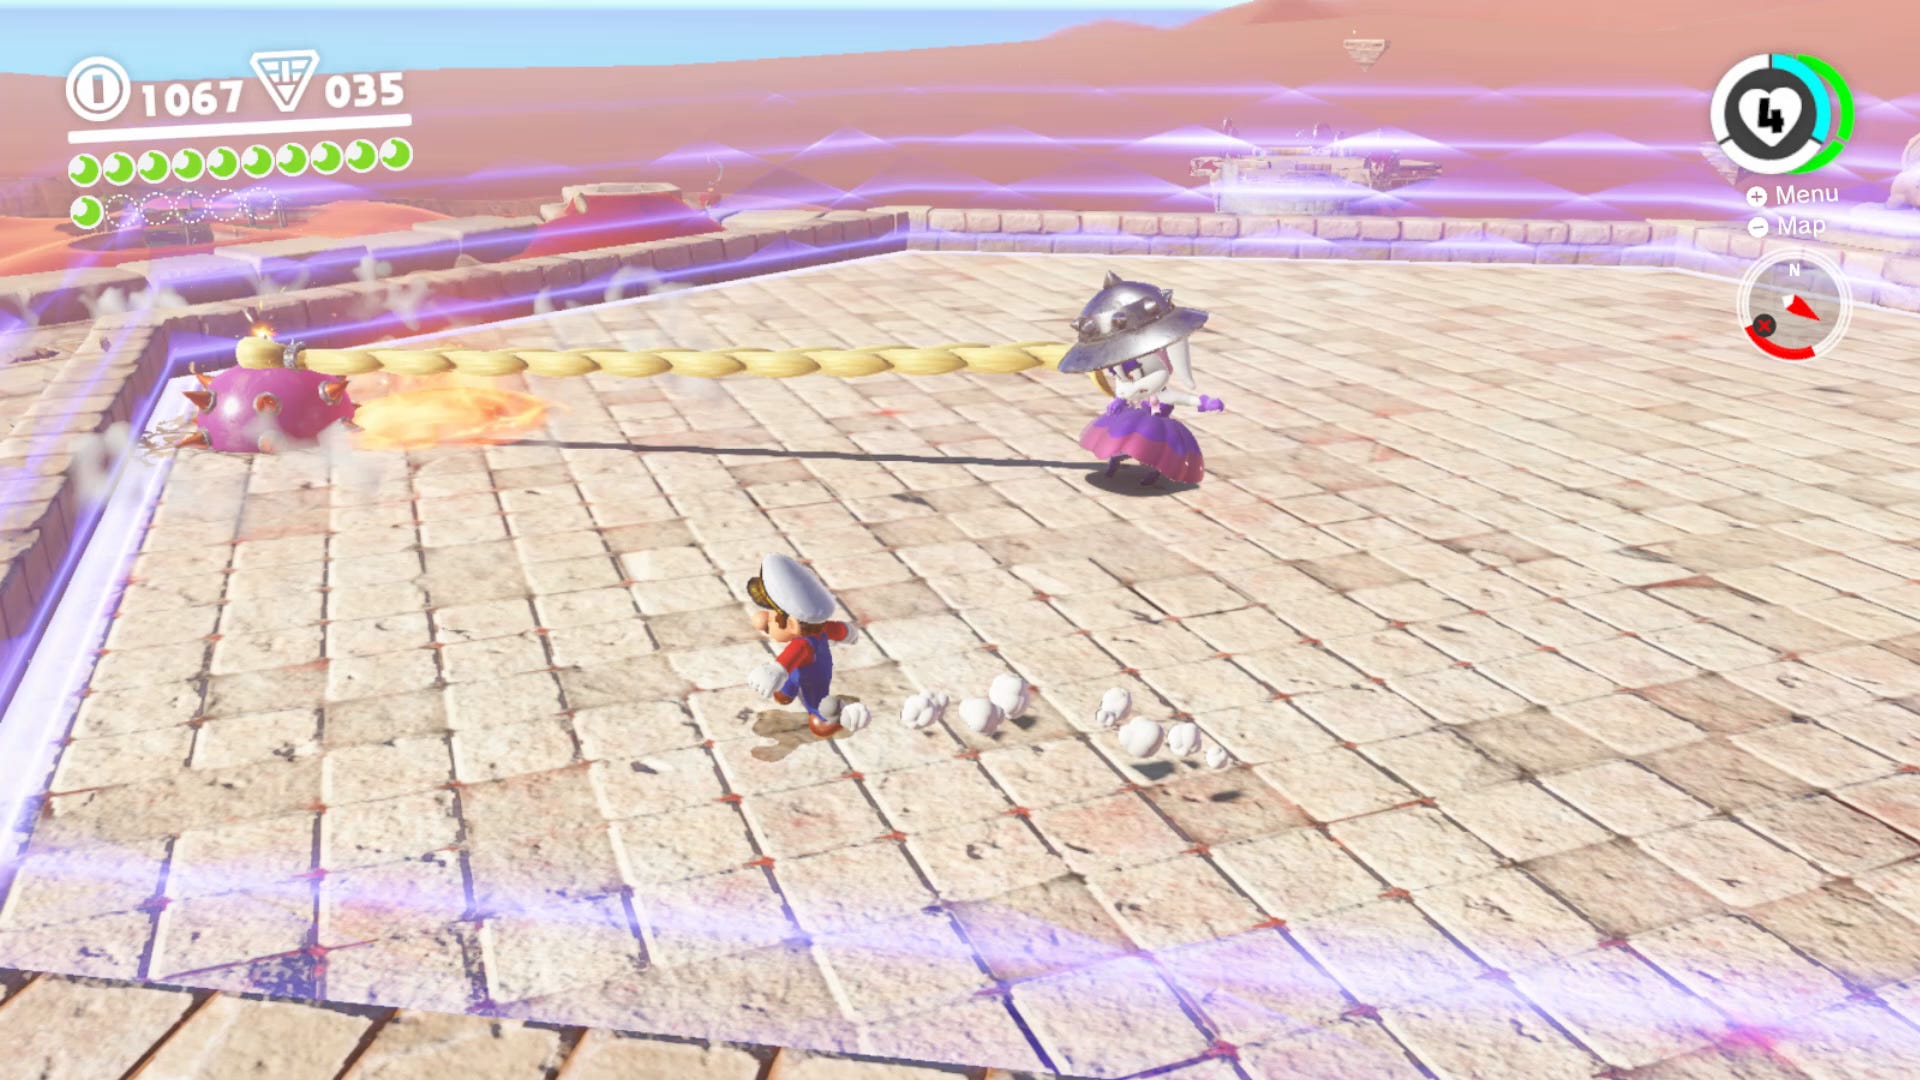
Head into the centre at the top of the Inverted Pyramid and you’ll start a fight against a Broodal. The tactic here is easy. Avoid all her attacks by running around the arena. When she launches an attack that causes here spikey ball to stick in the ground, fire Cappy at it and it will result in it spinning around and hitting her. This will cause her helmet to come off, allowing you to jump on her head. Repeat this until she is defeated and you can collect three power moons.
Sand Kingdom Power Moon 4. The Hole in the Desert Power Moons
Head into the hole in the desert (as seen in the Goomba Tower Assembly power moon) and follow the path through. You’ll need to possess a series of Bullet Bills in order to reach the final area where you’ll face off against a boss.
This boss will try to hurt you with its massive stone fists. They are pretty easy to avoid, though. Once they hit the ground and have stars spinning above them, fire cappy into one and possess it. Now fly the fist into the boss. Repeat this and three power moons will be yours.
Sand Kingdom Power Moon 5. Overlooking the Desert Town Power Moon
The first power moon you’re likely to find in the Sand Kingdom is at the top of a tower in the initial town area of the Sand Kingdom. Climb up there and the power moon is yours.
Sand Kingdom Power Moon 6. Alcove in the Ruins Power Moon
To get this hidden Power Moon, you want to go to the Tostarena Ruins Round Tower flag, then descend until you're on the same level as the cannon firing Bullet Bills just south of the flag. Go to where the first moving platform meets the level, and drop off so you're in the quicksand. Now turn around and move towards the Power Moon, constantly jumping so you don't get dragged down by the quicksand.
Sand Kingdom Power Moon 7. On the Leaning Pillar Power Moon
This power moon on Sand Kingdom can be seen just across from the Block is a Hard Place moon. Once again possess the Bullet Bill and then ride it straight into the Power Moon.
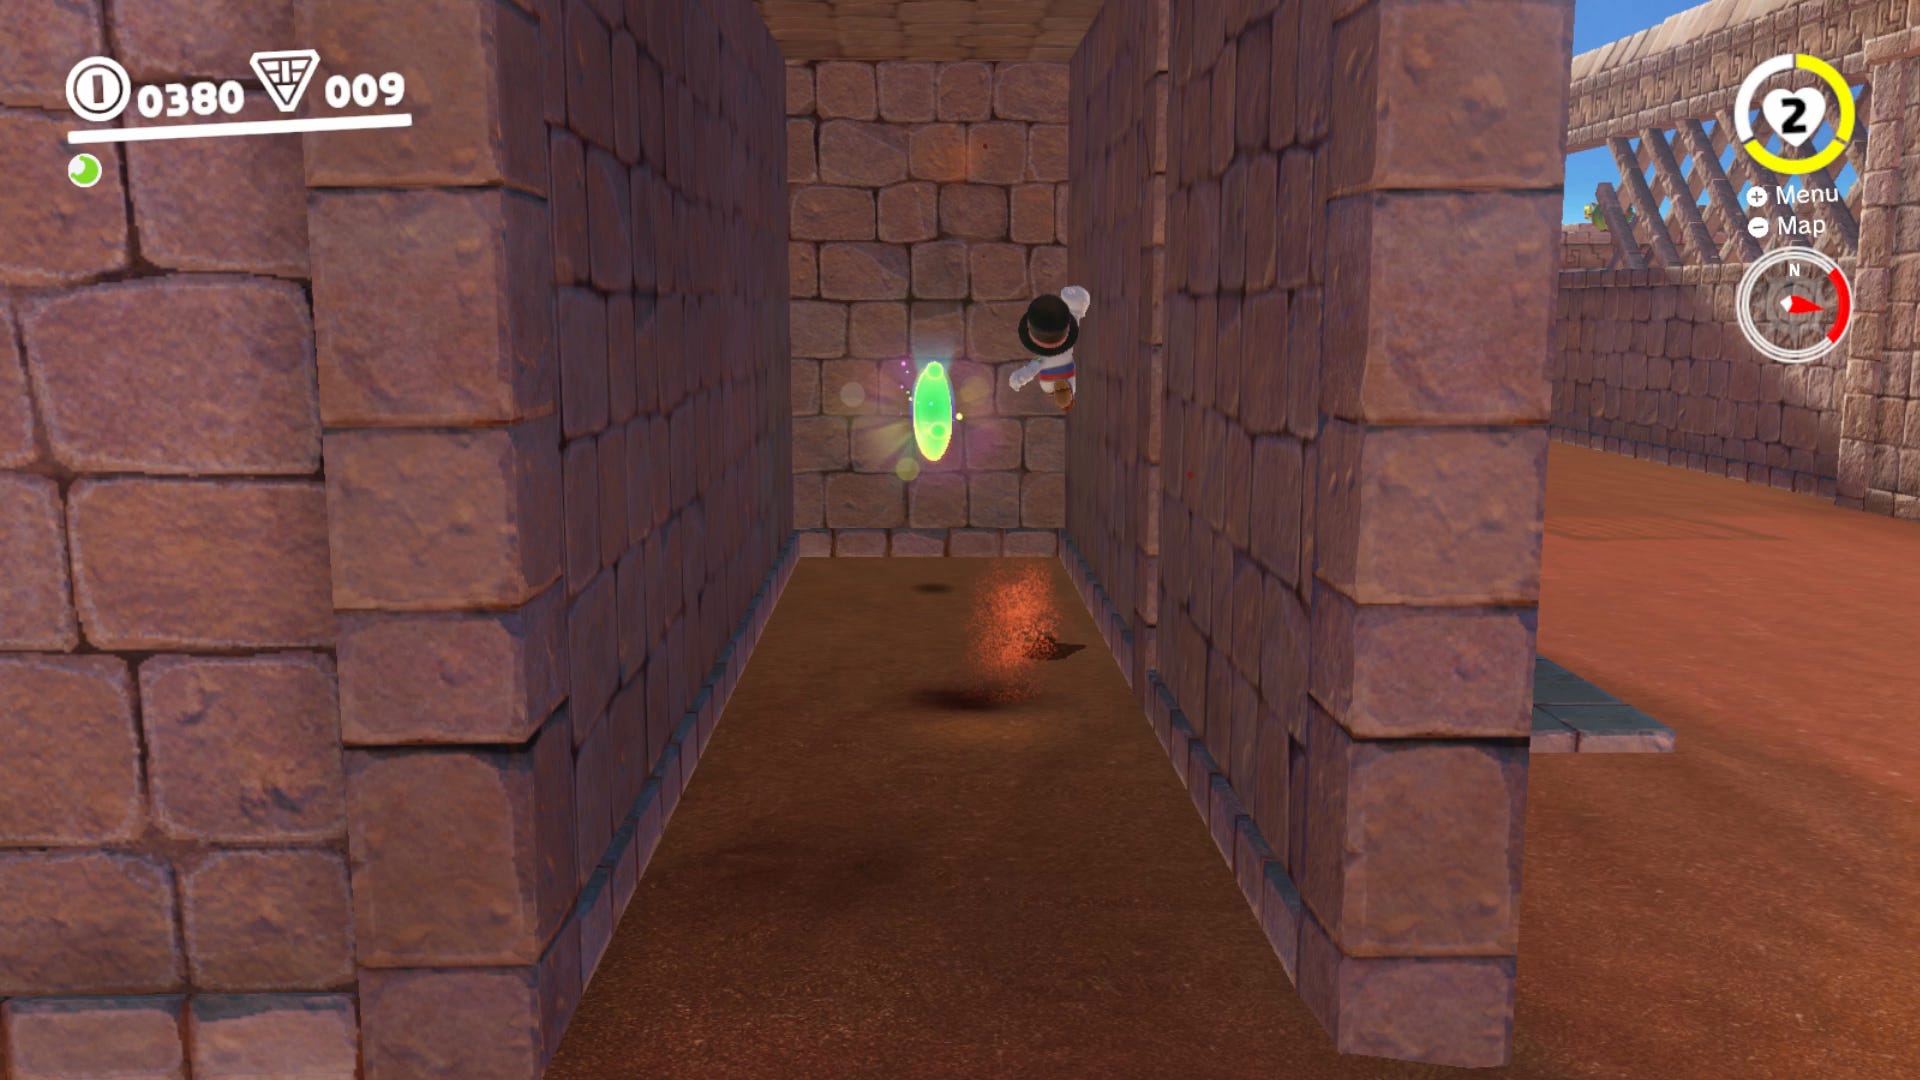
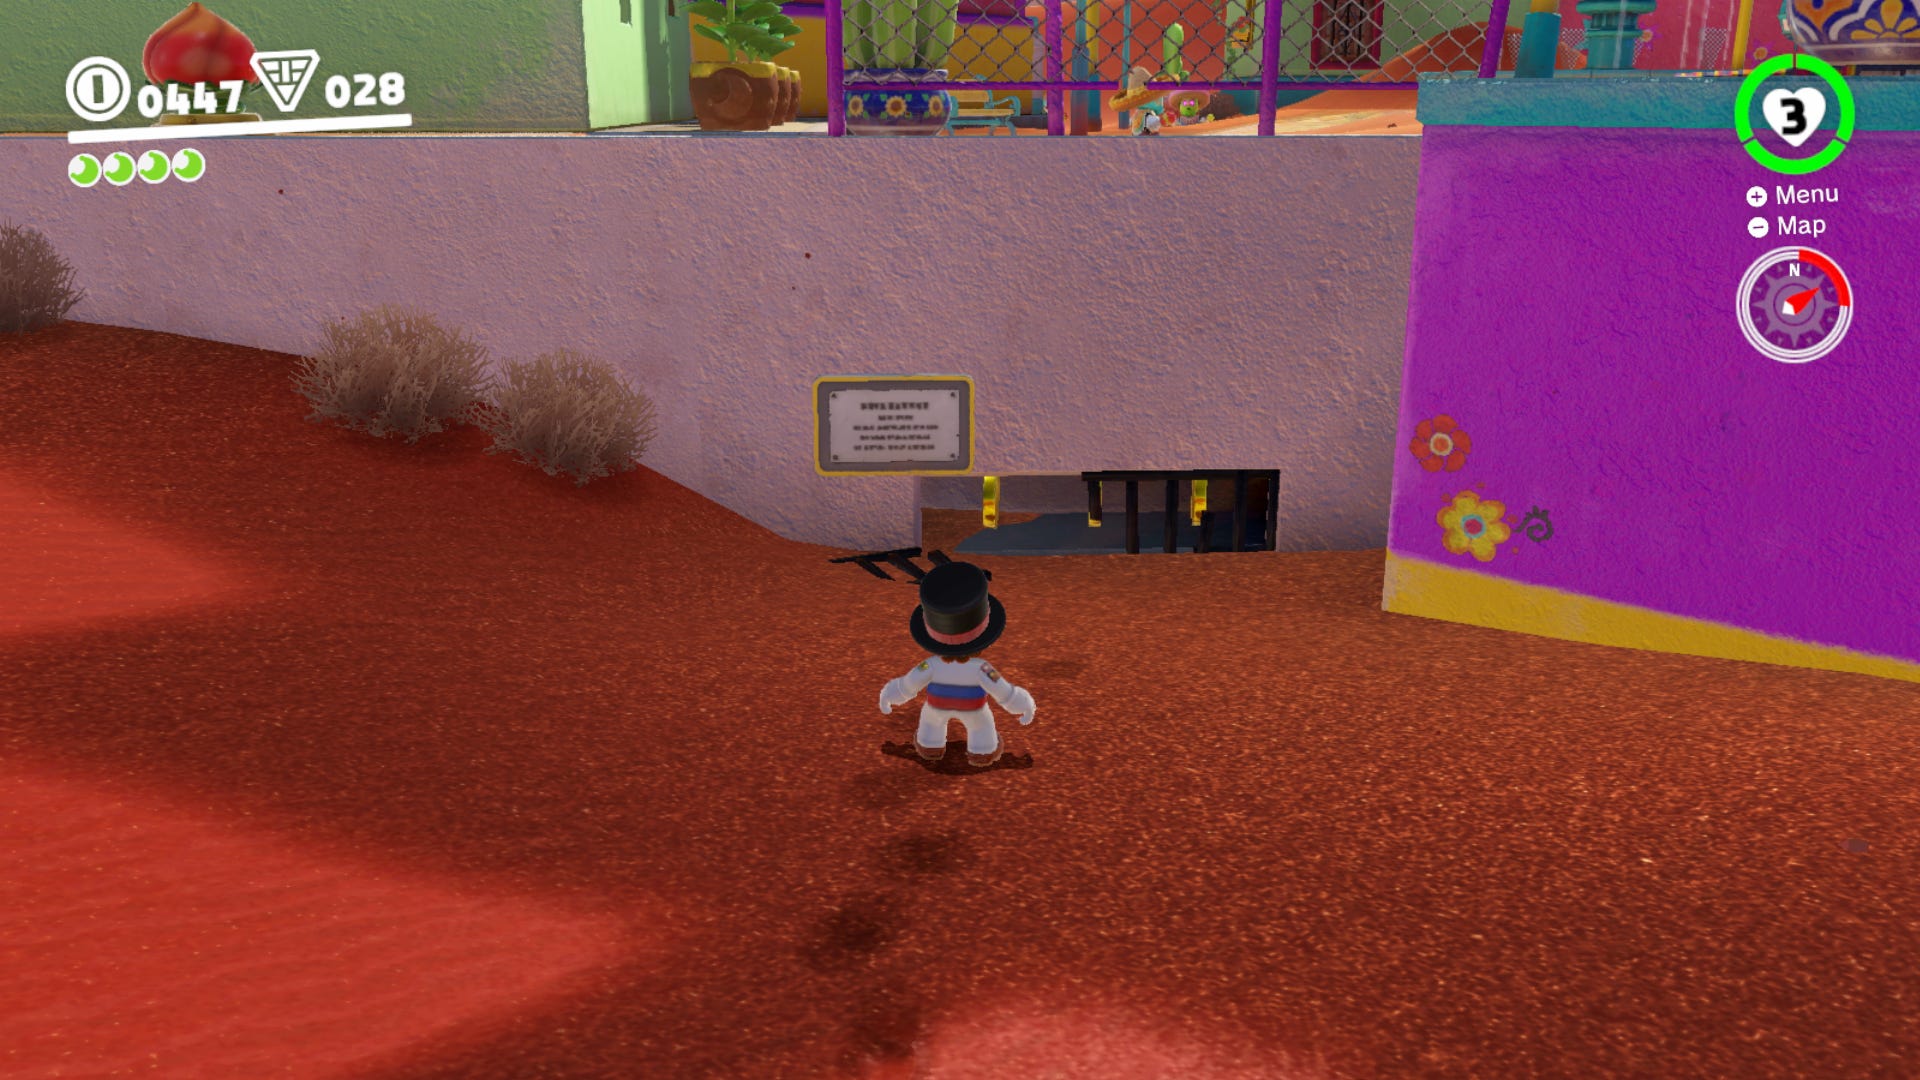
Sand Kingdom Power Moon 8. Hidden Room in the Flowing Sands Power Moon
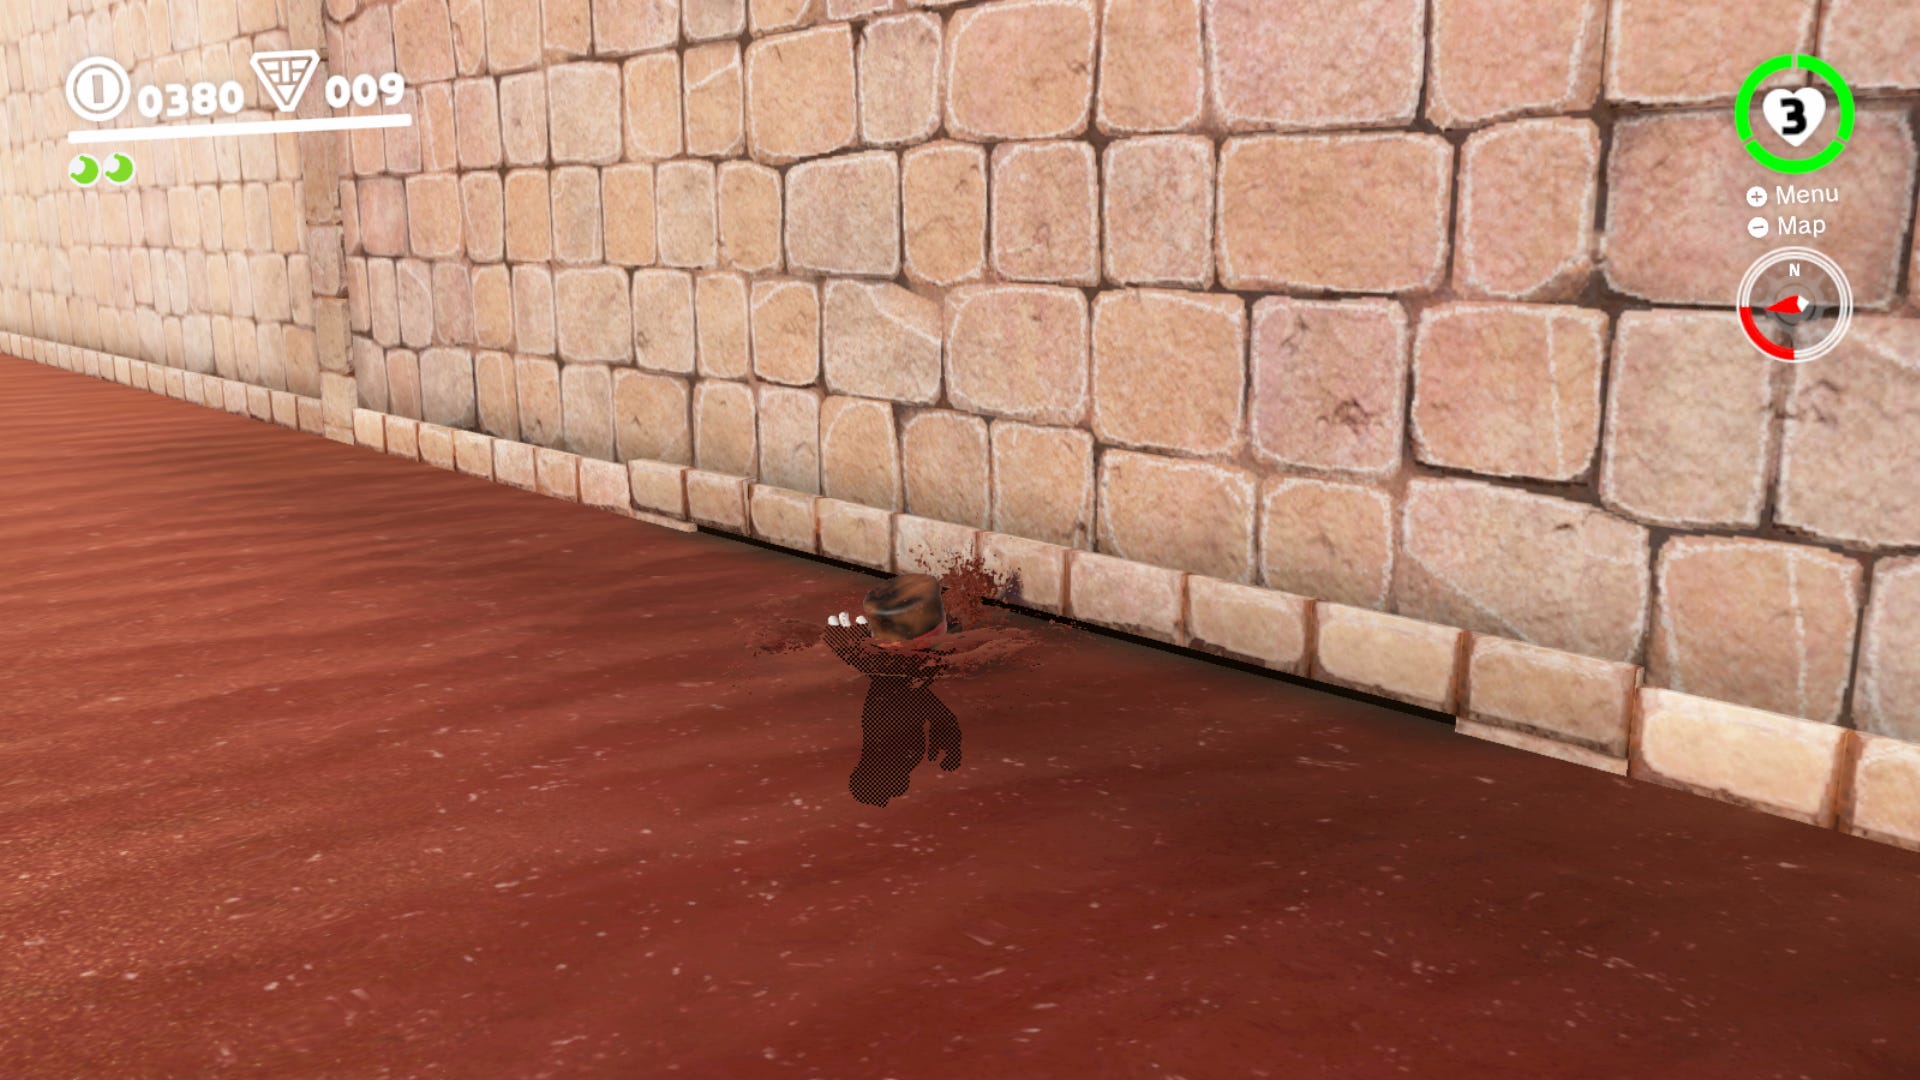
For this tricky Power Moon, you'll have to head to the Tostarena Ruins Round Tower and drop straight down into the quicksand area. Check the wall for a tiny opening where the quicksand meets the wall, and let Mario sink into the sand until he's almost submerged. Now mash B and while heading underneath the wall, and you'll come to a room with the Power Moon.
Sand Kingdom Power Moon 9. Secret of the Mural Power Moon
You'll have to once again warp back to the Tostarena Ruins Round Tower flag, and drop down to the lower level, where you can enter the pipe and turn into 8-bit Mario. Now, head to the very end of the mural where you can jump up to the flag, but stop and let the moving platform below slide to the very left. Now, jump down to the left to reveal a secret passageway, leading to the Power Moon.
Sand Kingdom Power Moon 10. Secret of the Inverted Mural Power Moon
Inside the Inverted Pyramid you’ll have to make it through a fairly challenging retro level. Once you get back outside (while still in the retro level) you’ll come across a warp pipe. Don’t go in this. Instead carry on round to the right and you’ll find a secret area. This area is home to a power moon.
Sand Kingdom Power Moon 11. On Top of the Stone Archway Power Moon
Head back to the very top of the Tostarena Ruins Round Tower once again, and look to the south, where there'll be a new power line (provided you've thawed the region). Simply throw Cappy onto the power line and head towards the town, crouching to drop off onto the archway partway through, and claim the Power Moon.
Sand Kingdom Power Moon 12. From a Crate in the Ruins Power Moon
To get this power moon you’ll need to work your way up the retro Mario area, then smash the crate on the platform above. The power star will then move across to another platform. Possess the Bullet Bill and fly over to it to collect the power moon.
Sand Kingdom Power Moon 13. On the Lone Pillar Power Moon
This Power Moon is easy to reach once you've thawed the Sand Kingdom as a whole. Simply head to the top of the Inverted Pyramid from the Tostarena Ruins Round Tower, using the power line, and do a running jump from the spot of the missing statue to reach the Power Moon.
Sand Kingdom Power Moon 14. On the Statue’s Tail Power Moon
Once you’ve made it through the Inverted Pyramid you’ll be on top of it. Before you head forward, look around to see a statue with a glowing tail. Run over to it and fling Cappy on the tail to reveal a power moon.
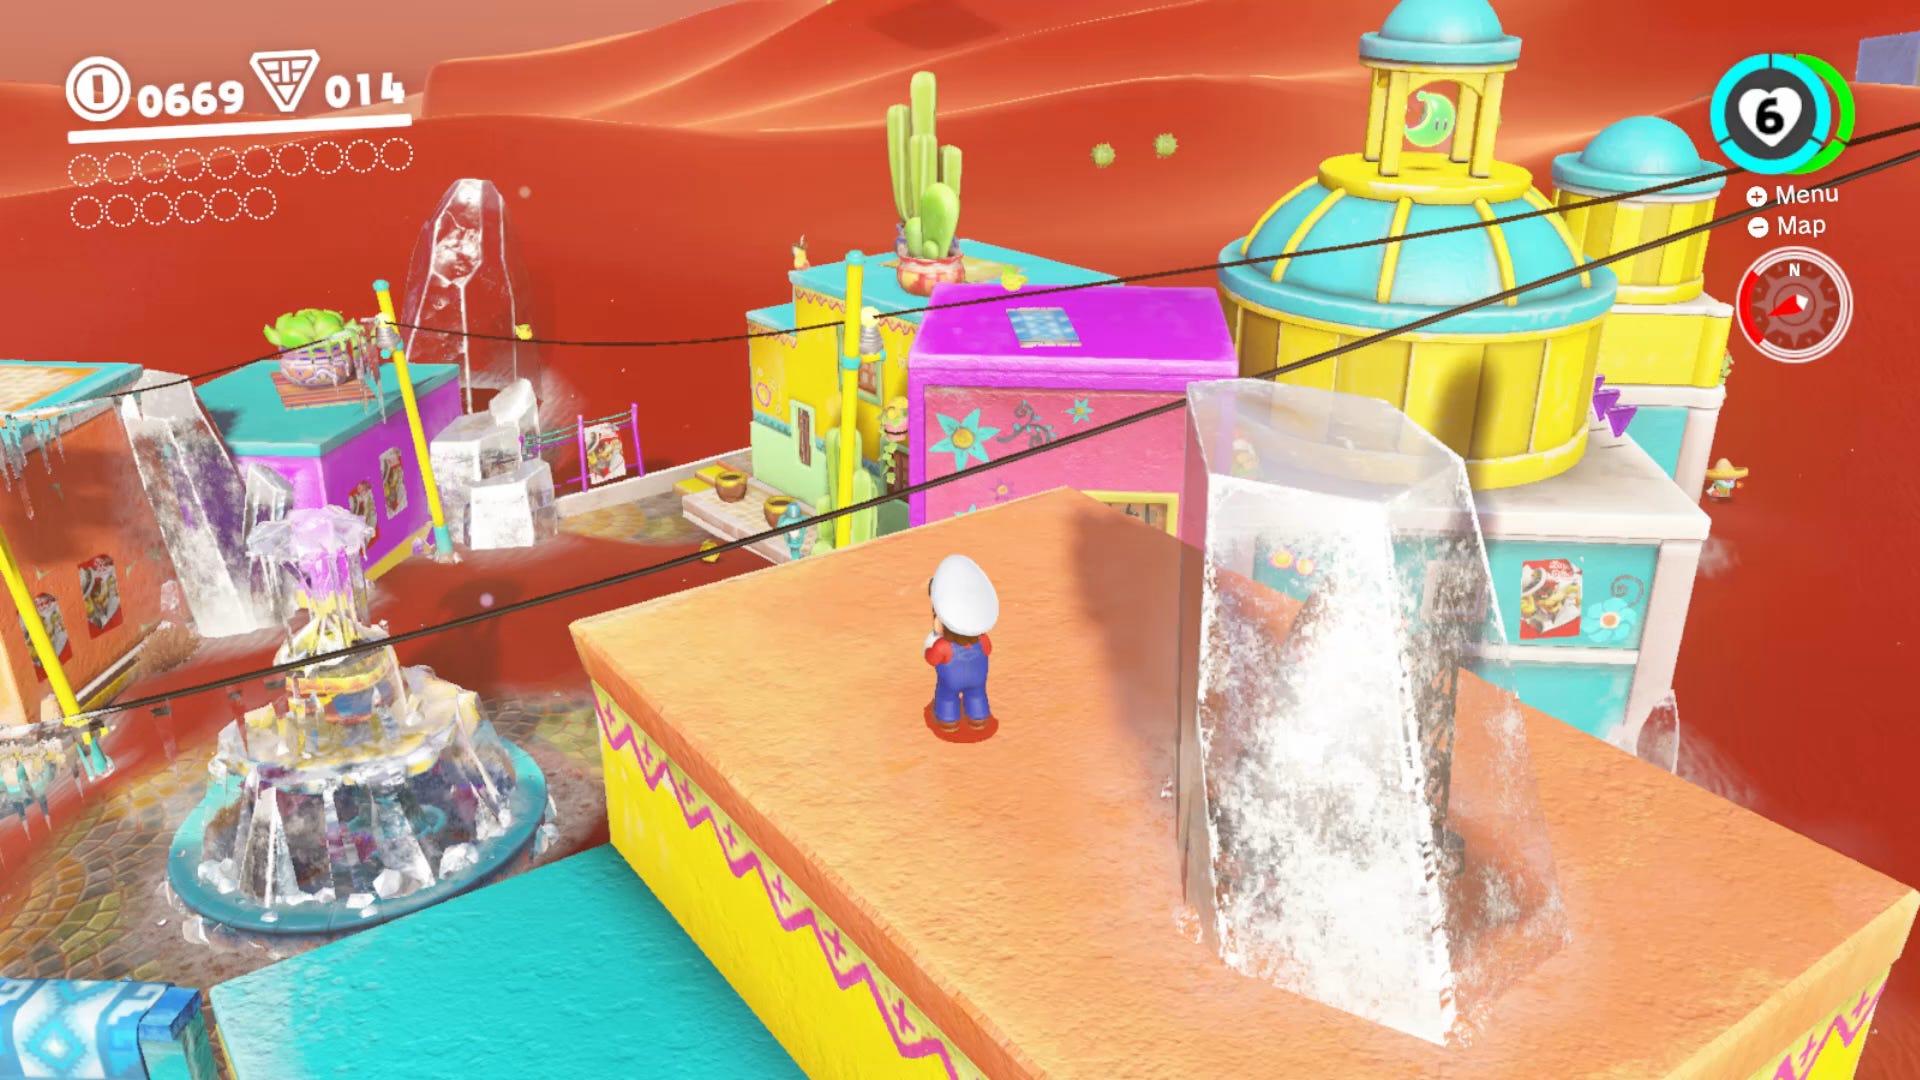
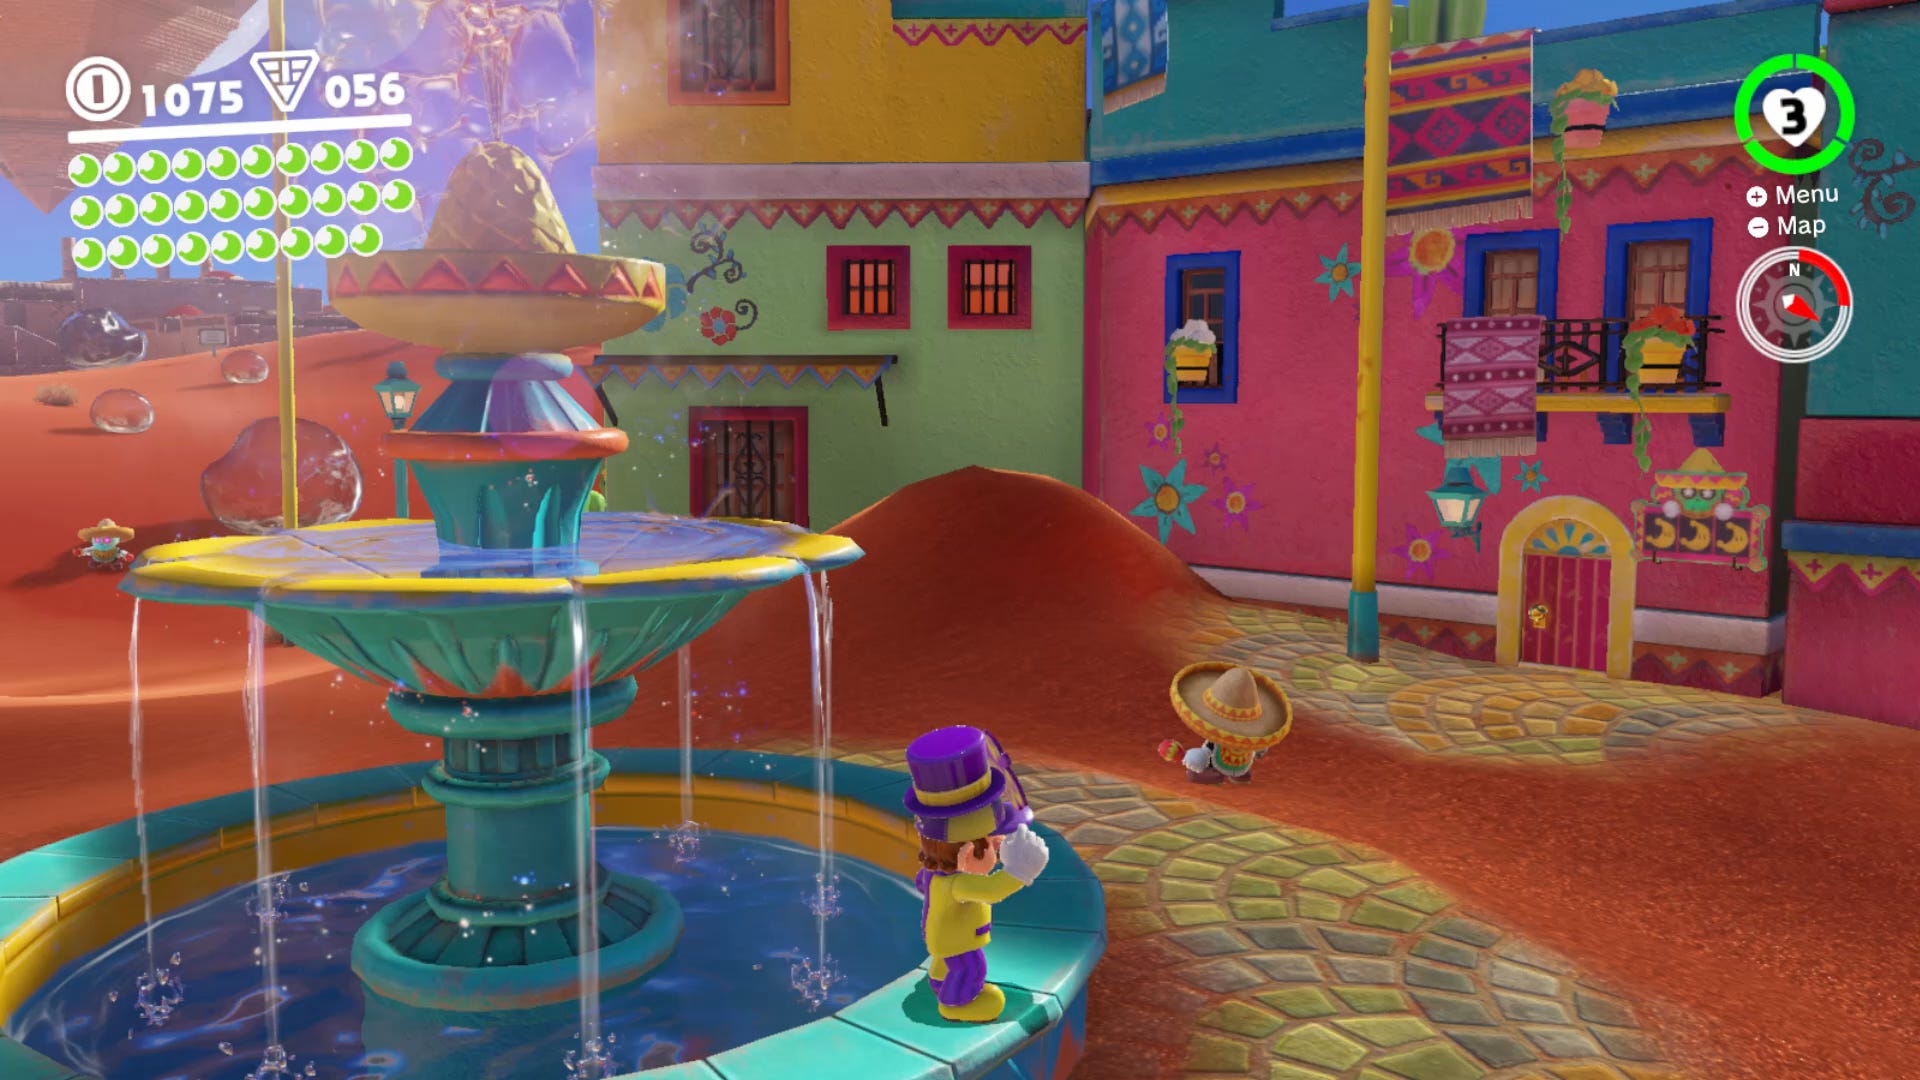
Sand Kingdom Power Moon 15. Hang Your Hat on the Fountain Power Moon
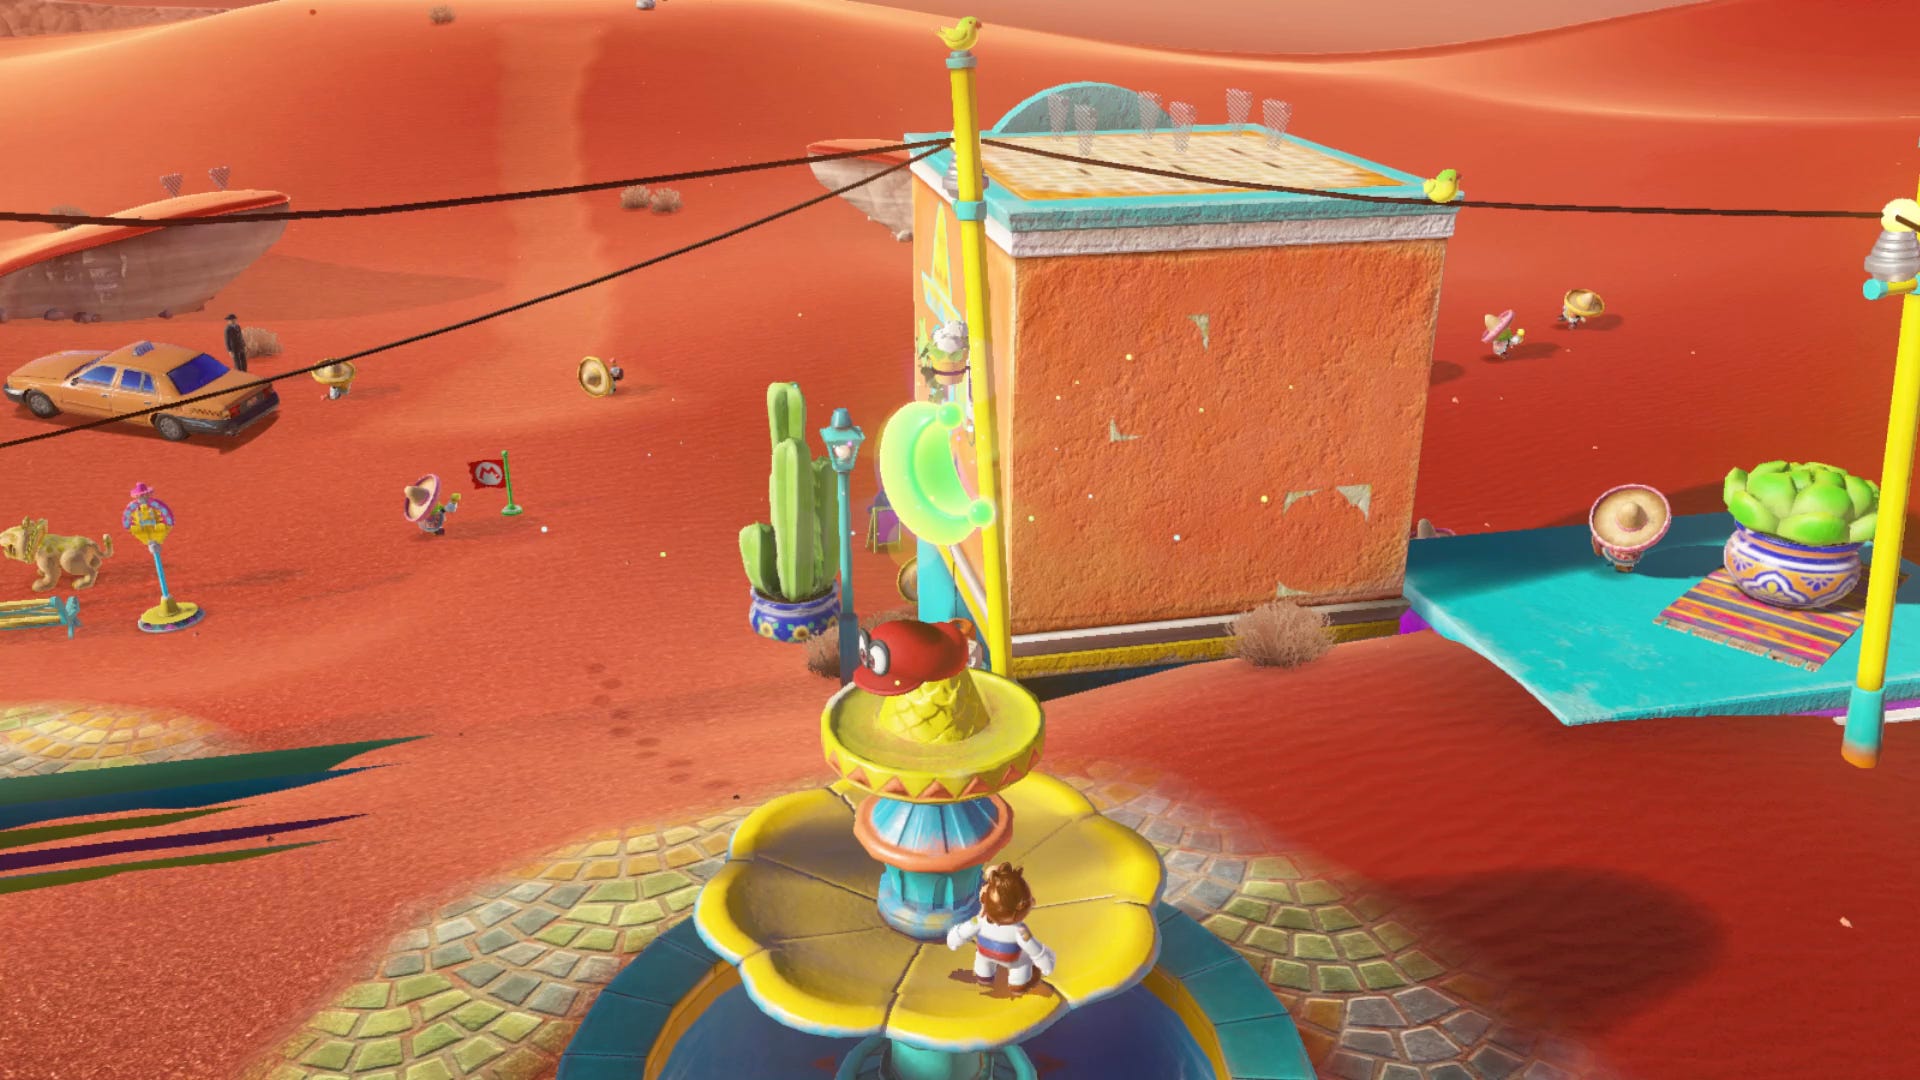
This Power Moon is an easy one to get, but you'll need to make sure the Sand Kingdom is thawed first. Once it is, head to the water fountain in the center of Tostarena Town, throw Cappy at the tip of the fountain, and hold Y to make him spin there for a few seconds. Once you've done this, the Power Moon will appear, and is yours to claim.
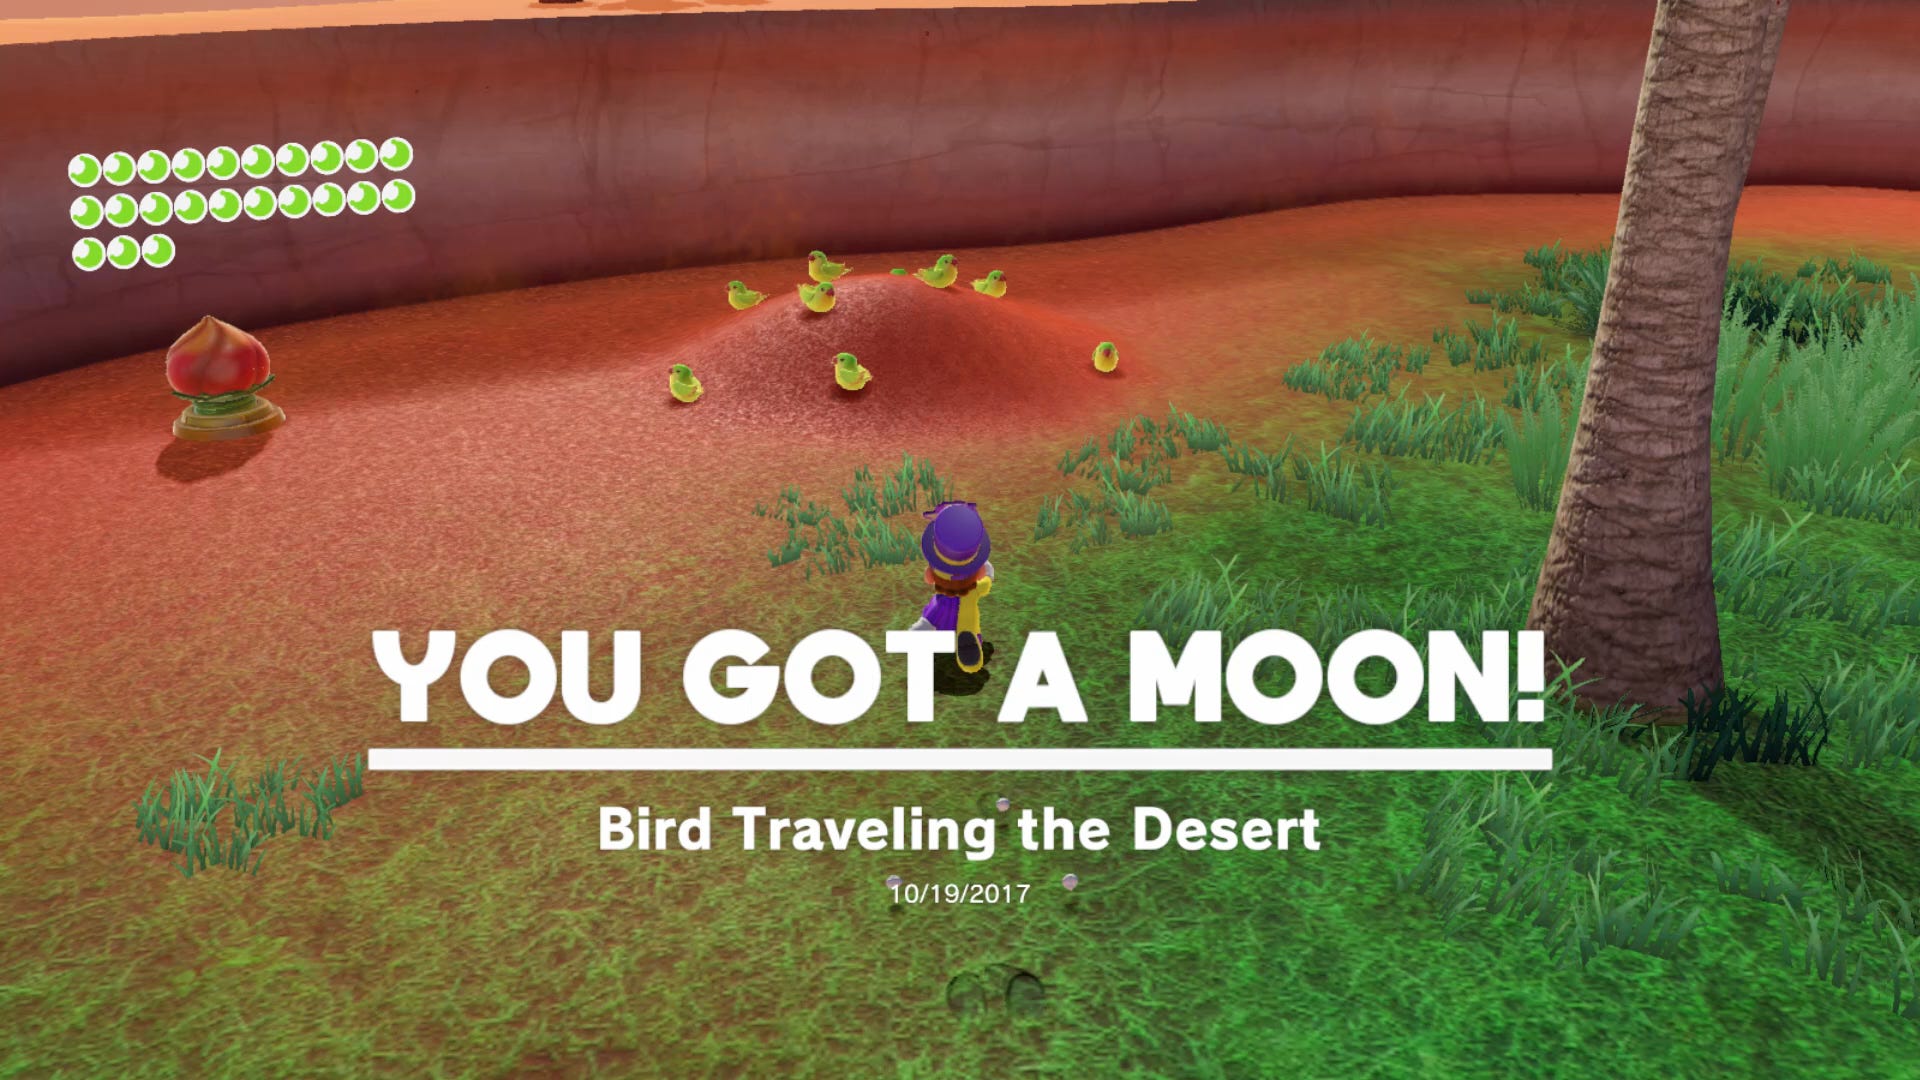
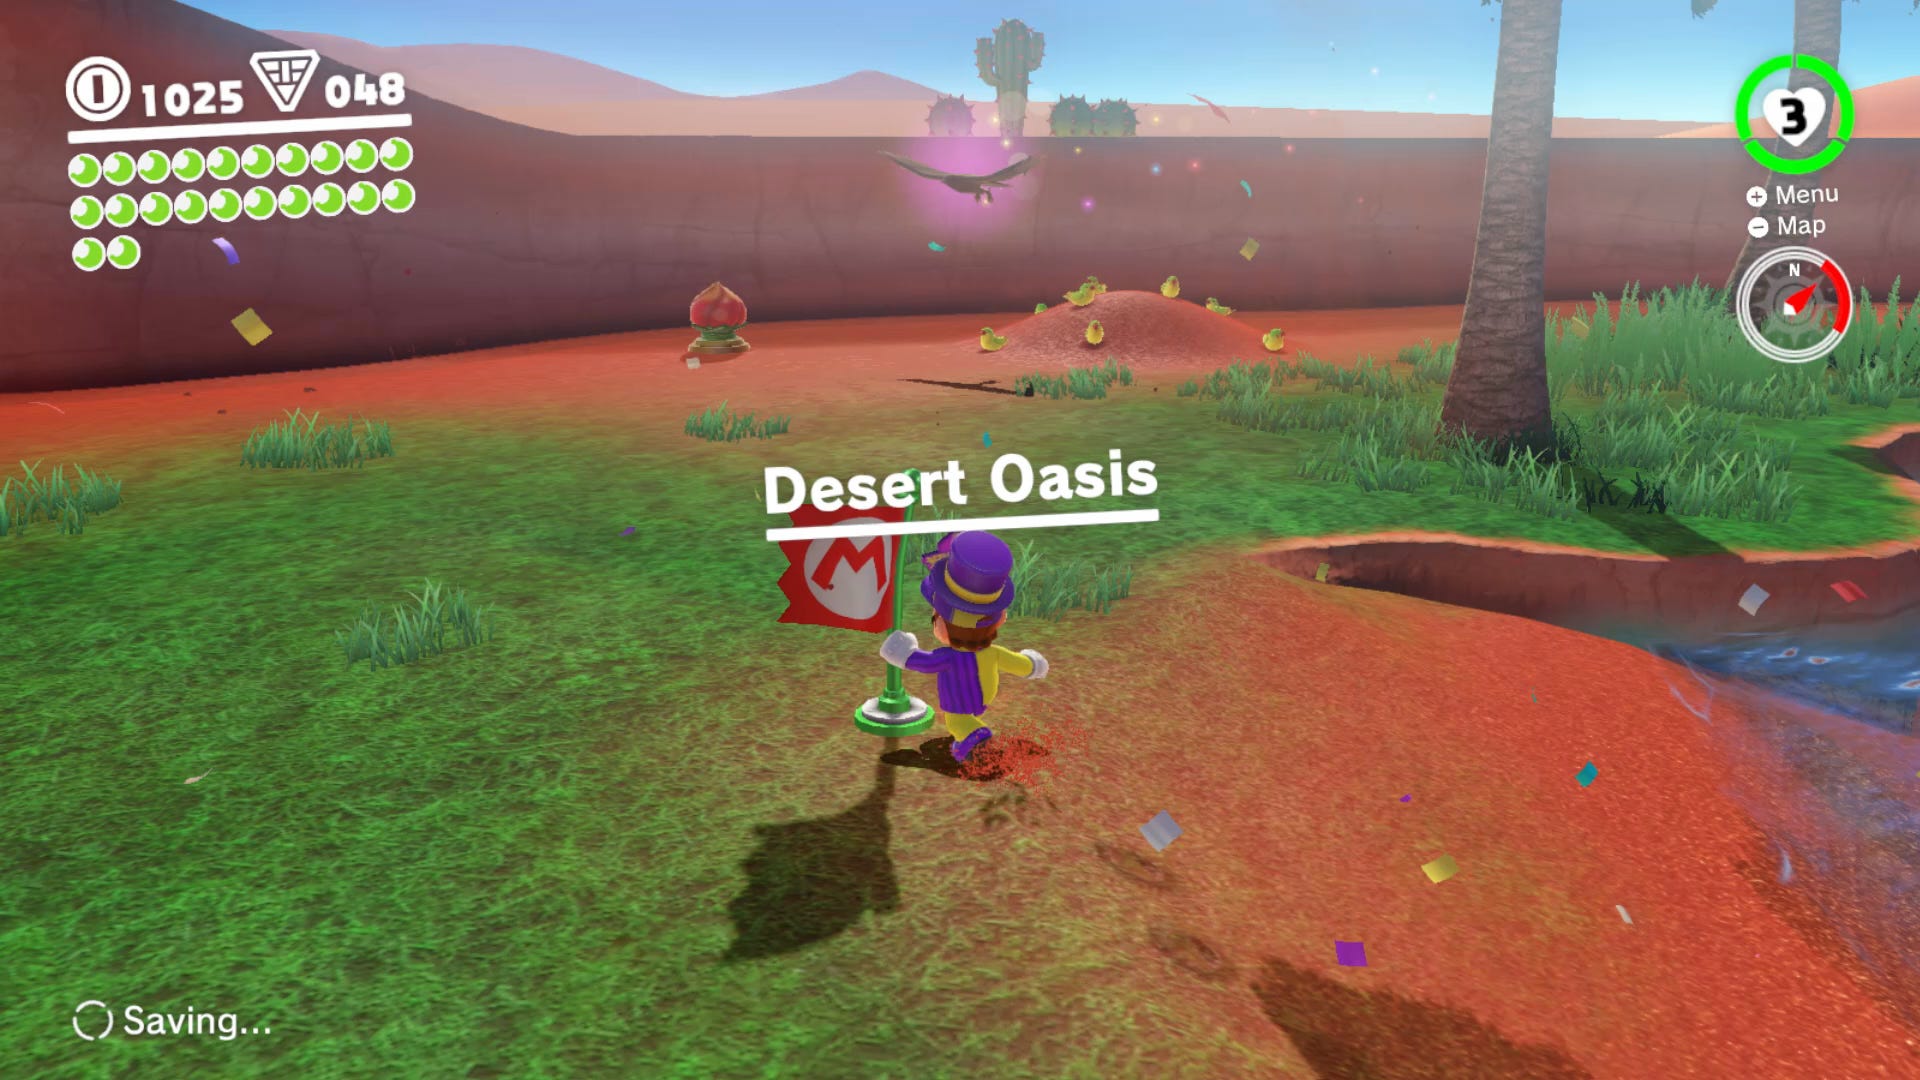
Sand Kingdom Power Moon 16. Where the Birds Gather Power Moon
In the Oasis area again, a group of yellow birds on on a mound. Ground pound the centre of this mound and you’ll get another power moon.
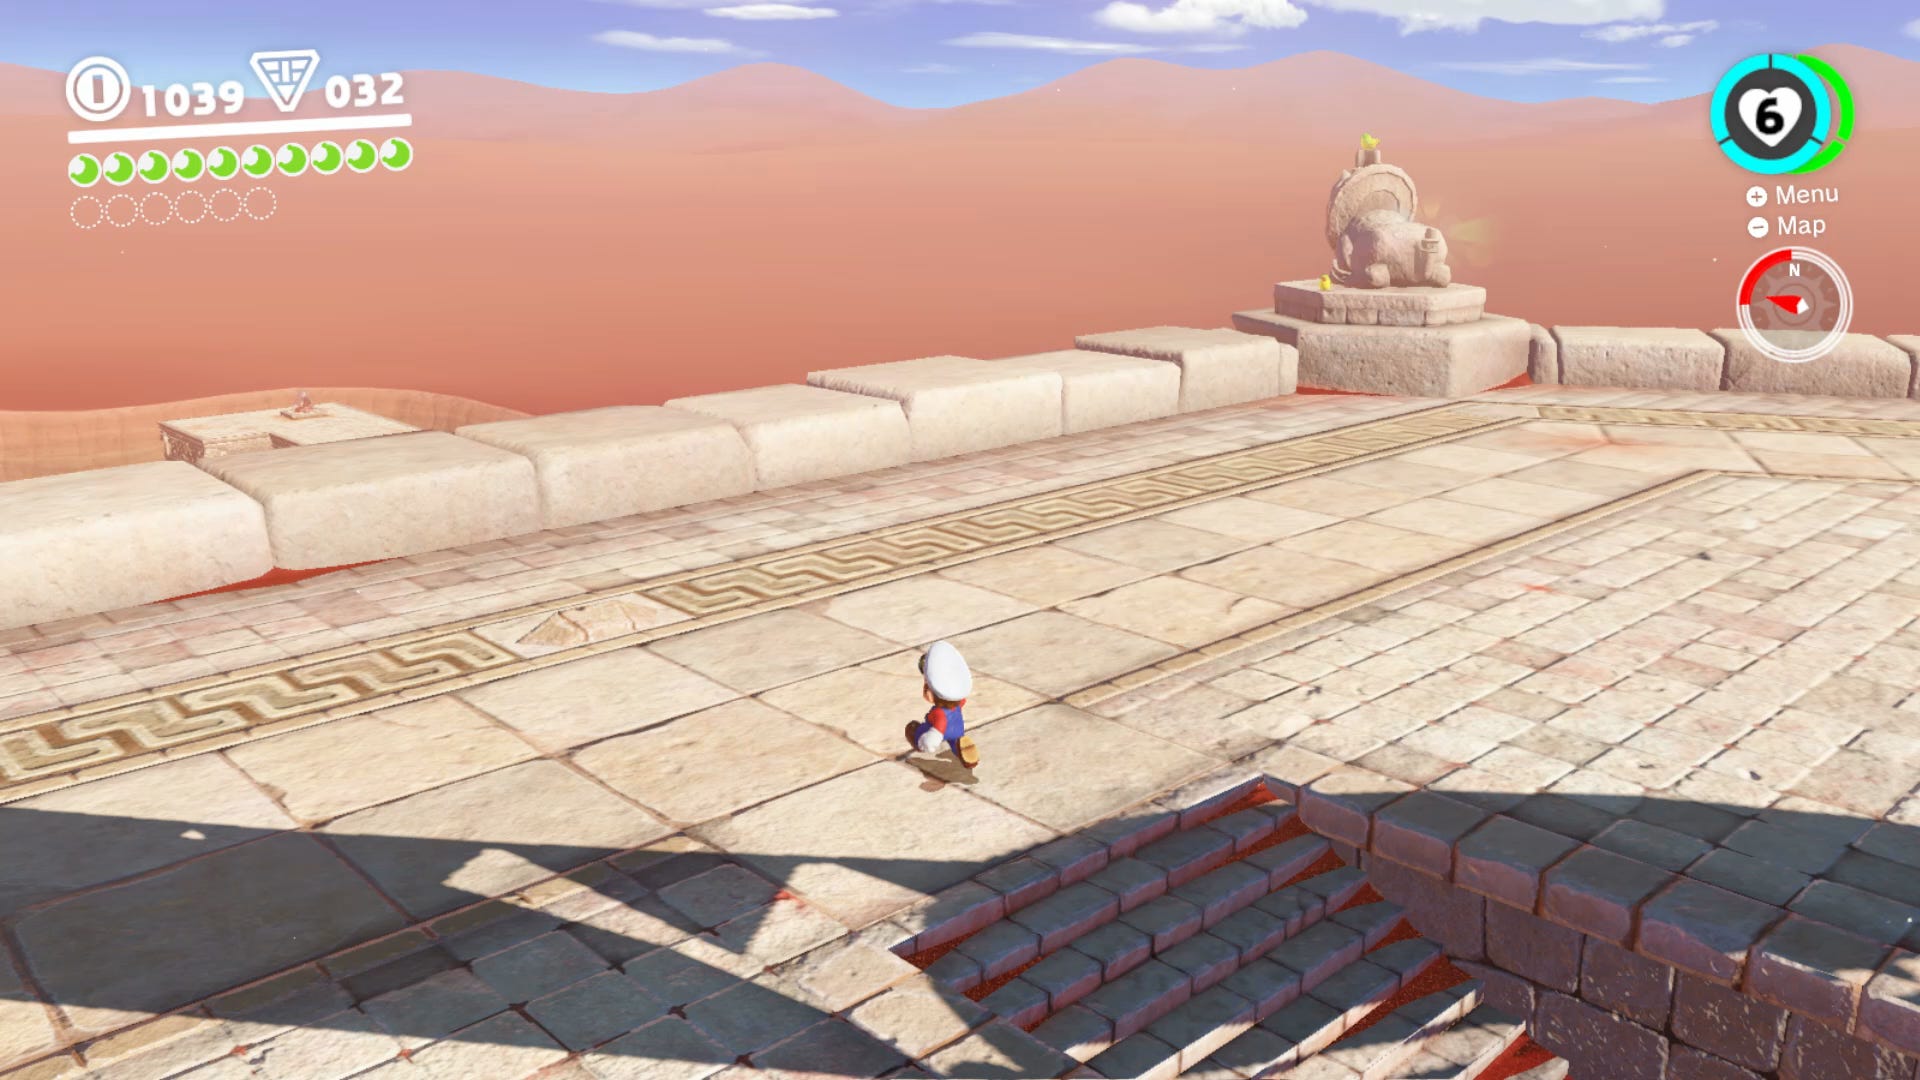
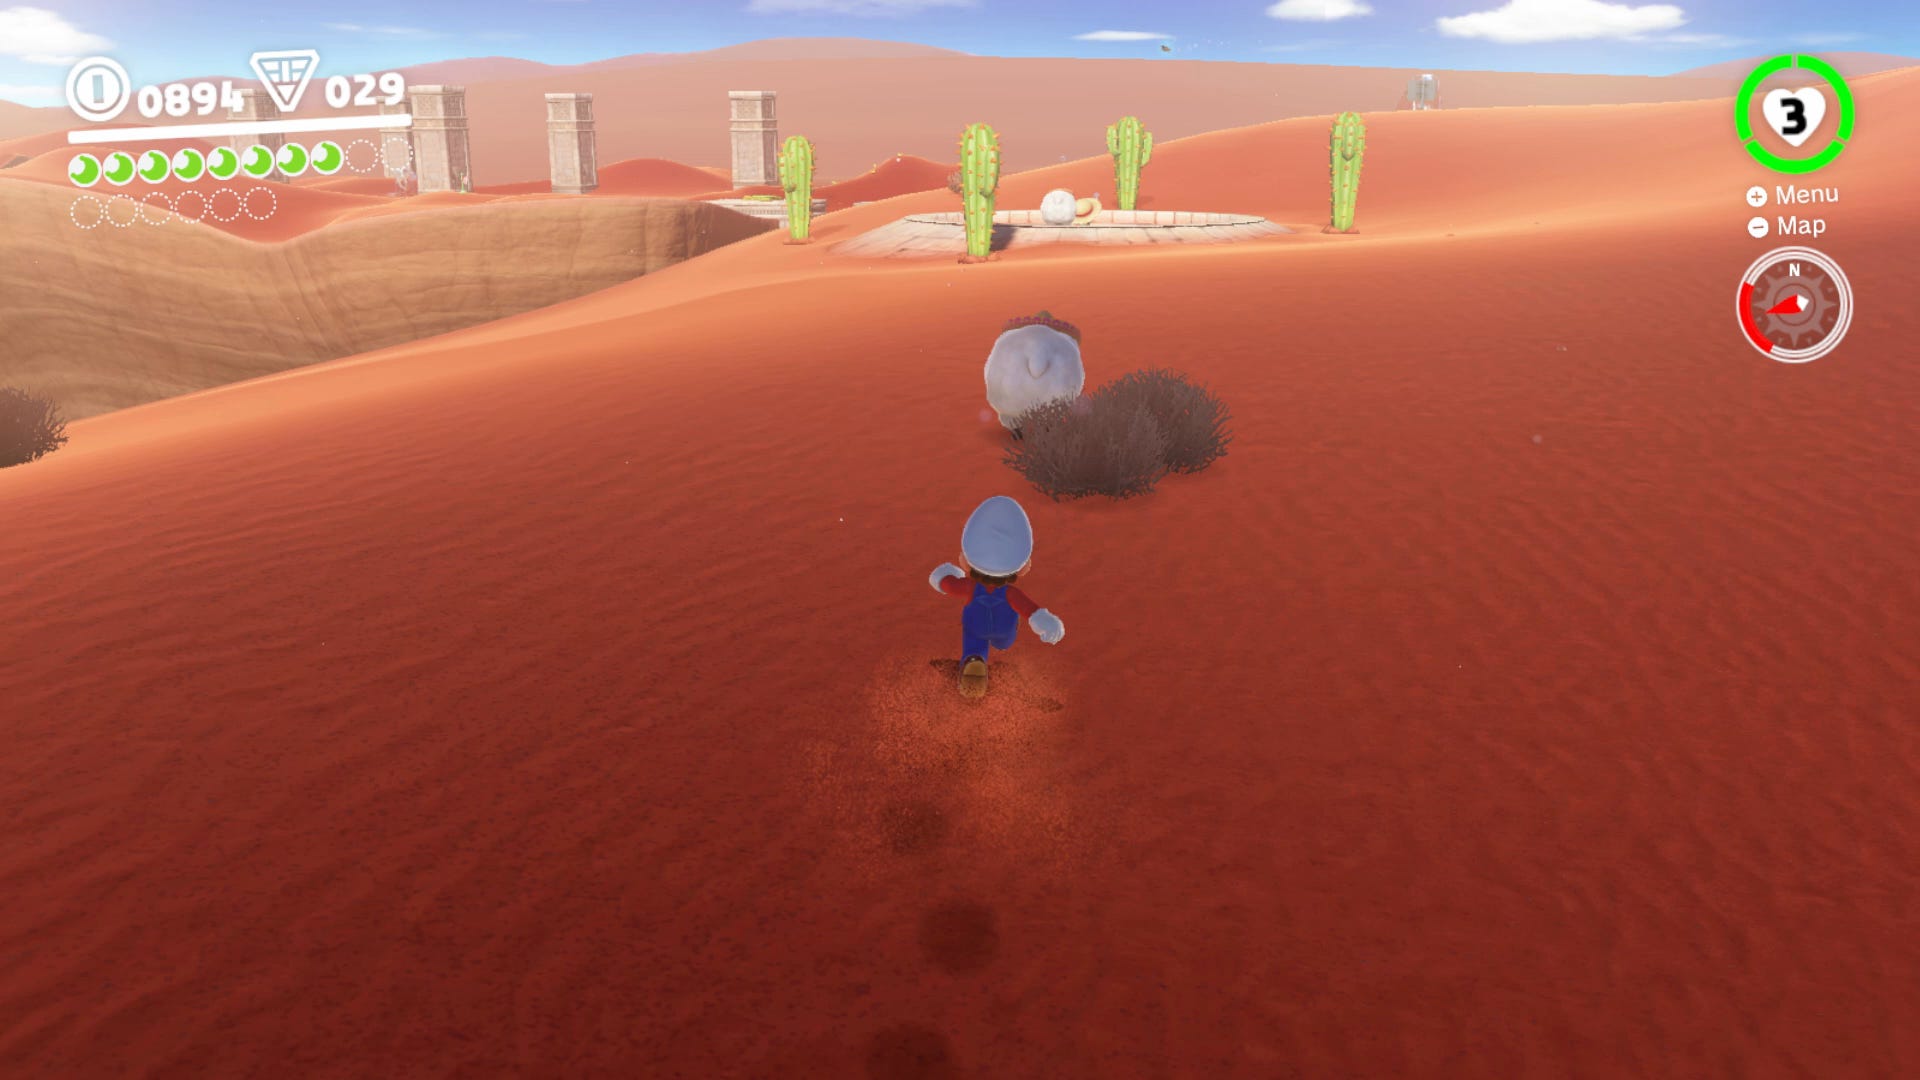
Sand Kingdom Power Moon 17. Top of a Dune Power Moon
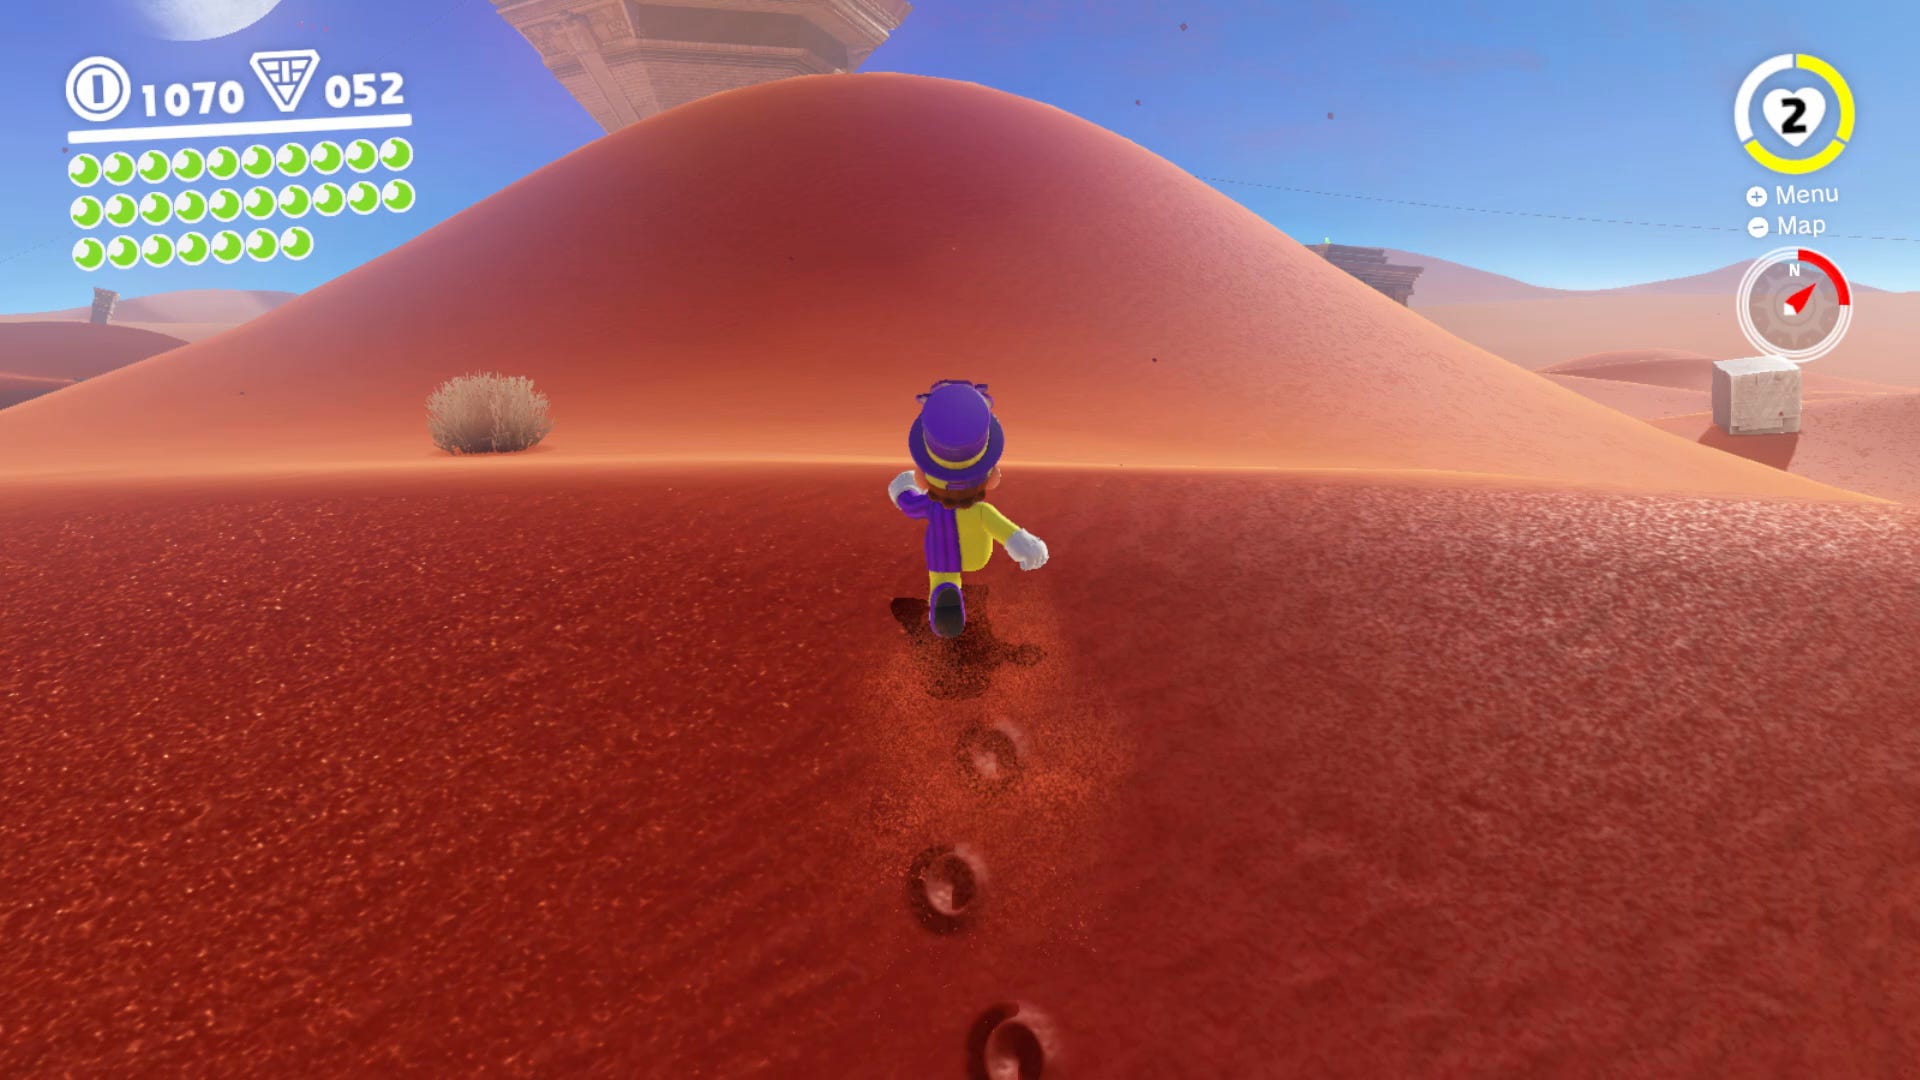
If you ground pound at the top of the Dune (seen in the pic) you’ll get a power moon. It’s considerably larger than the other dunes in the area.
Sand Kingdom Power Moon 18. Lost in the Luggage Power Moon
Near where you’ll see a car stuck in ice you’ll also see some miscellaneous boxes and luggage. The area on the ground that has a shimmering glow coming from it can be ground pounded to reveal a power moon.
Sand Kingdom Power Moon 19. Bullet Bill Breakthrough
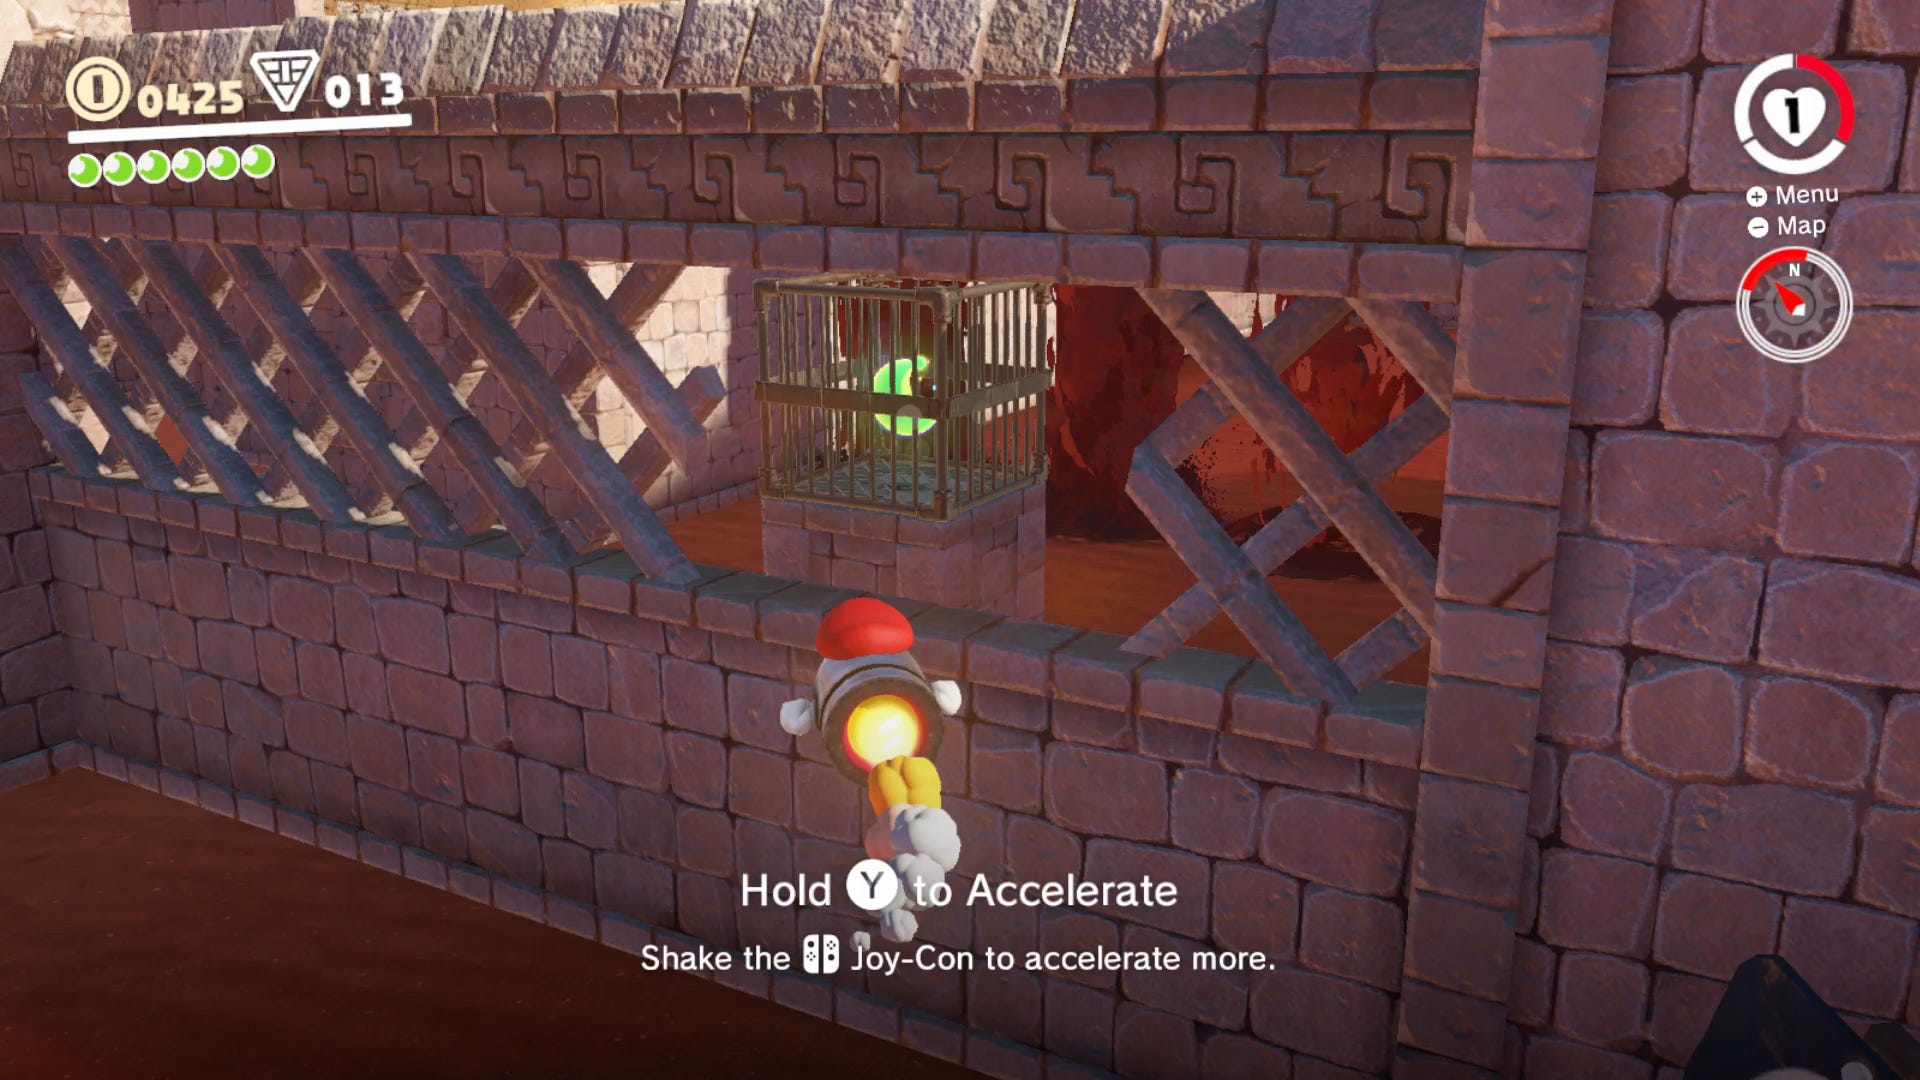
This Power Moon is located right in the center of Tostarena Ruins, and is actually locked in a cage, located just to the side of the mud platforms. Start from Tostarena Ruins Entrance and make your way inwards till you can capture a Bullet Bill. Once you've captured it, steer it through the gap in the stone fence and hit the cage around the Power Moon, unlocking it for you to collect.
Sand Kingdom Power Moon 20. Inside a Block is a Hard Place Power Moon
Head to the area where small Bullet Bills are coming out of the wall. You’ll notice a brick in the corner that has a slight glow. Possess a Bill and then drive into the brick to release the power moon.
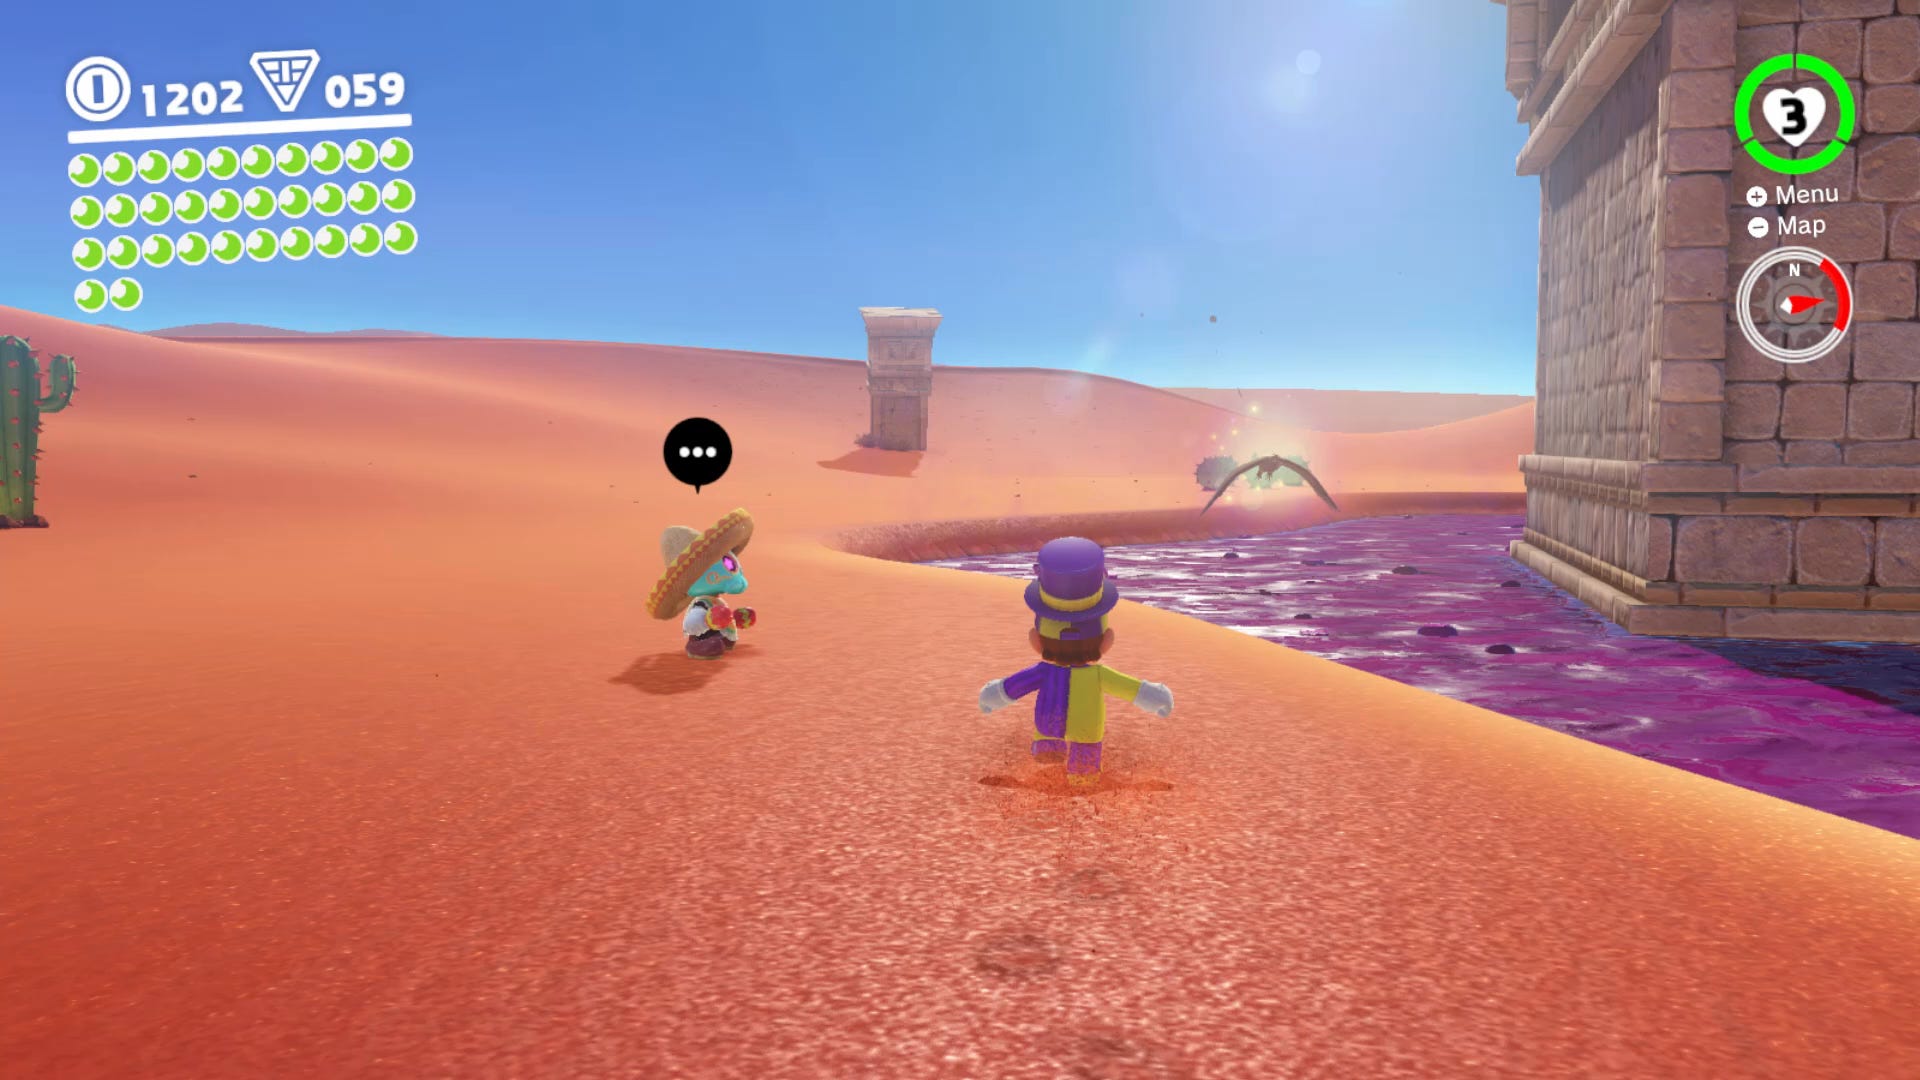
Sand Kingdom Power Moon 21. Bird Travelling the Desert Power Moon
An oasis can be found over to the right of the Odyssey (as you’re looking toward the town). A bird can be seen flying around the water. Fire Cappy into the bird and you’ll get a power moon.
Sand Kingdom Power Moon 22. Bird Travelling the Wastes Power Moon
Flying around the purple lake is another bird. Hit it with your cap and it will release another Power Moon. If it lands over the purple liquid you’ll collect it and then die.
Sand Kingdom Power Moon 23. The Lurker Under the Stone Power Moon
To get this Power Moon, you'll need to make it to the top of the inverted pyramid, after the region has been thawed. Head to the middle area, and you'll notice something moving about underneath the stone. Hit it with Cappy, and jump/ground pound on it while it's stunned to reveal the Power Moon.
Sand Kingdom Power Moon 24. The Treasure of Jaxi Ruins Power Moon
Once again, warp yourself to the Tostarena Ruins Round Tower, and look down to the quicksand below. Let yourself be sucked in by the hole in the quicksand, where you'll find yourself in a brand new icy area. This is incredibly difficult to navigate, so make sure to take things slowly, but rush through the parts with the falling columns as quickly as possible. At the end of the area, you'll find a green pipe which leads to a chest containing the Power Moon.
Sand Kingdom Power Moon 25. Desert Gardening: Plaza Seed Power Moon
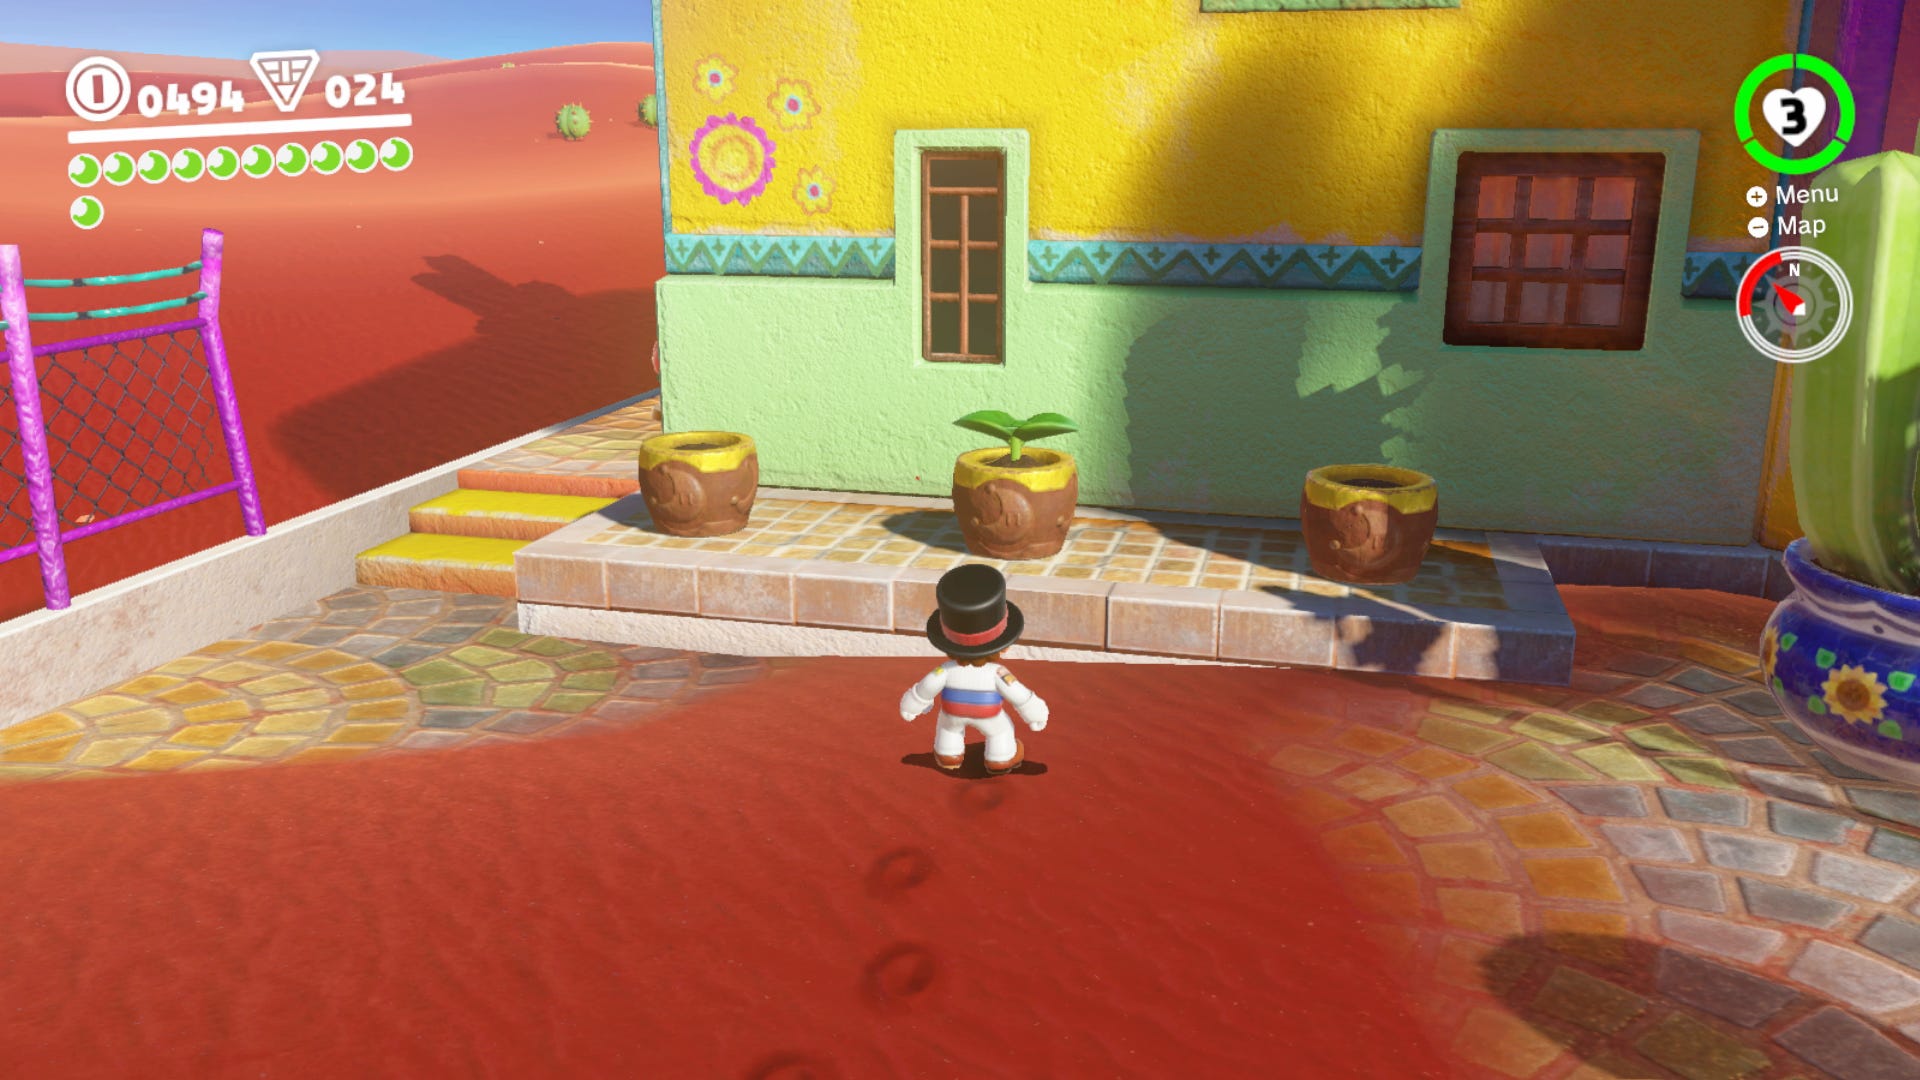
This Power Moon actually takes quite a while to appear, so it's best to start the process of unlocking it, then return in roughly 20 minutes. To begin the process, head to the water fountain in the middle of Tostarena Town, and look around until you see a glowing acorn in front of three plant pots. Pick the seed up and throw it in a plant pot, and roughly 20 minutes later, a Power Moon will appear there for you to collect.
Sand Kingdom Power Moon 26. Desert Gardening: Ruins Seed Power Moon
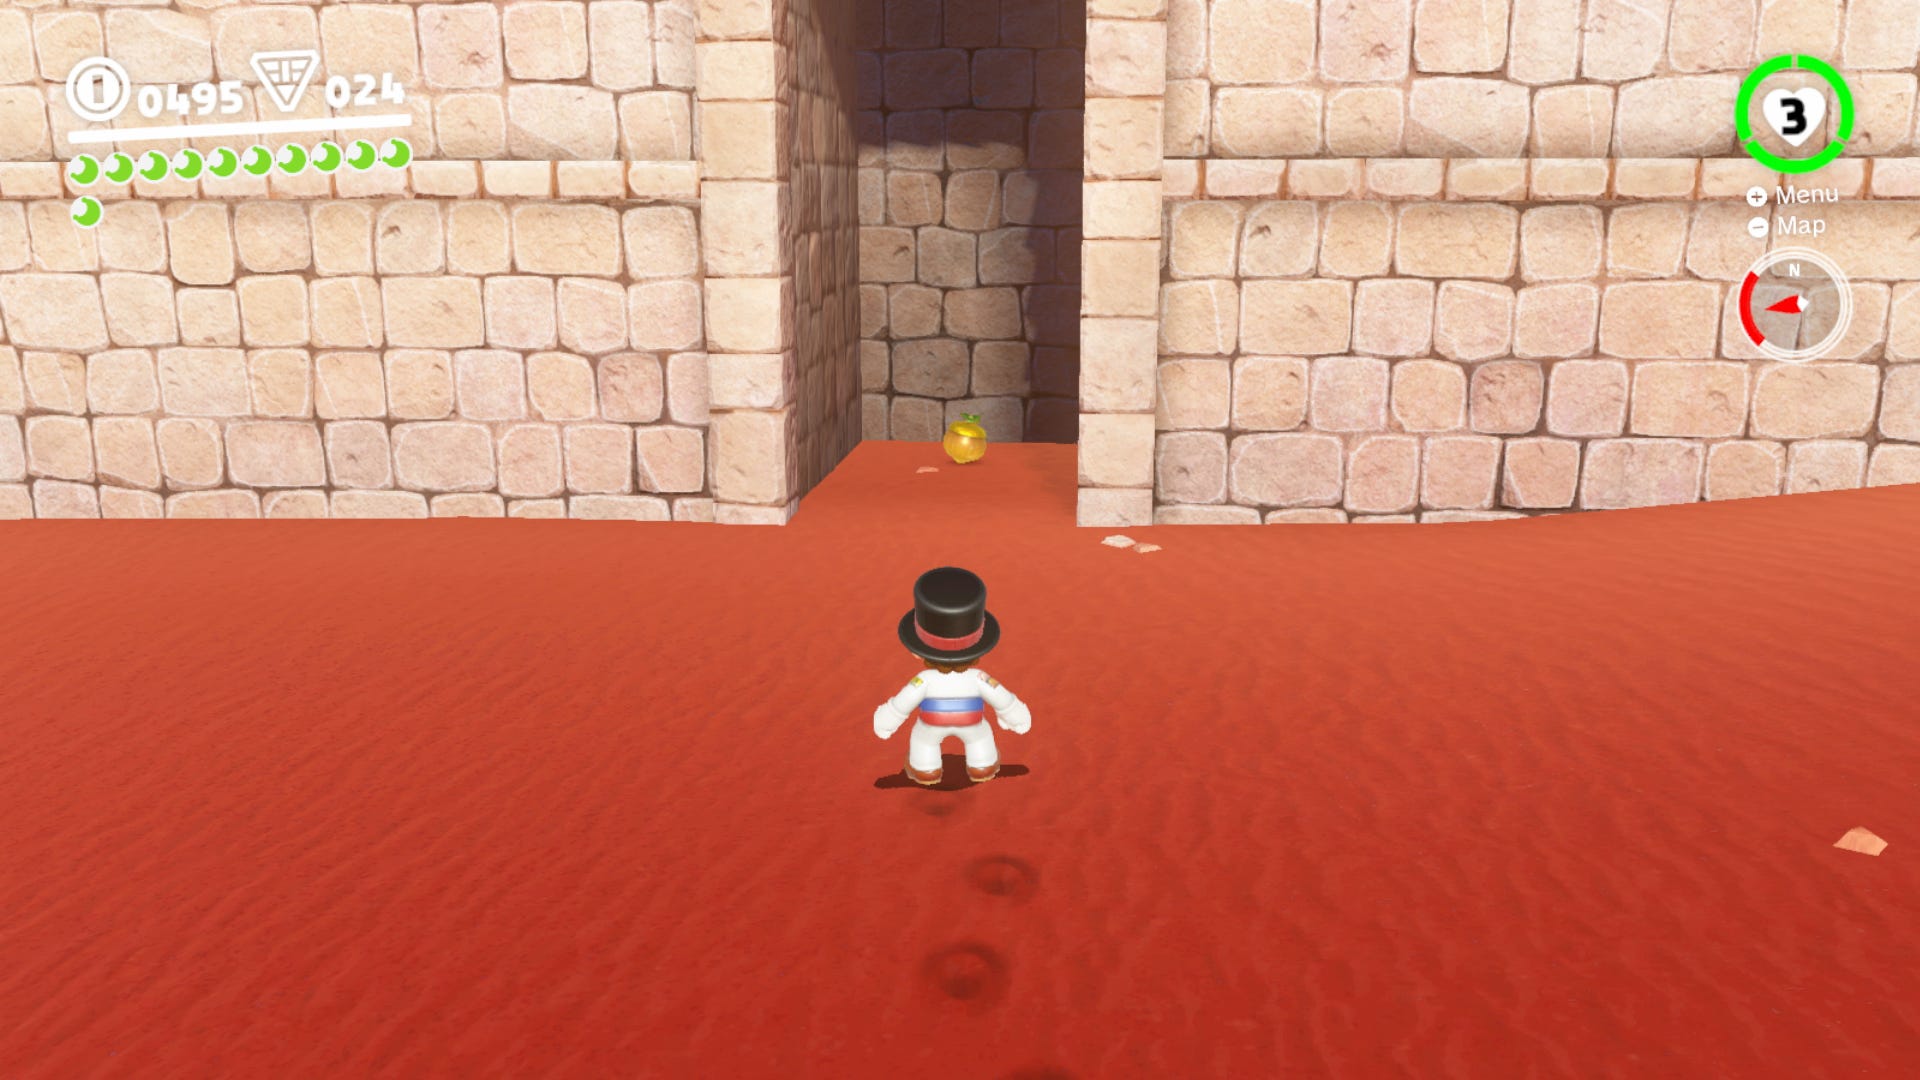
Again, this is another Power Moon that takes a fair amount of patience to obtain. Warp to the Tostarena Ruins Sand Pillar flag, and drop down outside the entire ruins, turning back to face the wall and find a small hidden alcove with a golden seed in. Pick this up, take it back to the plant pots in Tostarena Town, plant the seed, and wait roughly 20 minutes for your Power Moon.
Sand Kingdom Power Moon 27. Desert Gardening: Seed on a Cliff Power Moon
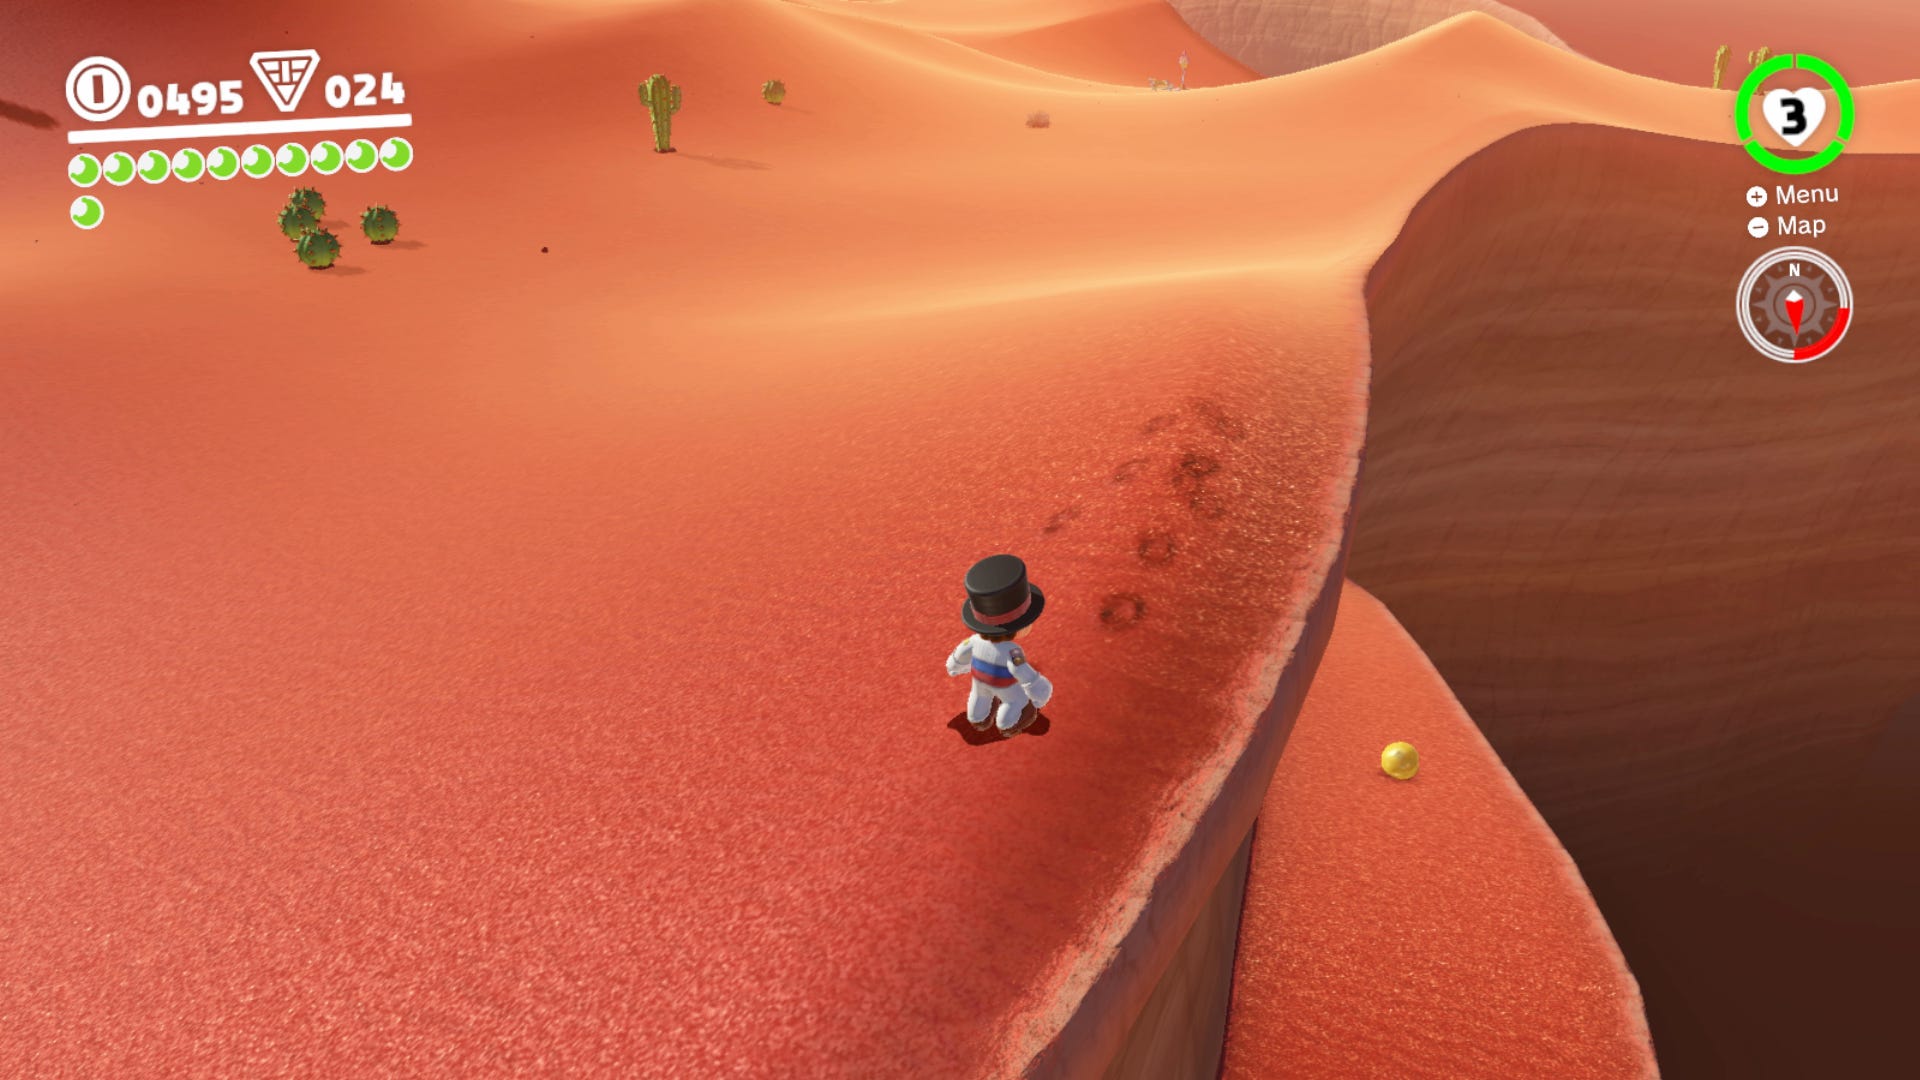
The third and final Gardening Power Moon in the Sand Kingdom, can be found if you head all the way to the west edge of the map from Tostarena Town. You'll find a small ledge underneath the rest of the map, which you can drop down to, in order to recover the third and final seed. Simply head all the way back to Tostarena Town with the seed, plant it, and wait to claim your Power Moon.
Sand Kingdom Power Moon 28. Sand Kingdom Timer Challenge 1 Power Moon
In the far northwest corner of the Sand Kingdom (reachable via a cable attached to the top of the Inverted Pyramid) you’ll find a structure with a scarecrow on top. Activate the scarecrow and complete the easy timed challenge to get a power moon.
Sand Kingdom Power Moon 29. Sand Kingdom Timer Challenge 2 Power Moon
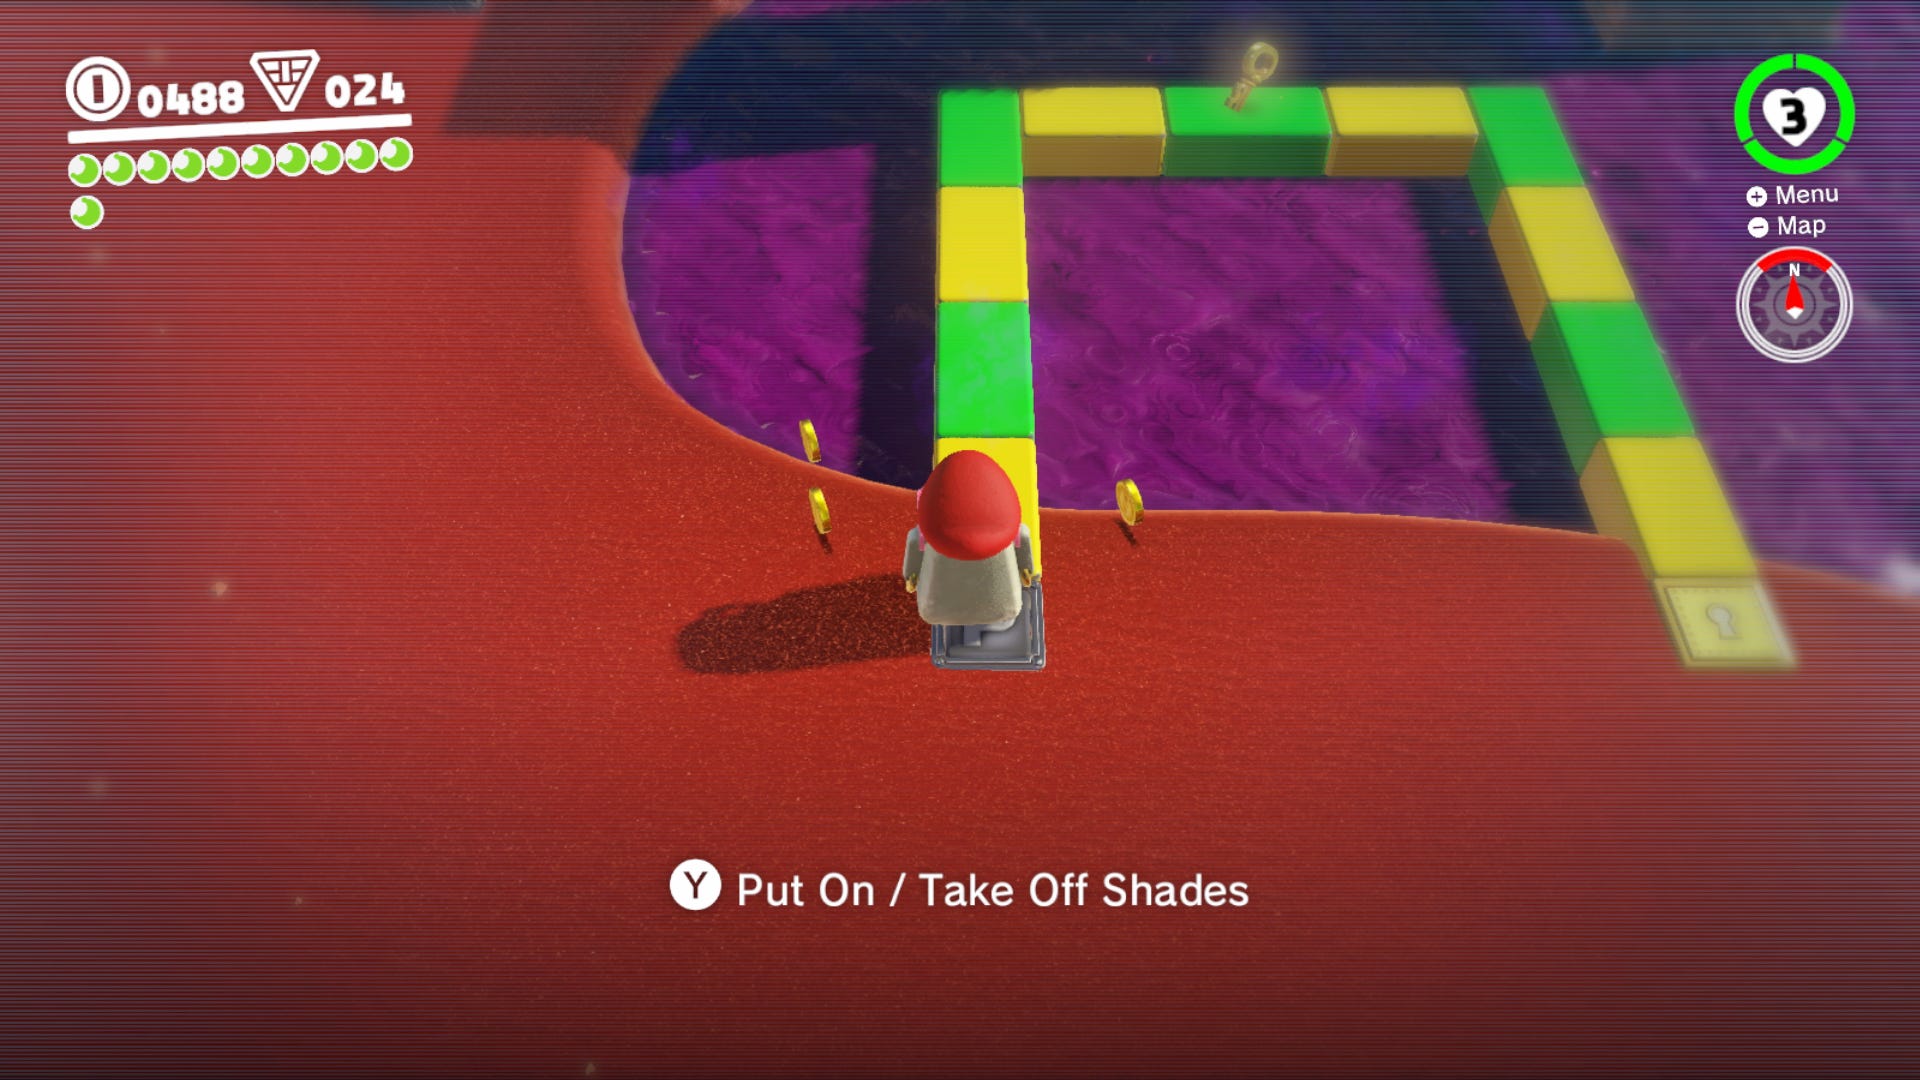
This is a slightly tricky Power Moon to recover, as you're going to have to memorise a path. Head to the south west area of the Moe-Eye Habitat island, and step on the P sign you can see lit up on the ground. As soon as you've done this, the key will appear on the pathway, as pictured above, and your goal is to follow the now-invisible path, collect the key, and put it in the key hole before time expires and the path disappears for good. It's not an easy challenge by an means, and you'll have to memorise the path you move quickly to obtain the Power Moon.
Sand Kingdom Power Moon 30. Sand Kingdom Timer Challenge 3 Power Moon
For the third and final Timer Challenge Power Moon in the Sand Kingdom, you'll want to go all the way to the east of the map, to the right of the poison lake, where you'll find a scarecrow. Activate it using Cappy while facing towards the lake, run downhill, and long jump over all the gaps in the obstacles to collect the Power Moon at the end of the stretch.
Sand Kingdom Power Moon 31. Found in the Sand: Good Dog
In Sand Kingdom town you’ll find a dog near the sign for the shop. Spin Cappy into him and the dog will guide you to a place where you can ground pound to find a power moon.
Sand Kingdom Power Moon 32. Taking Notes: Jump on the Palm
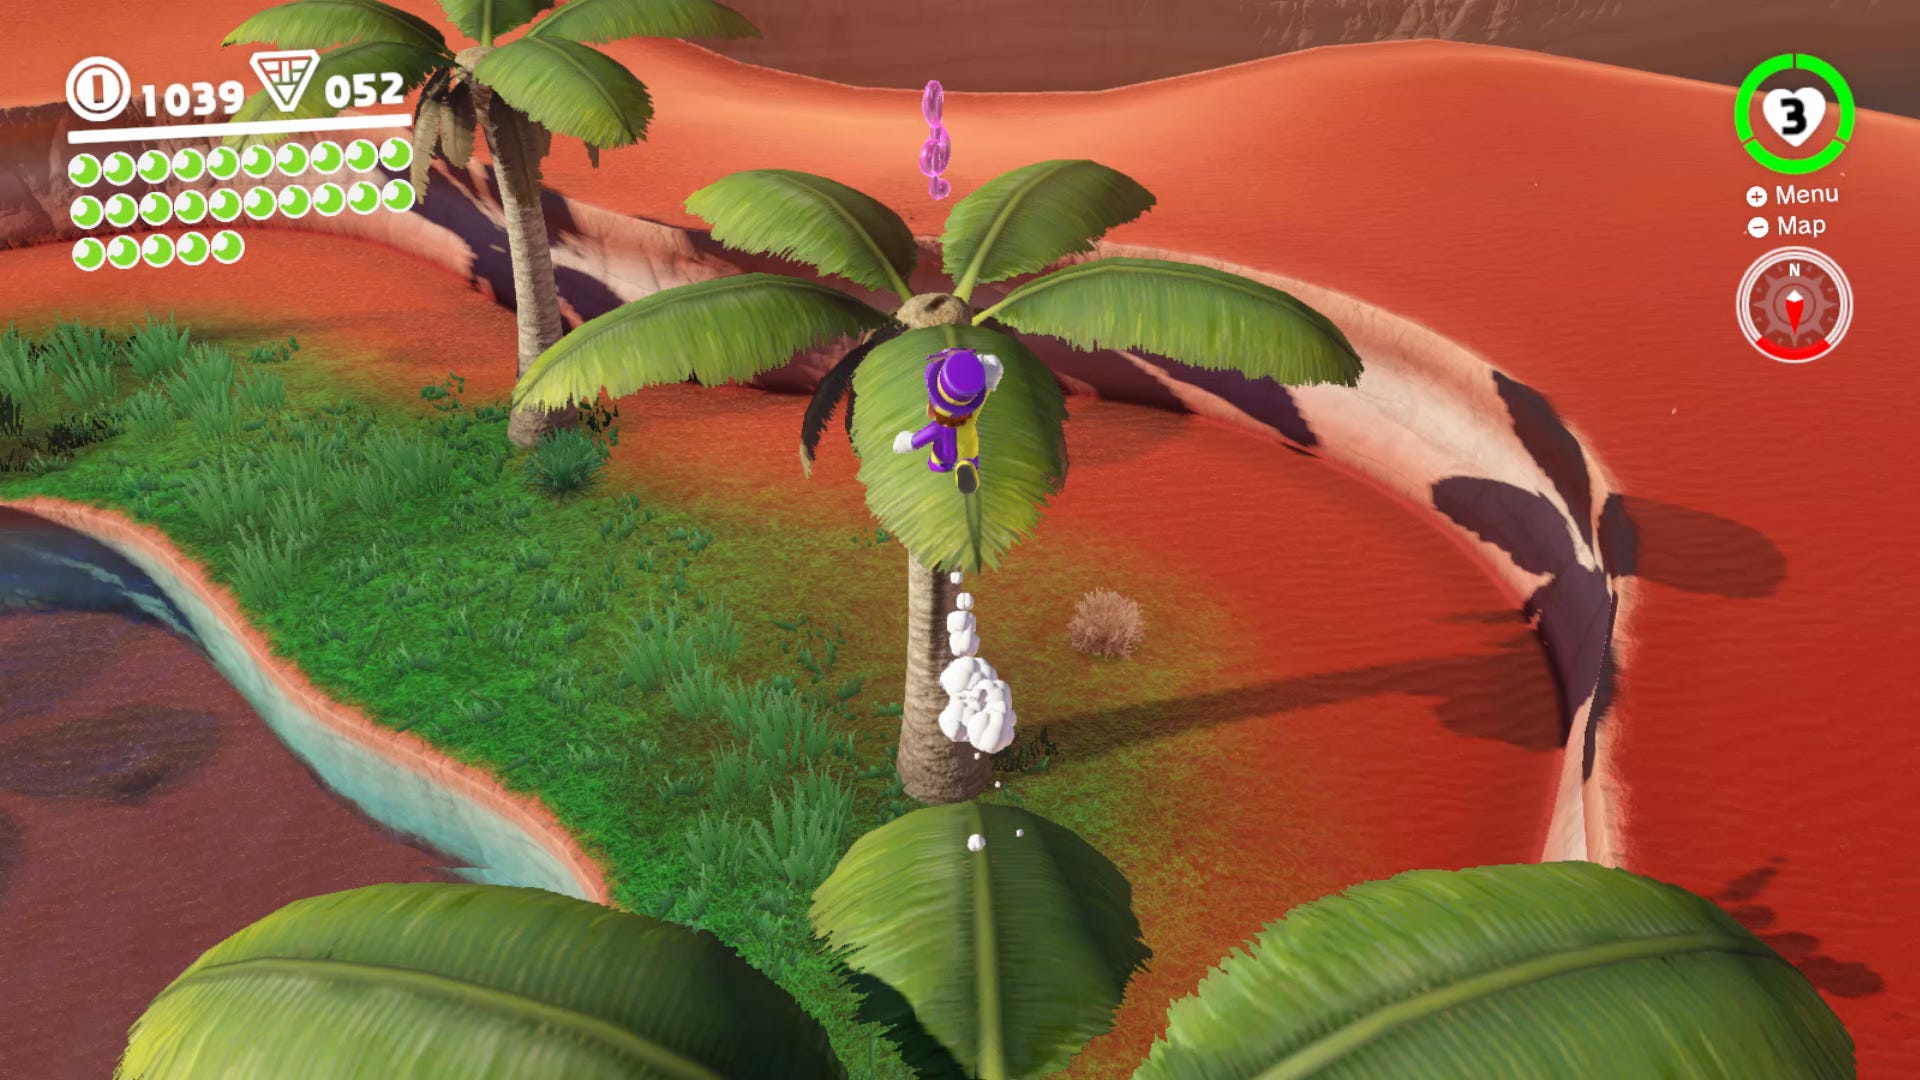
In the oasis a Note can be found above a palm tree. Use the bounce pad to leap up, trigger the note collecting sequence, and then collect them all before the timer runs out. Do this and you’ll get another power moon.
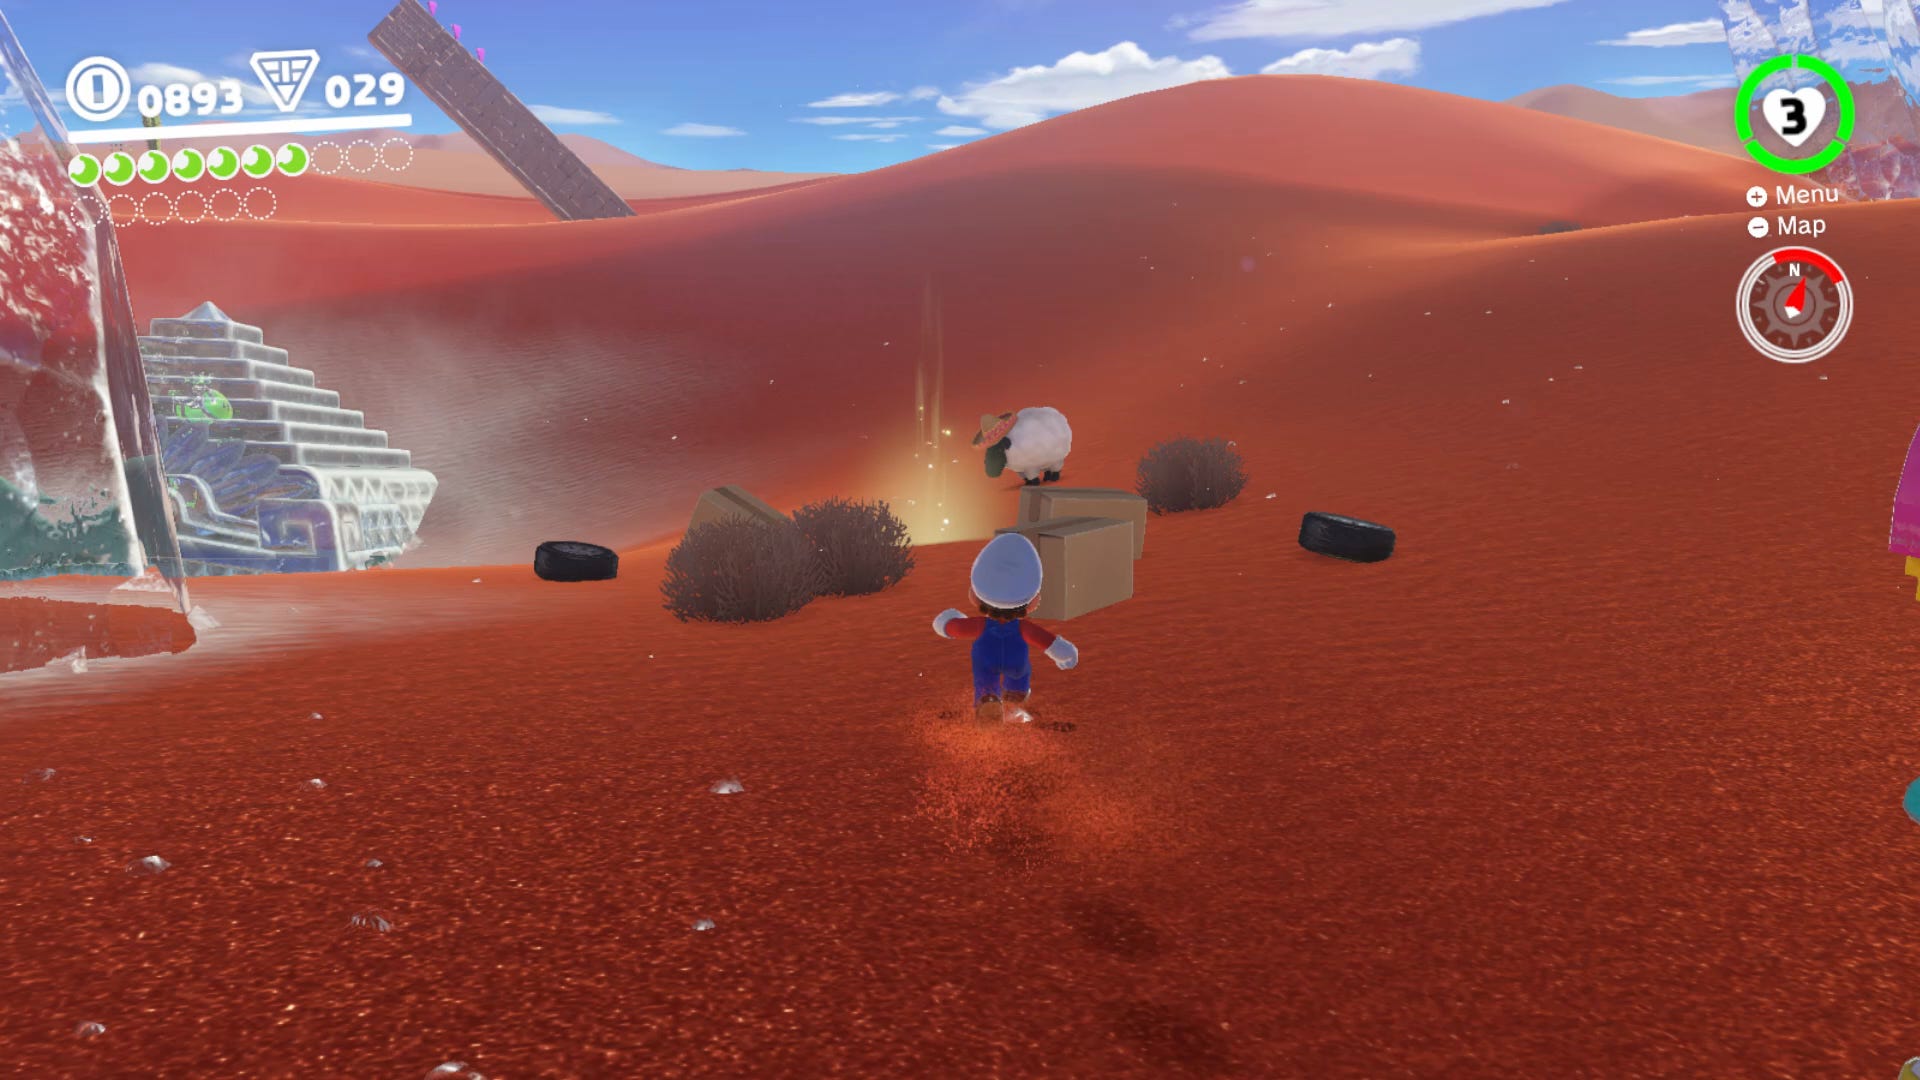
Sand Kingdom Power Moon 33. Herding Sheep in the Dunes Power Moon
A poor farmer has lost his sheep. Find the three sheep in the local area (they aren't far from the pen) and push them towards the pen by throwing Cappy into them. Get all three back and you’ll get the power moon.
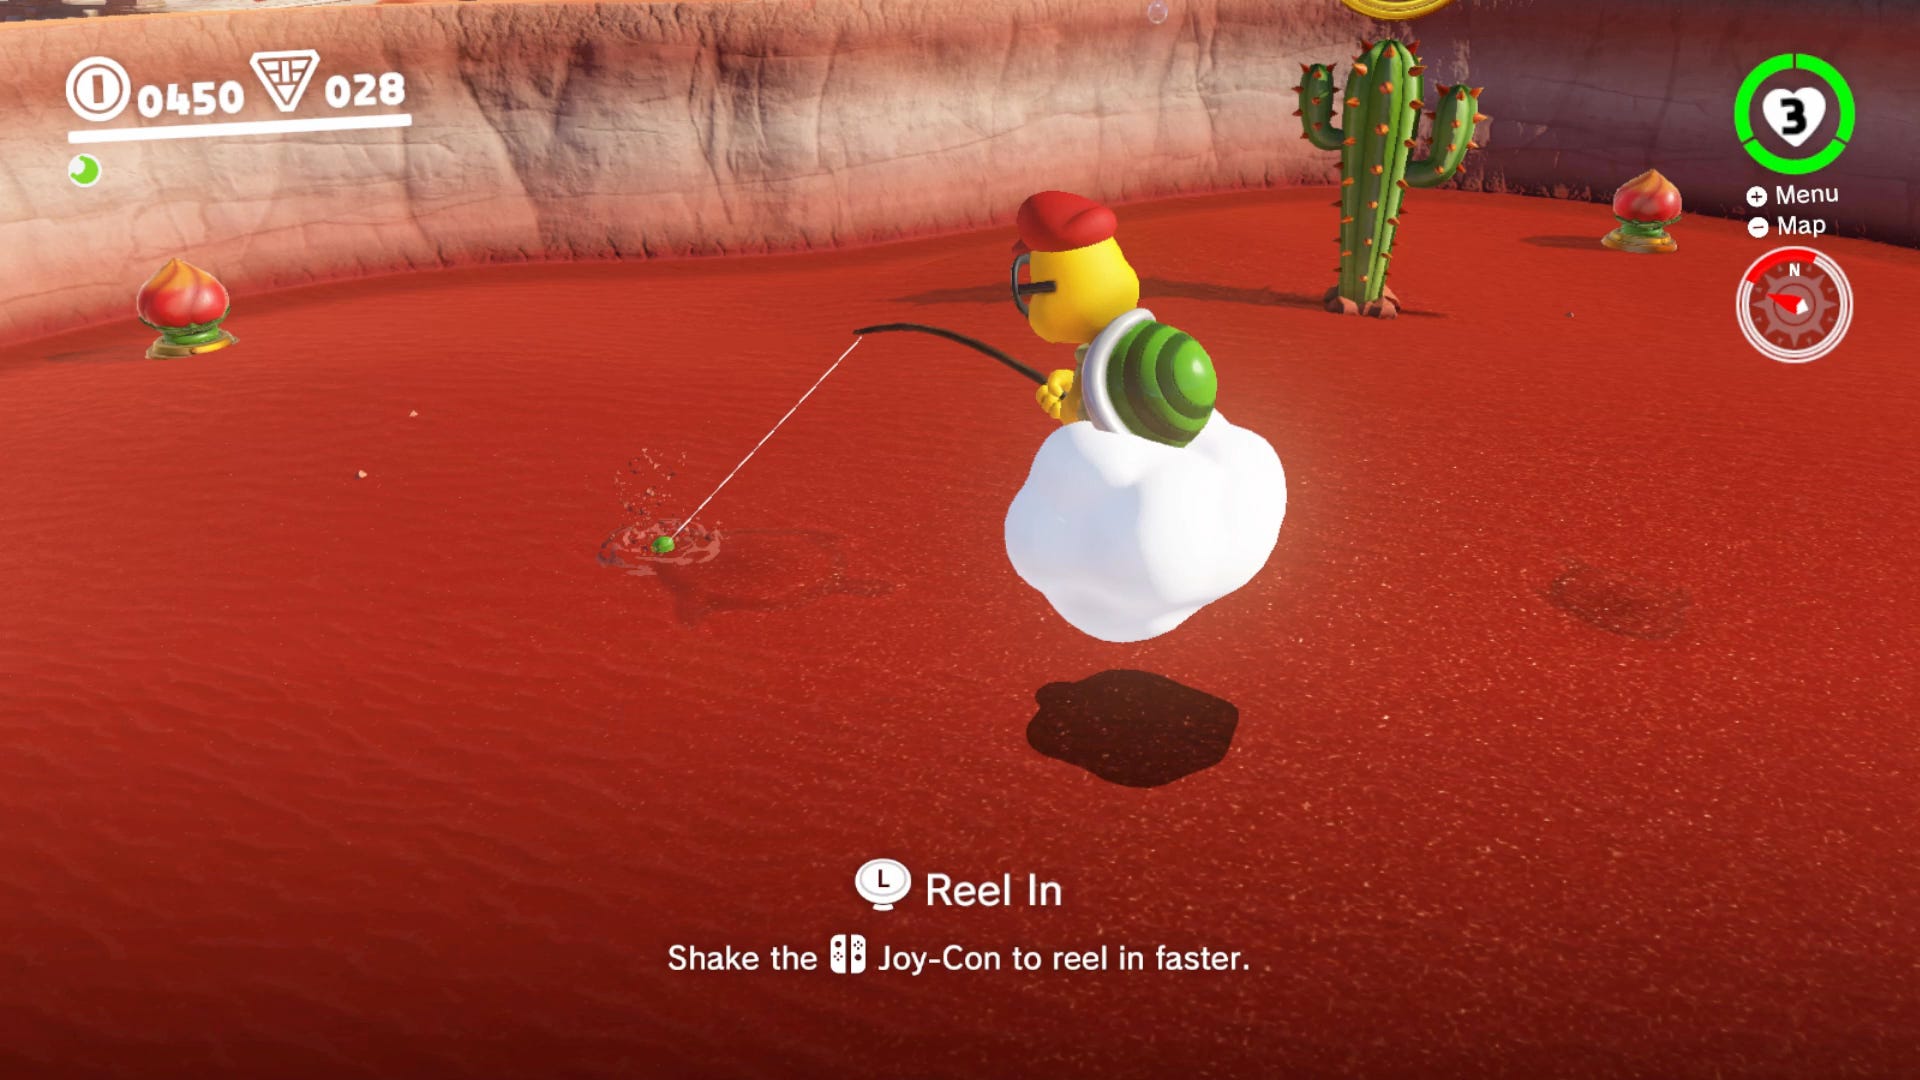
Sand Kingdom Power Moon 34. Fishing in the Oasis Power Moon
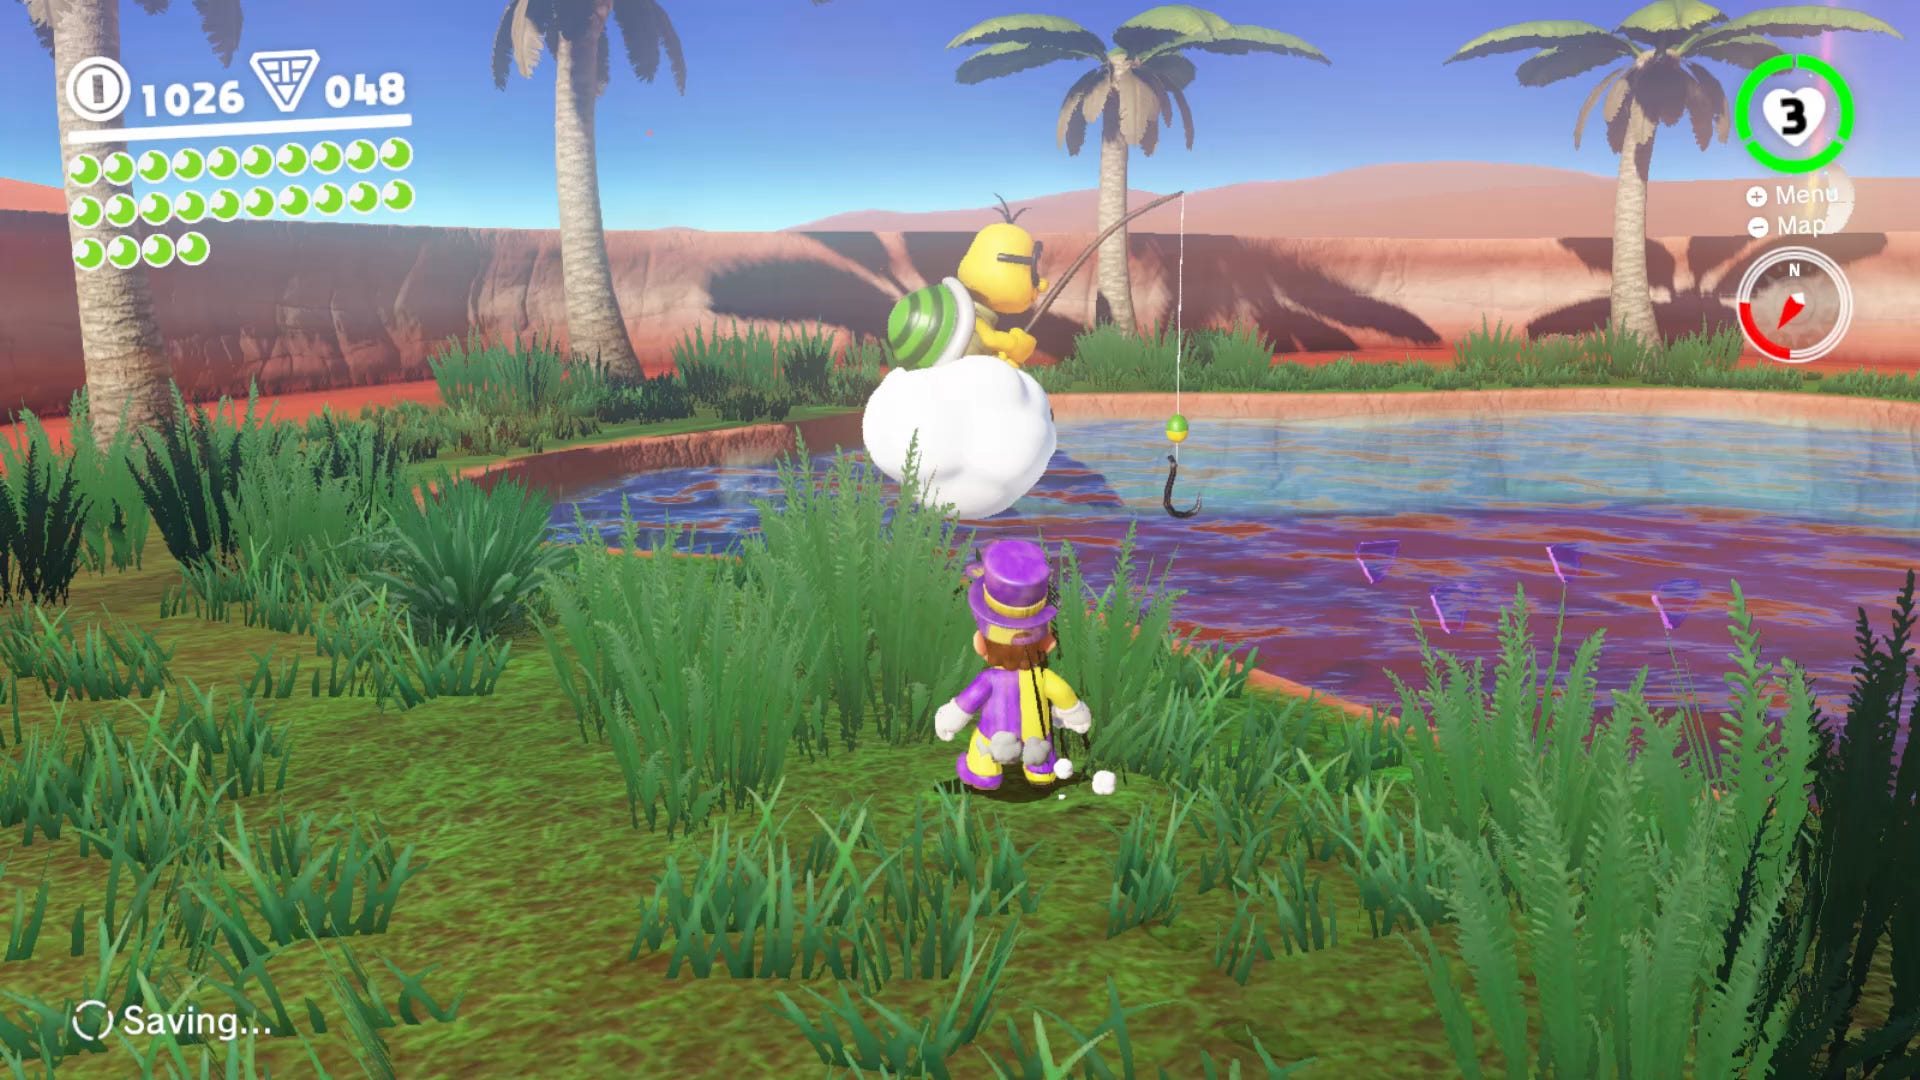
Lakitu can be seen fishing over the water in the oasis. Possess him with Cappy and then fish. If you catch a big fish you’ll be awarded with a power moon. You’ll know you’ve got a big fish as you’ll be asked to reel the fish it. Only strike when the rumble persists. Little pecks cause tiny rumbles and you should leave your rod still during these moments.
Sand Kingdom Power Moon 35. Love in the Heart of the Desert Power Moon
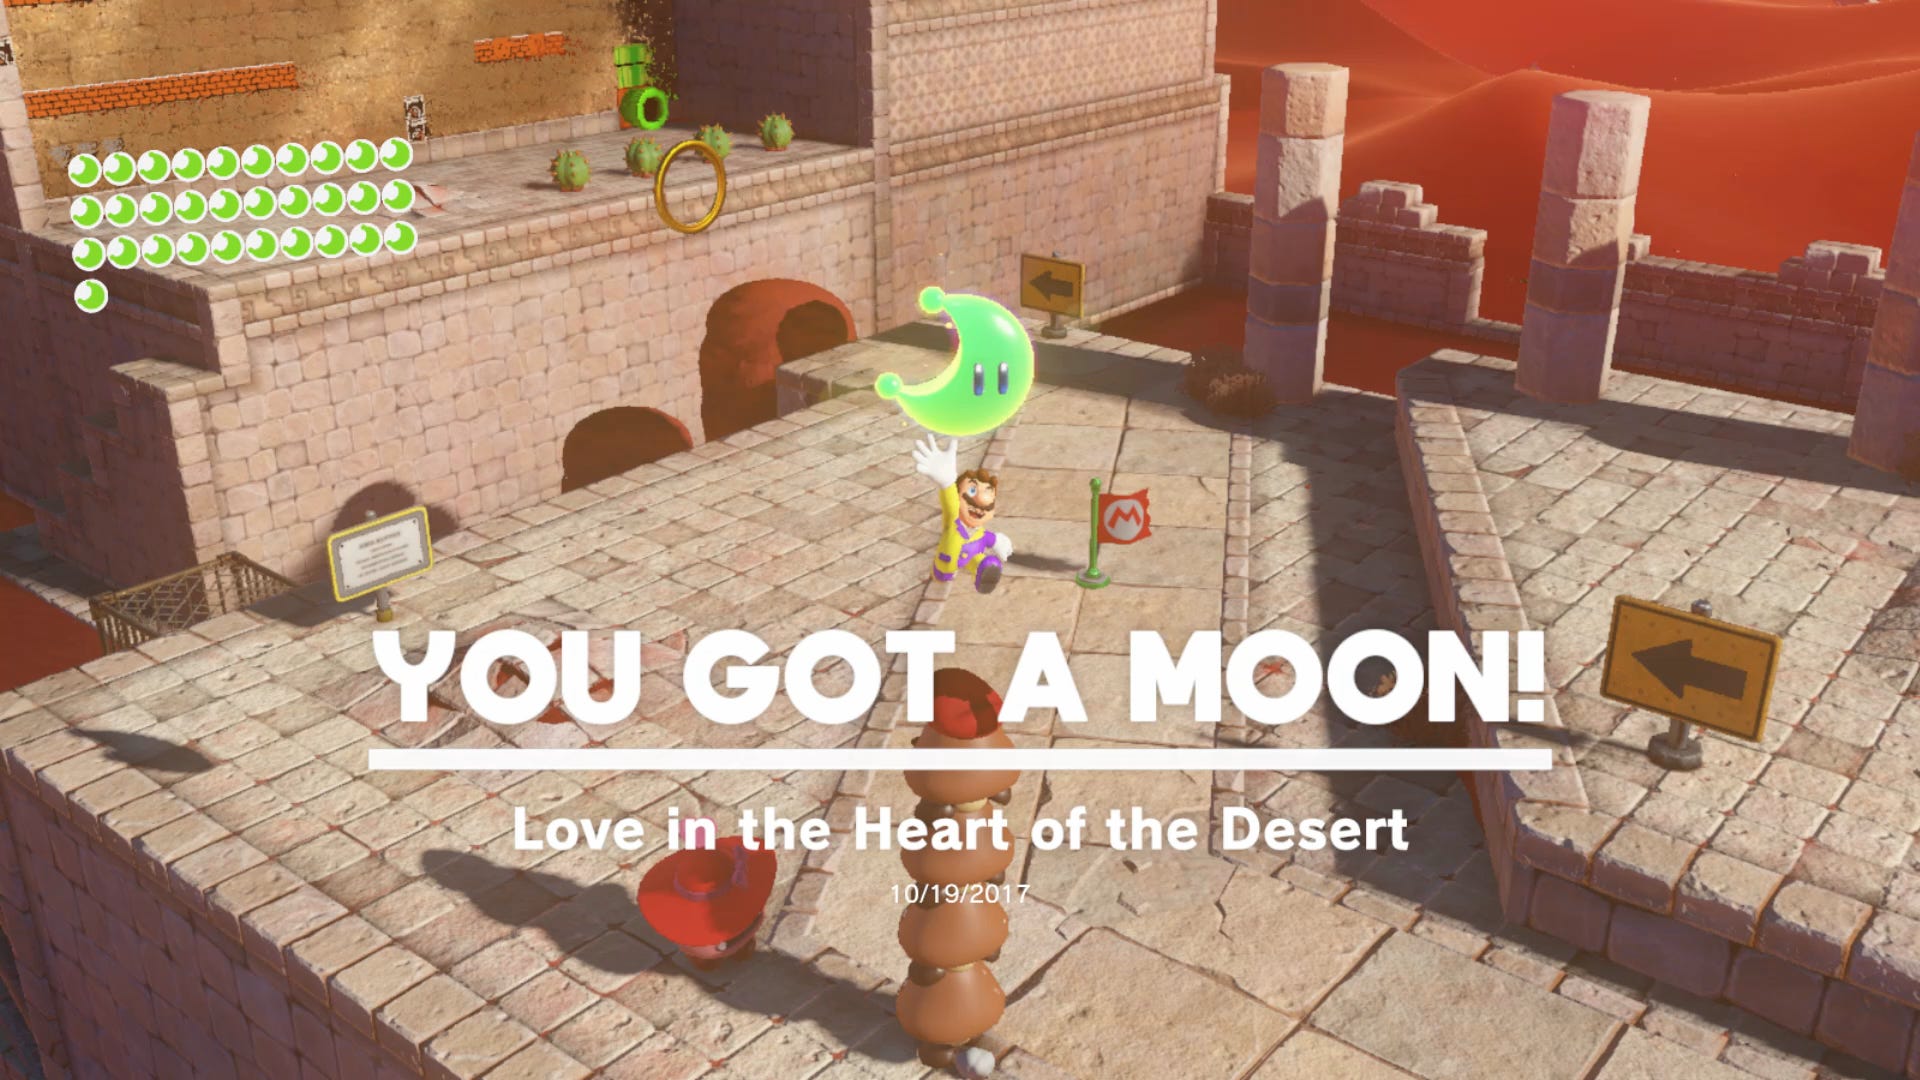
Above where the Bullet Bills are flying around in the main central structure you’ll see a Pink Goomba. This Goomba will only be approached by other Goombas, so collect some from the entrance to the area and then make your way over. Walk up to her and it’s time to collect another Power Moon.
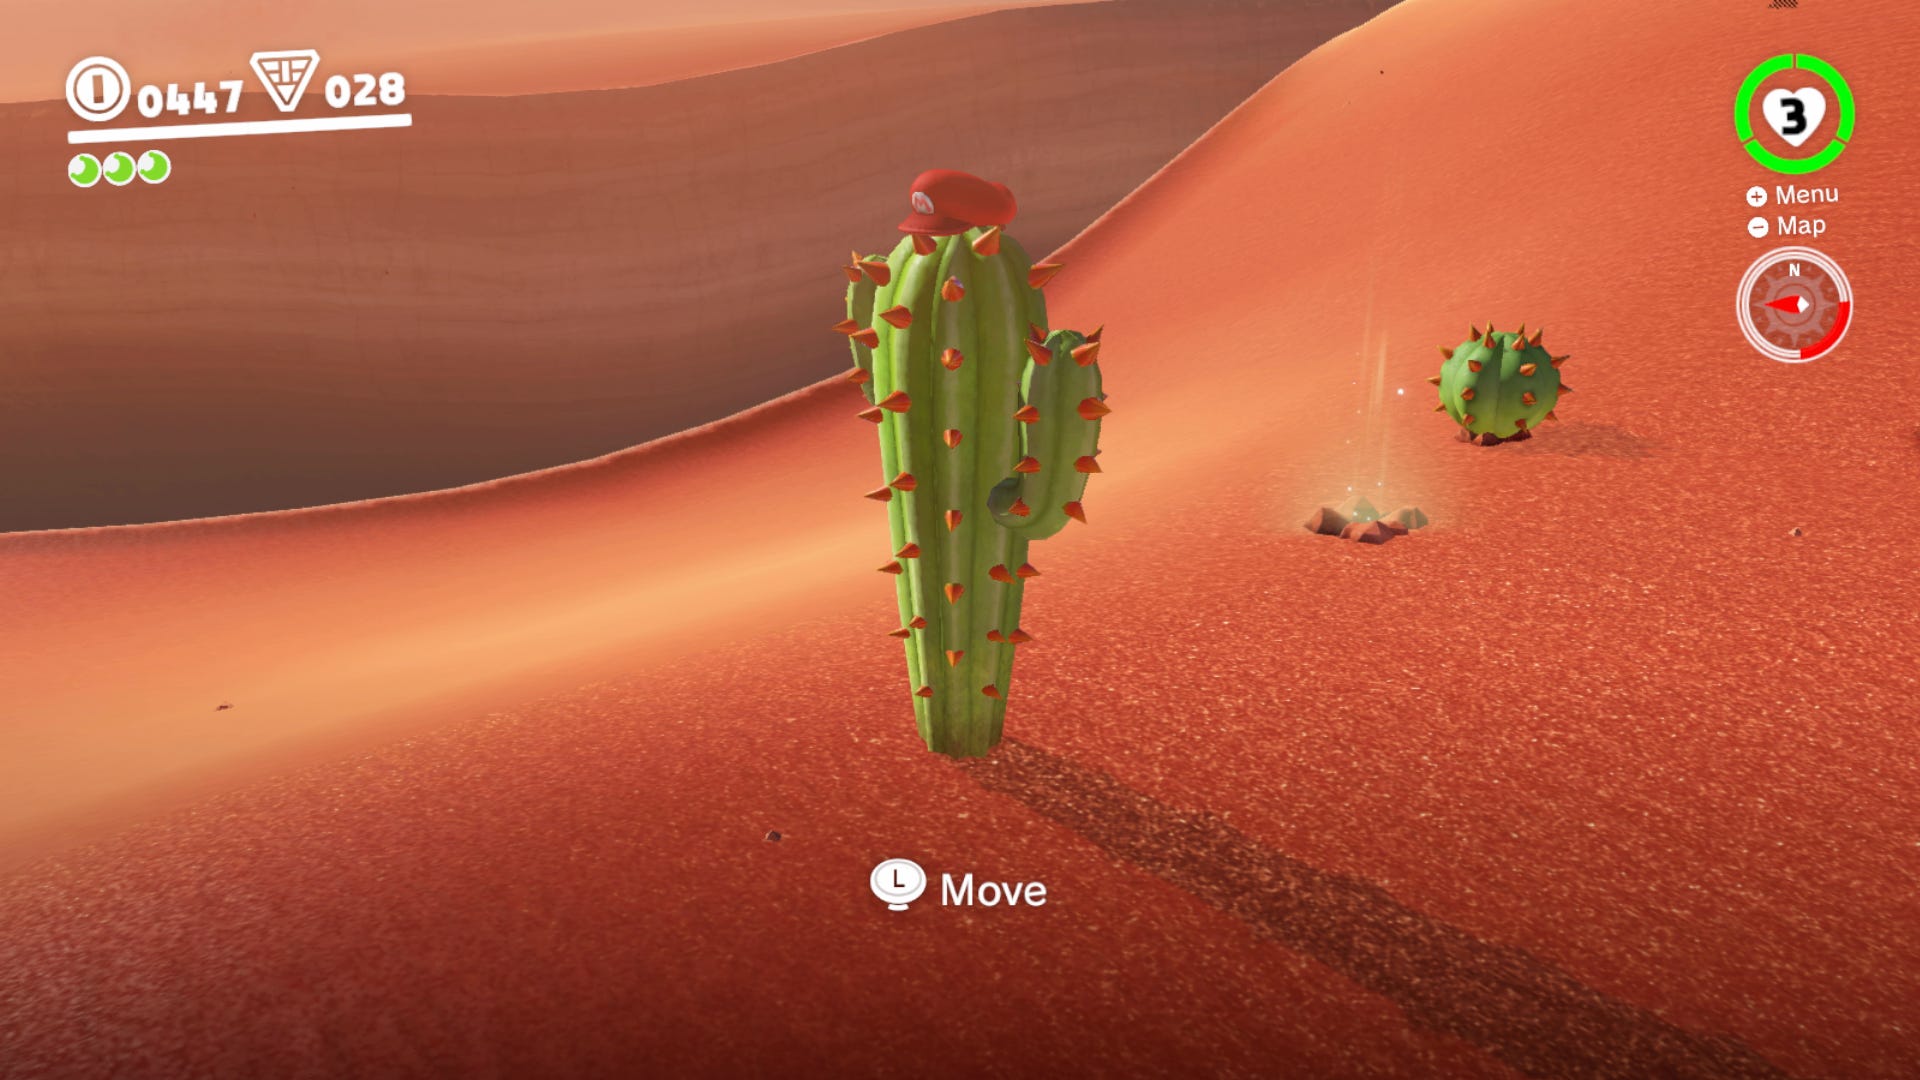
Sand Kingdom Power Moon 36. Among the Five Cactuses Power Moon
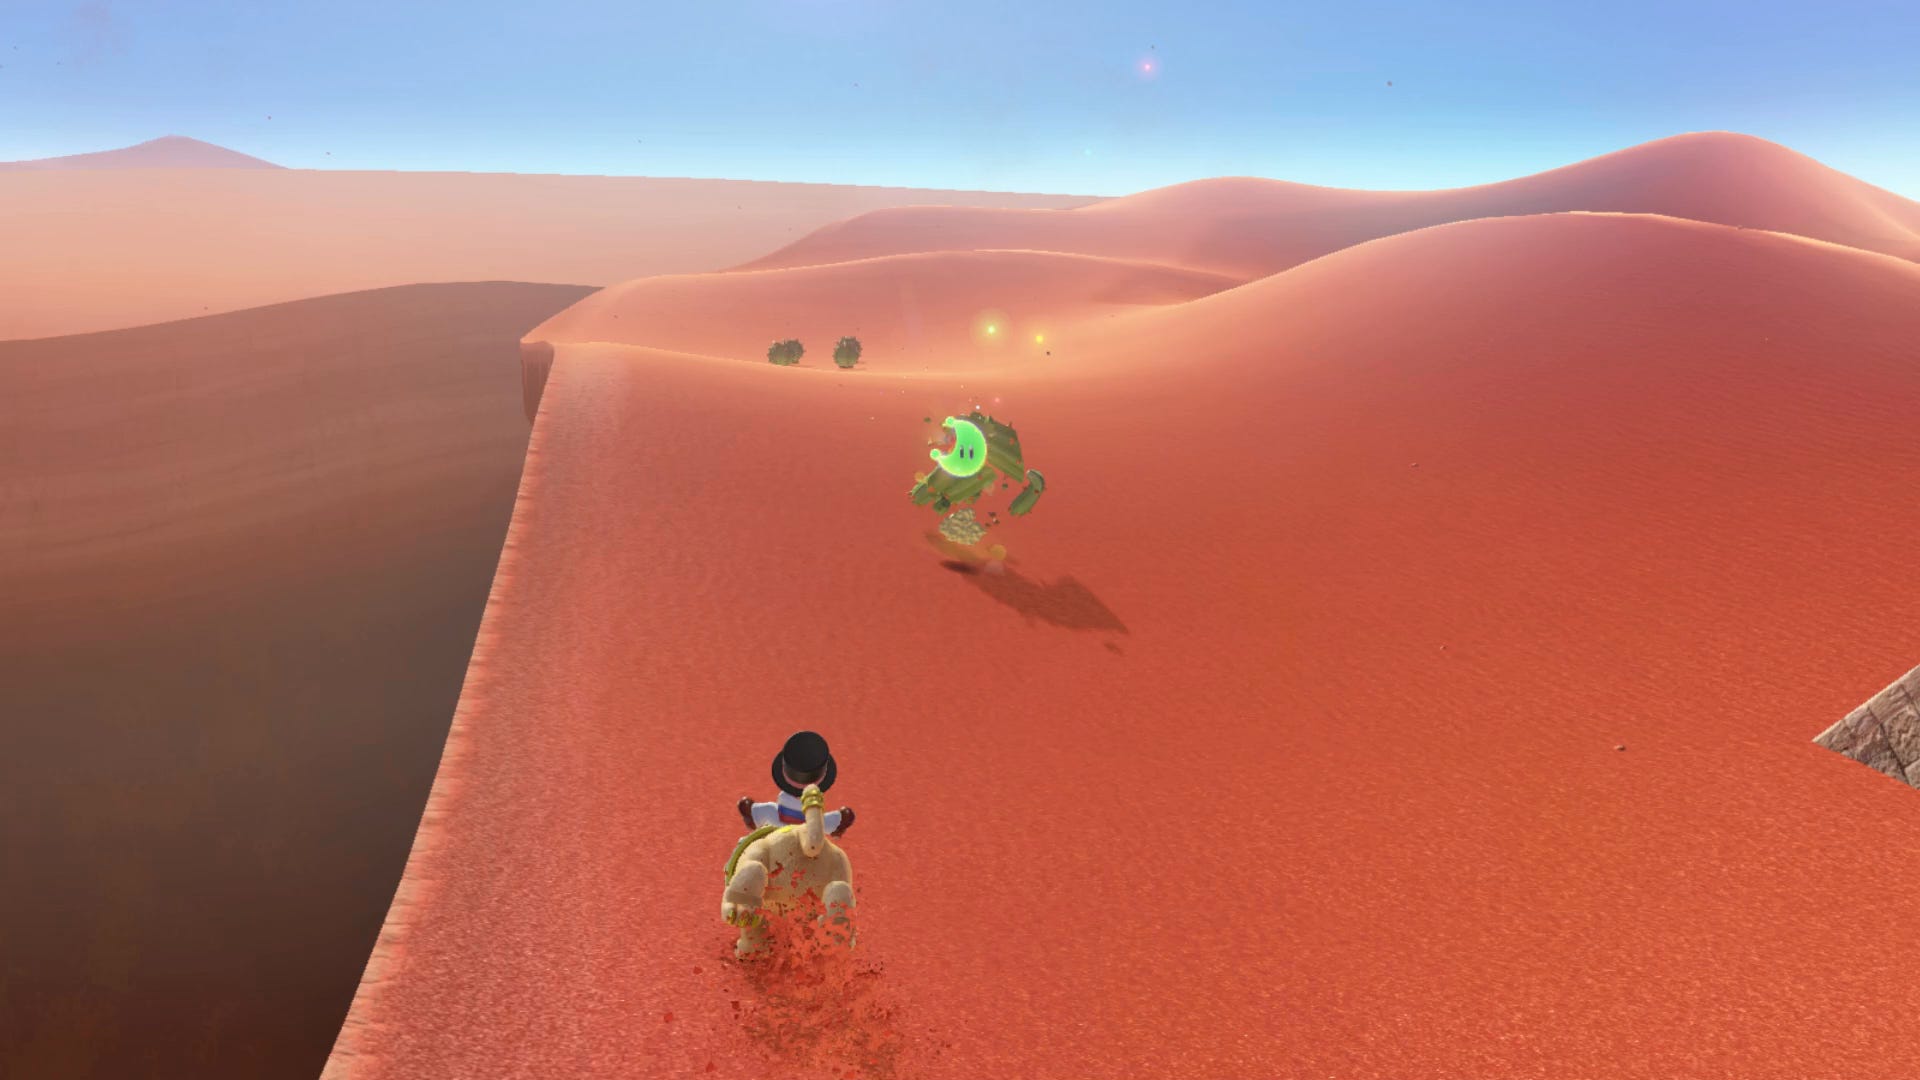
The easiest way to get this Power Moon is to warp to Tostarena Town, and get on the Jaxi there. Ride the Jaxi all the way round the right side of Tostarena Tower to reach the northern edge of the map, and you'll find five cactuses in a row. Approach the cactuses from the side on the Jaxi, smash the middle cactus, and you'll reveal the Power Moon.
Sand Kingdom Power Moon 37. You're Quite a Catch, Captain Toad! Power Moon
To get this Power Moon, you'll want to head to the oasis in the south east corner of the map, and capture the Lakitu. Next, head north until you come to an open space with shadows roaming the sand. Position yourself near the larger shadow, lower your line into the sand, and then yank the shadow up when it draws close to reveal Captain Toad with a Power Moon.
Sand Kingdom Power Moon 38. Jaxi Reunion Power Moon

Head to Tostarena Town and ride the Jaxi there until you're just north of the oasis, and you'll see a single stone Jaxi opposite an empty pedestal. Position your Jaxi so it fills the empty pedestal opposite the stone Jaxi, and you'll unlock this Power Moon.
Sand Kingdom Power Moon 39. Welcome Back Jaxi Power Moon
On top of the Inverted Pyramid (which you can get into by using the catapult down below once it’s raise of the ground) you’ll find Jaxi the taxi. Ride him onto the area that is missing a statue and you’ll get a power moon.
Sand Kingdom Power Moon 40. Wandering Cactus Power Moon
Head just north of the oasis, where you'll find a tall catcus with a green button on top of it. Throw Cappy at the cactus to control it, and move the cactus out of position, so you can ground pound the space left vacant by the cactus, and reveal the Power Moon.
Sand Kingdom Power Moon 41. Sand Quiz: Wonderful Power Moon
You can get another power moon by answering a series of questions from Sphynx. The questions and answers are below.
What does the thieving monster require from this land? Answer: Ring
The one who gallops across the sand. How many gold coins are required to get on its back? Answer: 30
The foreign visitor travelling by car - what stopped his journey? Answer: Ice
Atop the inverted pyramid, how many statues of the sand gallopers are there? Answer: 5
What is my name? Answer: Sphynx
Sand Kingdom Power Moon 42. Shopping in Tostarena Power Moon
Head into the shop in the town area of Sand Kingdom and exchange 100 gold coins for a Power Moon. Easy.
Sand Kingdom Power Moon 43. Employees Only Power Moon
Head outside the Crazy Cap shop in Tostarena Town, where you'll find the grate pictured just above. Enter it while crouching down, and you'll find yourself inside the Crazy Cap shop, able to retrieve the Power Moon just behind the counter.
Sand Kingdom Power Moon 44. Sand Kingdom Slots Power Moon
If you go through the door (pictured above) in the Sand Kingdom town you’ll be able to play a slots game. Get three Moons and you’ll be awarded with a power moon. It’s pretty simple. Just time your Cappy throw to stop each on the Moon, or you can thrown a moon through all three if your timing is good.
Sand Kingdom Power Moon 45. Walking the Desert Power Moon
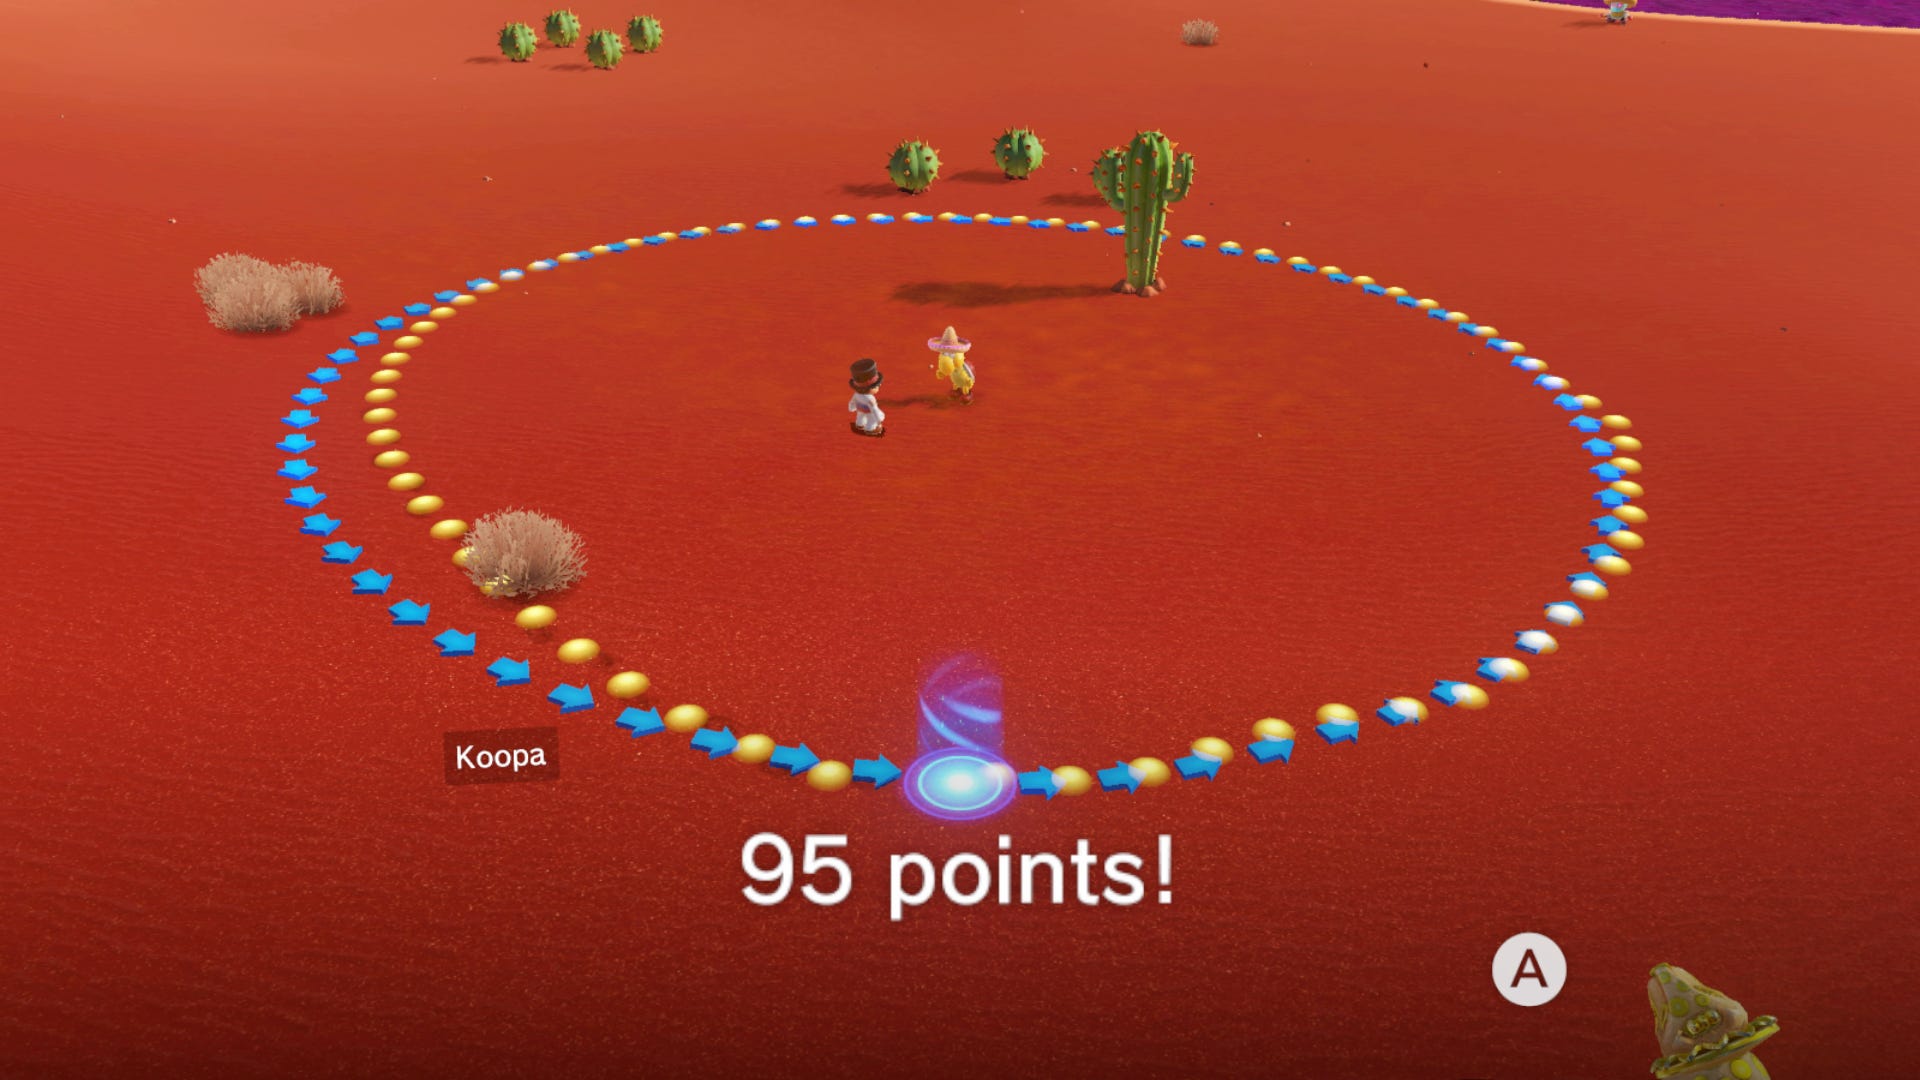
Head to the Koopa just north west of the oasis, where you'll be issued with the desert walking challenge. To complete the challenge and get the Power Moon, you have to score at least 80 points, while following the disappearing arrows as closely as possible. It might take you a few attempts, but try to find the perfect amount to push the right analog stick to follow the arrows, and you should be fine.
Sand Kingdom Power Moon 46. Hidden Room in the Inverted Pyramid Power Moon
Head back to the top of the Inverted Pyramid using the power line from the top of Tostarena Tower, and head down the stairs to within the pyramid. Here, you can bounce on the flower to reach the row of moving towers, and let yourself be taken off the screen by their movement, reaching a new room with a chest containing a Power Moon.
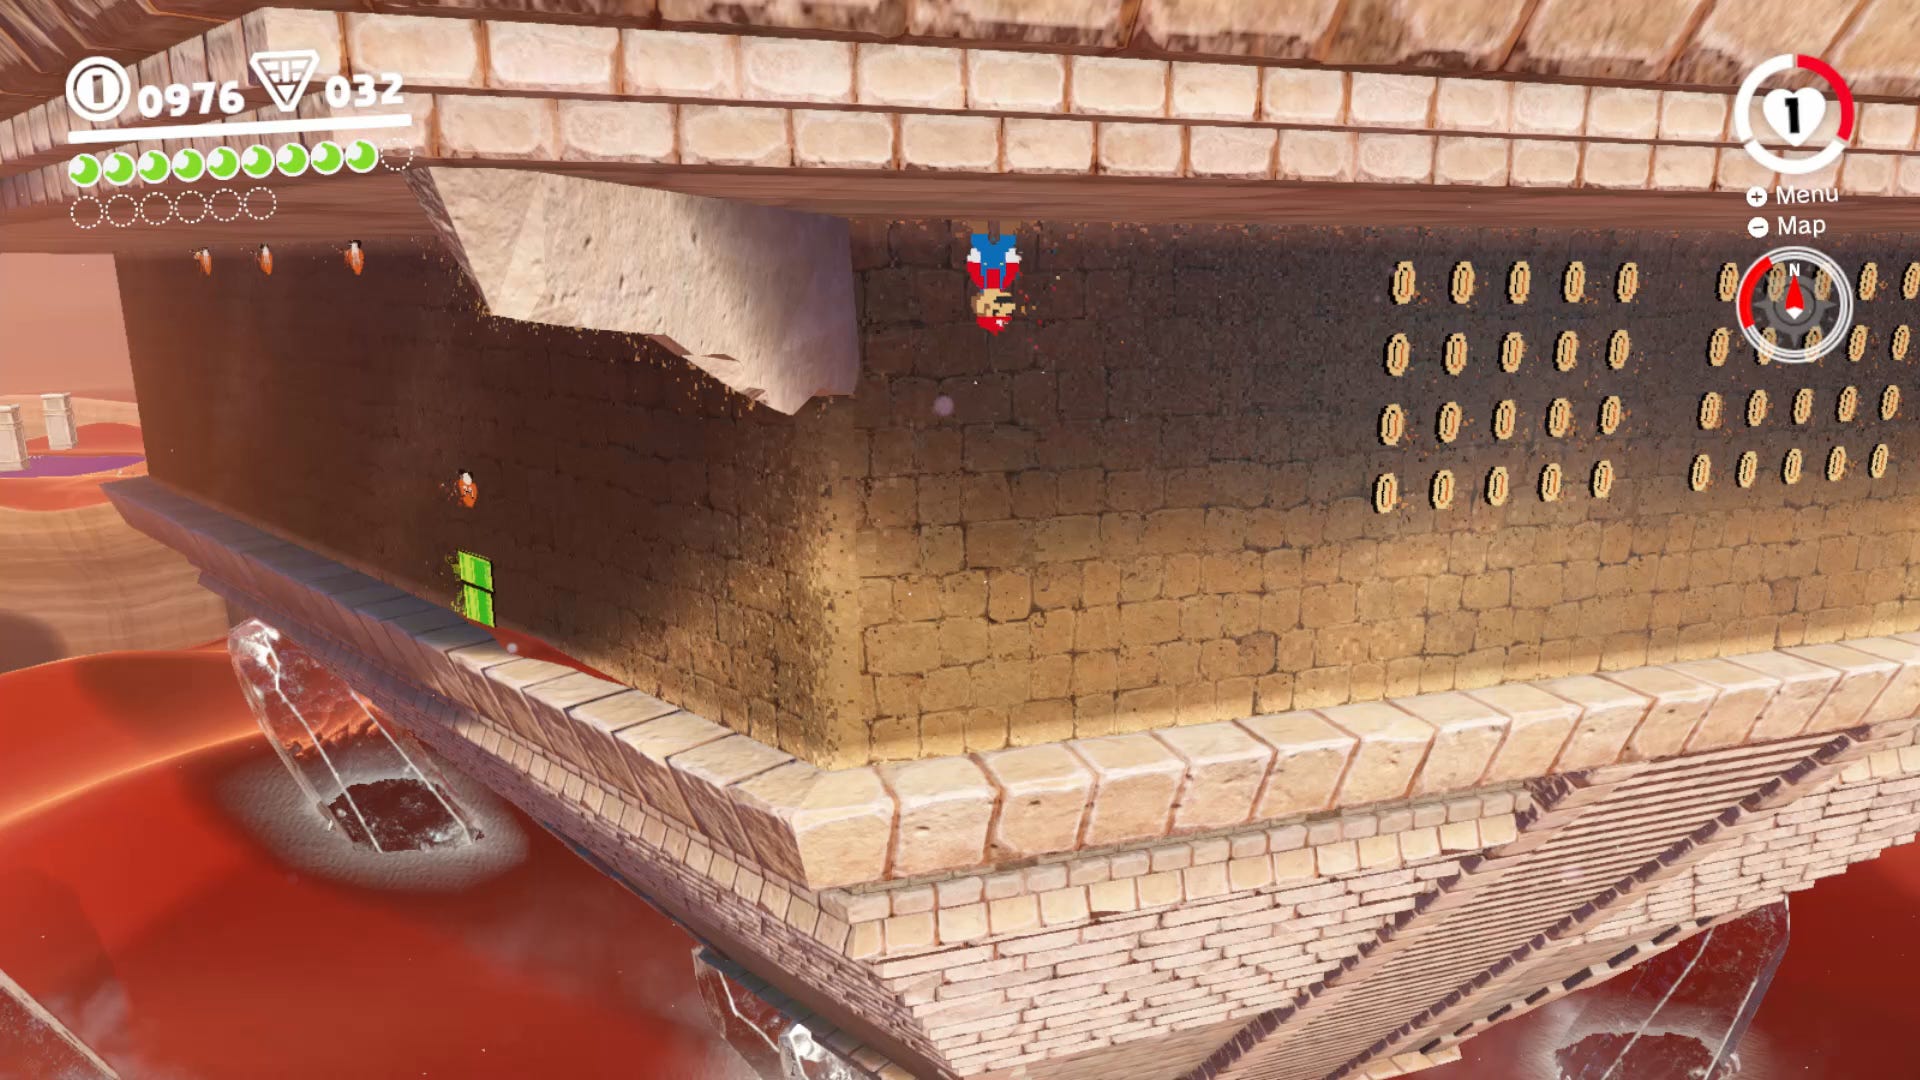
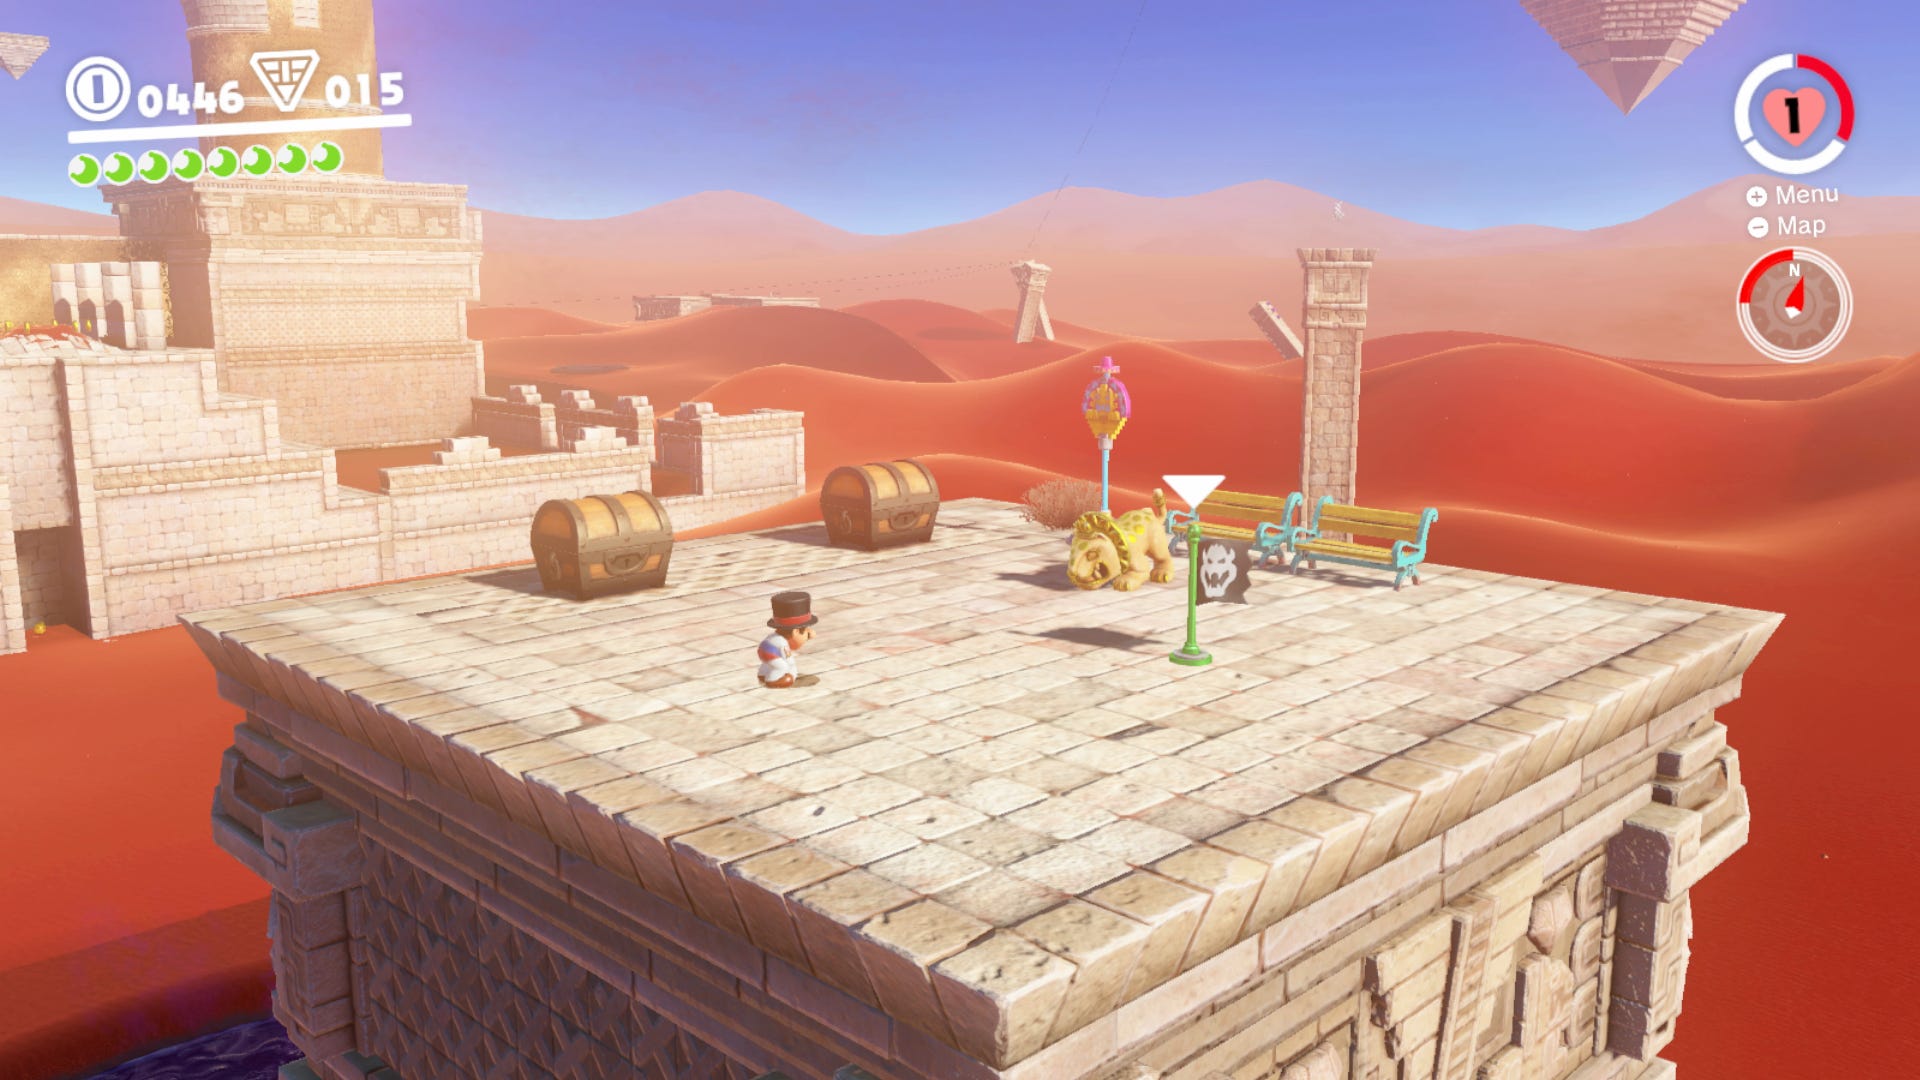
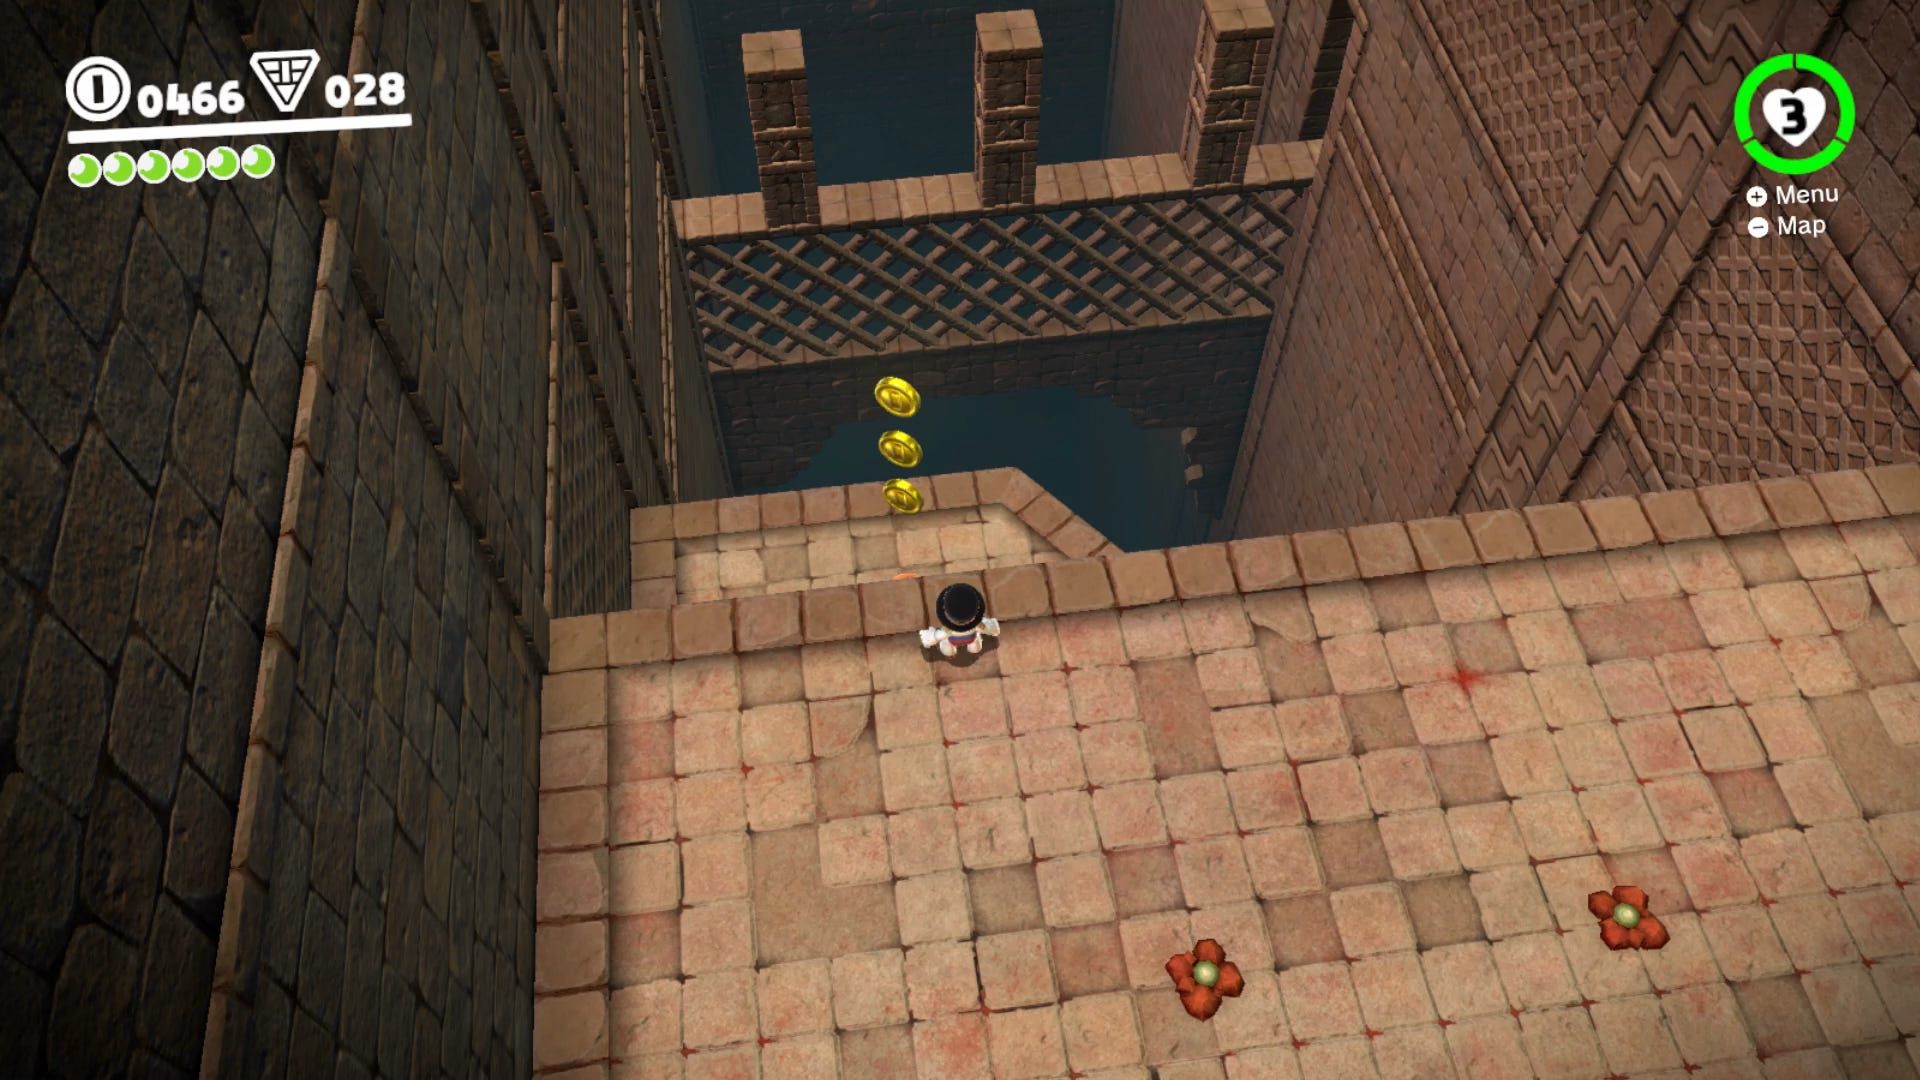
Sand Kingdom Power Moon 47. Underground Treasure Chest Power Moon
This Power Moon is located in the latter part of the ice cave, with the set of Bullet Bills. Once you're onto the second Bullet Bill, head to the right side of the large wall, where you'll find a set of stairs with a trampoline. Take the trampoline all the way to the top, follow the path until you find the treasure chest, and the Power Moon is yours.
Sand Kingdom Power Moon 48. Goomba Tower Assembly
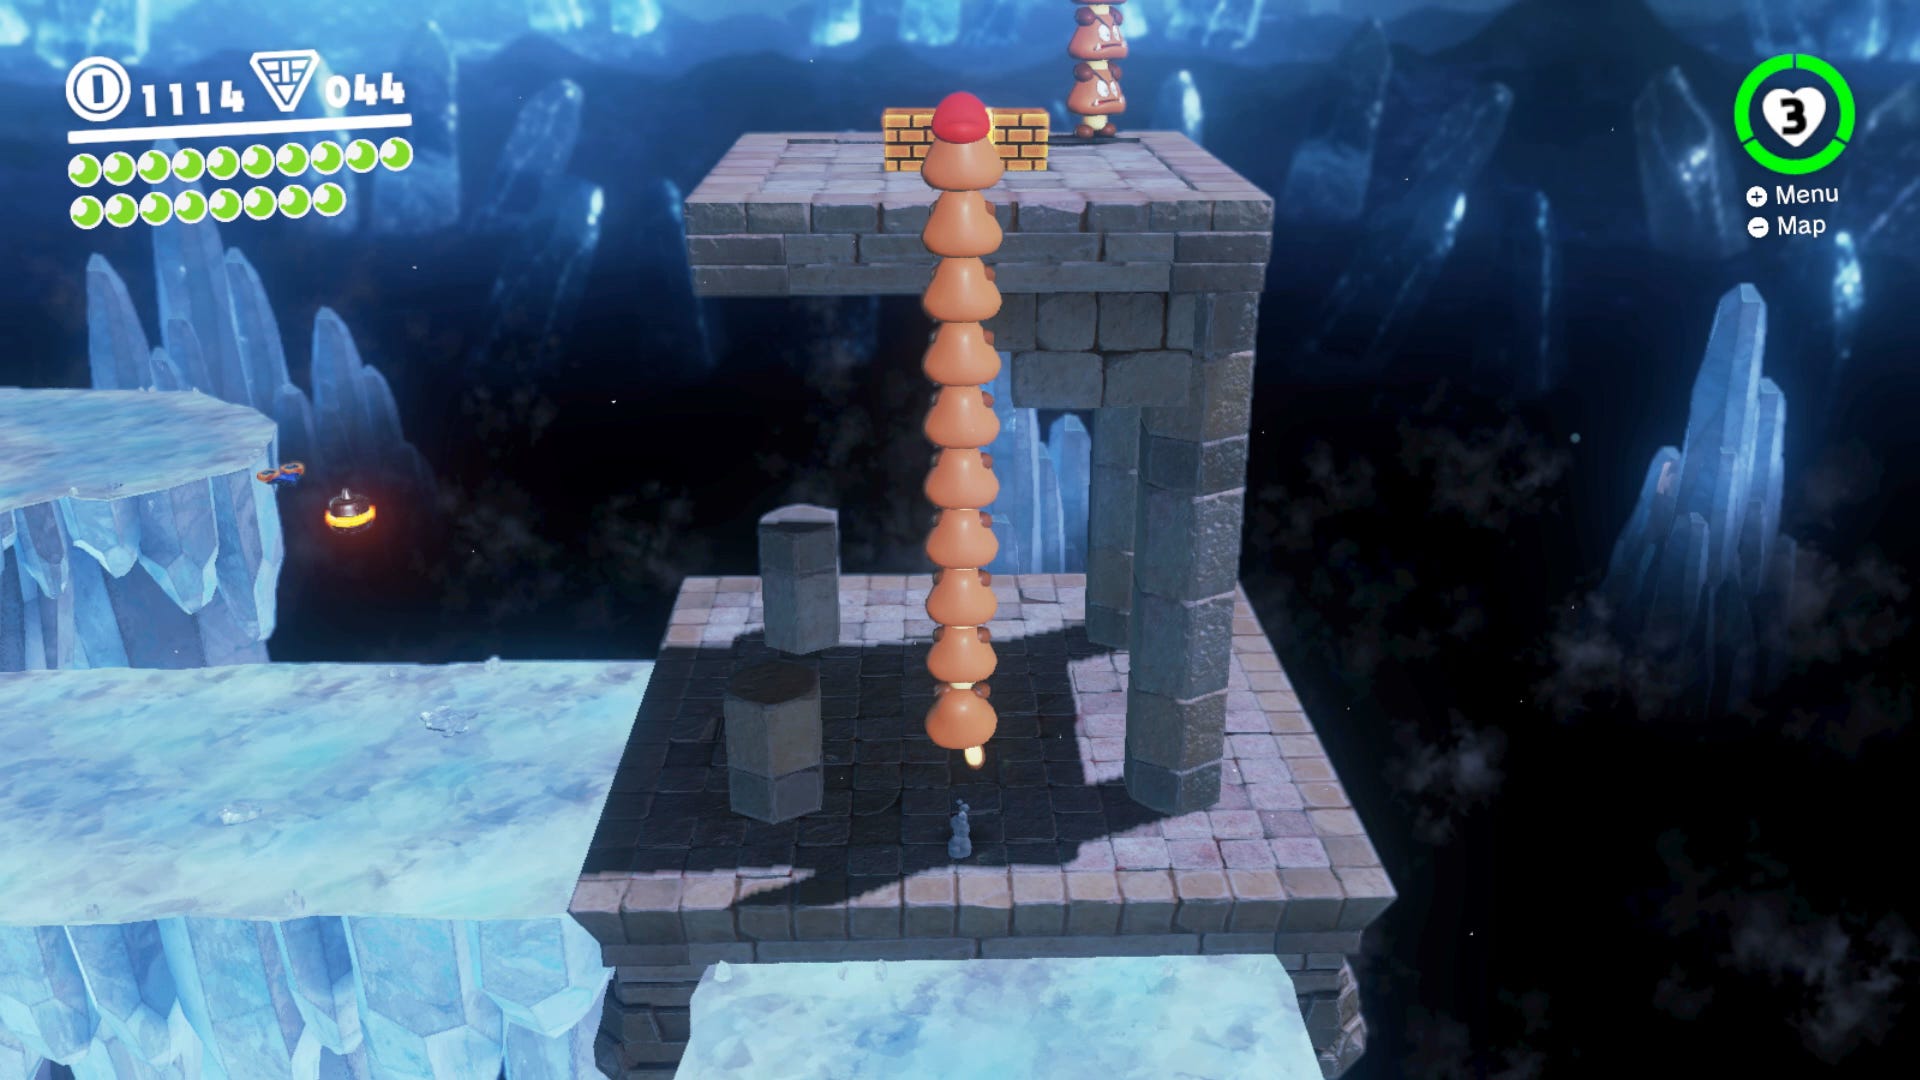
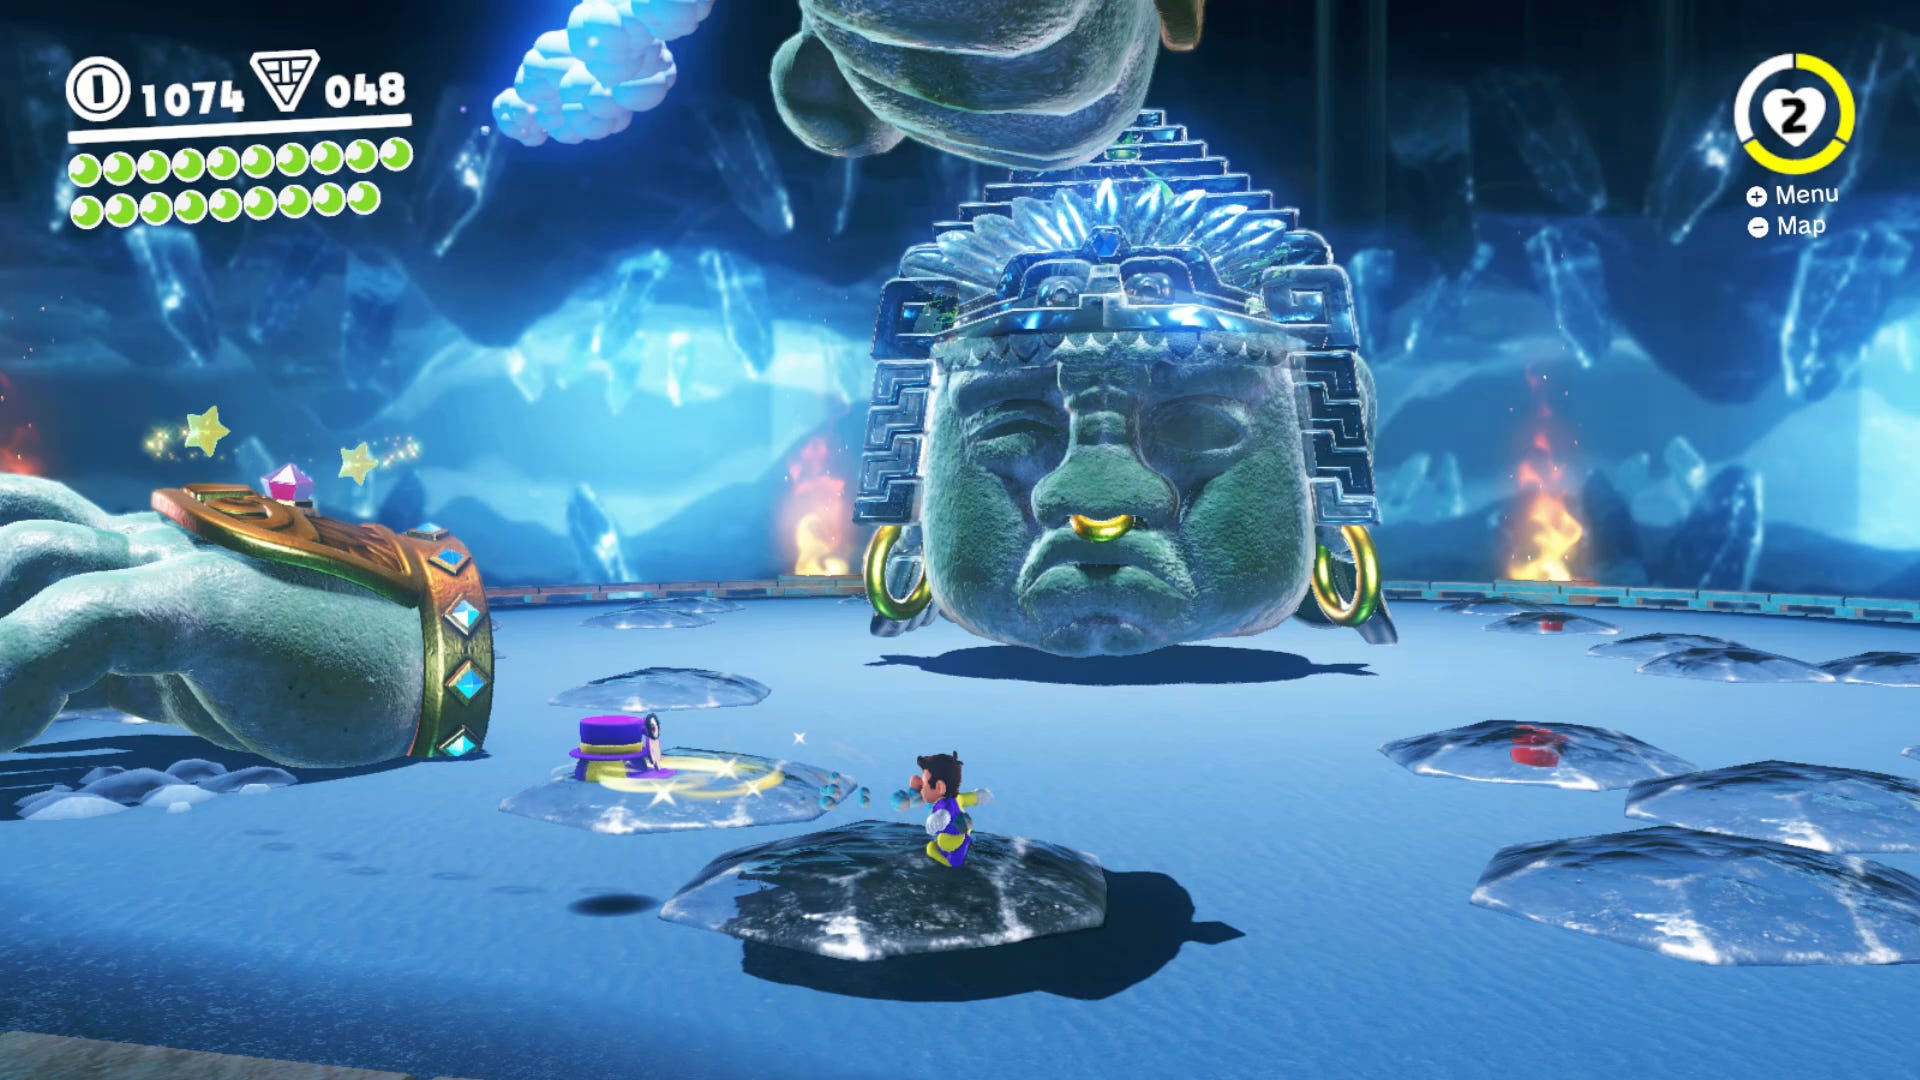
Head into the Underground Temple by jumping into the hole underneath the Inverted Pyramid. This dangerous icy area is home to a number of power moons. The first can be collected by building a high tower with Goombas. Posses one and then assemble the tower. You’ll need to build a tower big enough to reach the high platform, leap off, possess the two up there, then jump back onto the previous tower.

Now you should be tall enough to grab the power moon.
Sand Kingdom Power Moon 49. Under the Mummy's Curse Power Moon

Once the Sand Kingdom has been thawed, you'll need to jump down the hole in the ground in the northern part of the map, with the two townspeople standing over it, and fight a boss. This boss is actually rather simple, as all you need to do is identify which mummy enemy is glistening, and jump on them, and this will reveal the Power Moon.
Sand Kingdom Power Moon 50. Ice Cave Treasure Power Moon
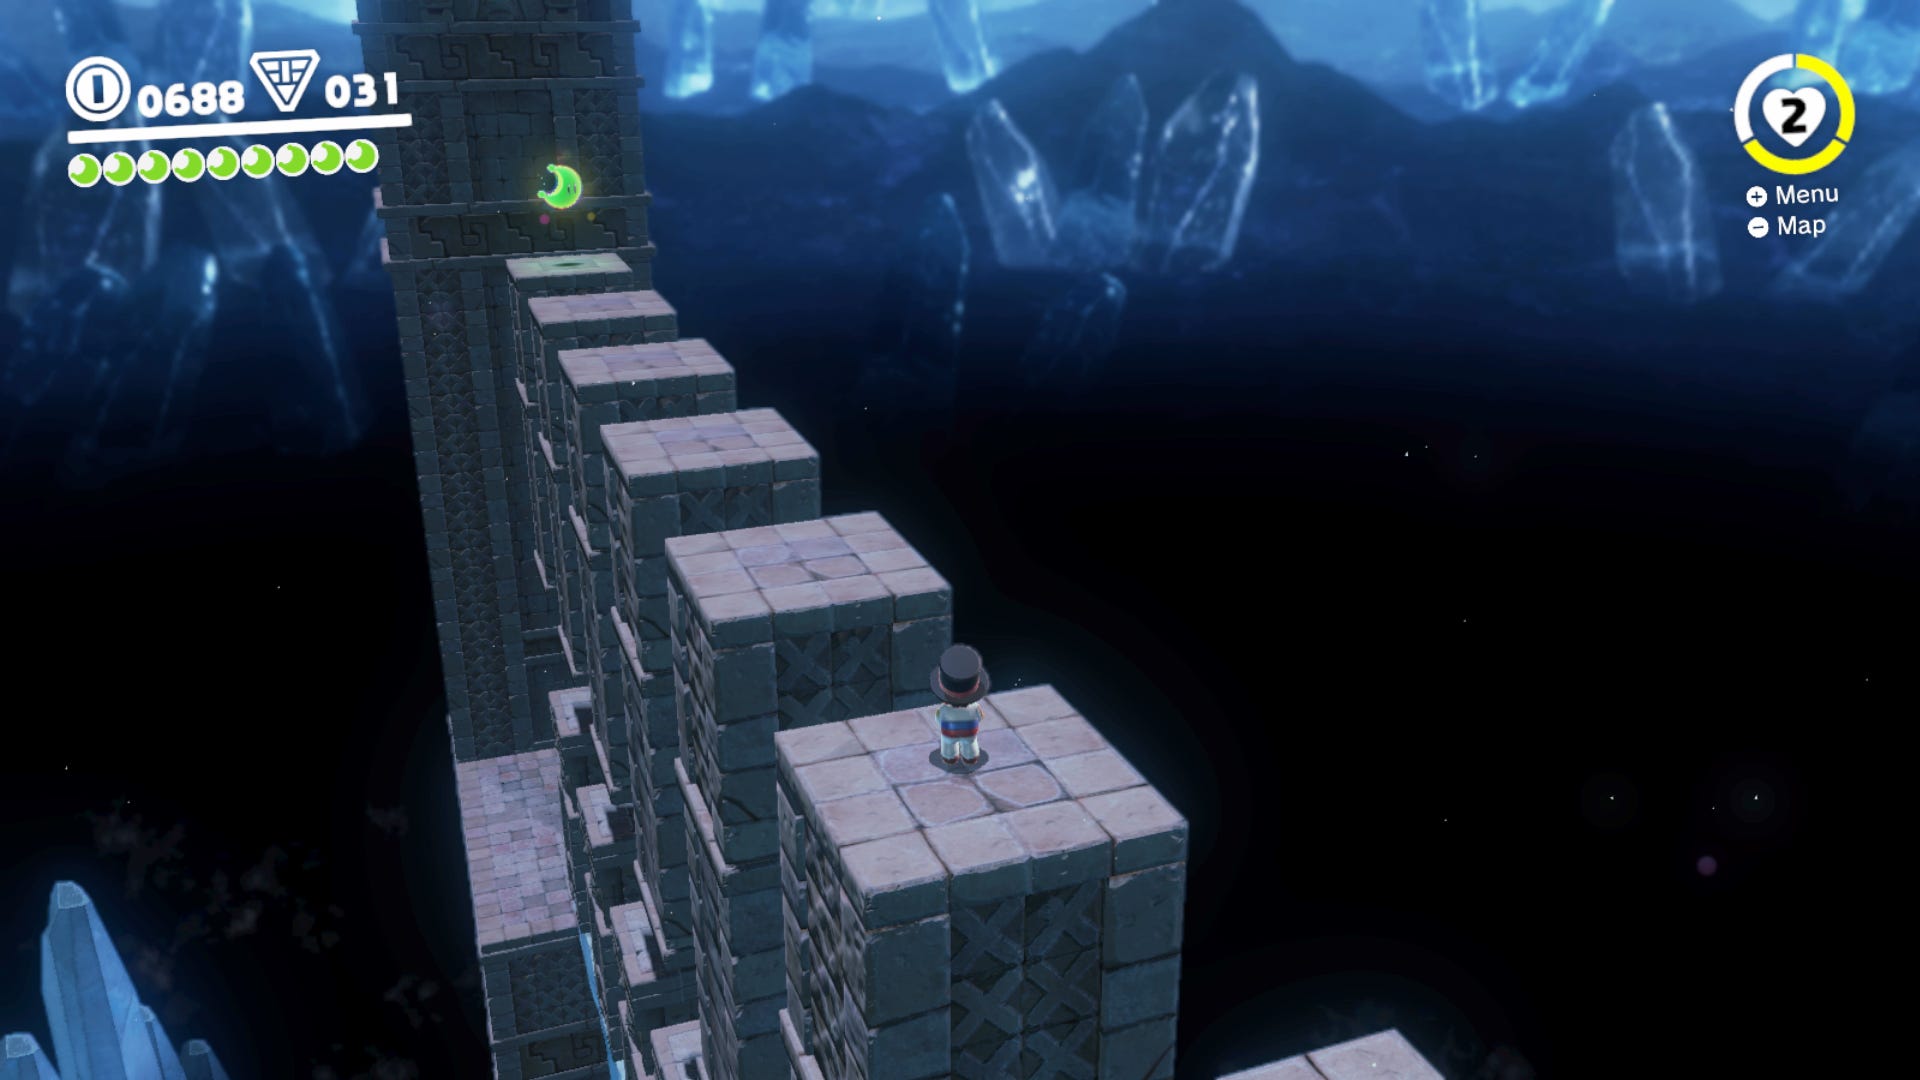
This Power Moon can be found by heading to the Tostarena Ruins Round Tower, and dropping down into the hole in the quicksand directly next to the tower. Once you've reached the second set of moving pillars just before the exit pipe, you'll need to jump from pillar to pillar, wall climbing your way so you reach the above set of stationary pillars, and can reach the Power Moon.
Sand Kingdom Power Moon 51. Sphynx's Treasure Vault

Round the back of the central large structure in Sand Kingdom is a Sphinx. Answer his question and you’ll get access to a treasure room filled with coins and a power moon.
Sand Kingdom Power Moon 52. A Rumble From the Sandy Floor Power Moon
This power moon on Sand Kingdom is super easy to get. From the overlooking moon location you should be able to see a warp pipe below.
Head in there and you’ll find an empty room. Simply head to where the rumble is strongest (in the location in the picture above), slam the ground by jumping and pressing left trigger, and the power moon is yours.
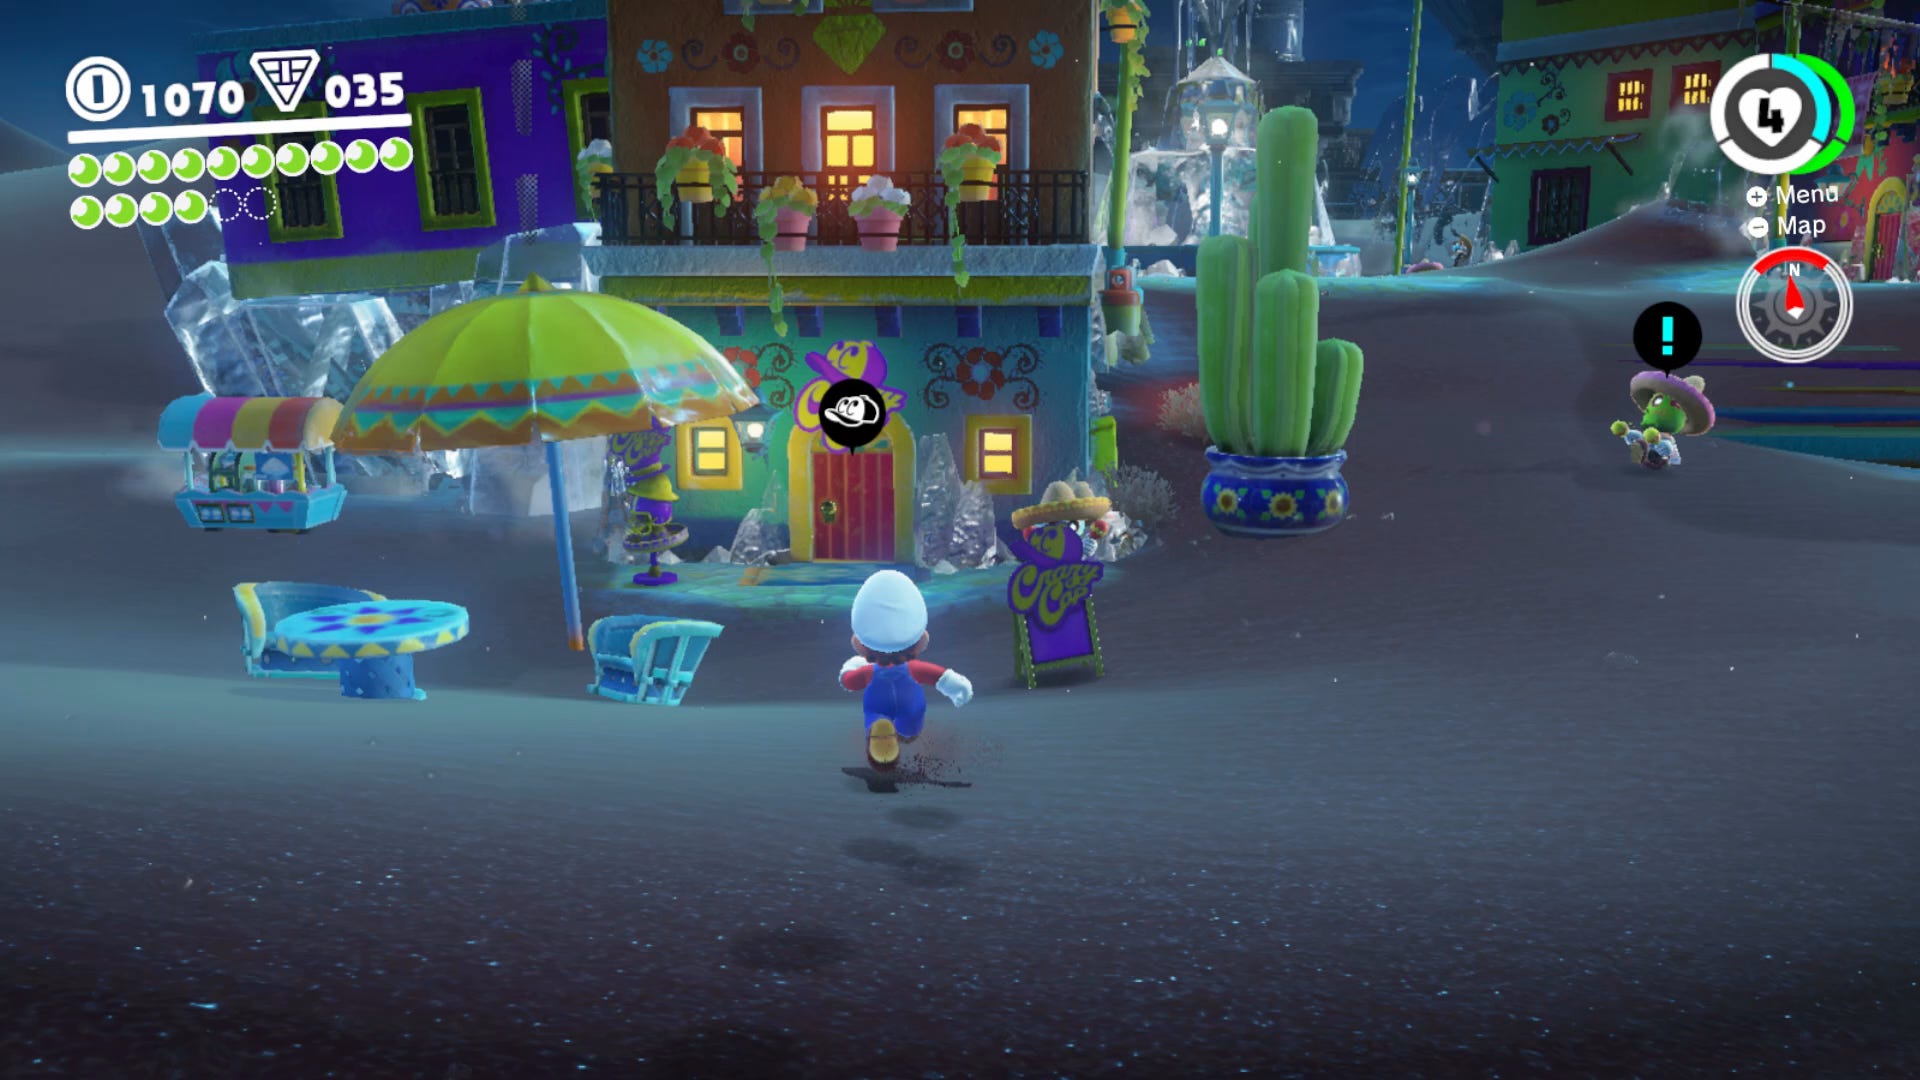
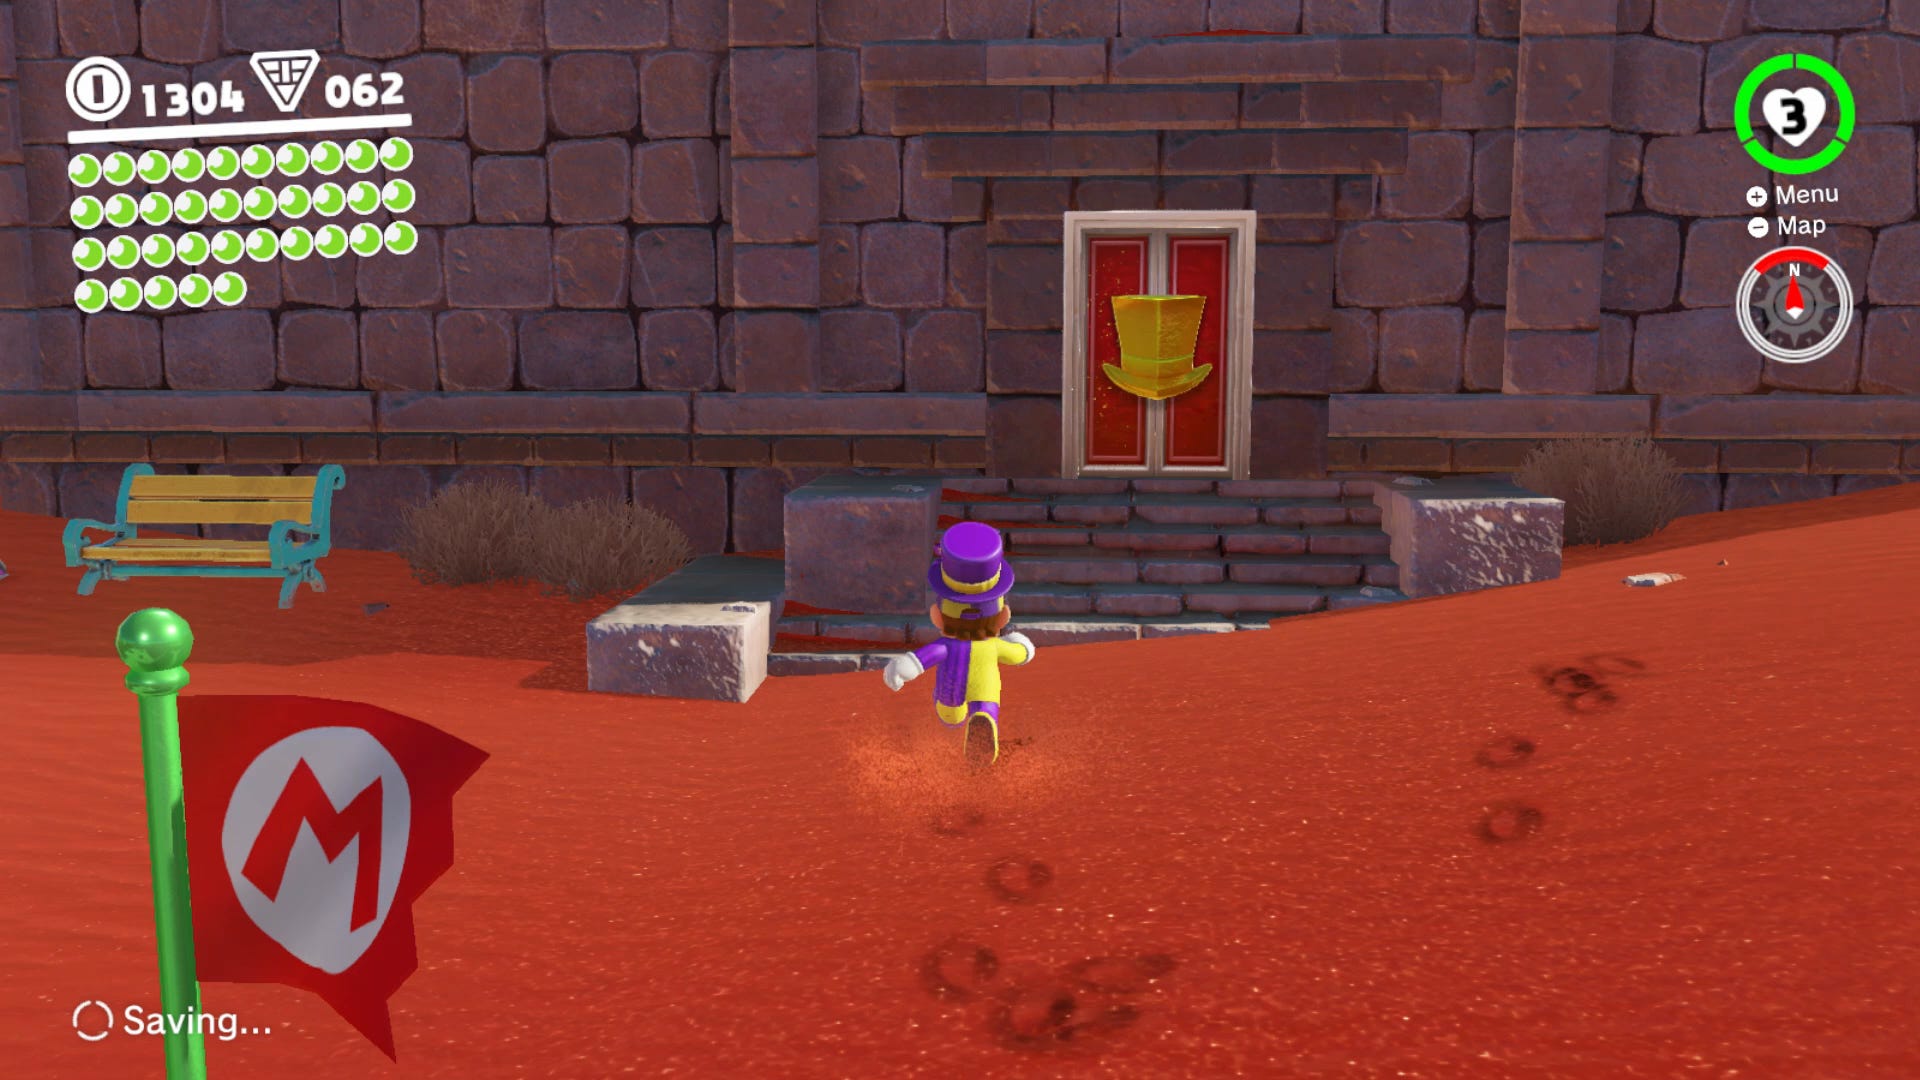
Sand Kingdom Power Moon 53. Dancing With New Friends Power Moon
In the north west corner of Tostarena Town, there's an NPC that will only open a door once you're dressed in full poncho gear, hat included. Dress yourself accordingly from the Crazy Cap shop, return to the NPC, and he'll open up the door to reveal a party room. Simply stand in the middle of the stage, let Mario dance, and the Power Moon will be yours.
Sand Kingdom Power Moon 54. The Invisible Maze Power Moon
For this Power Moon, head north of the Moe-Eye area, and you'll discover a secret area in the side of the cliff, with a door leading to a new area. In this section, you'll need to possess each Moe-Eye, remember the route through the poison that you see while wearing their shades, and follow them until you reach the Power Moon at the end.
Sand Kingdom Power Moon 55. Skull Sign in the Transparent Maze Power Moon
As with the above Power Moon, in the very first room with the Moe-Eye, you'll see a poison sign in the back of the room. Throw Cappy onto it and hold Y to keep it there, and after a few seconds the Power Moon will be yours to claim.
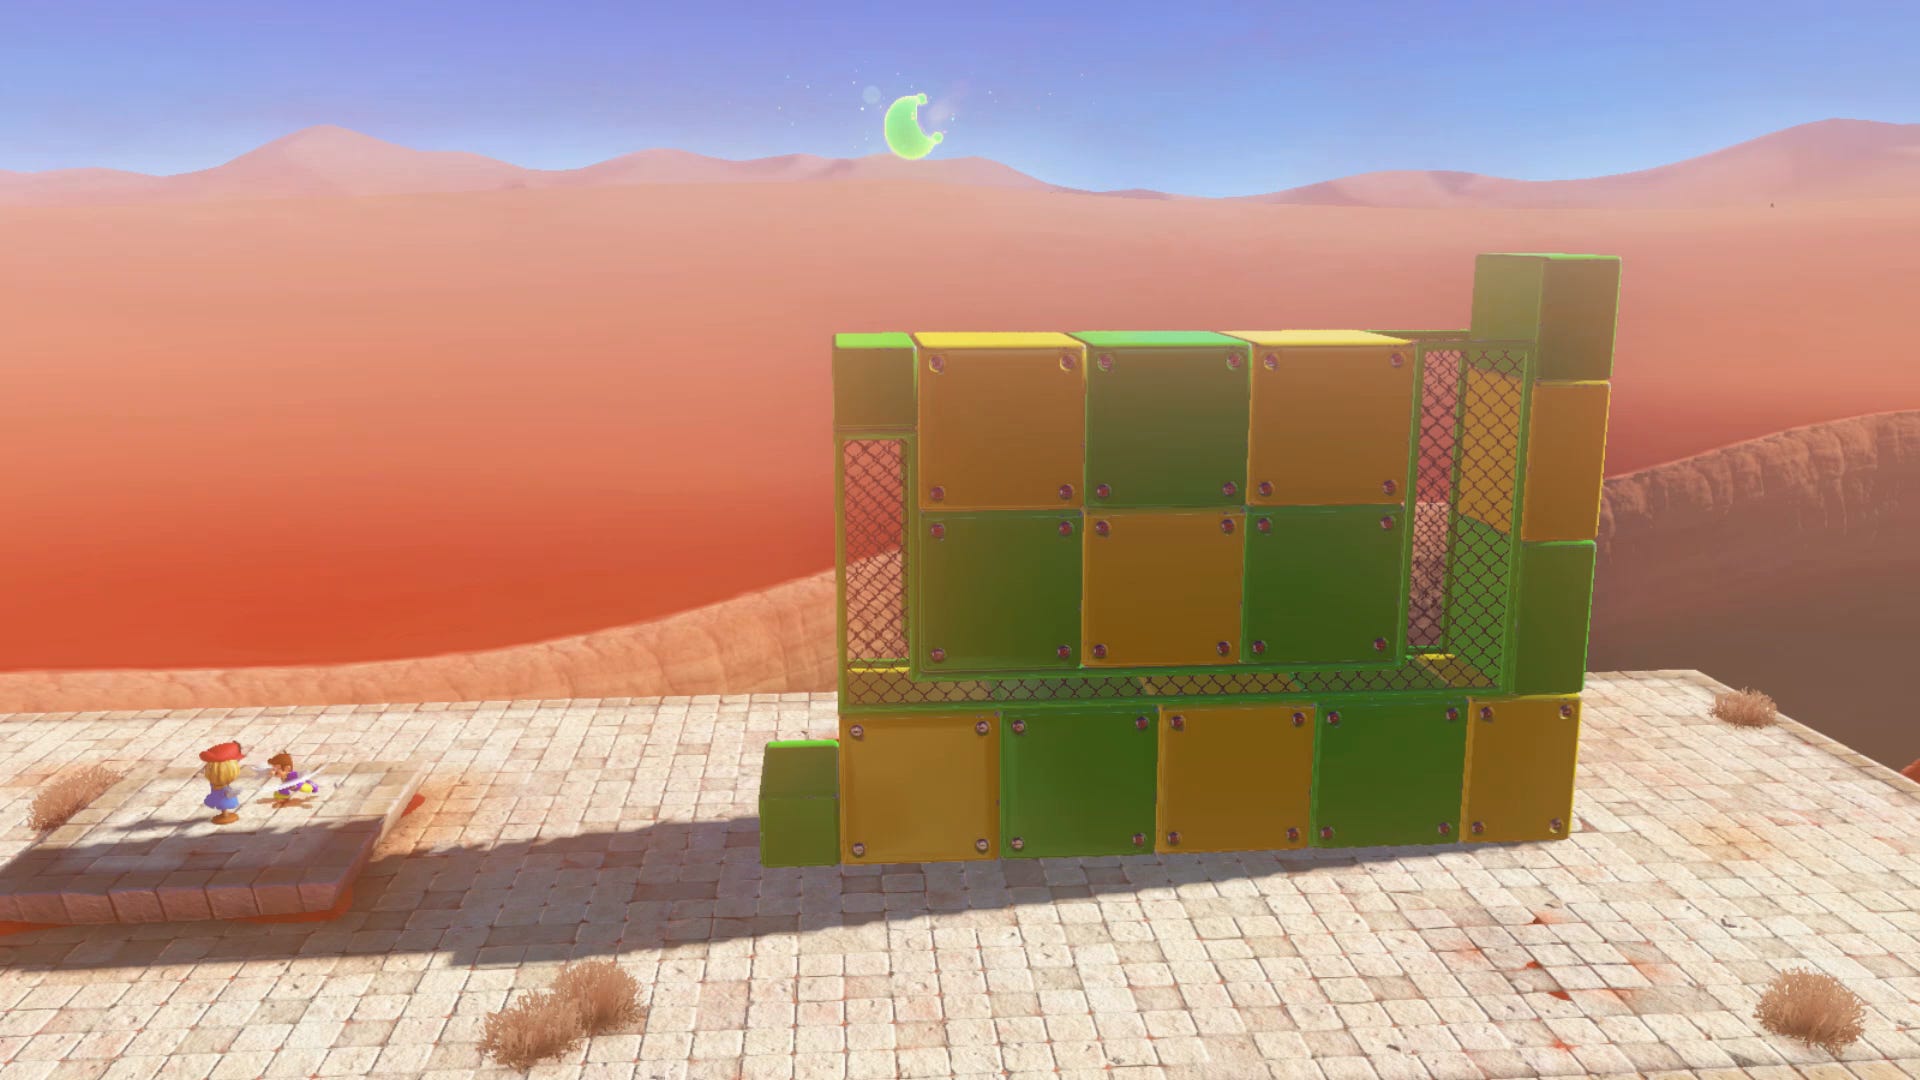
Sand Kingdom Power Moon 56. Bullet Bill Maze: Break Through Power Moon
In the far Northwest corner of Sand Kingdom, on the side of the structure that the scarecrow sits atop, is a secret door. In here you can ride a series of Bullet Bills. Make it to the end and you’ll get a power moon.
Sand Kingdom Power Moon 57. Bullet Bill Maze: Side Path
For the next Power Moon within the Bullet Bill Maze, you'll want to divert off to the side path on the left side of the maze, riding a Bullet Bill round a single winding corridor until you reach the Power Moon at the end.
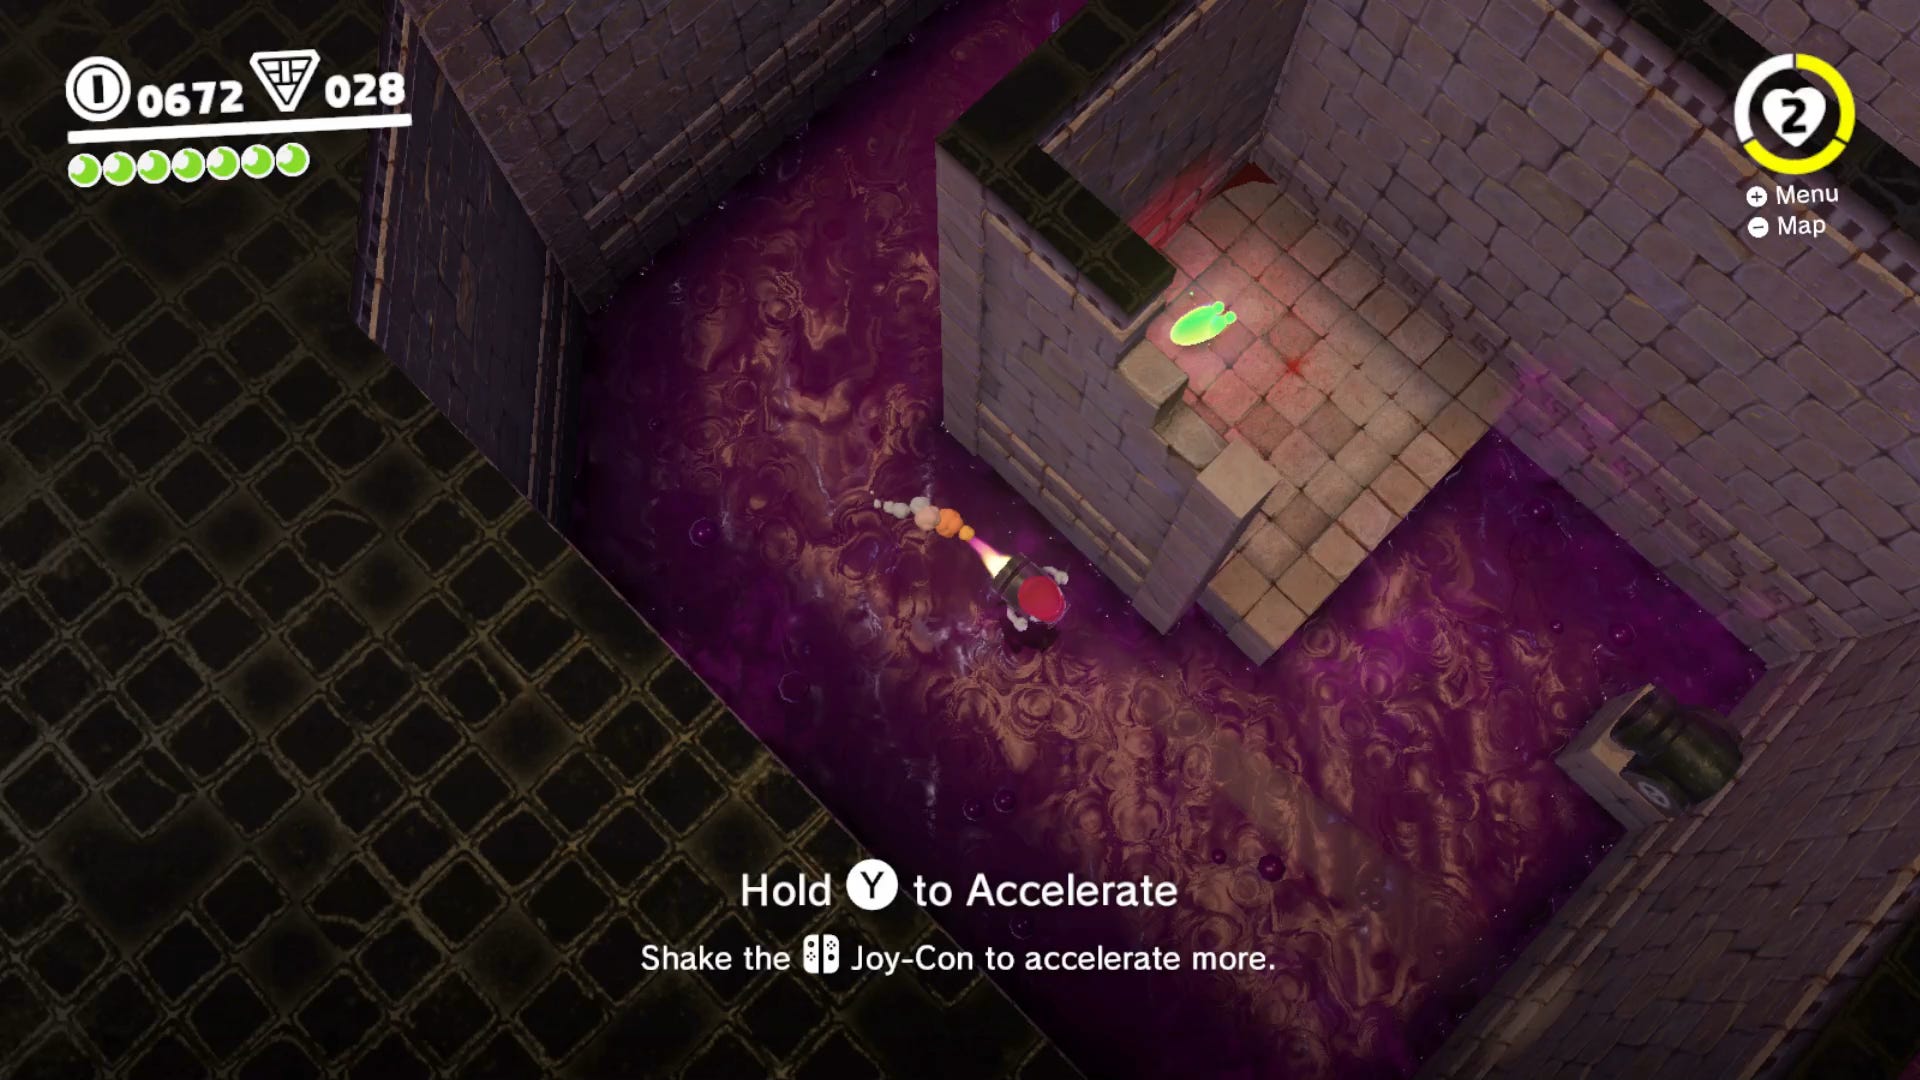
Sand Kingdom Power Moon 58. Jaxi Driver Power Moon
In the underground area found while riding Jaxi across the purple lake, complete the course to find another power moon.
Sand Kingdom Power Moon 59. Jaxi Stunt Driving Power Moon
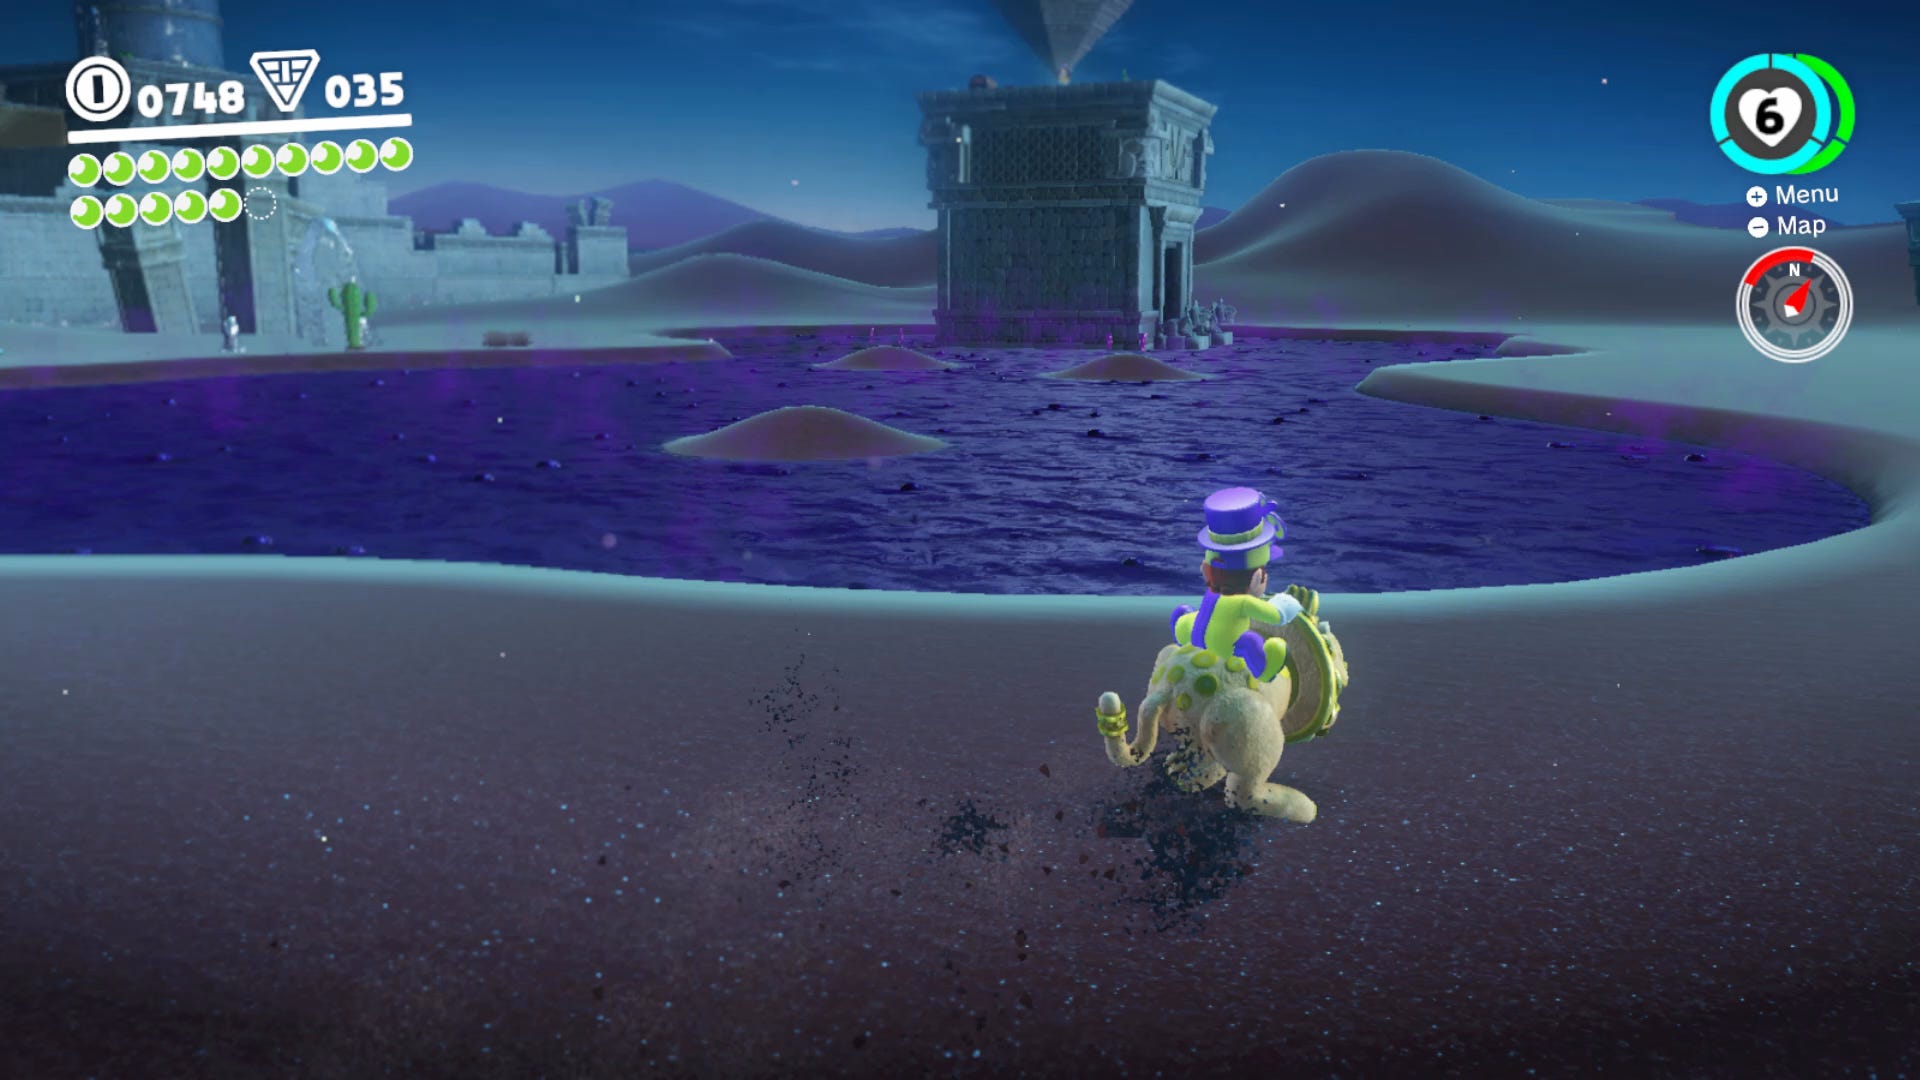
Jaxi, a ridable taxi cat statue, can be found near the town. Ride him and you can cross the purple liquid that usually kills Mario. Head to the large lake with a building in it. While riding Jaxi you can head inside the entrance to an underground area.

Ride Jaxi through this area until you see a Note on the left. Complete the note challenge by collecting them all before the time runs out and you’ll get a power moon.
Sand Kingdom Power Moon 60. Strange Neighborhood Power Moon
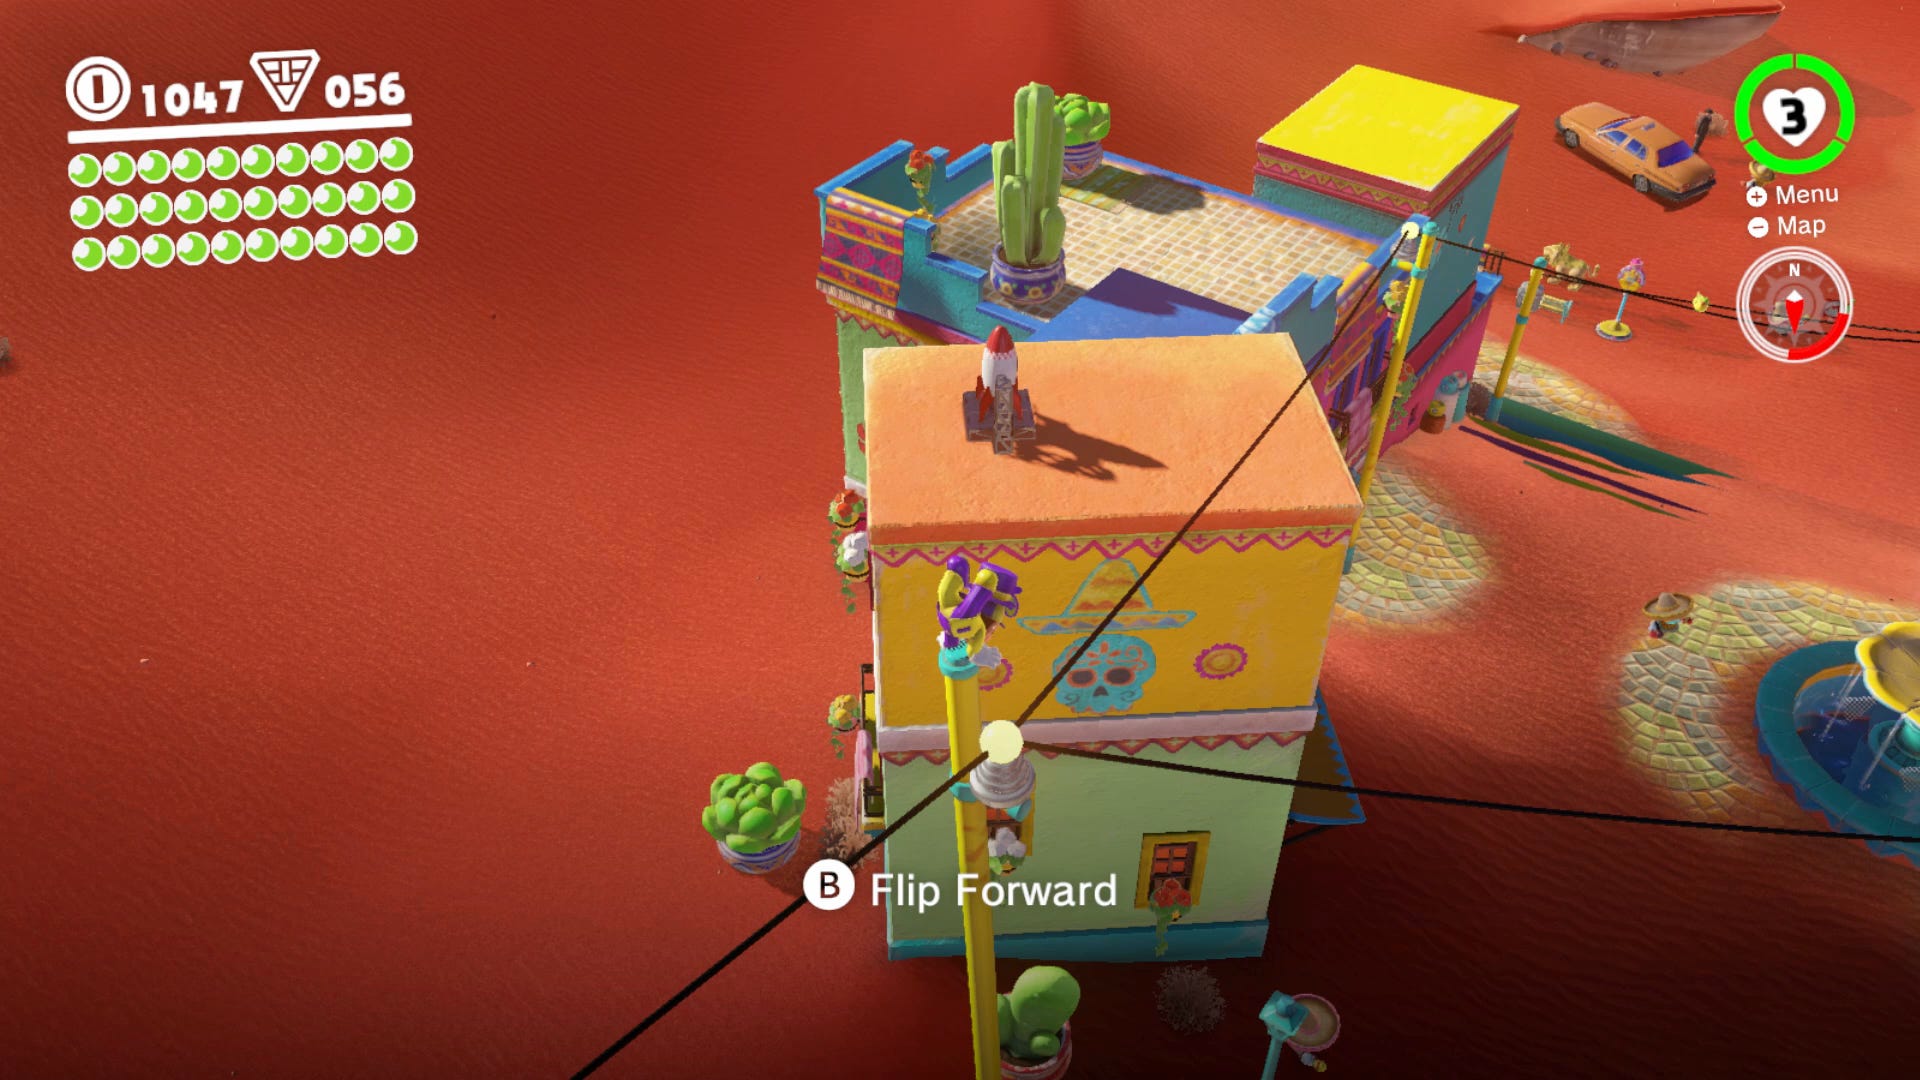
On top of the buildings in the town area of Sand Kingdom is a rocket. Possess it and you’ll blast off to a new area. Spin the scarecrow and you’ll start a platforming challenge. Get the end (careful, as the platforms spin) and you’ll get a Power Moon.
Sand Kingdom Power Moon 61. Above a Strange Neighborhood Power Moon
Roughly halfway through the path to getting the Power Moon just above, you'll see three Goombas along with a row of three blocks. Jump on to the blocks, and jump up from the middle one to reveal a hidden block. Jump up from this block to claim the final Power Moon in the Sand Kingdom.
Secret Entrance to Metro Kingdom
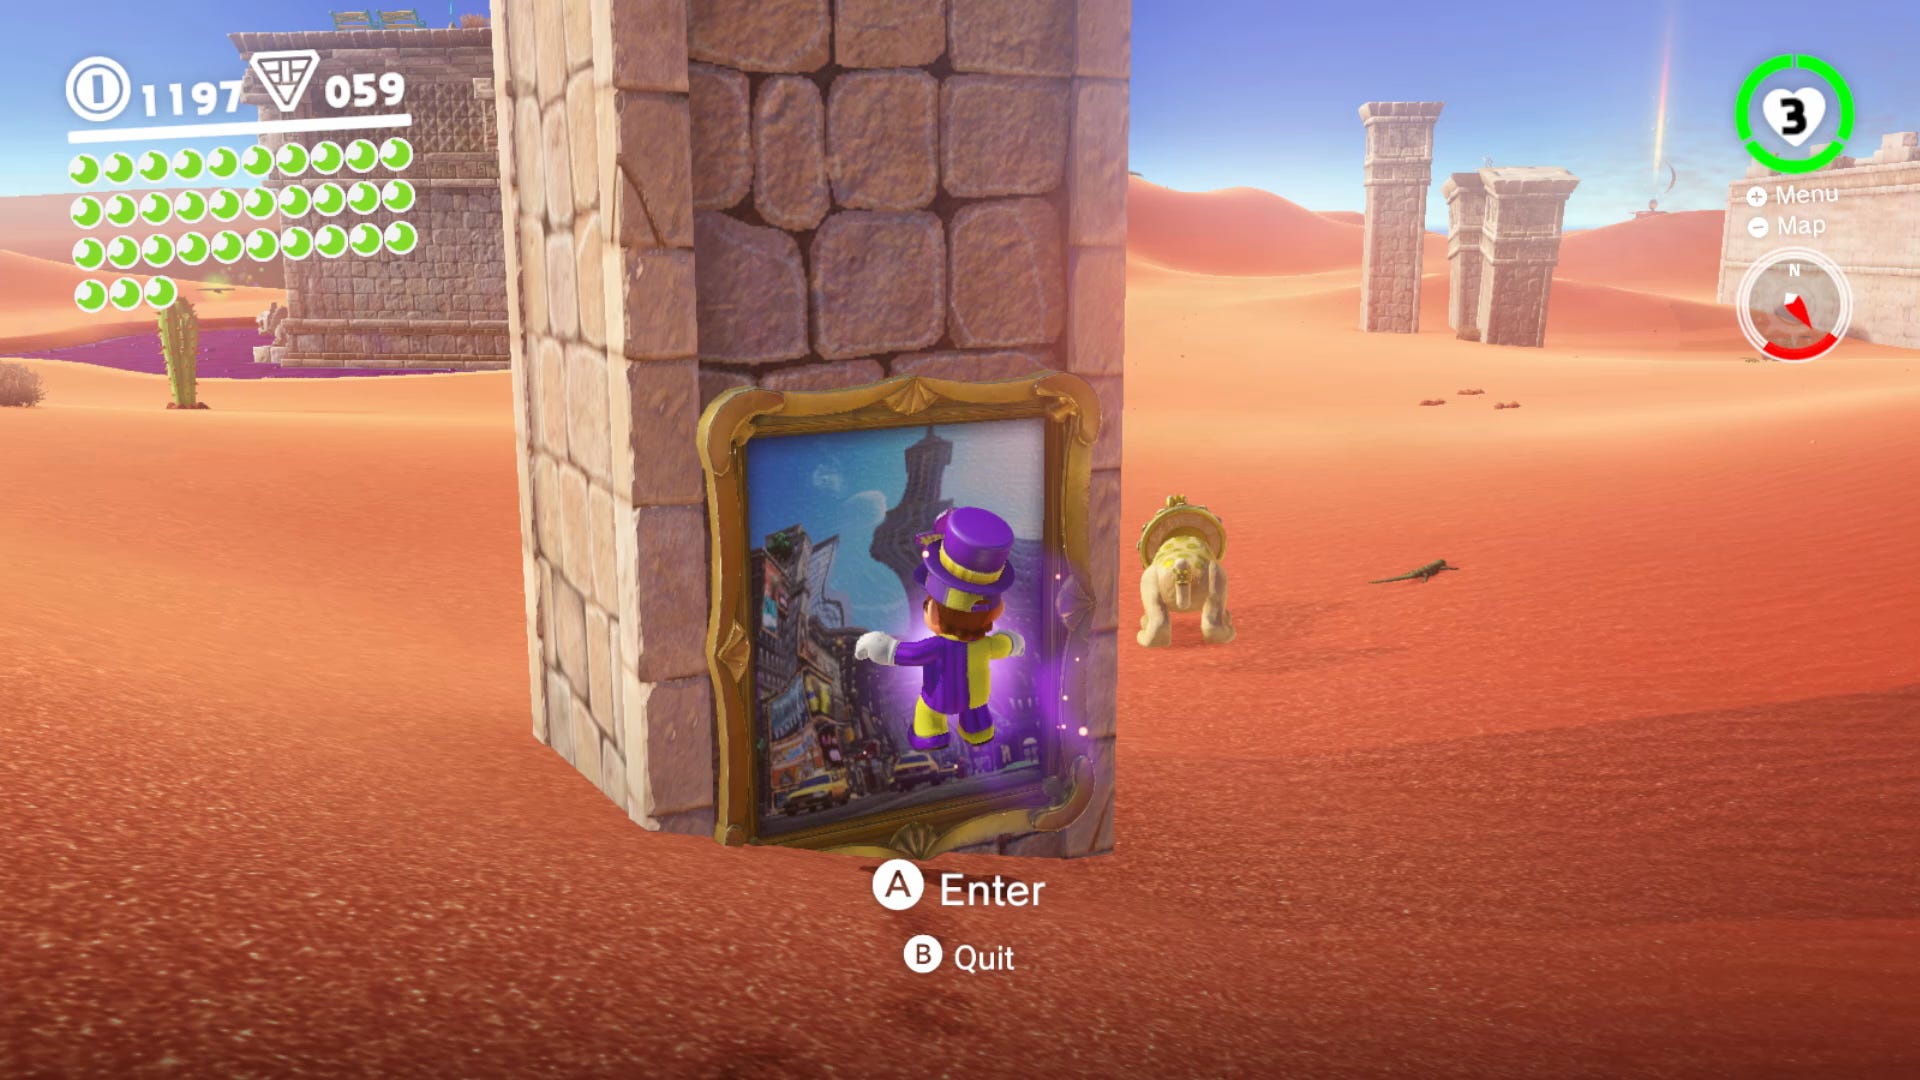
A secret entrance to Metro Kingdom is found behind a pillar, looking back towards the start of Sand Kingdom, directly in front of the purple lake.
- Super Mario Odyssey Cascade Kingdom Power Moon Locations - All Secrets
- Super Mario Odyssey Sand Kingdom Power Moon Locations - All Secrets
- Super Mario Odyssey Wooded Kingdom Power Moon Locations - All Secrets
- Super Mario Odyssey Lake Kingdom Power Moon Locations - All Secrets
- Super Mario Odyssey Cloud Kingdom Bowser Fight - All Secrets
- Super Mario Odyssey Lost Kingdom Power Moon Locations - All Secrets
- Super Mario Odyssey Metro Kingdom Power Moon Locations - All Secrets
- Super Mario Odyssey Seaside Kingdom Power Moon Locations - All Secrets
- Super Mario Odyssey Seaside Kingdom Power Moon Locations - All Secrets
- Super Mario Odyssey Snow Kingdom Power Moon Locations - All Secrets
- Super Mario Odyssey Luncheon Kingdom Power Moon Locations - All Secrets
- Super Mario Odyssey Ruined Kingdom Power Moon Locations, Dragon Boss - All Secrets
- Super Mario Odyssey Bowser’s Kingdom Power Moon Locations - All Secrets, Broodal Boss Fights
- Super Mario Odyssey Moon Kingdom Power Moon Locations - All Secrets, Defeat Bowser
- Super Mario Odyssey Mushroom Kingdom Power Moon Locations - All Secrets and Achievements
- Super Mario Odyssey Moon Rock Guide - What are the Metal Cubes? How to Activate the Metal Cubes - Metal Cube Locations
Black Friday might be almost over, but if you're still looking for a deal, we’ve got the best Black Friday Deals hub for you. It’s got the best PS4 Pro Black Friday deals, the best Xbox One Black Friday deals, the cheapest Nintendo Switch Black Friday deals, amazing prices on gaming laptops this Black Friday, smartphone deals, and the best Black Friday prices on 4K TVs.