Horizon Zero Dawn: The Frozen Wilds - how to get Bluegleam

Horizon Zero Dawn: The Frozen Wilds introduces a new resource called Bluegleam. Here's how to get Bluegleam, where to find it, and what to spend it on.
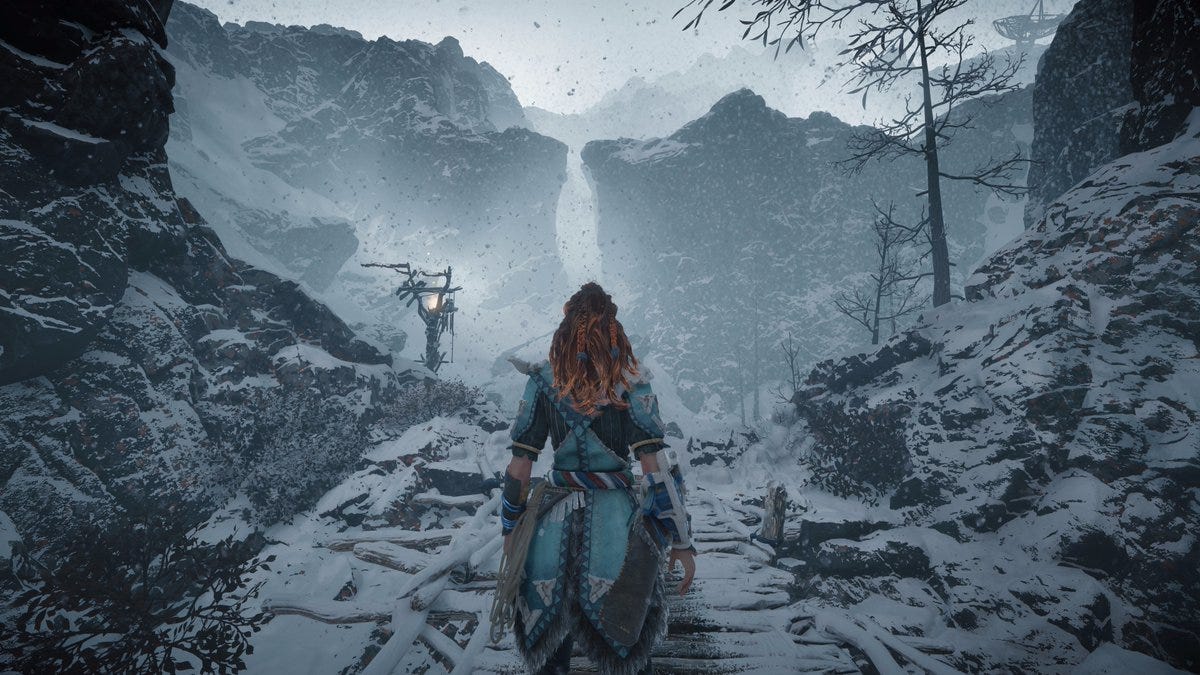
Bluegleam is a gemstone of sorts found only in The Frozen Wilds DLC for Horizon Zero Dawn. A crystalline substance, it seems to grow on dead machines in the frosty reaches of The Cut, and is prized by Banuk shamans. Let's talk it over, as part of our Horizon Zero Dawn guide.
Bluegleam is the only currency Banuk merchants will accept in exchange for their best local goods: upgraded versions of the hunter, sharpshot and war bows you'll want to get your hands on as early in Horizon Zero Dawn: The Frozen Wilds as possible, so you can enjoy using them throughout the tougher challenges offered by the expansion.
You can also buy outfits with Bluegleam, but that can wait for endgame assuming you have the Shield-Weaver, Horizon Zero Dawn's best outfit, since none of the new ones live up to it.
You can earn Bluegleam by completing quests in Horizon Zero Dawn: The Frozen Wilds, and we've listed the most profitable sources below, but since you'll probably want those new weapons before you do all the tough story quests, we've also listed locations you can find it just lying around in the world, with map references. Do a tour of The Cut and collect all the Bluegleam you can, then grab your new weapons and head off into the quests.
Once you've got pockets full of Bluegleam, track down a Banuk goods merchant, as indicated by a blue icon, and get your goodies. Horizon Zero Dawn: The Frozen Wilds introduces the best weapons in the game, and it's well worth the effort of tracking them down.
Bluegleam quest rewards
This is an incomplete list of Bluegleam rewards for completing quests in Horizon Zero Dawn: The Frozen Wilds, or found while completing those quests. There are a few other quests in the DLC not mentioned here, which we'll add at a later date once we know what you get.
- 3 Bluegleam for completing the Waterlogged quest.
- 1 Bluegleam found on the ground during the Shaman’s Path quest, after destroying the Control Tower and climbing.
- 6 Bluegleam for completing the Shaman’s Path quest.
- 1 Bluegleam in the Drone Hangar, a dungeon in the north visited during the A Secret Shared quest.
- 1 Bluegleam for finishing the A Secret Shared quest.
- 3 Bluegleam for finishing The Survivor quest.
- 1 Bluegleam found on the far side of lake at the third encounter in The Hunters Three quest.
- 3 Bluegleam for completing The Hunters Three quest.
- 3 Bluegleam for completing the Firebreak quest.
- 7 Bluegleam for completing The Forge of Winter quest.
- 6 Bluegleam for trading Animal Figurines (one in each reward box).
Bluegleam formation locations
Outside of quest rewards, Bluegleam is most easily found in Horizon Zero Dawn: The Frozen Wilds by purchasing the Bluegleam map, which is found in the Special Items section of the inventory of most vendors found in The Cut. You'll need to a badger bone and a goat skin to trade for the map, so get hunting. Once you have the Bluegleam map, you can just travel to the areas indicated by it and then use your Focus to spot Bluegleam formations.
Don't worry if you can't afford the map or have no luck tracking down the required trade items, though; we've found all the Bluegleam in Horizon Zero Dawn: The Frozen Wilds and can show you exactly where to pick it up.
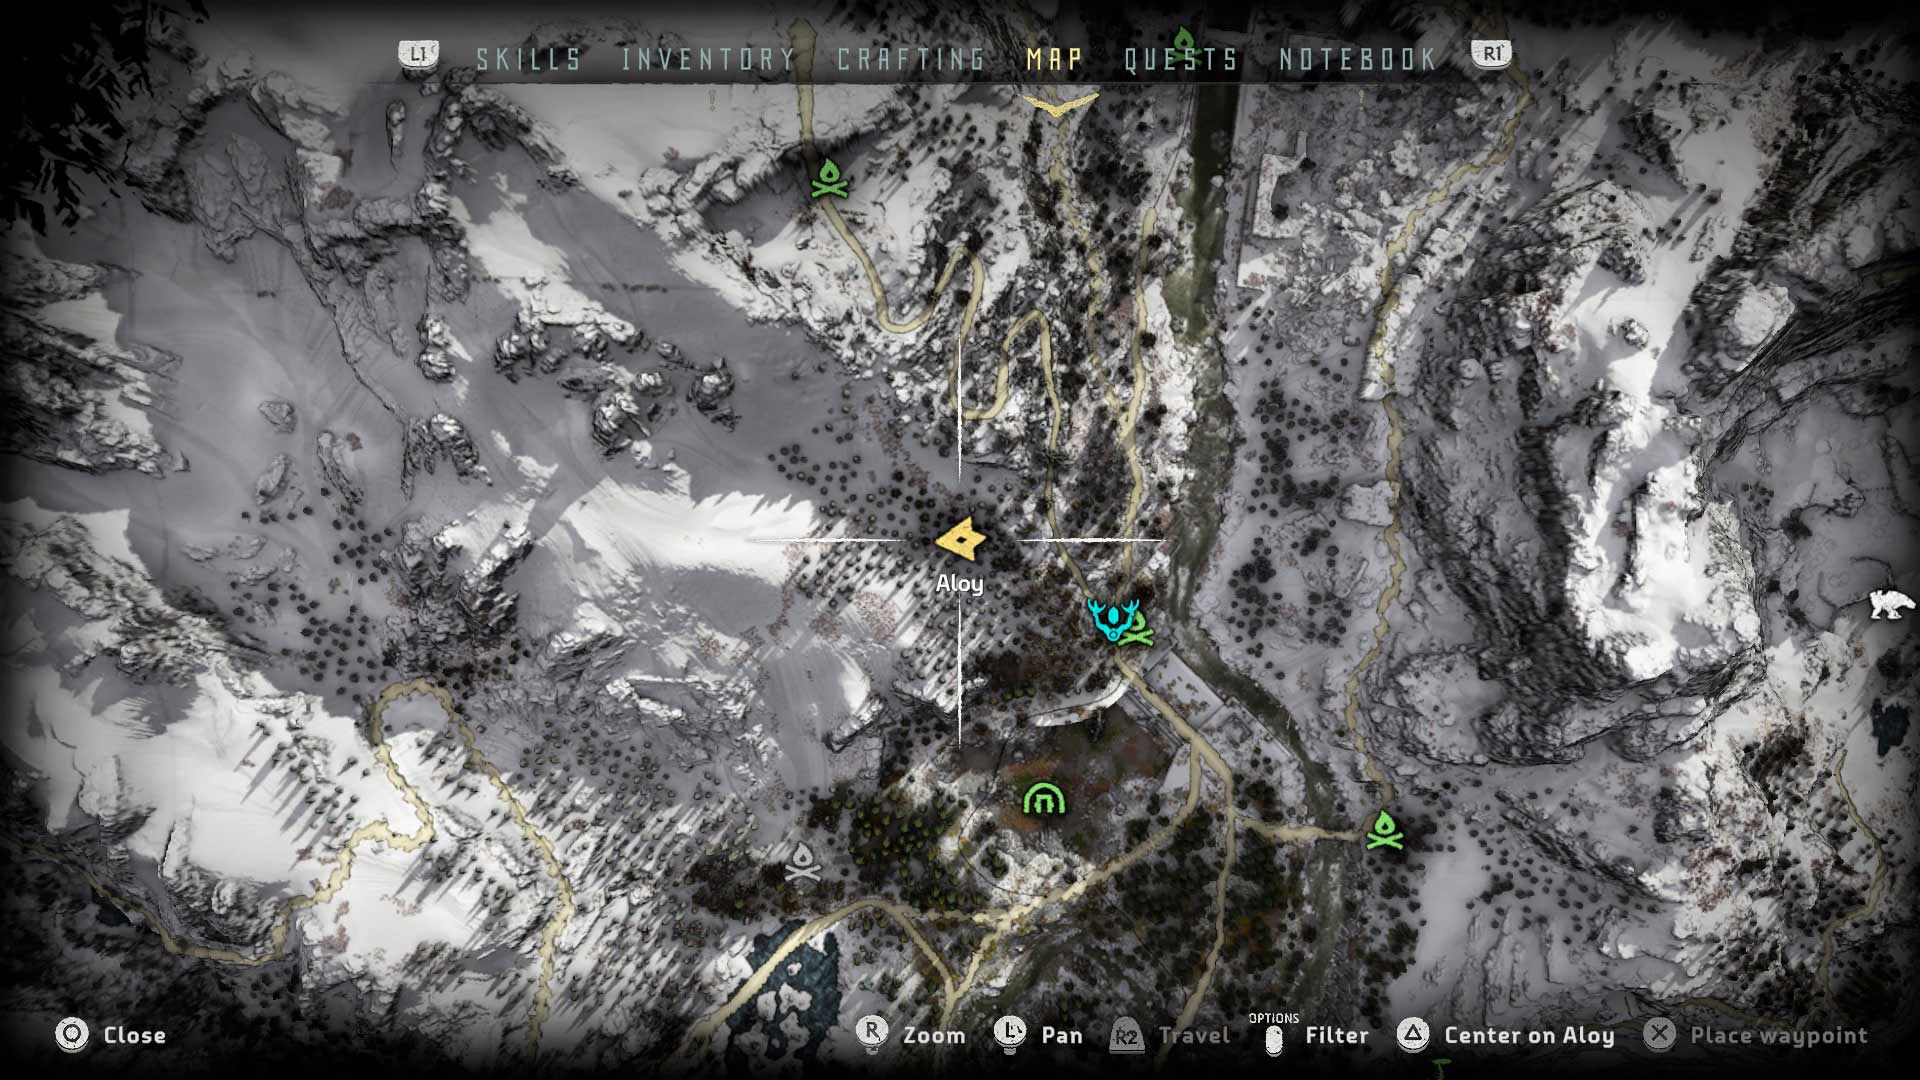
Bluegleam location #1
Start at Song's Edge, the first settlement you discover in Horizon Zero Dawn: The Frozen Wilds, and travel north east to find a bonfire. From here, climb the rise to the southwest to find three Bluegleam formations. Here's a map:

Bluegleam location #2
There are three Bluegleam formations west of Song’s Edge, but you can't get to them from the settlement. The easiest way is to work your way south from the bonfire just to the north of the location shown on the map below.

Bluegleam location #3
Start at Song's Edge and travel northeast to a bonfire north of a Banuk merchant - unfortunately we're missing a map for this one, but hope to update in a few days. There are three Bluegleam formations in this area. One is in a cave right under the bonfire, but you'll have to drop down to the valley below to enter it. Another is openly lying on a ridge to the southeast of the bonfire, near the river, and easily spotted with your Focus. The third is east and slightly north of the bonfire; follow the trail in this direction until you reach a Bnuk watchtower, then search along the nearby cliff’s edge with your Focus.
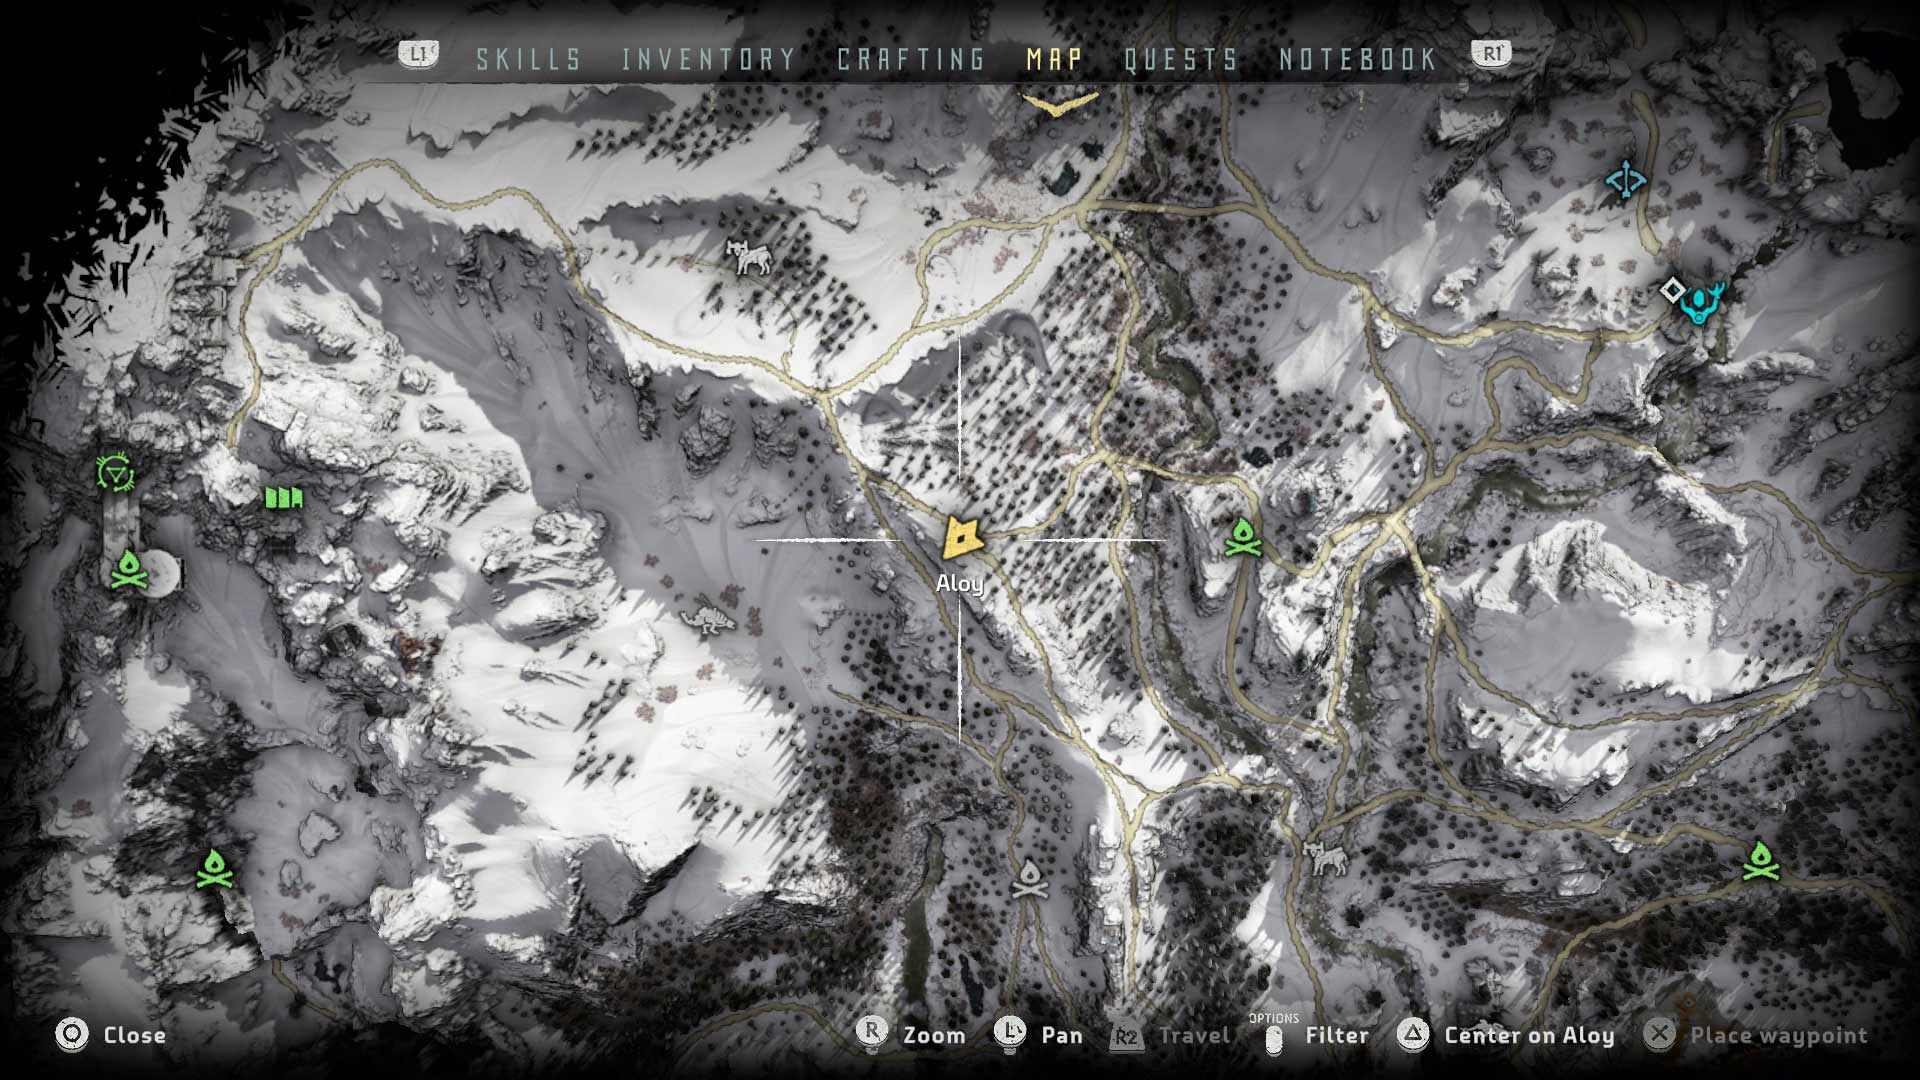
Bluegleam location #4
Start at Deep Din and head east to the bonfire. From here, go north to spot some climbing handholds. Search along this higher ledge to find four Bluegleam formations, then rappel down and search along the river bank heading back towards the bonfire to locate a fifth Bluegleam formation. The map below shows where to start.

Bluegleam location #5
There are three Bluegleam formations on the slopes to the north of Deep Dim, a location you'll find during the Waterlogged quest. Here's a map to show you exactly where.
Bluegleam location #6
While you're at Deep Dim, head northwest and climb way, way up into the mountains to find five Bluebleam formations. The map below shows where to start looking.

Bluegleam location #7
At the bonfire right before entering the caves at the start of the Shaman's Path (which you explore during the quest Shaman's Path, believe it or not), head north east, hugging the mountain wall, to find one Bluegleam formation. This map shows its location.

Bluegleam location #8
There's one Bluegleam formation halfway along the Shaman's Path. You need to leave the path to reach this, so it’s best done when you're not in the middle of the quest. To reach the Bluegleam, follow the path through the cave and cross the first tripping bridge. Then, when facing the zipline to the second tipping bridge, step off the cliff to the east and search the snowbank. You can also reach this spot by going backwards along the Shaman’s Path route but it’s tricky to jump or clamber out of the river under the zipline. After collecting the Bluegleam it is safest to fast travel away. Here's the correct spot on a map:

Bluegleam location #9
Start at the Hunting Grounds and head southwest to reach a bonfire. From here, head west to find two Bluegleam formations. The first is on a ridge by a Banuk tent structure of some kind, as shown on the map below, while the second is directly north of it. Both are easy to spot but watch out for the patrolling Sawtooth.
Bluegleam location #10
Check your map to find a Charger site west of the Hunting Grounds and northwest of the Drone Hangar. If you go directly north from the Charger icon you'll find one Bluegleam formation. Here's a map.

Bluegleam location #11
There are two Bluegleam formations in the mountains north of the Hunting Grounds. The easiest way to reach them is to fast travel to Hunting Grounds icon, then drop down to the arena and head west, hugging the mountains, until you find an area where you can run and hop up into the peaks. The two Bluegleam formations are a few metres apart and well hidden in the rocks. This map shows where to start your search.

Bluegleam location #12
There's one Bluegleam formation west of Drone Hangar; you find this dungeon during the A Secret Shared sidequest. The Bluegleam is just lying in the snow but you have to slog uphill to reach it. Here's where you'll find it:

Bluegleam location #13
Start at the Hunting Grounds and head to the bonfire to the southeast. There's one Bluegleam formation just to the west. Check the exact location on the map below.

Bluegleam location #14
In the northwest of the map is a Bandit Camp, which becomes a settlement called Stone Yield after you clear it. There are three Bluegleam formations north of this location, along the mountain ridge between the high and low trails. The easiest way to get these three Bluegleam drops is to start at the bonfire near the hot spring pools to the west of Stone Yield, and head towards the location marked on the map below until you reach some climbing handholds. At the top you'll arrive exactly at the spot marked on the map, and the first Bluegleam formaiton will be almost at your feet. Look for a second set of handholds nearby to reach to the second Bluegleam formation, then just follow the trail up and around to spot a snowbank, at the end of which you'll find the third Bluegleam formation.

Bluegleam location #15
Have you met Enjuk yet? He's the merchant with whom you swap Animal Figurines, and hangs out in the Visitor's Centre with a handy bonfire right outside. There's one Bluegleam formation to the southwest of this bonfire. The map will help you find it:

Bluegleam location #16
We're missing a map for this next one, but it's not too hard to find. Start at Longnotch, a settlement far to the east of the map. Now head to the bonfire that's directly west of it. There are two Bluegleam formations in easy reach of this bonfire. To get the one to the west, just head west along the trail, hugging the mountain, to find it in a little sheltered snowbank at ground level. The one to the south east is likewise found by heading in that direction and just hugging the mountain, but this time as high as you can go without jumping or climbing, as the Bluegleam formation is among the rocks.
Bluegleam location #17
Finally, head to Longnotch and then to the bonfire southwest of it. From here it's a short trot east to the two Bluegleam locations shown on the map below, which are just lying around in the open.

Hopefully between the quest rewards and open world Bluegleam formations this is all you need to know to collect all the Bluegleam you could ever need in Horizon Zero Dawn: The Frozen Wilds - it was enough for us to purchase all three Banuk weapons and the four new outfits, anyway!