Mortal Kombat X D'Vorah Tips - Brutalities, Fatalities and Variants
Learn all of D'Vorah's basic attacks, the difference between her three variants, and all of his special moves.
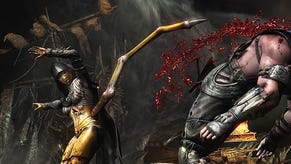
D’Vorah is a unique mashup of overhead and low hitting attacks. Her primary game plan is to knock the opponent down and then set them up for a Spawning Pool, which will force them to block once they stand up. Depending on what variant you choose, the options you have as D’Vorah will vary. She has quite a learning curve, so it is recommend that newcomers only play as her after they’ve grown used to the game using other characters.
Brush up on all of D’Vorah’s Fatalities with our in-depth guide to every Fatality featured in Mortal Kombat X. You can also unlock all of her unique costumes and Brutalities by checking out our complete guide to every item hidden in the Krypt.
Key
Due to the nature of these moves and the complications they require to pull off, we condensed the commands into numerical values. The table below will offer the number that we use, as well as the button that corresponds to that number on your Playstation of Xbox controller.
Xbox/Playstation
- 1: X/Square
- 2: Y/Triangle
- 3: A/X
- 4: B/Circle
Swarm Queen Variant
The first variant is unique because of the Vortex Swarm attack, which replaces D’Vorah’s normal Spawning Pool. During this attack D’Vorah lifts the enemy kombatant into the air, which will allow the player to easily start up a combo attack. This attack alone makes this the preferred choice for D’Vorah’s variants. If you happen to connect a combo after using Vortex Swarm, you can easily transition into a Corruption Combo or longer combination attack.
In this variant, D’Vorah’s projectile attack transforms from a simple projectile to the Wasp Grenade (Down, Forward +1). Instead of simply hitting enemies, this attack will now stun them for a short amount of time. If the player is close enough to the target after hitting them with this attack, they can easily transfer into a combination. If you aren’t close enough to hit a combo, you can still manage to strike the enemy with a great mashup of low and overhead attacks.
Brood Mother Variant
In this variant, D’Vorah’s projectile attack will change to the Bug Blast (Down, Forward +1) which is a bit more of a traditional attack than the others, and it even allows you to extend the attack’s launch time or cancel it altogether by pressing Forward or Back. The other big addition to this variant is the Krawler special move (Down, Forward +3). When you use this attack D’Vorah will place a bug on the ground that will then move forward and attack low on your enemy. This is great to use after you’ve knocked an enemy on the ground, or used an attack like Spawning Pool. When using this move, you should run up after the Krawler and hit the other kombatant with a combo move. This attack can also be used for a bait and switch, since the enemy player will need to block either the Krawler or D’Vorah herself.
Venomous Variant
The final variant that players can use for this character specializes in poison effects. Use of this variant means your attacks will continue to damage the opponent even after they hit, which can be great for wearing your enemy down. Like her other variants, this will once more change the projectile attack, replacing it with Bug Burst (Down, Forward +1). The short range projectile stuns the enemy kombatant. Sadly, you can’t follow this up with a guaranteed combination, but if you manage to hit your opponent while they are in the air, it will drop them to the ground in a standing position with D’Vorah at a distinct advantage. This will allow you to follow up with a devastating mashup of overhead and low attacks.
Basic Strategies for D’Vorah
D’Vorah thrives on setting up her opponents and then forcing them into hard to exit places. This means players will want to use every attack they can to keep opponents in the corner and unable to move around the map. Her low attacks aren’t that great, but her Spawning Pool (or variant equivalent) is fantastic for dealing some damage from the lower area of the map. The attack can lead to some outstanding setups when timed correctly.
Most of D’Vorah’s combos will rely on the player setting up Spawning Pool so that it hits just as the opponent is getting up off the ground. Then you can follow with Ovipos Strike (Forward +2) or the Pestilence combo (Forward +3, 4) for an overhead mashup attack. From Ovipos Strike you can even lead into the Corruption combo (Forward +2, 2) that will end with Ovipositor Charge, and easily set you up for another Spawning Pool.
This can be an endless cycle if you want it to be, and in order to escape your opponents you’ll need to use a wakeup special move. You can counter this movement by using a neutral jump, or backdashing to bait your opponent into moving. Once they make their move, return to your previous position and punish them for their ignorance.
Basic Attacks
Spawning Pool: Down, Back +1
This is D’Vorah’s basic low attack. When used she will shoot fluid onto the ground, which will appear under the opponent’s position. By itself the attack can serve to keep your opponent on their toes and moving, however when used after knocking the enemy kombatant down, it forces them to block. This will give D’Vorah the perfect chance to hit with an overhead or lower attack.
Air Throw: Down +Throw
The basic grab and throw is useful for combo enders, especially after the Dragon Fly Combo (Back +1, 2). It replaces the last hit in the combo for increased damage output, and also allows you to move the enemy to a position that better suits your needs.
Ovipositor Charge: Down, Back +4
Whenever you want to end a combo with Spawning Pool, therefore continuing the vortex attack, use this move. It will leave the opponent on the ground long enough for Spawning Pool to hit just as they stand up. It isn’t the highest damage dealing combo ender, but it’s versatile in the fact that it can easily be thrown at the end of any of D’Vorah’s combos.
Brutalities
Migraine: Kill an opponent with Ovipositor Charge (Down, Back +4) with at least 50 percent health left, then hold forward.
Fly Swatter: Perform a four-hit kombo, ending with a Backward Air Throw (Down +Throw, Back). The final hit must be with the Backward Air Throw, and it must be performed while in the air.
Incubate: Can only be used with the Brood Mother Variation. D'Vorah has to connect three Krawler attacks (Down, Forward, 1), and the final hit must be a throw.
Bug Zapper: Only works with the Swarm Queen variation. Player must stun opponent using Bug Bomb (Down, Forward, 1 + Block), and must be at full screen distance away from enemy kombatant. The final hit must come from Infestation.
Acid Burn: This Brutality can only be used when the Venomous variation is equipped. D'Vorah must hit with all nine hits from Bug Spray(Down, Forward, 1 + Block), and the final hit has to come from Bug Spray.
Fatalities
Bug Me: Back, Forward, Back, 3 (Mid-screen attack)
Heart Broken: Forward, Back, Forward, 2 (Close-ranged attack)
X-Ray: Stick Around
The most unique thing about D’Vorah’s X-ray attack is the exact thing that can make it one of the hardest to connect in many situations. First D’Vorah will jump upwards and then dive down towards her enemy. This attack avoids most low counters, but it can easily overshoot the target if the enemy kombatant is jumping or running forward, depending on the situation on-screen. It features armor like most x-rays, and can be easily used as a combo ender. We suggest waiting to use this attack at the end of powerful combos to reduce the chance of it missing during a bad setup.
Not sure if Mortal Kombat X is the game for you? Check out our full review to see why we believe it’s a must-have for fighting game fans everywhere. If you’re having problems with the main story, or if you just want to unlock Shinnok, you can check out our complete guide to Mortal Kombat X’s story mode.


