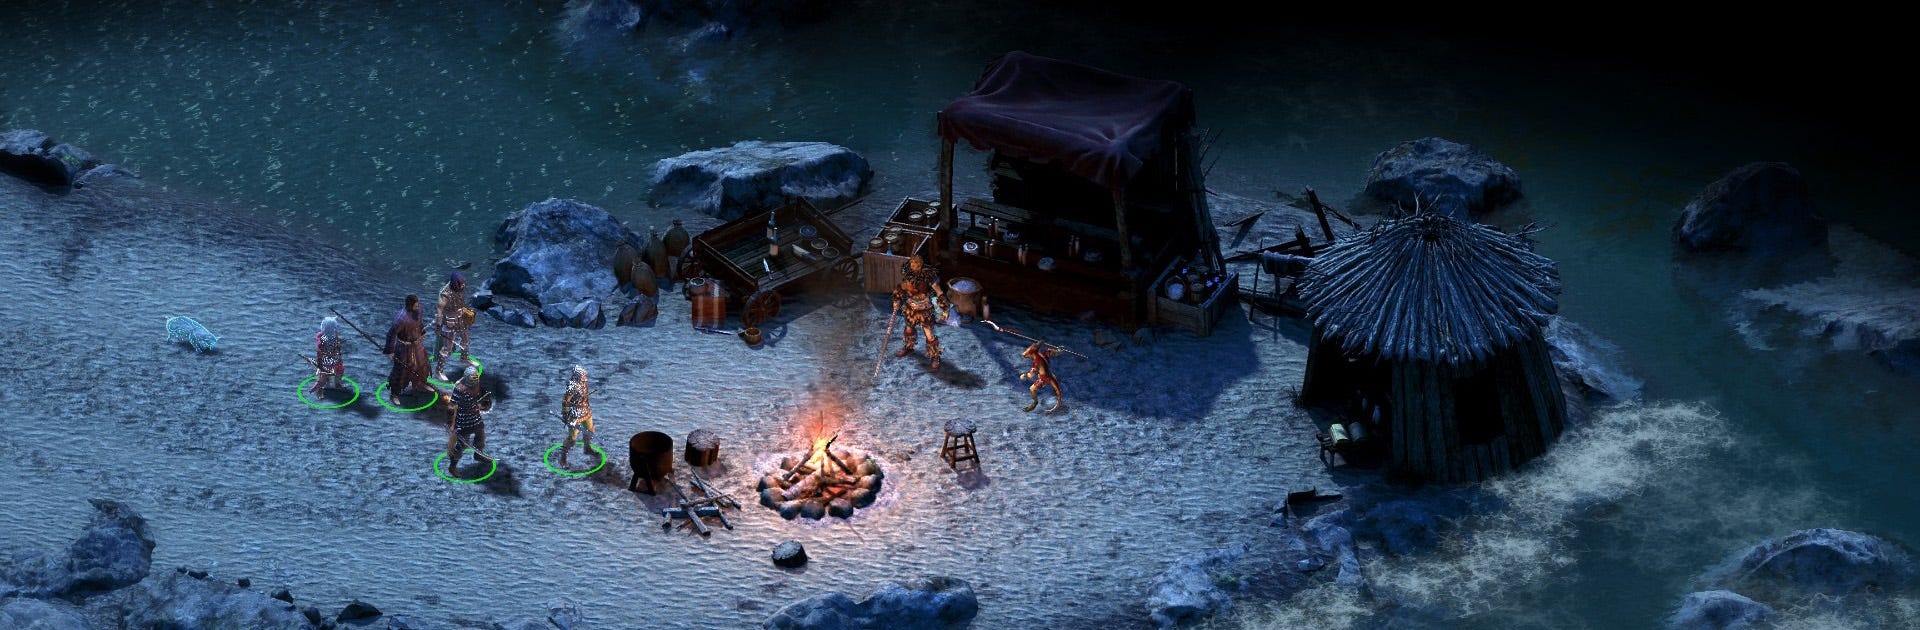
Pillars of Eternity Side Quest Guide - Act II: Copperlane, Defiance Bay, and First Fires
A guide to every side quest featured within Act II of Pillars of Eternity, starting in Defiance Bay, First Fires, and Copperlane.
Pillars of Eternity has many activities. Whether you’re looking to dig deeper into the lore or collect all of the pets, there are numerous things that may distract you from the main quests. If like us, you’re the type of person who likes to get the most from your play time, we suggest taking up your sword and continuing down Side Quest alley for your next adventure.
Before starting these Act II quests, make sure to finish all of the quests from Act I. In addition, players should complete all of the side quests featured in this Act before moving the main story forward. As you progress through the Act II main quest, your actions will change the way this area looks and reacts, which will cut off many of the side quests we’re about to cover.
Still looking for more quality reading? We also have an in-depth review, as well as our Pillars of Eternity character creation tips. Once you've purchased the game and get started, you can also check out our guide to help you level up fast in Pillars of Eternity.
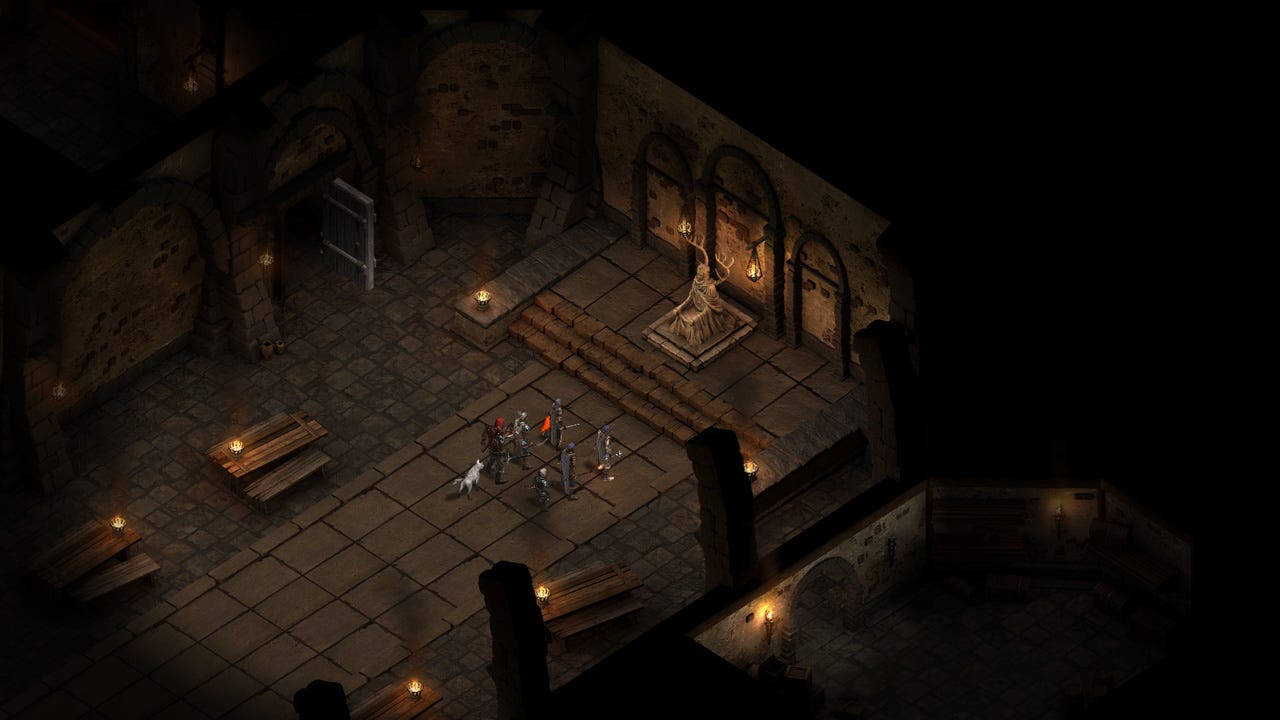
Side Quest: His Old Self
Consoling Kaenra in the Inn
To start this quest, you’ll need to head into the Goose and Fox Inn and speak with the woman sitting near the fireplace. Her hair is a bit shiny, and she should have traces of wounds on her face. Interacting with her will spark a conversation, and you’ll learn that her husband-to-be, Purnisc, is a troublemaker who’s up to no good with his pals at their house. She thinks he is addicted to the drug Svef, and then gives you her engagement ring.
Svef Vendoring in Purnisc’s House
Now it is time to head out of the Inn and move over to the marketplace to find Purnisc’s home. Head inside and you’ll be greeted by some drug addicts cowering in the room, as well as a few well-trained mercenaries. Take a right turn and move into the next room over to find your target, Purnisc. Speak with him and hand over Kaenra’s Ring.
He’s not very happy about the ring, and this will give you a few options to reply. Choose whichever you feel best defines your play style and then continue from there. If you choose to be passionate and fight Purnisc, then he’ll reveal himself to be a wizard named Nyrid. At this point, you can either return to Kaenra and end this quest, or keep going to learn more.
Nyrid the Nefarious
If you choose to keep going, you’ll want to approach the mercenary near the steps and try to move up. He’ll stop you, and you can either wave him off and anger everyone, pay him 100CP to pass, or if you have a resolve of 14 or higher, you can intimidate him with your sword to get by. Once you’re upstairs, head into the bedroom and kill the mercs. From here, you should check their bodies to find a Rusty Bronze Key. Take the key to the door just southeast of your position and unlock it to find a man inside who looks like Purnisc.
The other Purnisc is a fake! Talk with the real one to learn how Nyrid didn’t like being peddled with, and he’ll ask you to kill the wizard and the mercs. Easy enough, right?
Getting Rid of Nyrid or Not
From here it’s your choice. Either kill the wizard and his pals, or tell him that you set the real Purnisc free and make a deal to provide Svef for cheap. Just be aware that doing this will basically kill the real Purnisc.
If you choose to fight Nyrid, take him and his buddies out before heading back upstairs to speak with the real Purnisc. From here, you can either agree to speak to Kaenra, or you can tell him to get over it and move on. Should you choose to help him out, he’ll ask you to bring Kaenra home.
Conclusion
Head back to Kaenra at the Inn and speak with her to let her know what happened. There are quite a couple of outcomes, so we’ll briefly line them up for you.
Killing Purnisc without getting more information and then informing Kaenra that you returned the ring will result in the Amulet of Unwavering Resolve.
Talking to Nyrid and taking his side, then murdering Purnisc and telling Kaenra will result in the Amulet of Unwavering Resolve and a discount on goods from Nyrid.
Killing Nyrid, freeing the real Purnisc, and then getting Kaenra to rejoin him will result in the Amulet of Unwavering Resolve and a discount on goods from Purnisc.
Defeating Nyrid and then freeing Purnisc without getting Kaenra to return will result in the Amulet of Unwavering Resolve.
Make your decision and then complete the quest however you see fit.
Side Quest: A Voice From the Past
Dreams of Rowyna
Head west of the bridge in Copperlane to find an older gentleman named Dalton. Speak with him to find out that he’s been hearing the voice of his long-deceased wife, Rowyna. When asked, agree to check out the Catacombs and search for her.
The Dark Deeds within the Dark Crypts
Once inside the Catacombs, you’ll need to head southeast of the canal bank. Head around the three Black Oozes and approach a set of stairs that lead downward. However, you’ll want to instead explore the circular crypt to find five Skeletons. Defeat them and then walk north to move into Helig of Thein’s Chamber.
Turns out Helig is a necromancer, and once you speak with him he’ll tell you the location of Rowyna, however he’ll want you to first track down Moedred the animancer, then take the magic user’s grimoire from a chest that he’ll provide a key for.
If you aren’t interested in any of this, reply aggressively and then beat Helig and his pals, then skip down to Soul Carrying.
Journey of the Unwarranted
To grab the grimoire, you’ll need to head up to the Sanitarium located within Brackenburry. Head inside, then move to the lower level and sneak into Moedred’s living quarters. Talk to him about Helig and he’ll advise you that the chest mentioned is in fact not real. Turns out Helig just wanted Moedred slain. Either kill the animancer or return to the Catacombs to murder Helig for his lies.
Soul Carrying
If you killed Moedred, simply return to Helig to receive Rowyna’s Amulet.
If you chose to kill Helig you’ll need to murder him and his pals, then pillage their pockets to find the amulet.
Now head back to the surface and find Dalton where you spoke to him before. You have three options to end this quest, and we’ll list them and their rewards below.
If you wish to hold onto the amulet, you will need to lie to Dalton. Either don’t talk to him, or speak to and advise him that you were unable to find anything. You’ll get to keep the Soulward Amulet, and you’ll lose a bit of Reputation in Defiance Bay.
The second choice is to tell Dalton about the amulet and then suggest he break it open to free her. You can of course do this yourself. Going with this choice will reward you with the Dial Ewn Dibita Club, and a minor Reputation boost within Defiance Bay.
Choice number three is to give Dalton the amulet and convince him to hold onto it. You’ll receive the Dial Ewn Dibita Club and a minor Reputation Boost within Defiance Bay.
Make your choice and finish the quest to earn your spoils.
Side Quest: Rogue Knight
Finding the Family Heirloom
To start this quest, you’ll need to head to Copperlane and move northeast into the corner. From here you should enter Expedition Hall, and after a short standoff with a group of adventuring NPCs, you’ll want to continue northeast up the hallway to find the training pit. Speak with Osric and advise him that you’re looking for work. Turns out he has just the job for you, and will ask you to retrieve his family’s breastplate from a knight named Penhelm.
The Investigation of a Subversive Soul
Now you should head over to First Fires, where you’ll want to enter Crucible Keep. After a short chat with the guard, you’ll need to enter the door ahead and move into the archives chamber. You should see several scrolls along the wall, just behind the desk. By pressing TAB, you’ll be able to highlight and grab one called Penhelm’s Affidavit.
With the affidavit in hand, head into the next room over and speak with Penhelm. He won’t be interested in talking about the breastplate, but he’ll promptly advise you that the affidavit about his soul being subversive is indeed fake. You’ll need to prove him wrong by getting Kurren to authenticate it.
The Hunt for Proof
Go ahead and backtrack to Brackenburry, where you’ll need to head southwest into Hadret House. Once inside, locate Kurren by one of the large tables. Show him the affidavit and he’ll admit it’s a forgery, but explain that he’s too busy to do anything about it. He’ll send you scampering off to talk to Commander Clyver about this whole ordeal.
Fight of Knights
Exit Hadret House to run into Penhelm, who is now well aware of your plan to prove his forgery. At this point, you have a few options:
A: Give him the affidavit
B: Murder Penhelm and his pals by choosing another option in conversation.
Winning Favor with the Dozens
Once Penhelm is dead, you should pillage his body and grab the breastplate before heading back to Expedition Hall and turning the quest in to Osric. As with most of these quests, you’ll have a few options.
You can tell him you bought the armor off Penhelm after you disgraced him (only if this occurred). You’ll be rewarded with 2,000 CP and a minor Reputation boost with the Dozens.
You can advise him you had to kill a few people for it, at which point he’ll freak out, tell you to keep the armor, and give you no reward. You’ll also lose Reputation with the Dozens.
The best option, however, is to lie to Osric and tell him that Penhelm let you have the breastplate. This is the best option because it will reward you with 2,000 CP, the Osric’s Family Breastplate, and a minor Reputation Boost with the Dozens.
Side Quest: The Bronze Beneath the Lake
Accepting this quest will lock your faction to the Dozens, and is irreversible.
After completing the Rogue Knight quest, you will have gained enough favor with Osric and can now meet with Wenan at the map table within Admeth’s Den. Here you can ask Wenan about an invitation to the animancy hearings. He will ask you to complete a small task for him, but be aware that completing this quest will remove your ability to help the Crucible Knights or the Doemenels. Once you’ve agreed to it, he’ll ask you to help out a group of fighters called the Giant Slayers. Looks like these brutes are better with their fists than they are at finding treasure, and they’re having a hard time obtaining a set of weapons that Wenan wants. Accept the quest and then head over to Woodend Plains to continue.
Meeting the Giantslayers at Woodend Plains
Once in Woodend Plains, head southeast until you spot the Giantslayers camped along an elevated hill. Move up here and speak with the leader, Byne, to learn that he scouted an area within Stormwall Gorge and found flooded ruins.
There are a couple of options open to you here: either continue your conversation with Byne and retrieve the Engraved Adra Disc without violence, or if you’re just in the mood to murder some thugs, pull out your weapons and defeat the Giantslayers before grabbing the Engraved Adra Disc off Byne’s dead body.
Entering the Ruins via Stormwall Gorge
Stormwall Gorge is just to the west of Woodend Plains. Once you arrive within the new area, continue forward until you spot a group of circular ruins. From here, head south and take out the group of Crucible Knights and the three Pwgra guarding the ruins. Once your foes are defeated, head over to the circular carved stone on the outer end of the stonework. Interact and investigate it to find a strange indentation.
Now you need to insert the Engraved Adra Disc into the indentation and wait for the water to drain away. Once the water has drained away, simply head down the stairwell into the now empty pool.
Find the weapons of Lle a Rhemen
Time to find yourself some weapons. Continue down the stairs through the pool and into the temple. Continue to follow the path until you meet the Widowmaker. This fight is a little tough, but once it’s over, simply continue north into the curved hall to reach the Chamber of Transference.
Take a turn to the east and you’ll find yourself in a very large chamber filled with Crystal Eater Spiderlings and Ivory Spinners, another Widowmaker, and a Crystal Eater. Take out this group of foes and then move to the tunnel along the southeastern wall of the chamber to inspect it. There are two ways to continue from here. The first is to break the webbing so you can walk through, however this will require a skill of +16 Might and will spawn additional Widowmakers. If you don’t have this high of Might on any of your characters or would rather avoid extra combat, simply crawl under the webbing to continue.
Once you’re past the webbing, continue forward and to the southeastern corner to find a Crystal Eater Spider and a Widowmaker. Take them out and then head west into the Artifact Hall to find Nridek the Vithrack. He’s a bit of a skittish lad, so you’ll want to keep conversation calm. You can either let him go with the weapons, which will fail the quest, let him leave without the weapons, or you can attack and murder him.
If you want to complete this quest and get a great weapon, you’ll need to abandon your morals and stick your sword through his heart. Once he’s dead, loot his body for his brain and Soul Vessel before inspecting the weapon rack in this room to find the Ancient Engwithan Weapons and Cladhaliath.
If you chose not to kill him, simply inspect the weapon rack to continue the quest.
Bring the weapons to Wenan
Head back to Expedition Hall and speak with Wenan to hand over the weapons. At this point you can either speak positively with Wenan and side with the Dozens, or you can be a jerk and lose favor with them. Assuming you are doing this quest to side with the Dozens, you’ll need to be positive.
Your reward for this quest is an invitation to the meeting at Ducal Palace. If you chose to murder Nridek, you also get the bonus reward of the weapon Cloudsplitter, however you’ll need to do a little work before it’s completed.
Splitting the Clouds
Like we mentioned earlier, killing Nridek is the best way to go in this quest. It’s aggressive, sure, but it nets you the Soul Vessel and brain you need to complete one of our favorite weapons. Thankfully, Wenan was only looking for the Enwithan Weapons, so that means Cladhaliath is yours to keep. To create Cloudsplitter, you’ll need to grab the necessary supplies, the brain, Soul Vessel, and Cladhaliath. Now head over to the forging chamber within the temple where you killed Nridek.
You’ll need to interact with the stone heads and answer their questions before you’ll be allowed to proceed. It isn’t hard work. Just interact, answer their questions, and then have two of your companions stand on the matching symbols in the other rooms. Make sure your main character has the Soul Vessel and then the symbols should light up under your companions.
Once both of the symbols are activated, head up the stairs within the Transference chamber to trigger a cut scene that will end with dialogue. Once the ritual is complete, you’ll see another short cut scene and then a glowing orb will appear over the podium at the foot of the steps. Interact with the podium to bring up the enchantment window, then place Cladhaliath and the Soul Vessel into the crafting pane. Now hit ENCHANT to complete the deed.
Side Quest: A Two Story Job
You’ll grab this quest automatically after killing a group of thieves and looting the body of a man named Langden. Upon reading the letter, you’ll learn that someone is planning to rob Lord Reymont. Your task, should you choose to accept it, is to tell somebody, but we’re not going to do that yet.
Since you know that the group has been planning this, as well as what they’re trying to steal, you can do it yourself instead. Pillage the house with the dead thieves, then head on over the Reymont Manor and make your way to the first floor. As soon as you enter a servant will approach and advise that you can’t be here, and try to keep you from going further. If you’re Power skill is 13 or higher you can strike her, thus avoiding a fight, or you can simply attack and murder her. So much for chivalry, eh? No matter which way you choose to take out the servant, you’ll have to fight at least two guards on this floor before you can move on.
Now it’s time to find the treasure. Head down the corridor on the first floor until you reach the end. It looks empty, but there’s a hidden door within the wall. To trigger it, you’ll need to head into Scouting mode and then interact with the glowing candlestick to open the door. The treasure you’ve been tasked with stealing is located within the last crate. Grab it and then make your way through the rest of the house to nab as much extra money as you can before leaving.
Now it’s time to tell somebody about that letter, and you know who that’s going to be? The instigator of the theft. With the gem and letter in hand, head over to the Doemenel Family resident and show the letter to the butler at the door to enter. Now find Abrecan Doemenel and return the letter. He’ll ask you to steal the gem anyway, so go ahead and give it to him to earn quite a few CP.
If you don’t want to complete this quest in the above fashion, you can simply take the letter to Lord Raymont and be rewarded with a small amount of CP.
Side Quest: The Changing of the Guard
You’ll receive this quest from Gedmar Doemenel after completing the quest, A Two Story Job. Head up to the second story of the Doemenel Manor and speak with him. Accepting this quest means joining the Doemenel family as your faction, which is an irreversible decision.
The point of this quest is to kill Marshal Wenfeld, one of the representatives of the opposing faction, the Crucible Knights, and frame the third faction, the Dozens, for the crime. It sounds complicated, and it kind of is, but that’s why we’re here. As soon as you head towards the exit of the Doemenel house you’ll be greeted by Abrecan Doemenel, who will ask you not to do as his father asks.
Marshal Wenfeld is inside the Crucible Keep, which just happens to be the stronghold for the Crucible Knights. More importantly, you’ll find him inside the Temple within the eastern area of the fortress. He’s praying and there are patrolling guards, so you’ll want to make sure you sneak in and wait for the opportune moment to strike. Once he’s dead, simply plant the token of the Dozens on the altar and then head back to Gedmar to turn the quest in.
Alternatively, you can follow Abrecan’s request and not plant the Dozens’ token. Gedmar will be angry at first, but eventually his feelings will return to mutual understanding and you’ll still be rewarded the same amount of copper for completing the quest in this fashion.
Side Quest: The Final Act
To begin this quest, head into Hadret House and speak with Kurren. Here you’ll be advised that three people went missing, and Kurren will ask you to look into it. Once you’ve started the quest, it’s time to head over to Brackenbury to speak with the first of three contacts you’ve been given. The first, Elcga, can be found between two stairs after the center fountain as you leave Kurren’s location. Talk to her to find out that one of the missing people, Kendal, was last seen a week ago with a female actor.
Now you need to head over to Copperlane and move towards the amphitheater. Speak with a woman named Lumdala and ask her if she knew Kendal. She’ll tell you she didn’t, and then you’ll need to speak with the next contact.
To find Lora, you’ll want to head to the market area. Speak with her and you’ll find out that she is Kora’s sister, and that Kora, the second missing person, was last seen before a big acting performance. Now returned to Lumdala with this information and she’ll still deny knowing either of them.
Time to head to Ondra’s gift and speak with the third contact, Oly. Head to the Salty Mast brother to the south to find Oly dining in the corner just to the first of the entrance. Speak with him to learn that Lendry, the final missing person, was last seen with a woman named Lumdala.
With all your information in hand, head back to Copperlane’s amphitheater and speak with Lumdala a third time. Tell her that Oly was told by a friend that they were meeting Lumdala, to which she’ll say you don’t have proof. At this point, mention to her that she is connected to three recent disappearances that she claims to have no knowledge of. Clearly this is coincidental. Once you do this, you’ll be approached by an actor named Kadal, who will ask you to meet him at Lumdala’s house. Time to head over that way.
Lumdala’s house is located near the northern gate into Copperlane, and once you meet with Kadal, he’ll provide you with a key to a door behind you. Take the key and open the door to reveal a passage into the catacombs beneath the city. Head down into the tunnels to enter a large underground theater and interact with Kora’s scarf in the middle of the room to trigger a vision. After the vision, Lumdala will emerge from the shadows with a small army of minions.
At this point, you need to return to Hadret House to report your findings, however Lumdala and her present company are a bit of a problem. You can continue from here in two fashions. Either spare her life and receive an additional 1,000CP, or kill Lumdala and her actor pals.
If you kill her, simply return to Kurren and report your findings. However, if you decided to let Lumdala live, you can speak with Lord Gaderman on the way back towards Hadret House. If you agree to let him get off free this time, he’ll reward you 1,000CP and give you Linete’s Signet Ring, and ask you to frame Lord Reymont’s daughter for the crimes. At this point you can return to Kurren and choose how you want to go about it. Just be aware that the different endings will affect how your character is perceived.
Side Quest: Built to Last
You can pick up this quest speaking with Commander Clyver of the Crucible Knights. You’ll find him in the council room in the northernmost part of Crucible Keep. Upon speaking to him, you’ll be asked to gather the research of a woman named Vianna, who was last seen in Scriveners Dormitory. Head over there and speak with Coren to learn that Vianna traveled to Ondra’s Gift to visit a friend.
You’ll find Vianna in an abandoned house in Ondra’s Gift. Once you enter, move further inside the structure to find her in an argument of sorts with Dodwyna of The Dozens. Battle with the would-be assailants, and Vianna will thank you for saving her life and hand over the research The Dozens were trying to steal.
Now head back over to Crucible Keep and turn in the research results to Dunstan in the western area of the fortress to complete this quest and earn a Reputation boost with the Crucible Knights.
Side Quest: Winds of Steel
You can only receive this quest after completing Built to Last, and only if you haven’t lost any good graces with the Crucible Knights by completing other faction-specific quests. Once you’re ready to start, head up to the Crucible Keep and speak with Commander Clyver. After the conversation, it’s time to head out of the city and start off on your next adventure.
First things first, you need to visit a man named Aranroed, who can be found at the pier in Anslog’s Compass. Once you arrive, you need to speak with him. Sadly you won’t get to finish the conversation, as you’ll get attacked by a group of mercenaries led by Padebald. These guys are tough, so you’ll want to end this fight as quickly as possible. We suggest taking out the mage and the archer first, then dealing with Padebald and the rest of the fighters to finish up. After the fight concludes, speak with Aranroed once more and then leave the area.
Time to head back to Crucible Keep, which is located in First Fires. Once you approach the keep, you’ll learn it’s been attacked. Eliminate the steel knights outside one at a time, and then enter the keep. To continue, you’ll need to defeat every steel knight in the area. Don’t worry, as many of them will be weaker thanks to the strong Crucible Knights fighting to defend the keep. Once the area is secure, meet up with Commander Clyver to finish the quest and choose the Crucible Knights as your faction.
Side Quest: Cinders of Faith
Talk to Fyrga in Ducal Palace. You’ll find her in the temple located in the eastern side of the complex. She is concerned about the situation in the city, but she had a vision telling her that there is an item in a temple that can help her deal with it. Your task is to find that place and bring the item to her.
To know what you are looking for, you need to go to Admeth's Den. There, you’ll need to find Wenan and ask him about the cave. He will tell you it is located in the Searing Falls. From here, you need to head into the cave and walk to the very end to meet a large drake known as Cail the Silent. You’re going to have to fight him, so be prepared because it is a rough battle. Cail is also backed by two younger drakes and several Xaurips, so make sure to keep an eye on your endurance bars.
Once the enemies are defeated, grab the Burning Stone from Cail’s body and then loot the other corpses and containers to gather extra treasure. Once you’re done, return to Fryga and choose between the following conversation options for different rewards.
A: To earn a Reputation boost within Defiance Bay as well as receive the Unforgiven Flail, express faith in Fryga.
B: If you don’t care about your Reputation in Defiance Bay but still want to Unforgiven Flail, express a lack of faith in Fryga.
Side Quest: A Farmer’s Plight
If you speak with a fellow named Rumbald in Dyrford Village, you’ll learn that he has an ogre problem. No, we aren’t speaking of a Shrek-sized problem. We’re talking about a herd abducting ogre problem. Turns out that Rumbald wants the troublemaker to pay for his sins, so you’ll need to kill him and return with proof of his demise. In other words, he wants the head of his enemy delivered to his doorstep.
The best way to find the ogre is to speak with Trygil, the owner of the Curriery. By speaking to Trygil, you’ll learn that the ogre is probably living somewhere east of the village. Now head to Dyrford Crossing and into the cave in this area to find the ogre camping out in the southeastern area of the map. Speak with the ogre, whose name is Korgrak, to learn that Rumbald’s pigs were indeed used as his dinner, and then attack him. Once the battle is over, return to Rumbald with Korgrak’s head to end the quest and grab your reward.
Quest Completion Alternatives:
During the conversation with Korgrak, you can make him leave the cave and go elsewhere, where he will not bother the villagers. You can also send Korgrak to your keep as a mercenary, but you’ll need to have a barracks built at Caed Nua. Choosing either of these options will result in you explaining your choice to Rumbald.
Saying the ogre will cause no more trouble will reward you with a Reputation boost in Dyrford Village and you’ll receive 350CP from Trygil, and as well as a special present, a piglet as your pet.
By responding that his behavior is repulsive, you will slightly increase your reputation in Dyrford Village and receive a piglet as your pet. Choosing this option will forfeit your monetary gain.
Telling him to take care of the ogre himself will net you 350CP, the piglet as your pet, and a Reputation decrease in Dyrford Village.
Eventually you can give Rumbald 400 gold so he can buy a new herd. This will allow you to gain a lot of reputation in Dyrford Village, a piglet, as well as a valuable item, the Lead Spitter. This weapon is a very powerful blunderbuss.
Side Quest: Blood Legacy
Speak with one of the guards on the bridge near the windmill to learn that Lord Harond is in Dyrford Village. You’ll also learn that his daughter, Lady Aelys, went missing. First head to the Dragocen Inn and speak with Lord Harond. Sadly he’s a bit busy at first, but once he finishes arguing with the innkeeper you can speak with him to find out that he knows very little. Time to ask around the village.
Information that you’ll need to obtain:
If you have Perception at level 13, Resolution at level 12, Honesty at level 3, or Benevolence at level 2, you can question the innkeeper at the Dracogen Inn to learn that Lady Aelys wanted to escape from her father and that she has recently spoken to Trygil, the local tanner.
Talk to Hedyna so that Aelys spoke to Trygil.
Talking to Winfrith will teach you that Aelys was seen talking to Hedyn, the potions master.
Now it’s time to talk to Trygil, who will advise you that an ogre kidnapped Aelys when he was trying to help her escape. With this information, head over to the ogre’s case in Dyrford Crossing and speak with the ogre. He will advise you that he had nothing to do with the kidnapping, and from here, you can either confront Tygril and fight him, or continue searching for lady Aelys. Now head back to Dyrford Crossing and locate the temple entrance in the center. There are a quite a few ways for you to enter, and we’ll list them below.
A: Use the Hammer and Chisel to make a hole and then use a crowbar to move the statue.
B: If you have 1 Power you can move the statue and enter.
C: If your Mechanics level is high enough, you can simply pick the lock and move inside the temple.
D: If for some reason you aren’t strong enough to do any of the above, you’ll need to find a key, which is conveniently located on a ledge close to the ogre’s cave. Head back over there and look for access to the ledge in the northwestern area of the cave to find the key on a Skaen devotee corpse.
Once inside the temple, head for the crossroads, where you’ll have another three options for entry.
With a high enough Mechanics (level 8), you can enter the temple through the door without a key.
With Mechanics level 7, you can open the door to a complex of rooms, where you will find the key to the temple's main door.
If your Mechanics isn’t at a high enough level, you’ll need to cross the collapsed bridge using a grappling hook.
Once on the opposite side, you’ll want to find the Old Dungeon Key, as it will let you open the main door to the temple. Sadly, it’s locked in a chest in a room full of Skaen Cultists, so you’re in for a bumpy ride.
Once you’ve found the key, head to the very center of the temple and open the door. Now approach the Blood Pool and speak with it. Here you’ll be able to sacrifice a companion in order to pick up the Effigy’s Resentment talent, though we highly suggest NOT sacrificing any companions you’ve found throughout the game. If you want this talent, make sure you only sacrifice a party member you hired at the Inn or barracks.
Now move into the Library and past the ritual spot to find the Crypt’s Master Key on the table. This key will allow entrance to the keep, where you’ll trigger a cut scene and witness some sort of cultist ritual that will end with Priest Wymund telling you that Aelys is not Harond’s daughter, and that she is in fact his niece. What’s more important is that he has a child with her. At this point, you should let Aelys go and return to Harond to finish the quest.
During your conversation you will have several options for ending the quest.
A: Do not tell him what happened. Be nice to him. You will receive 1200CP, the Amulet of Summer Solstice and an increase in Reputation in Dyrford Village and Defiance Bay.
B: Do not tell him what happened. Demand more money and you will receive 1450CP, the Amulet of Summer Solstice and a rise in reputation in Dyrford Village.
C: Tell Harond about the ritual performed on Aelys. Using a Power level of 14, you will gain 750CP and a rise in Reputation in Dyrford Village.
D: If you tell Lord Harond about the ritual and let him walk, you will receive no monetary reward. This will only increase your Reputation in Dyrford Village.
Alternative Solution:
With Mechanics at level 7, you can go to Trygil's Curriery and open the door to an underground area. This way, you will avoid having to defeat dozens of opponents and crossing all of the other locations.
With Mechanics at level 9 you can avoid crossing the temple, as you can simply open the door next to the entrance.
While talking to Wymund, if you allow the Grieving Mother to "enter" Aelys's mind, you will start a fight with Wymund and 4 other Skaen devotees. The fight will be very difficult because each opponent uses magic and has a lot of endurance points. Loot Wymund's corpse to find Wymund's key, which you can use to open the chest in the northern part of the room.
Unfortunately Aelys will not make it. After you return to Lord Harond, who is on the upper floor of the inn, you can do one of the following:
Let him go. You will gain 1200CP and an increase in Reputation in Dyrford Village.
With Power at level 14, you can receive 1450CP and a considerable rise in Reputation in Dyrford Village. Sadly you’ll lose some Reputation in Defiance Bay.
You can kill Lord Harond. You will gain Reputation in Dyrford Village, but lose it in Defiance Bay. You will also gain 1200CP, as well as several items from his corpse.
You will achieve the same effect as above if you break simply Aelys' neck.
Side Quest: The Theorems of Pandgram
Speak with Nedyn to learn that she needs a manuscript in order to continue her work. Sadly, nobody wants to give her access to the document she needs, so you’ll need to go to the Hall of Revealed Mysteries and get it for her.
Once you arrive, you’ll need to find the ancient archives. They are in the main building on the western side. You’re going to need a key to enter, though, so find Grimd to get the key. Upon speaking with Grimd, you’ll learn that she wants you to complete the Parable of Wael Task before she’ll give you the key. If you aren’t interested in completing that quest, you can simply tell her you’re here for Nedwyn, at which point she’ll try to keep you from getting the manuscript. If you don’t mind doing the optional task, simply complete it and then come back to this guide once you’re finished.
Once you have the key, it’s time to head back to the archives and open them up. Now head inside and look for the chest at the very end of the room. It’s trapped, so be careful as you open it. Once you have the book, simply return to Nedyn and turn the quest in.
Side Quest: Far From Home
While speaking with Thristwn in Brackenburry you will discover that he wants you to retrieve a necklace from his partner in crime.
The partner in question is a woman named Serel, and she works at the Salty Mast in Ondra’s Gift. To meet up with her, you’ll need to fork out 1000CP to the owner of the brothel, Maei. She’s located on the ground floor of the building. After you’ve paid her off, it’s time to purchase the amulet from Serel for 6000CP. If you aren’t interested in this, you can kill her for a Reputation loss in Defiance Bay. Either way you go about things, return the medallion to Thristwn to earn 2000CP and complete the quest.
Alternatively, you can let Serel keep the amulet, at which point you’ll be rewarded Serel’s Ring.
Side Quest: Supply and Demand
Speak with the owner of the Salty Mast brothel to learn that bandits have been attacking the area more and more frequently. This is obviously a problem for a hero of your sort, so head over to the monument near Odda’s House. There are three total bandits here, and you’ll need to kill all of them. Once they are dead, loot their bodies for a Rusty Bronze Key, and then access their HQ by visiting the Crumbling House. Inside you’ll find two more bandits as well as their leader. If you want to complete the quest, you’ll need to kill the bandits. Once they are dead, return to the brothel and receive your reward of 600CP and a minor Reputation increase in Defiance Bay.
Side Quest: At All Costs
Head to the Vailian Trading Company and speak with Mestre Verzano to start this quest. This job seems simple enough, as he’ll only ask you to deliver a package to a client of his.
For this, you’ll need to head over to Copperlane and visit the Goose Fox in. The client you’re looking for is a man named Gareth, and you’ll need to speak to him about the package. After the conversation the inn will be stormed by the Doemenels. At this point the leader, Danna, will ask you to return to Verzano and slay him. Leave the inn and travel back to the trading company to speak with Verzano. At this point a cut scene will play and you’ll have to make a choice.
If you side with Verzano he’ll be extremely grateful, but Danna and her gang will storm in and you’ll have to fight them.
If you tell Verzano he’s on his own, Danna and her gang will storm in and you’ll get thrown out of the building. After you re-enter the building will be completely empty, and you can loot it as you please.
If you choose to side with Danna and attack Verzano, you’ll need to kill him with the help of Danna and her thugs. Afterwards she will thank and tell you to talk to her brother, Abrecan. This will give you access to the Doemenel Manor.
Once you’ve completed the quest speak to Pallegina to get her to join your party.
Side Quest: The Wailing Banshee
In the central part of the Docks you will find Niah, who is looking for workers. During a conversation with her, however, you will learn that the actual problem is the haunted lighthouse, which scares all of the workers away. Your task is to clear the lighthouse of the evil spirits.
In order to complete this quest, you will need to go to the Lighthouse, and you can open the door with the key you receive from Niah. The building consists of three levels with several opponents on each floor. Remember, however, that they appear only when you reach a certain spot, or do a certain thing.
On the first level, opponents appearing is determined by the opening of the chest in the northern part of the map. Three Rain Blights will appear that you should be able to deal with without any problems. The second area in which opponents appear is the door to the room with stairs.
On the second level of the Lighthouse, you can avoid getting into a fight if you have Mechanics at level 4 or higher, which will allow you to open a locked door. You can also use 4 lockpicks with Mechanics at level 3. If you can’t complete either one of these requirements, simply continue through the floor and take out the enemies.
On the third floor you’ll find Lilith, and if your perception is high enough, you can make a note of the substance on her hands. Search for clues around the area by entering Scouting mode and collect a journal from the table in the northern side of the room. Read it to learn more about Lilith, who is an apparition waiting for a ship.
Time to report to Niah, who should be near the lighthouse. She tells you that the ship is a pirate vessel, commanded by Maerwith, who is staying in the city at the Charred Barrel Inn.
Maerwith is on the upper floor accompanied by three pirates. Speak to her, and if you play your cards right, Maerwith will go to the lighthouse. Do not suggest that she is afraid, or she will attack you, along with the other pirates.
Head back to the lighthouse and speak with Niah once more to learn that the problem is no longer an issue, and you will gain 1000CP, as well as a Reputation Boost in Defiance Bay.
Are you ready to continue your journey right now? Feel free to hop on over to our amazing guide to all of the side quests in Act III of Pillars of Eternity.