Valheim: Workbench | How to upgrade workbenches and repair tools

When it comes to surviving the brutal Viking purgatory of Valheim, your workbench is the linchpin.
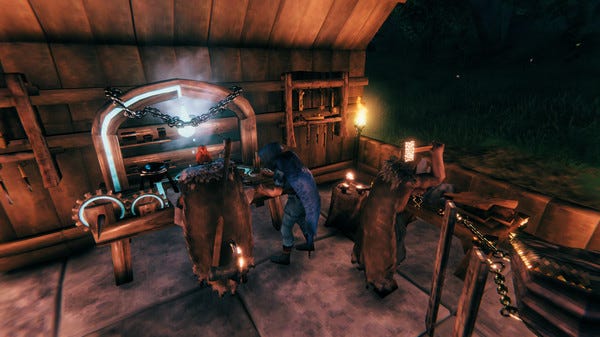
While not as flashy or attention-grabbing as some of the game's weapons, the workbench might actually be your best friend in Valheim (no comment on how this reflects on your potential co-op mates).
You need a workbench in order to build a base or a ship with which to explore other islands. Additionally, one is required to craft most weapons and tools beyond the very basic, as well as to perform essential repairs on them.
In other words, you won't get far without a workbench.
On this page:
- How to build a workbench in Valheim
- How to upgrade your workbench in Valheim
- How tool durability works in Valheim
- How to repair tools in Valheim
How to build a workbench in Valheim
The single most important factor in your ability to repair your tools is your workbench. Having one is basically essential in Valheim. In fact, you'll have to make one before you can even progress very far into the game.
In terms of pure resource cost, workbenches in Valheim practically pay for themselves. All it takes is ten pieces of wood, which you'll almost certainly have picked up while exploring long before you thought about making a workbench.
To build a workbench, interact with the hammer in your inventory and enter the crafting tab. The option to build a workbench is there.

Your first workbench needs to be placed indoors — which in Valheim is counted as an enclosed area with a roof. It's generally a good idea to place your first building, construct a workbench, and then place additional workbenches in all subsequent buildings you make.
Aside from their use for repairing tools, workbenches have a number of other features in Valheim. They can, for instance, be used for crafting new items from raw materials. You can also upgrade your workbench as you unlock new recipes through gameplay.
How to upgrade your workbench in Valheim
As you progress through the game and unlock better crafting recipes, you'll often need a better workbench in order to actually make them.
The way workbench upgrades work in Valheim is actually pretty neat. It goes beyond an abstract idea of better performance, instead adding specific new functions as you discover new materials to work with.

In total, there are five levels of upgrades you can apply to your workbench:
- Level 1: This is the basic workbench you construct to begin with.
- Level 2: Adds a chopping block. This upgrade is unlocked the first time you acquire flint. Ten pieces each of flint and wood are required to perform the upgrade.
- Level 3: Adds a tanning rack. This upgrade is unlocked the first time you kill and loot a deer. You need five deer hides and 20 leather scraps, along with another ten wood and 15 flint, in order to perform the upgrade.
- Level 4: Adds an adze. There are two requirements for unlocking this one: acquiring fine wood from birch trees and crafting bronze. You'll need three pieces of bronze and ten of fine wood to perform the upgrade.
- Level 5: Adds a tool shelf. This upgrade is unlocked when you mine obsidian in the Mountains biome. You need four pieces each of obsidian and iron, as well as ten pieces of fine wood, to perform this final upgrade.
While the nature of the game's progression means that these upgrades will unlock linearly, you aren't technically obliged to apply them in order. Since you'll likely end up with several secondary workbenches in Valheim, you can apply upgrades to them out of sequence.
Each workbench's level will then be determined by the number of upgrades you've applied to it. So, for example, a workbench with the tanning rack and adze upgrades would be Level 3.
How tool durability works in Valheim
Valheim is a self-described "brutal" survival game — and as survival fans are no doubt already well aware, even comparatively gentle examples of the genre feature tool durability as a prominent mechanic.
As soon as you've built them, every use of your precious handmade tools in Valheim causes them to degrade. They become less effective, and eventually they're rendered totally unusable.

Tool degradation is tracked by a bar underneath each tool's icon. A white bar indicates a tool is at full strength, while a red bar means it's completely depleted.
However, tools in Valheim don't actually break — so instead of crafting new ones, you're better off maintaining the ones you have. That's where repairing comes in.
How to repair tools in Valheim
Despite its self-confessed brutality, Valheim does actually do you one massive favour when it comes to repairing tools. Other than the initial set-up cost of building a workbench (plus any upgrades you choose to make to it), there's no additional resource cost for carrying out tool repairs.
To repair a tool, simply interact with a workbench and click the hammer icon on the left. This automatically repairs one of your tools. Somewhat frustratingly, at the time of writing you can't choose which tool to repair: the game picks at random. However, since it doesn't cost you anything, you might as well keep repairing until all your tools are fully maintained.

For more Valheim tips, here's our full guide hub.
Hungry for more Valheim? Check out our guide on how to plant seeds and craft agricultural tools.