Bloodborne: Iosefka's Clinic to Central Yharnam
Bloodborne begins with character creation, and proceeds through a dozen deaths to the first major boss - the Cleric Beast.
Bloodborne starts with a cutscene and moves immediately into character creation. Each Origin (class) has different starting stats. If in doubt, plump for an Origin with high strength and endurance; it makes combat easier initially. You'll be able to customise as you level up, so it's not too intense a commitment at this stage.
Your other choices are purely cosmetic, so go for broke - but remember other players will see you in multiplayer, and you'll be stuck with your face for a good 40 hours. Don't be ashamed of taking a preset face; it's very easy to make a terrible mess with the sliders.
After another short cutscene, you'll awaken in Iosefka's Clinic. Inspect the nearby chair to find a note. There are two doors leading out but only one opens right now, so take it.
Admire the lighting as you head downstairs. there are two Messengers in this room with basic control information. Look for the bubbling spots that transform as you approach.
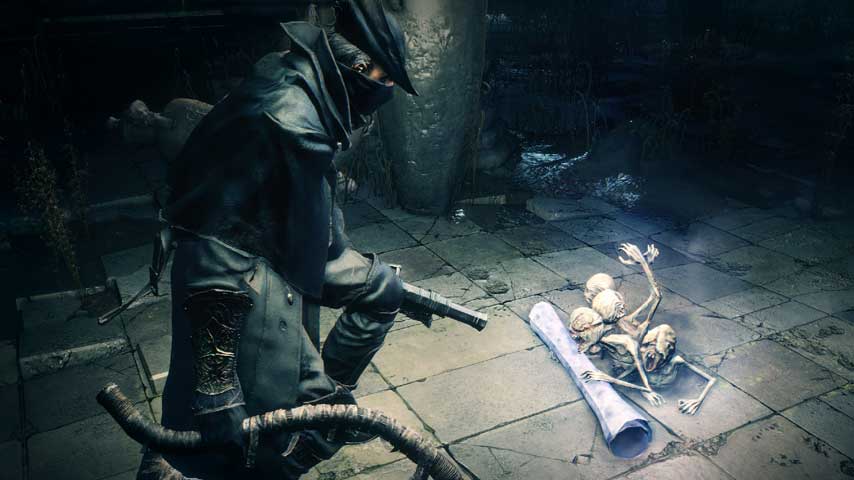
The next room contains a Nether Beast. If it kills you you'll go straight to the hub, Hunter's Dream, to kick off the game proper. We recommend this course, because it's how you obtain your first weapon, but if you want to keep playing with bare hands, skip the next section.

Hunter's Dream
This is your main hub and base of operations, so learn to love it. You're safe from attack here. Note the Tombstone to your right as you start; this is where you warp to gameplay zones.
Run around the yard and read all the messages to learn the game's controls, then head up the set of stairs with three Messengers waiting along them. Here, you can choose your initial melee weapon and firearm, as well as pick up your notebook so you can leave messages of your own.
There's nothing else to do here for now. Equip your new weapons (press Options, then click on the first square of Arms to select and equip your primary weapon. Click on the third square to select and equip your primary firearm) and your notebook (The Quick Items slots are what you want here).
Once you've made your preparations, use the Tombstone to warp back to the 1st Floor Sickroom, just down the stairs from the room where you started. Notice the lantern here; these are checkpoints as well as fast travel nodes.
Iosefka's Clinic
Before you continue on, trot backwards oorm the Lantern to the Clinic door to speak with Iosefka, which is important later on. If you didn't go to Hunter's Dream yet, remember to come back here later.
There are several more tutorial prompts here now, so maybe it's time you faced down that Netherbeast. if it's too hard, sprint past, up the stairs and through the door. You can easily get close and kill it with a swift chain attack while it is still busy with its meal. You should retrieve some lost Blood Echoes for your pains - assuming you succeeded first time.
Before going up the stairs through the next room, look around for a corpse with a Blood Vial (search for the glowing item marker).
Passing through the door you should find yourself in a yard. Search the nearby item glow for 10 Quicksilver bullets, then take the gate that was on your left hand side as you entered this area (you should see the sunset through an arch ahead if you have the right one).

Central Yharnam
Welcome to Central Yarnham. Before tacking the enemy to the right on the upper level, collect the four Blood Vials on the corpse in the balcony below.
Approach the enemy - a Walking Henchman - and then retreat to bring him back into the wider open space to make your battle easier. Wait for his attack, dodge, then attack - dodging back after three strikes to avoid a counter, if he is not already dead.
In the area the Walking Henchman was patrolling, you'll find a body with two Blood Vials and a lever which brings down a ladder. Before you climb, head a little further down this narrow path - very, very slowly.
There are two Agile Henchmen here, sitting down and hard to see. As soon as one stands up, retreat to lure him away. Dodge his attack (it may be one hit or two) then dash in and hit him quickly. One strike should be enough, depending on your stats. If the other baddie is still sitting down, wait for your stamina to refill, then rush and attack him before he can get it together.
Immediately behind where the second Agile Henchman was sitting is a stash six Molotov Cocktails. Now go climb that ladder and light the Lantern.
This is where our two groups - those who died and visited Hunter's Dream and those entering it for the first time via the Central Yharnam lantern - meet up. If this is your first visit to Hunter's Dream, please refer to the section above before proceeding.
Hunter's Dream
On this second visit, the door at the top of the stairs is open, so enter and have a poke around.
In this room you can store items on the shelves; repair and upgrade weapons at the Workshop; and buy items at the Insight Store outside (you don't have any Insight, though). Other functions are still locked at present. There's an NPC you can talk to twice, although there's no reward for it. Finally, and I think you'll agree this is the best bit, you can knock over books.
Take the Tombstone back to central Yarnham when you're feeling rested.

Central Yharnam
Enemies have respawned since you returned from Hunter's Dream, so be wary if you decide to backtrack. There's no reason to at this stage, though.
From the Central Yarnham Lantern, look for a lit window just nearby - there's a reddish lamp near it, and you can hear coughing. You can chat with someone inside here.
Don't take the gate near the coughing window; head around the other side until you reach an item light with eight Pebbles. Pop these in your item quickslots now.
Cross the bridge, being wary of the Agile Henchman who will ambush you towards the far side. Continue on around the corner to the right, to face another Agile Henchman and a Shielded Henchman. You can take out the first guy before he stands up, then face off against the shielded one in comfort. You can damage this enemy slightly through his flimsy shield, but a few strikes will knock it away and give you a real shot at him. Beware of his counter attack, though; it's safer to circle him until you end up behind or he takes a shot (and missies, if you're moving quickly).
Before you go down the stairs, think about your next move. the are below is patrolled by groups of enemies who cna be deadly en masse. Turning left at the bottom brings you to a barricade you can cut through to face a big tough enemy called a Hooded Bruiser. Doing so nets you a Tempering Blood Gemstone weapon upgrade, but you can't use it yet, so is it worth it? The Bruiser will take a Backstrike to bring down, most likely. Decide whether you want to do it now or come back when you're stronger and more experienced. If you do have a go, lure him back to the main path so it's easier to get your Blood Echoes back. Remember all the enemies will have respawned, and one may have stolen your Blood Echoes; look for the glowing eyes.
Whether you kill the Bruiser or not, head in the other direction now - away from the path with the barricade and the levered gate. Kill or avoid any patrols you meet, then take the stairs near the next carriage, pass around the well and find four more Molotov Cocktails. You can talk to the lit door here but it's not especially helpful.
Go back down and move past the carriage to find another set of stairs with a Sitting Henchman, whom you should off. Climb up, then look for an item at the top of some stairs. Approach cautiously; you'll be ambushed by another Henchman from your right. The item is a Blood Stone Shard - a weapons upgrade well worth the trip.
Back on the middle level, head forward for another sneak attack by a Henchman. Pass the next set of stairs leading down - looks nasty down there, doesn't it? - and move along the middle layer further to kill another Henchman. One or more of the Henchmen bellow may aggro on you; running to the far end usually discourages most of them from pursuing, but stay alert in this area. There's a corpse back the way you came with a pile of Quicksilver Bullets on it.
Now it's time to take out those guys downstairs. I recommend luring them back up the middle level a few at a time to begin with, because once you get close to the bonfire you'll face a Hound and several Henchmen with ranged attacks, too. Running back to the stairs will give you breathing room and a chance to heal up. Be wary of running too far back if you left the patrol alive, though!
once everything is dead, collect up all the loot, especially the two Blood Vials on the corpse near the shuddering, growling door (it's safe).
Climb to the upper level on the other side of the bonfire courtyard to take down that blasted riflemen. There's a Coldblood Dew here worth 350 Blood Echoes.
Go through the short arched tunnel and break the barrels outside and to the left to collect a Blood Stone Shard. Continue onwards and collect two Blood Vials near the stairs, and optionally knock at the laughing door to chat with the characters inside.
Go down the stairs and walk slowly around the fountain in a clockwise direction. You'll spot three Crazed Crows. You can kill all three in the lull after their initial attacks, or if you're quick enough, take them all down before they even get airborne. Behind them are two Oil Urns.
Now it's time to take down the Brick Brute making all that noise on the opposite side of this area. As usual, let him get close, dodge his attack, then hit from from the side - or from behind with a charged attack, if you can. Be bold, brave hunter! You can collect a Torch and four more Molotov Cocktails from the door he was wailing on.
Back to the fountain courtyard, and visit the only cardinal point you haven't seen yet. After going up the first flight of stairs, go right to collect another Coldblood Dew at the end of the path. No doubt it had been taunting you.
Back to the second flight of stairs now, and a big mass of Henchmen to face - including one guy with a rifle - and three Hounds.
Once everything's dead, go loot searching. The corpse on the bench has six Blood Vials so if you have more than 14, heal up before collecting. Now head up the stairs on the far side to reach the bridge - beware the two Netherbeasts on the other side. Don't take these on together; they will seriously ruin your day. It's very hard to get them on their own, too; be patient, wait for them to be as far apart as possible, then throw a pebble at the nearest one. A Molotov or gunshot will aggro them both. Turn and sprint down the stairs and hope one follows you.
If the Netherbeasts are too much for you, here's a cheese strategy. Normal walkthrough resumes after the italics.
Run past the Netherbeasts and duck down a set of stairs to the left near a Henchman. Inside, kill the Henchman who followed you, and another two Henchmen lurking in the dark. Turn around and you'll see the Netherbeasts cannot enter the door. Put your weapon in long form, stand well back or to one side, and poke at them till they die. If they leave, wait a few seconds then cautiously poke your head out and lure them back in.
Back up on the Netherbeast's bridge, check the corners of the end opposite where the Netherbeasts were to find a Blood Stone Shard. Head down the stairs directly opposite your approach to the bridge, and smash some refuse on the left to find another Blood Stone Shard. (You have enough to upgrade your weapon now, by the way, so next time you die, maybe make a trip back to Hunter's Dream and get that done if you fancy your current blade.) Opposite this is a corpse with 10 Pebbles, and in the remaining end, another Blood Stone Shard.
Take a quick detour to collect some treasure.
Roll around in the breakable items to reveal an opening to the sewers. There's a narrow ledge to the elft you can use to reach a ladder. Take it, then look carefully right at your feet for another ladder down. Kill the three Hunchbacks, then walk around the borders until you see an item below. Drop down; if you miss, there's a ladder back up at the other end. The item is a Yharnam Hunter attire set.
Drop down, Do not go left, towards the open end; turn right, kill the Giant Rats, and collect the Oil Urn. You can now either climb back up the ladders, or cautiously approach the open end to be ambushed by a tough enemy. Use Countershots to take him out more easily. Just around the corner you'll find a superior Hunter attire set. There's a long fall to the area below, and we'll be back there more safely after the first boss, so for now just take the ladders back up.
Now head down the Netherbeast's bridge in the direction they were guarding. Henchmen may aggro on you and run up from the left side.
Here we reach a junction: you can make your first attempt on the Cleric Beast right now, gaining one Insight for entering the boss arena that is opposite the bridge. This will allow you to level up your character when you return to Hunter's Dream. Alternately, you can continue onwards to unlock new shortcuts and make it easier to get back here. How you proceed is up to you. In either case, you'll be back here eventually, pushing on; now is not the time to actually kill the Cleric Beast.
Head down the stairs on the left, taking out the Henchman waiting for you. Two more are in the dark ahead; lure them out by dashing in and out, then equip your Torch in your spare hand so you can explore. Make sure you know how to switch between your weapon quickslots using the right and left buttons on the D-pad. There's a corpse with a Coldblood Dew in here.
Go down the stairs, taking out a Henchman at the bottom, and then the Wheelchair Blunder hiding under the loft by the item; look for a yellow glow on him. This guy shoots, and it hits hard; don't give him time to fire a shot. You'll find two Pungent Blood Cocktails, which can be used to attract (and distract) beasts. Don't use them now; there are better places.
There's a door in the corner opposite the stairs, with a flight of stairs behind it. A Henchman is waiting for you up there, and a corpse with a Blood Stone Shard. Up the next flight you'll finally reach the gate you need to open to get back to the Lantern quickly - won't that be nicer than going all the way around?
Backtrack to the Netherbeasts' bridge (if you took a side trip to Hunter's Dream, remember they'll be back - gahhh) and look for a Brick Brute and three more Crazed Crows. This is an excellent place to toss out a Molotov; it makes this tricky battle much easier.
It is time, Hunter: let us face the Cleric Beast.