Until Dawn Chapter 9 Walkthrough: Save the Wolf, Mike and Ashley
Save your new wolf friend from certain death in Until Dawn on PS4.
In this Until Dawn Chapter 9 Walkthrough we’ll guide you through and make sure you save your new wolf friend and avoid getting Ashley killed.
For more help, head on over to our Until Dawn Walkthrough and Guide. It’s got all you need to survive the night with as many characters alive as possible.
Until Dawn Chapter 9 will leave you with two hours until dawn. You’ll start the chapter playing as Mike, and you can expect a decent amount of plot reveals and action. We’ll be doing our best to guide you through without spoiling things, but in order to save you we sometimes have to give you information that we’d rather leave out.
Lock the door behind you and start making your way through the creepy corridor. Feel free to explore the path to the left at the far end, but ultimately you’ll be heading to the right and up the stairs. Once you’re there you need to circle the banister and look for a Death Totem laying on the ground. Feel free to study it before moving on.
Leave the room, cross the hall, and then pass through the door to the left of the Exit sign. The room locked up with a chain-link door on the left has some useful items, so start by walking to the opposite end of the room (with the clock over the door at your back) and going up the stairs on your left. You can then move along the balcony and drop into the room we mentioned. You definitely want to grab and light the torch, as well as the sawed off shotgun. We hate to spoil anything, but you aren’t making through this chapter without these items. Actually, now that we think about it, it might be impossible to progress without them.
Open the door from the inside and go to the opposite end of the room. One door will allow you to briefly walk outside, but just before you do we suggest grabbing the Danger Totem to the left of the hole in the wall. After you snatch that up you can walk outside and view the Makeshift Grave. There’s nothing else to do out in the snow, so head back into the main room.
Before you go any further it would be wise to go to the center of the room and view the Cigar Box clue sitting on top of the barrel. You can then shoot open the door to the left of the one that led you outside, passing through and making friends with the wolf again. This friendly encounter is a result of you not kicking him during your first meeting.
Walk through the yard and into the building, turning left and opening the door using the lever. You can go left or right at the bottom of the stairs, and we chose left to search for clues. We found the Doctor’s Report sitting on a table, but other than that there wasn’t much going on. When you leave the room you can view the dead wolf hanging from the barred door, but your ultimate path is to the right.
The path forward will be fairly linear for a moment, but when you see a sign that says B-Wing you want to head in the opposite direction. This will take you past an old gurney and wheelchair, and the door to the left will lead you to the Old Film Reel. Leave the room and take another left, and then follow the hall until it delivers you into another room.
Look inside the desk drawer for the Case Study Dossier, flipping through the pages to get an idea of what you’re up against. When you’re done with that you’ll want to approach the wall with the light leaking through and bust it open, and then shoot open the cell door to gain access. Grab the note off the corpse’s knee and then you can backtrack to the B-Wing sign.
Follow the wolf until you find yourself outside in the yard, but don’t bother shooting the box that falls to your left. You’ll be busy shooting the Wendigo on your right. This will kick off the part of the chapter where things intensify, and when given the option we chose to Go Left rather than Straight Ahead. Once you’re through, be prepared to respond to the quick time event and push the cabinet in front of the door. Be sure to stay on your toes and respond to one more a few seconds later.
The good times will keep rolling with another Wendigo encounter (plus many more after it), and this time players will have to hold their controllers perfectly still to avoid being spotted. Make sure to snag the bottle when the QTE pops up, and then make your escape and start moving toward the Psychiatric Ward. Yeah, that sounds like a great plan.
The next section is going to see many different Wendigo enemies try and grab onto you through the bars of the cells. Get ready to hit the button that pops up on-screen, but don’t bother shooting them with your shotgun. If you recall, the stranger stated that killing them wasn’t ideal, and since they are locked up there is really no reason to. Just avoid them and keep moving.
Eventually you’ll find yourself trapped in a caged corridor with a Wendigo, and here is where we decided to kill one… Well, two. It was them or us, so we followed the QTE prompts to knock over the barrel, kick it in their direction, and then light them up.
Save Mike and the Wolf in Until Dawn Chapter 9
You’ll get a small break after you get through the door and lock it, and the path forward is once again very linear. Just keep moving and looking for collectibles (we didn’t find any), and then get ready for more action when you reach a long hallway. This time you’ll be shooting open the door in front of you, and once on the other side you’ll have to choose between Barricade and Escape. There a pros and cons to each choice.
If you choose Escape Mike will live, but the wolf will die. If you choose Barricade Mike and the Wolf can live. You can choose whatever you’d like, but we went with Escape and Mike lived, which for us was more important than saving the wolf as we didn’t know if Mike would survive by choosing Barricade. This is a Butterfly Effect moment, and it specifically mentions that we were unable to save our friend.
The next section isn’t fun, but we managed to get through it. You’ll end up trapped in a room with two more Wendigo, and we started off by shooting the one that came at us, and then the one on the other side of the room. There were four barrels in the room we could have shot to light them both up, but we felt this was too risky. The game will leave you with a cliffhanger, but follow our lead and trust that the right decision was made.
You’ll end up back with the other group and in control of Ashley. Walk forward until you see a sneaky alcove on the left, marked by a turned over barrel. You can grab the Danger Totem that sits on the ground there before getting back on the path.
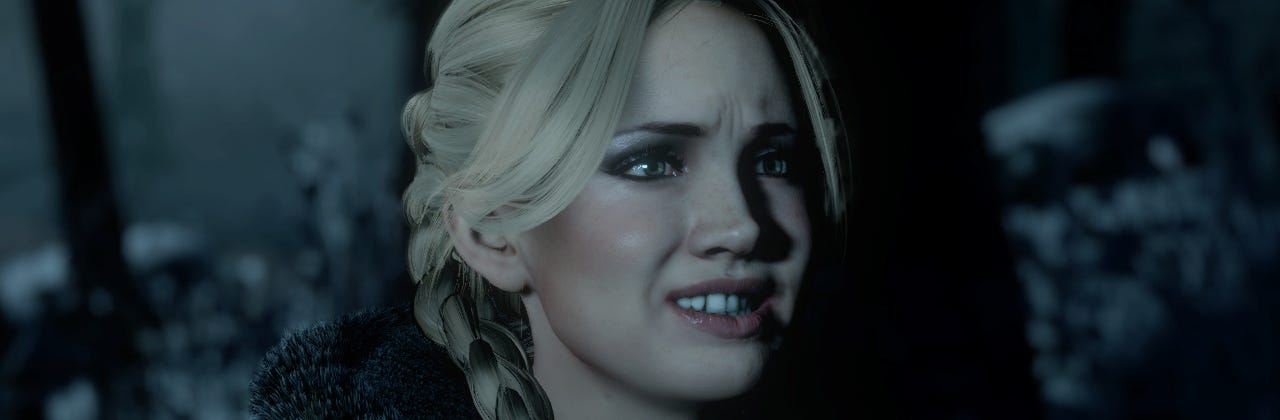
Avoid Getting Ashley Killed in Until Dawn Chapter 9
It won’t be long until your only move will be to interact with a grate on the floor, allowing Emily, Sam and Ashley to drop down in. Ashley will become separated from the other two, and eventually you will have to choose between Investigate Voice and Rejoin Group. Under no circumstance should you Investigate Voice, unless you are determined to get Ashley killed. Your only play here if you’re trying to help her survive is to Rejoin Group. Do so, and then move forward a bit to trigger another cutscene.
When the scene concludes you’ll be playing as Sam, and the goal here is to climb up the rock wall. It really shouldn’t matter how you choose to proceed, just make sure that you’re hitting all the QTE prompts when they come up.
When you reach the top of the wall there are two paths, but we’re not entirely sure what is down one of them. The path we didn’t explore was directly to the right of the rock wall, as we accidentally chose Drop Down thinking it was just a collectible. Since we can’t tell you what’s to the right, investigate at your own risk. We have no reason to believe Sam can die here, so collectible hunters might want to give in to their curiosity. Eventually, however, you’ll have to (probably) follow our lead and Drop Down.
Move Sam along the winding path until you reach a chain-link door. She can’t pull it open, but luckily there is a handy shovel there that you can use. Follow the prompts to get through the door, and then turn to your left to open a larger metal one.
We have it on good authority that if Mike had shot one of the four barrels in his last Wendigo encounter you would have met him here as Sam. If you’re seeing him now, that’s why. If you’ve followed our path, Sam is alone still.
Go outside and take the path to the right. There is also a path to the left, and there’s a good chance that you could spot a collectible there. Again, we can’t be sure, so investigate that at your own risk. If you survive, meet back up with us on the right path, moving forward until you reach another fork in the road. We took the right fork and crossed the bridge, shoulder charging the iron gate to bust it open.
Make your way to the front door and lift the wooden beam so that you can open it. You’ll find Mike battling a Wendigo here. If he had killed the Wendigo with the fire you’d have already met him, but since you didn’t Mike is still in the middle of battle. Rush forward and smack that Wendigo in the head with your shovel, and then do it again. This should take you to the end of the chapter.
Continue with Until Dawn: Chapter 10.