Until Dawn Chapter 5 Walkthrough: Save Sam and Matt
Make all the right moves to save Sam in Until Dawn on PS4.

In this Until Dawn Chapter 5 Walkthrough we’ll help you save Sam and Matt, so follow our guide closely. Don’t slip up or else characters will start to die!
For more help, head on over to our Until Dawn Walkthrough and Guide. It’s got all you need to survive the night with as many characters alive as possible.
Until Dawn Chapter 5 will leave you with six hours until dawn, and you’ll begin by playing as Mike. Walk forward until you reach the stone fountain in the middle of the yard and turn left. Head for the main gate and snag the Fortune Totem at its base. From here you can turn and move toward the building. We think you can enter through the main door, but we opted to take the sneaky way in on the left. Just make sure to read the Condemned sign to beside the door, although we’re not certain it’s even a clue.
Once you’re inside you need to go through the door with the chain link fence around it. You’ll find a barrel to the left that you can push into place, allowing Mike to jump up onto the catwalk. Follow it until you can climb up through the hole in the floor. You should now be in the area that the front door would have led you to, but we’re not sure how that entrance would have impacted your game. Stick with us on this one.
You should be in the lobby and see a Chapel sign leading to some double doors. You can approach and take a look inside, but you won’t be able to pass through just yet. Backtrack the way you came and look in one of the corners to find the Administration Notes. They should be near the front door.
Speaking of the front door, we actually opened this and went back outside, but weren’t able to find anything new or of value. You can skip that part and just stay inside and out of the cold.
When you’re ready, head for the Admin door, but take a moment to view the Blackwood Pines Sanatorium sign if you’d like. From here you can go into the Admin door and take a left, opening the safe to find the Clocking-In Cards. In another part of this same room you should find the Broken Camera sitting on top of a filing cabinet.
Pass through the door with the Morgue sign and avoid the left turn for now. Just go straight and turn into the room on the right, locating the Old Newspaper clue on the desk. You can then leave the room and get back to following the Morgue signs, ducking into another room on the right just before the stairs. It’s here that you’ll find the Medical Notes.
Follow the stairs down to the lower level and open the door where the bird is sitting on the table. You should now have the machete in your possession, which you’re definitely going to need. From here you want to go left, following the room as it hooks to the right. Here you’ll see a wheelchair with a door next to it (you might also hear a growling wolf), and inside is the Telegram About Miners on a table. After that you can back out and take the other door. You’ll know you’re where we are if a fake (we hope) skeleton appears on the left side of your screen.
Move along until you reach the Operating Room. You’ll see a hand in the middle, and as much as we’d like to tell you not to interact with it, we’re not sure that’s an option. If you can avoid messing with this hand, do so and just keep moving. If you have no choice but to interact with it, make sure you choose the Amputate Fingers option and not Open Bear Trap. While the latter sounds more appealing, it will ruin your machete, and according to the Butterfly Effect page, you need this.
Further on and in the next room you can view the Strange Skull clue on the shelf to the right. After that you can go to the left side of the room and start opening up the cabinets with the bodies. One of these is going to have a Death Certificate, one a Name Tag, and the other one will have the Chapel Security Pass that will allow you to open up the other door in the room.
After going through the door, head up the stairs to trigger a mid-chapter cutscene, and when it’s over you’ll need to drop back down to the first floor foyer. You can now open the Chapel doors with your card and head inside. Essentially you just ran around an entire building and potentially lost a couple of fingers so you could open a door. Seems reasonable.
When you open the door you are going to be confronted by a wolf, and if you recall the Guidance Totem from a chapter or so ago, it advised to do nothing. Do not attack this animal, instead opting to let the timer just run out.
Move to the right side of the room and grab the coat that’s hanging from the cage, and then the revolver that’s sitting just inside of there. You can now move on to the next room (or cage) and check out the Clippings Wall.
Before you leave this room there is one more task you should do. It’s one that we missed, and it might just help you out later on. Go to the middle of the room and up the set of three steps. You’ll see a chest on the ground, and after opening it can grab a bone. Take that bone and give it to the wolf by the door. We didn’t do this, and instead walked around with a bone in our hand like a fool.
Make your way to the door with the Exit sign to its left and shoot it open with your revolver. The next hallway is empty, and so is the outside of the room that it leads to. Just head down the large set of stairs and turn to your right. From this point on you can just follow the path and interact when required to finish up your time with Mike. If you followed our steps he should be alive, and if you did as we said rather than what we did, he should have all of his fingers.
Things will shift and you’ll find yourself in control of Matt. Feel free to wander around outside a bit and see if there’s anything worth picking up, but eventually you’ll need to grab the Axe that’s stuck in the door of the cable car station. From here you can choose to Help Emily Through or Smash Door. We went with the former, but she wasn’t having it and we had to smash through the door anyway.
How to Save Matt in Until Dawn
Head inside and make your way up the set of three steps and into the room. You can then view the map on the wall, as well as the graffiti that is also close by. This will trigger a conversation with Emily, and we chose Disagree instead of Agree. This is a Butterfly Effect moment, and we’re 99 percent certain that by choosing the same option as us, you can save Matt’s life. If you choose to agree with Emily, you might be sealing Matt’s fate, and not in a good way.
Leave the room and follow Emily to the ladder. You can basically just follow the on-screen prompts and shimmy around the wall, but players will want to keep a keen eye out for a quick time event. We suggest not missing this one.
As soon as your feet are back on the ground you’ll have a Guidance Totem in front of you that shows Emily giving Matt a flare gun. Keep that in mind as you move along the path, but keep an eye out for a Fortune Totem that isn’t too much further up the path.
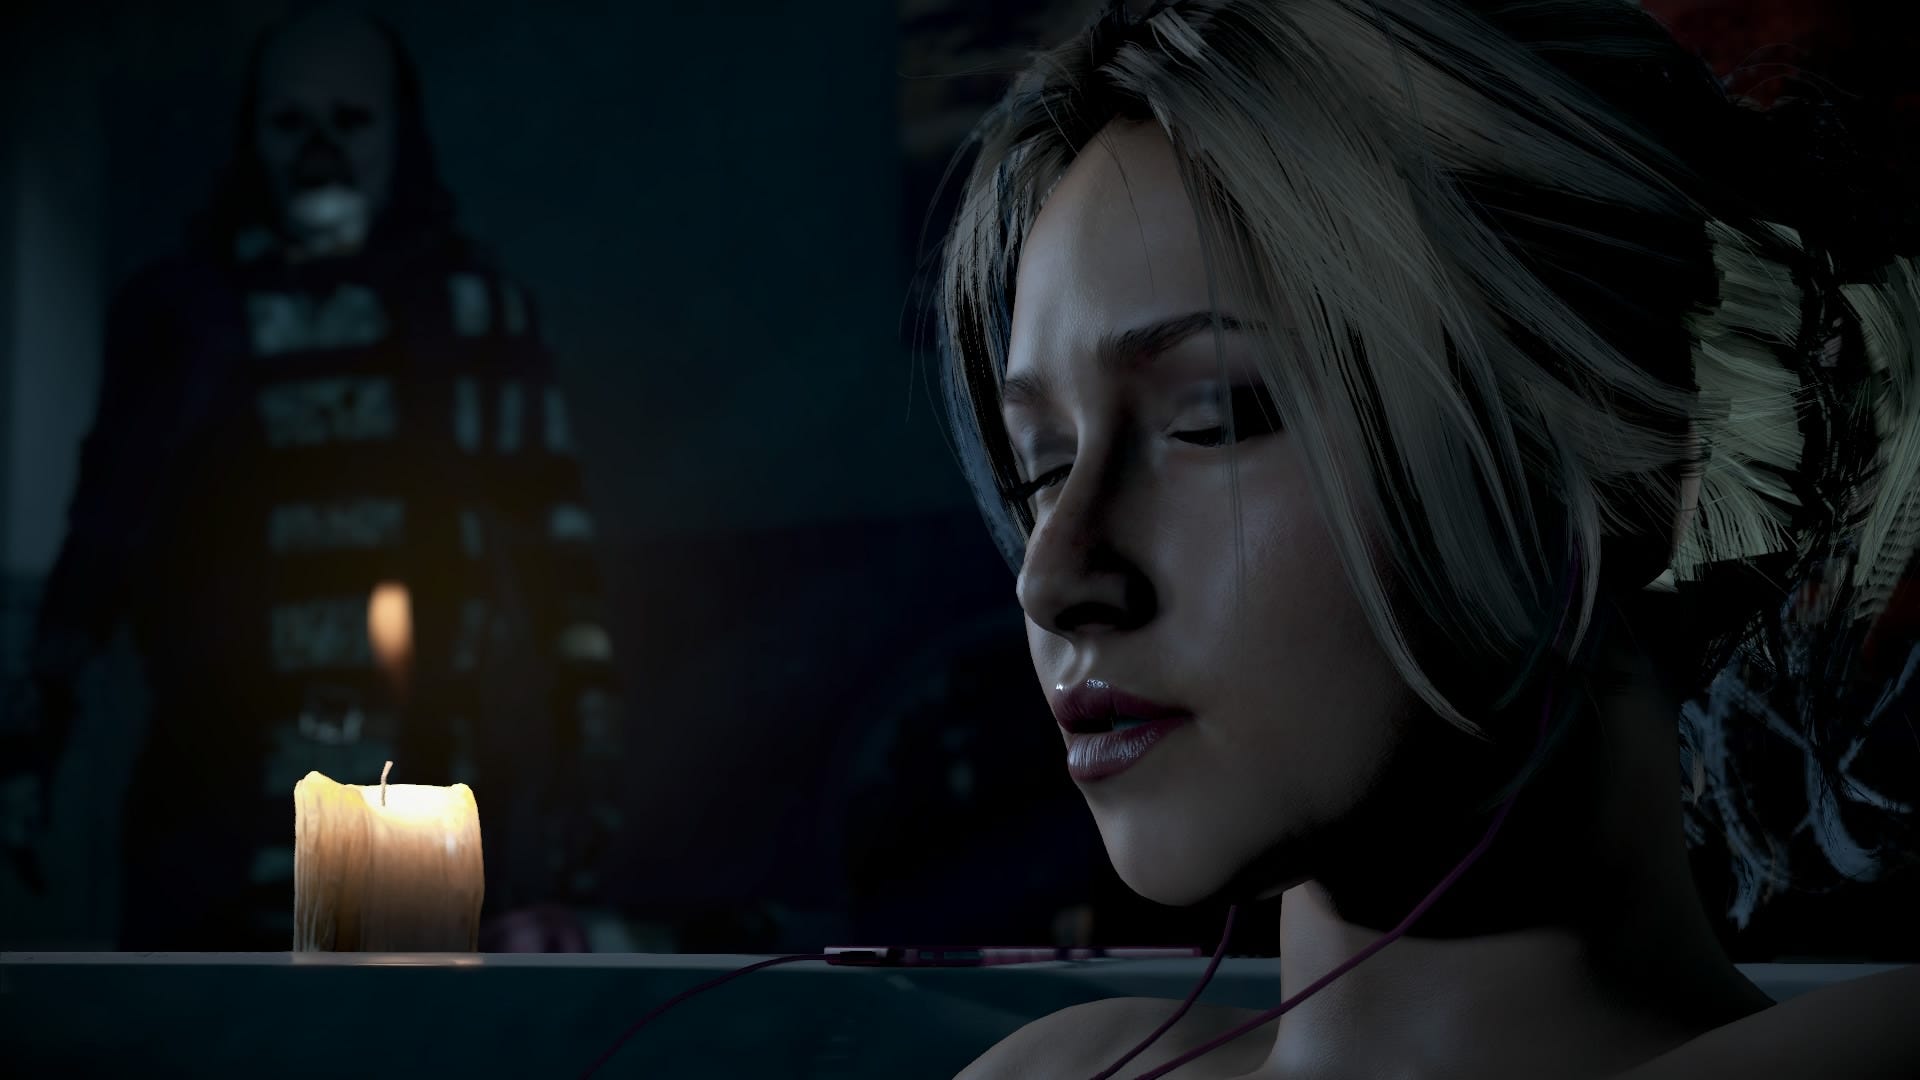
How to Save Sam in Until Dawn Chapter 5
You’ll soon switch over to Sam, and we can confirm that we made all the right moves here, so you’re going to want to do exactly as we did to get the best possible outcome.
Start by following the balloons that will lead you to the Cinema Room. This is where things will get nuts, and you first choice will be whether to Throw Vase or Run. We decided to go on the offensive and throw some glass at this psycho. When you get to the bed, go with Jump instead of Hide, and then be ready to respond to a quick time event as you run down the stairs.
When you get to the same room that Chris and Ashley found the dollhouse, opt for Run rather than Hide once again, leading you to a door with no handle. Your choice here is going to be Pull rather than Force, and once you are on the other side of the door you have to quickly lock it and close the shutter using the on-screen prompts.
Bust through the next door and you’ll find yourself in a long hallway. Quickly move through this until you get the option to Run or Hide again, but this time you are going to hide. Be ready to respond to the two quick time events on your screen, first turning off your flashlight and then holding your controller perfectly still so that the psycho doesn’t find you. If you are able to do exactly as we have outlined here and don’t miss any of the prompts, you will survive the psycho and find yourself back in Dr. Hill’s office to end the chapter.
\Continue with Until Dawn: Chapter 6.