Horizon Forbidden West Relic Ruin Ornaments: All Relic Ruin Codes and Solutions
Pre-machine museums.

Horizon Forbidden West is home to troves of old-world treasure, hidden in the dilapidated and decaying bones of a fallen society. Inside these Relic Ruins, your goal is to solve a difficult puzzle and collect a mysterious “Ornament” which can be used later on your adventure.
Solving all of the Relic Ruins and finding all of the Ornaments wins you a unique and useful prize you can’t get anywhere else - so they’re worth searching for. That’s easier said than done however, since a lot of the puzzles are pretty hard, and there are eight Relic Ruins in total to face.
Now updated with images for every puzzle solution, here's how to get every Ornament in all of the Horizon Forbidden West Relic Ruins.

To ease the archaeological endeavour, we’ve collected all of Horizon Forbidden West’s Relic Ruin locations and their puzzle solutions in one place for when you get stuck. .
- The Daunt Relic Ruin Puzzle and Door Code
- No Man's Land Relic Ruin Puzzle and Door Code
- The Dry Yearn Relic Ruin Puzzle and Door Code
- Restless Weald Relic Ruin Puzzle and Door Code
- The Stillsands Relic Ruin Puzzle and Door Code
- Runner's Wild Relic Ruin Puzzle and Door Code
- The Long Coast Relic Ruin Puzzle and Door Code
- Isle of Spires Relic Ruin Puzzle and Door Code
- Hidden Ember Relic Ruin Puzzle and Door Code
- Where do I take the Ornaments and what do I get for completing all the Relic Ruins?
Horizon Forbidden West The Daunt Relic Ruin Puzzle and Door Code
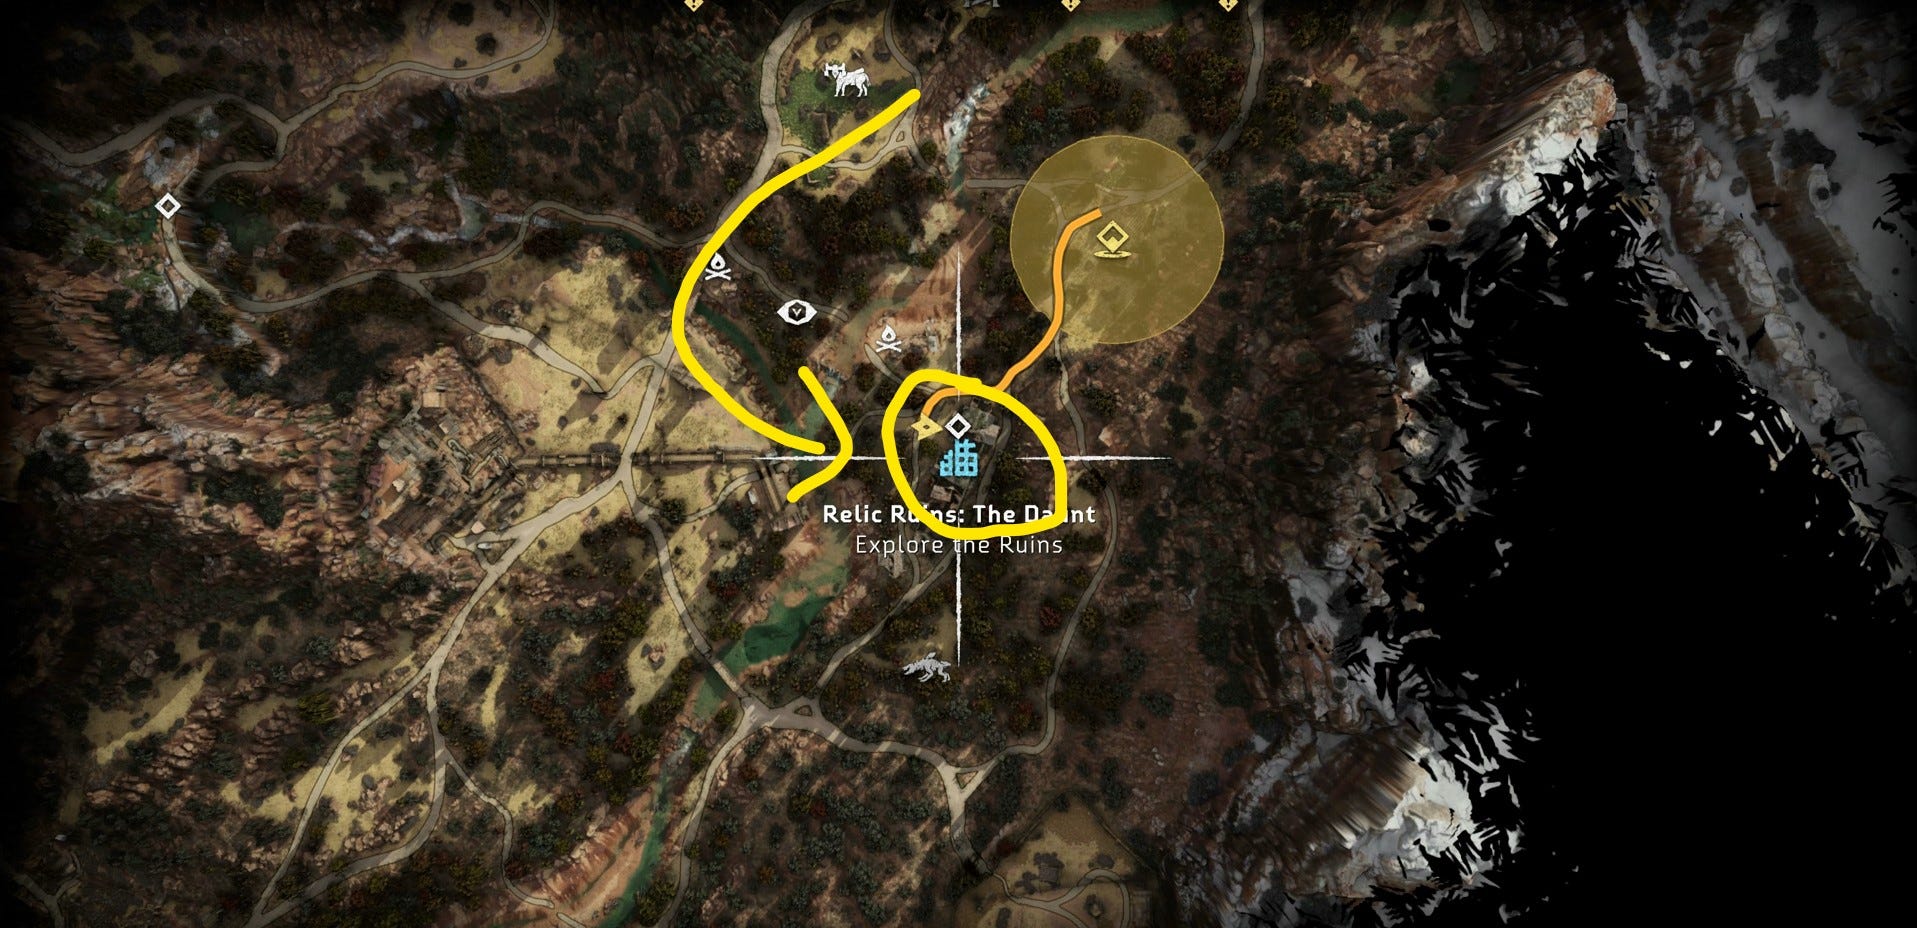
The Daunt Relic Ruin is found just to the south of Chainscrape in Horizon Forbidden West.
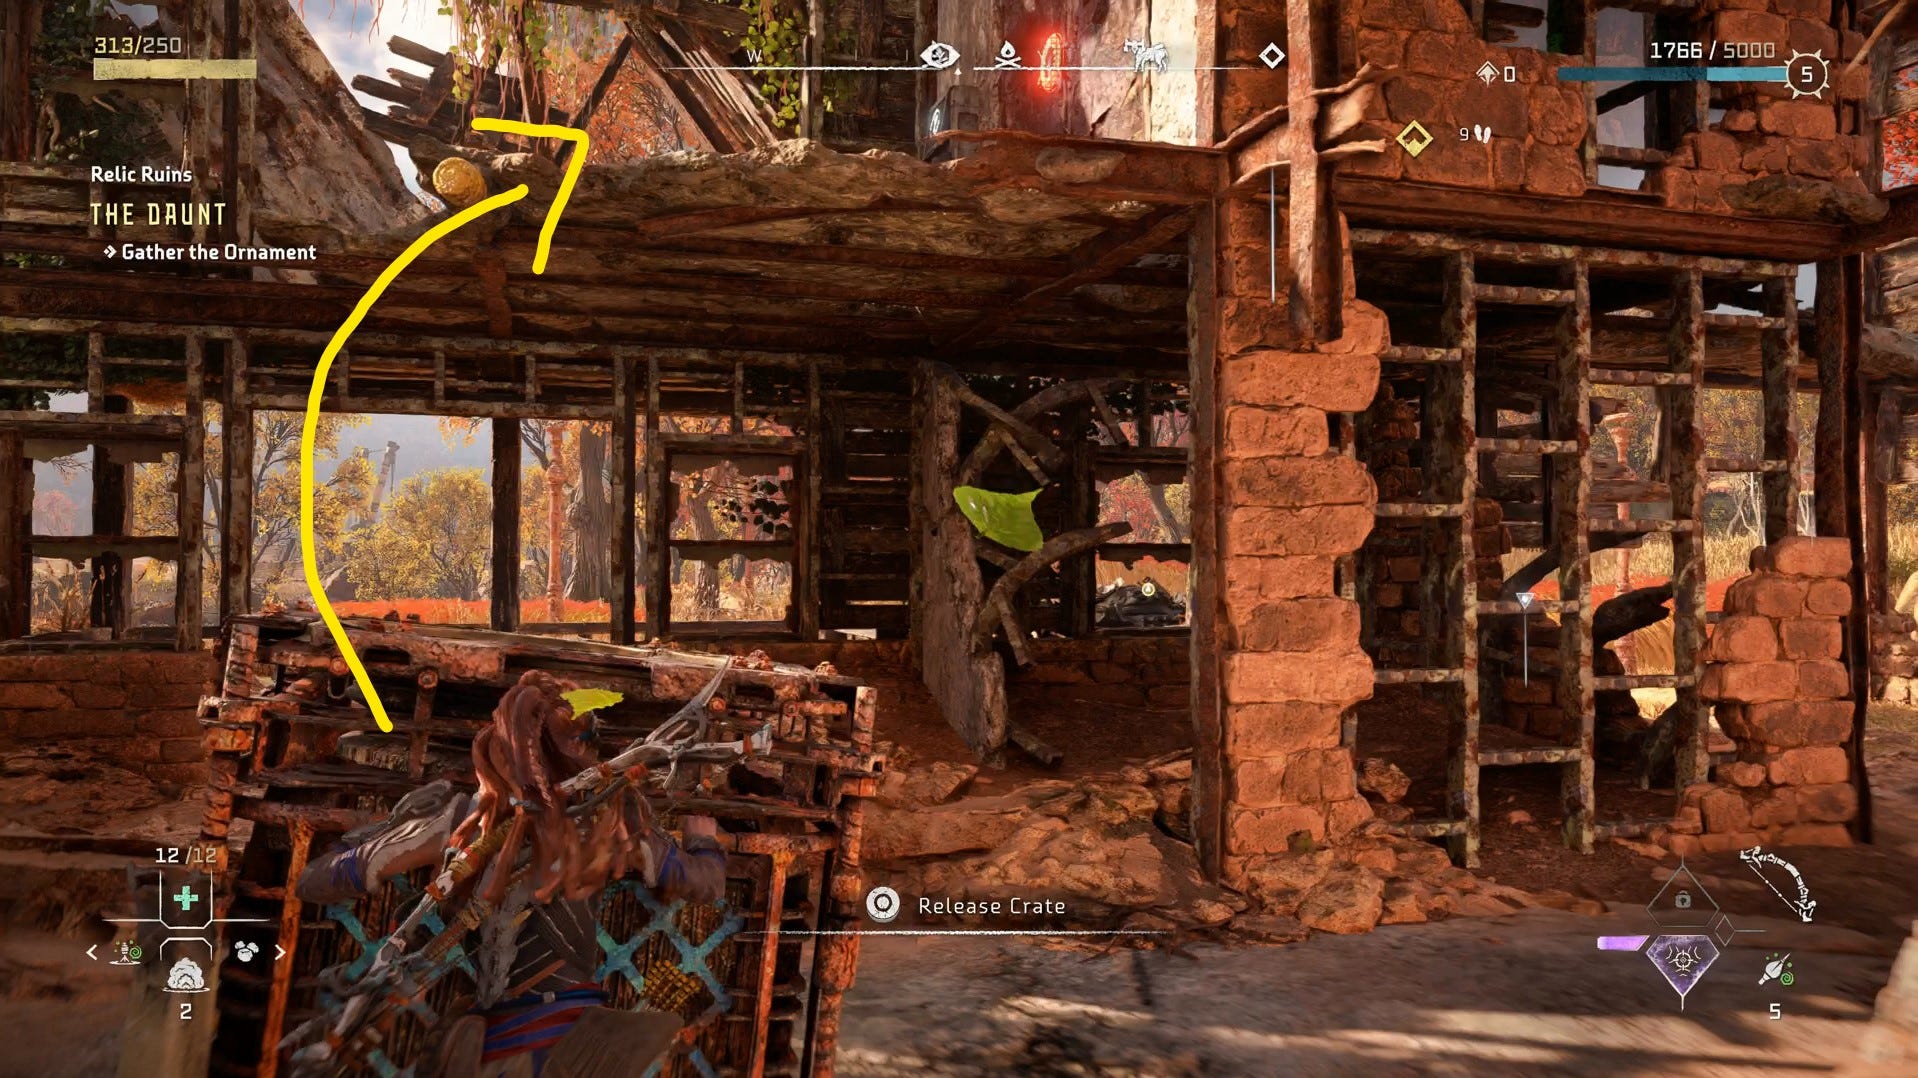
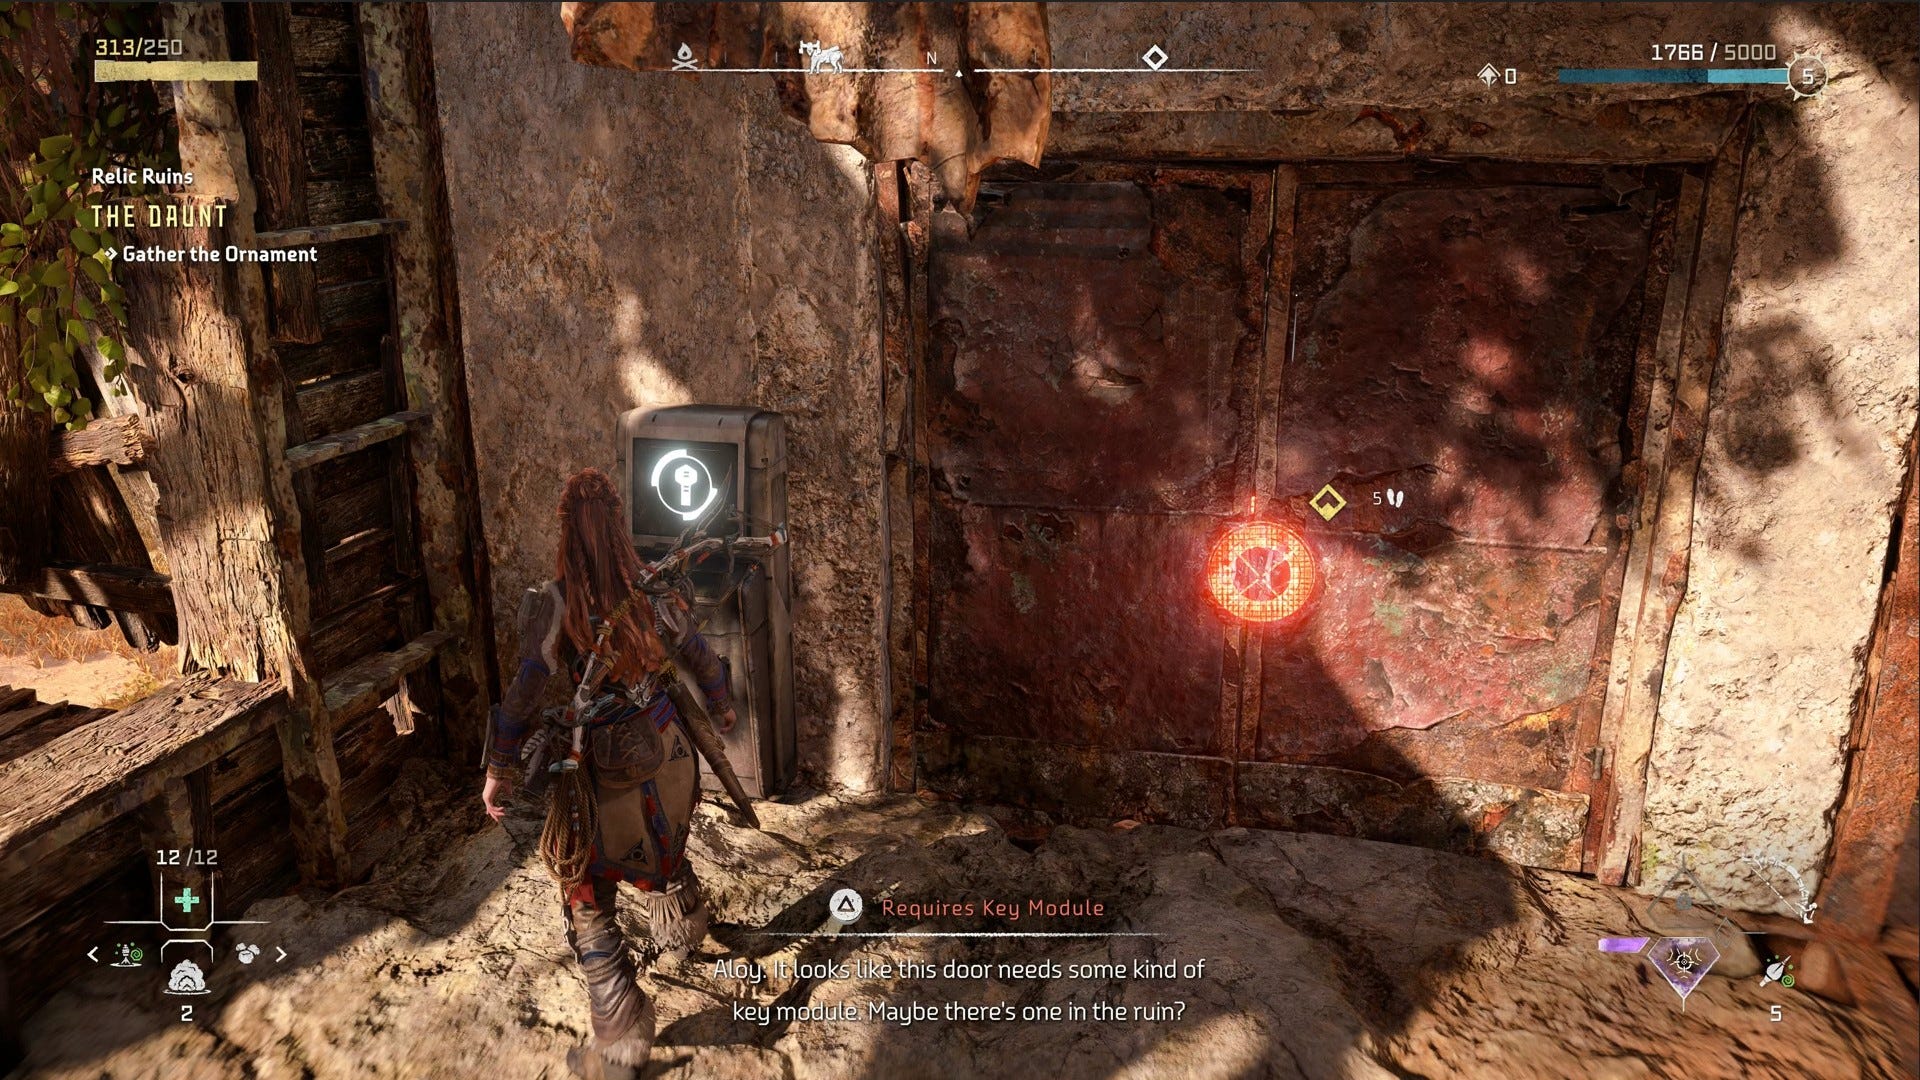
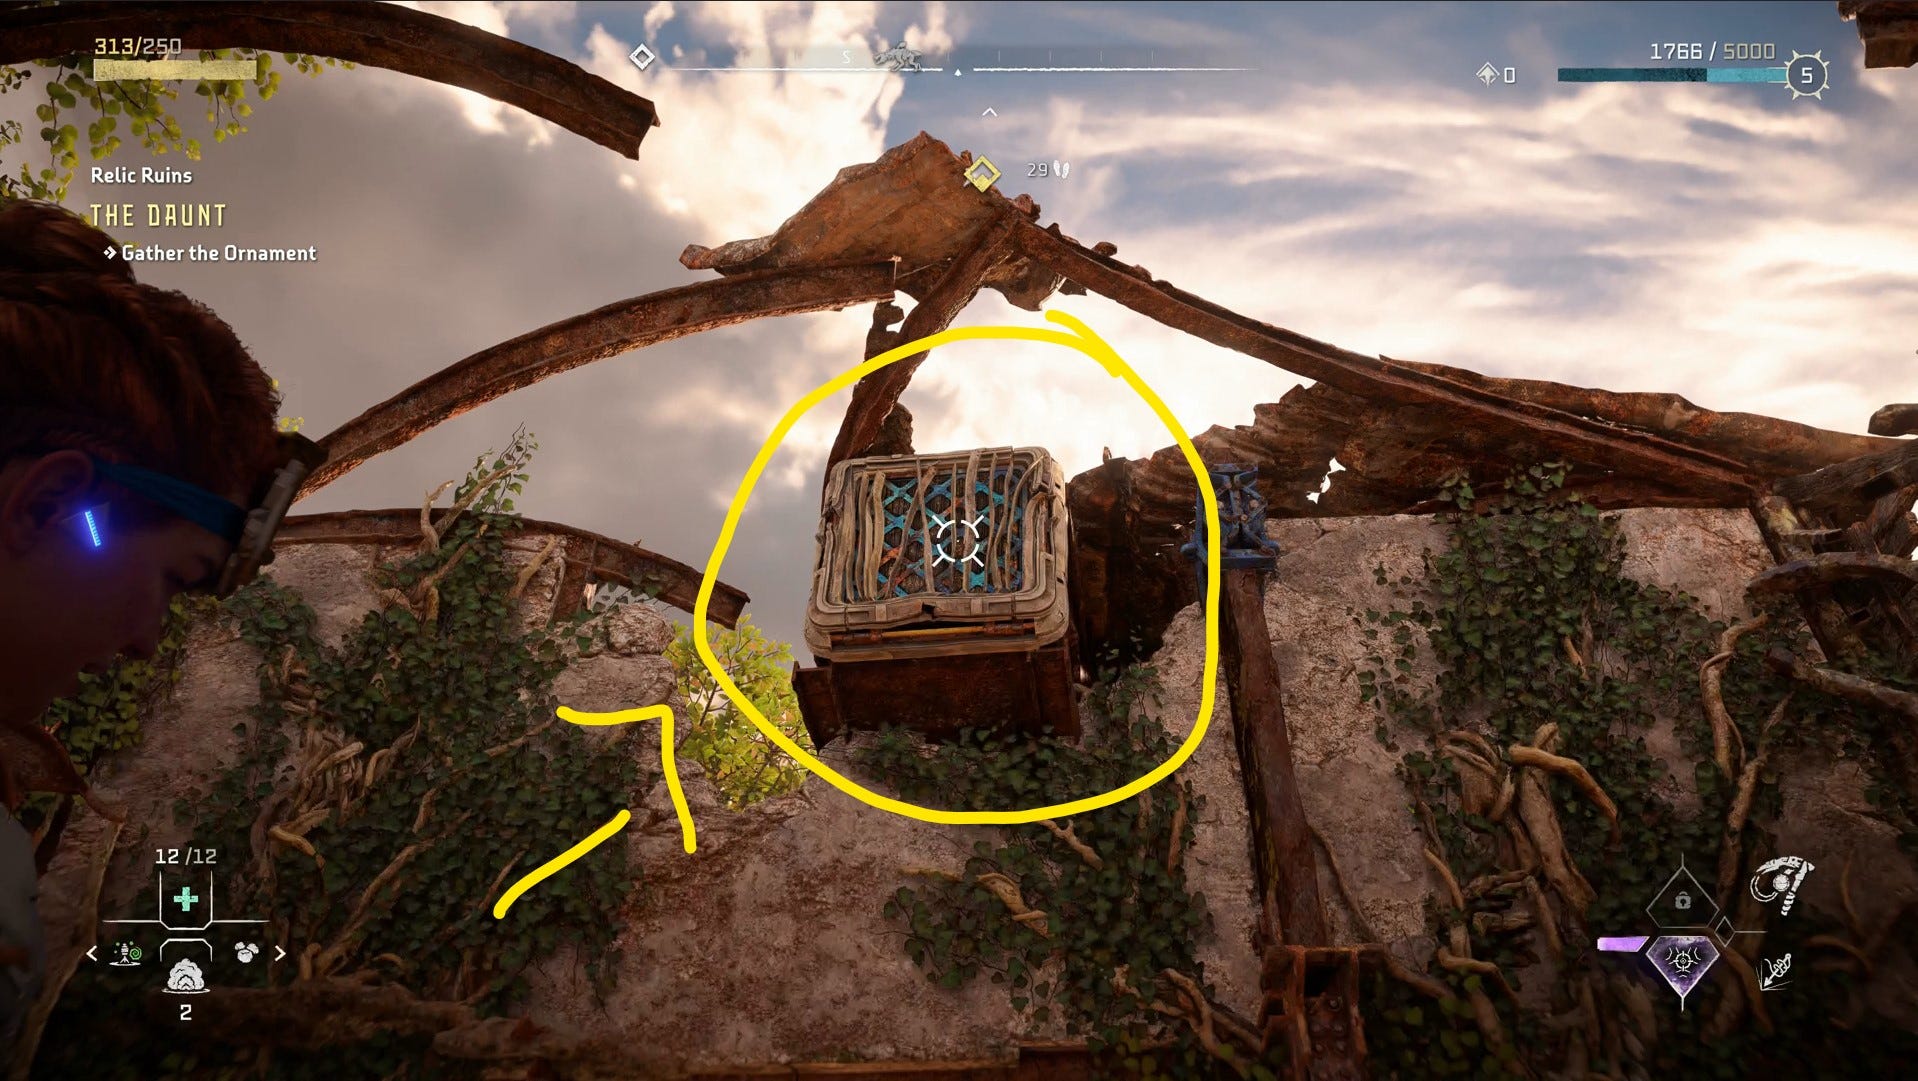
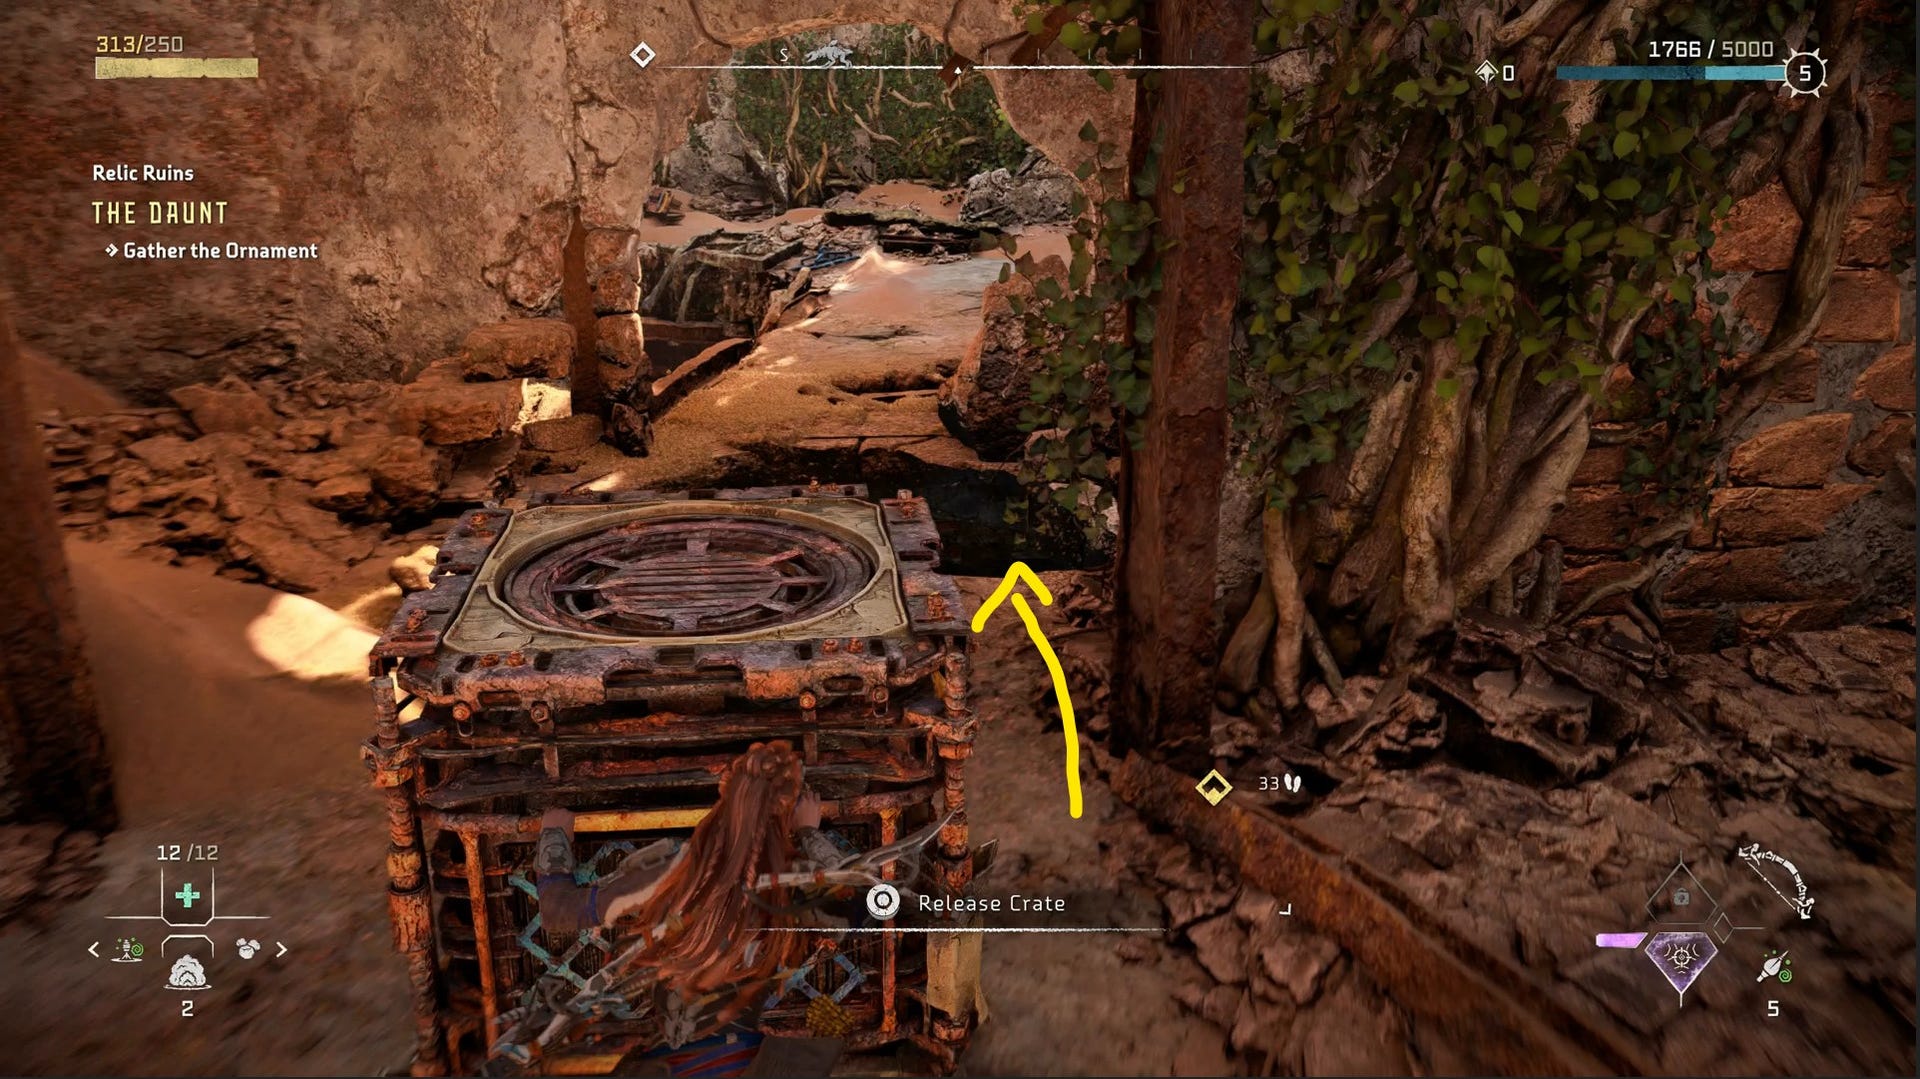
As you enter from the western side, look up and to your left, open your Focus and you'll see your objective - a locked door and the Ornament inside.
Grab the crate in front of you and place it close to the locked door.
Use it to jump up and you will see the door needs a key module.
Go out onto the broken balcony next to you, turn left, and jump across the gap in front of you.
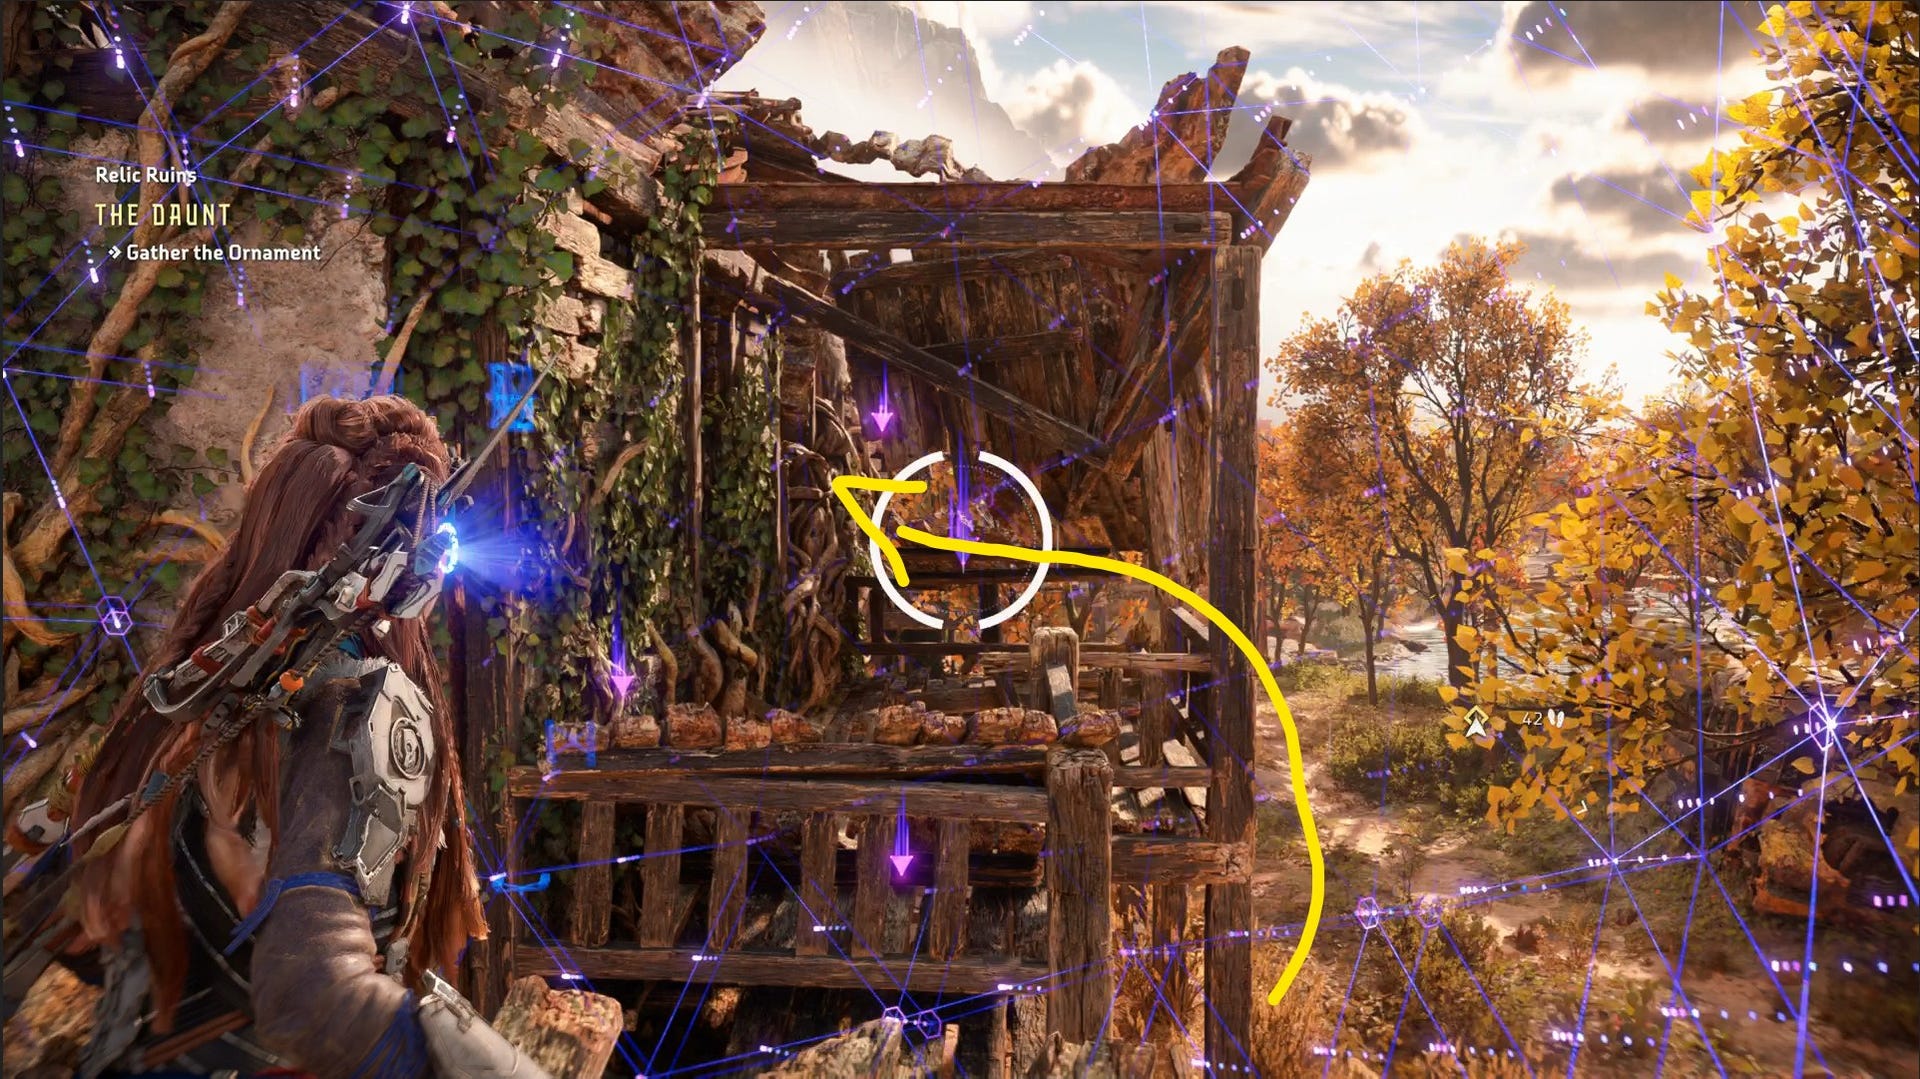
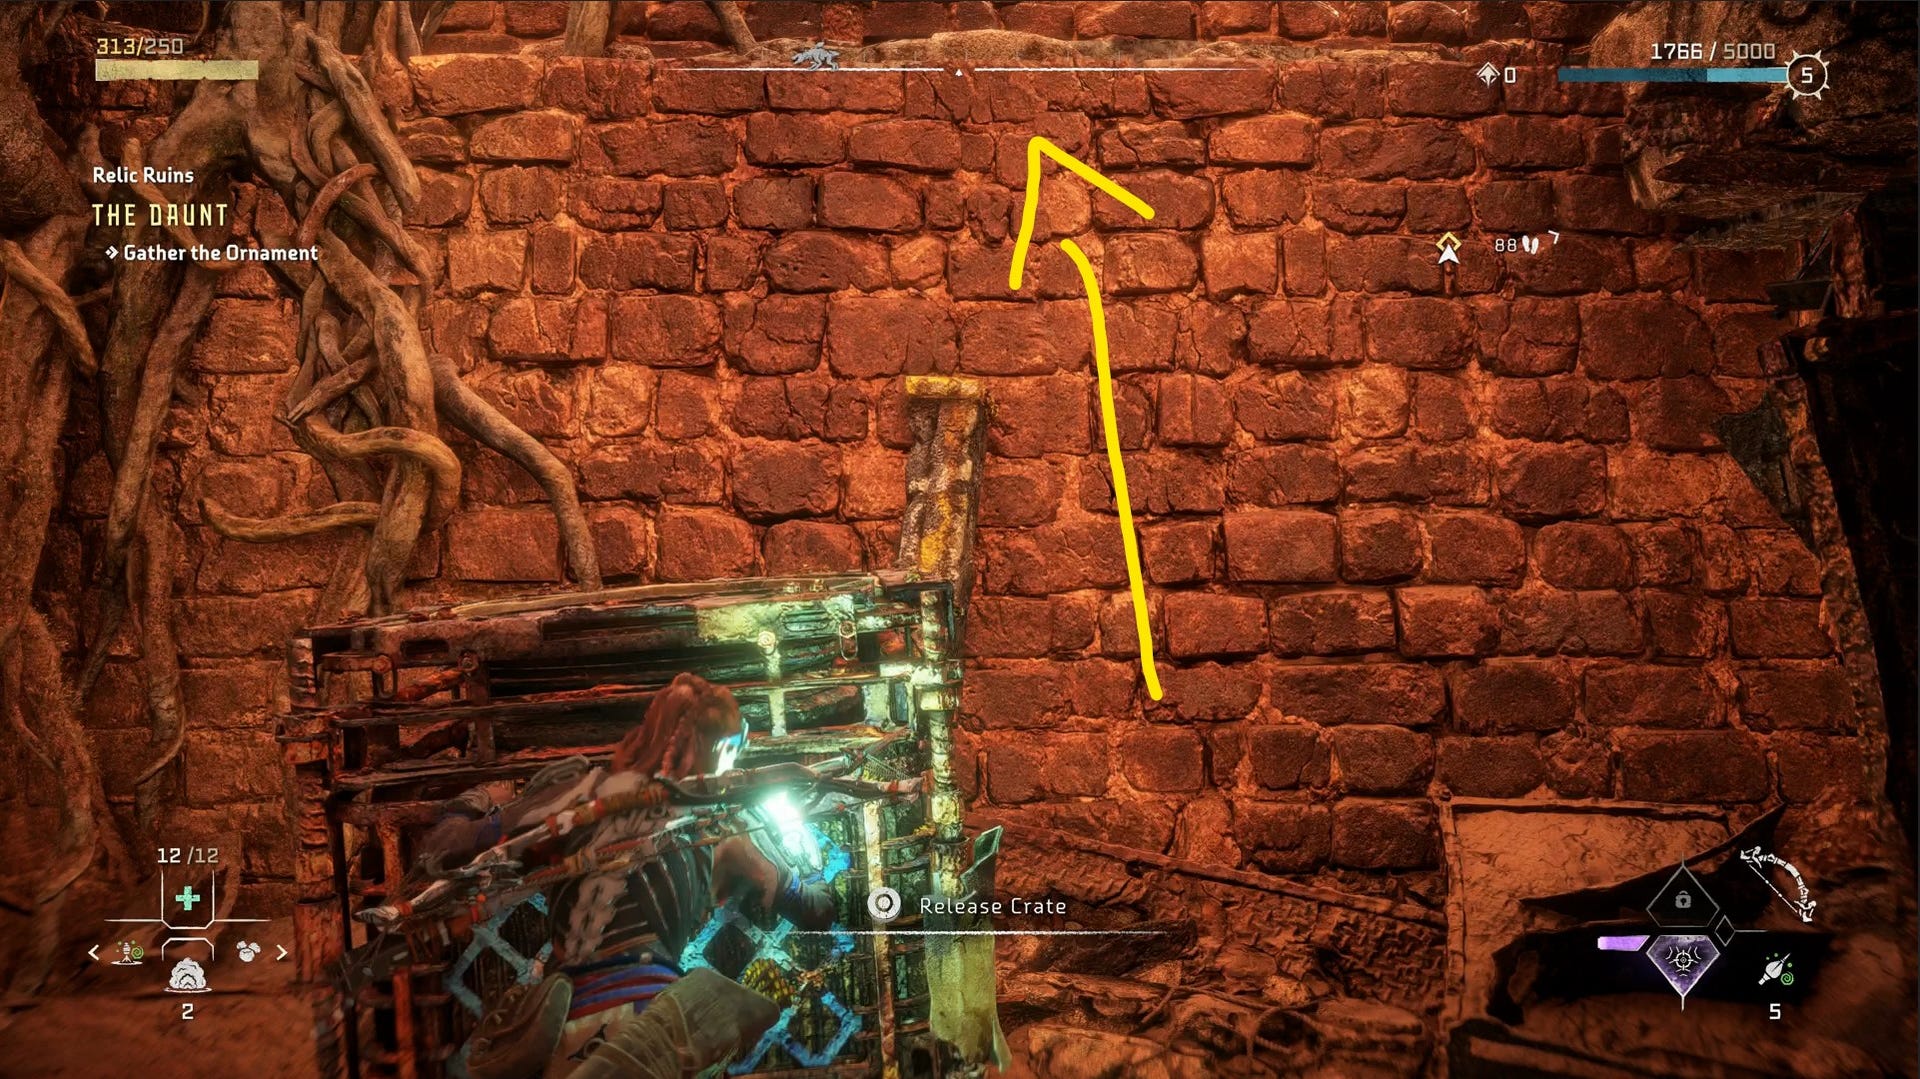
Follow the balcony and look to the left. Then use your Pullcaster to drag the crate you can see onto the ground below you.
Jump down and scan the note on the side. This gives you the door code.
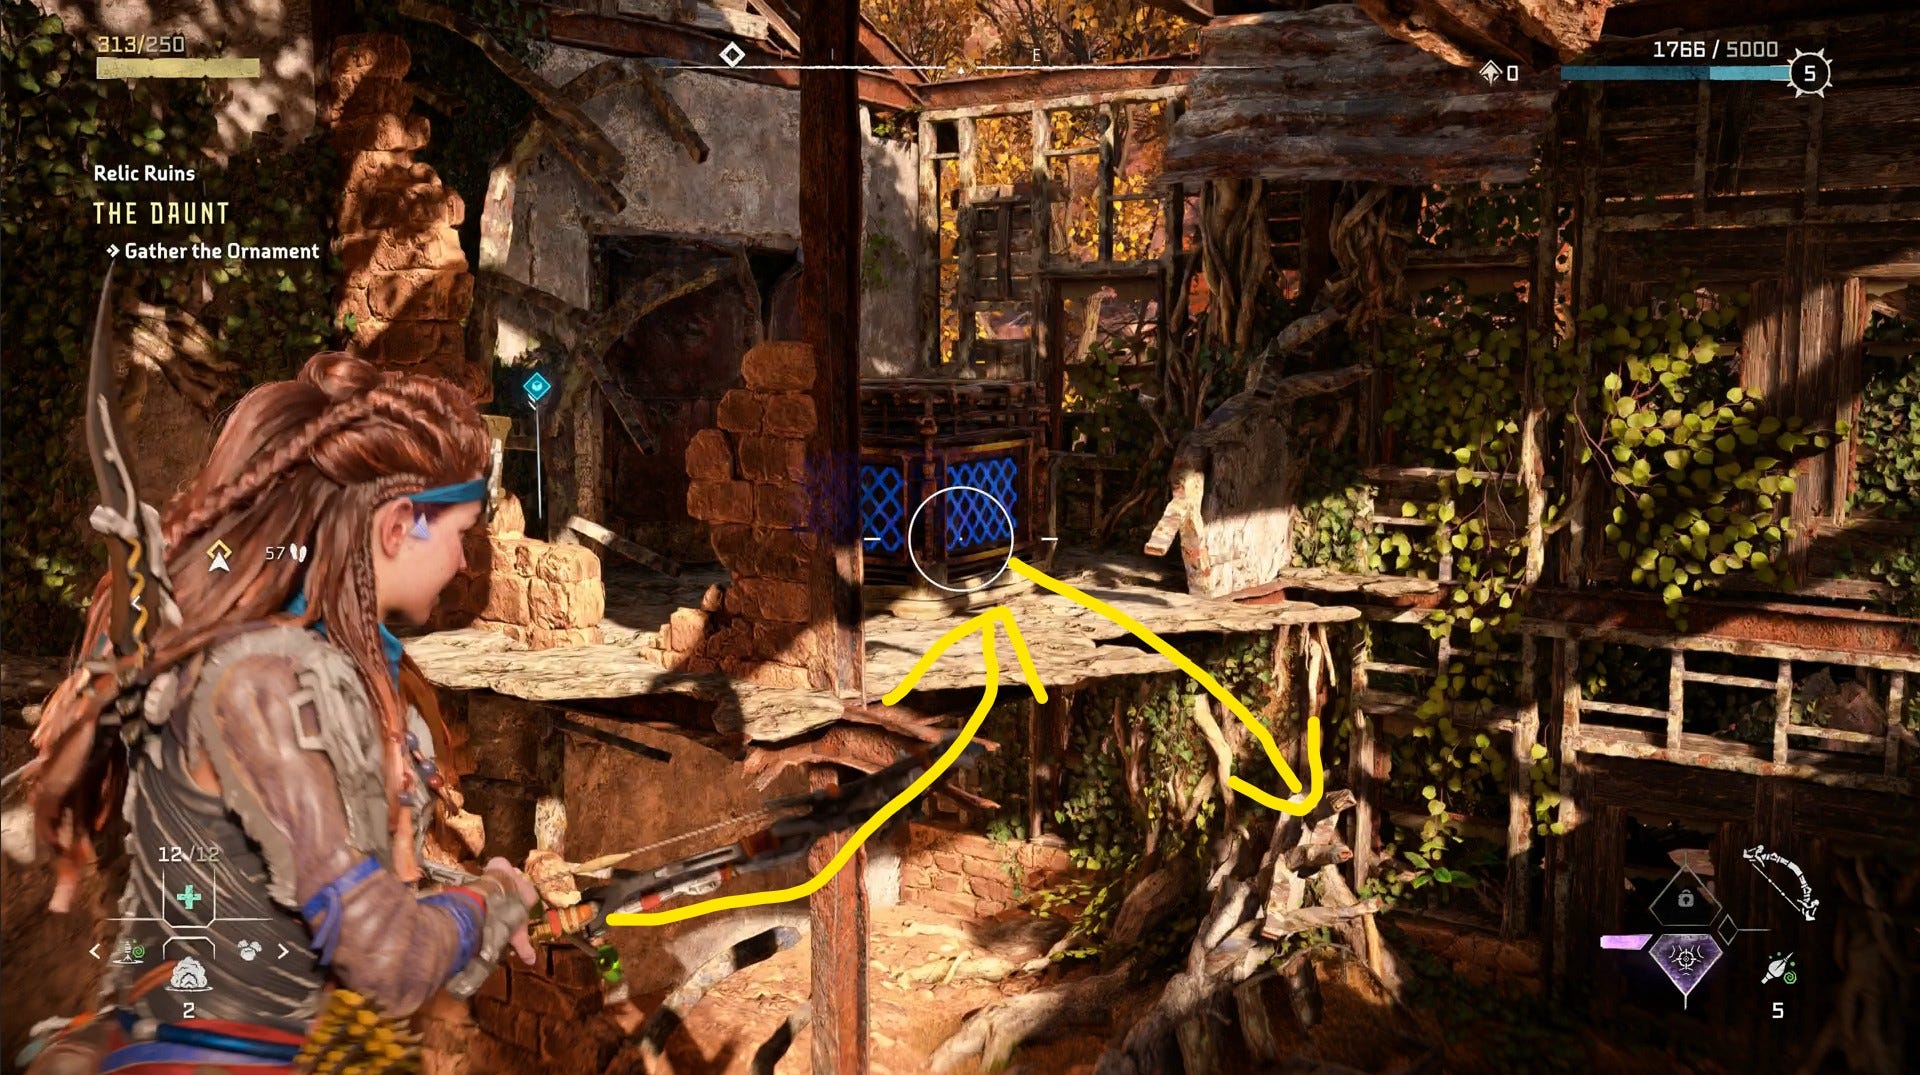
Next, look up behind you and use the Pullcaster again to wrench open the high vent. Then use the Pullcaster a third time to pull down the pillar next to the vent.
Now you can use the crate to get up to the vent.

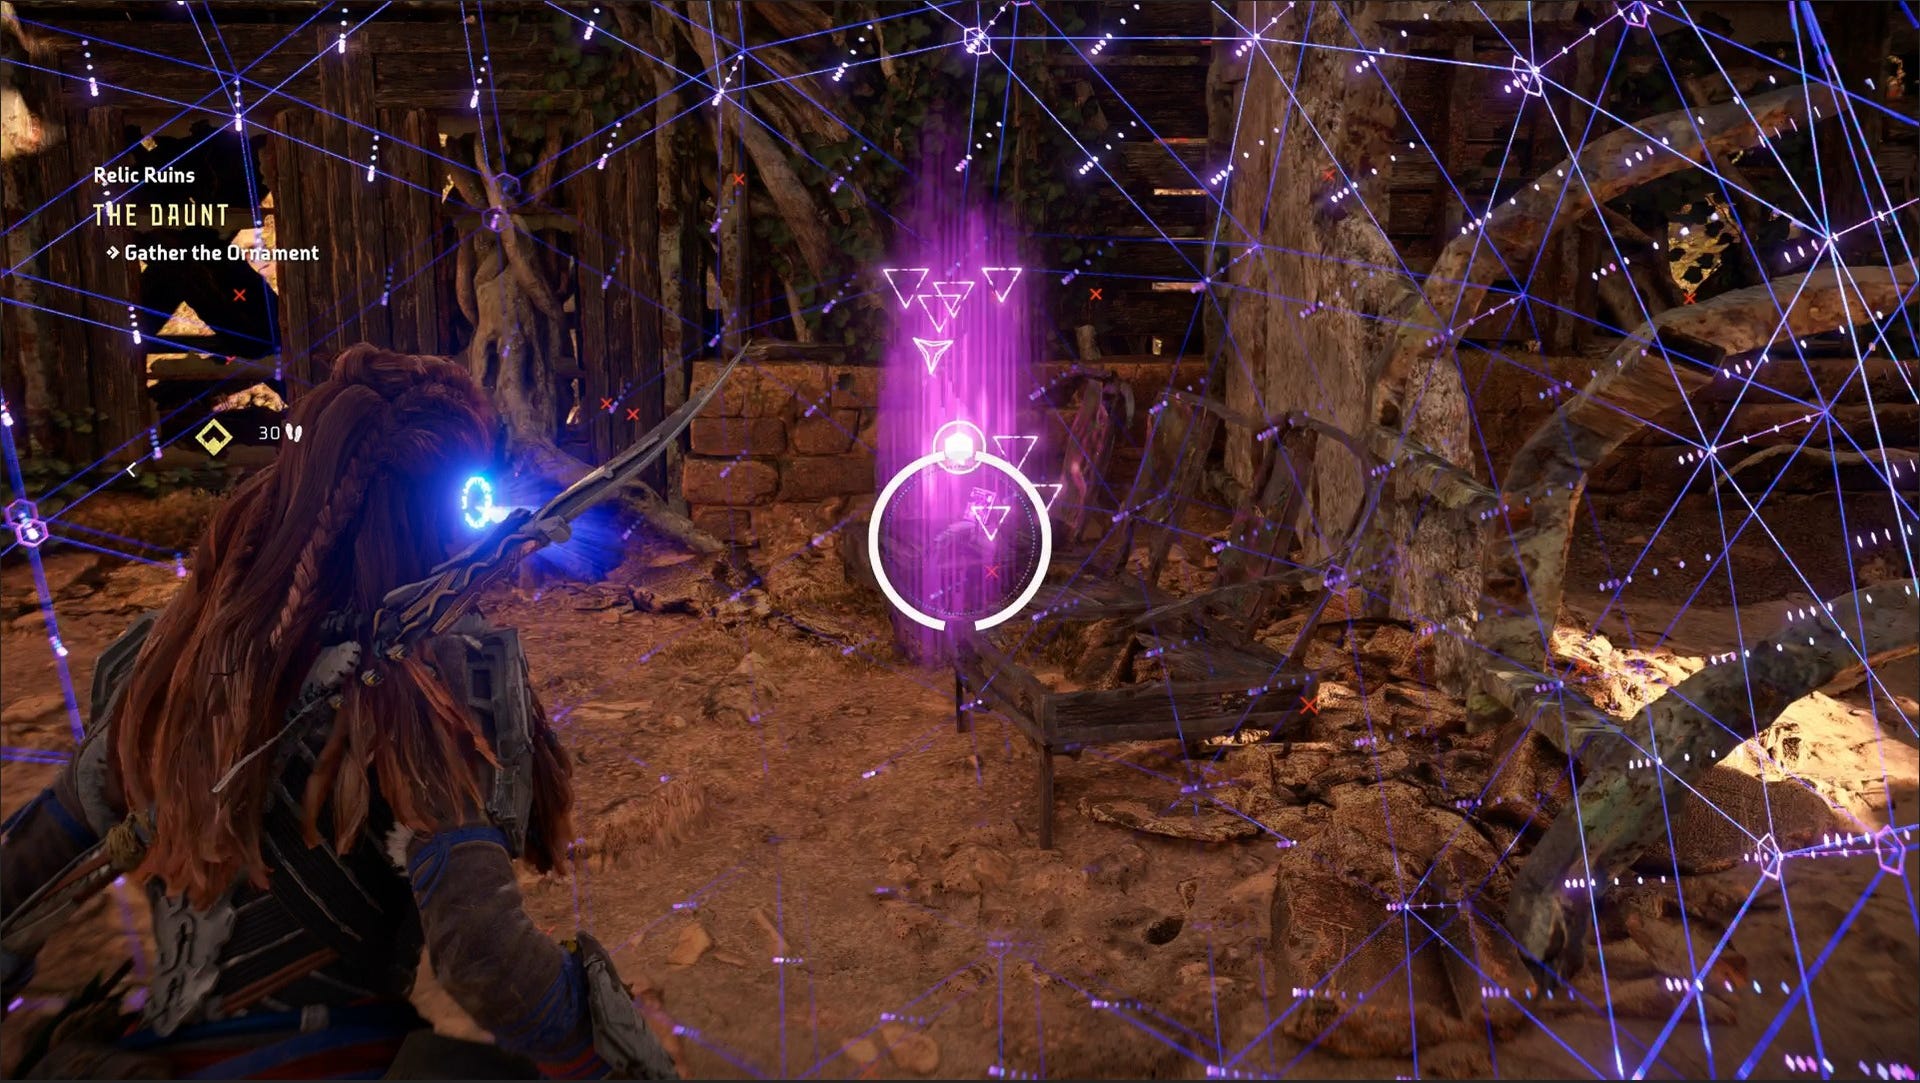
On the other side, turn around and break down the wall by pulling the clamp out with your Pullcaster.
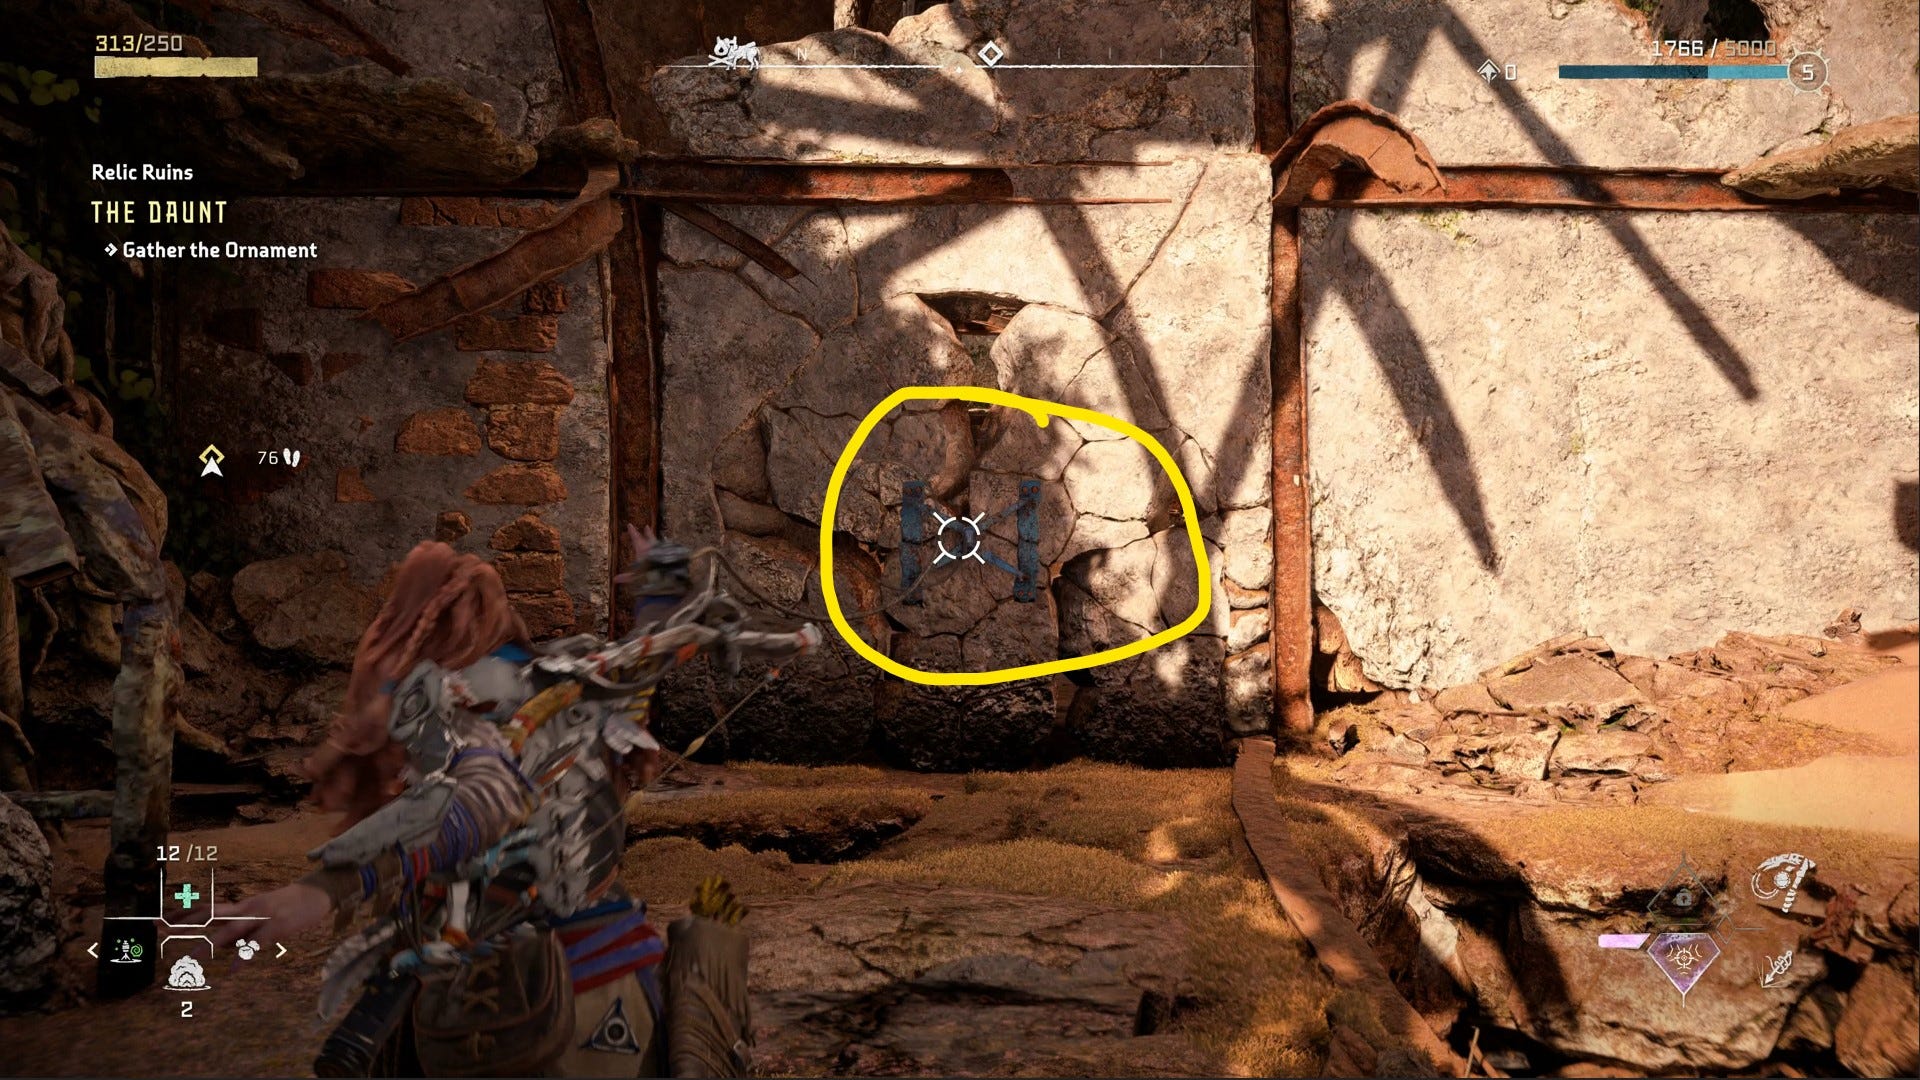
Jump down the hole next to you, then double back on yourself and follow the path.
At the end of the path, look up at the ceiling and break it down with your Pullcaster again.
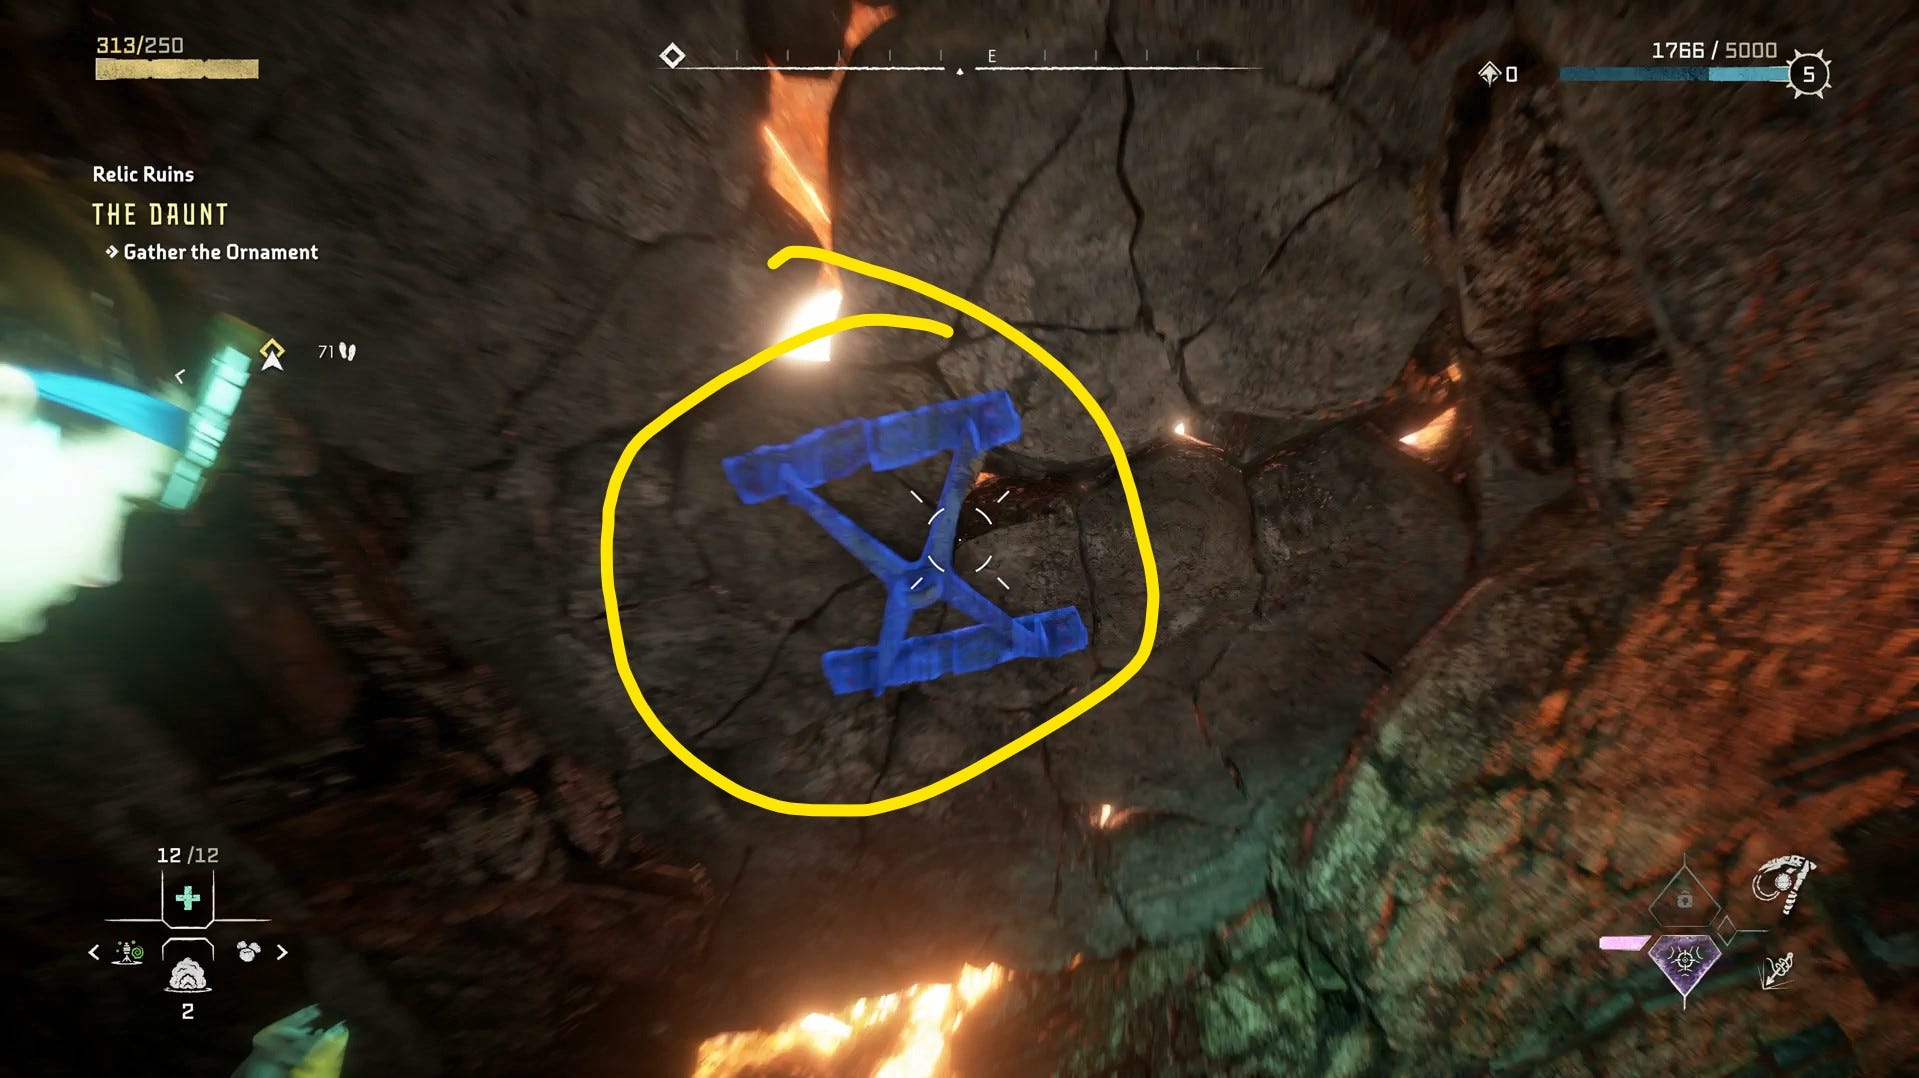
Now return to the surface and push the crate down the hole you just made.
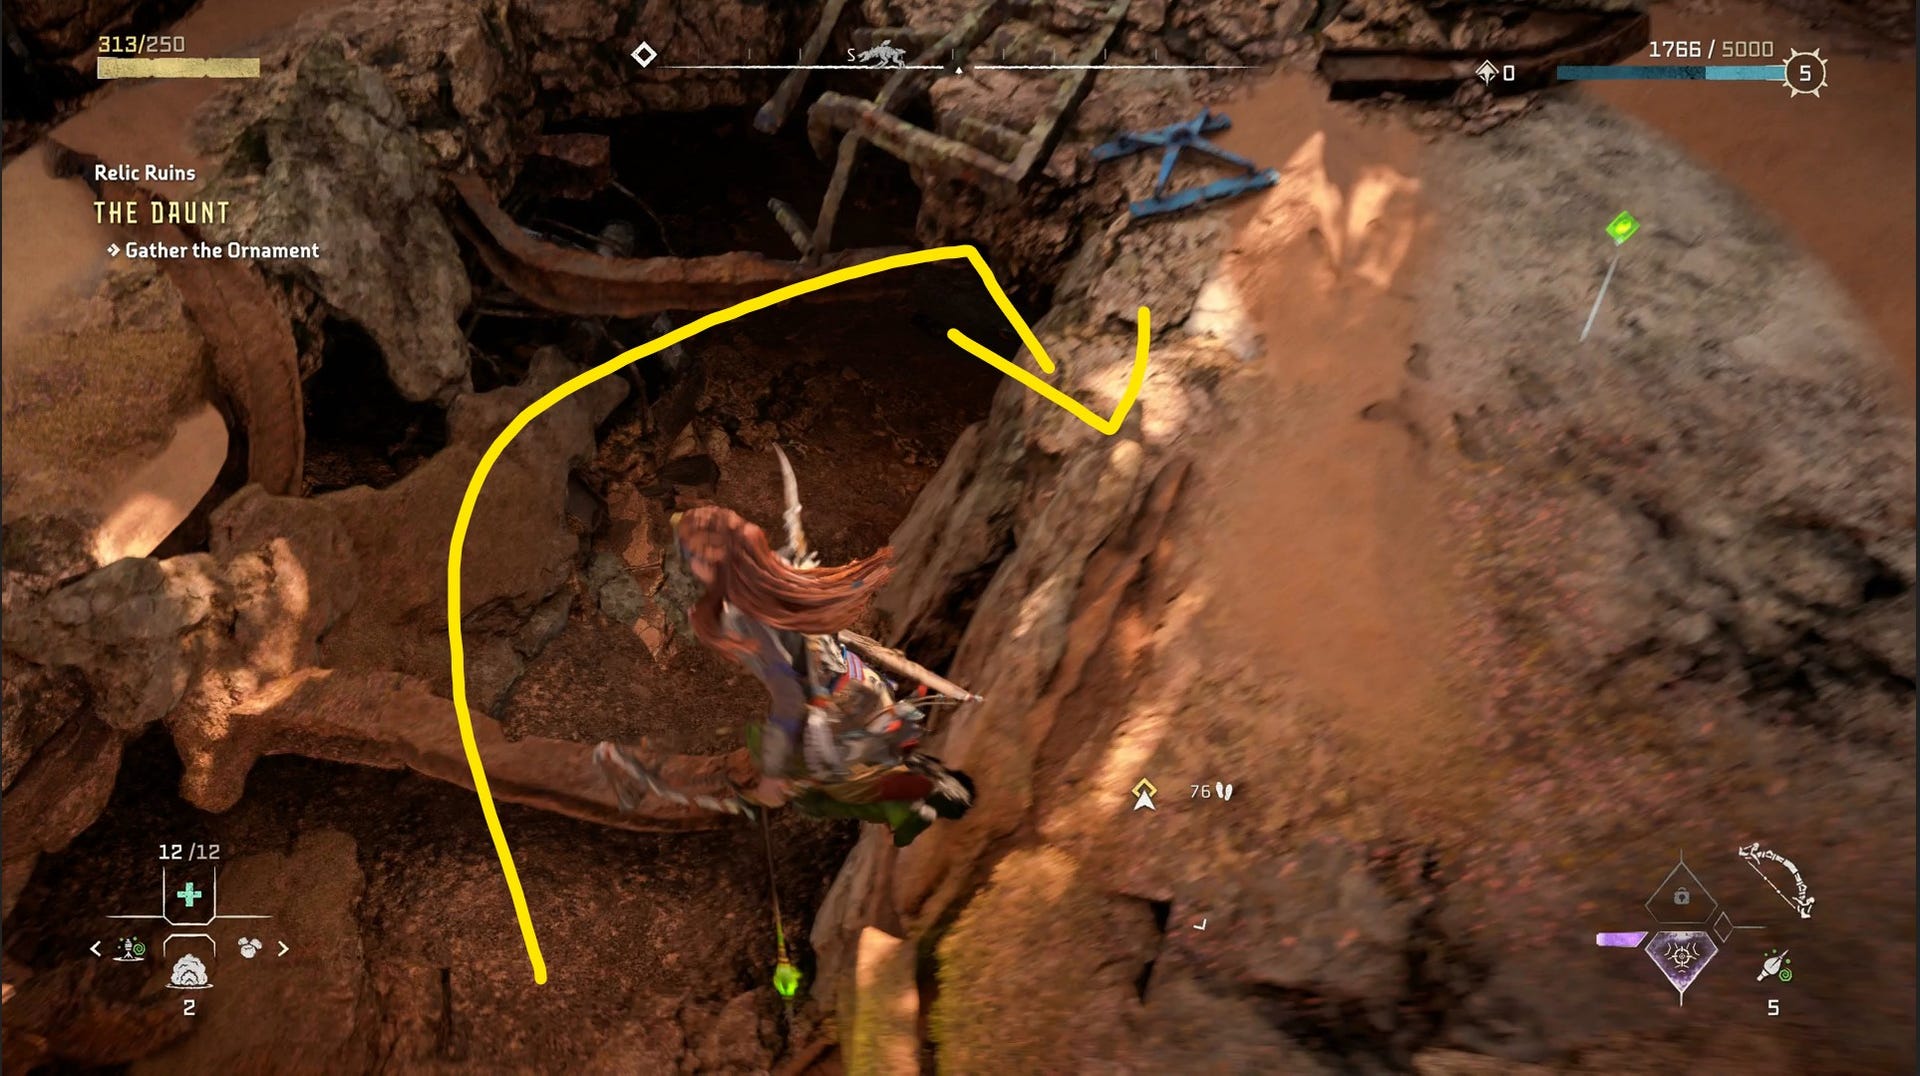
Drop down after it, then push it to the end of the path and use it to jump up onto the handholds there.
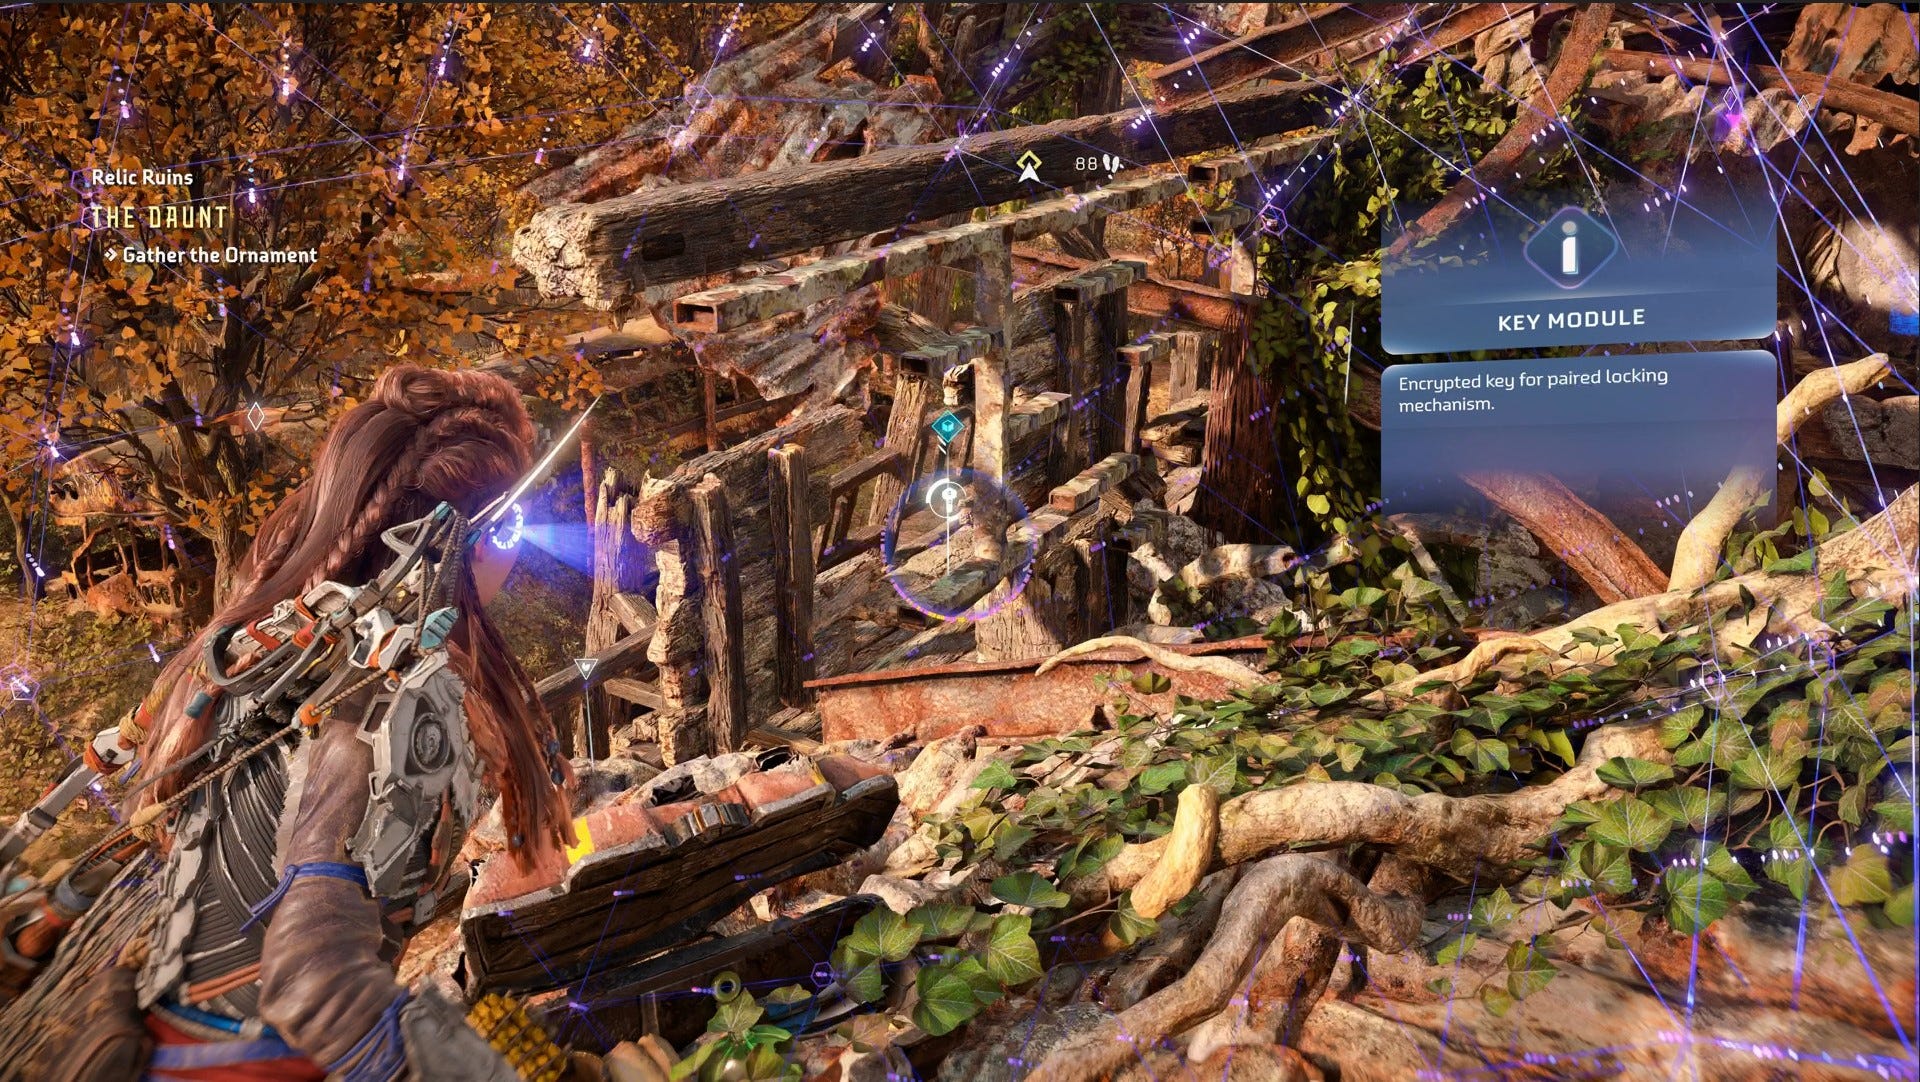
At the top, look over to the right and hop over to the balcony and grab the Key Module.
Now jump off the side of the building and back outside, then go back to the first room where you saw the locked door.
Hop up from the crate, then input The Daunt Relic Ruin Door Code: 1705 from your notebook.
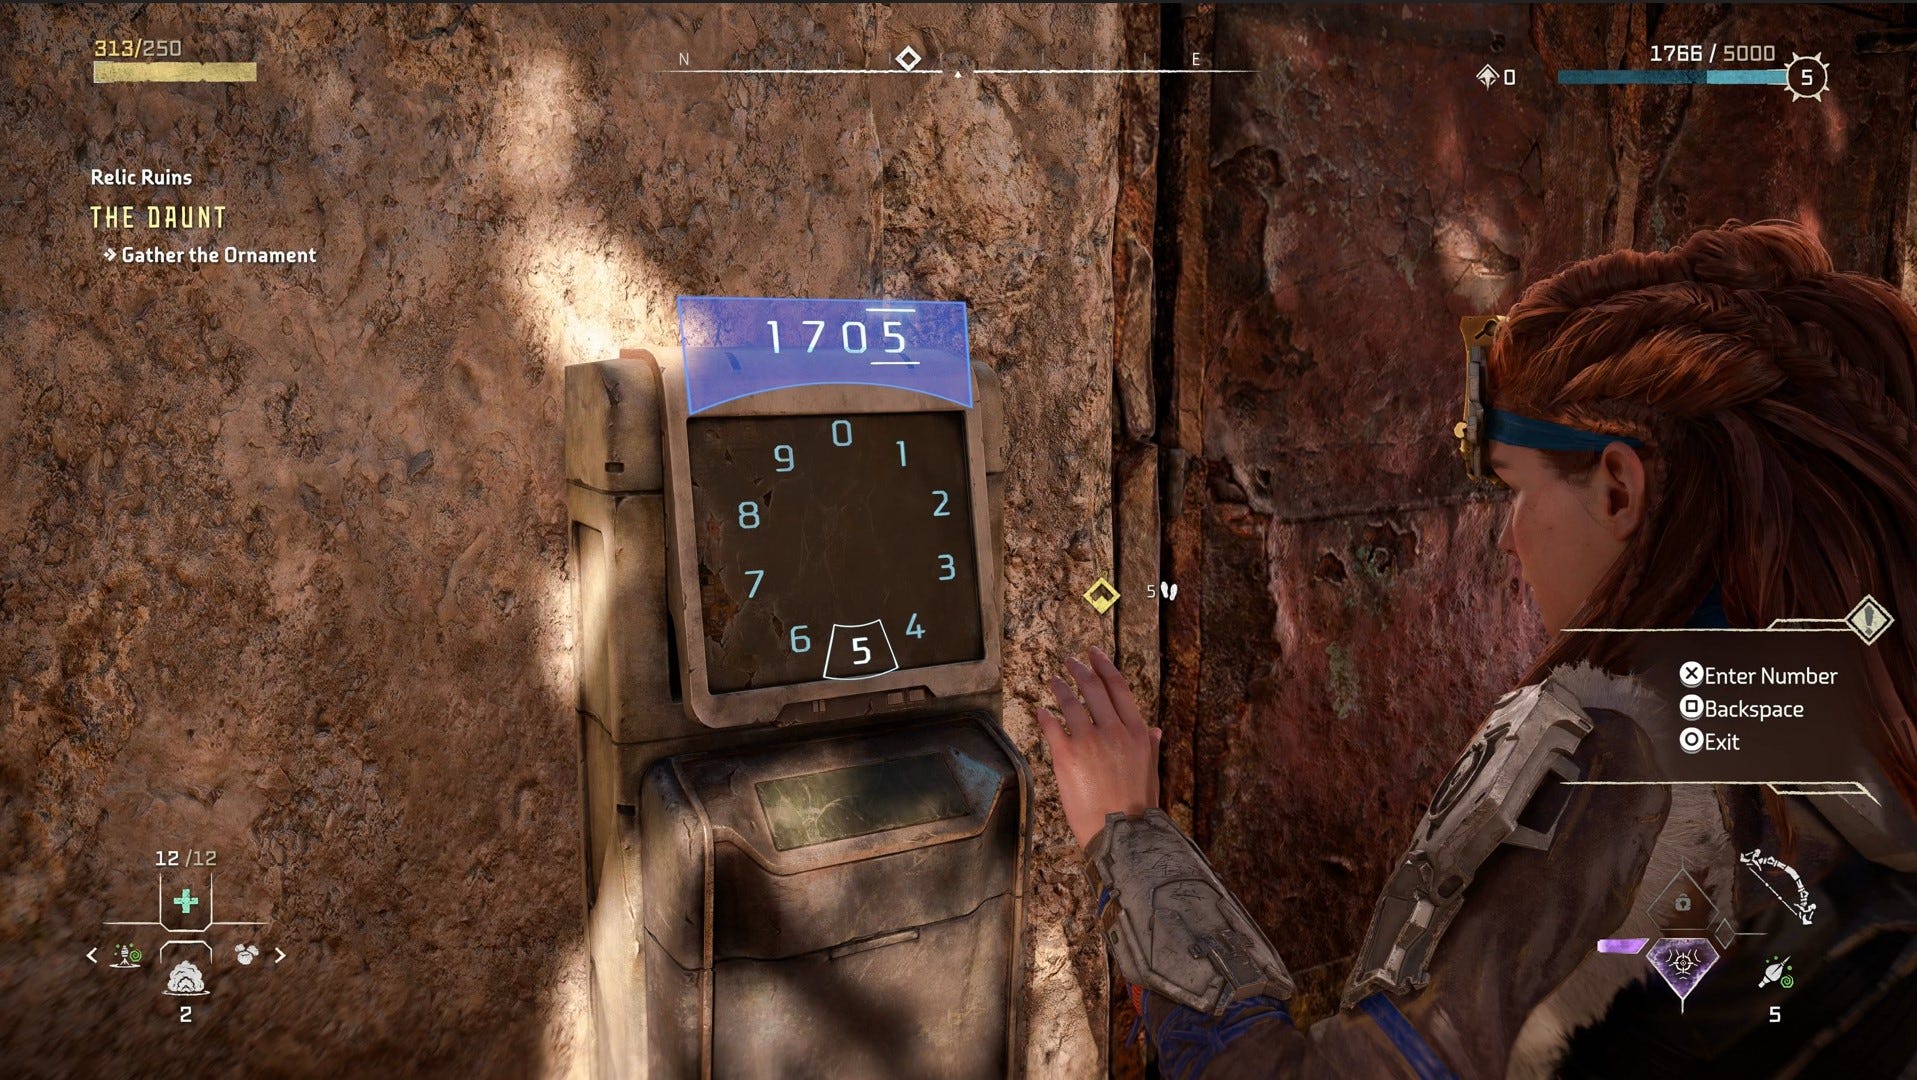
Inside you get your first Ornament, suitably named 'Let's Get This Started!'
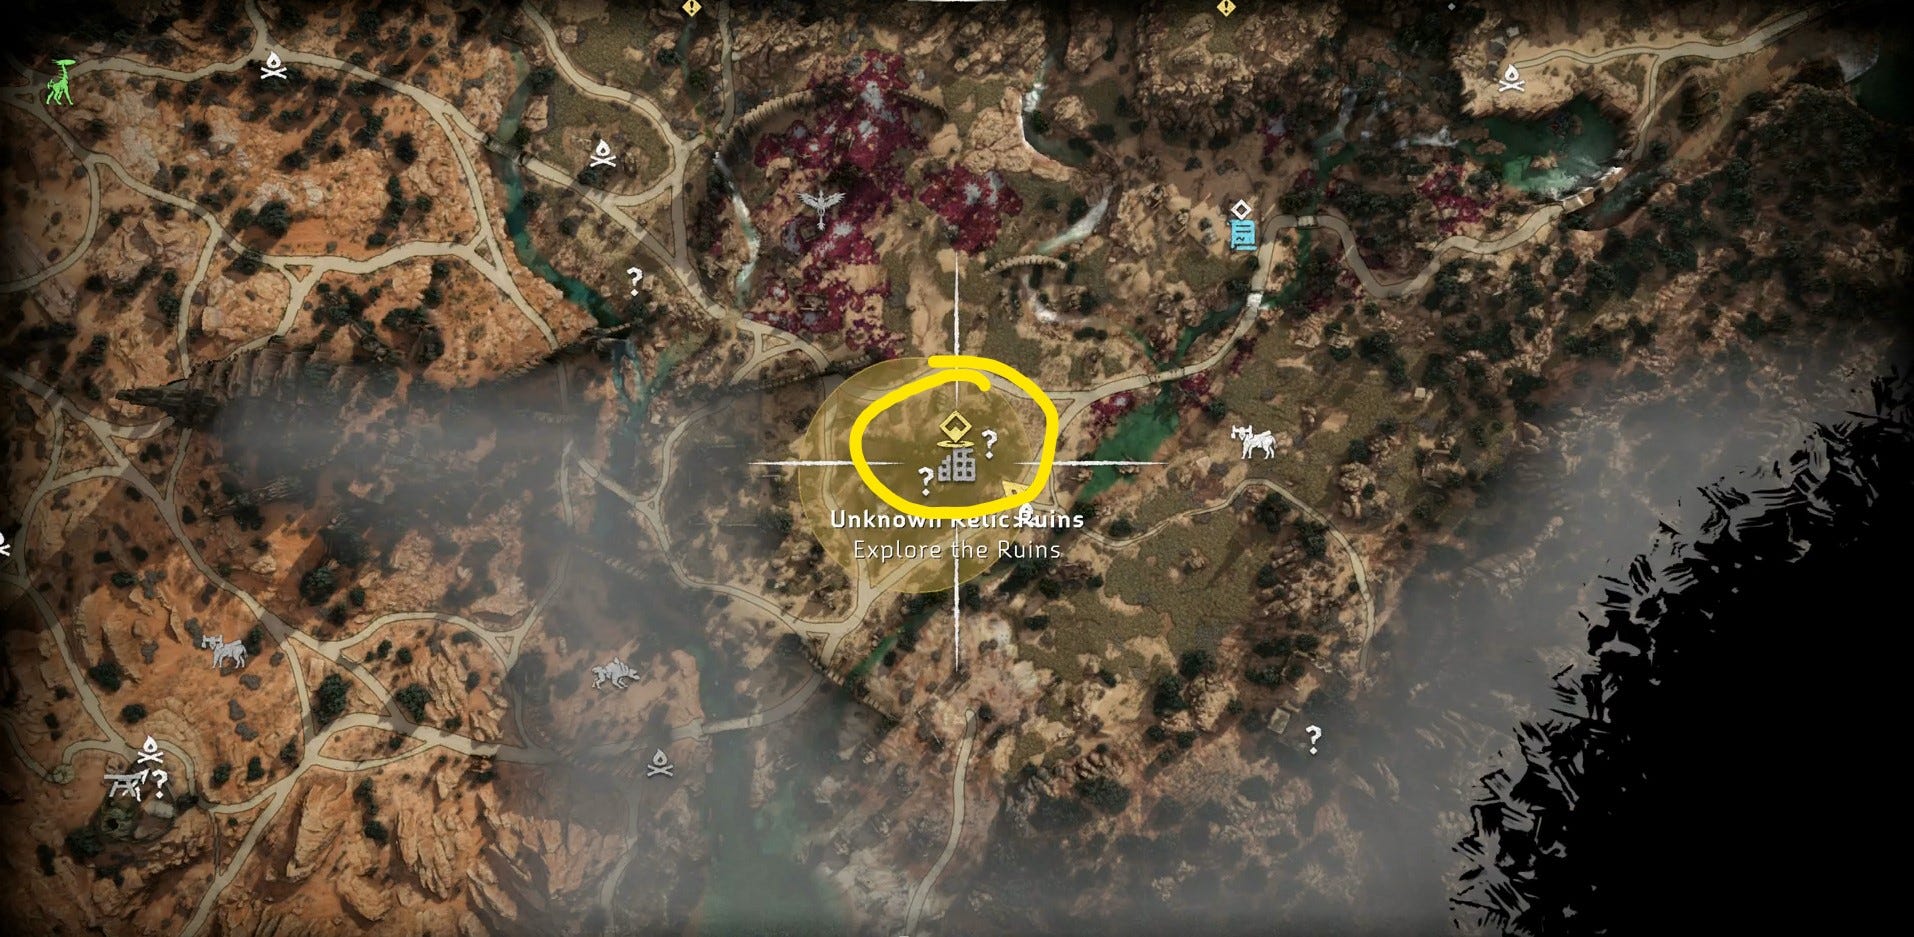
Horizon Forbidden West No Man's Land Relic Ruin Puzzle and Door Code
The No Man's Land Relic Ruin is found just west of Barren Light, near the Oseram camp in Horizon Forbidden West.
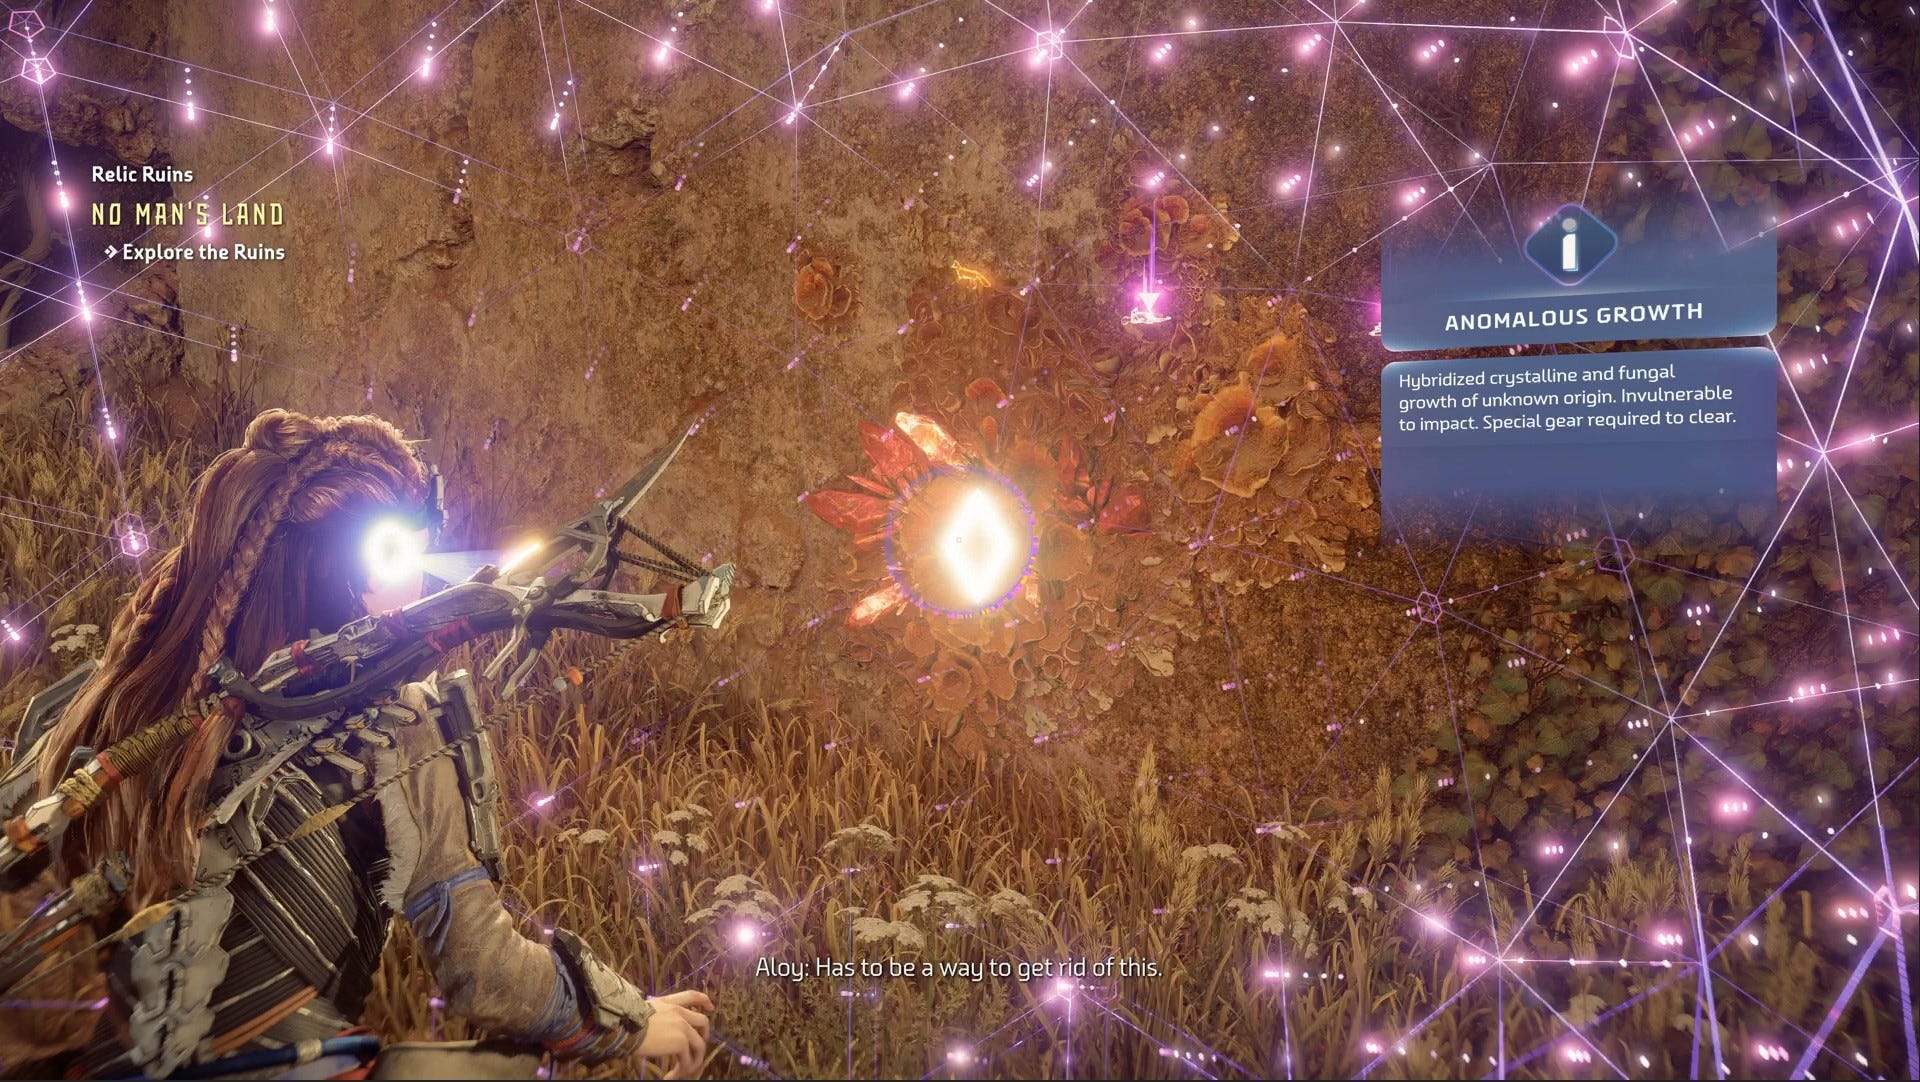
You can't complete the No Man's Land Relic Ruin until you've also completed the Death's Door Story Mission and crafted the Igniter.
This lets you explode Firegleam Blocked Paths, which is vital to completing this puzzle.
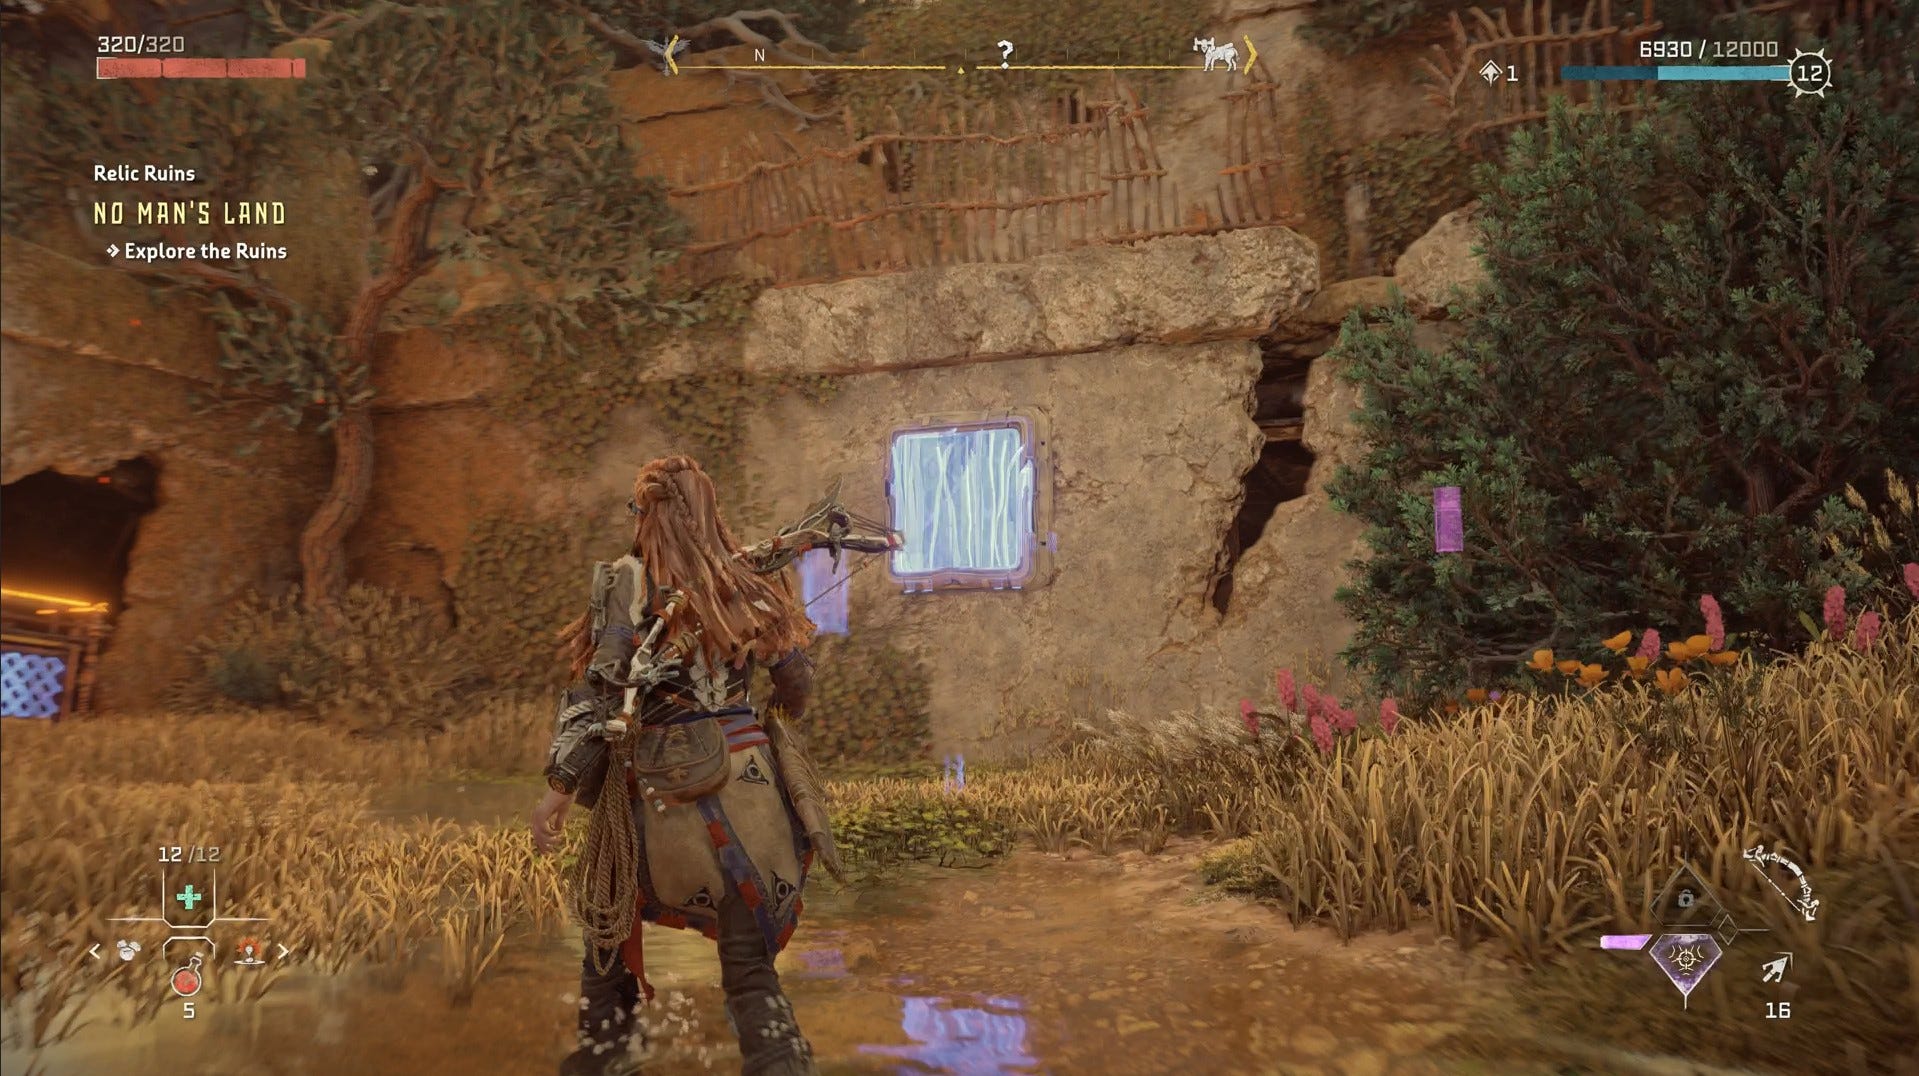
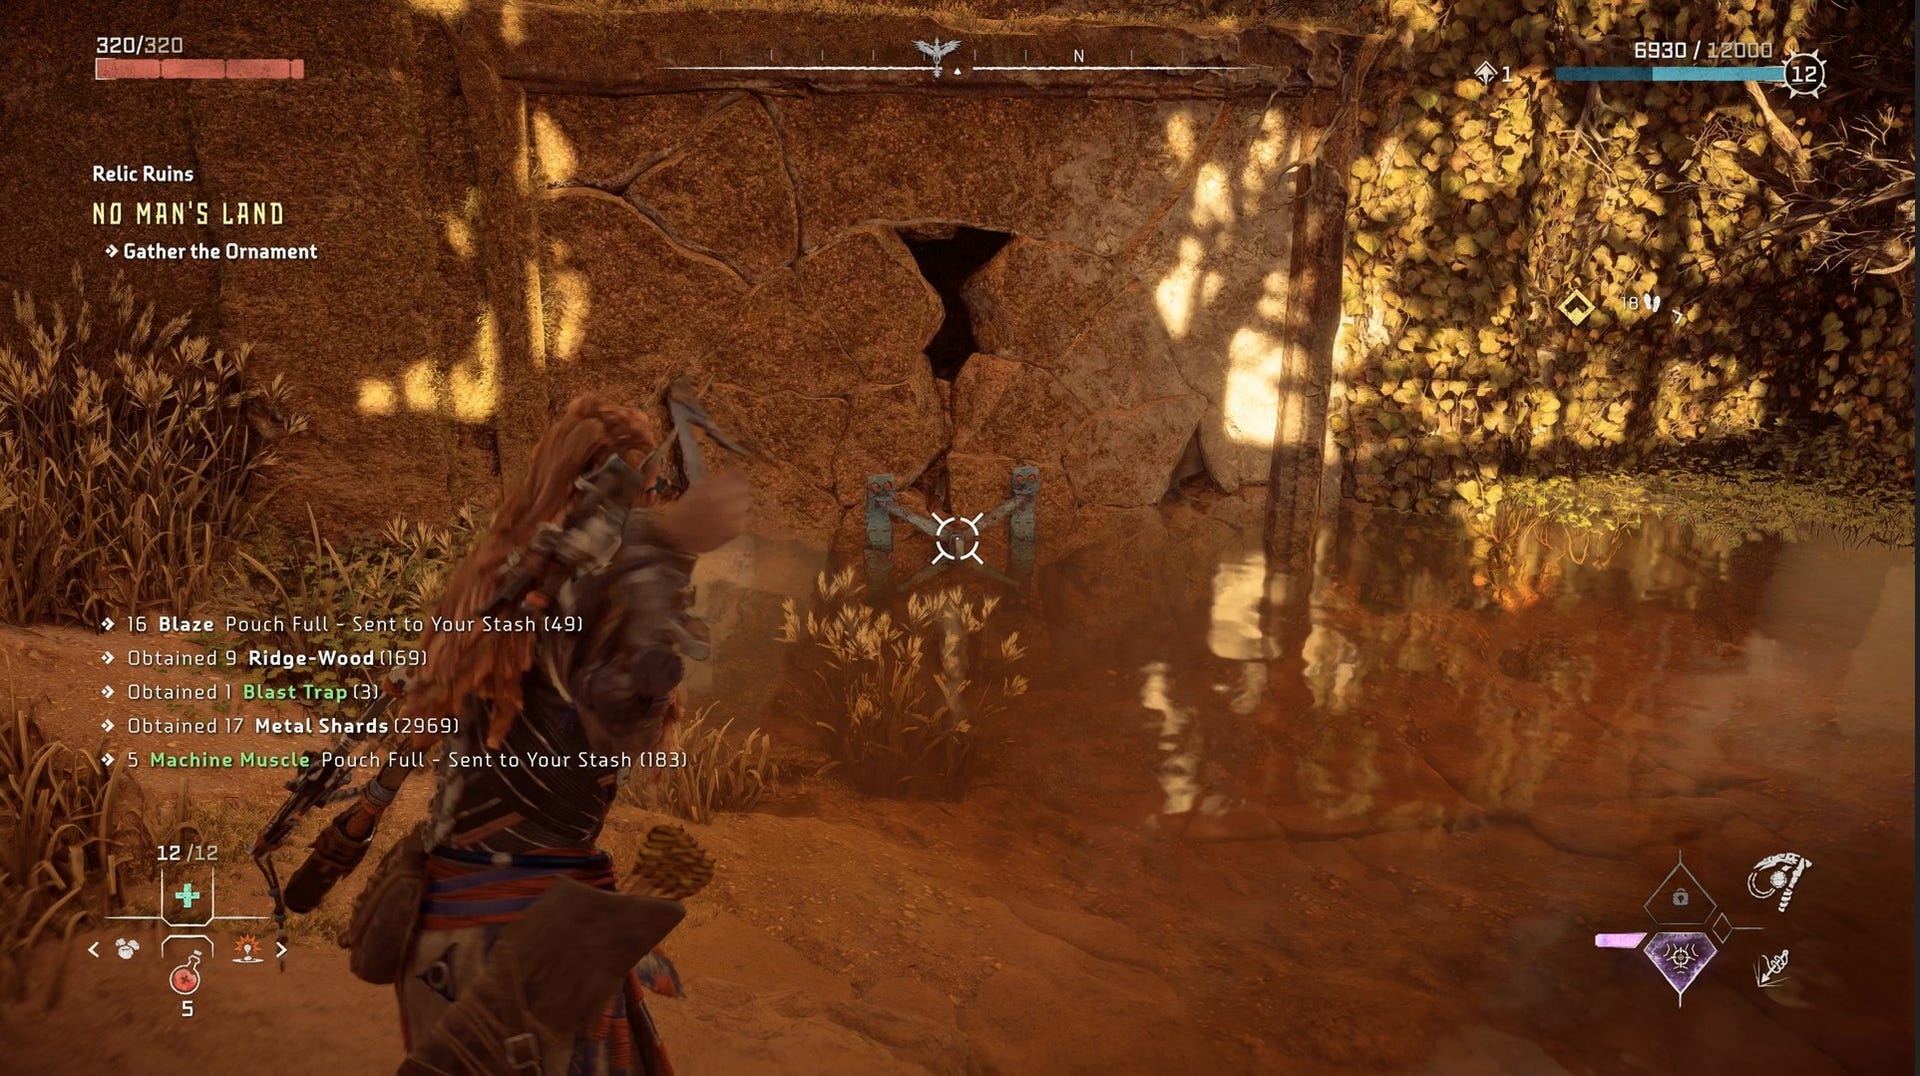
Approach the Relic Ruin from the southern side and you'll see a vent you can open with your Pullcaster. Wrench it open and head inside.
Once you're in, follow the path and you'll see some Firegleam on your right - explode it to expose a rack of enegy cells, but leave them there for now.
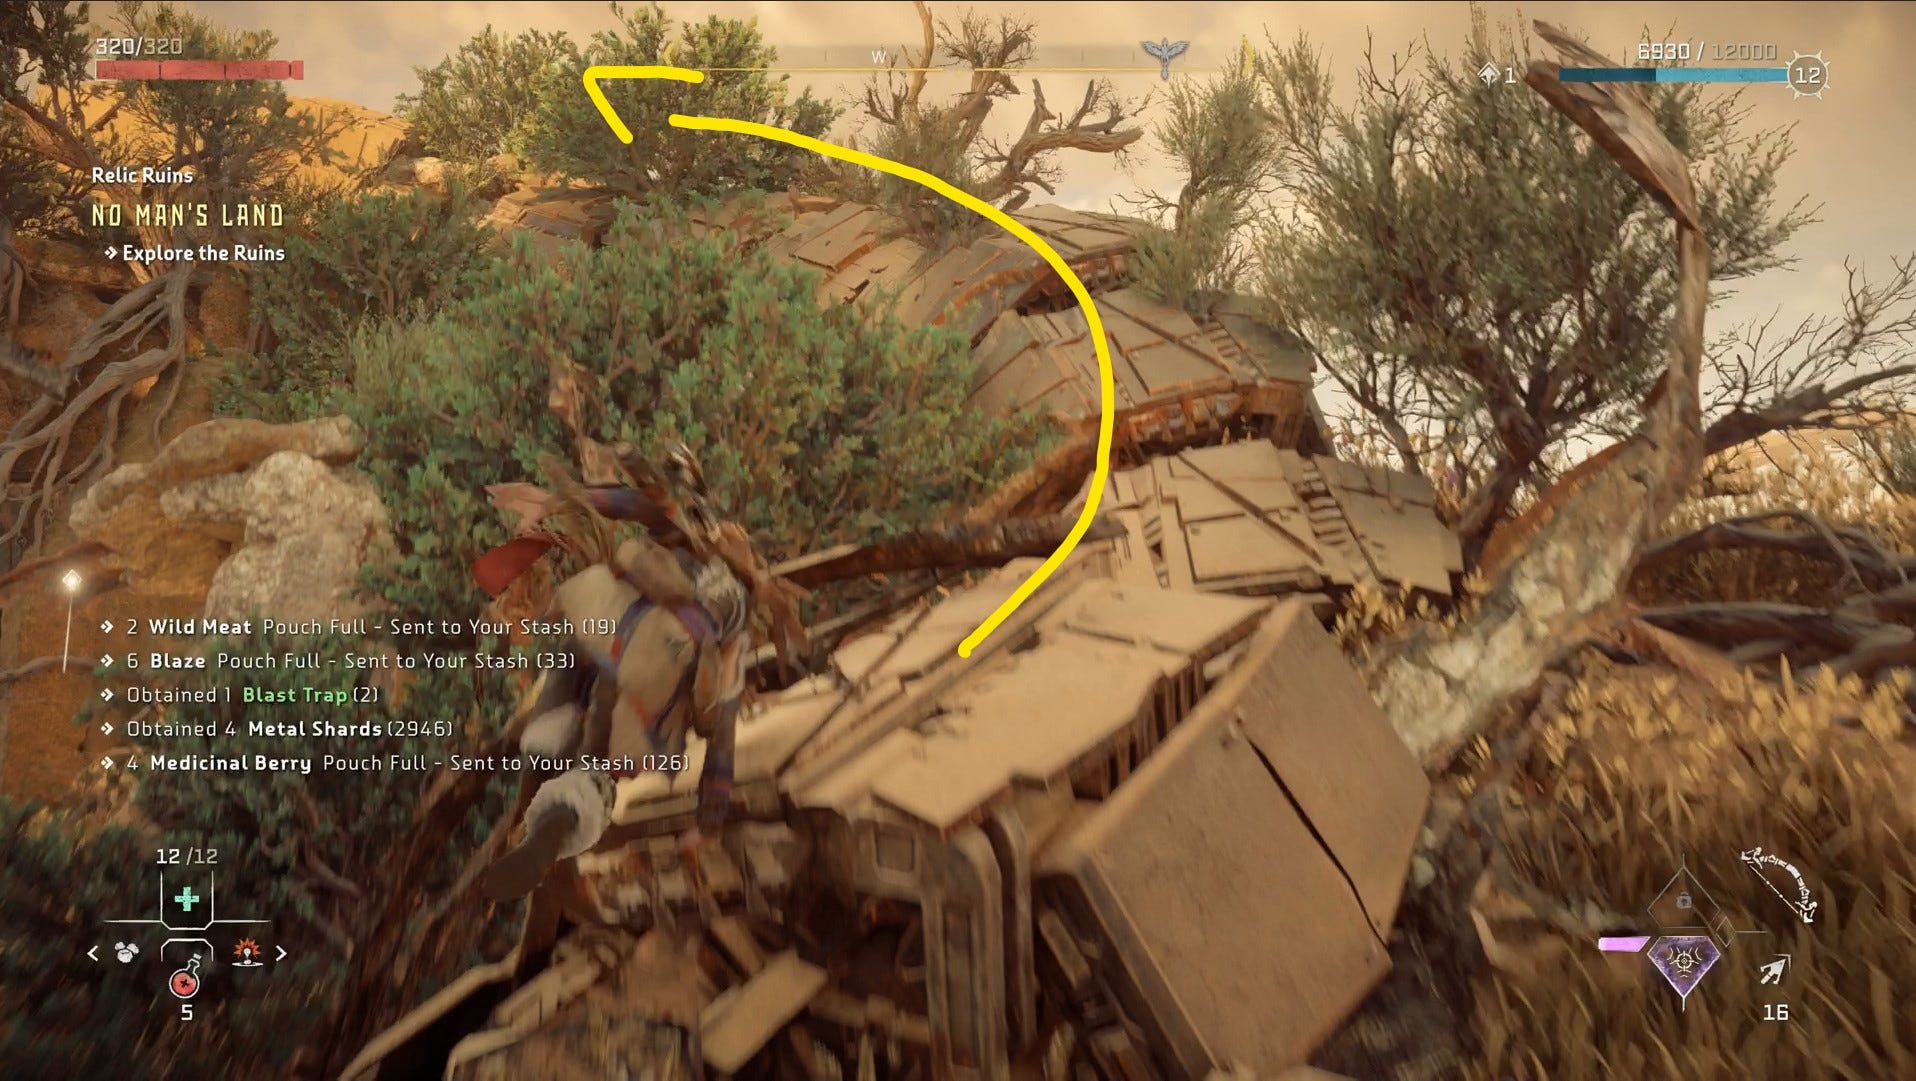
Look next to you can there's a machine skeleton you can jump up to get to the roof of the Relic Ruin. When you're up there, drop through the hole in the roof to get to a new area.
In this area, drop down again, look to your left, then pull open the wall with your Pullcaster. This creates an easy path between the energy cell and this chamber.
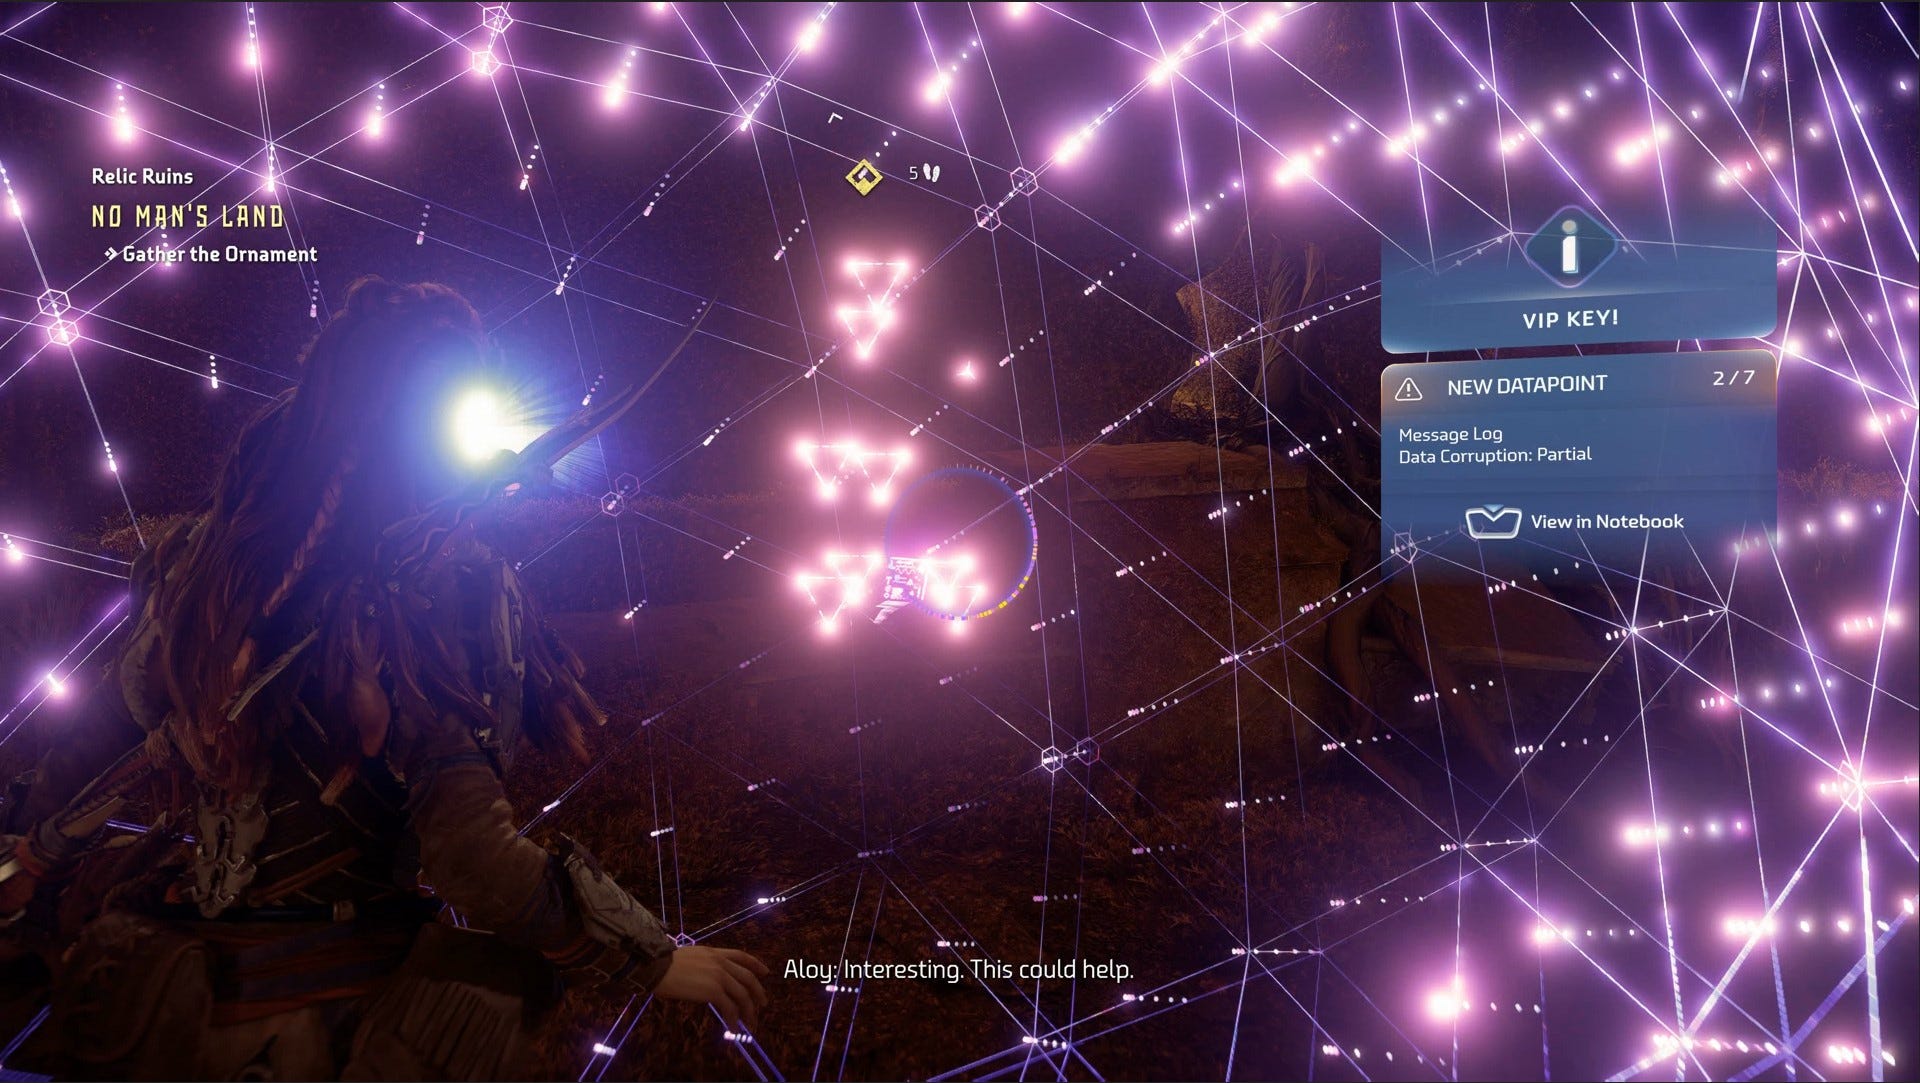
Rather than go through the hole you've created, look to your right and scan the note to get the VIP code for the door.
Next, look behind you and grapple up to the second floor.
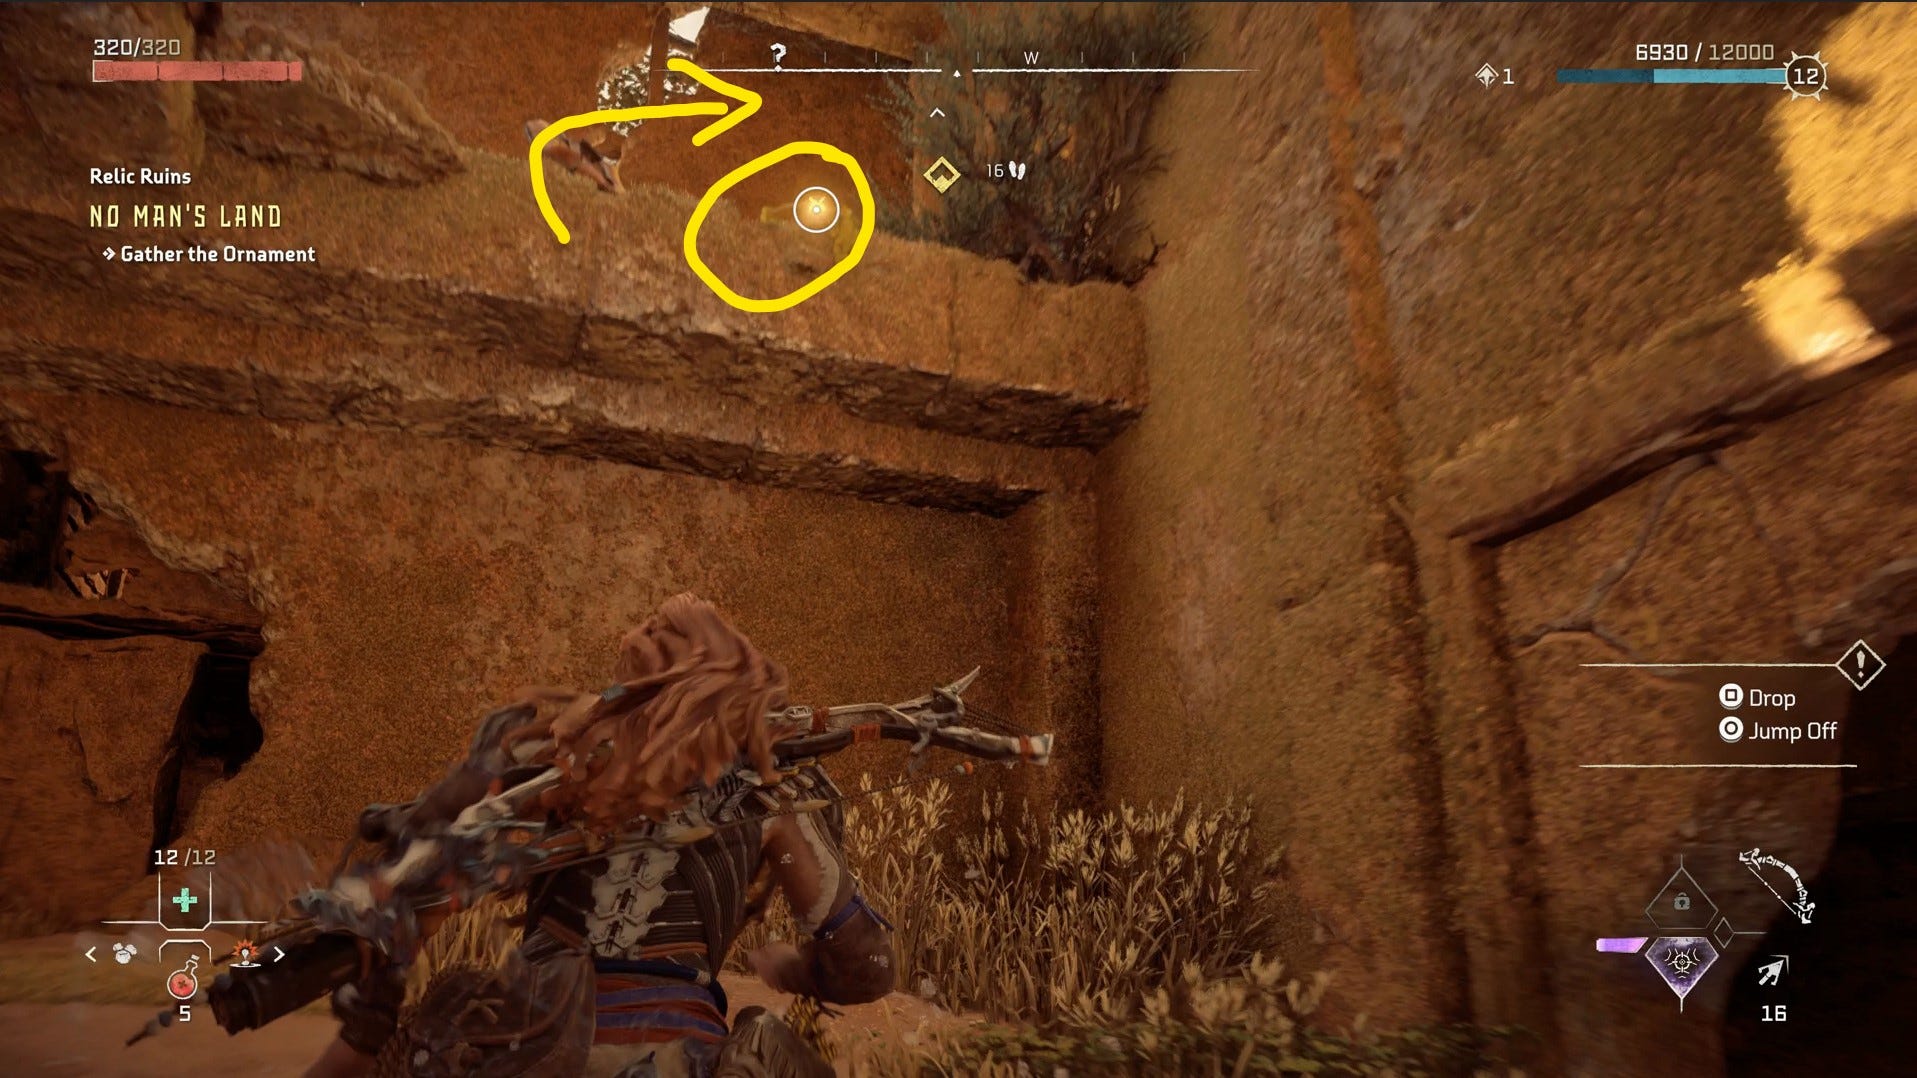
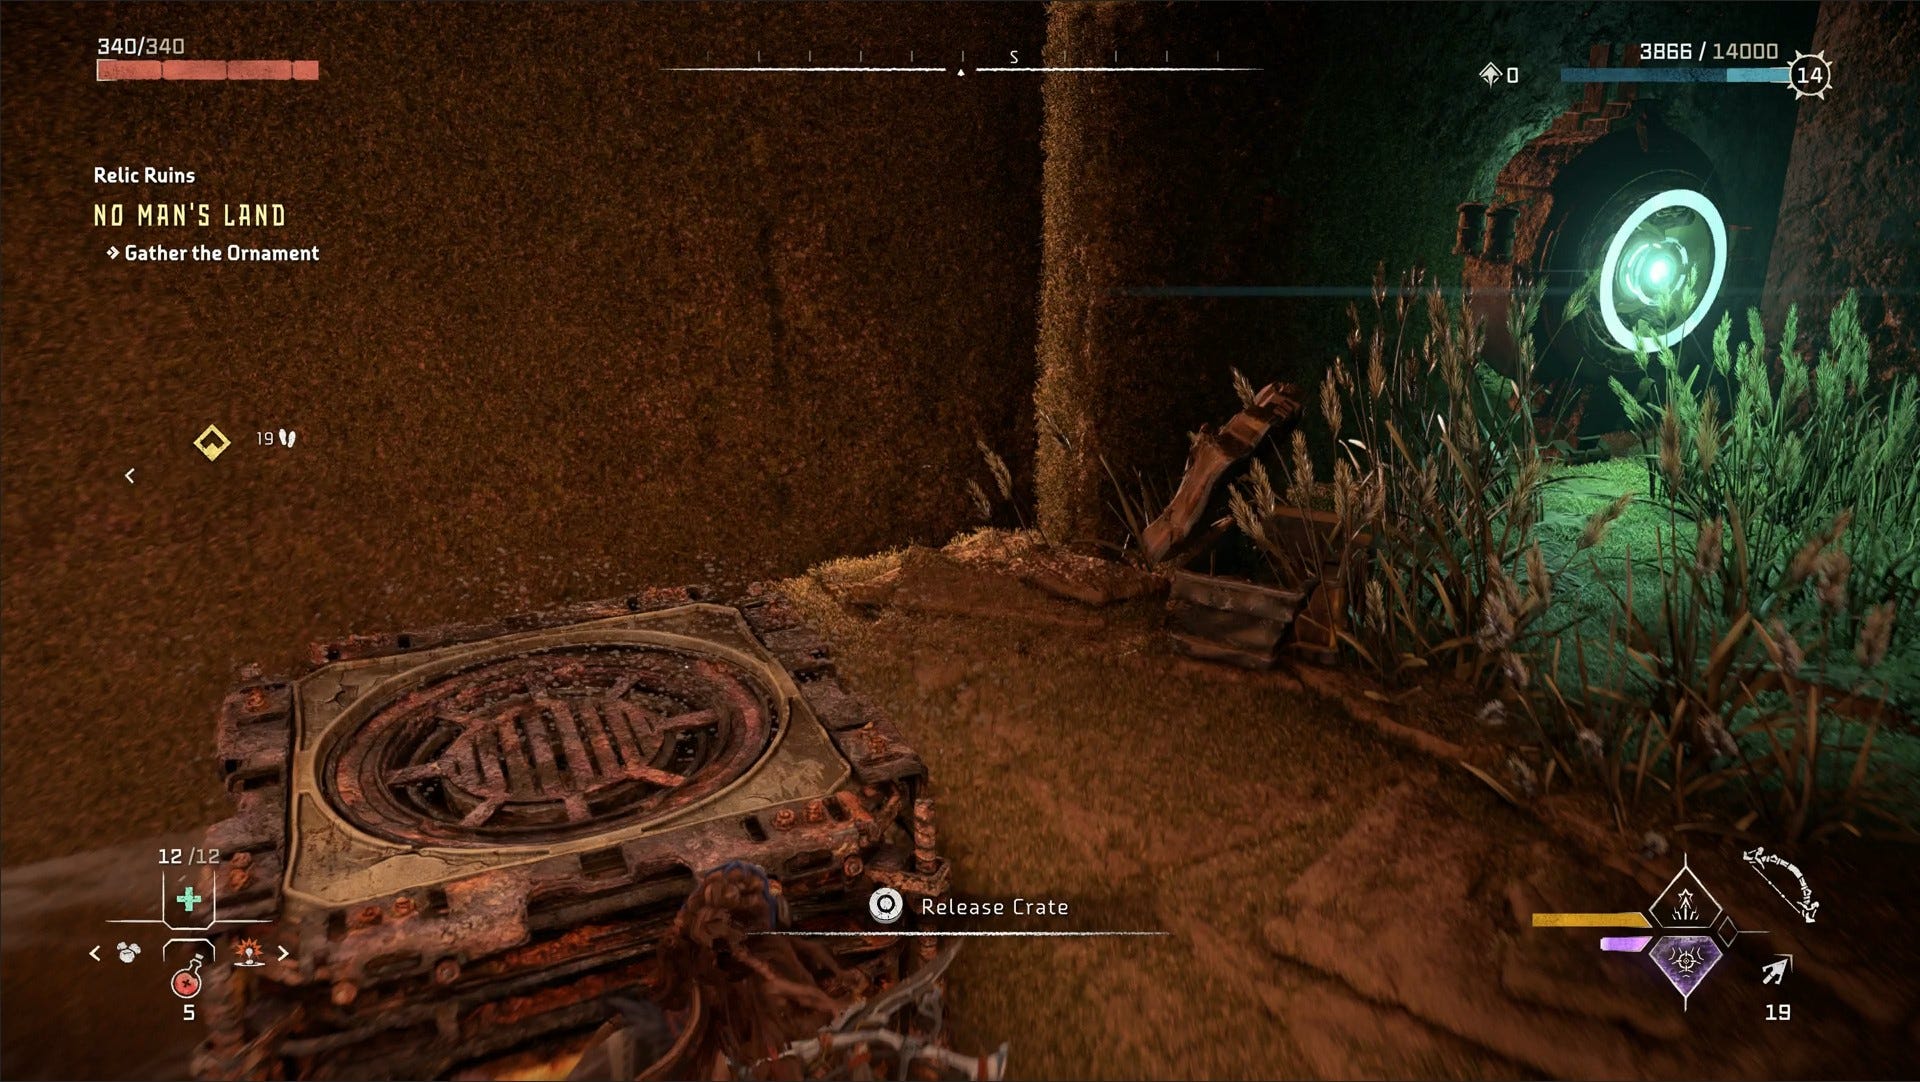
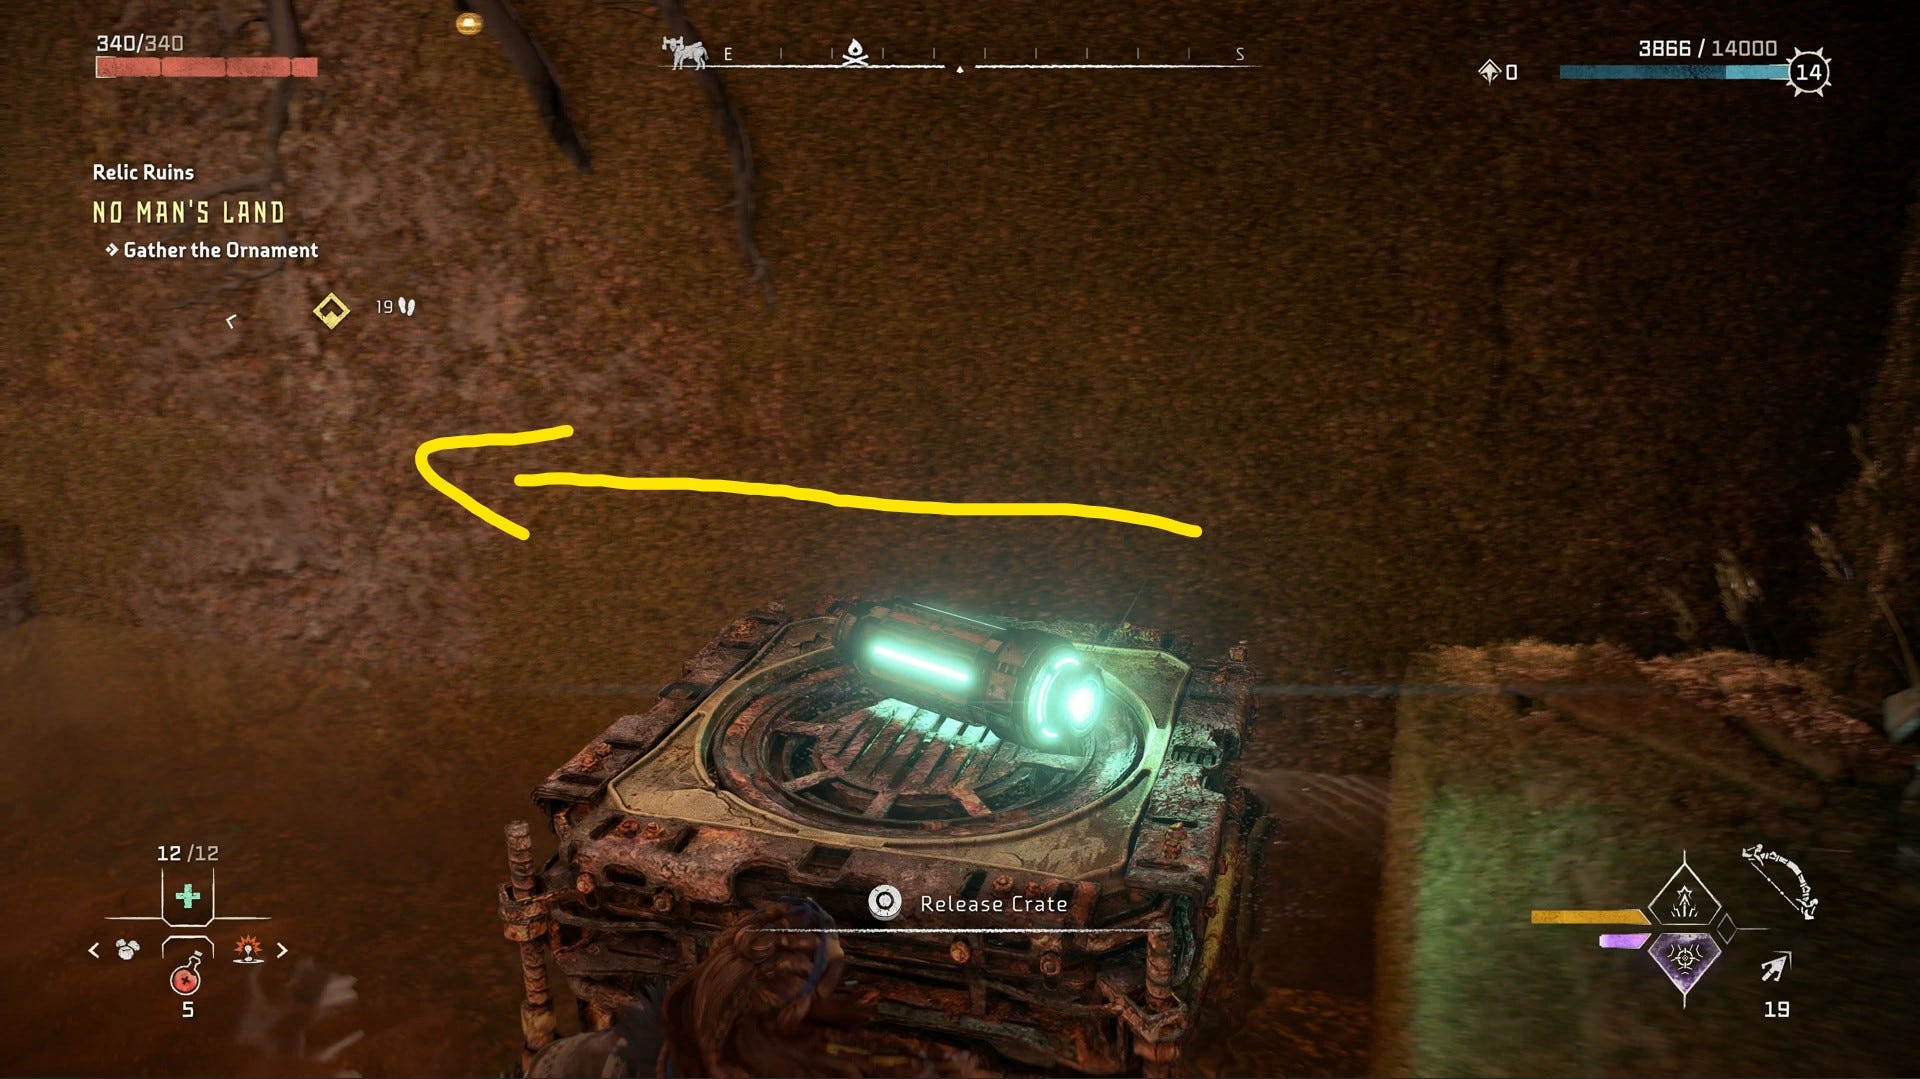
Go around the corner and use your Pullcaster to yank the crate towards you.
Then go out onto the balcony and yank it out from that side too, so it drops into the water.

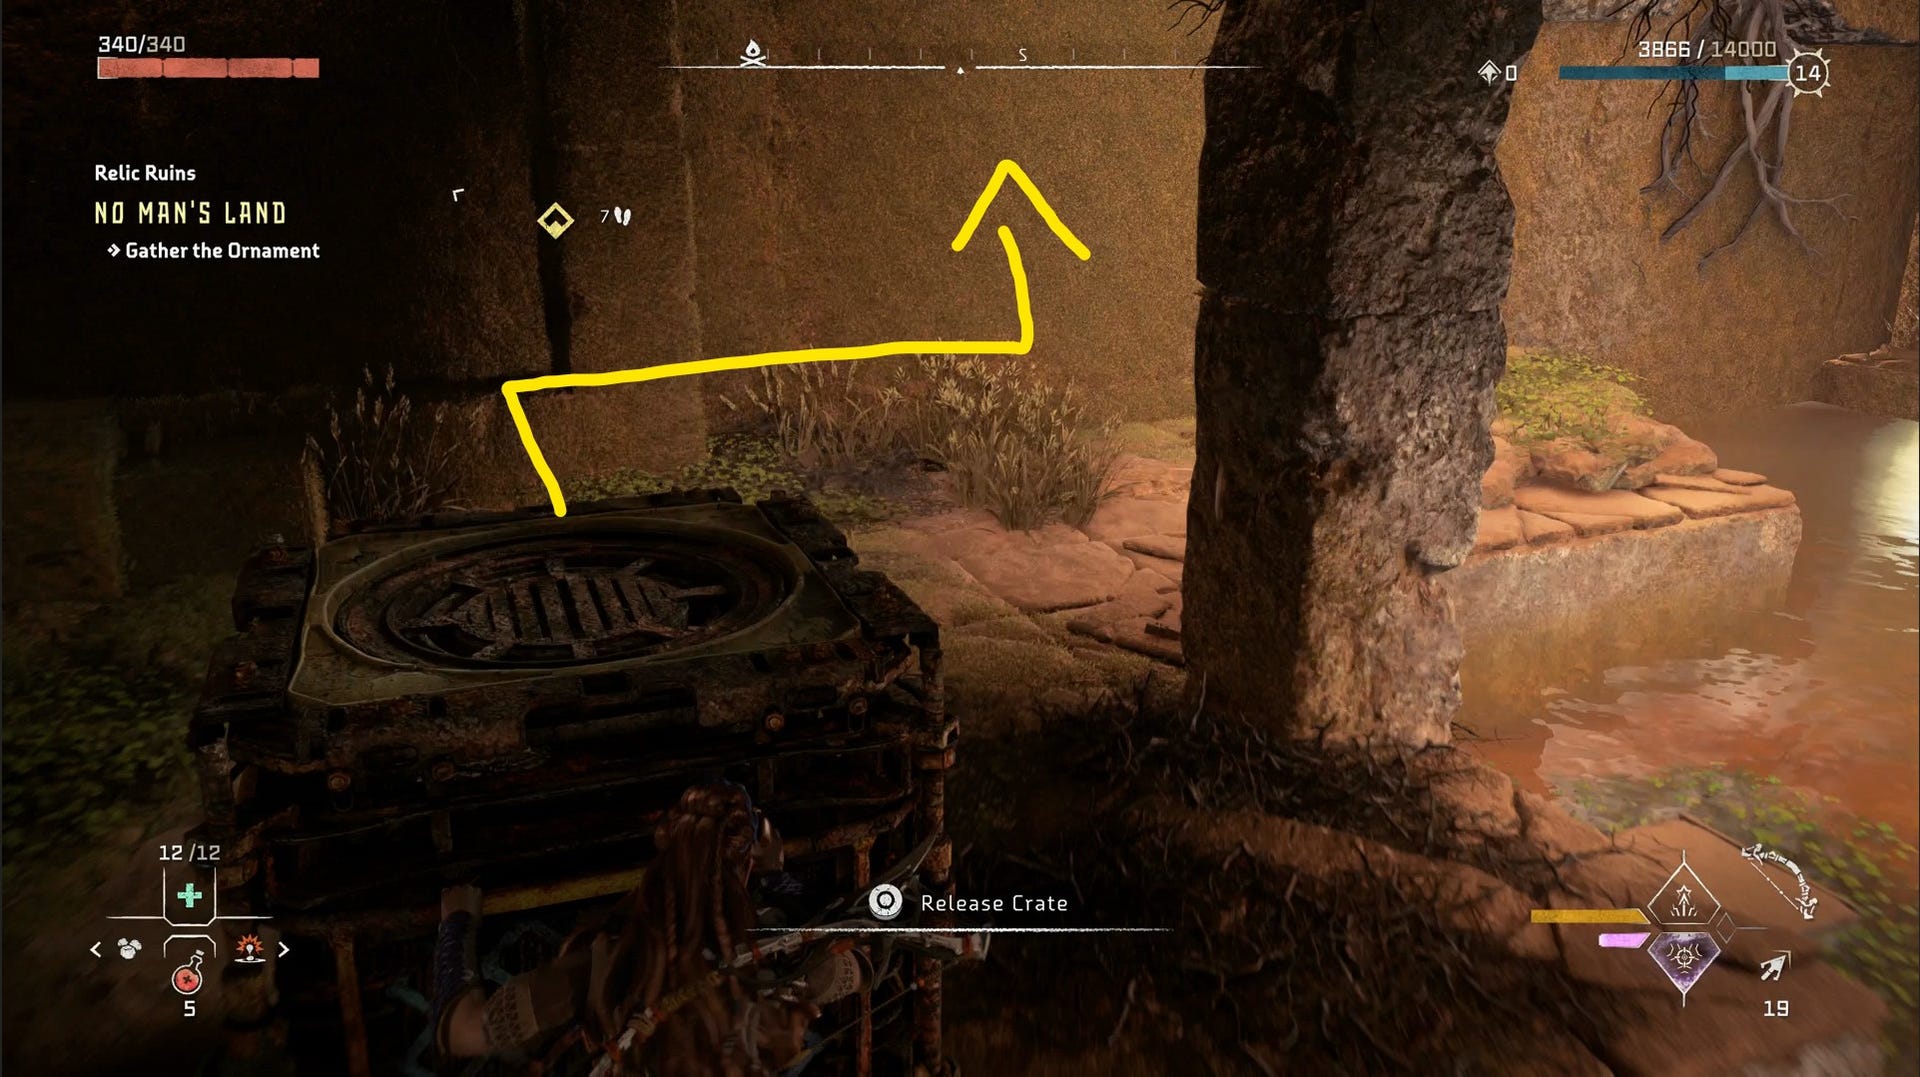
Now go and get the energy cell from where you blew up the Firegleam. Take it into the watery room, look to your right, and slot it into the device there.
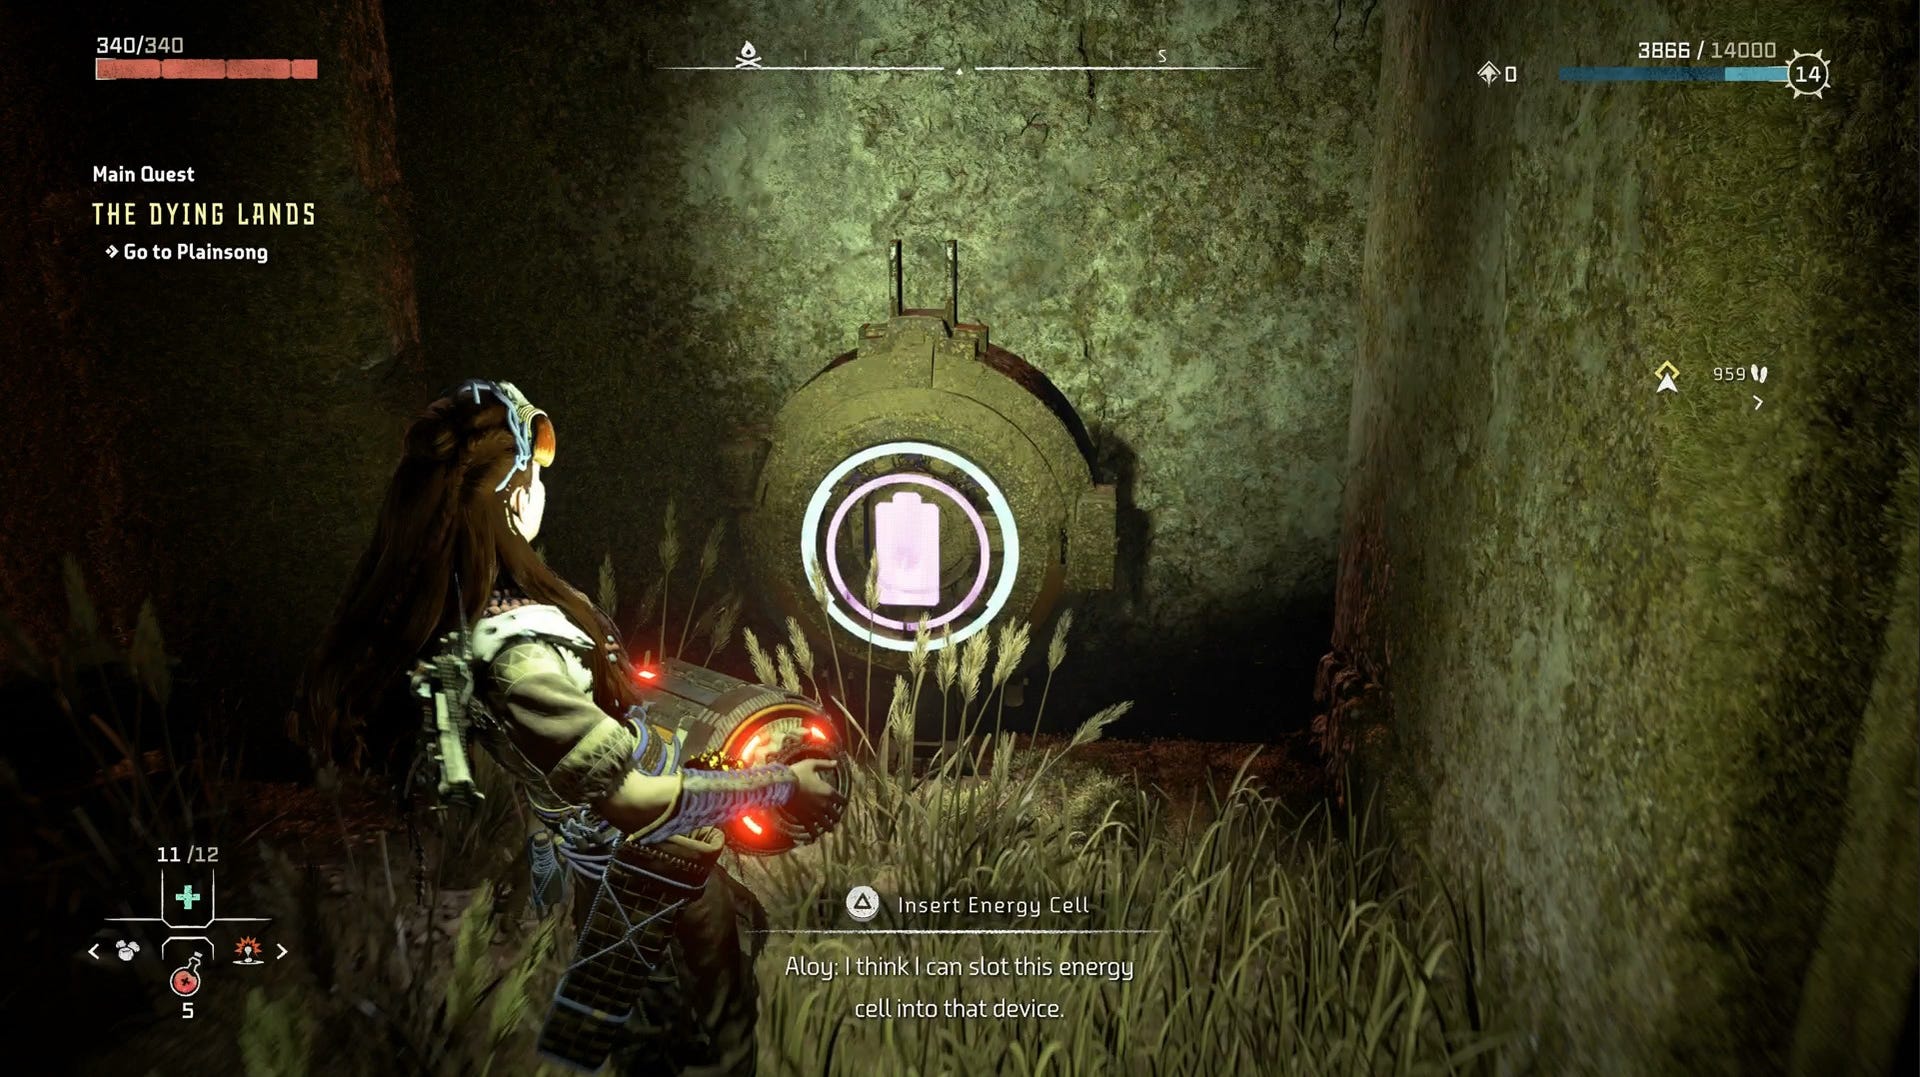
When that's done, drag the crate so that it's right up against the platform next to the cell charging station.
Then remove the cell and drop it onto the crate so that it doesn't get wet. You can then drag the crate through the water to ferry the energy cell without losing charge.
Slot the energy cell again on the other side.
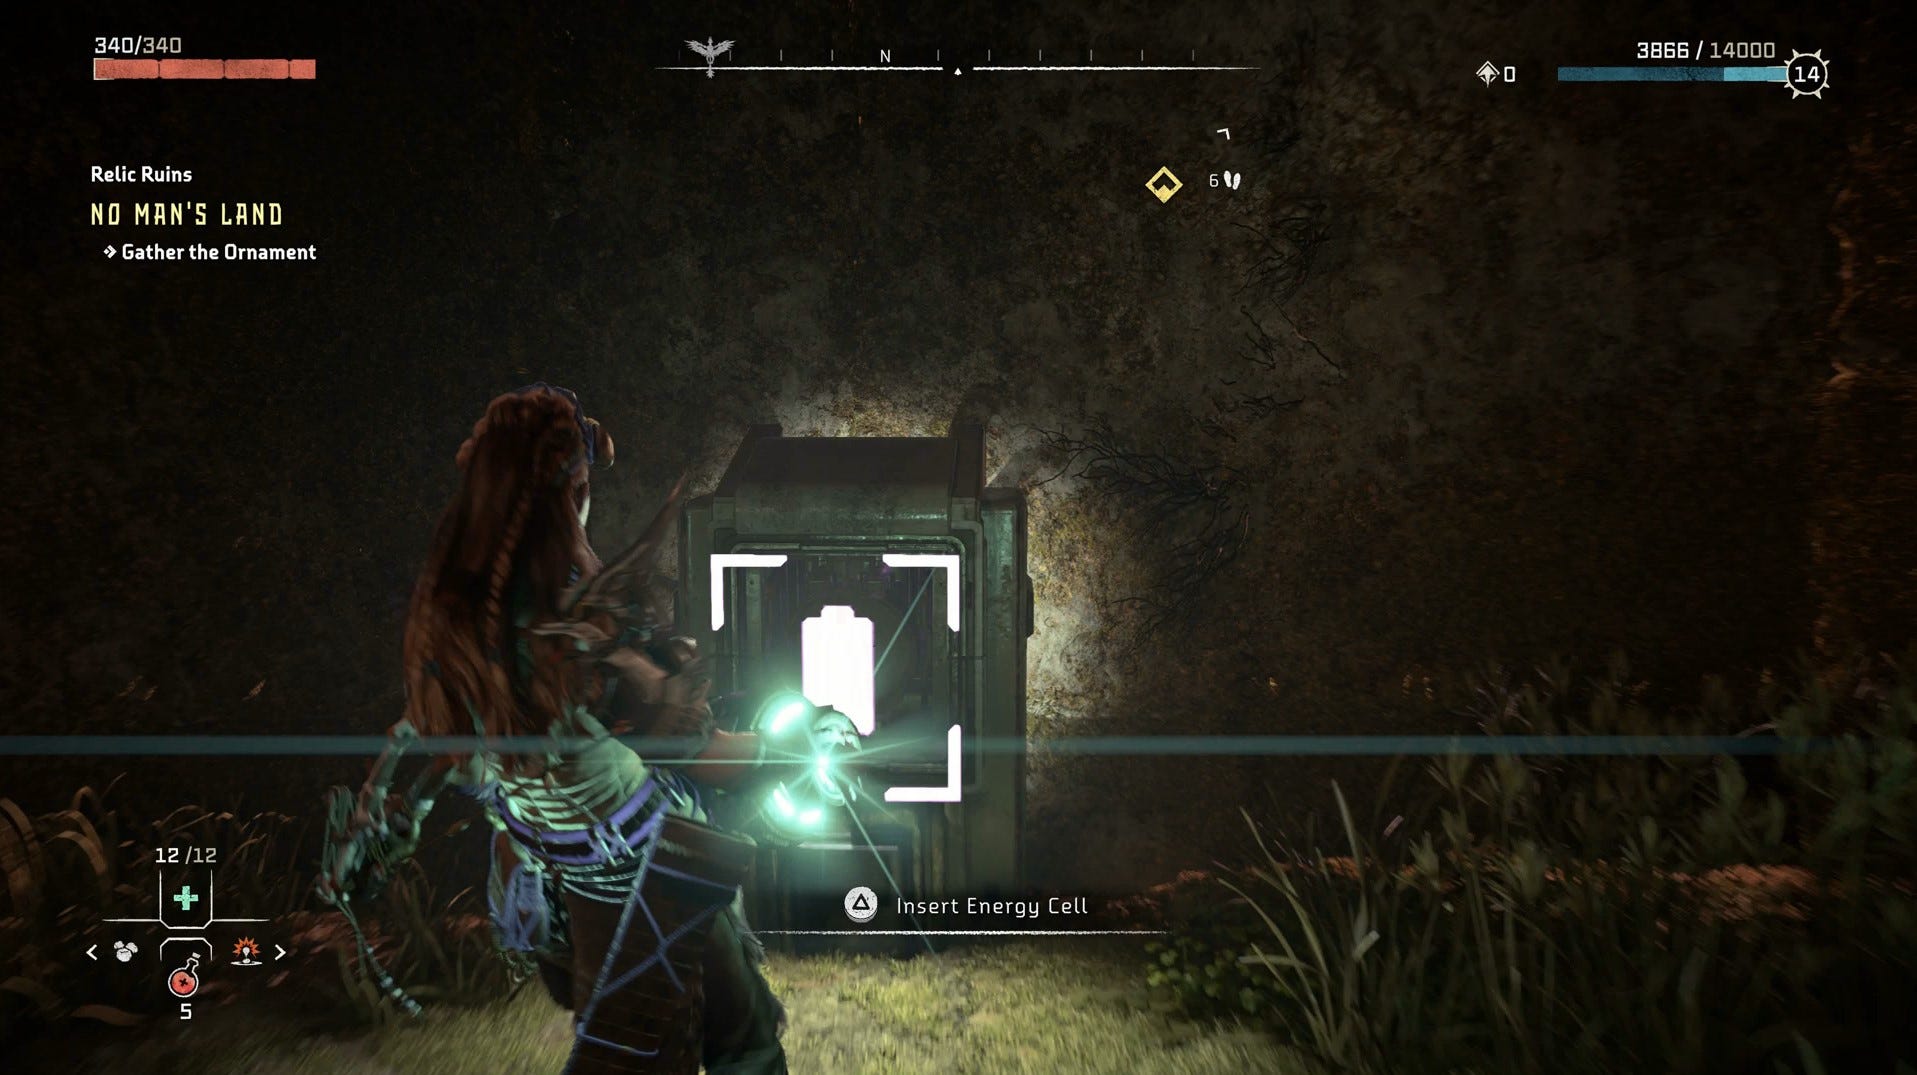
Now the door's open, slide the crate one final time so you can reach the handholds next to the door.
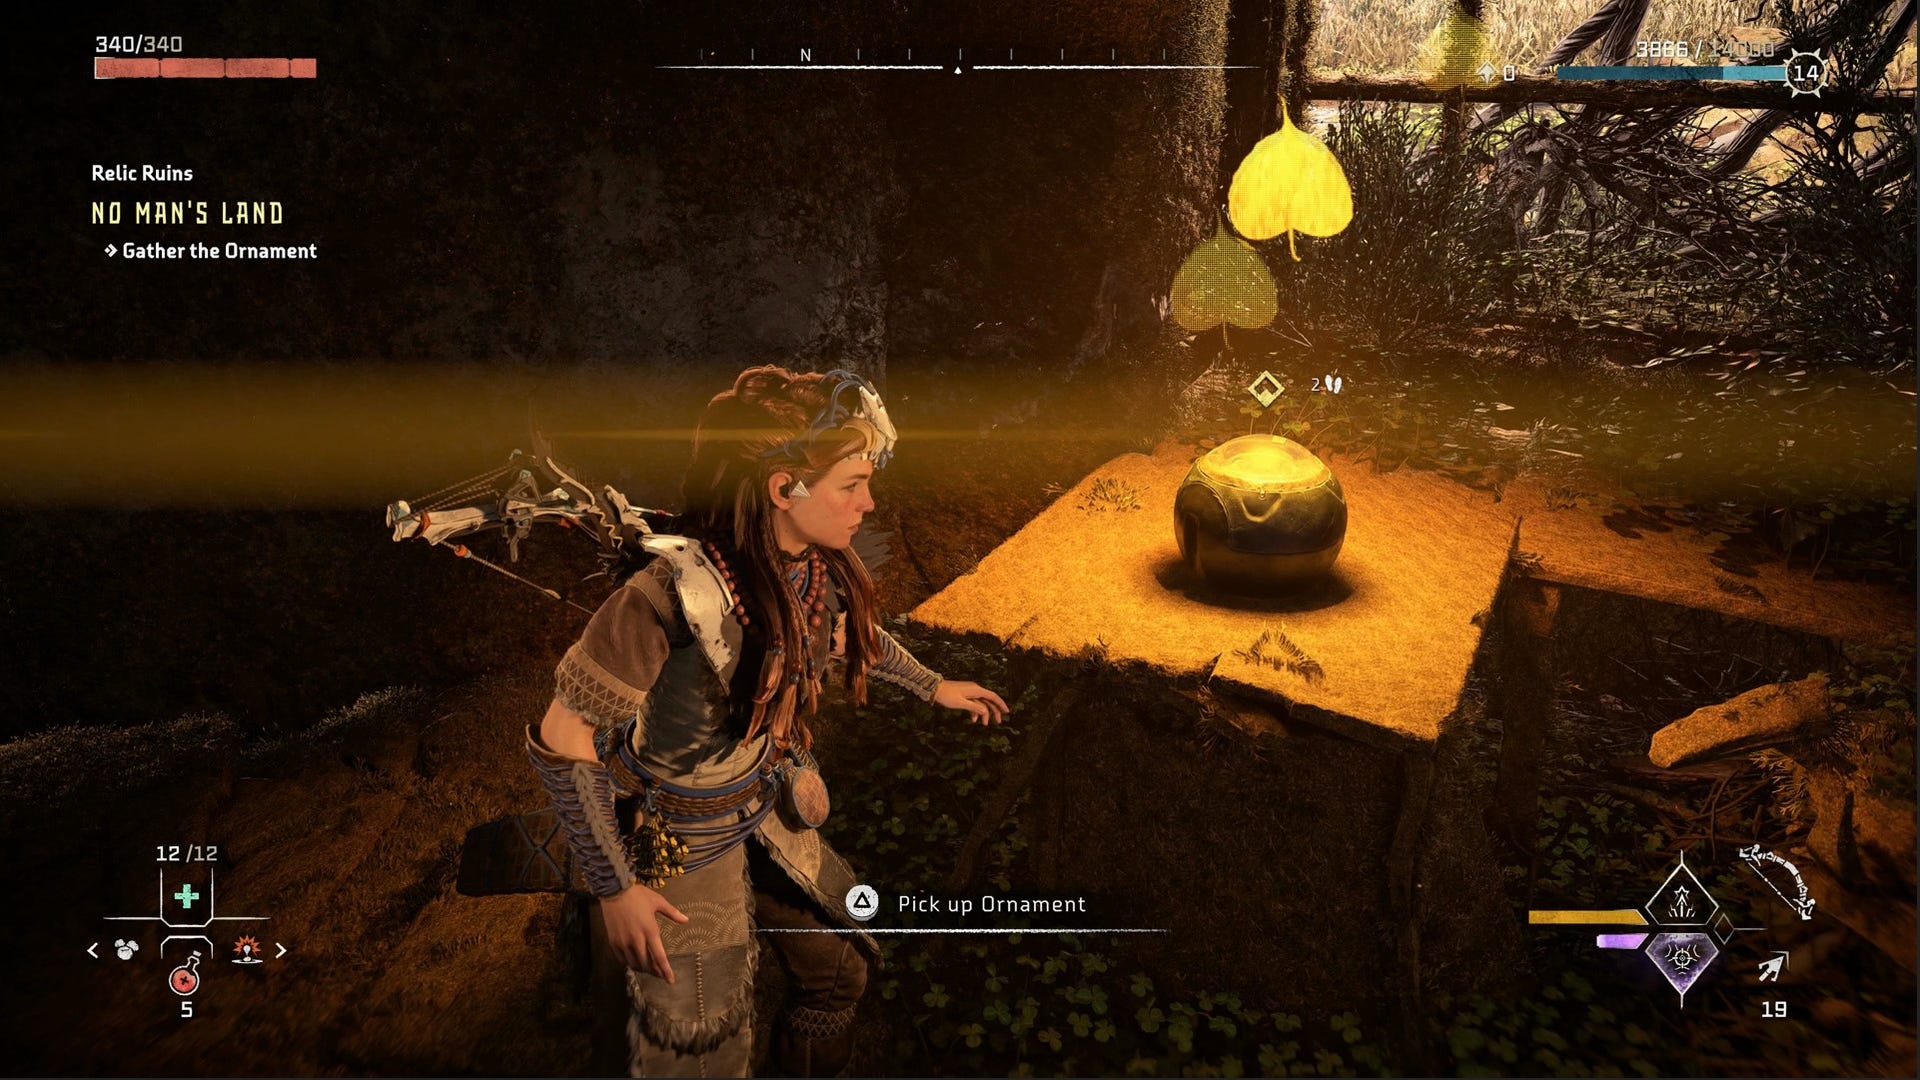
Climb up, then input the No Man's Land Relic Ruin door code: 2204.
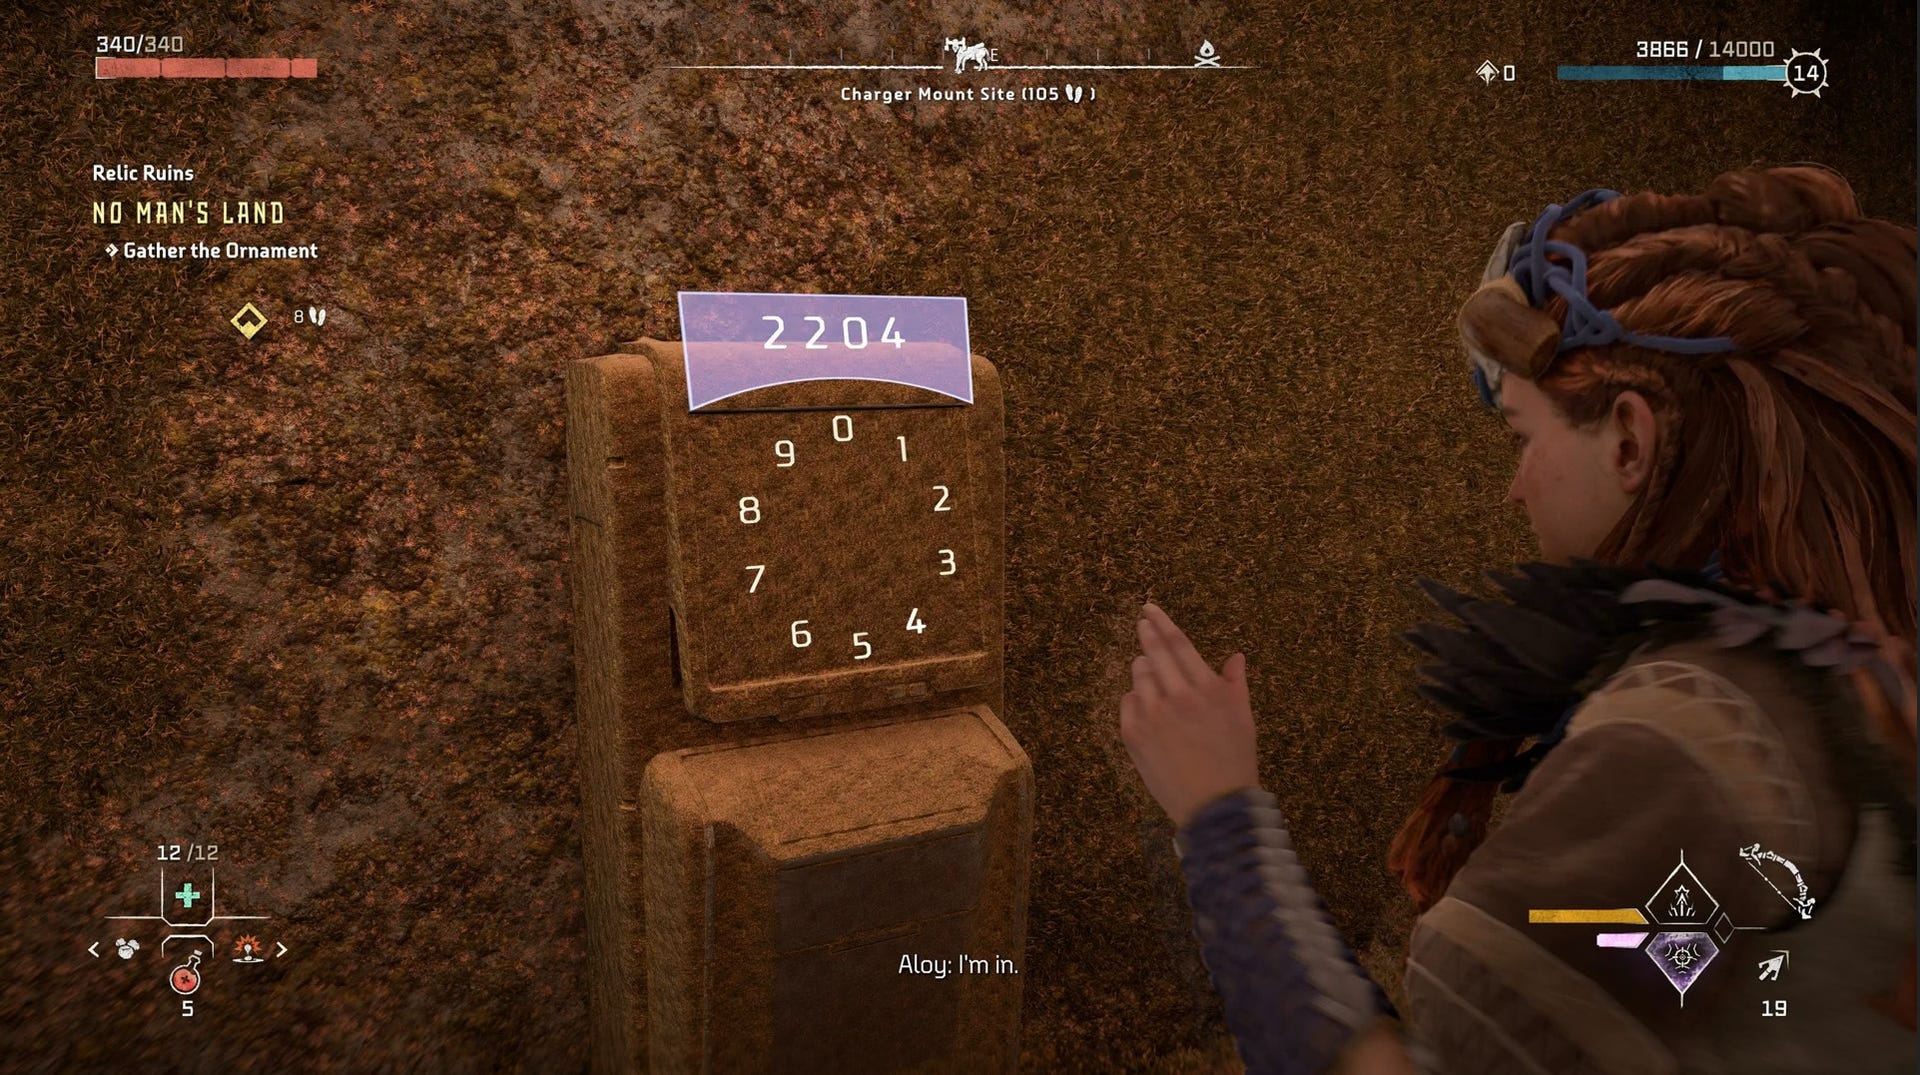
Nab your second Ornament from inside. This one is called 'Emergency Pit Stop.'
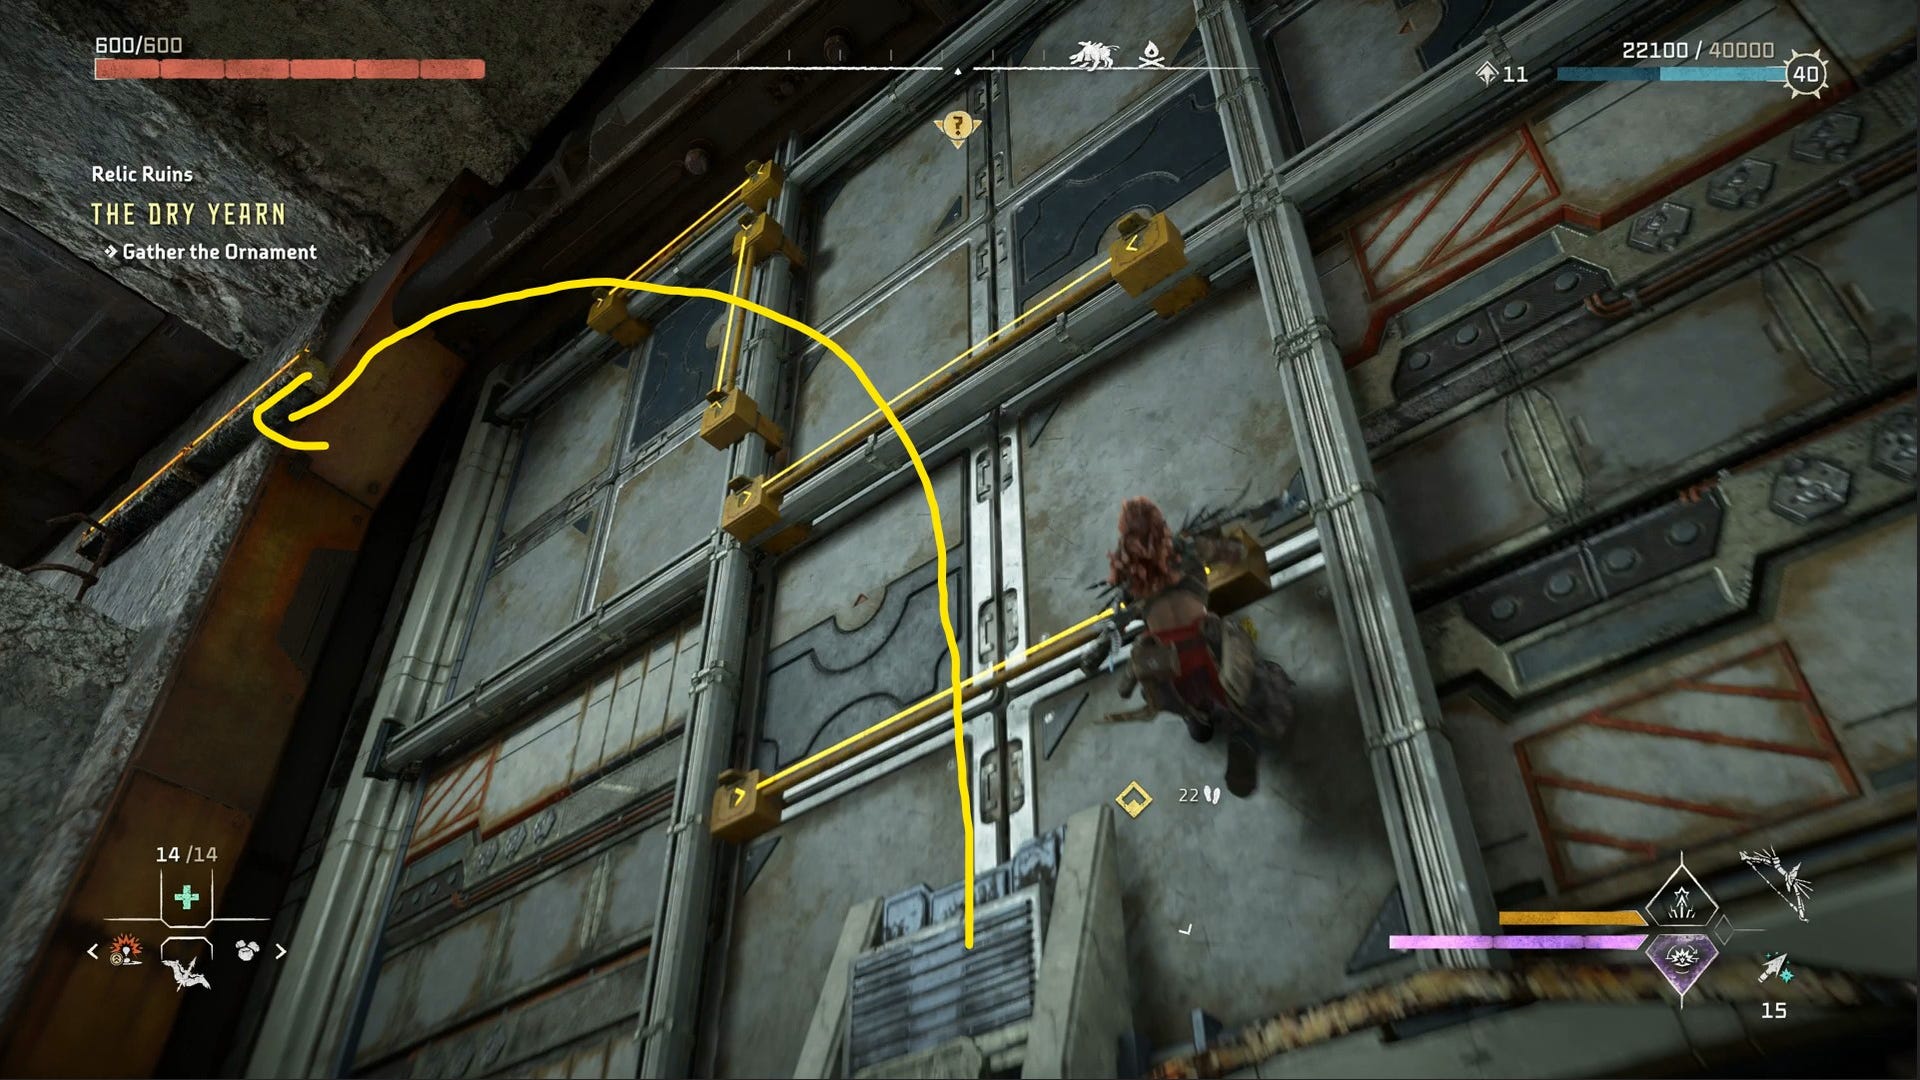
Horizon Forbidden West The Dry Yearn Relic Ruin Puzzle and Door Code
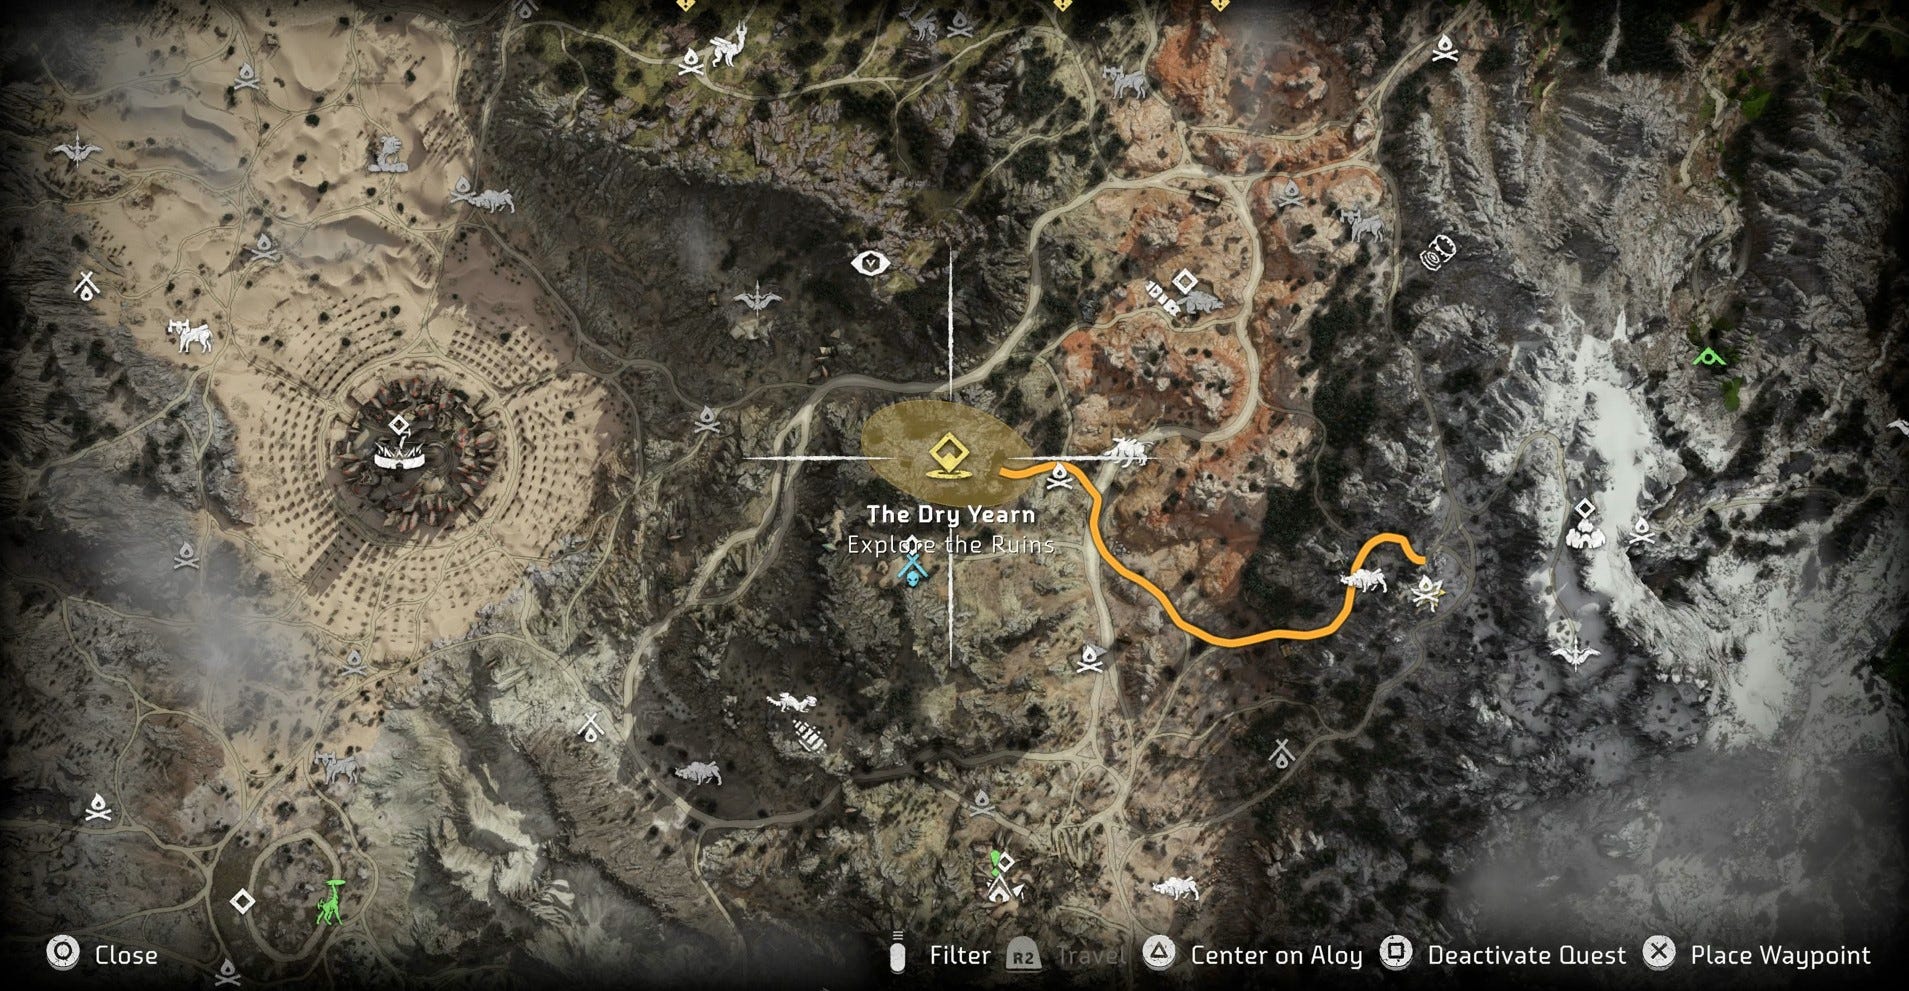
This Relic Ruin will be located east of Scalding Spear in Horizon Forbidden West. To be able to solve this Relic Ruin, however, you will first need to know how to deal with paths blocked by Metal Flowers.
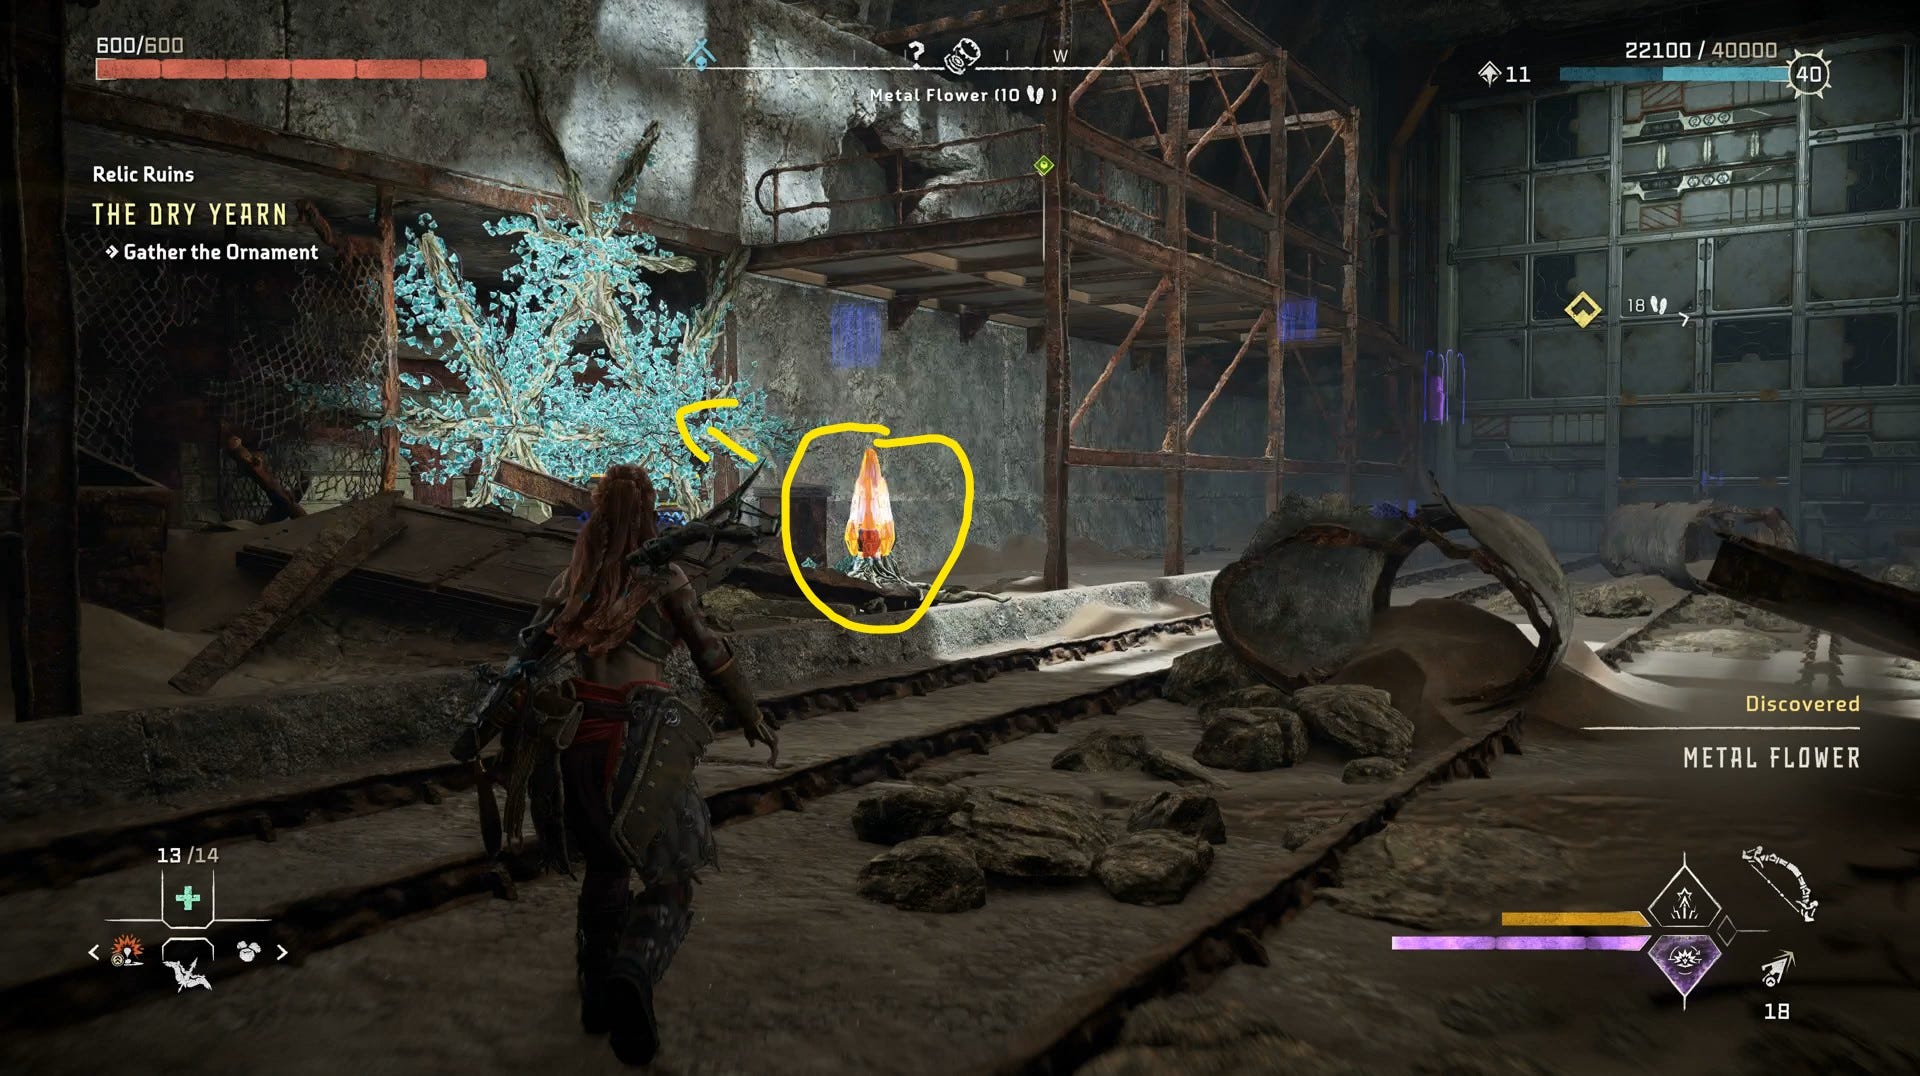
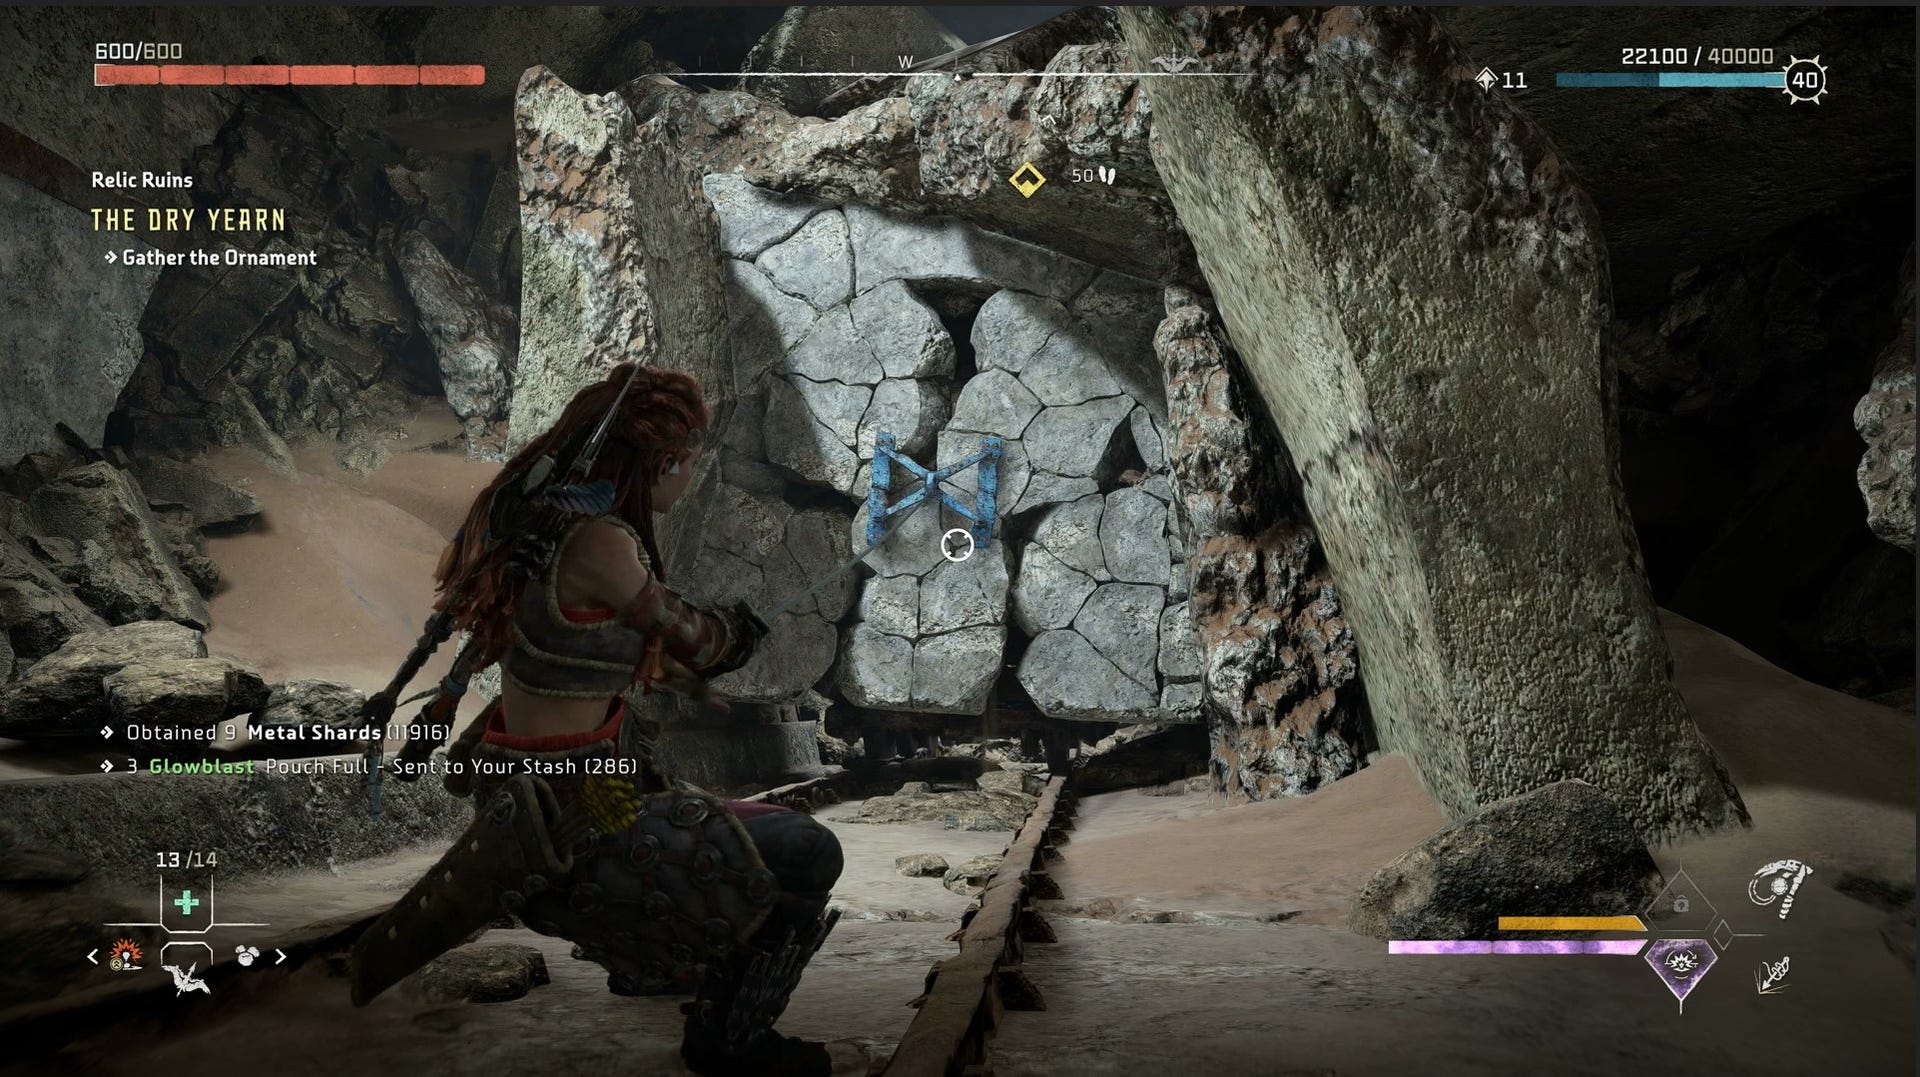
Enter what looks like a tunnel with ruined tracks inside. You will see your third ornament, Weekend Getaway, to the right. It is not yet attainable, and you’ll need to clear the Metal Flower to the left-hand side first.
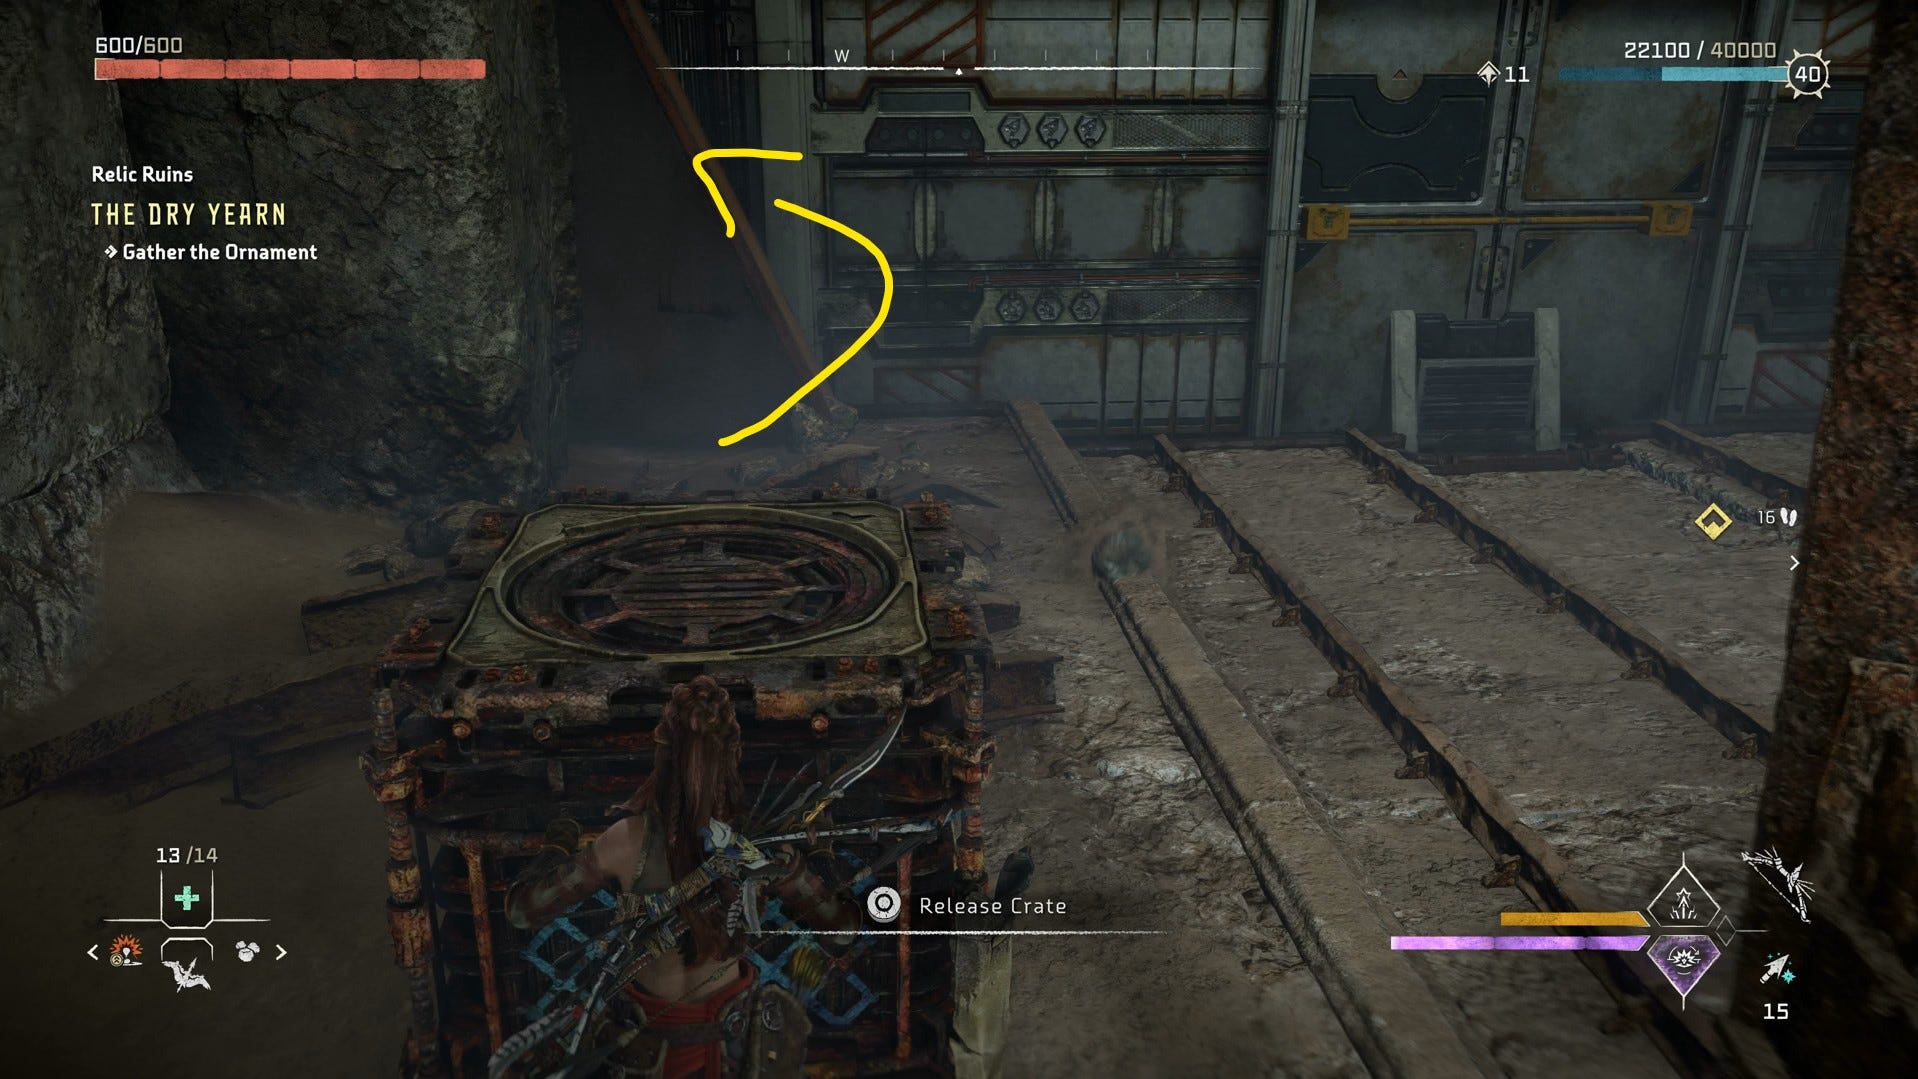
Enter the room that this then opens and locate the moveable crate. Push the crate back into the main area, where you started, and along the left-hand side of the tracks.
After pushing the crate towards the back, left-hand side of the room, this will allow you to platform your way onto a metal walkway. From here, use your Pullcaster to rip open the gate through the hole in the wall, then open the blast door using the yellow wheel and enter it before it slowly closes itself again.
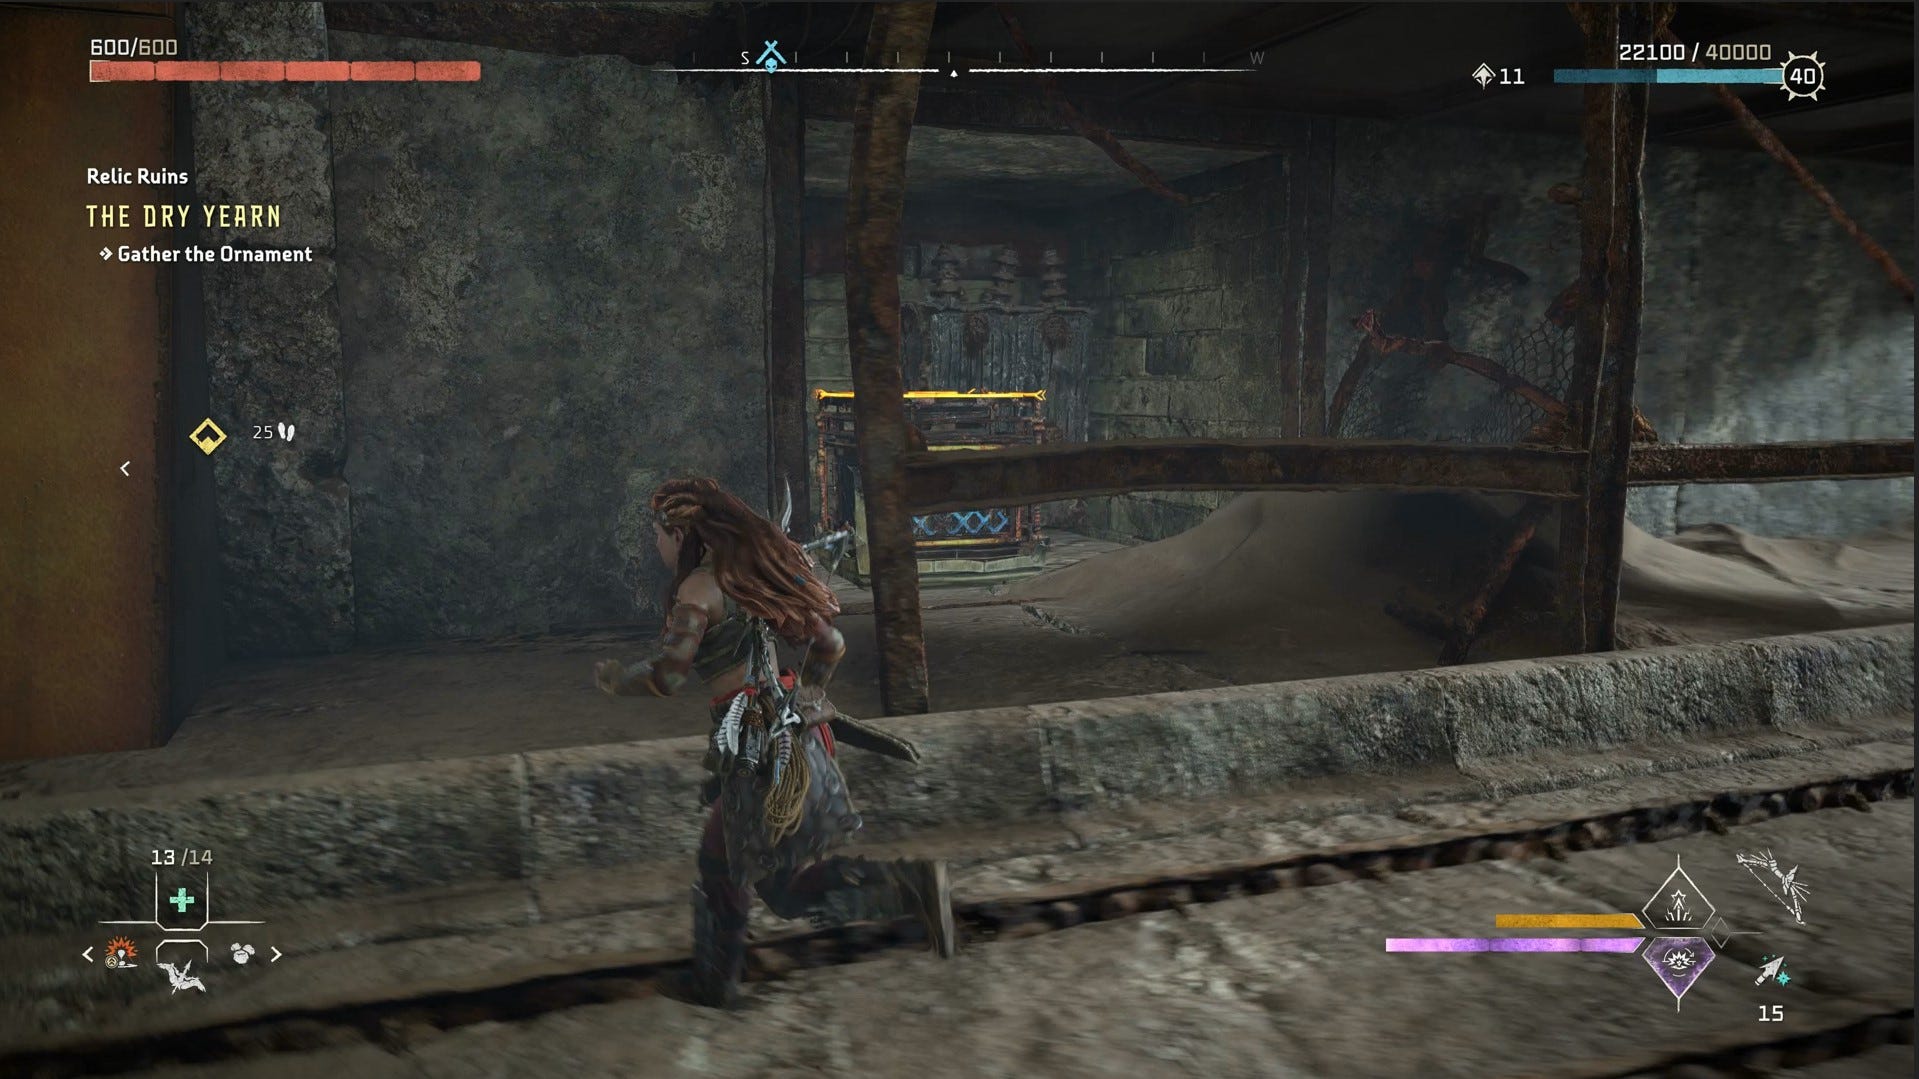
To your immediate left, in the new room, there is another crate. Push it around again, so you can platform your way onto the left walkway, and you’ll find a locked door.
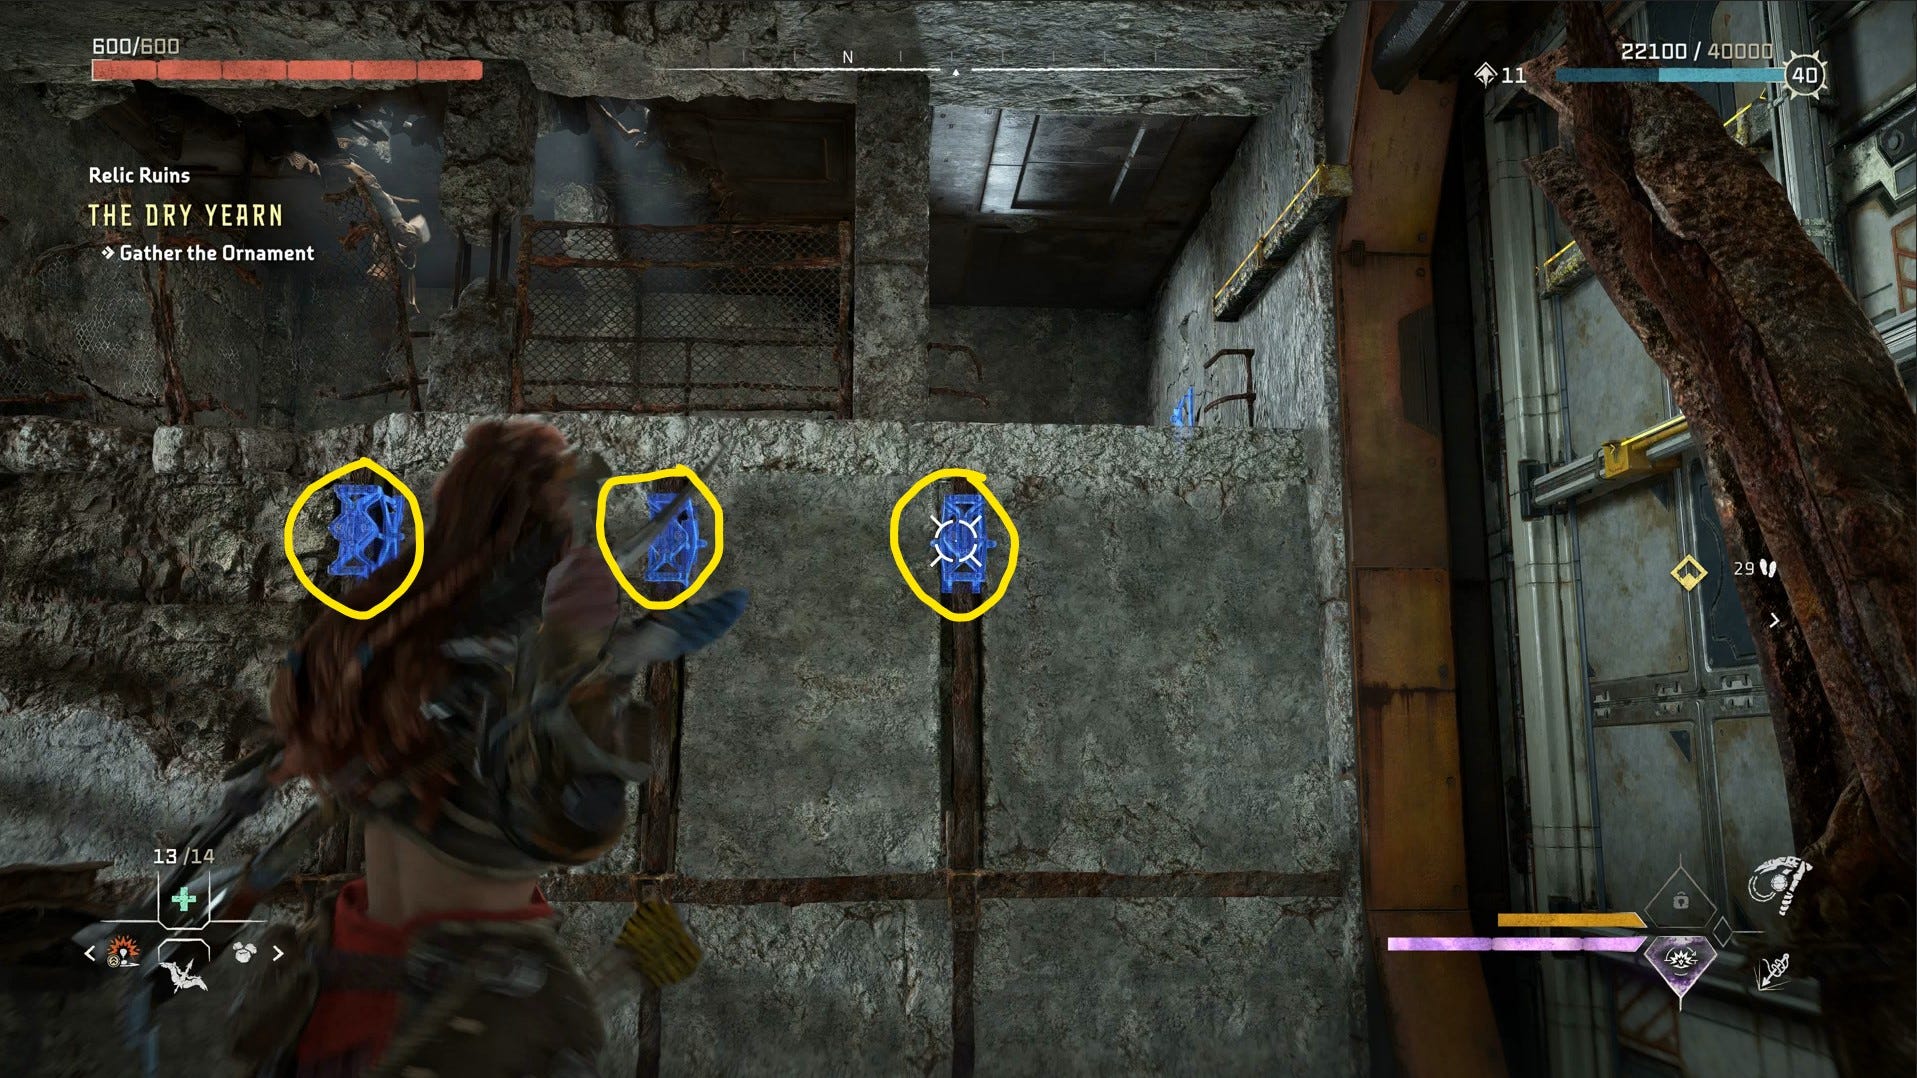
Return to the blast door from earlier. Facing it, there are three rusty beams in blue to the left that can be pulled down using your Pullcaster.
Before trying to traverse these beams, return to the floor and use your Pullcaster to disturb the rubble at the end of the tunnel. With the rubble moved, a railcar is revealed - yet another item you can push and pull. You’ll need this later. Pull this as close to the Blast Door as you can.
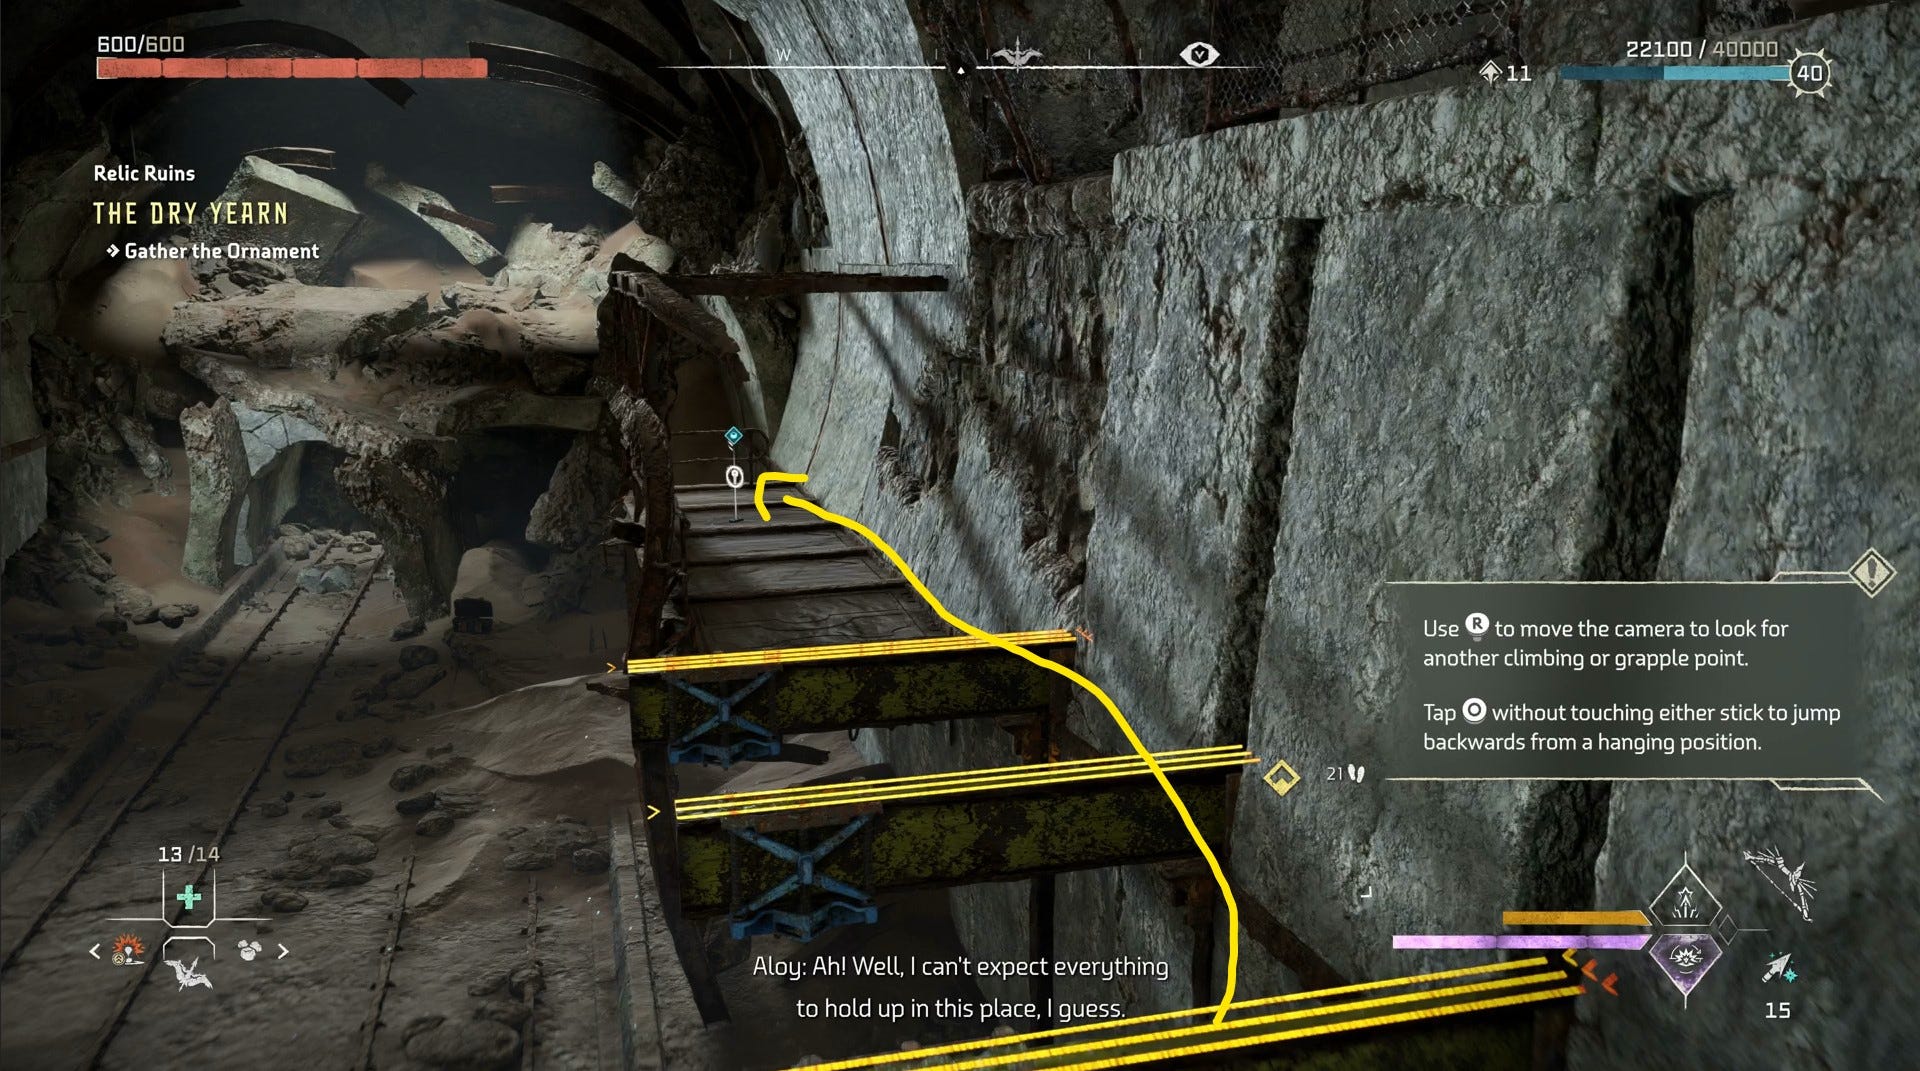
Then, ignore the railcar, and climb the ledges along the Blast Door. Press ‘Circle’ when you’re ready to leap backwards onto the beams you’ve just pulled down. However, take caution of the one ledge towards the top that will crumble under pressure.
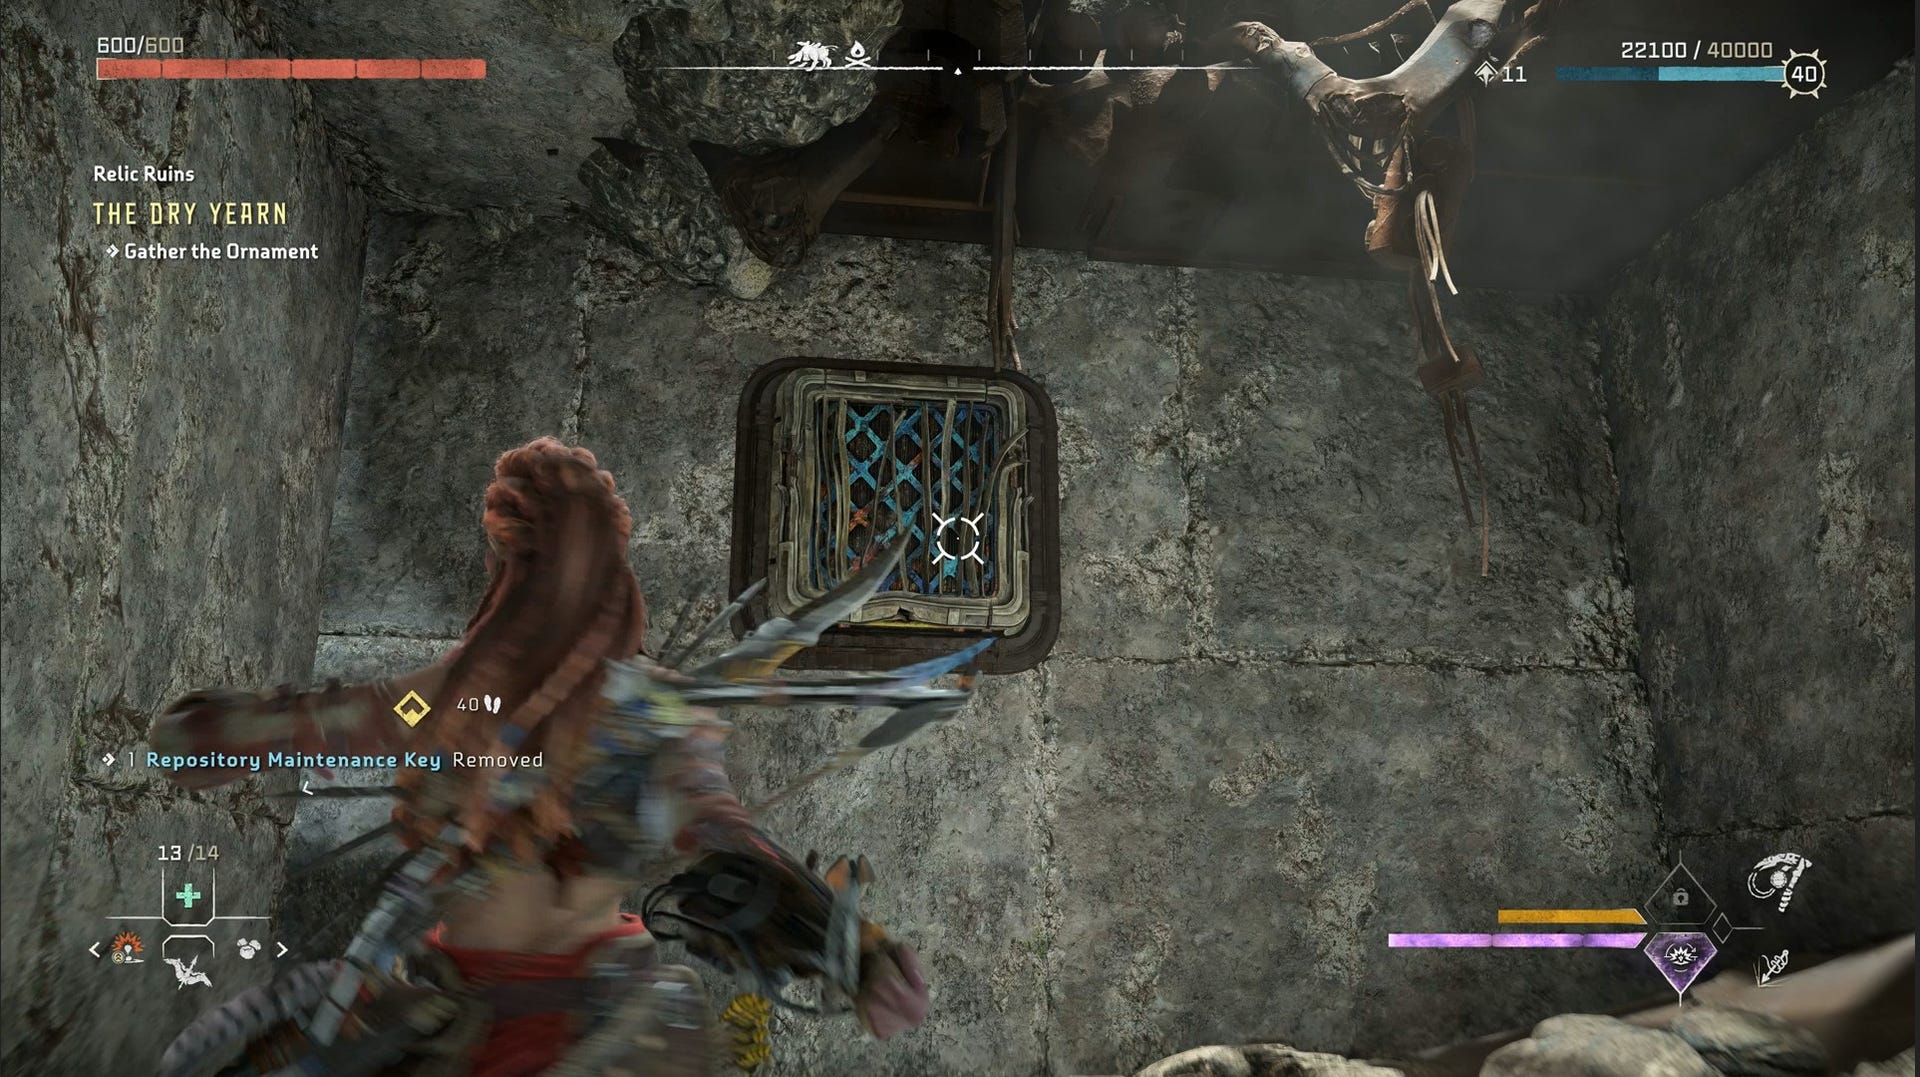
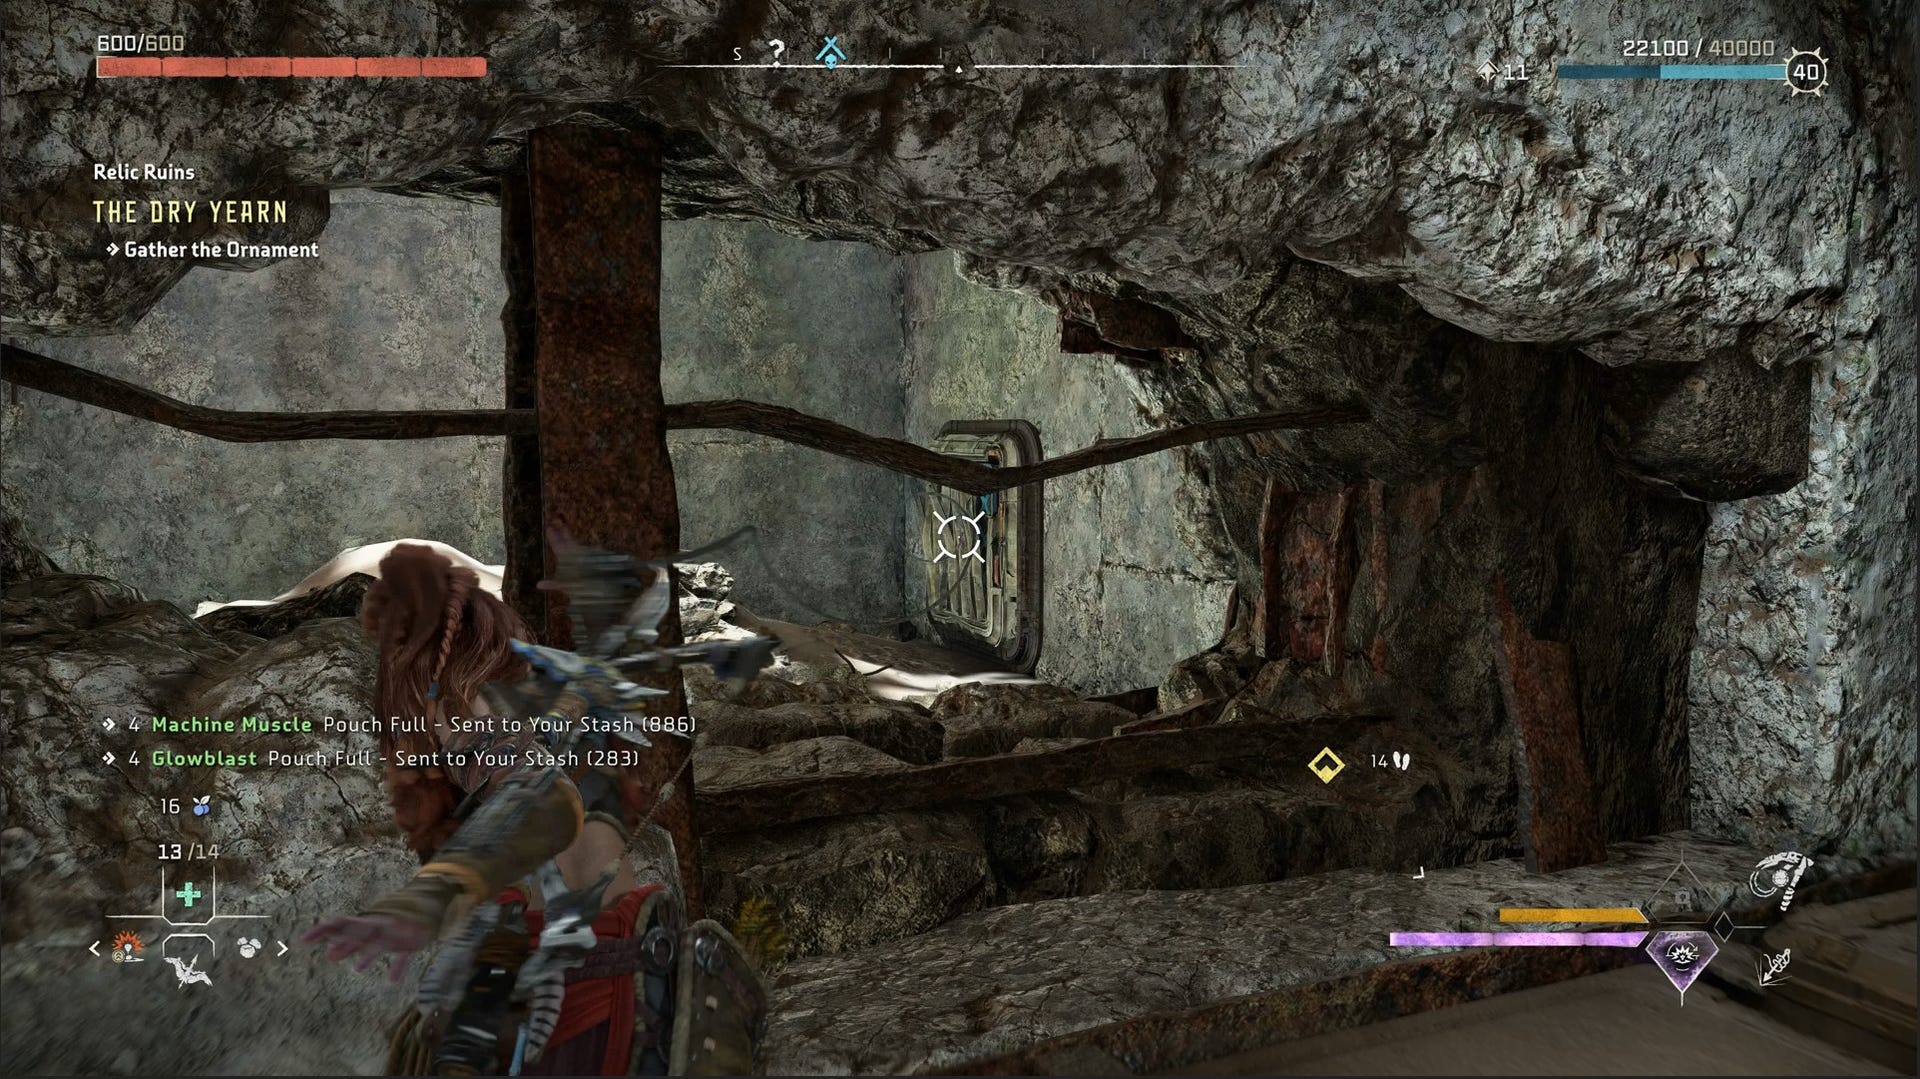
Jump along the beams until you reach the key required for the locked door from earlier. Then, return to the door and unlock it, and use your Pullcaster to open the vent to the left of this room.
Climb through the ominous vent to another new area, and blow up the Firegleam to your left. Continue through, and you’ll be back on the other side of the Blast Door, where you started. This is where that railcar from earlier is going to come in handy.
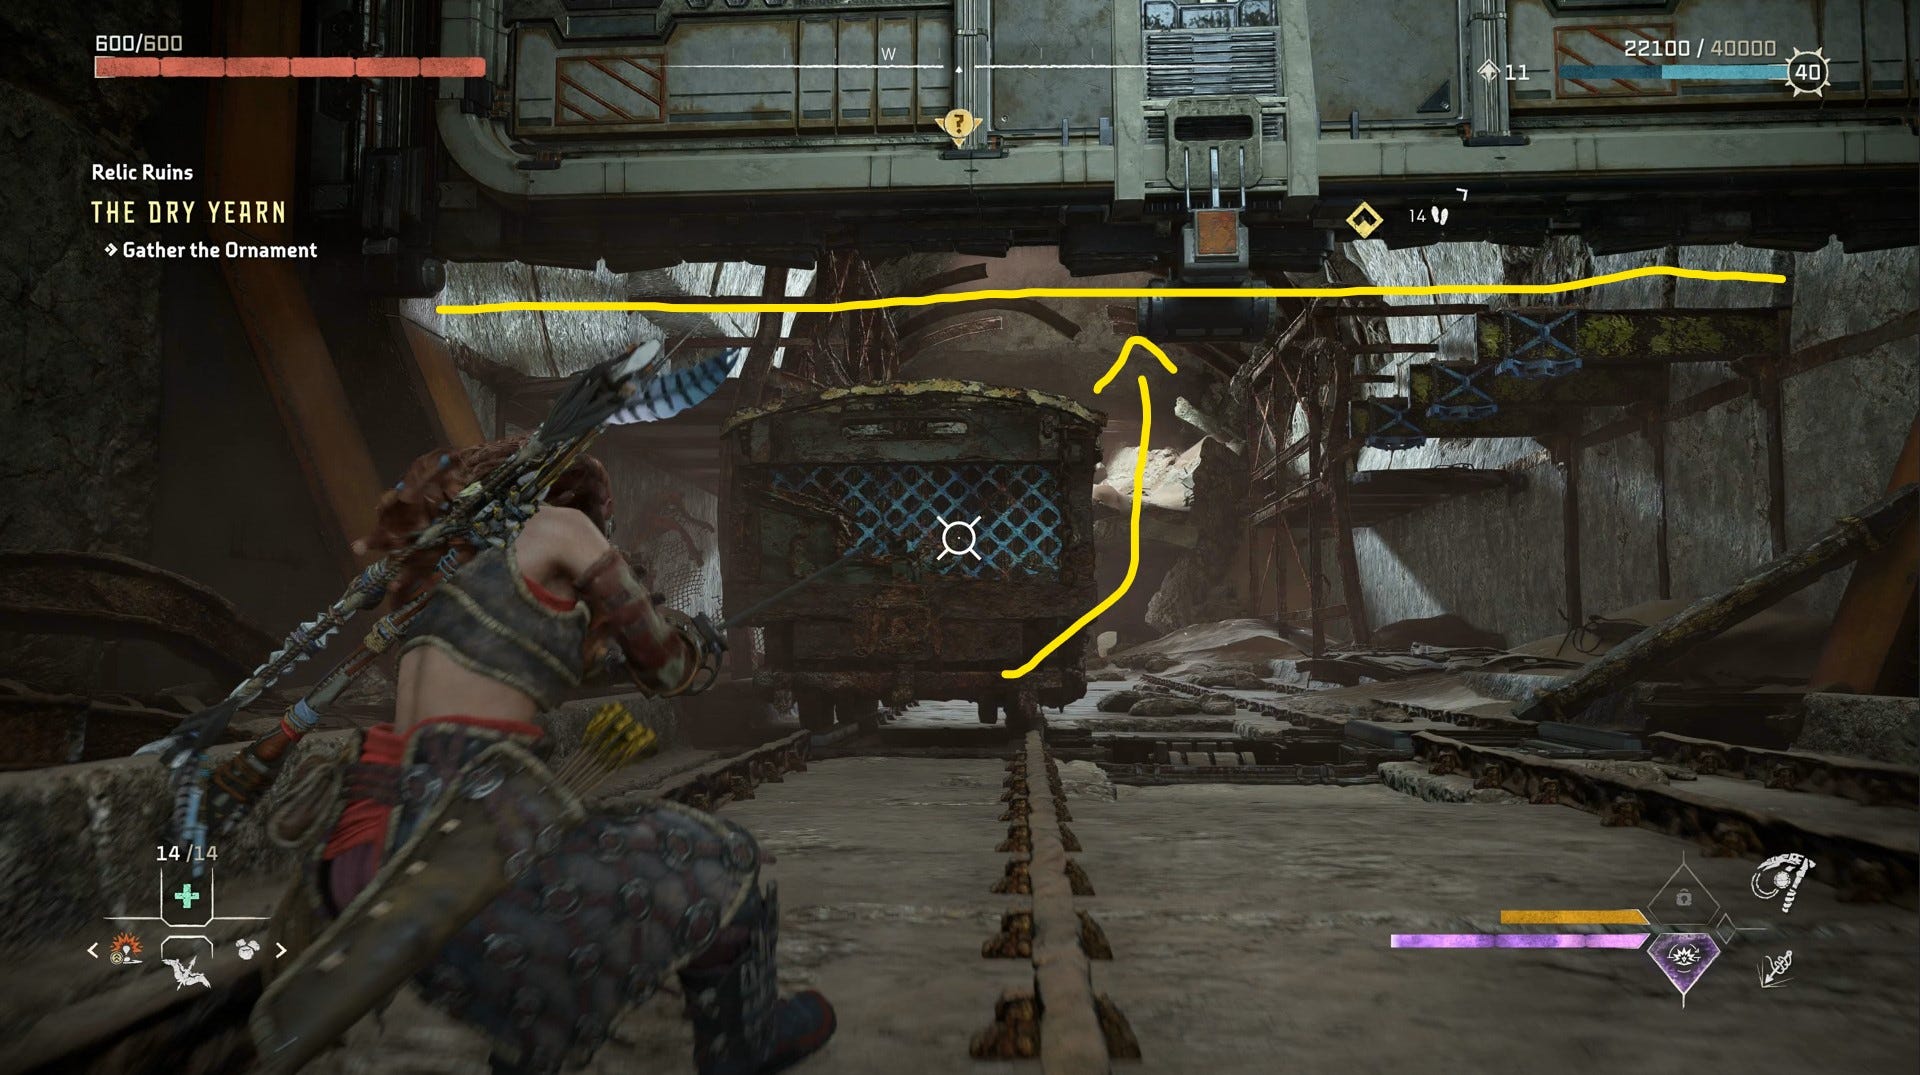
Now that you’re on the side of the Blast Door where you started, open the door again and pull the railcar along just enough so that it holds the door open.
Then, on the side of the Blast Door where you first uncovered the cart, climb it, and climb the Blast Door to the top-left.
When here, pull down the wall ahead of you. Venture into the new opening and drop onto the walkway.
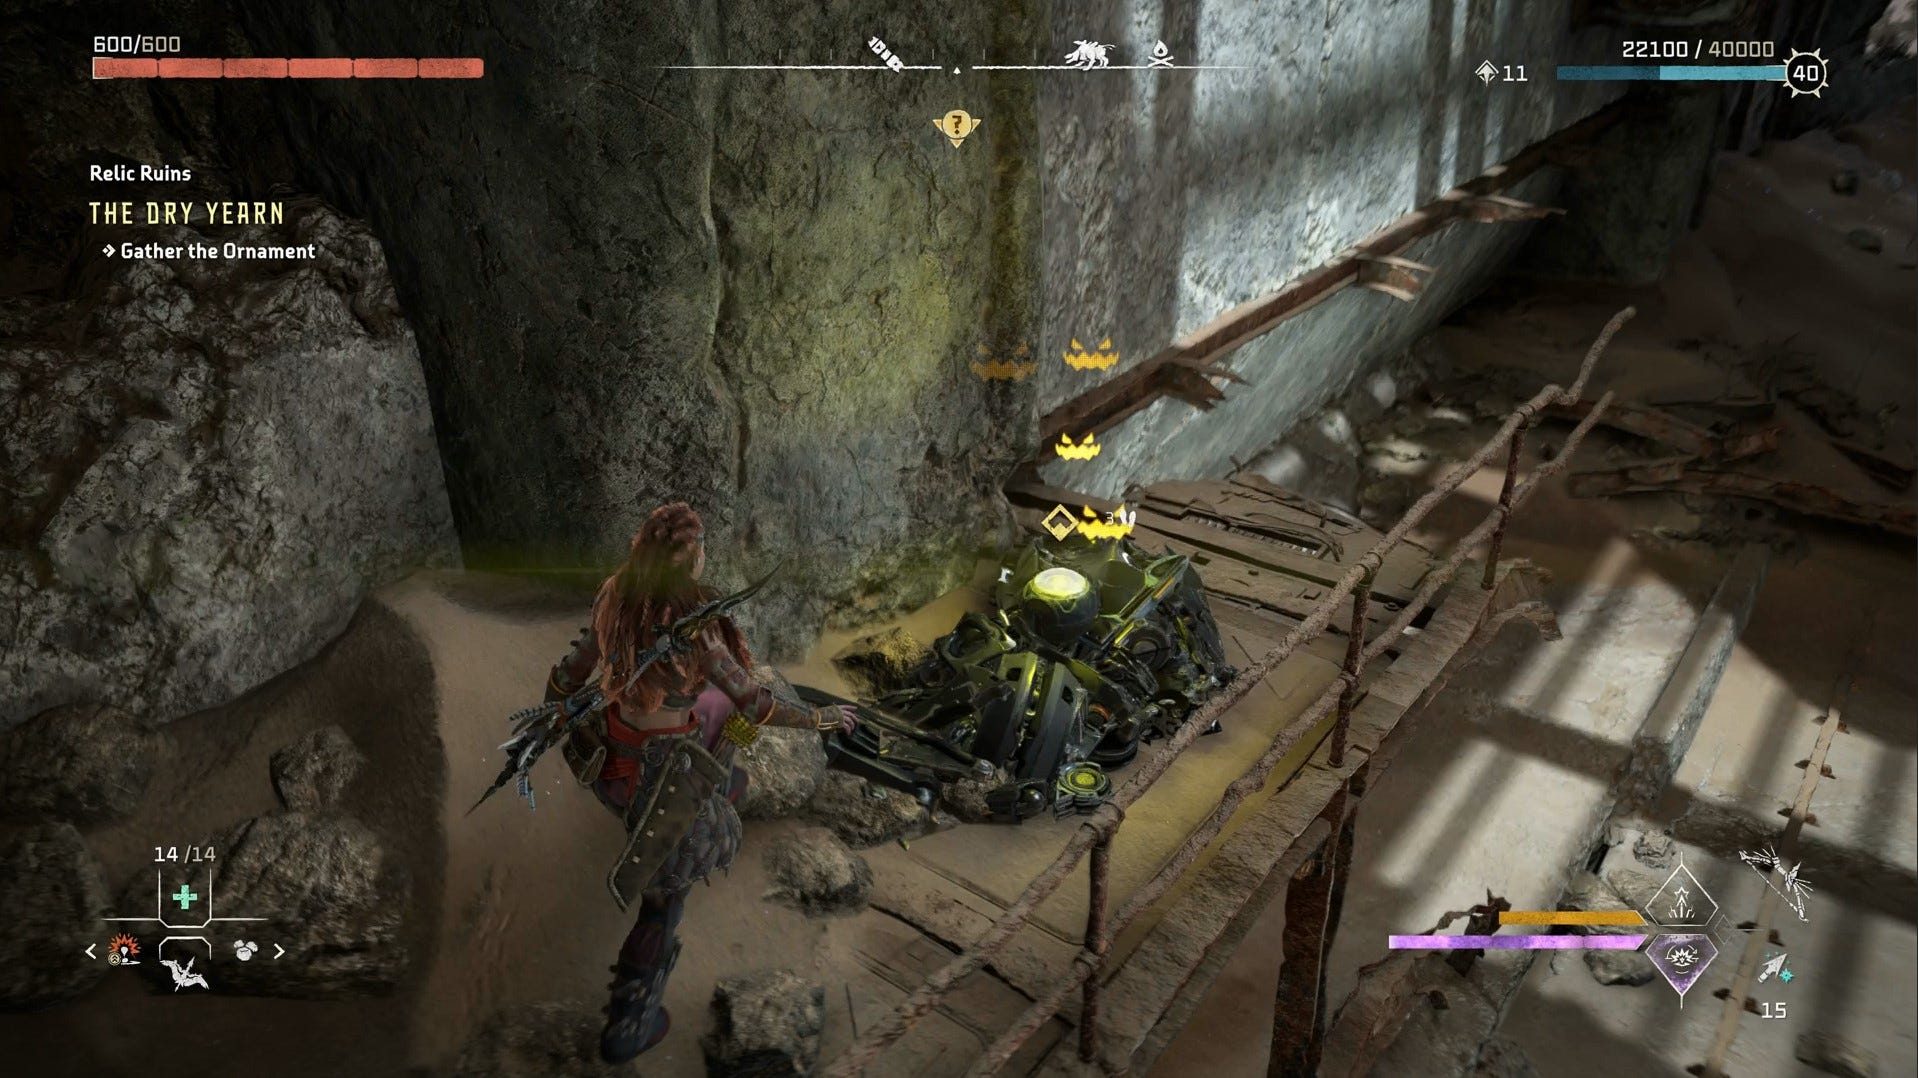
A few more steps, and the Ornament - 'Weekend Getaway' - is all yours.
Horizon Forbidden West Restless Weald Relic Ruin Puzzle and Door Code
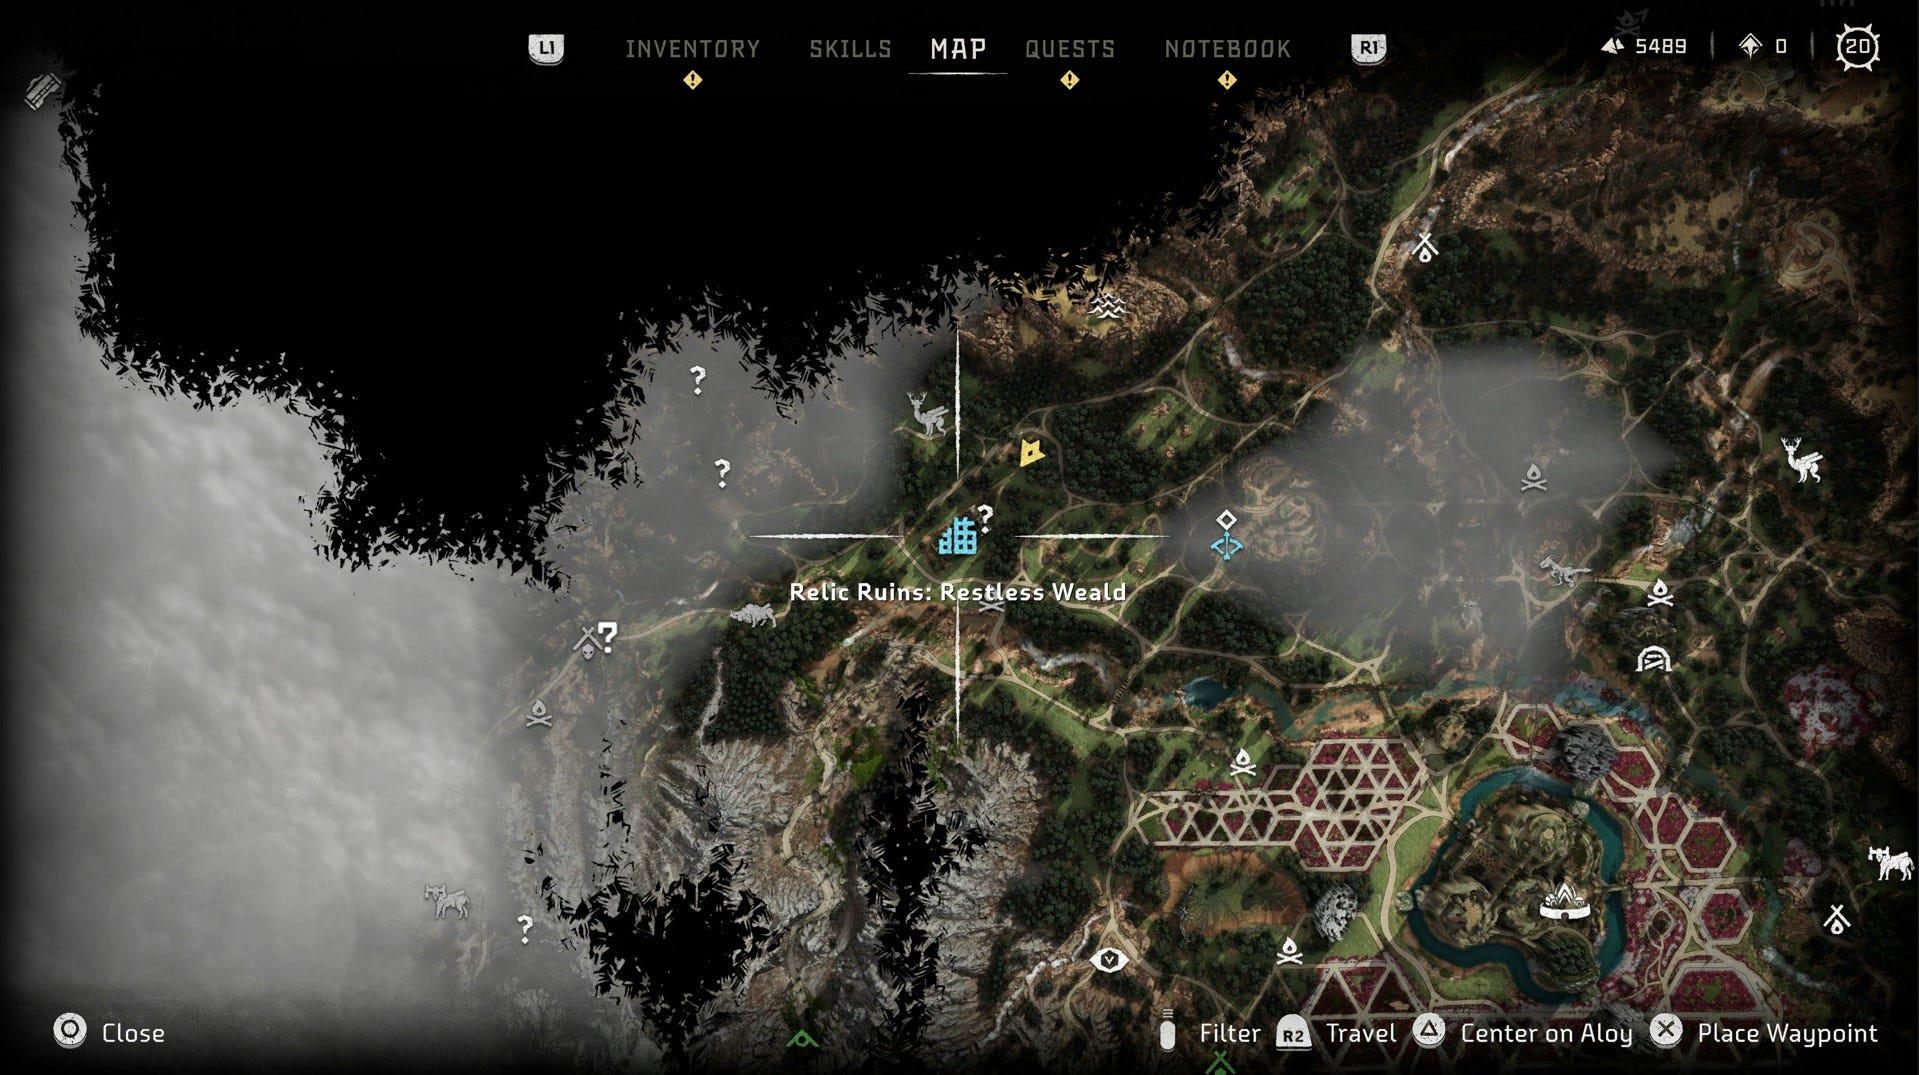
The Restless Weald Relic Ruin is west of Hunting Grounds: Plainsong in Horizon Forbidden West. You need to have completed the Death's Door Story Mission that unlocks the Igniter and allows you to clear out Firegleam Blocked Paths before trying to grab this ornament.
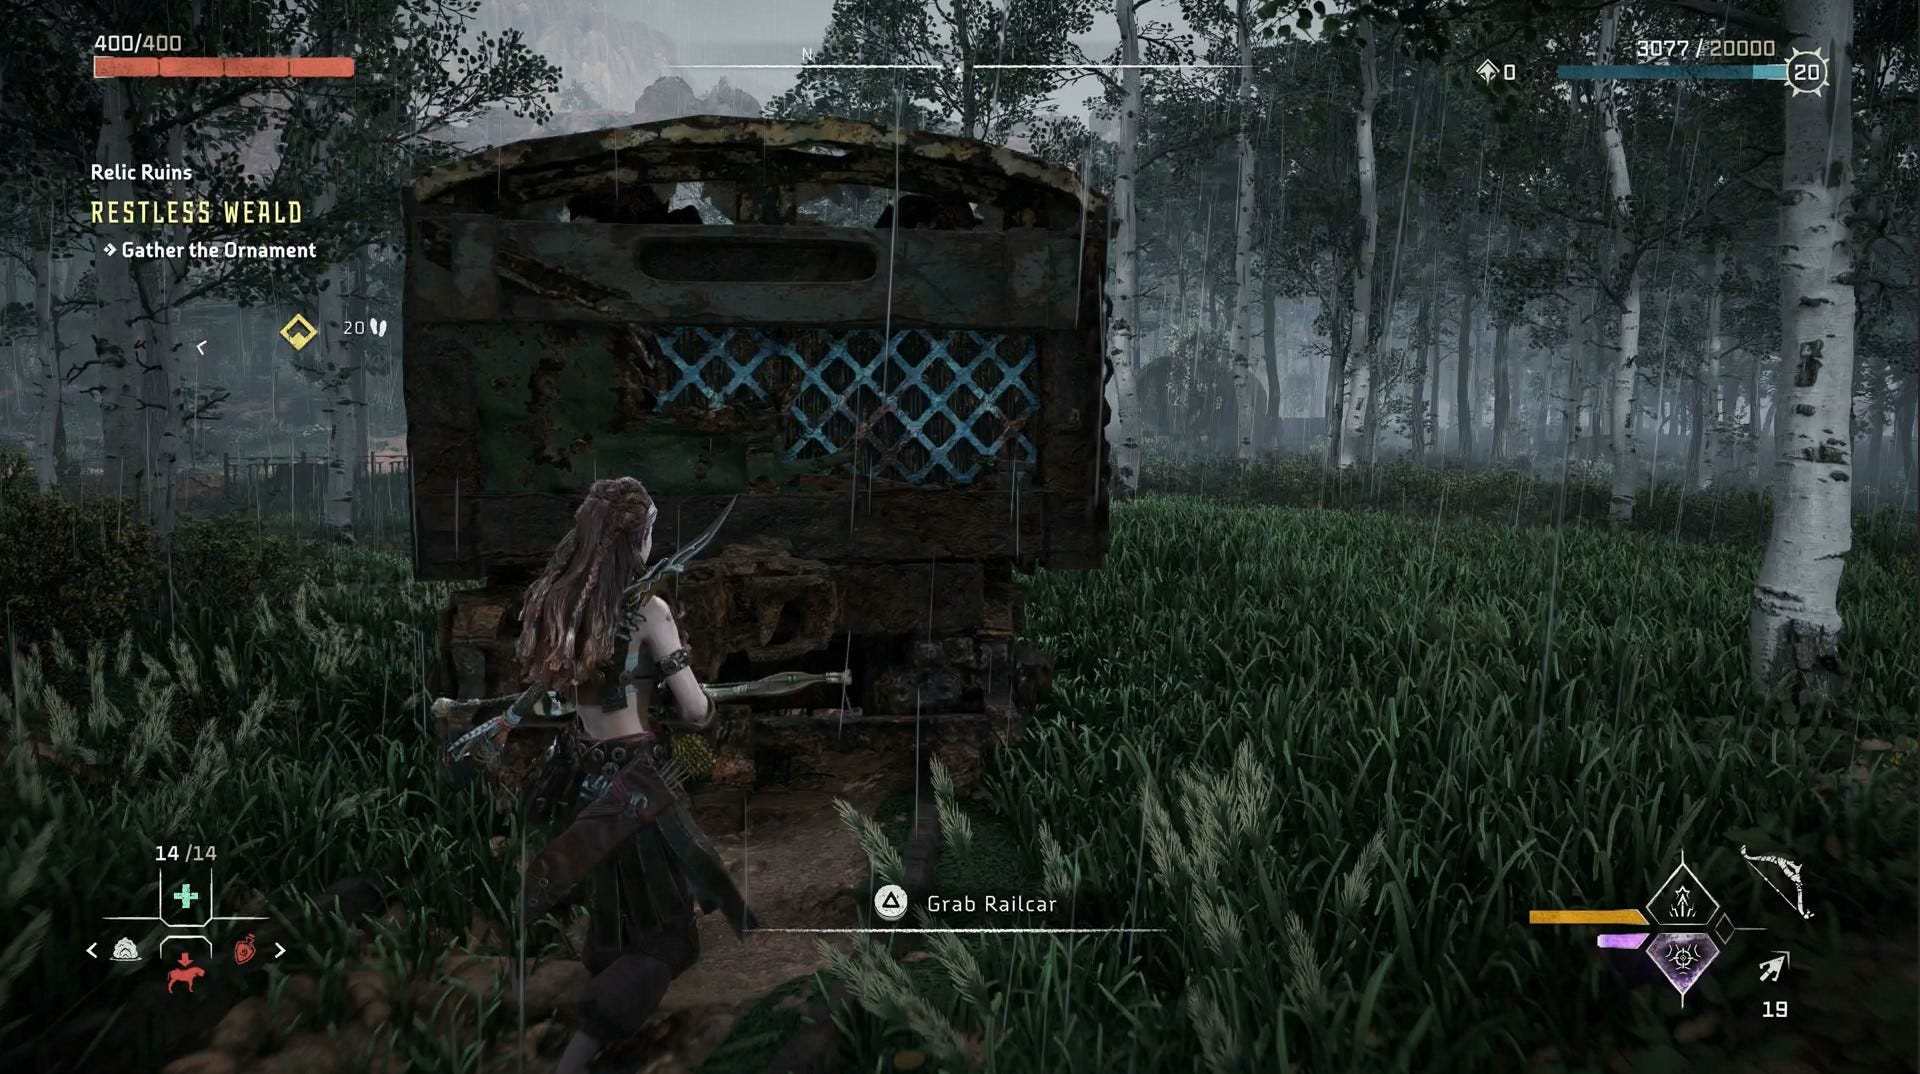
Outside of the ruins, you will find some tracks and an unused railcar with a yellow lever behind them. Pull the railcar from the curved track it is on using your Pullcaster, and onto the straight one that is adjacent with the lever.

After this, approach the level and press Triangle to ‘Change to Straight Tracks’. Then, make your way along the straight tracks and pull the railcar along with you using your Pullcaster until you reach a building.
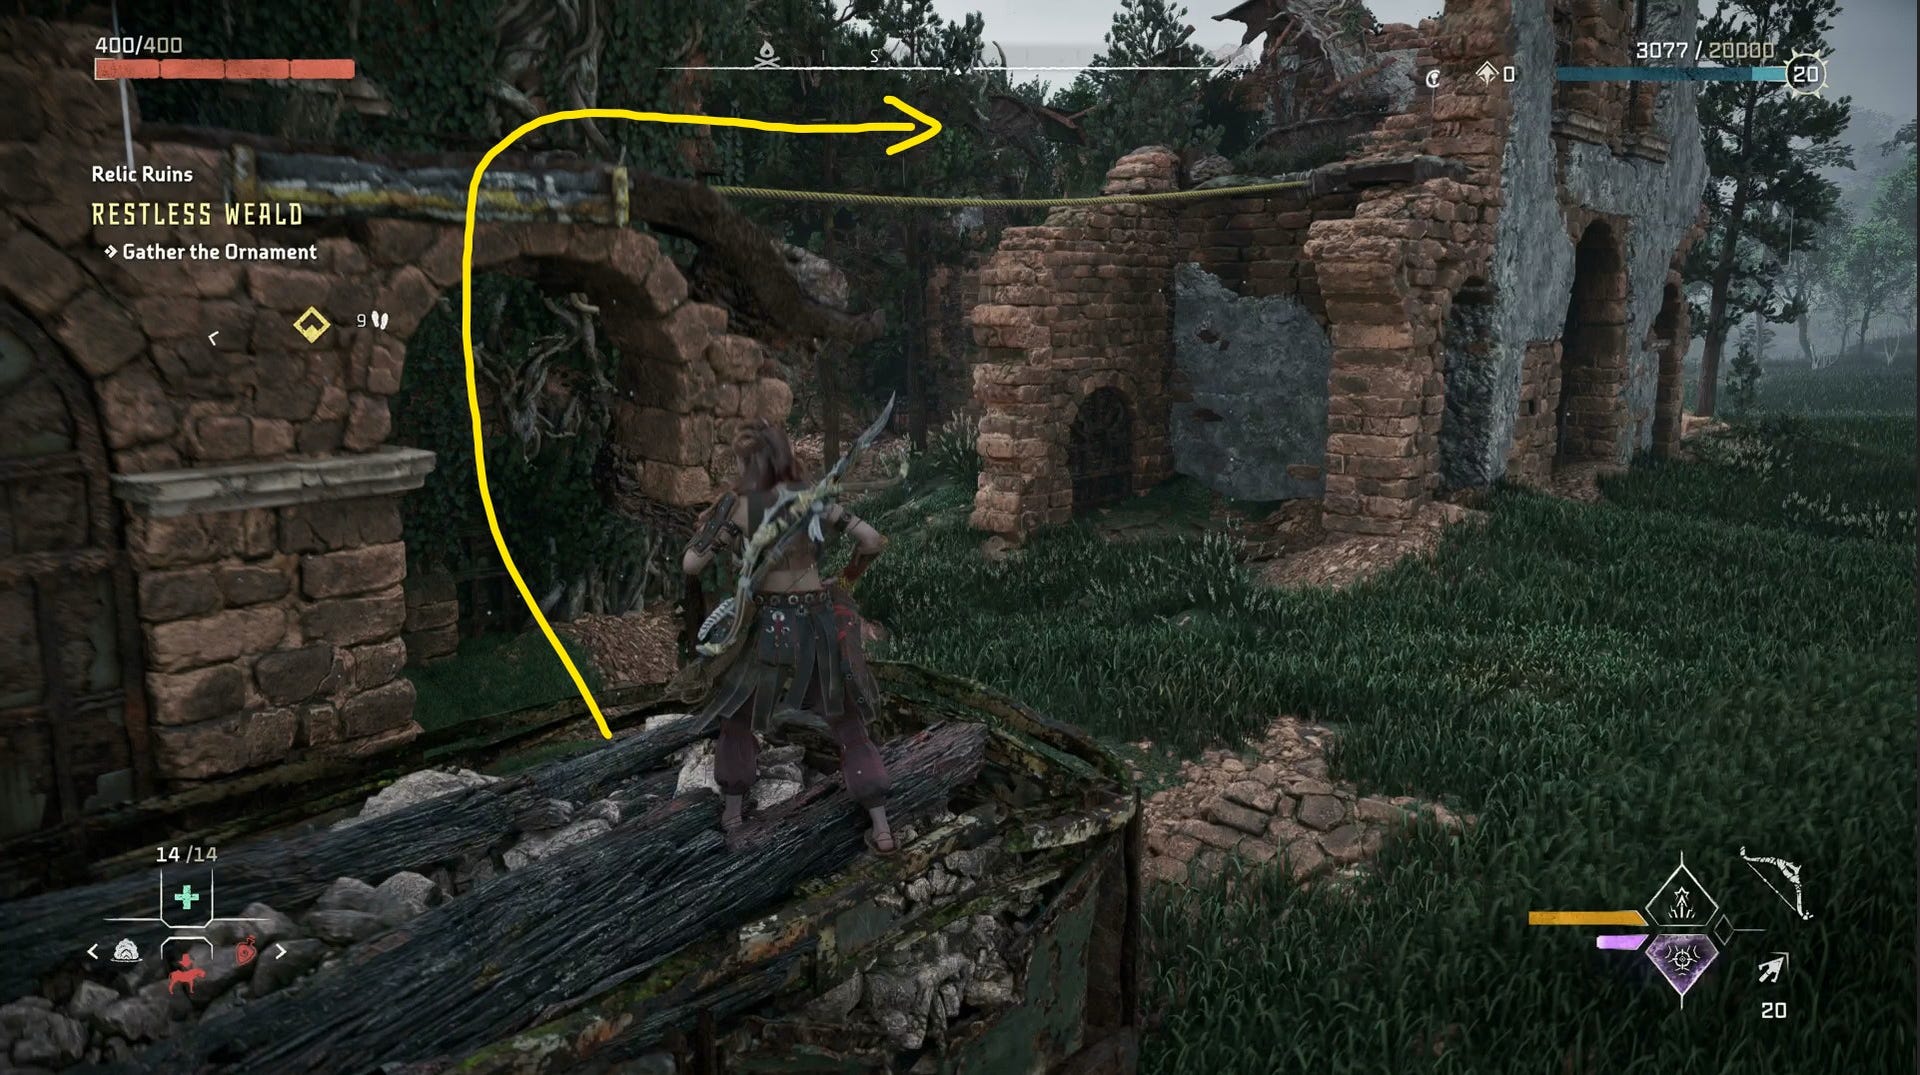
Ensure that the railcar is directly along the side of the building, and Aloy can then use it to climb atop of and reach the summit of the building.
Then, traverse the tightrope to another area where a key can be found. From here, you can take a jump down into the ruins themselves.
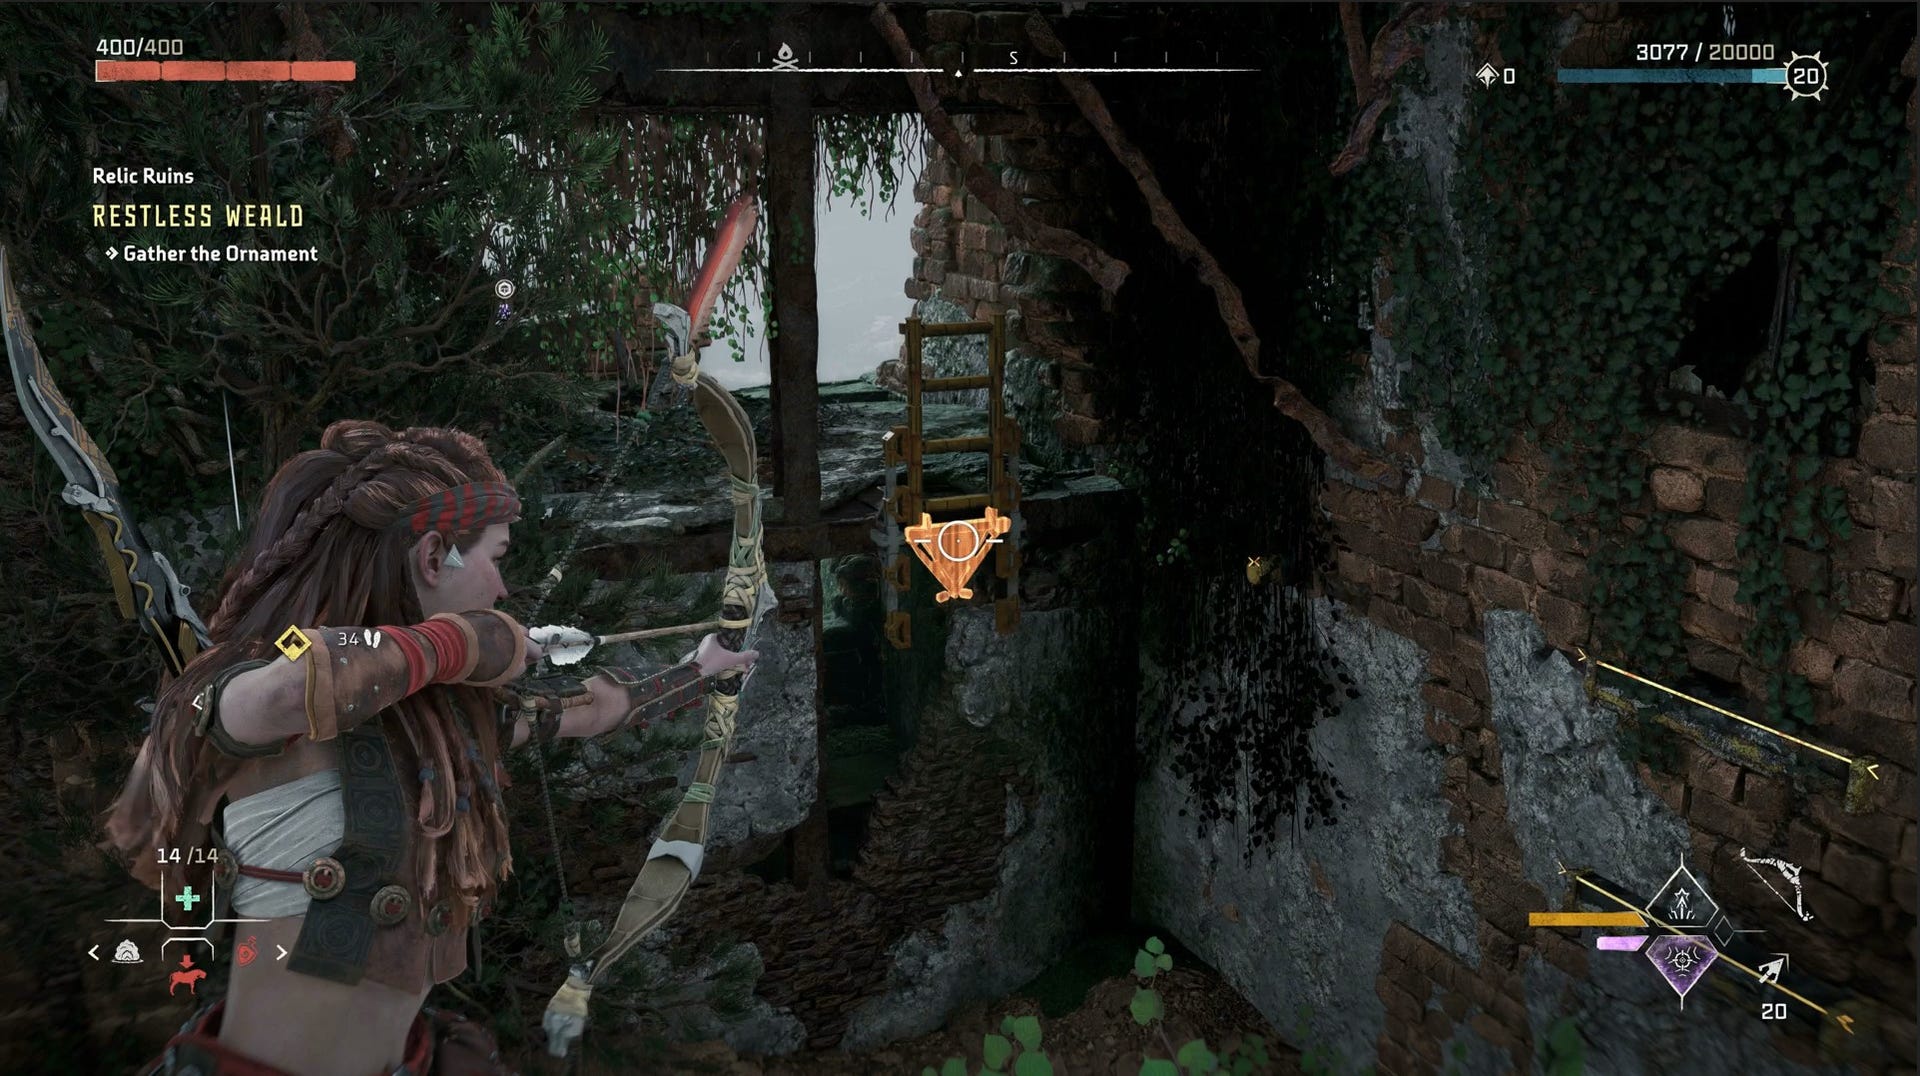
To your left, there will be a suspended ladder that is locked. Shoot the lock and climb back up again.
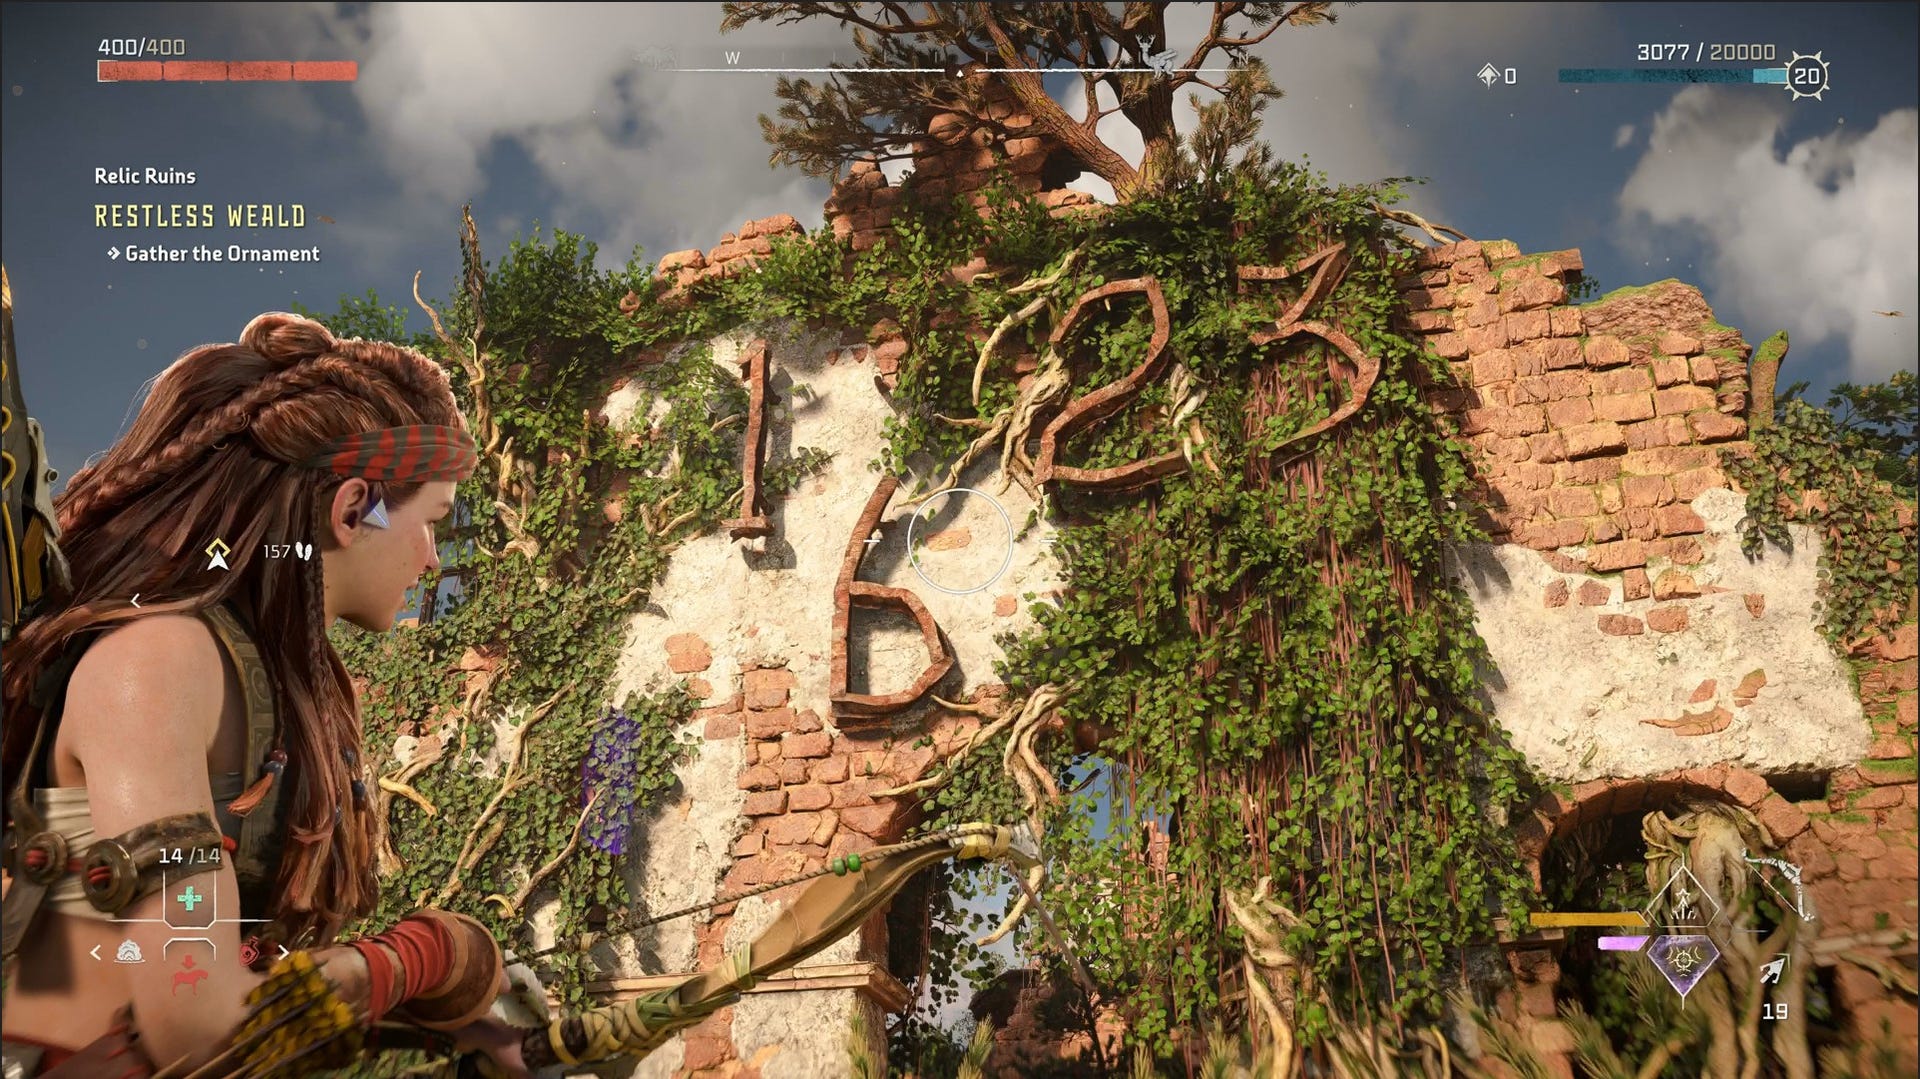
You will then find a locked door which requires a code to enter. The Restless Weald Relic Ruin Code is: 1923. You can see these numbers in bricks on the outside of the building.
Open the door and take the zipline facing you.

Next, blow up the Firegleam that blocks the wall in front of you. You can then go back outside.
Return to the railcar, and use your Pullcaster to take it back to the yellow lever you used earlier. Hit triangle at the level to ‘Change to Curved Tracks’.
This time, pull the railcar along the Curved Track and into the hole in the wall, where the Firegleam once was.
Aloy can then climb atop the railcar to access a ledge to the right of where you just entered. Travel around the ruins using the ledges until you reach the top floor of the ruins.
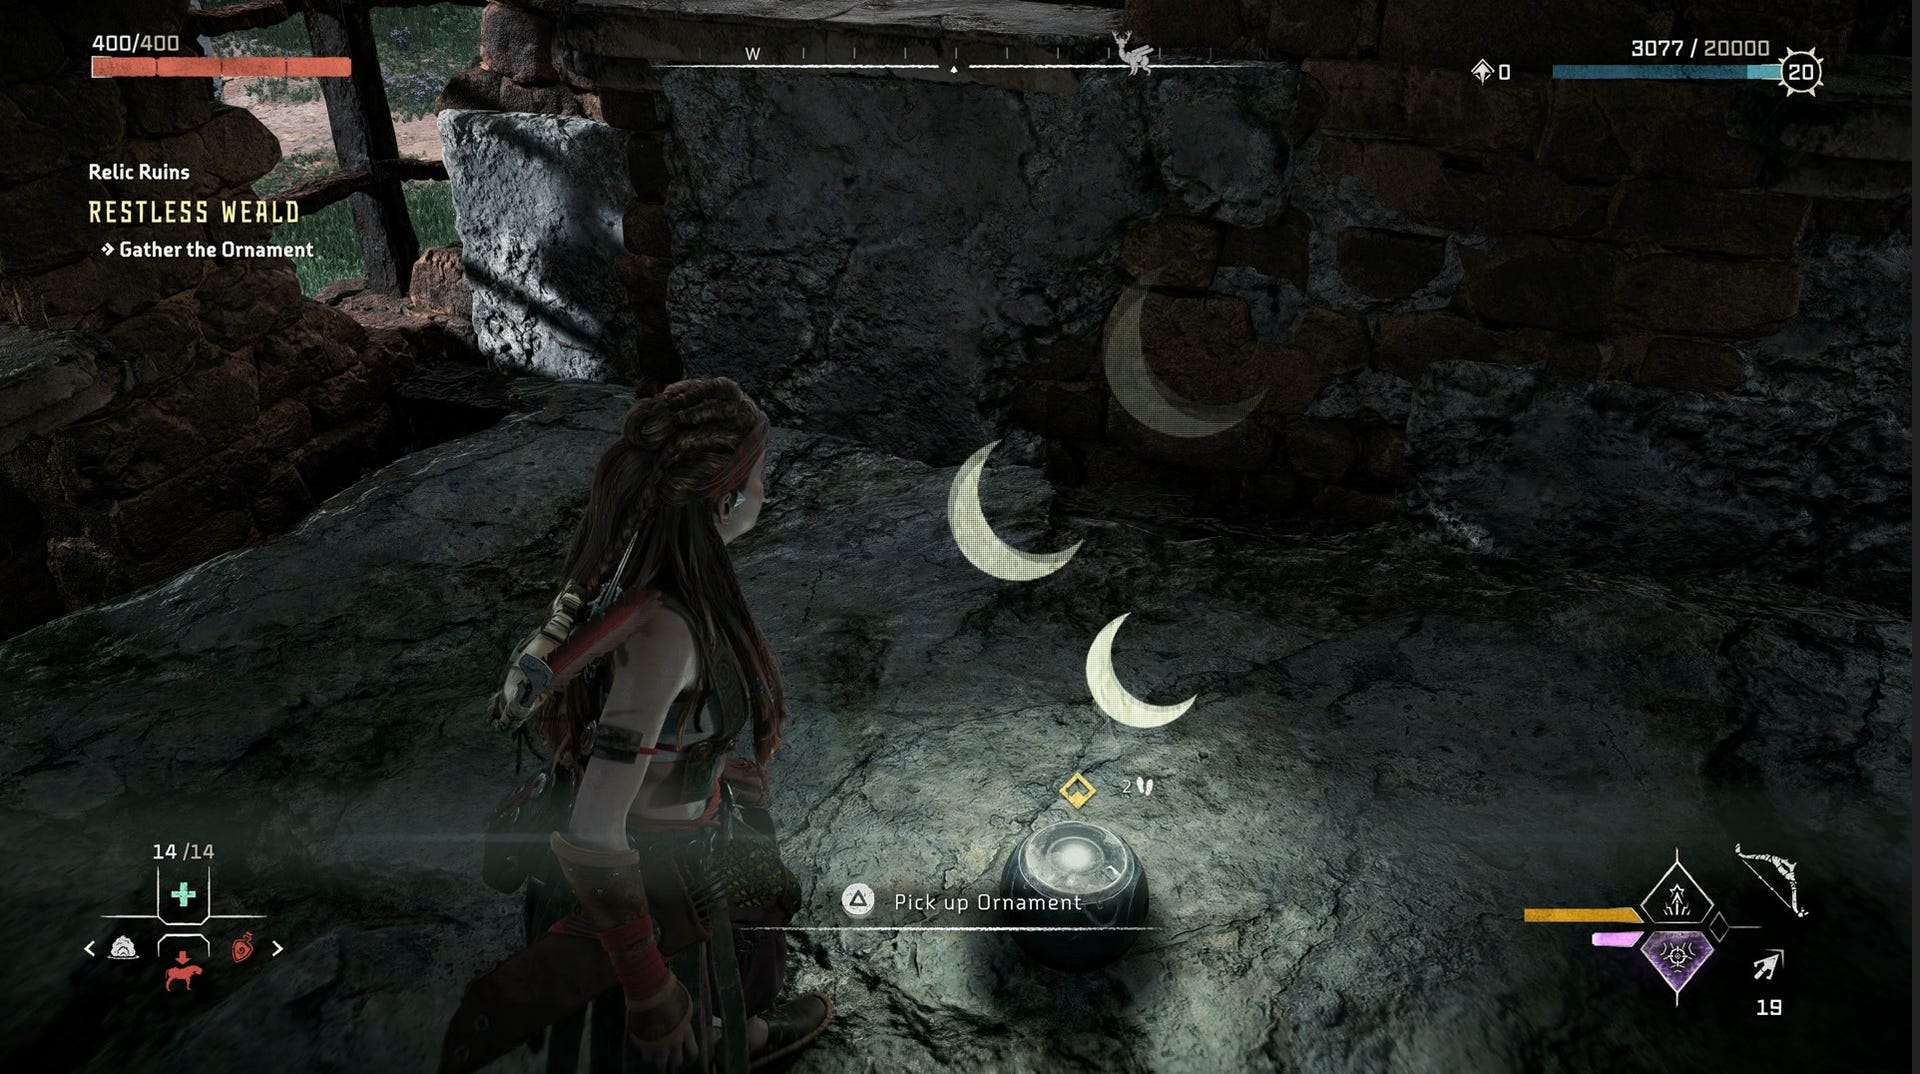
Here, the Ornament, 'Stanford Days', can now be all yours.
Horizon Forbidden West The Stillsands Relic Ruin Puzzle and Door Code
The Stillsands Relic Ruin can be found south of Tenakth Clan Lands in Horizon Forbidden West.
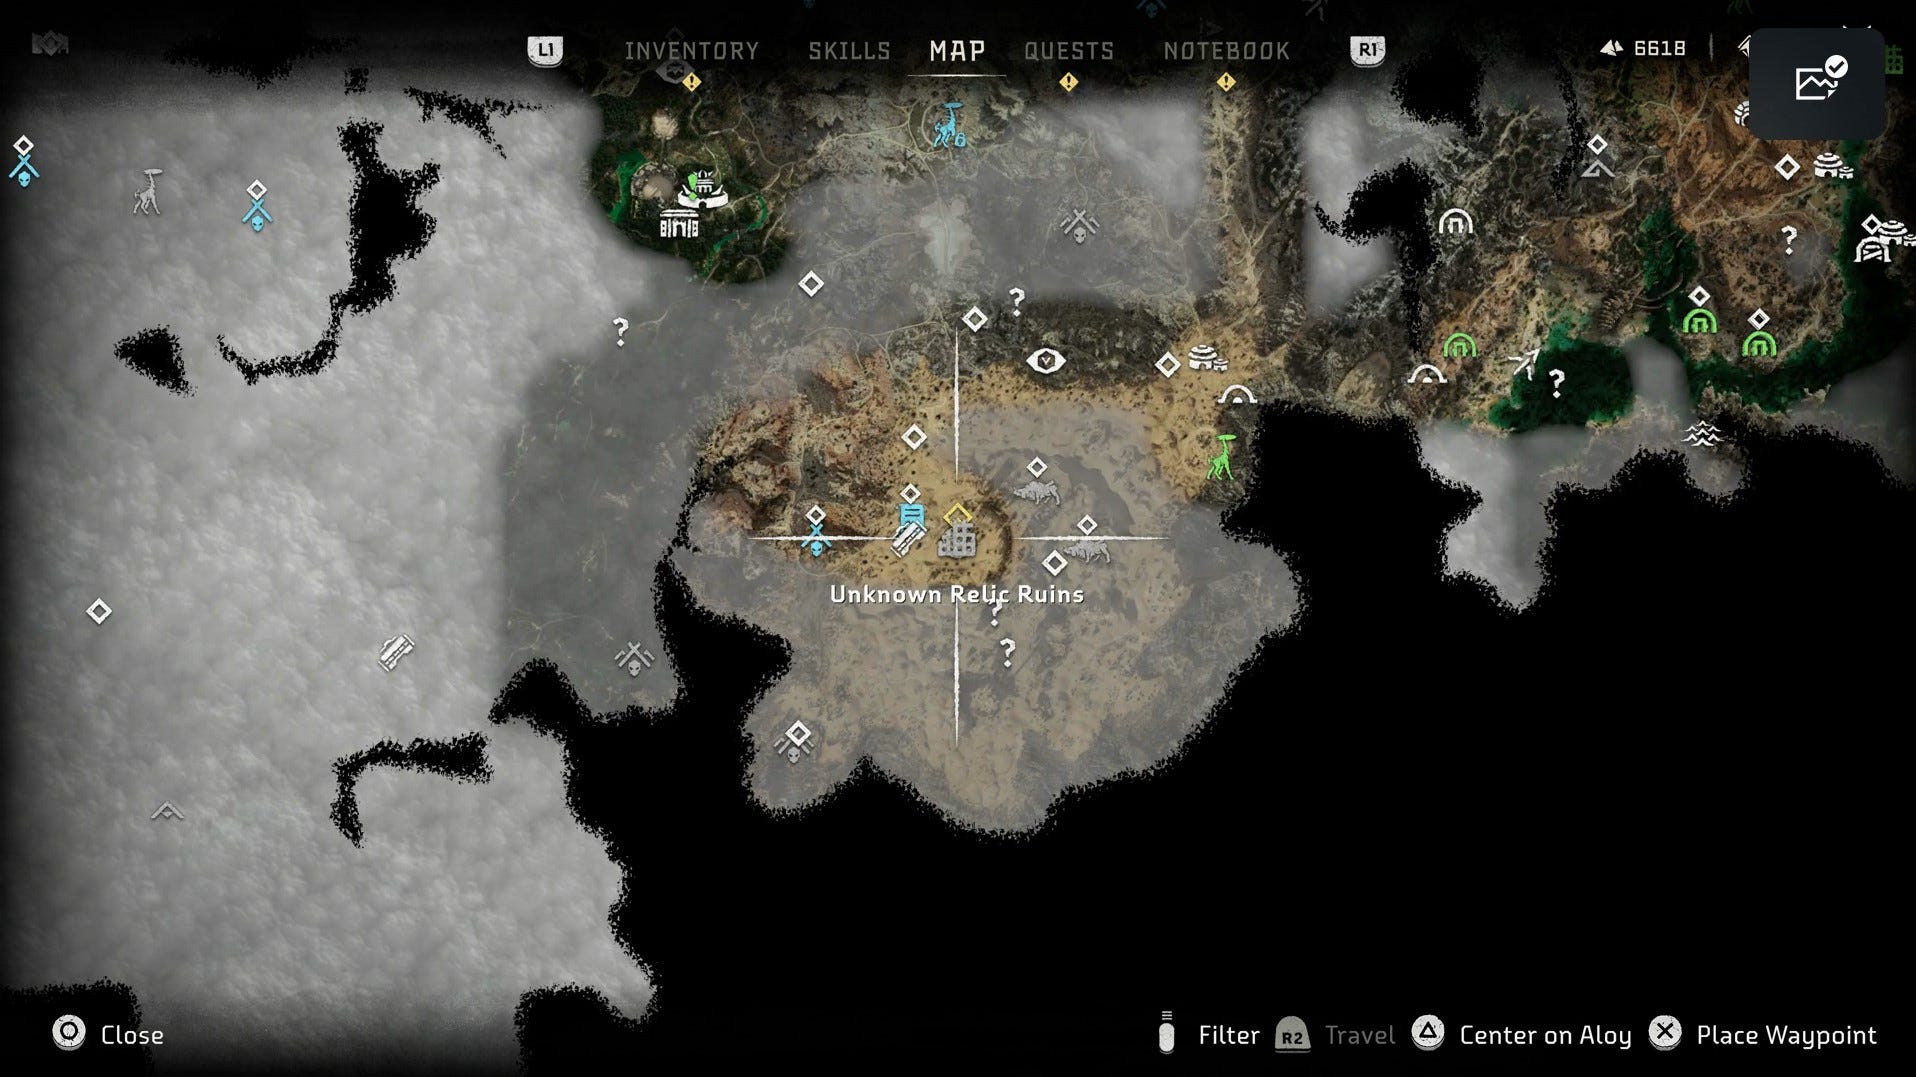
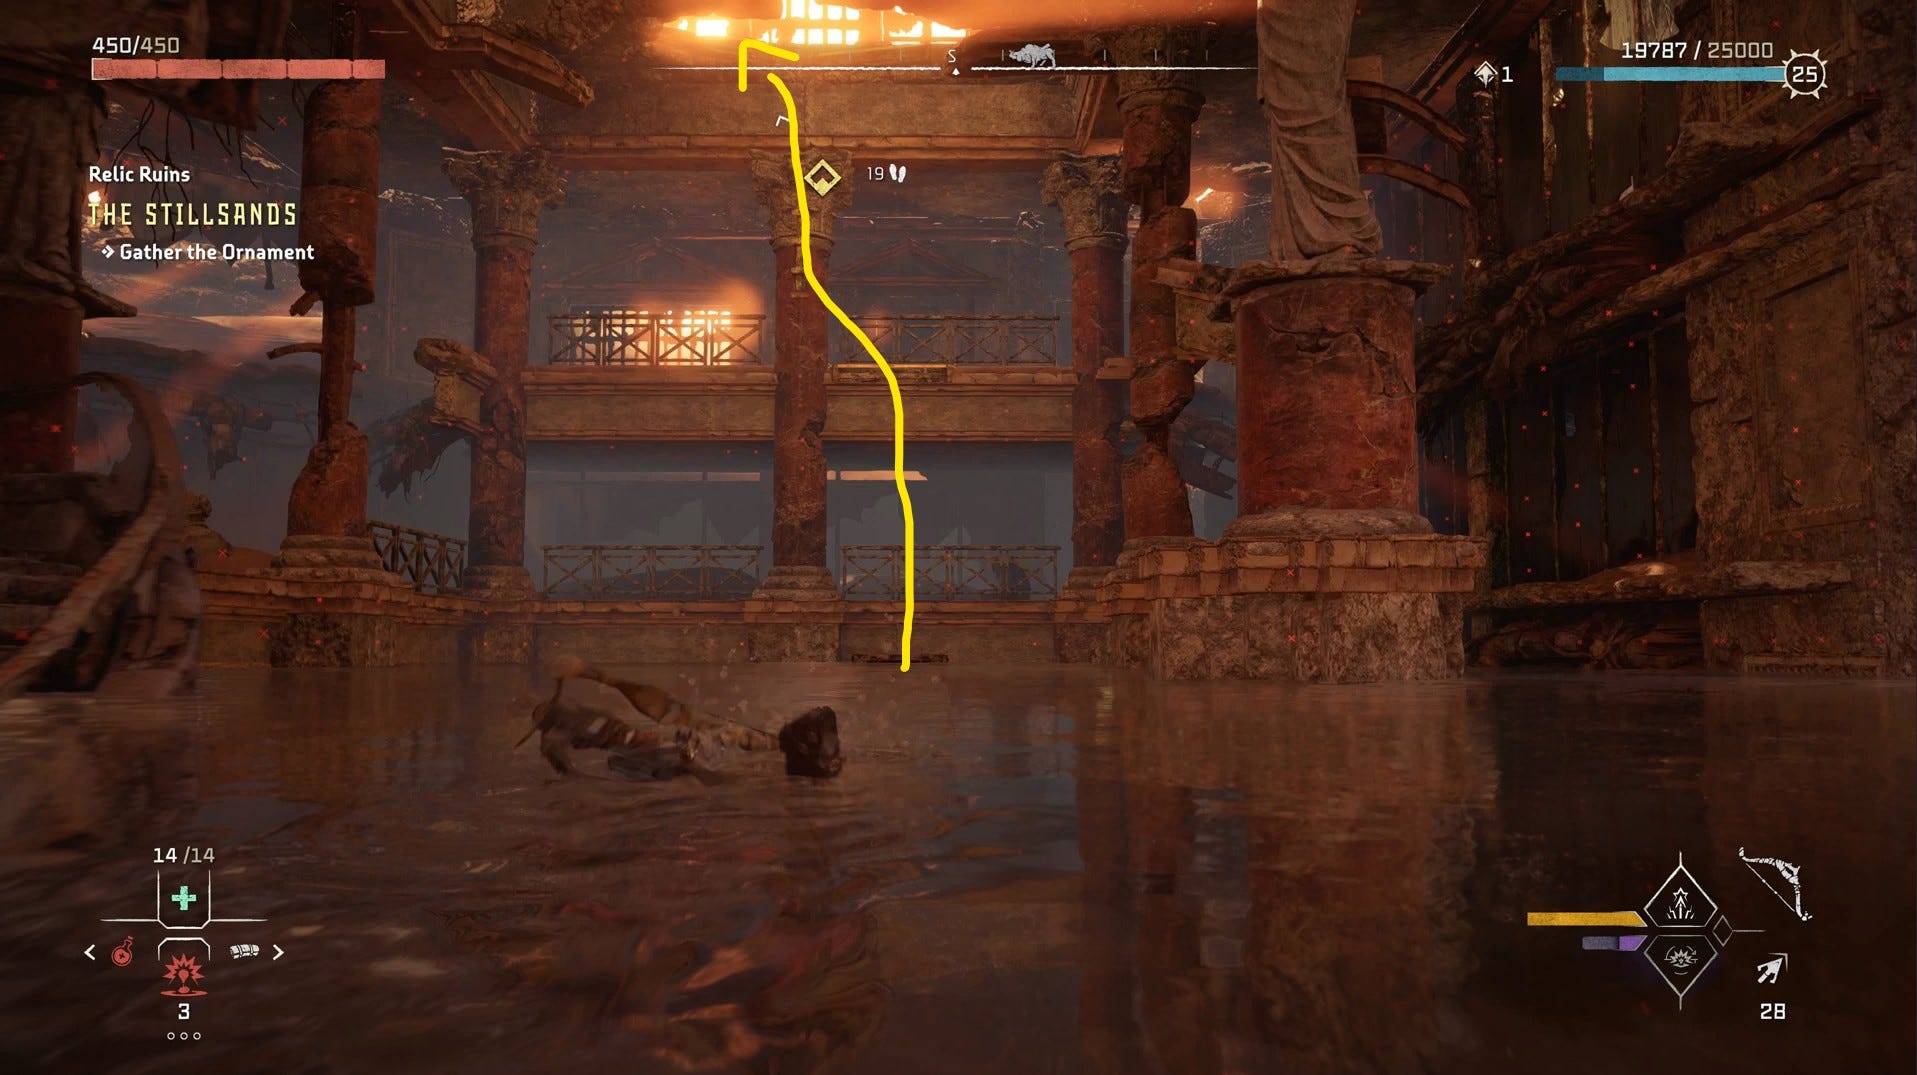
Explore the ruined area until you find an opening leading into some very grand looking ruins. You can see the Ornament on the other side, but you can’t yet reach it.
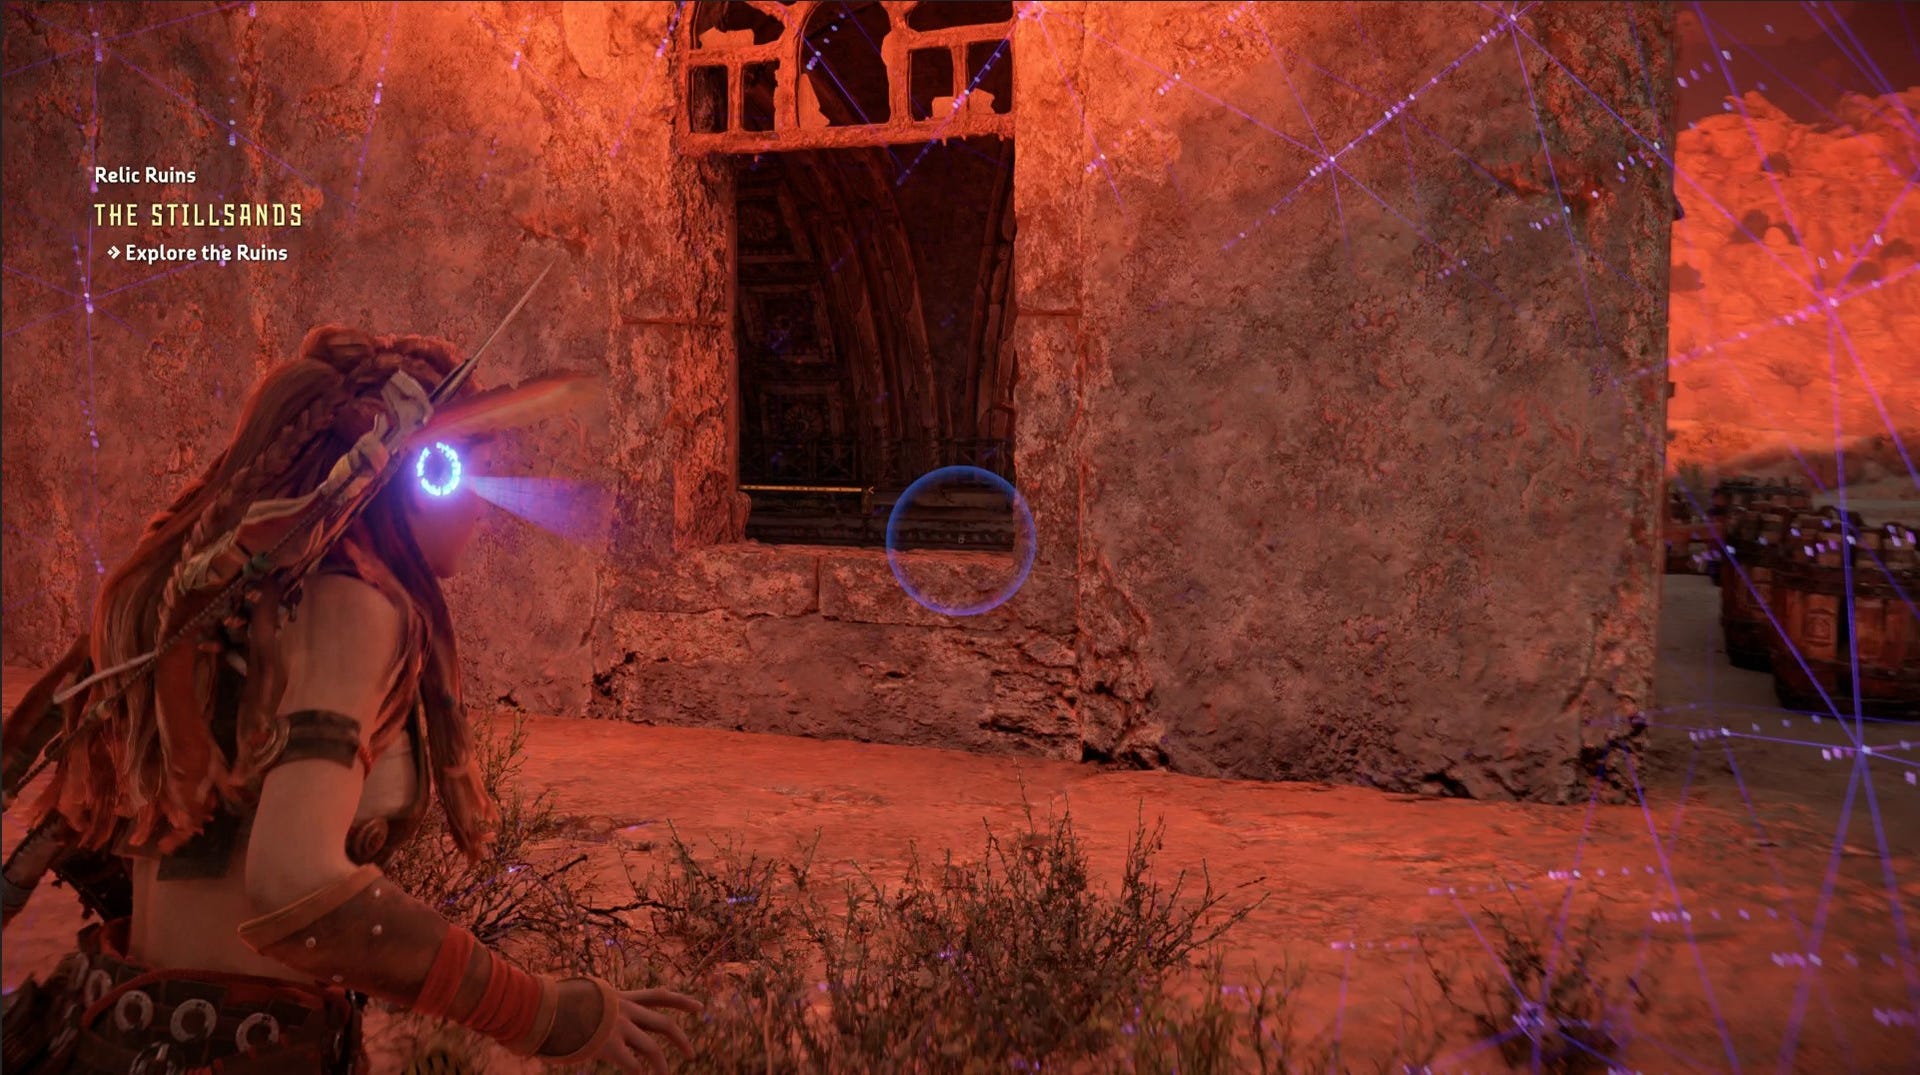
Walk along the beam in the middle, and press ‘Triangle’ to rappel down along the side of the ruins until you reach the bottom.
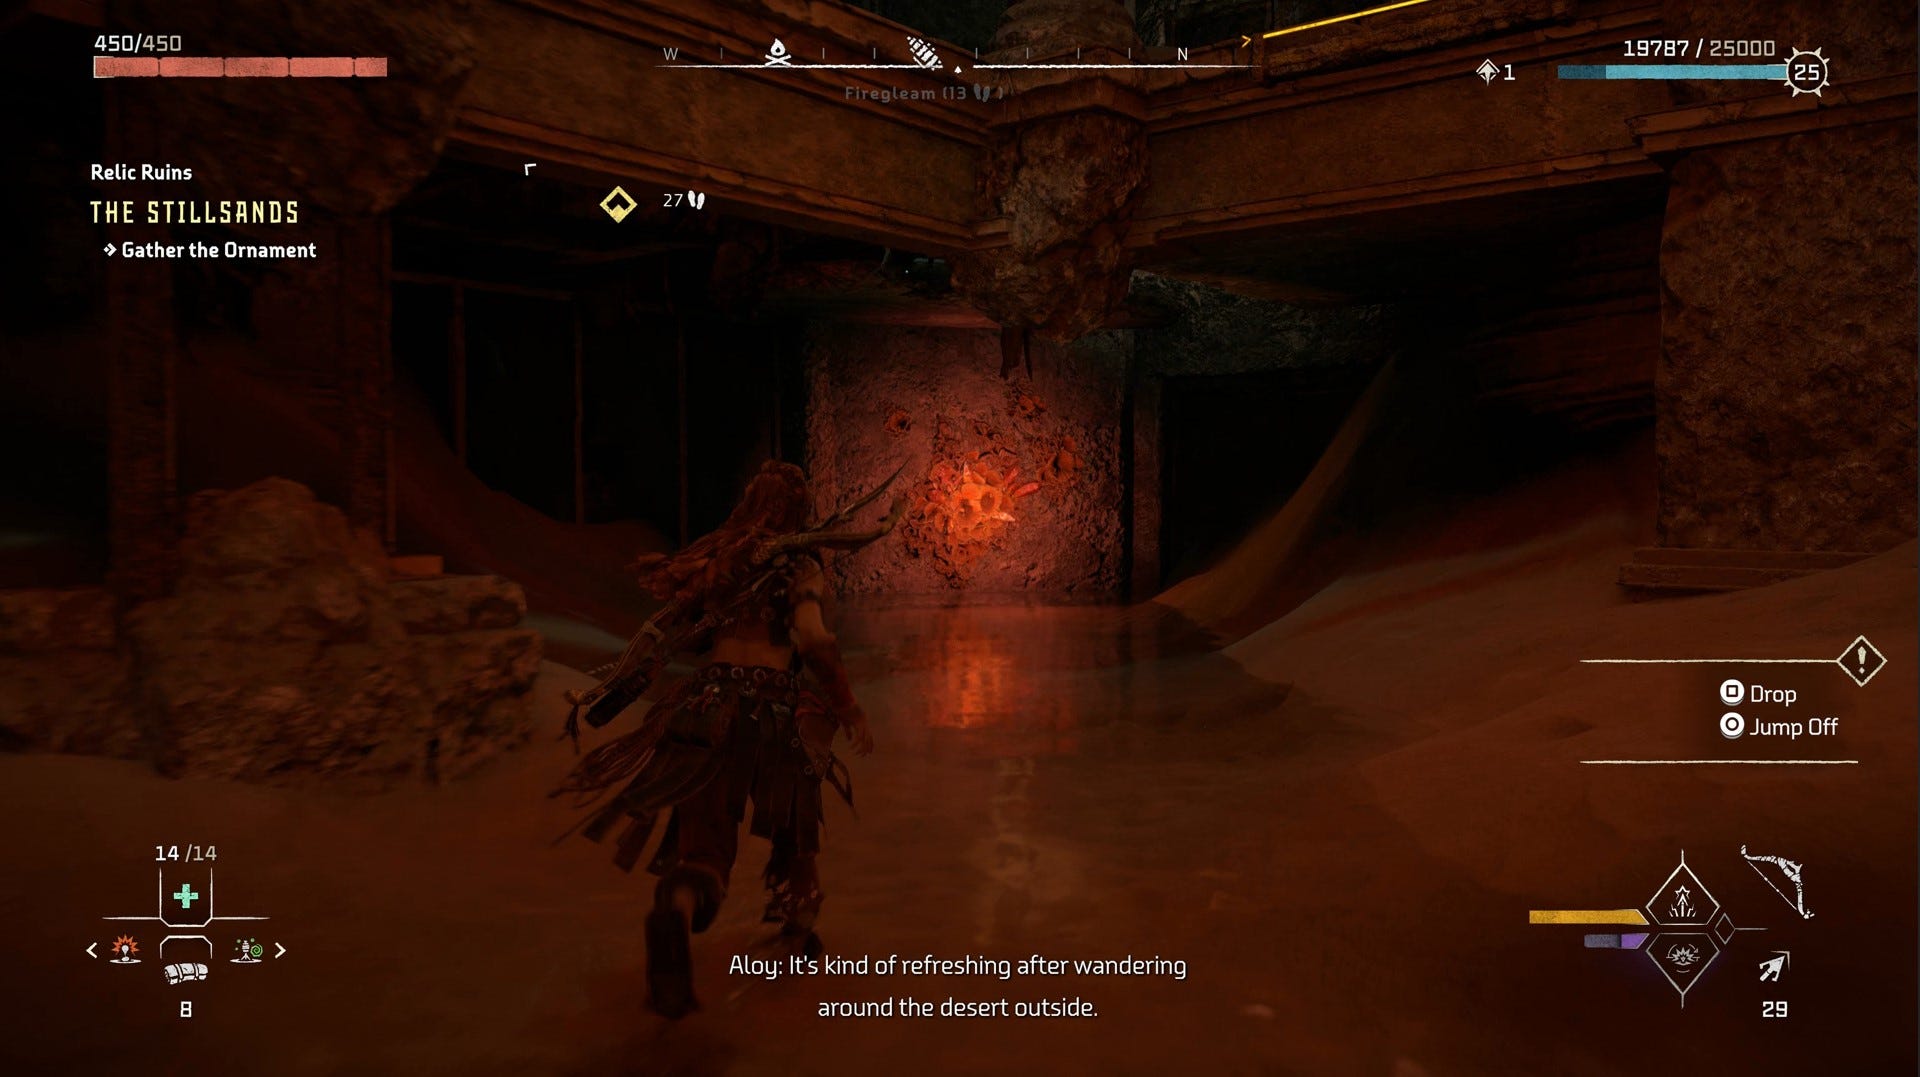
You will find a path blocked by Firegleam again, so you will need to have completed the Death’s Door Story Mission and unlocked the Igniter to continue. Ignite the Firegleam and there's another room behind it.
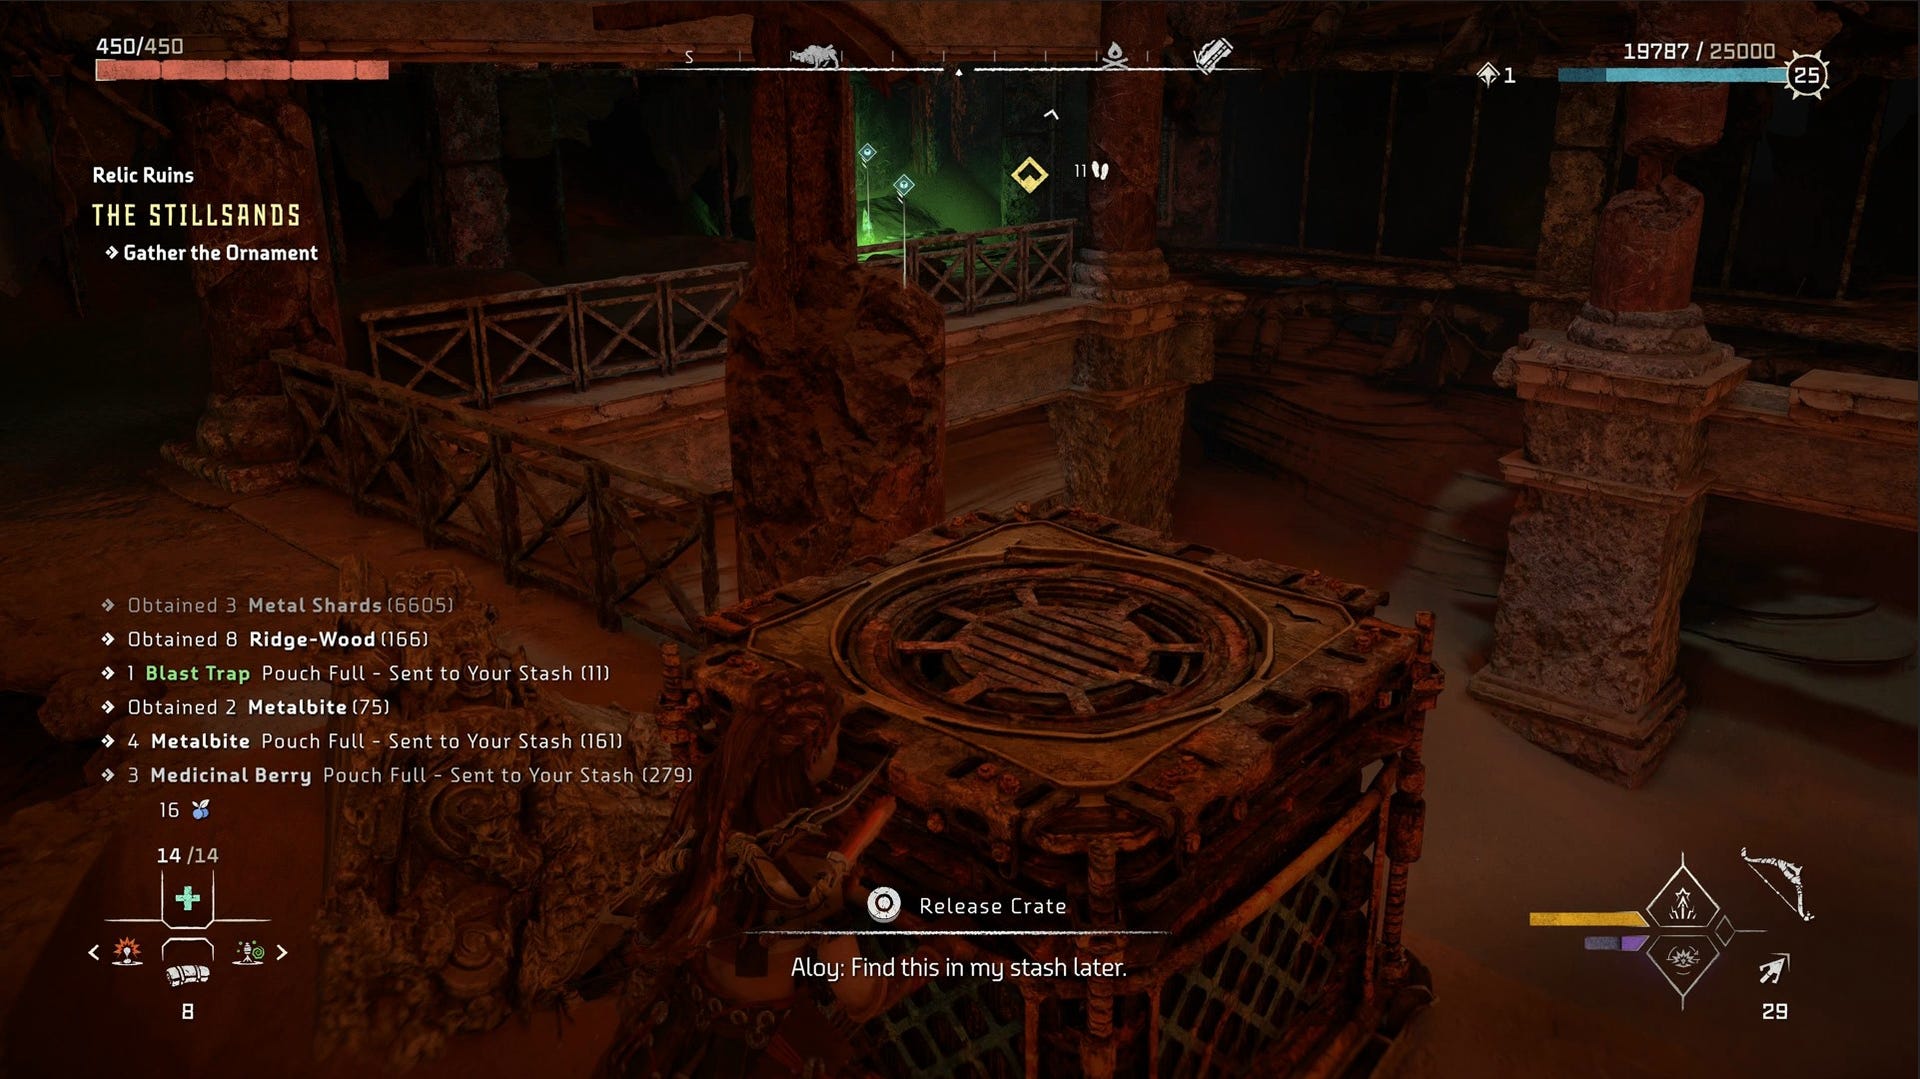
To get onto the metal walkway, go back into the main room and push the crate at the top of the spiral staircase in the middle of the room off the ledge. Push it into the room behind the firegleam you destroyed, then you can use it to get up to the rusted platform where you can find a yellow wheel.
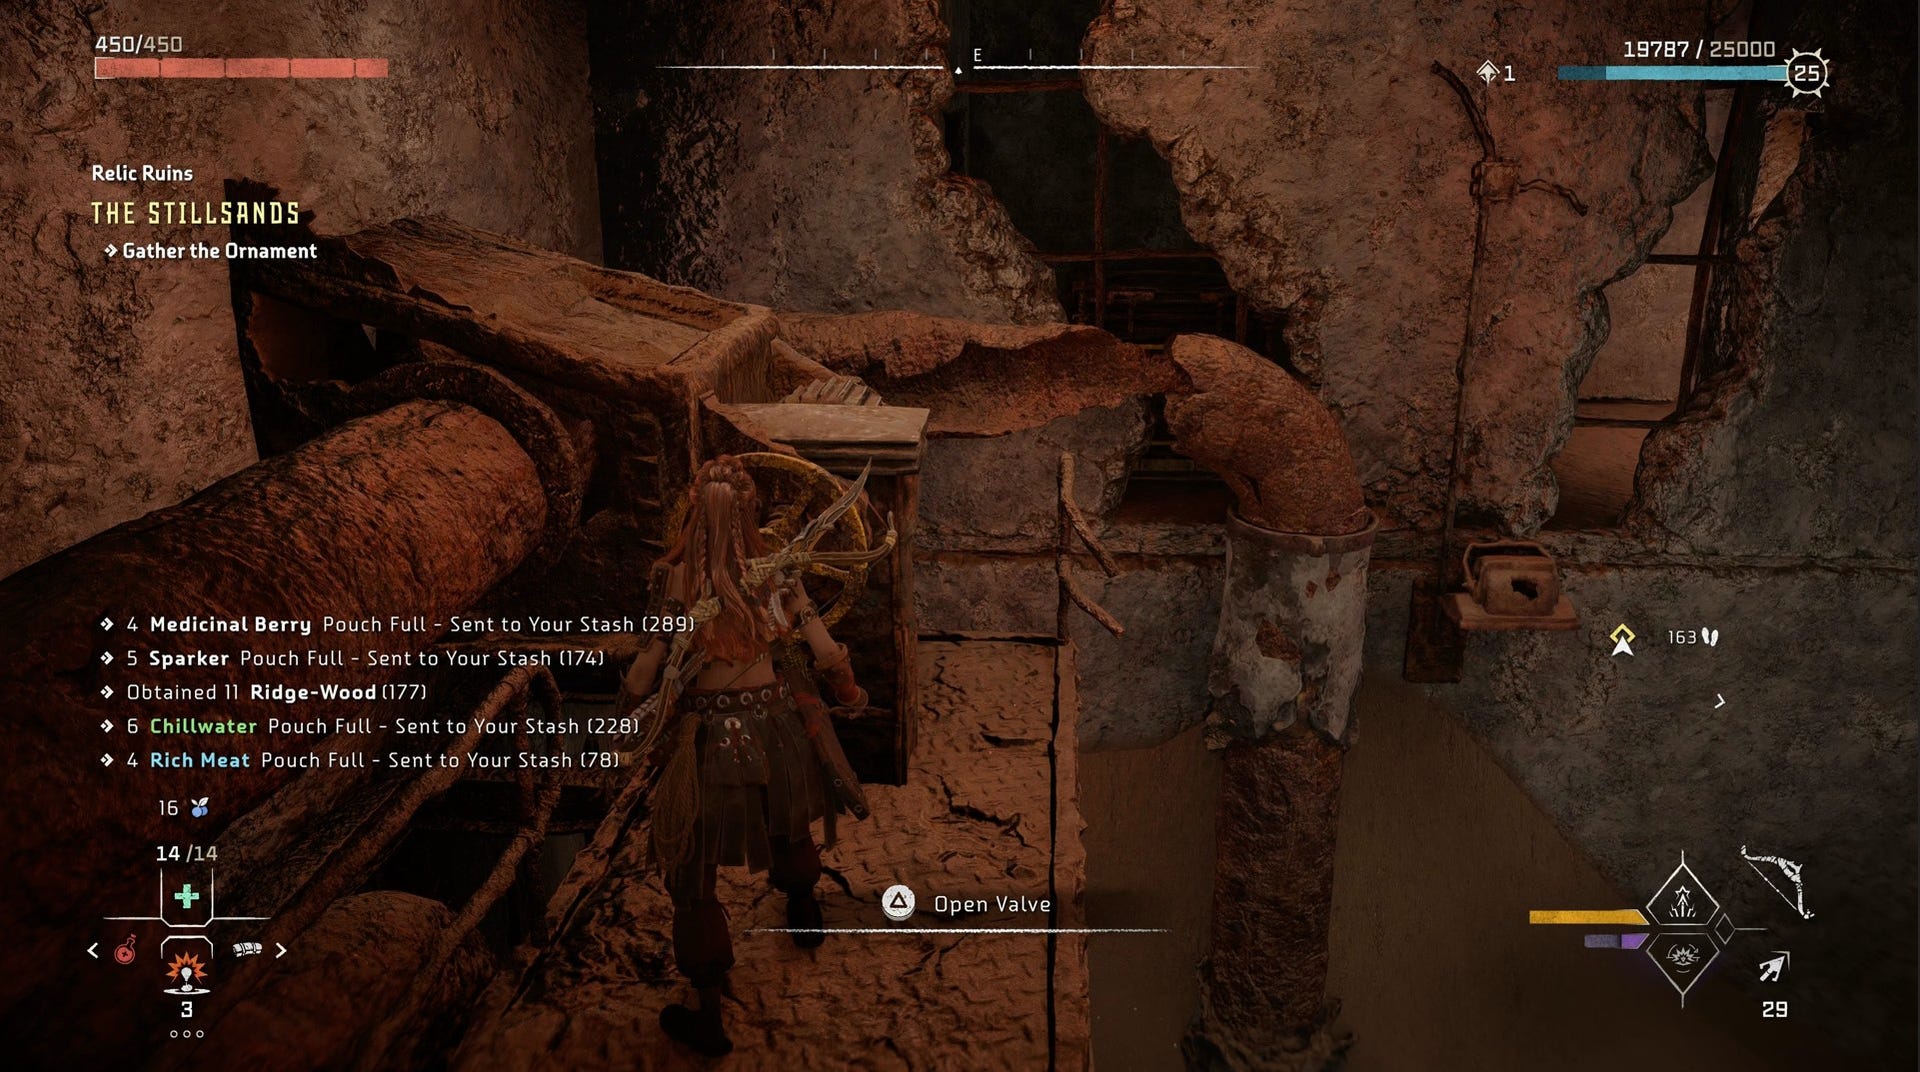
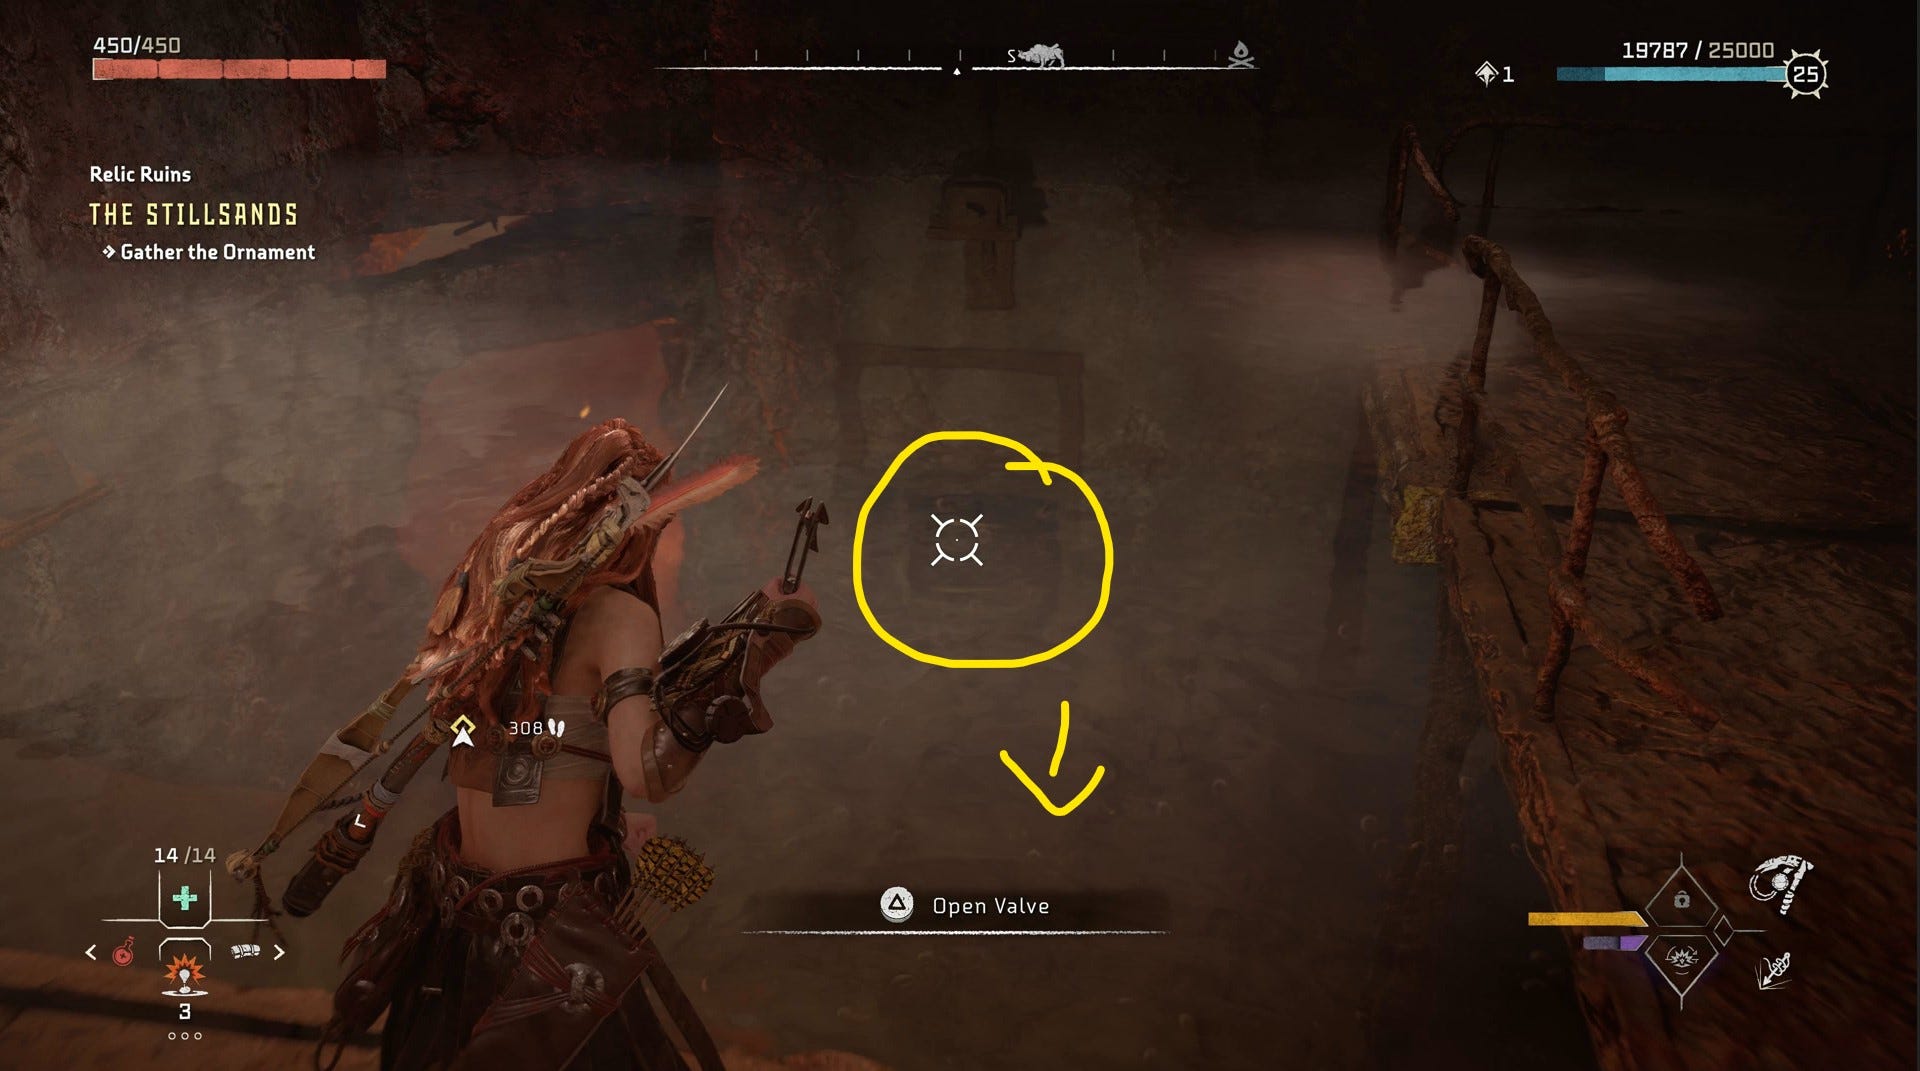
From here, turn the yellow wheel in front of you to start pumping water.
Head back down to where you came from and locate the crate. Move it so that it covers the drain; as you may have expected, this will stop the water from draining anywhere, and the ruins will then flood.
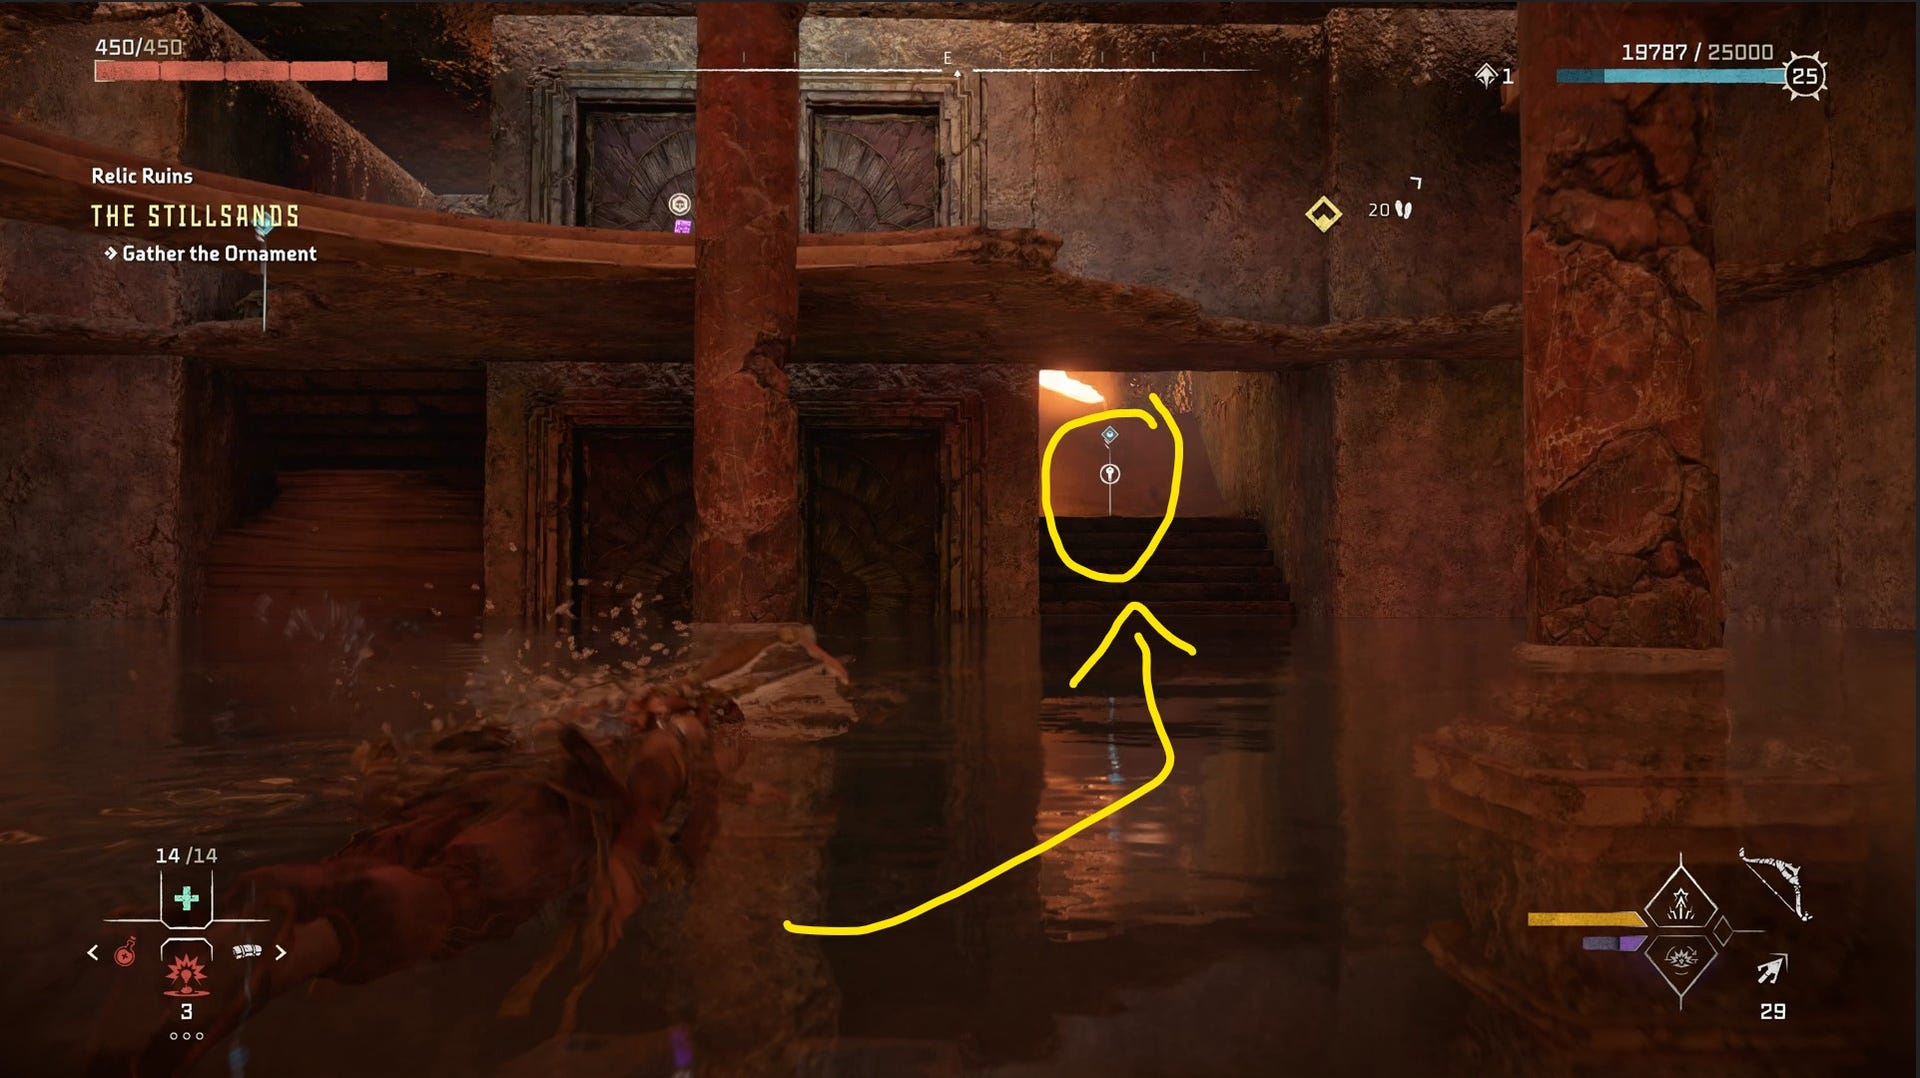
Swim back up, and you should be in the initial area again, and some stairs will be in the corner of the room. Here, there is a key to pick up.
Directly in the opposite corner of the room, there’s a door. Fortunately, you just acquired the key needed to unlock it. Open the door and find the crate in the next room.
Pull this crate back out of the room and push it out into the water. Make sure it’s floating far out.
Swim back down to the currently-blocked drain and access the platform with the wheel again. Then, use your Pullcaster to remove the crate from the drain.

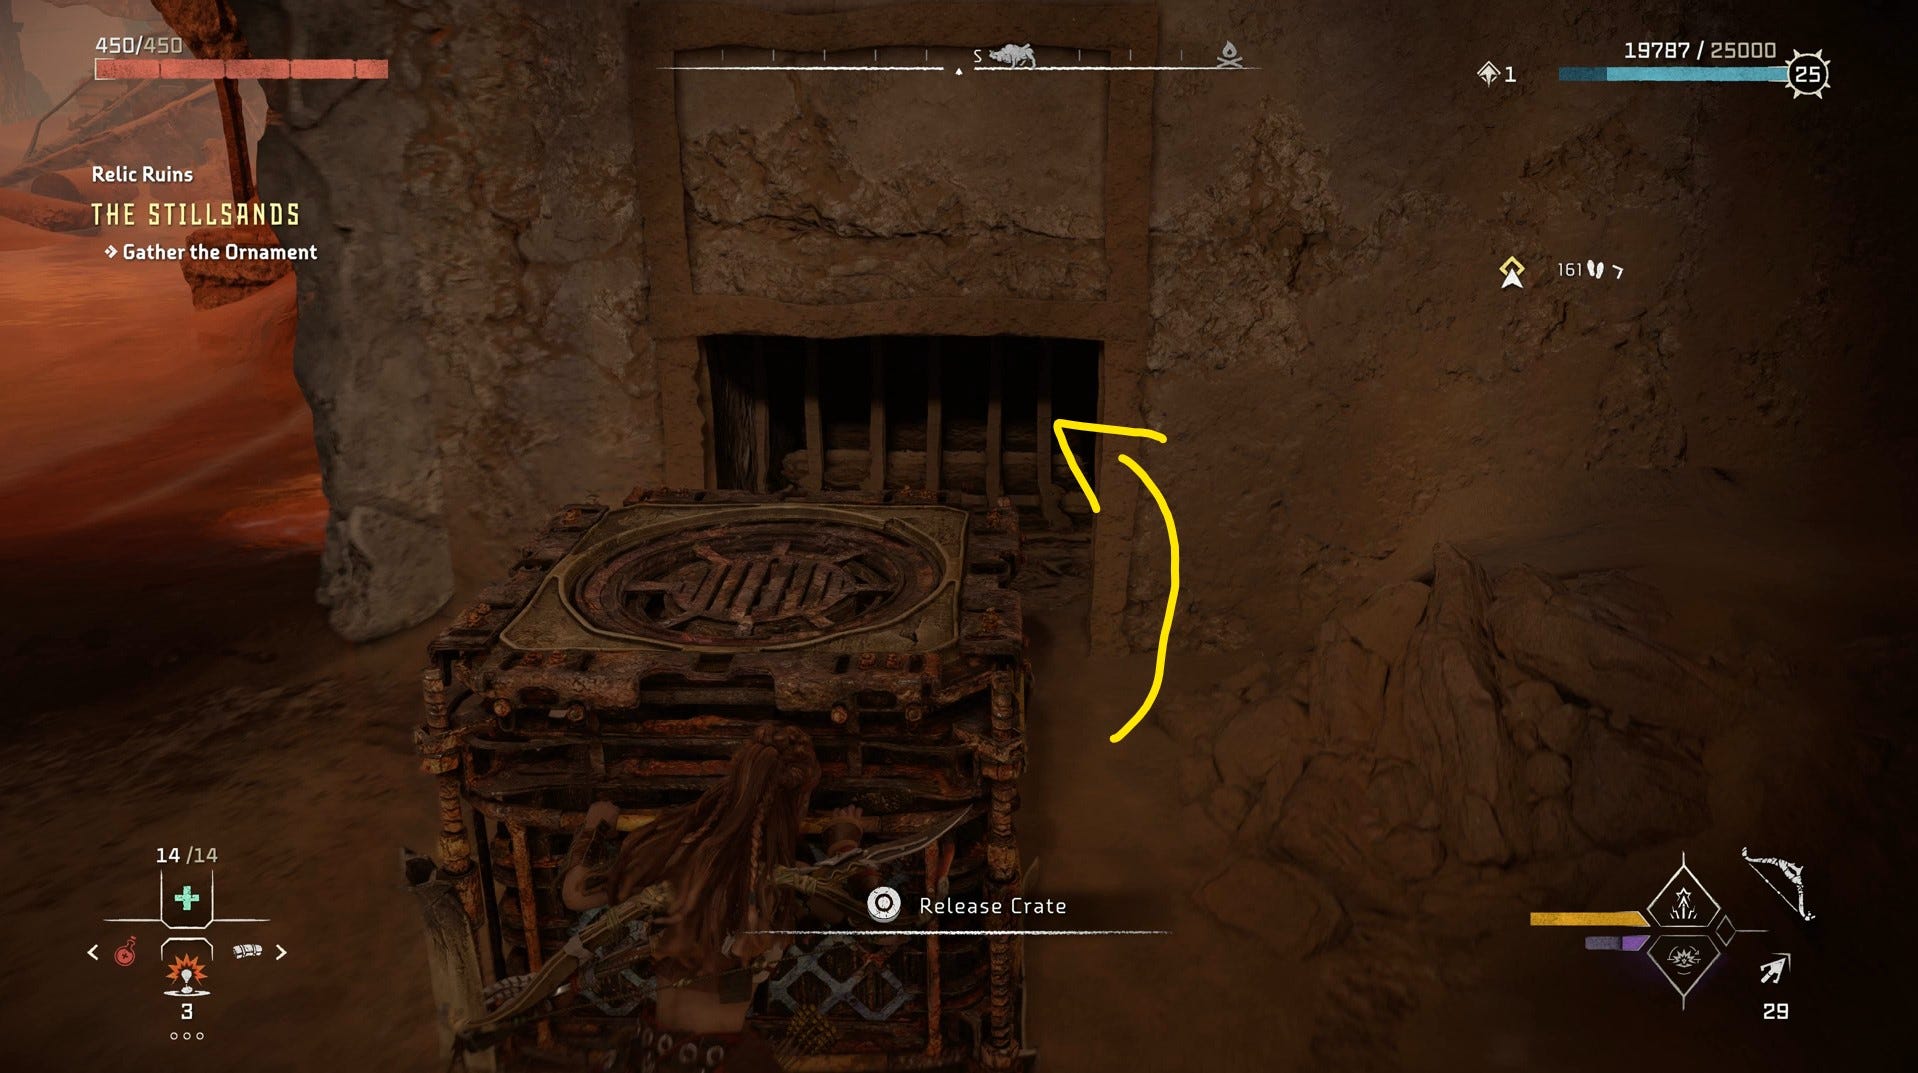
The ruins will now drain of water. Go back to the crate you retrieved earlier, and move it to the other end of the room between two pillars and below a ledge, pictured below.
Once again, block the drain using your initial crate and flood the ruins with water again. From where the second crate is now floating in the water, you can mount it to reach some ledges.
Climb the ledges, and sooner or later, you’ll reach the top. Now, you can finally collect the Stillsands Relic Ruin, ‘Go Big’.
Horizon Forbidden West Runner's Wild Relic Ruin Puzzle and Door Code

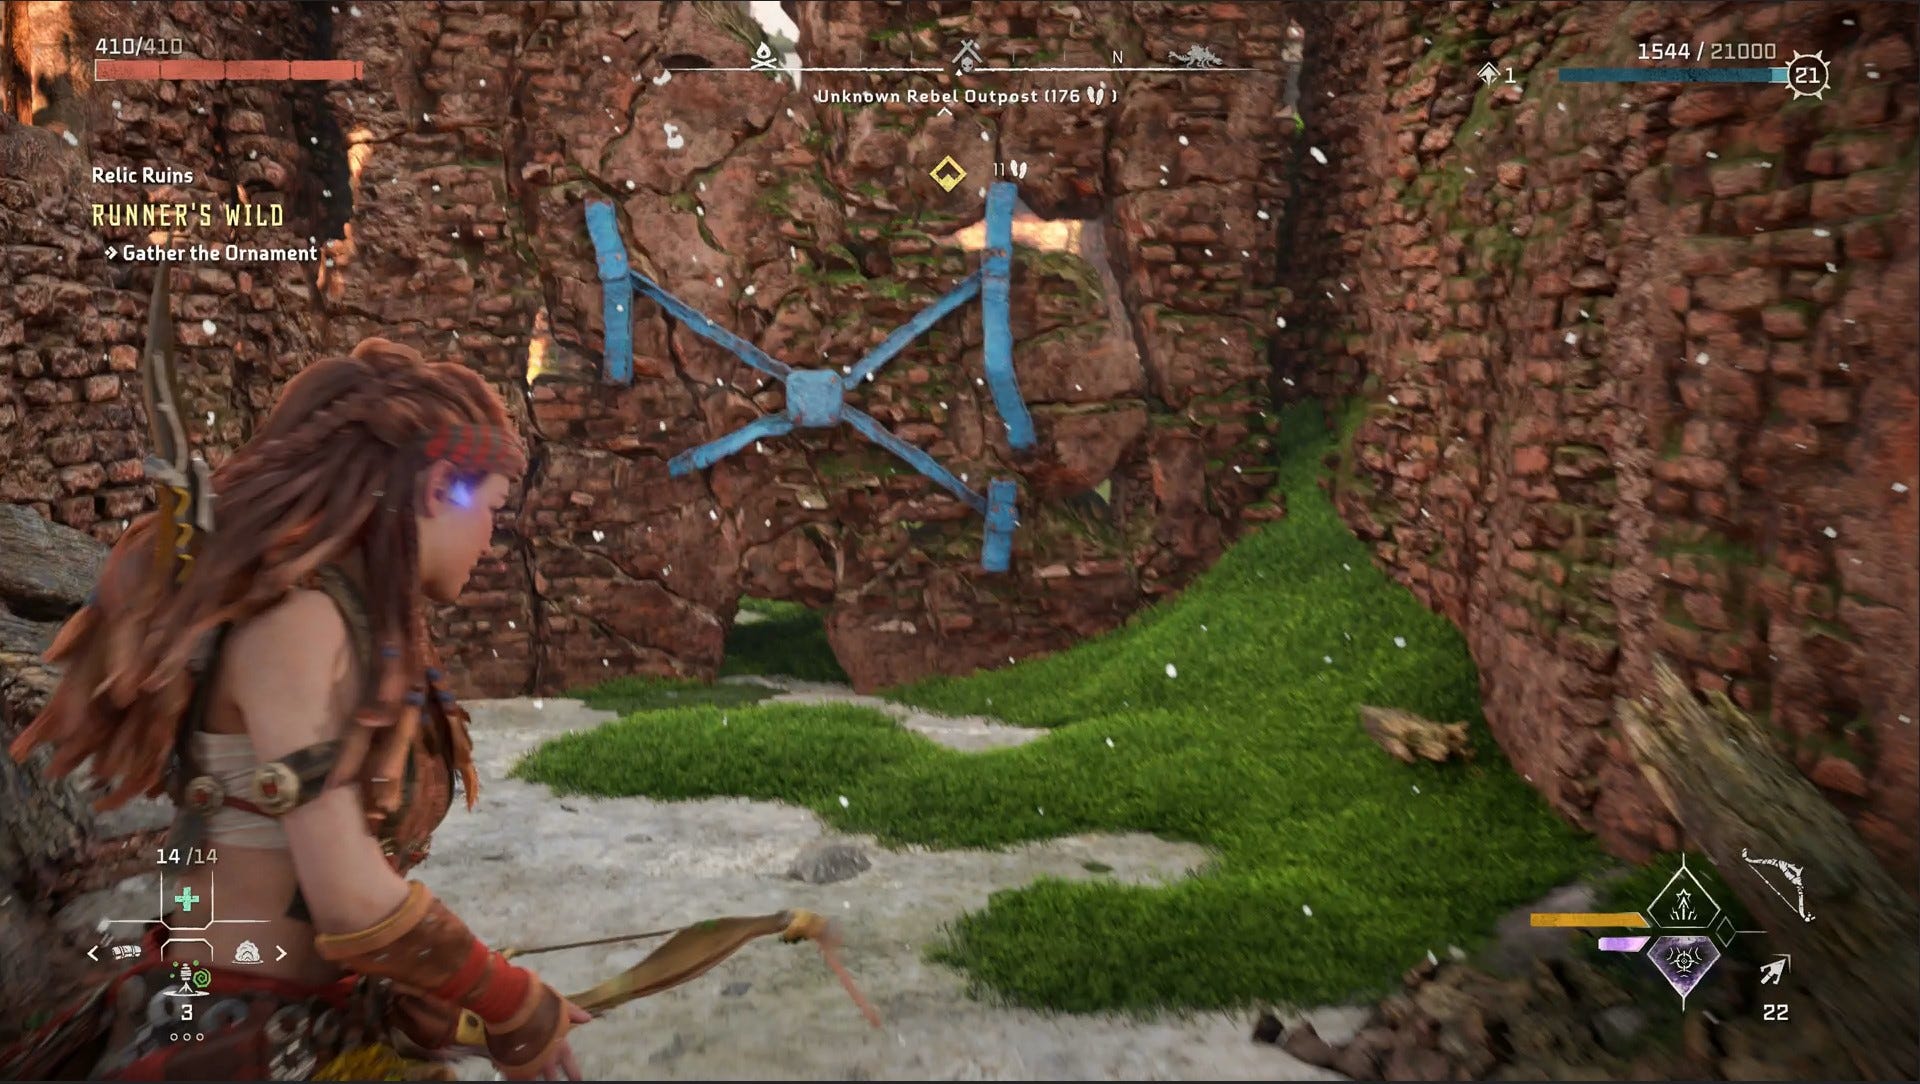
The Runner’s Wild is located west of Sheerside Climb in Horizon Forbidden West.
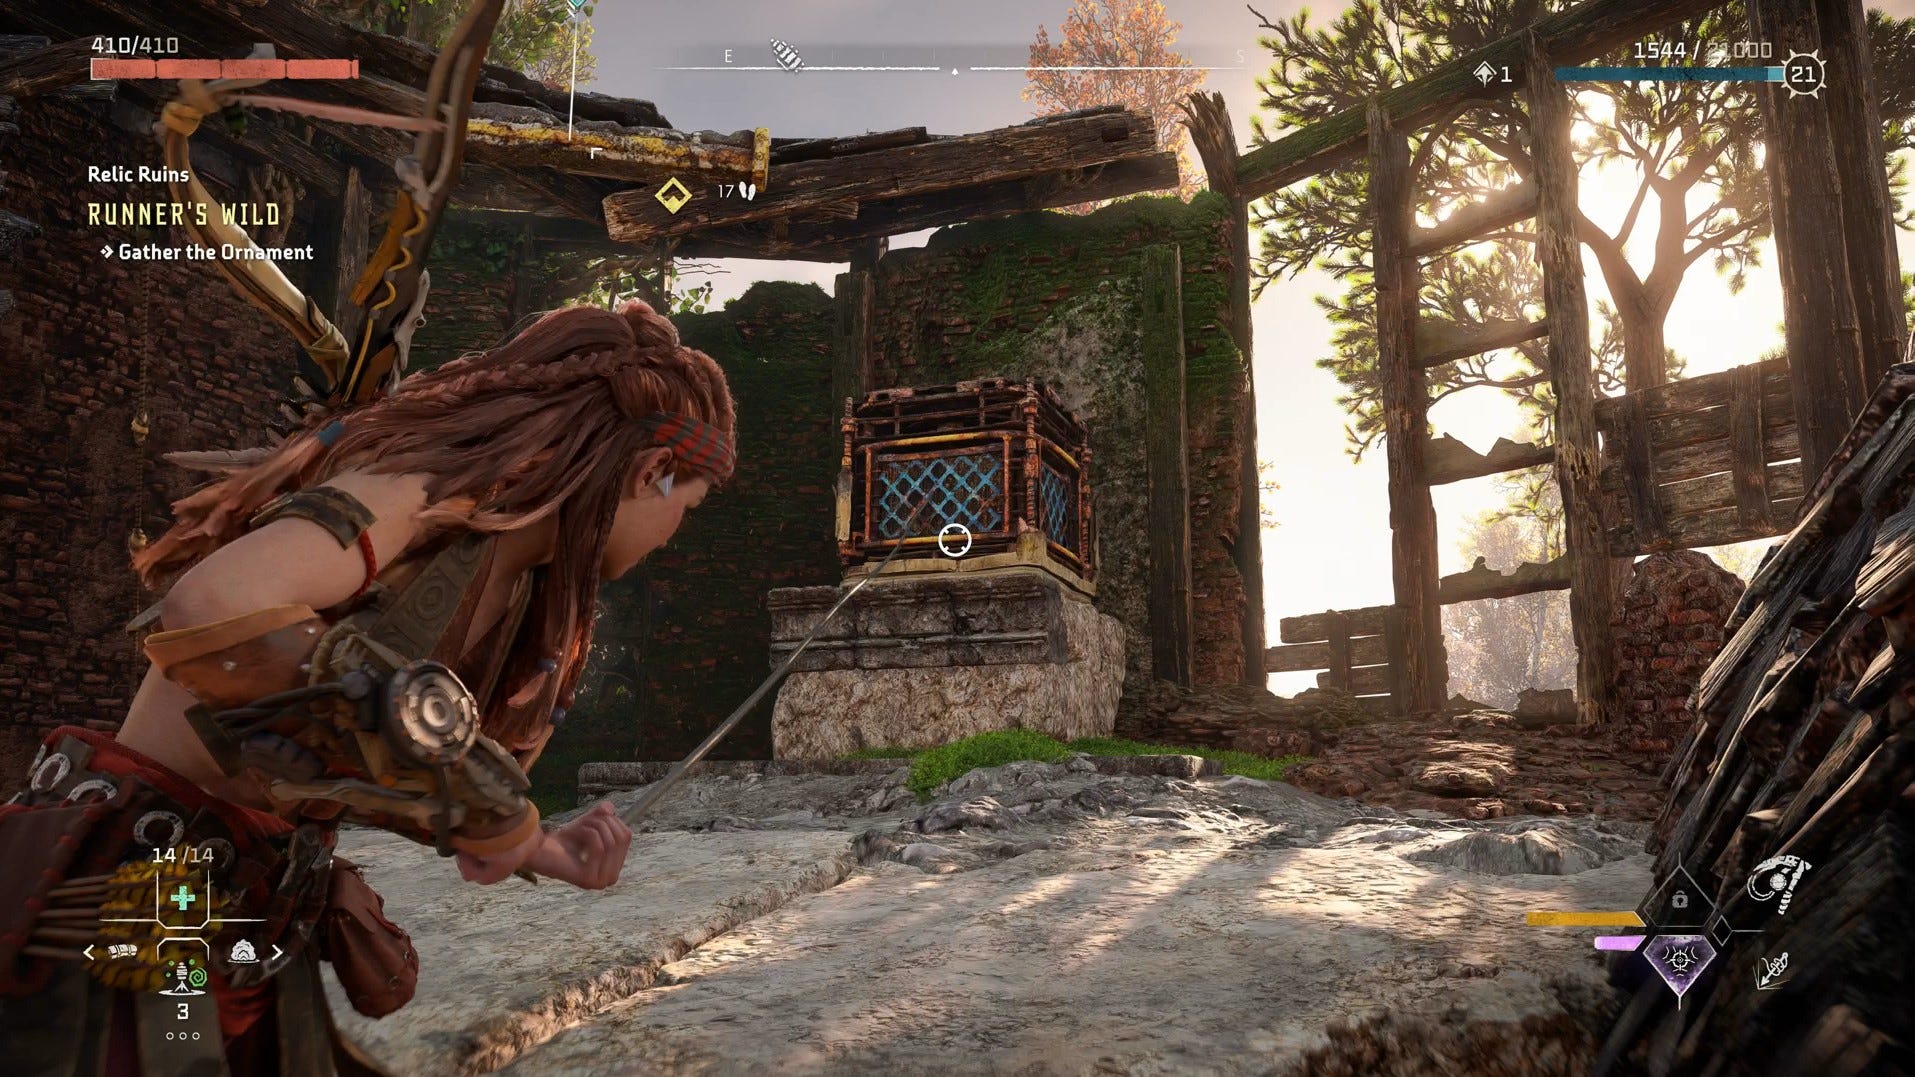
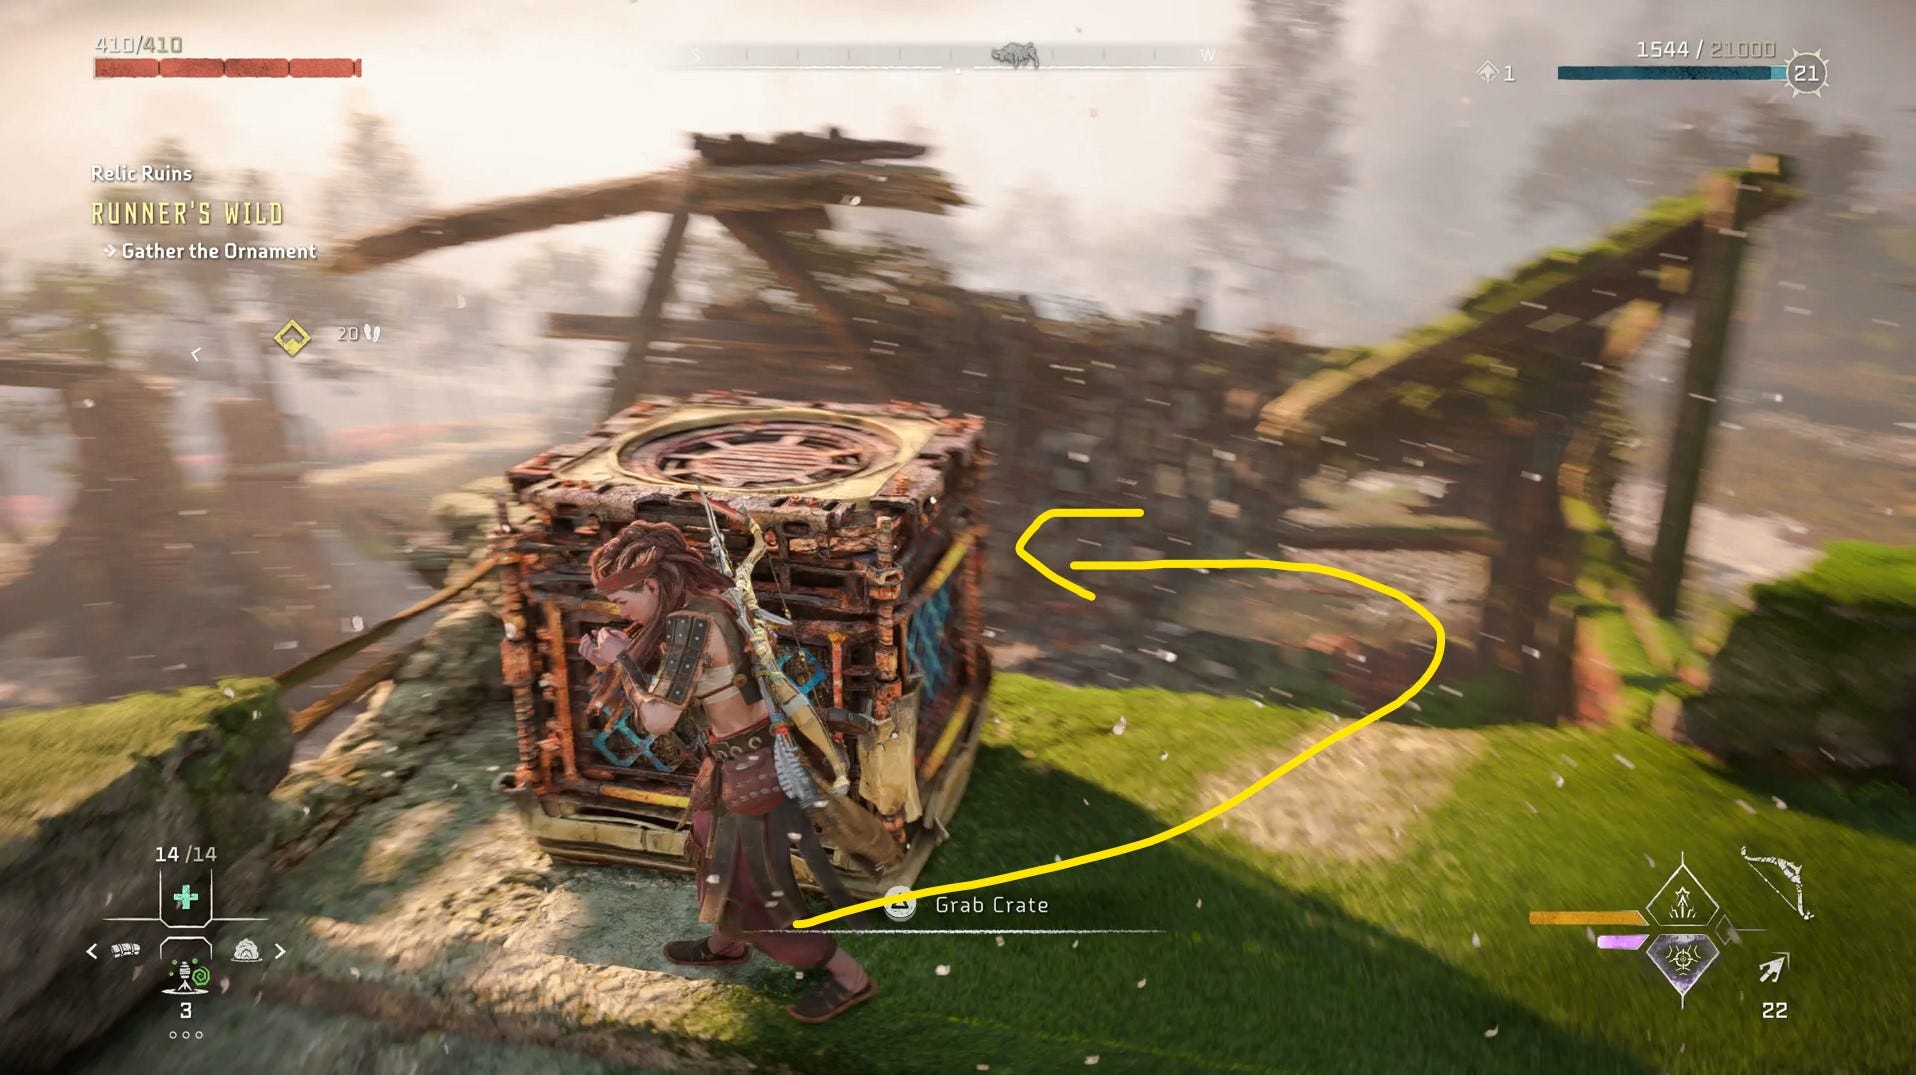
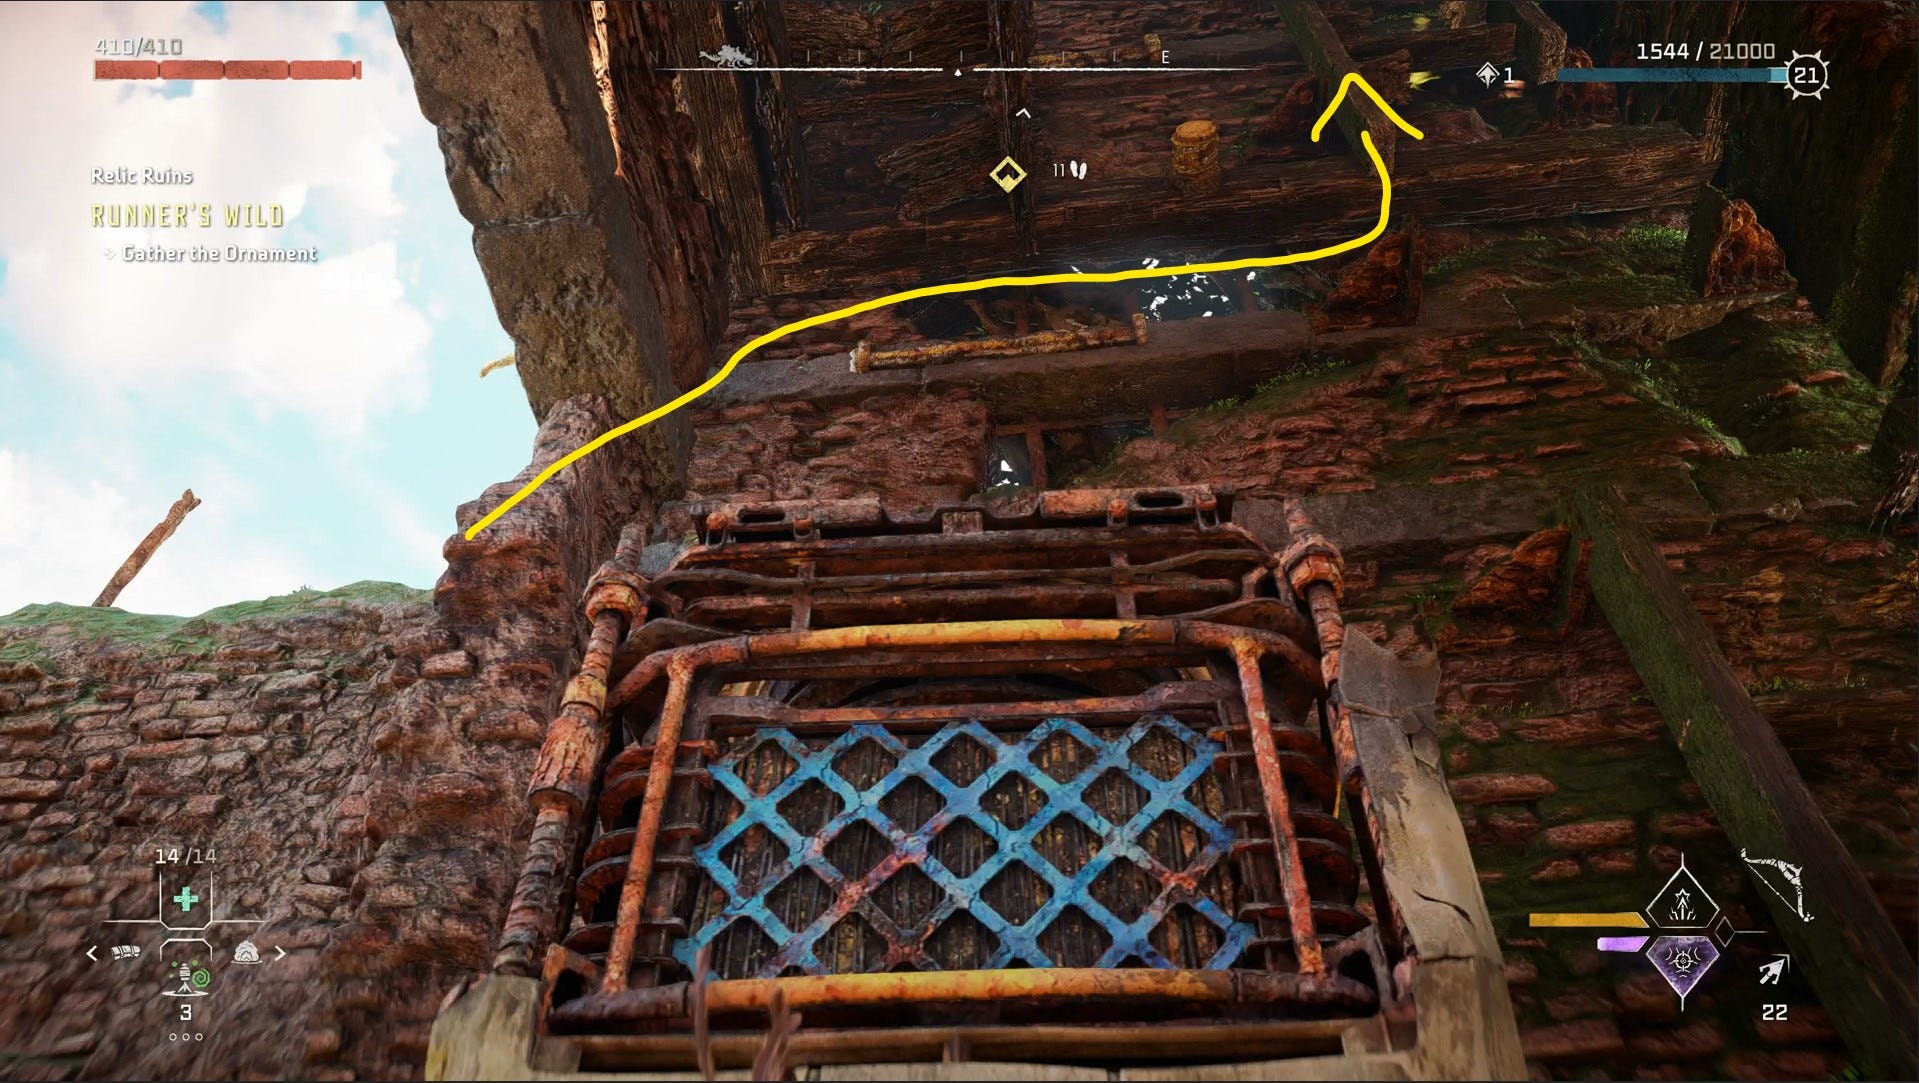
Approach the ruins from this direction and you’ll see a moveable box on a pedestal.
Yank the box off with your Pullcaster, then use it to get on the wooden roof above it.
Next, use the yellow handholds to climb over the broken wall and drop down on the other side.
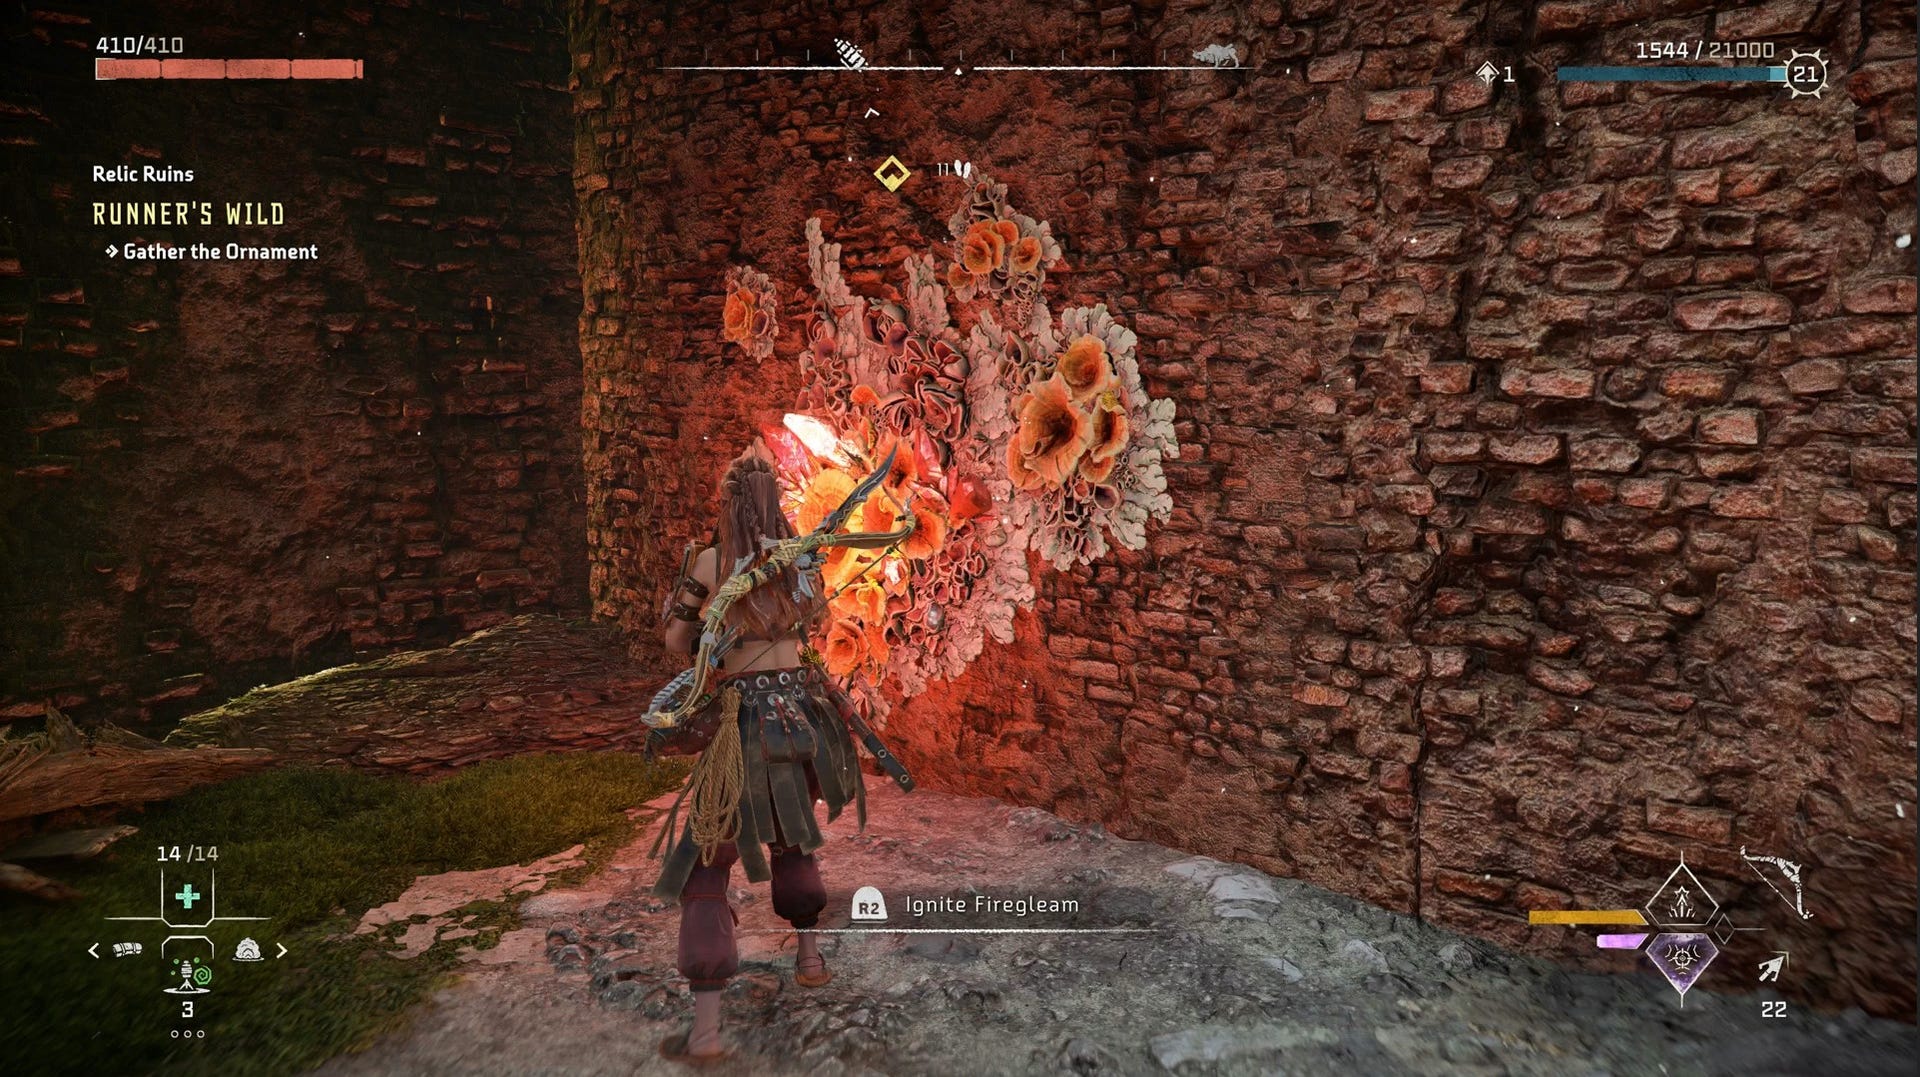
Here, there will be a room blocked by Firegleam, which you must have completed the Death’s Door Story Mission and unlocked the Igniter prior to be able to blast through. Ignite the Firegleam.
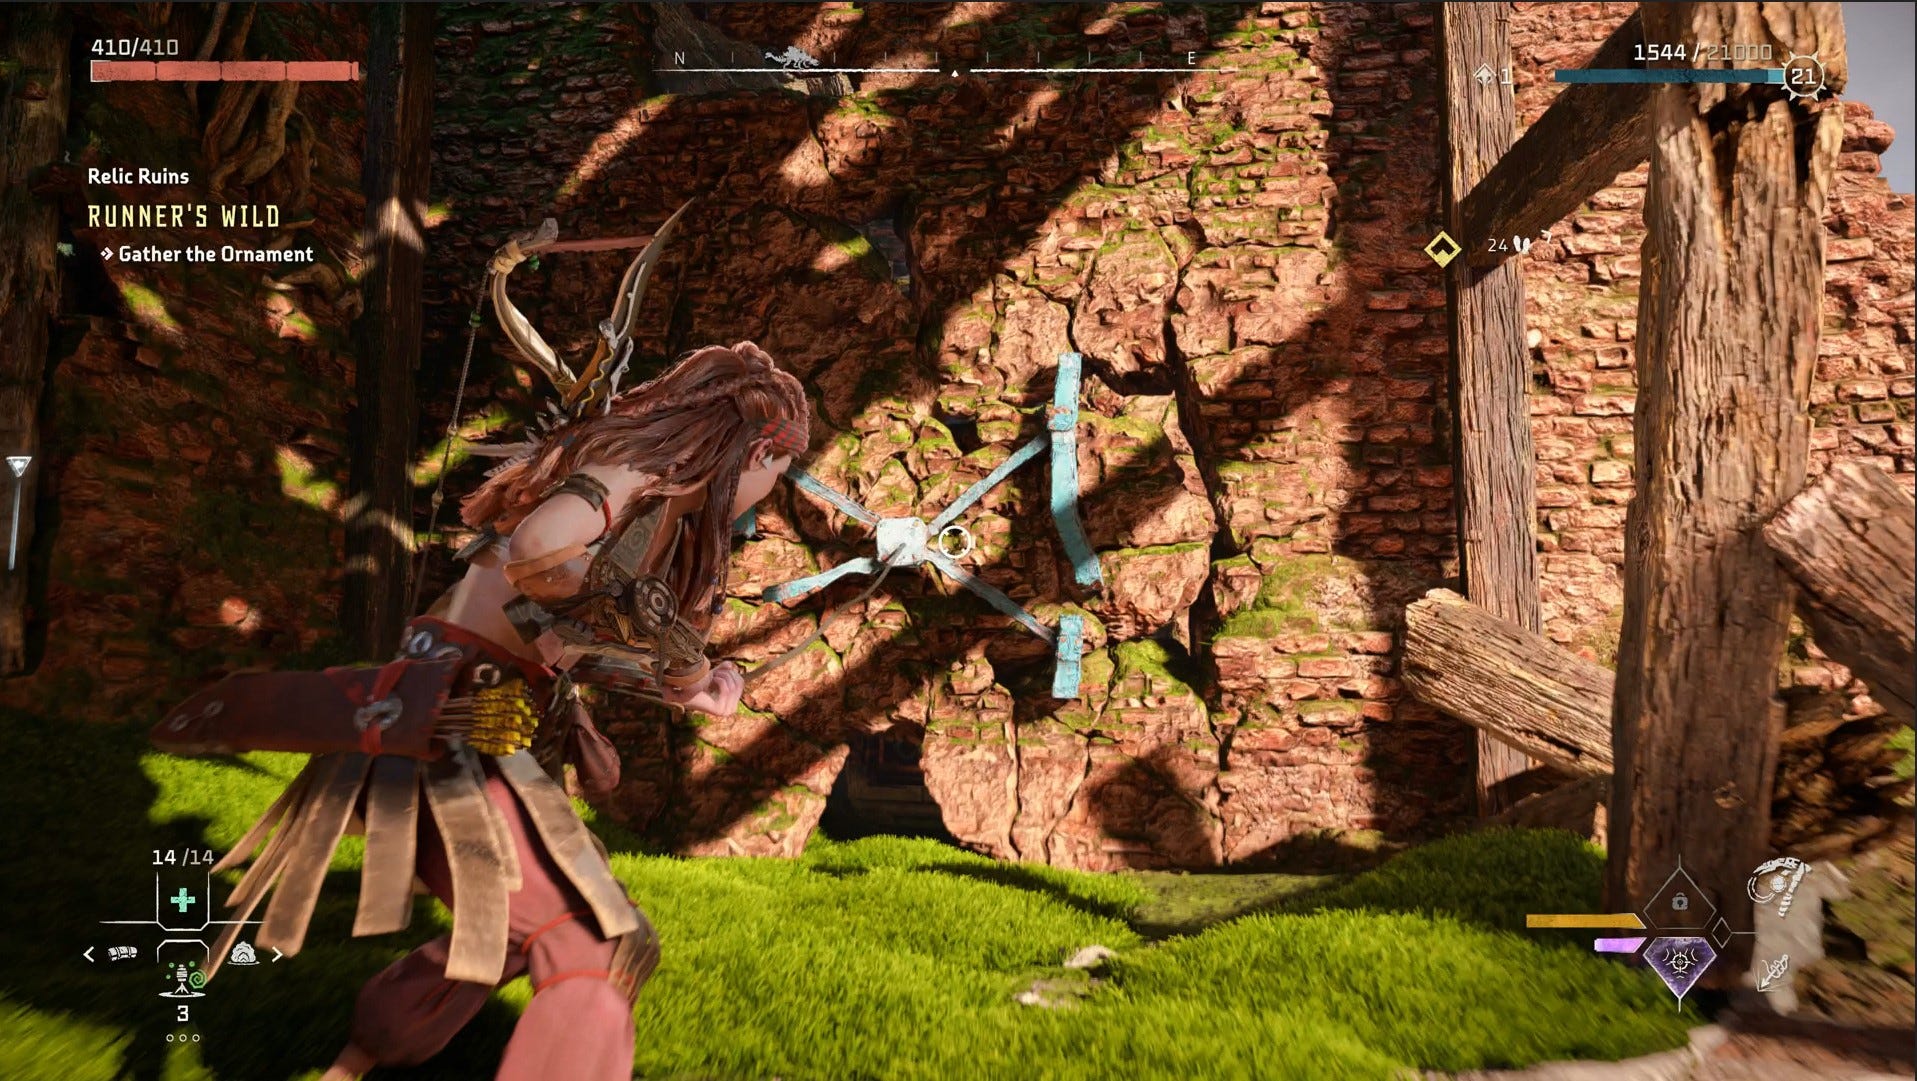
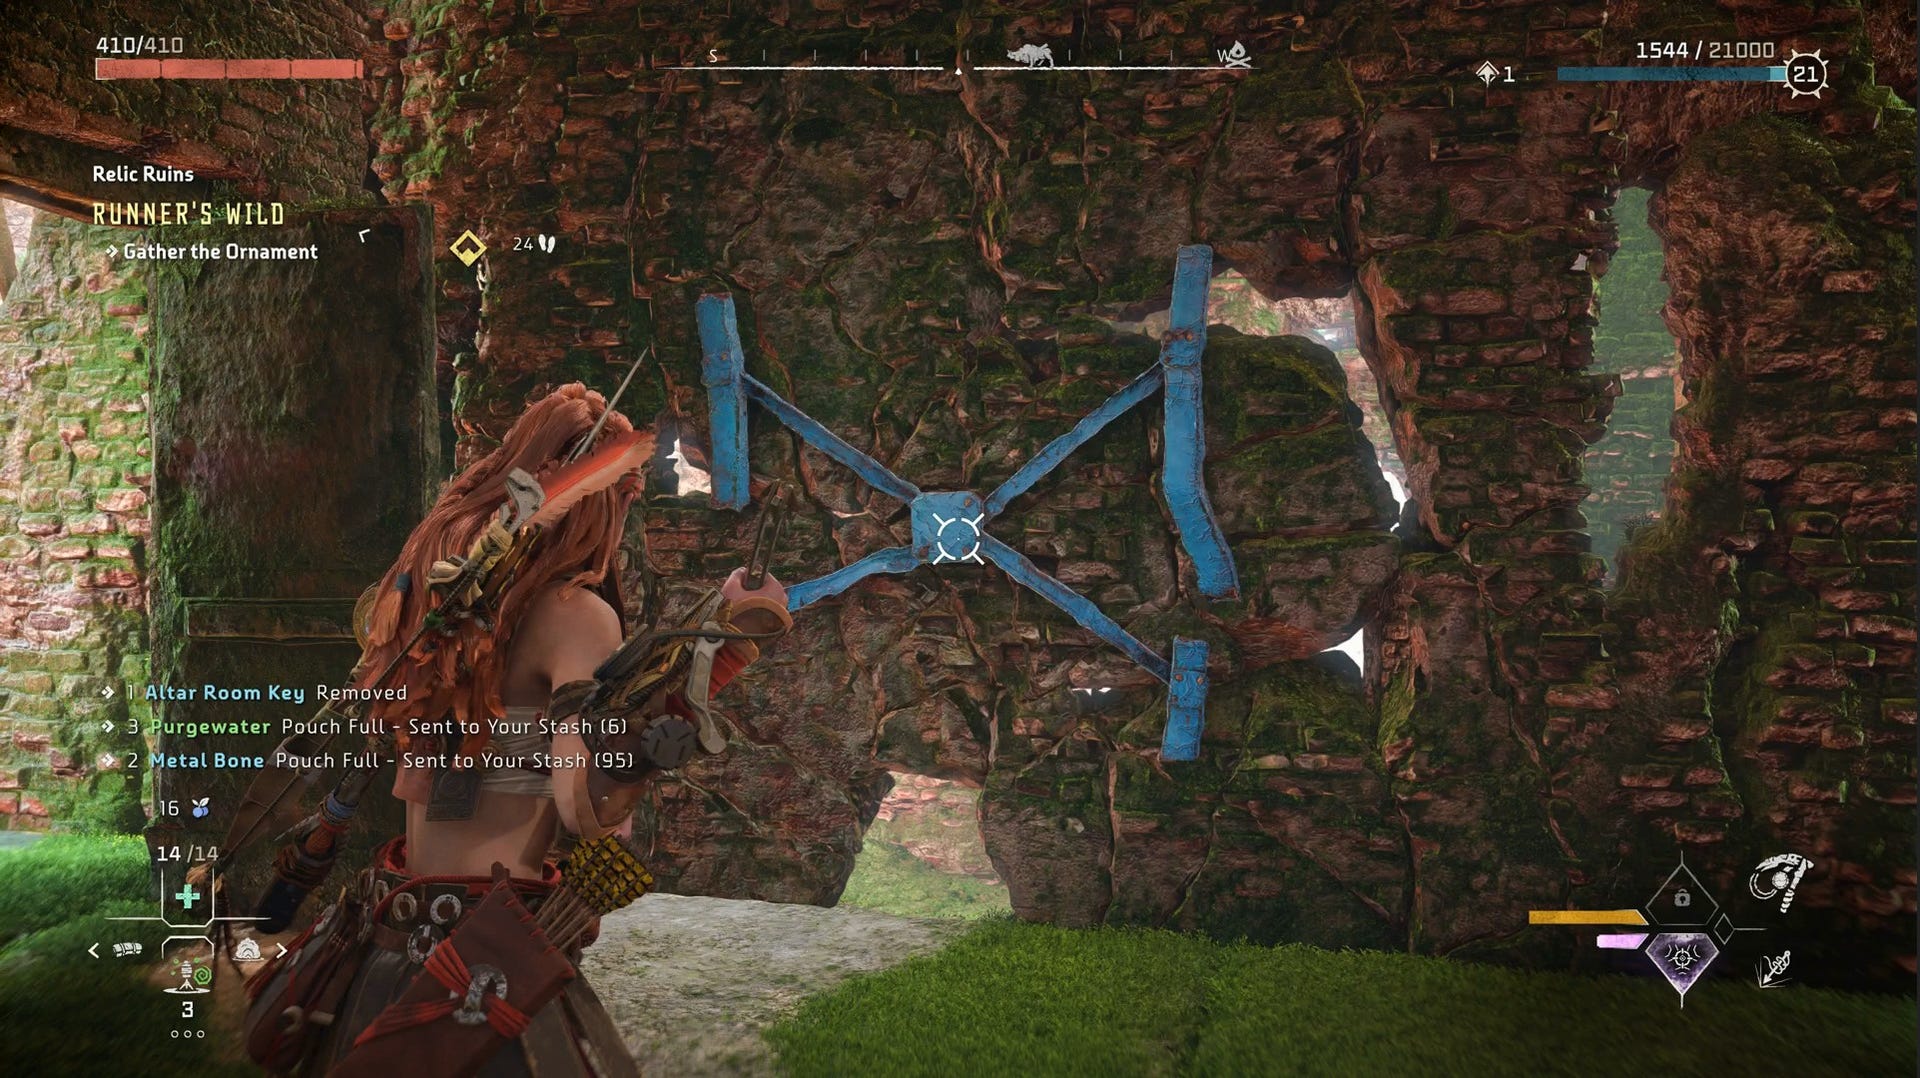
Beside it, there is a wall that can be pulled down with your Pullcaster.
Go into the area beyond the Firegleam wall and pull the crate off the small platform.
Move it through the Firegleam wall first, and then through the first Pullcaster wall you pulled down to the end.

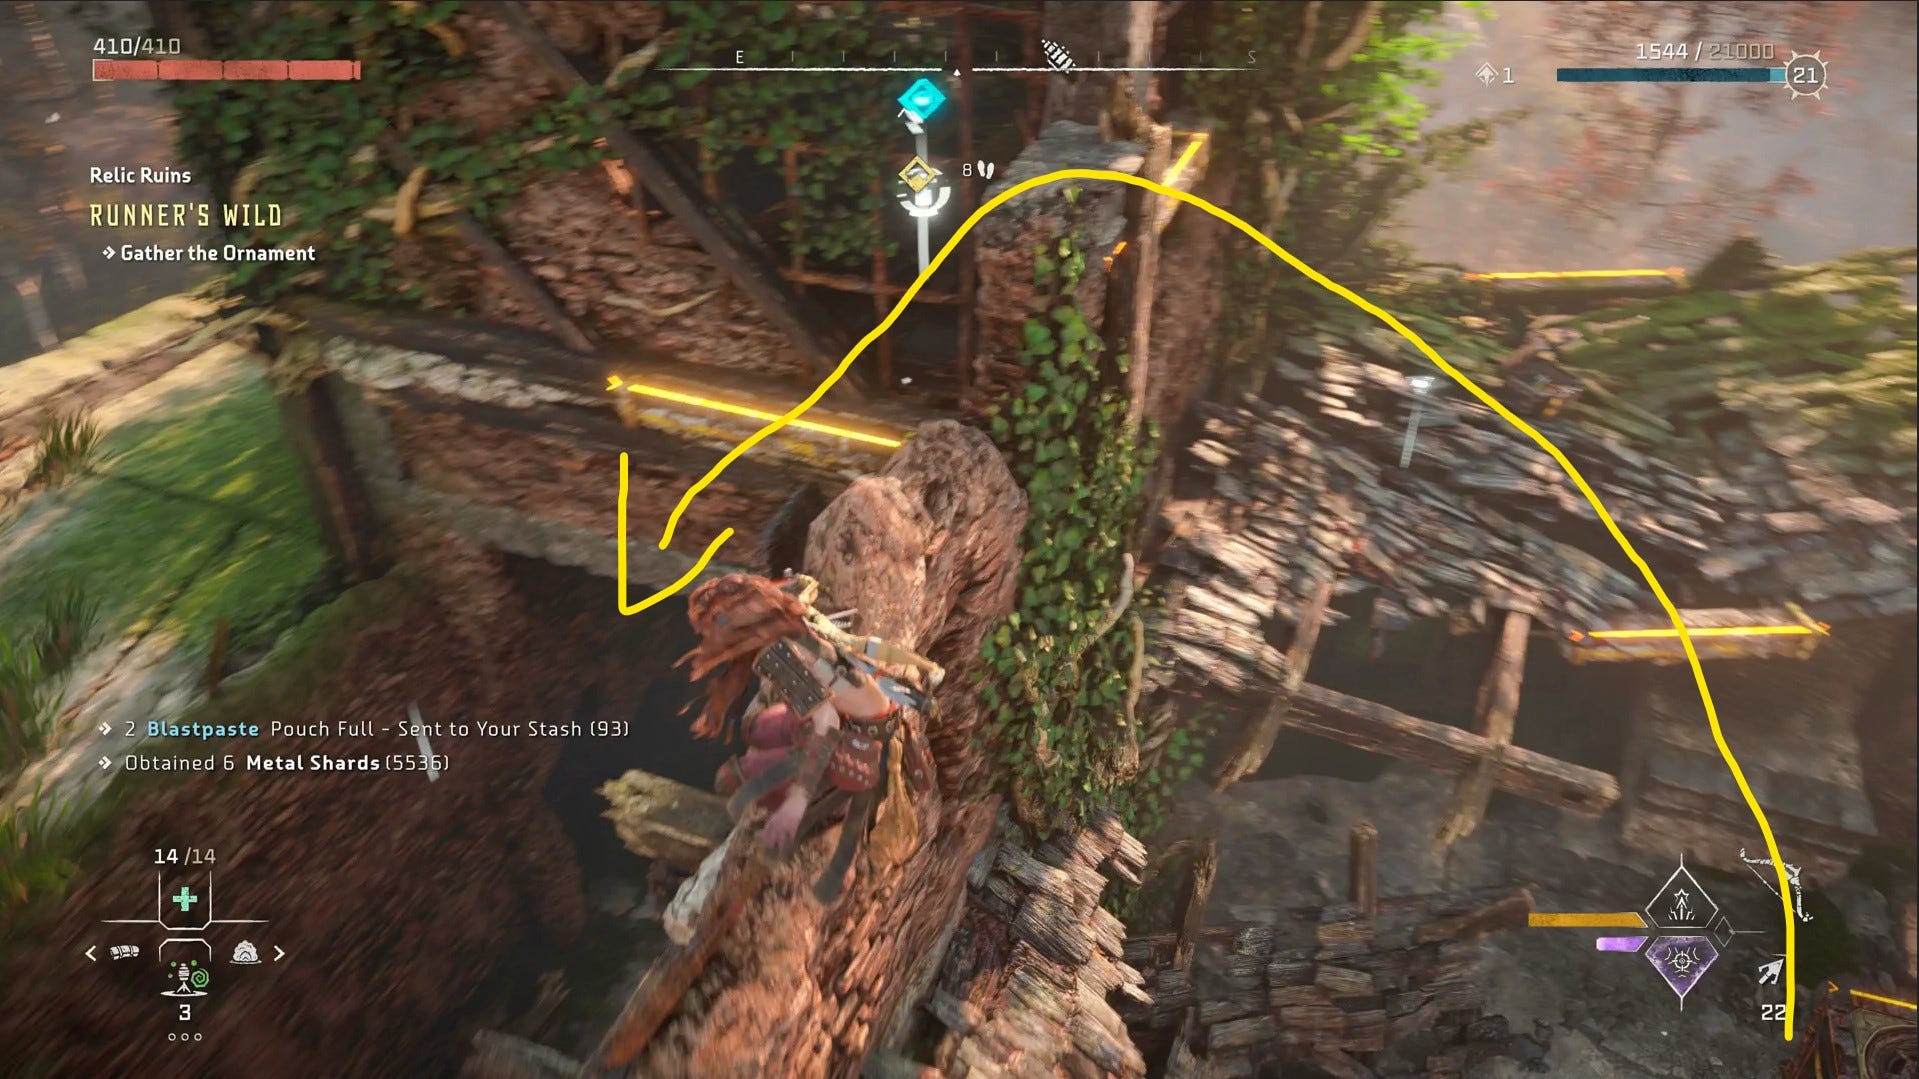
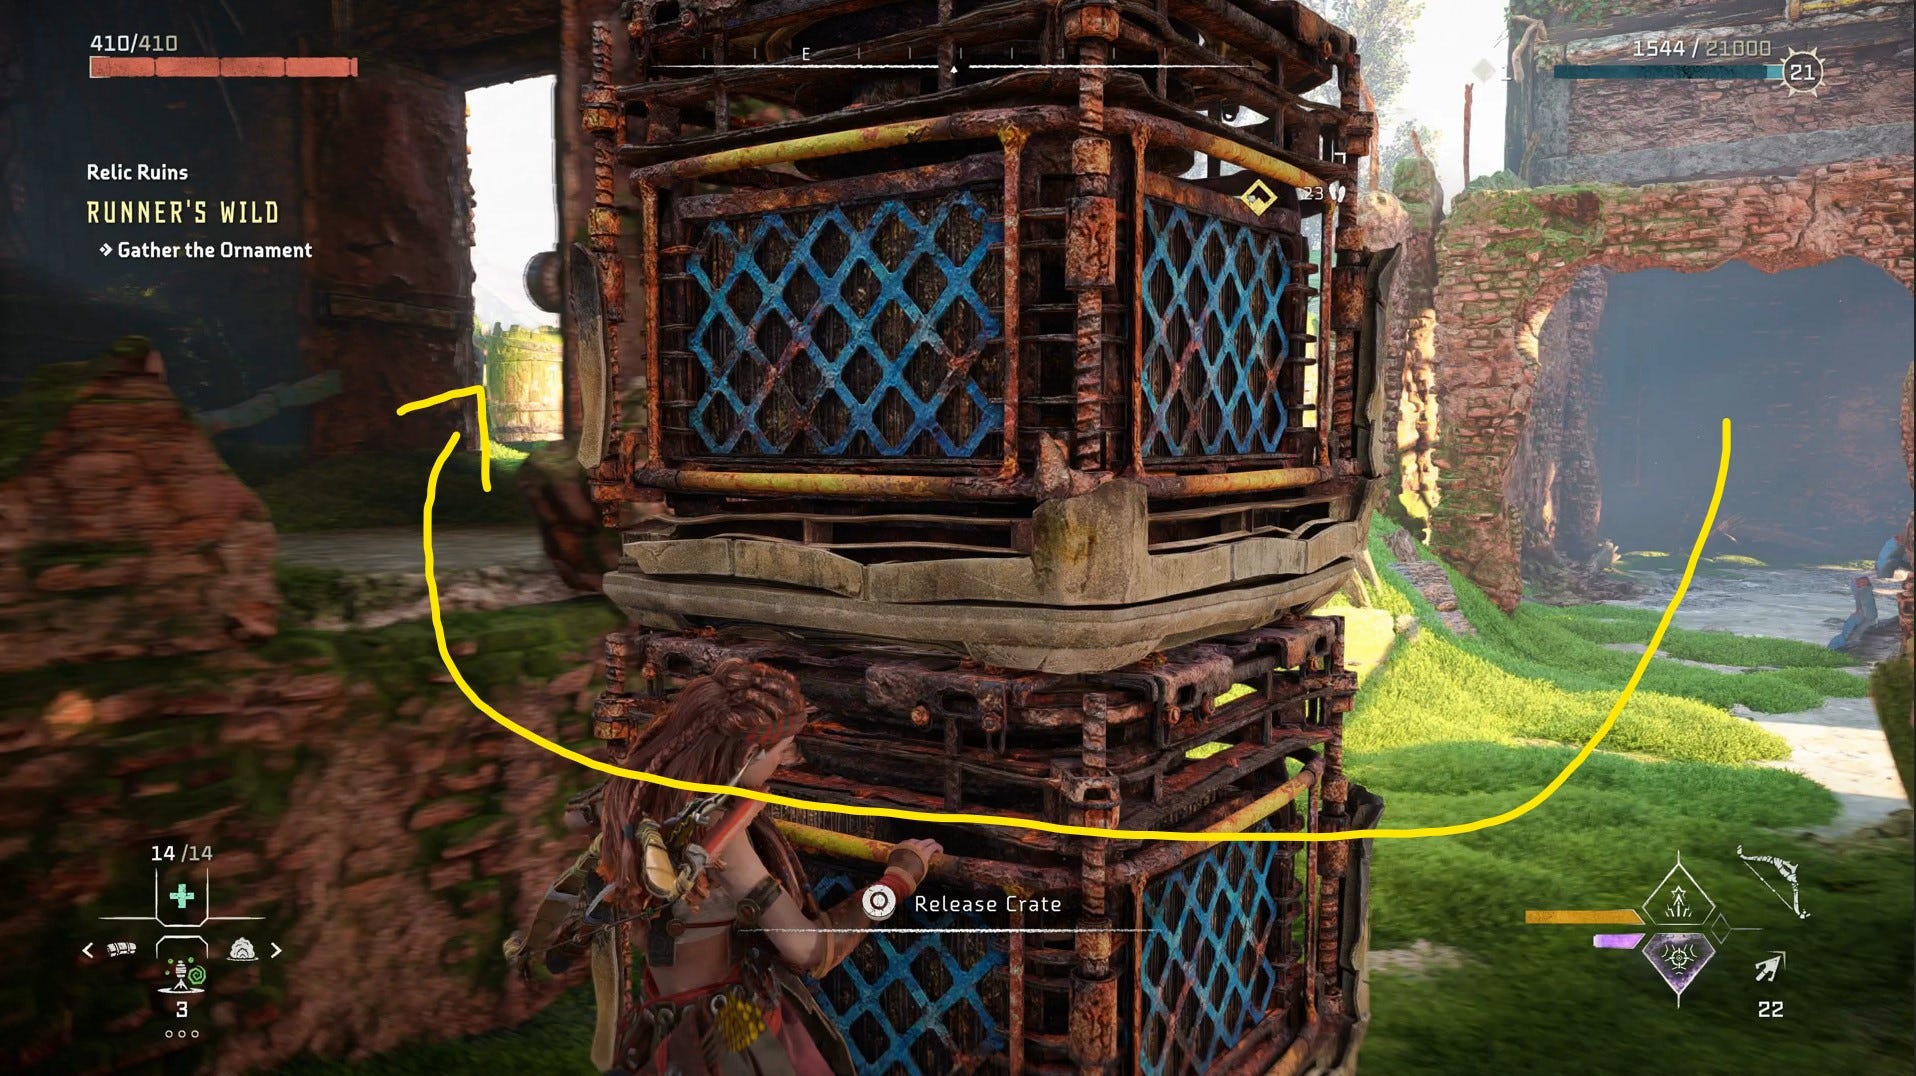
Climb atop the crate, and you can now access the roof of the ruins using a ledge to the right.
A second crate is here that can be pushed down into the main area.
The crate should, rather conveniently, drop in front of a small platform. To the right of the platform, you can see a second Pullcaster wall.
Pull down this wall using your Pullcaster, and then go back to the earlier crate. Move the crate past where the second wall collapsed, coincidentally just above your first crate.
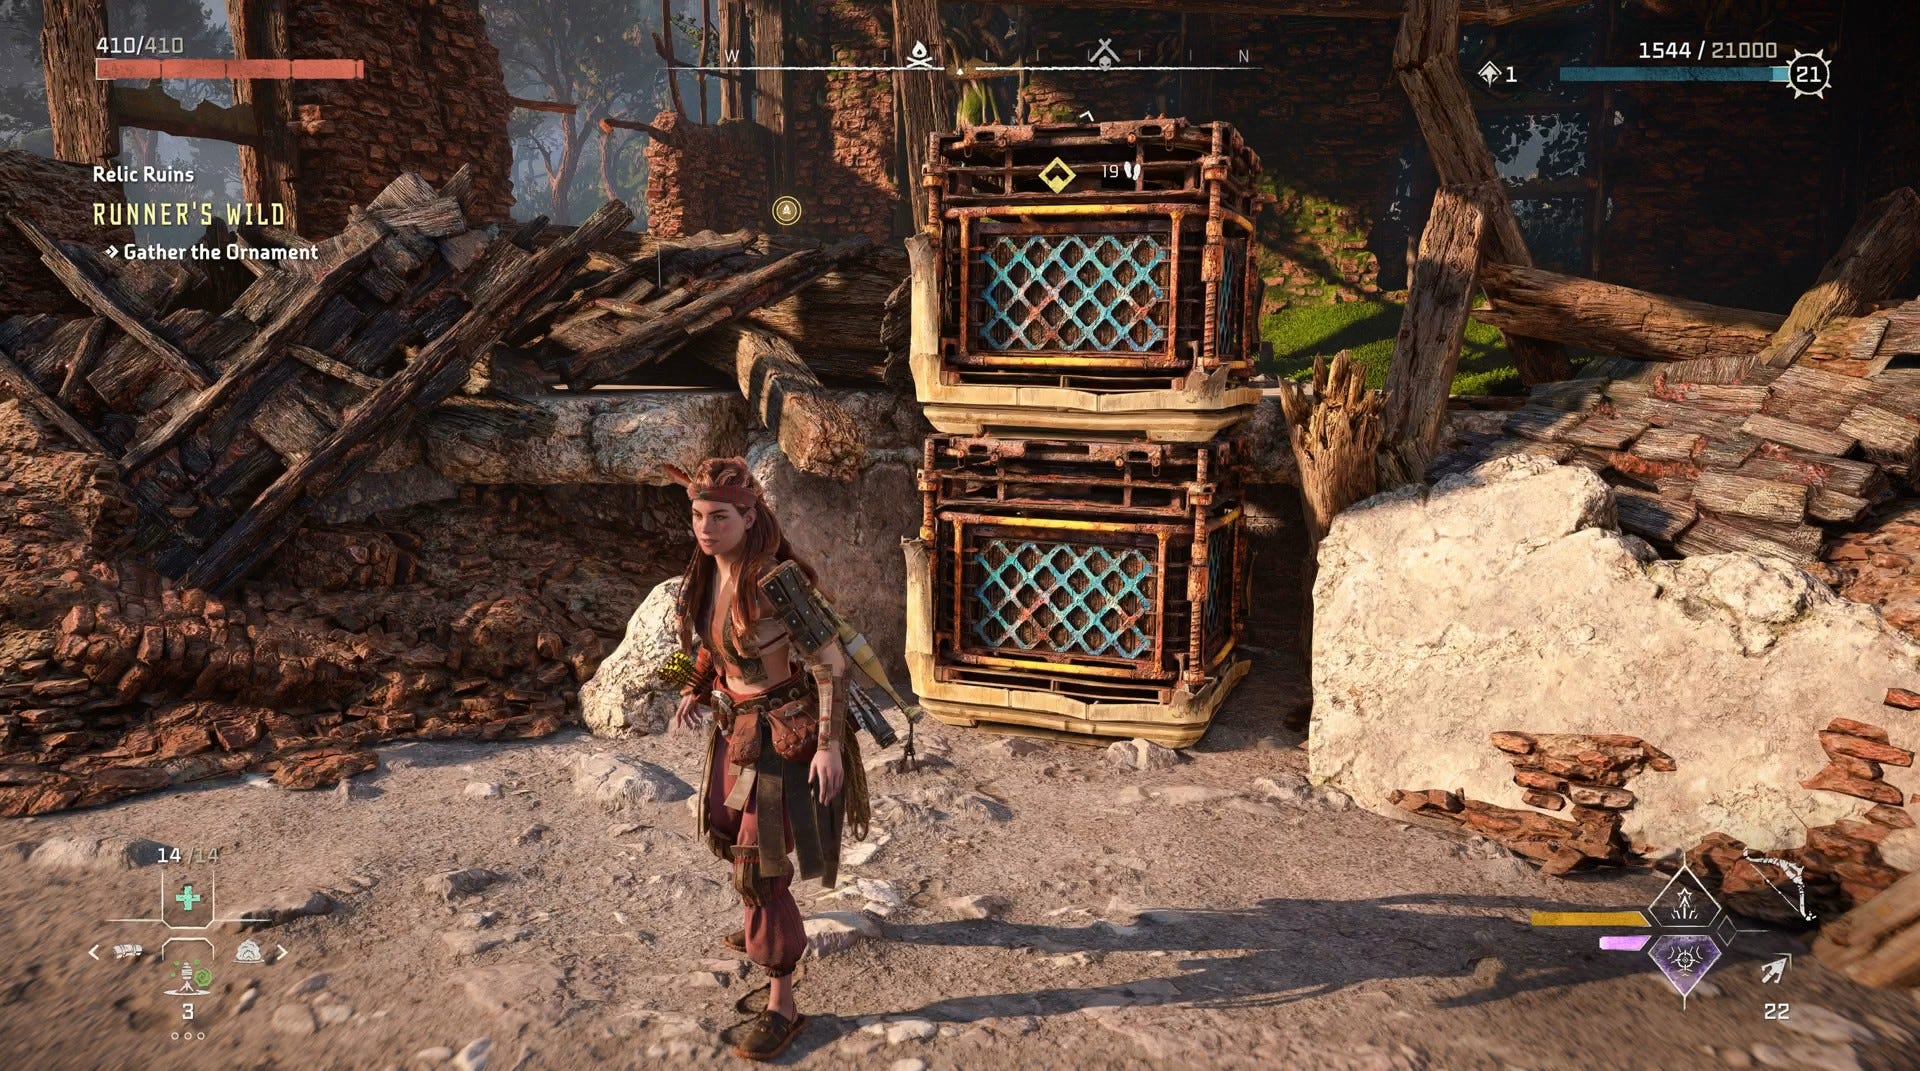
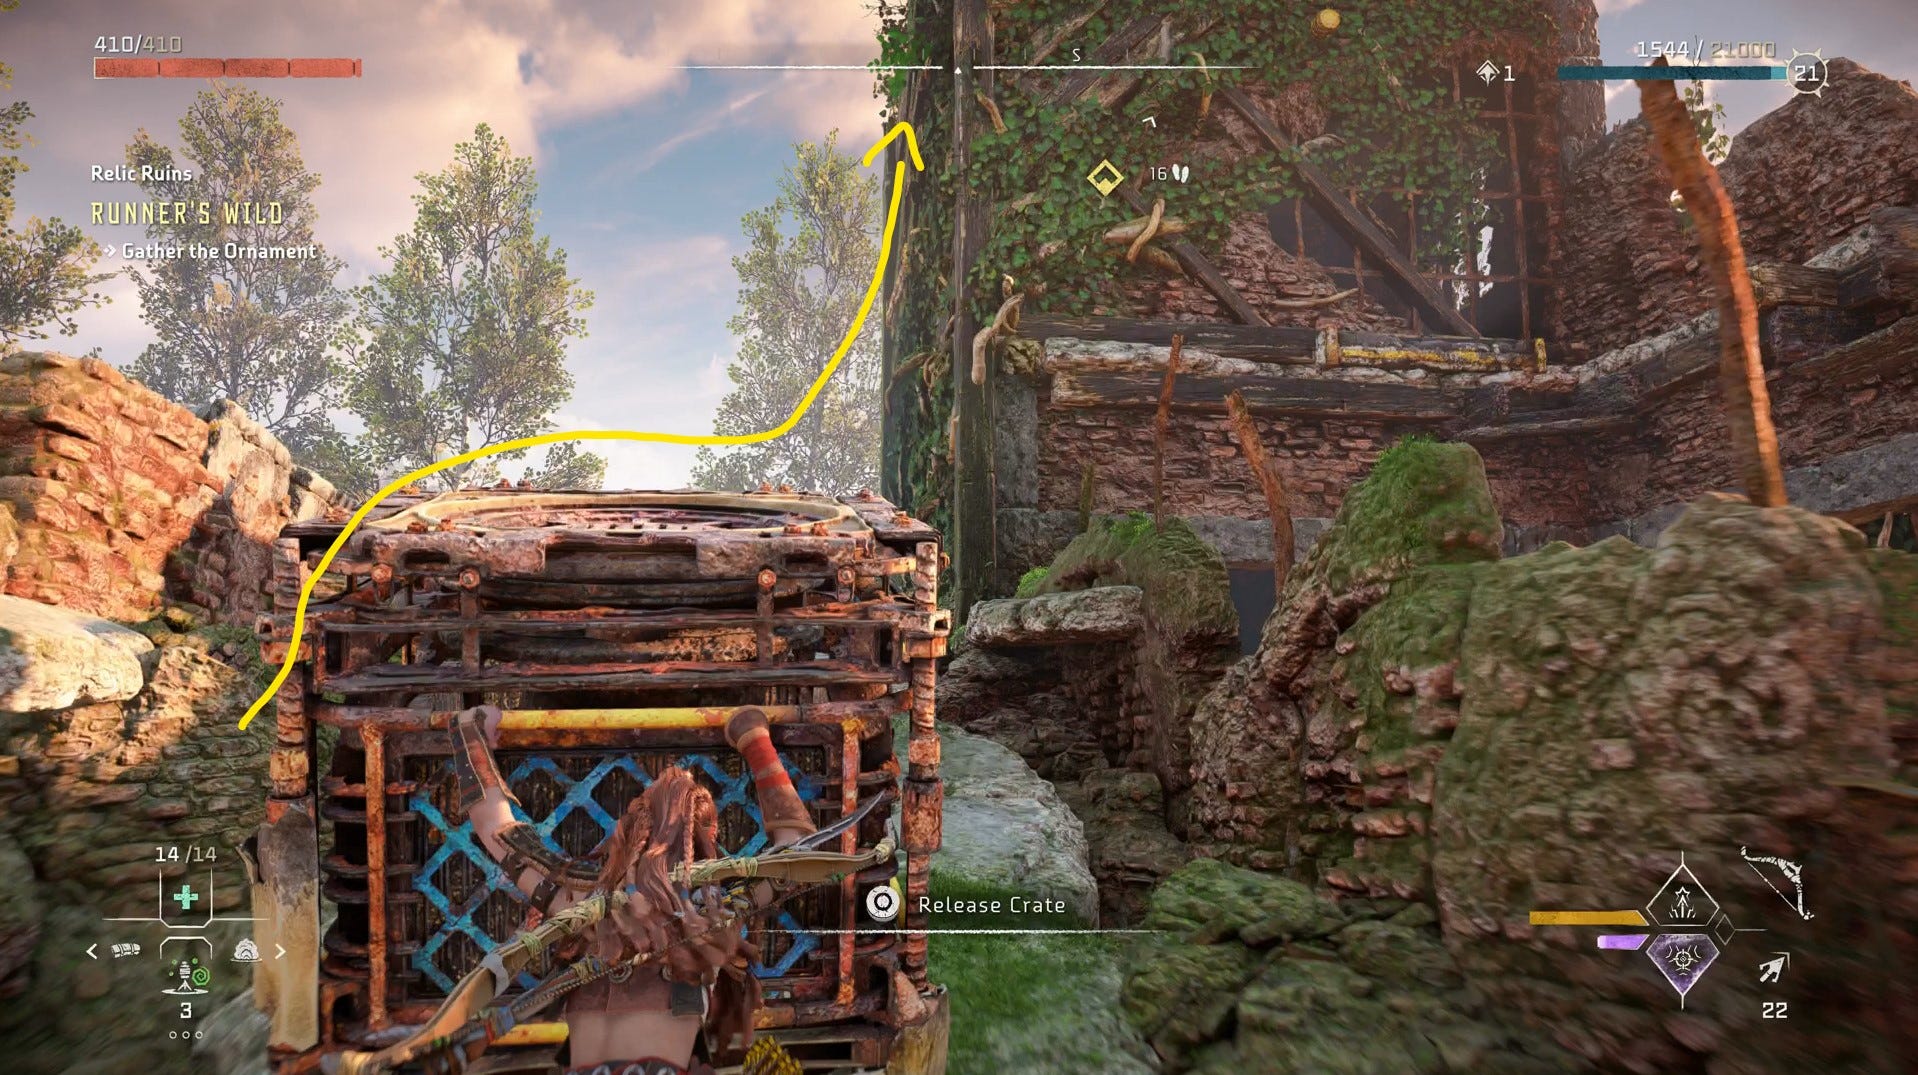
Push the first crate on top of the second crate to have an extended, double crate to utilise.
Then, move the crate back and through the Firegleam wall, where you may see some ledges. The first ledge will break if you try to climb the wall using a single crate.
With this in place, you can climb up it to access previously inaccessible ledges and get inside of the ruins. On the platform above is the key needed to open the door from earlier!
Return to the door and unlock it. On the left through the door, there will be another wall to pull down using the Pullcaster.
Retrieve the two crates from earlier and position them in front of the newest hole in the wall.
Return through the door and onto the higher ground, pulling the top crate into the small room with you.
Then, this crate can be used to access another ledge.
Atop, this ledge, and after a lot of pushing and pulling, you can finally reach the ‘A Church? Really?’ ornament of Runner's Wild Relic Ruins.
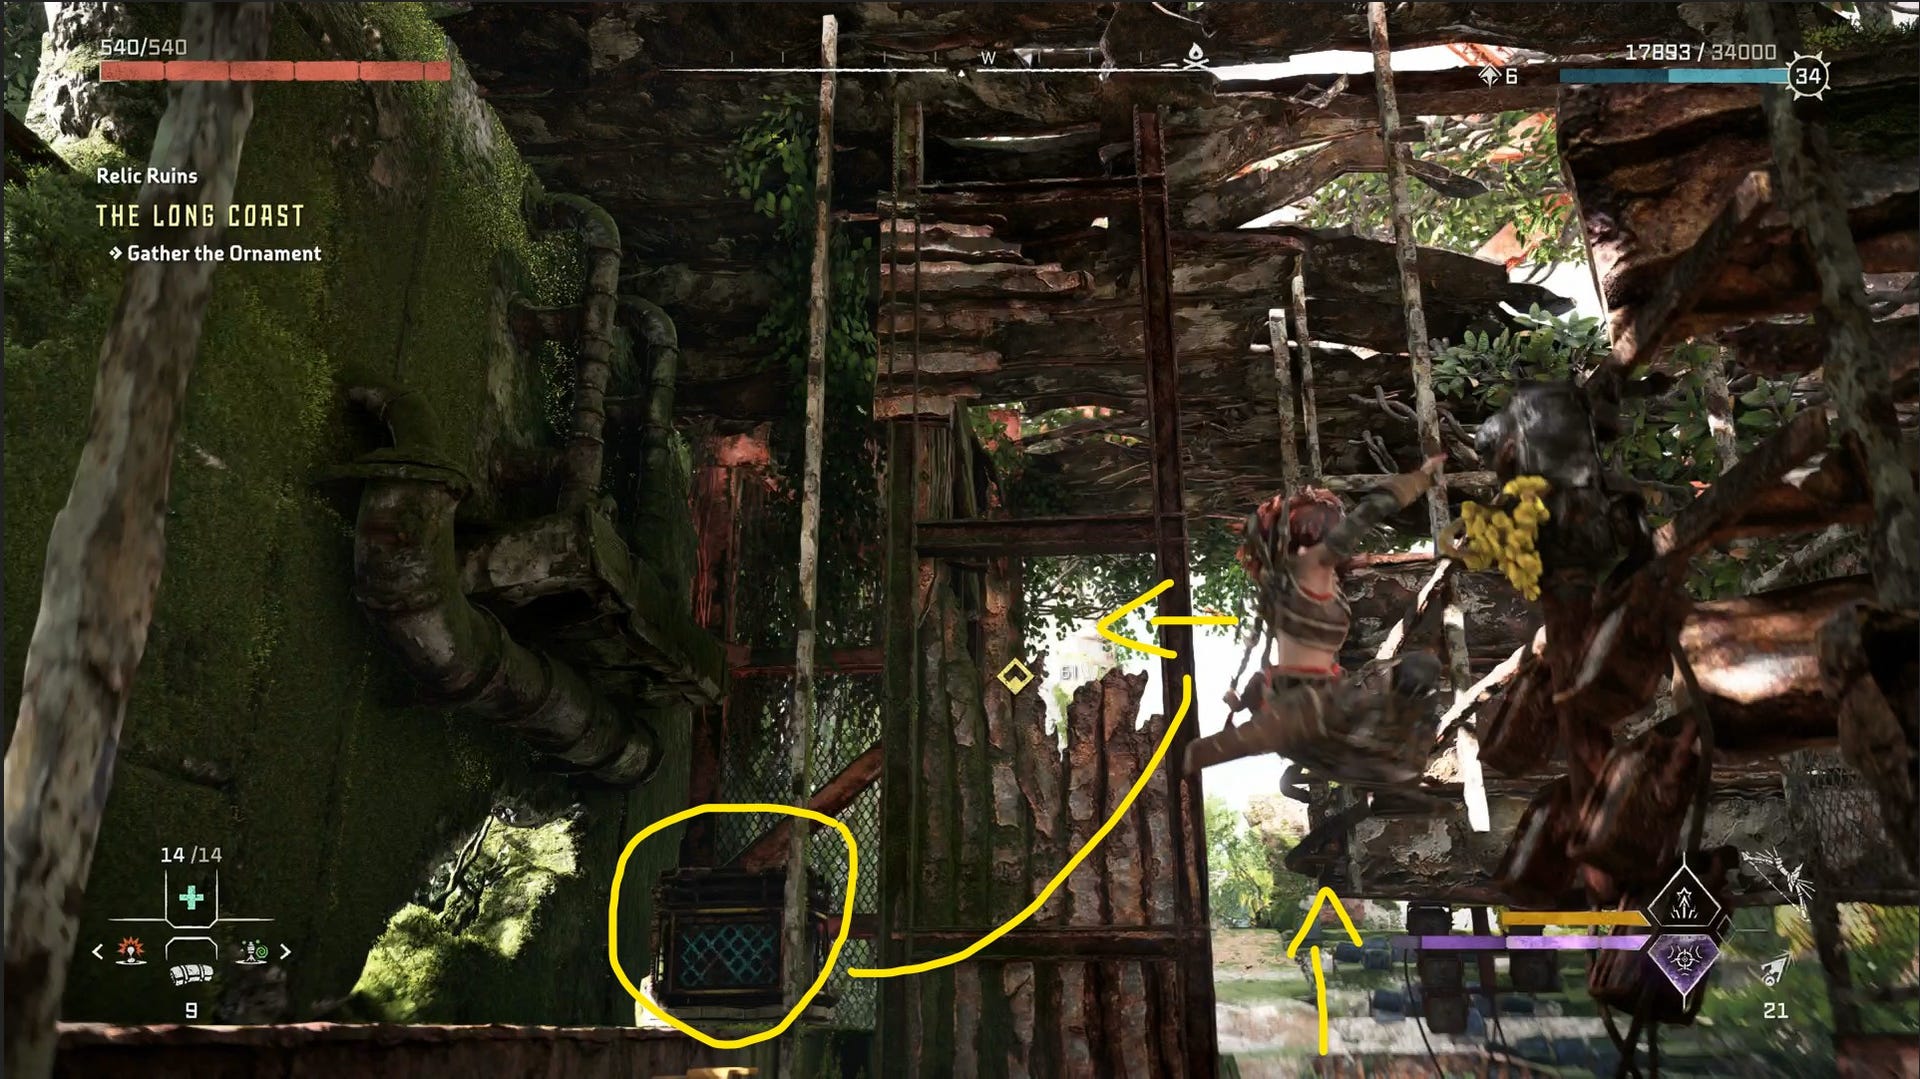
Horizon Forbidden West The Long Coast Relic Ruin Puzzle and Door Code
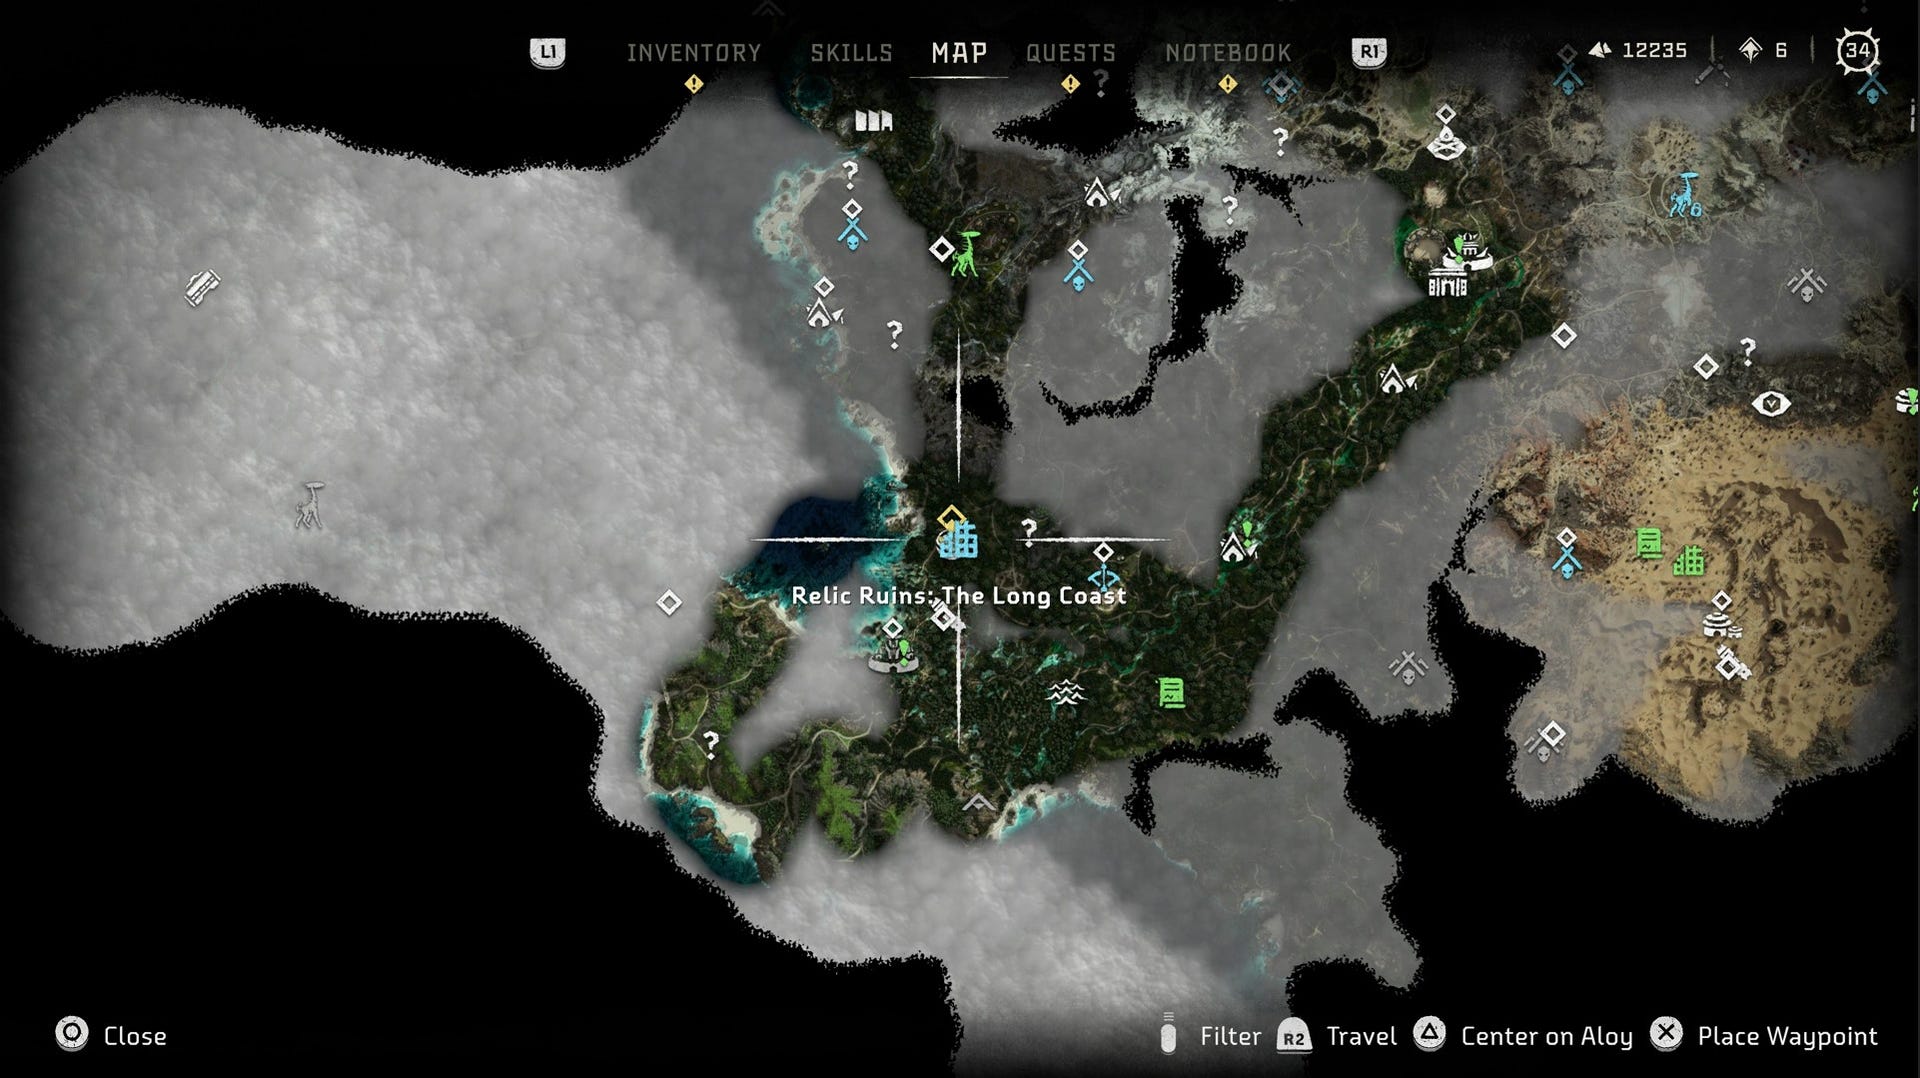
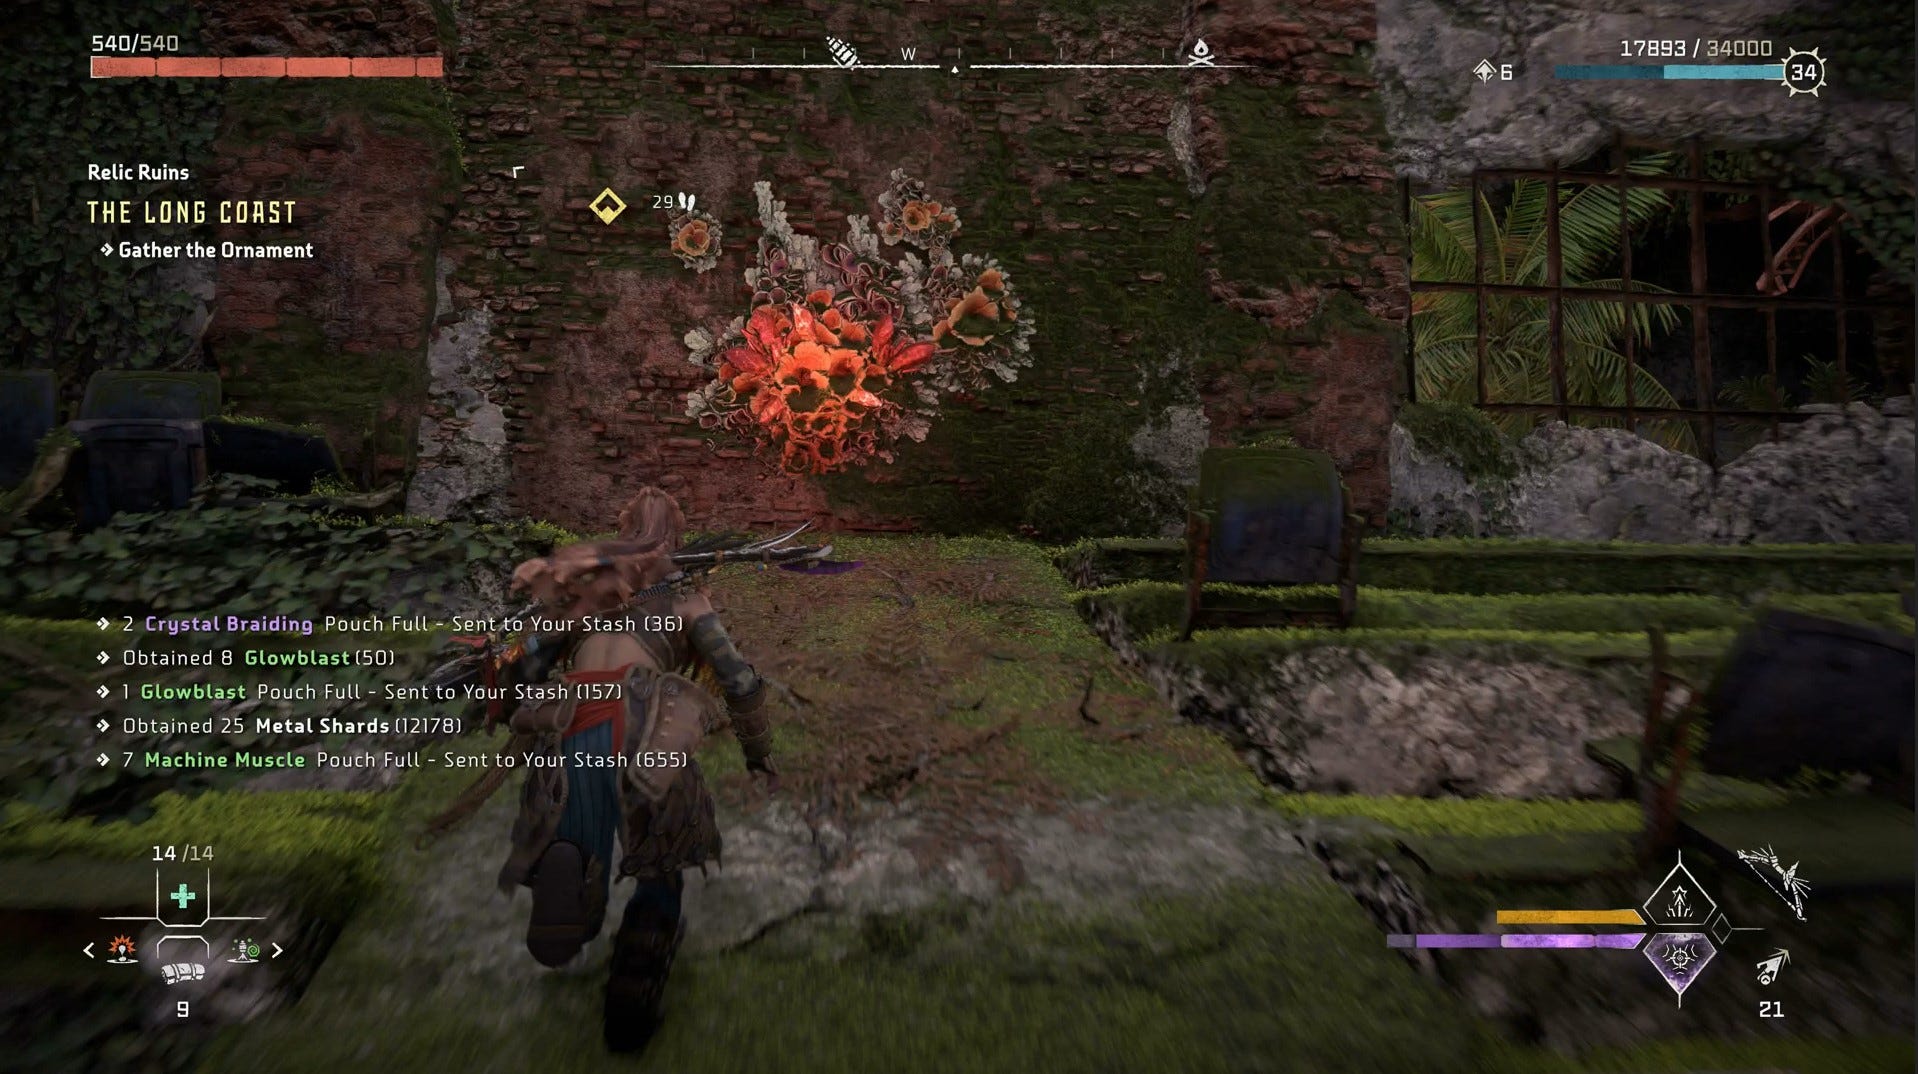
The Long Coast Relic Ruins can be found to the west of Raintrace Rise in Horizon Forbidden West.
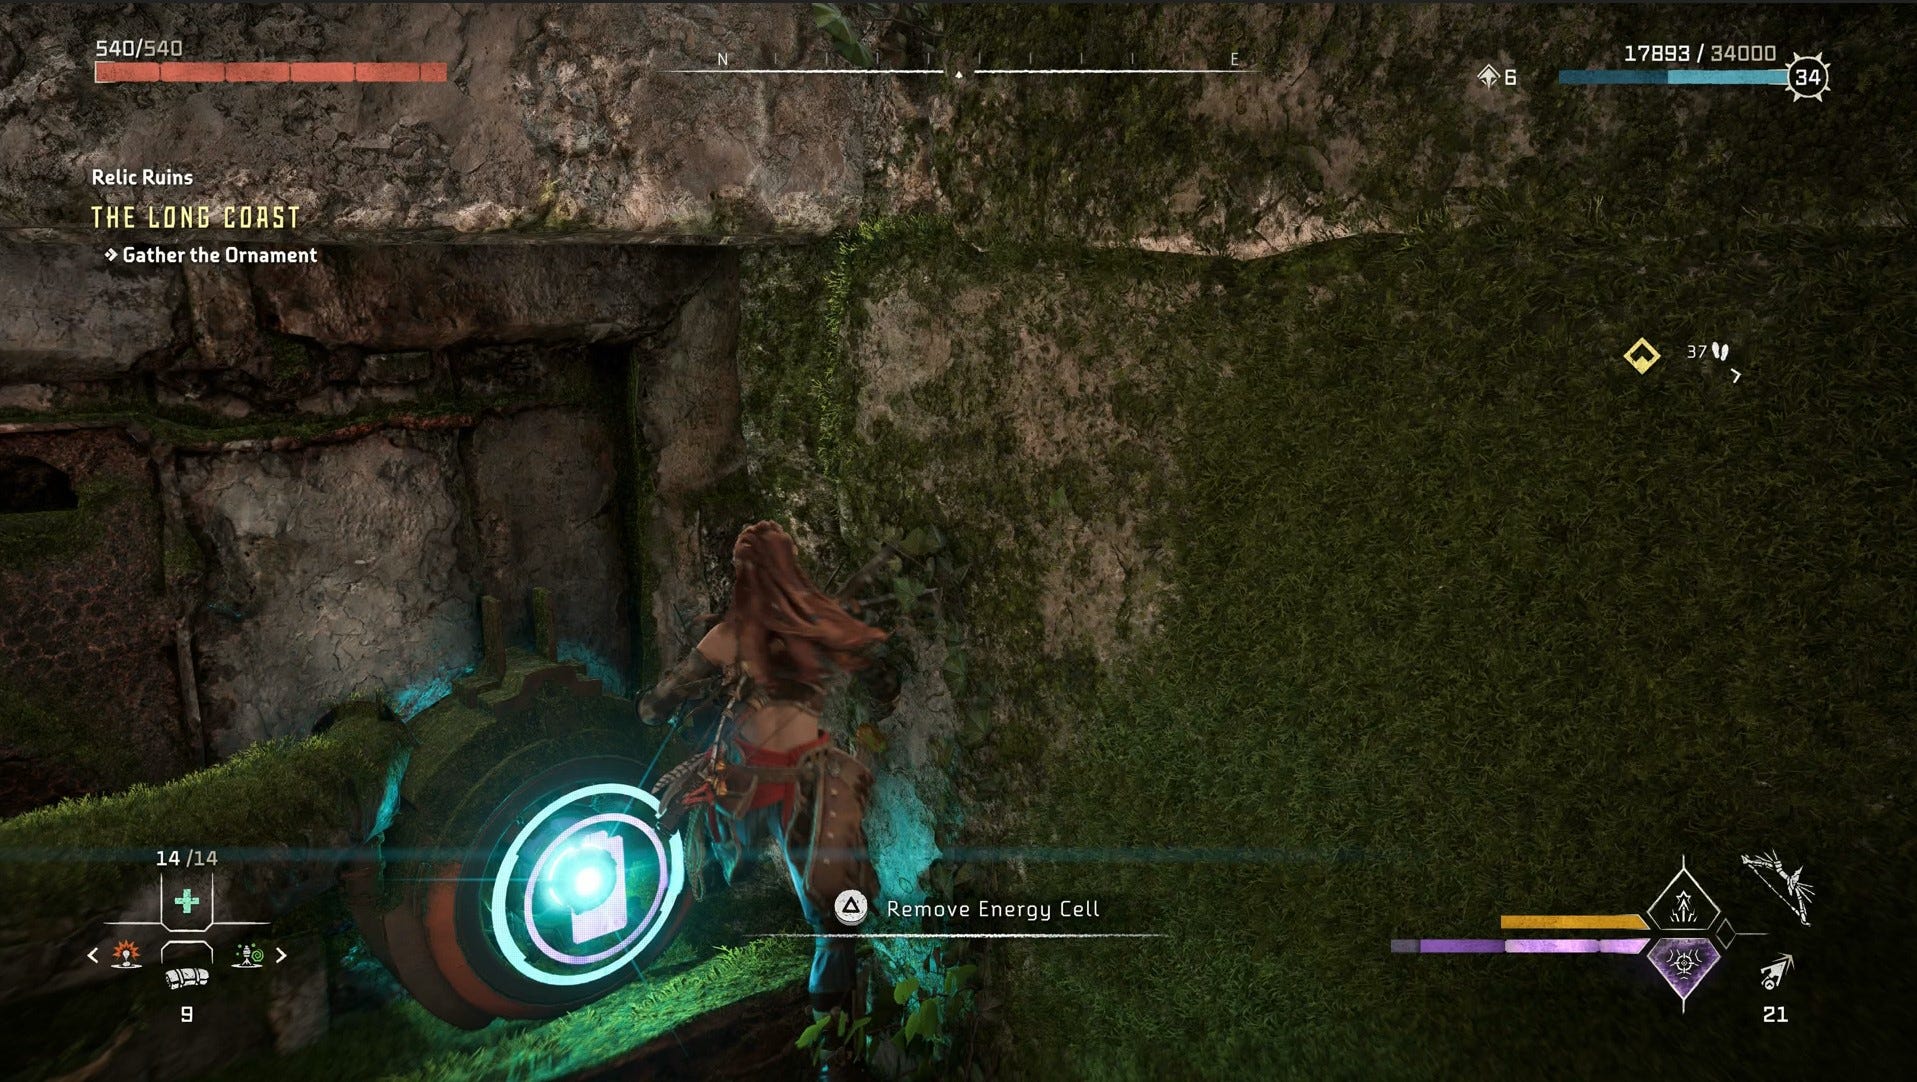
As you enter the ruin, to the right there is a glowing battery symbol on a module protruding from the wall, indicating that it is in need of an Energy Cell.
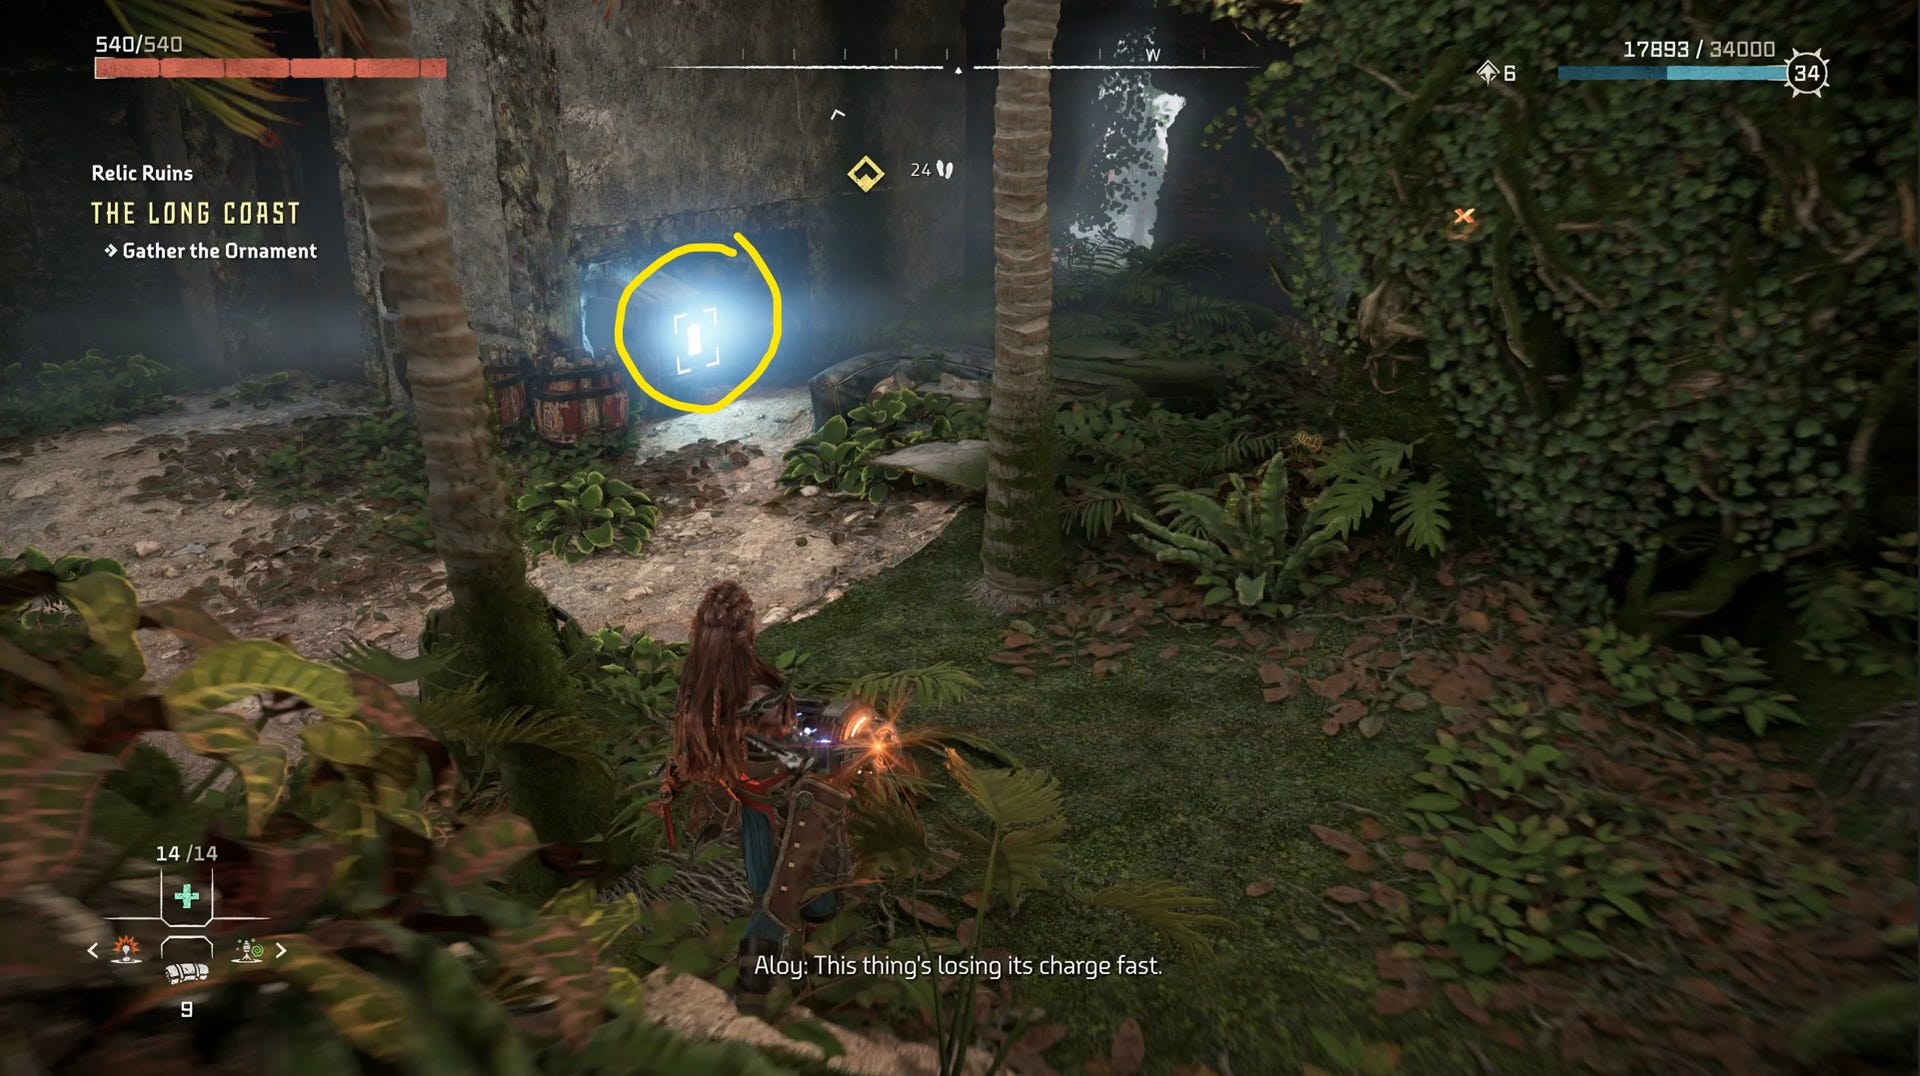
Navigate up the stairs to the left, and you’ll soon find an Energy Cell. Grab this and insert it into the battery slot.
Above, you can use your grapple to access another floor of the ruins.
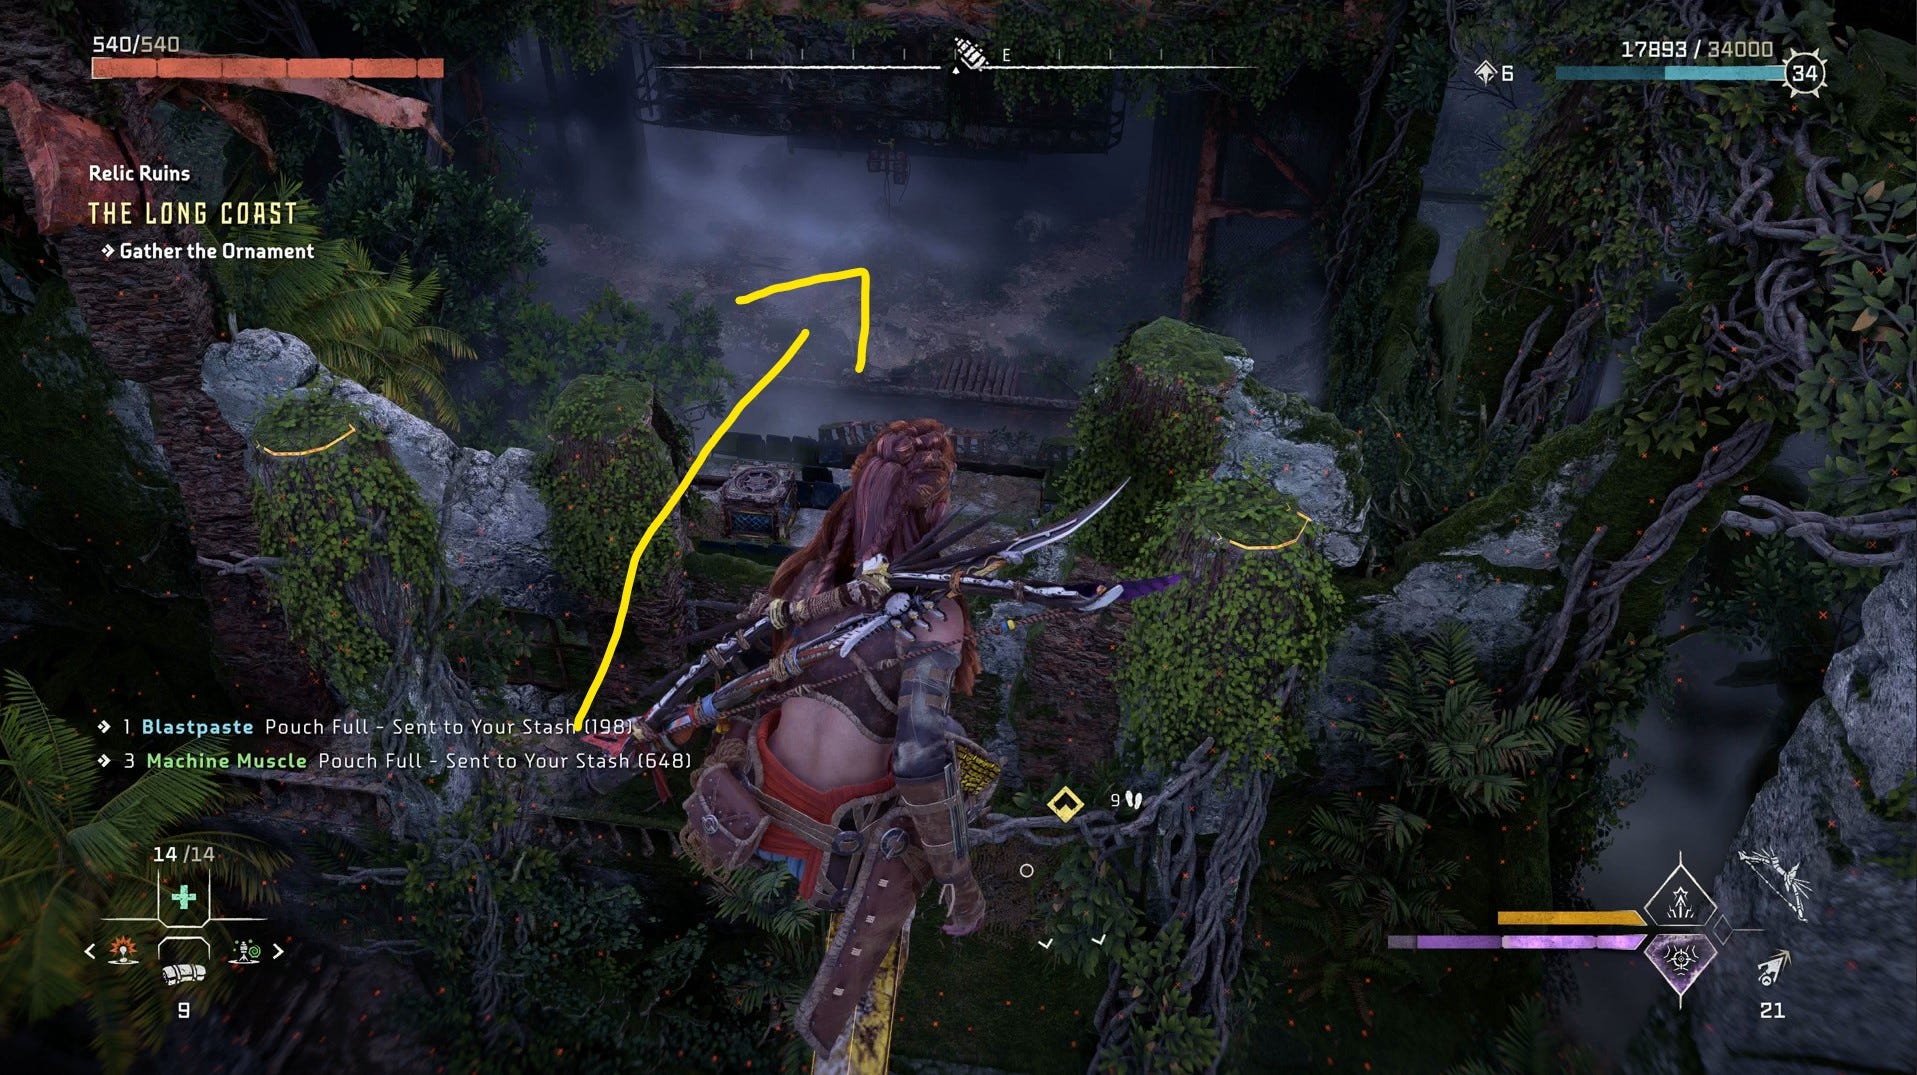
If you climb the clock tower and look across the ruins, you can glide across to a crate, and you will also find a Firegleam wall. Ignite the Firegleam wall. You can only do this after having unlocked the Igniter and completing the Death’s Door Story Mission.
Grab the crate and push it through the Firegleam wall and down onto the bottom floor. Go down with it, and power the elevator using the Energy Cell from earlier.

Put the crate in the elevator. Go inside the elevator and press the green button to be elevated to the upper floor again. Look up, and there is a vent on the ceiling of this elevator. Open it using your Pullcaster.
Now pull the crate out of the elevator so it's on the upper level. Then reset the elevator down to the lower level. Once that's done, grapple back up to the crate and push it onto the top of the elevator roof.
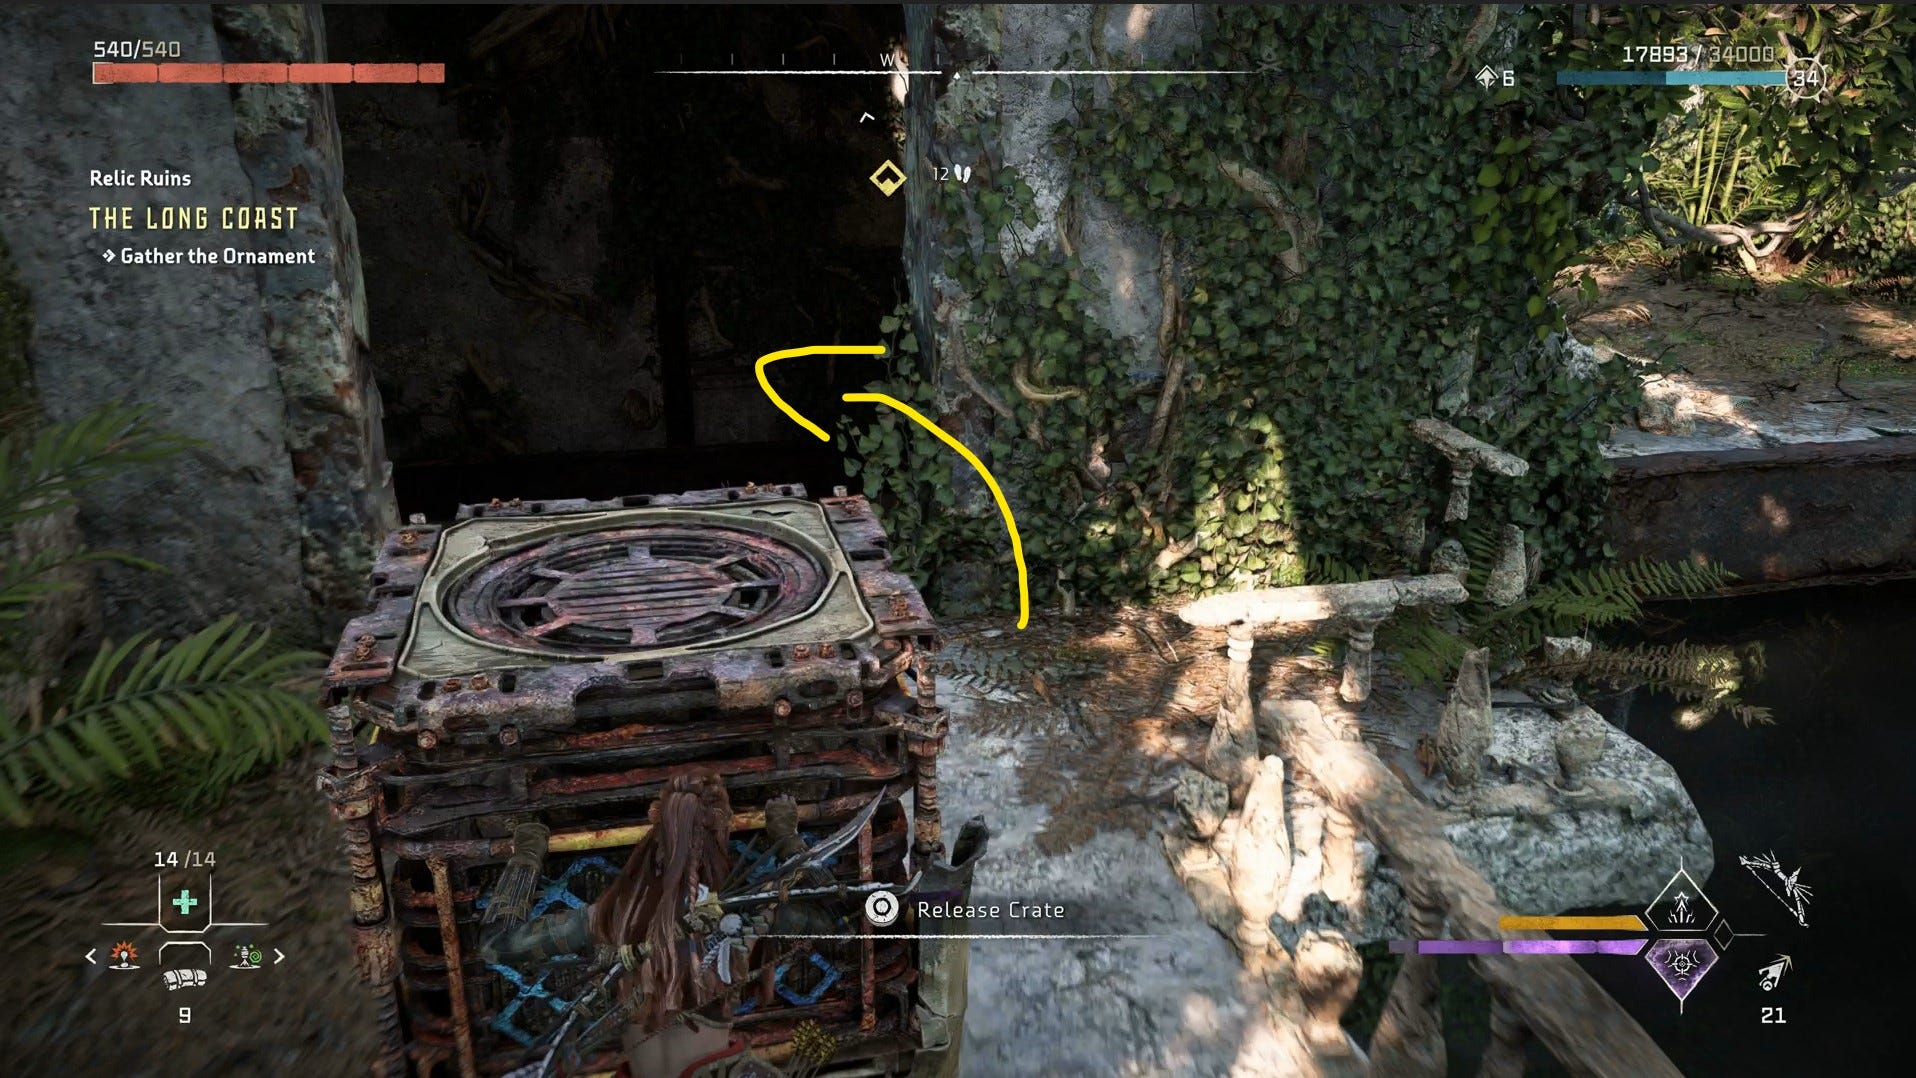
Now turn around on the upper level and jump down. Go across the water to more mossy, rusted architecture, and look around, there is a small hole in the wall by the back. Through the hole, you can see a Firegleam wall.
Climb onto the platform behind you, and there are small yellow lights along the end that you can use to climb across the wall and into the small room with the Firegleam wall.
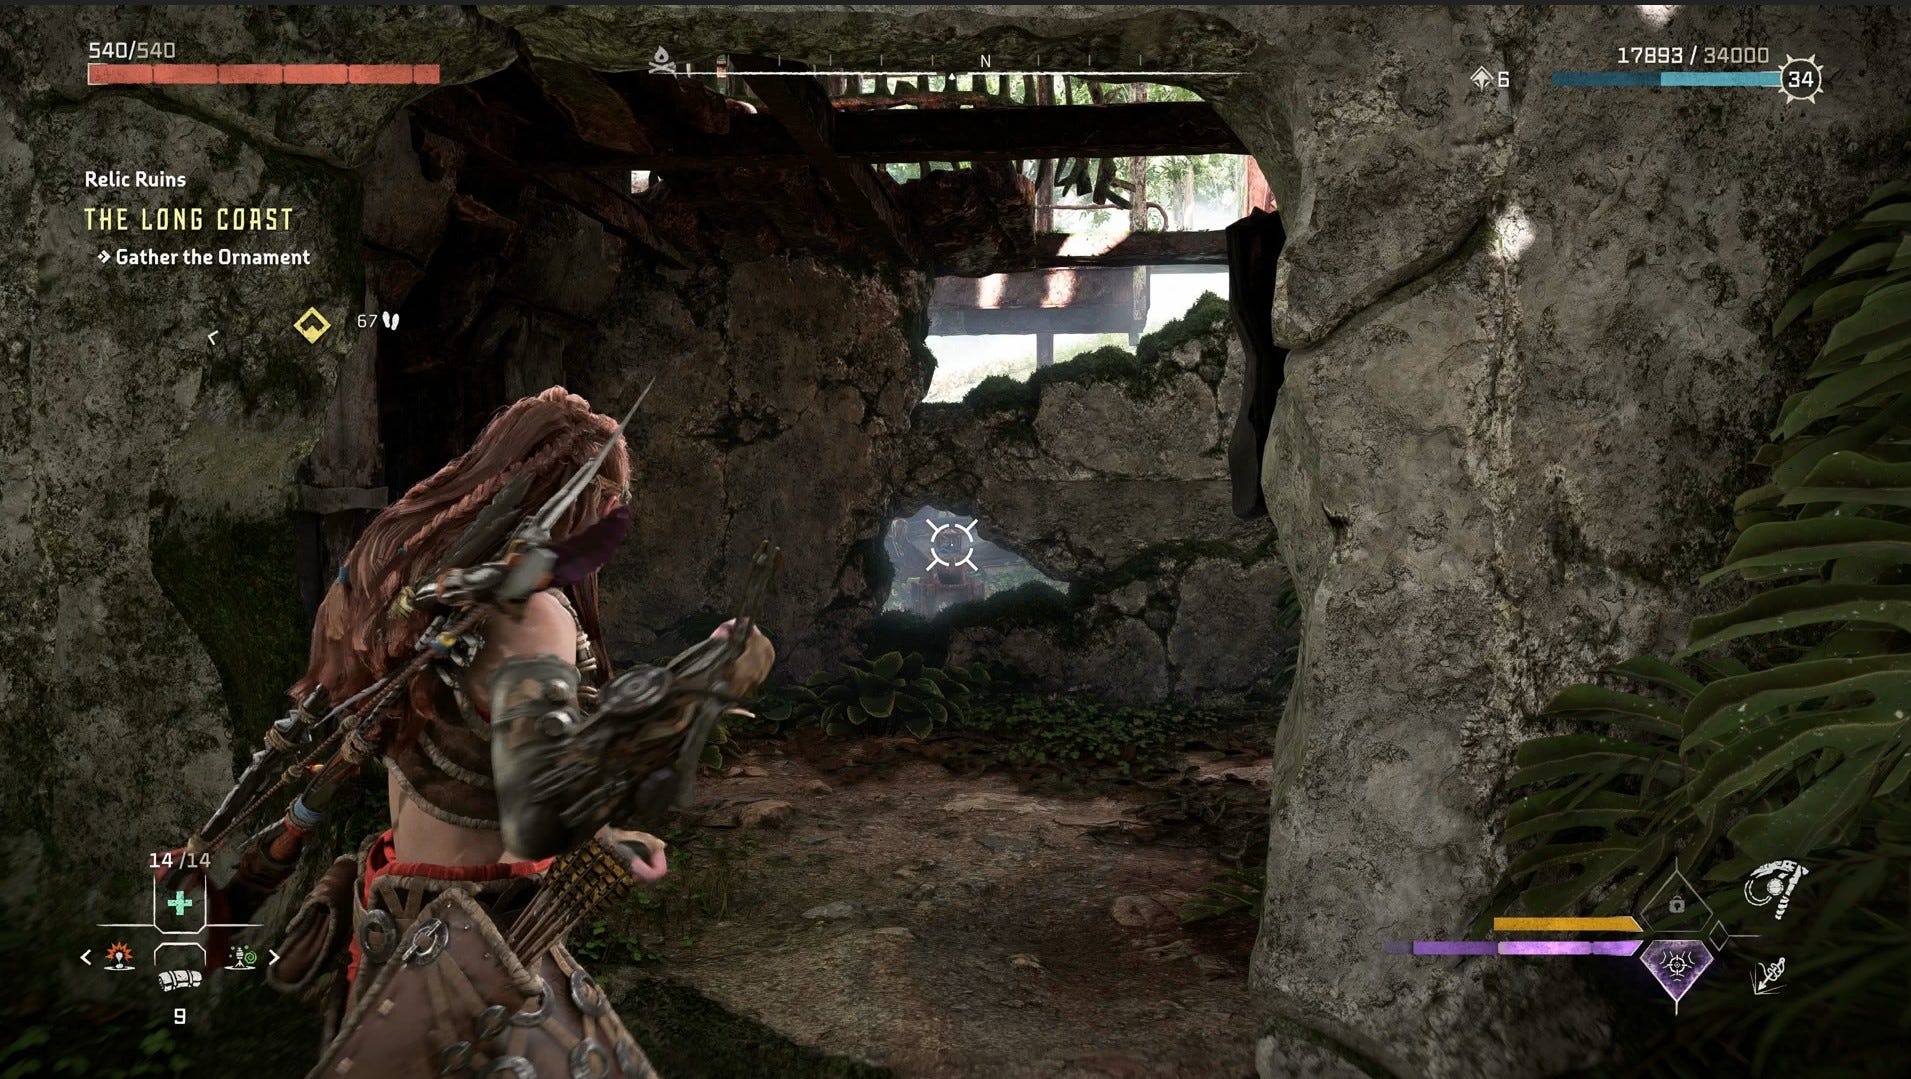
Ignite the Firegleam wall, and go through it. From a distance, you can now use your Pullcaster through the small hall in the wall to pull the lever.
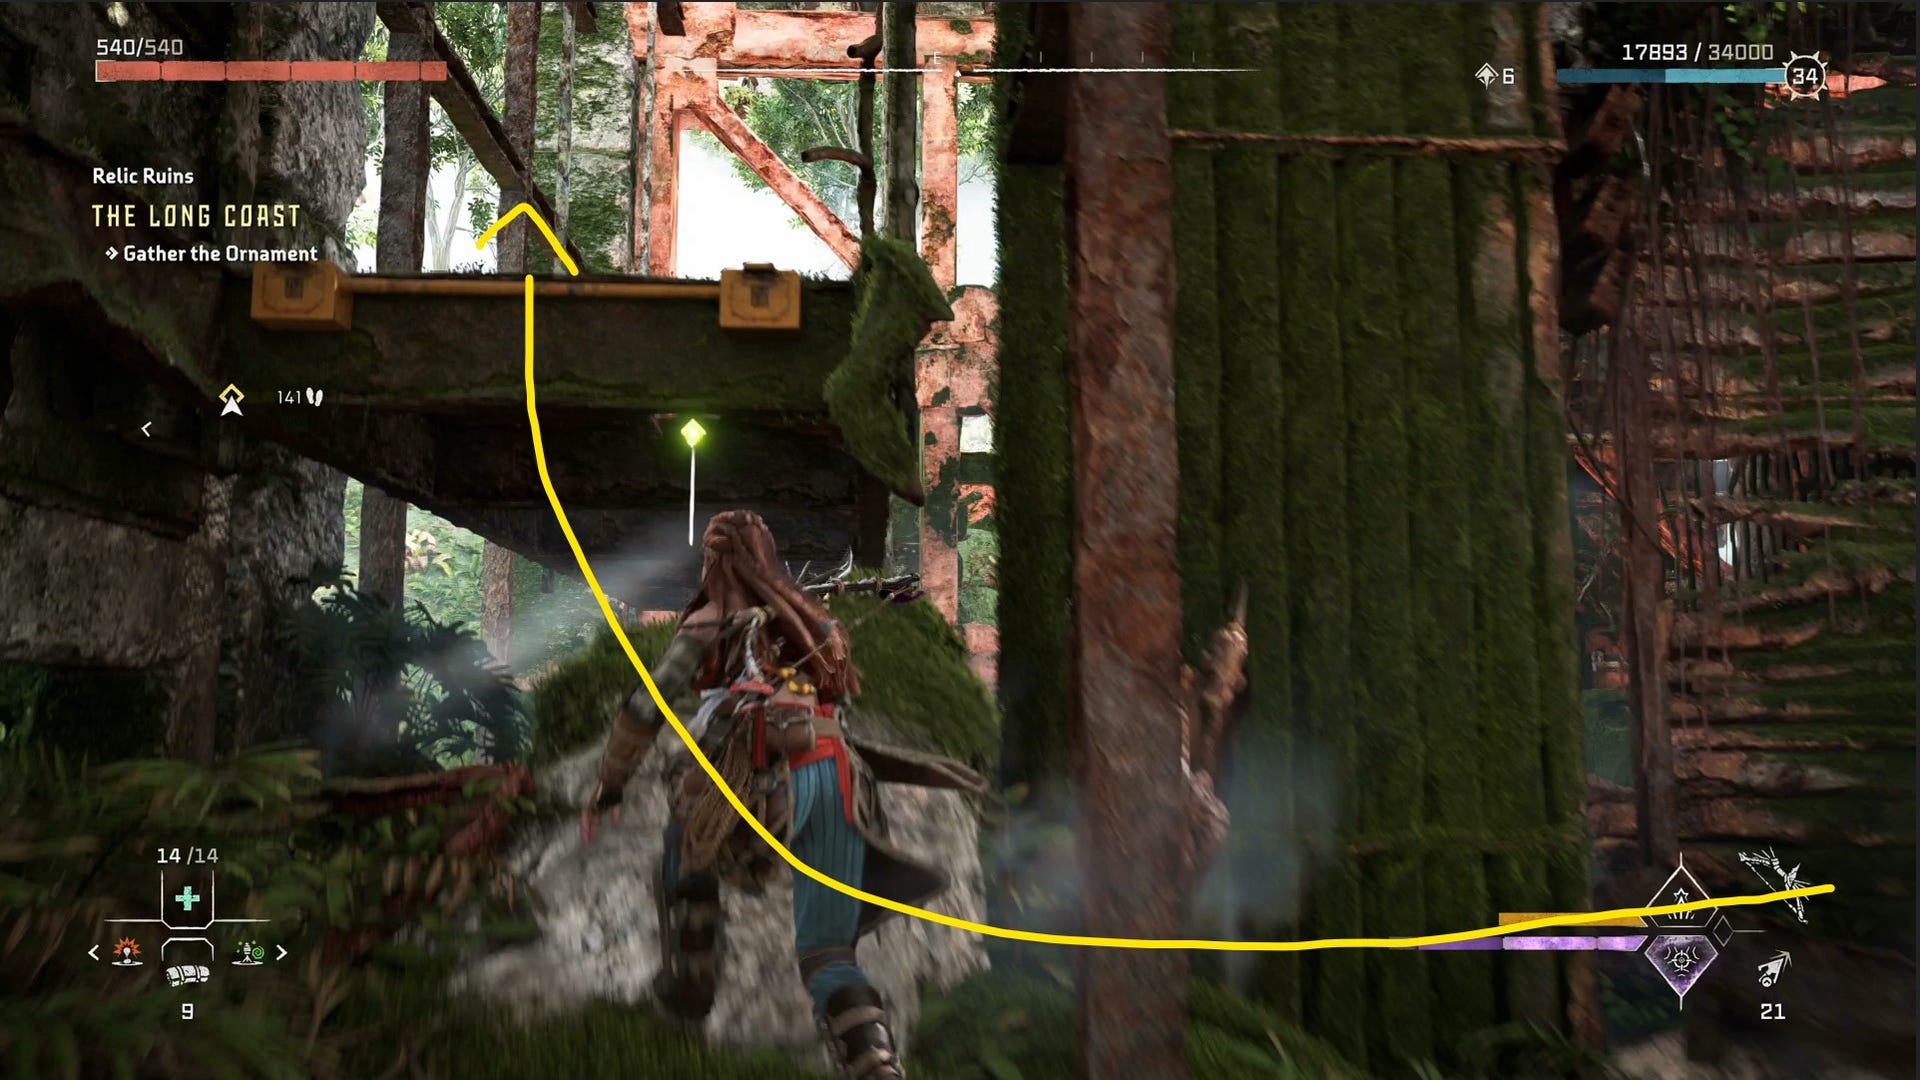
This will whiz a grapple point around to you for a limited time, so zip up and jump backwards onto the ledge, leading you to another crate.
Push the crate down off the platform and guide it back across to the other side of the ruin, using your Pullcaster to get it out of the water if it gets stuck.

Put the second crate into the elevator. Ride the elevator back up to the top floor. Ensure one crate is inside the elevator, and the other is on its roof.
Climb out of the elevator using the lower crate, then use the other crate to clamber up the elevator shaft using the handholds.
Once you reach the top, that’s where you can find The Long Coast Relic Ruins ornament, ‘The Bill’.
Horizon Forbidden West Isle of Spires Relic Ruin Puzzle and Door Code
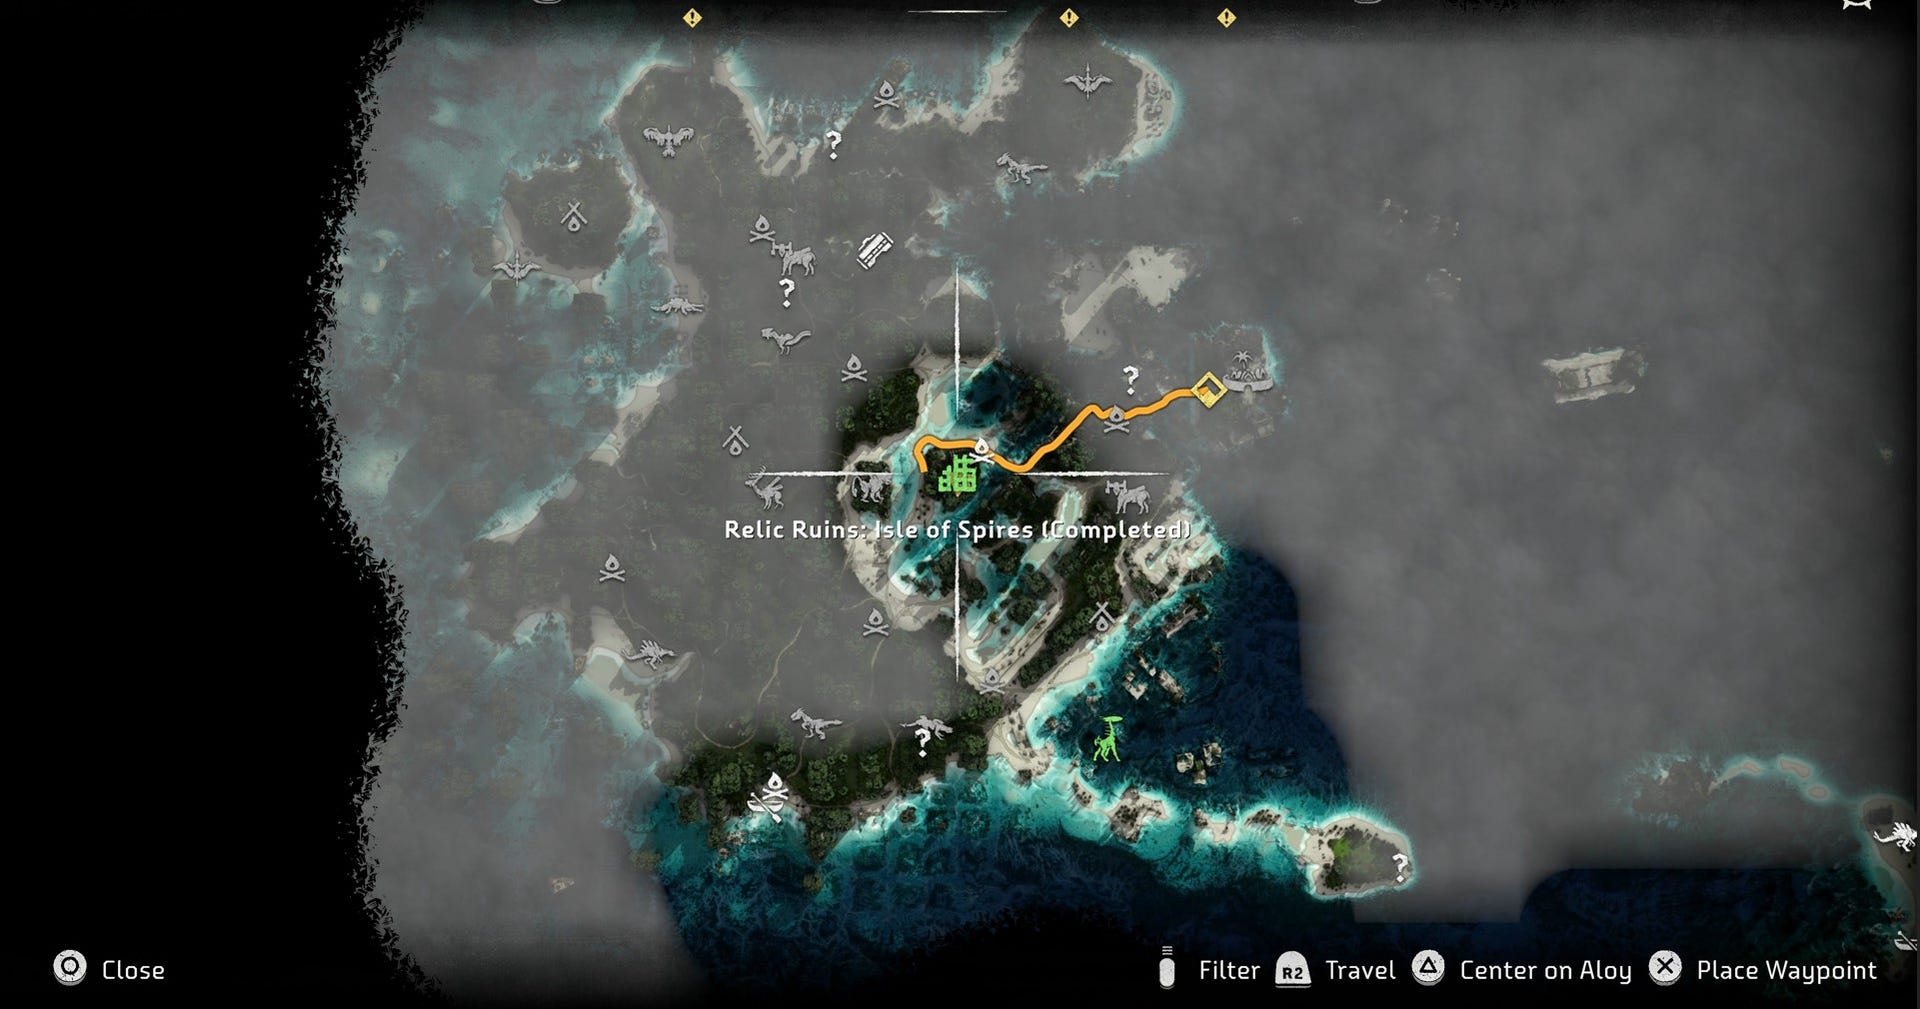
The Isle of Spires Relic Ruin is discovered during a Main Story quest in Horizon Forbidden West, and can be found on the island in the western area of the map. There is one Fire Clamberjaw site on this island, and the ruins are to the east of it slightly.
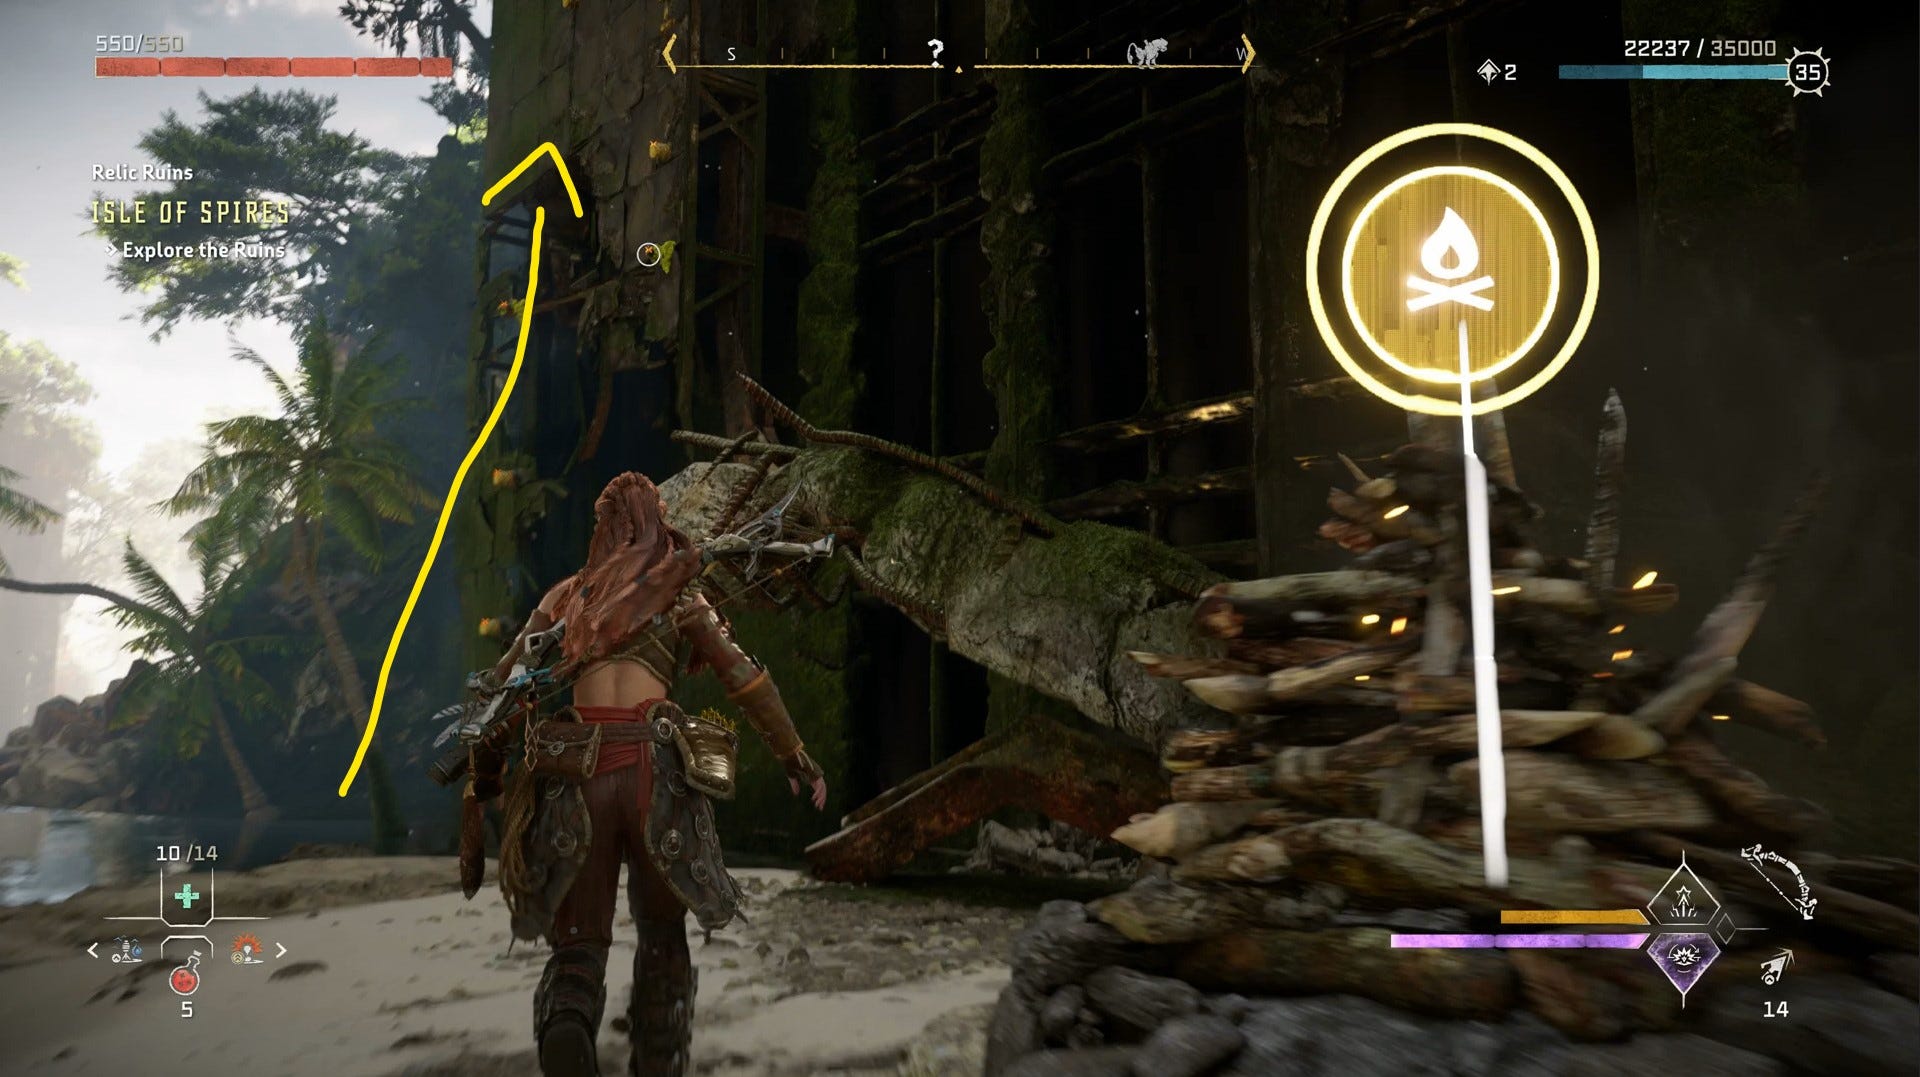
On the side of the ruins, there are ledges that Aloy can use to climb around the outside of the building until there is an opening to get inside.
Once you reach the summit, you’ll find elevators in need of some power.

Continue into the building to find an uncharged Energy Cell.
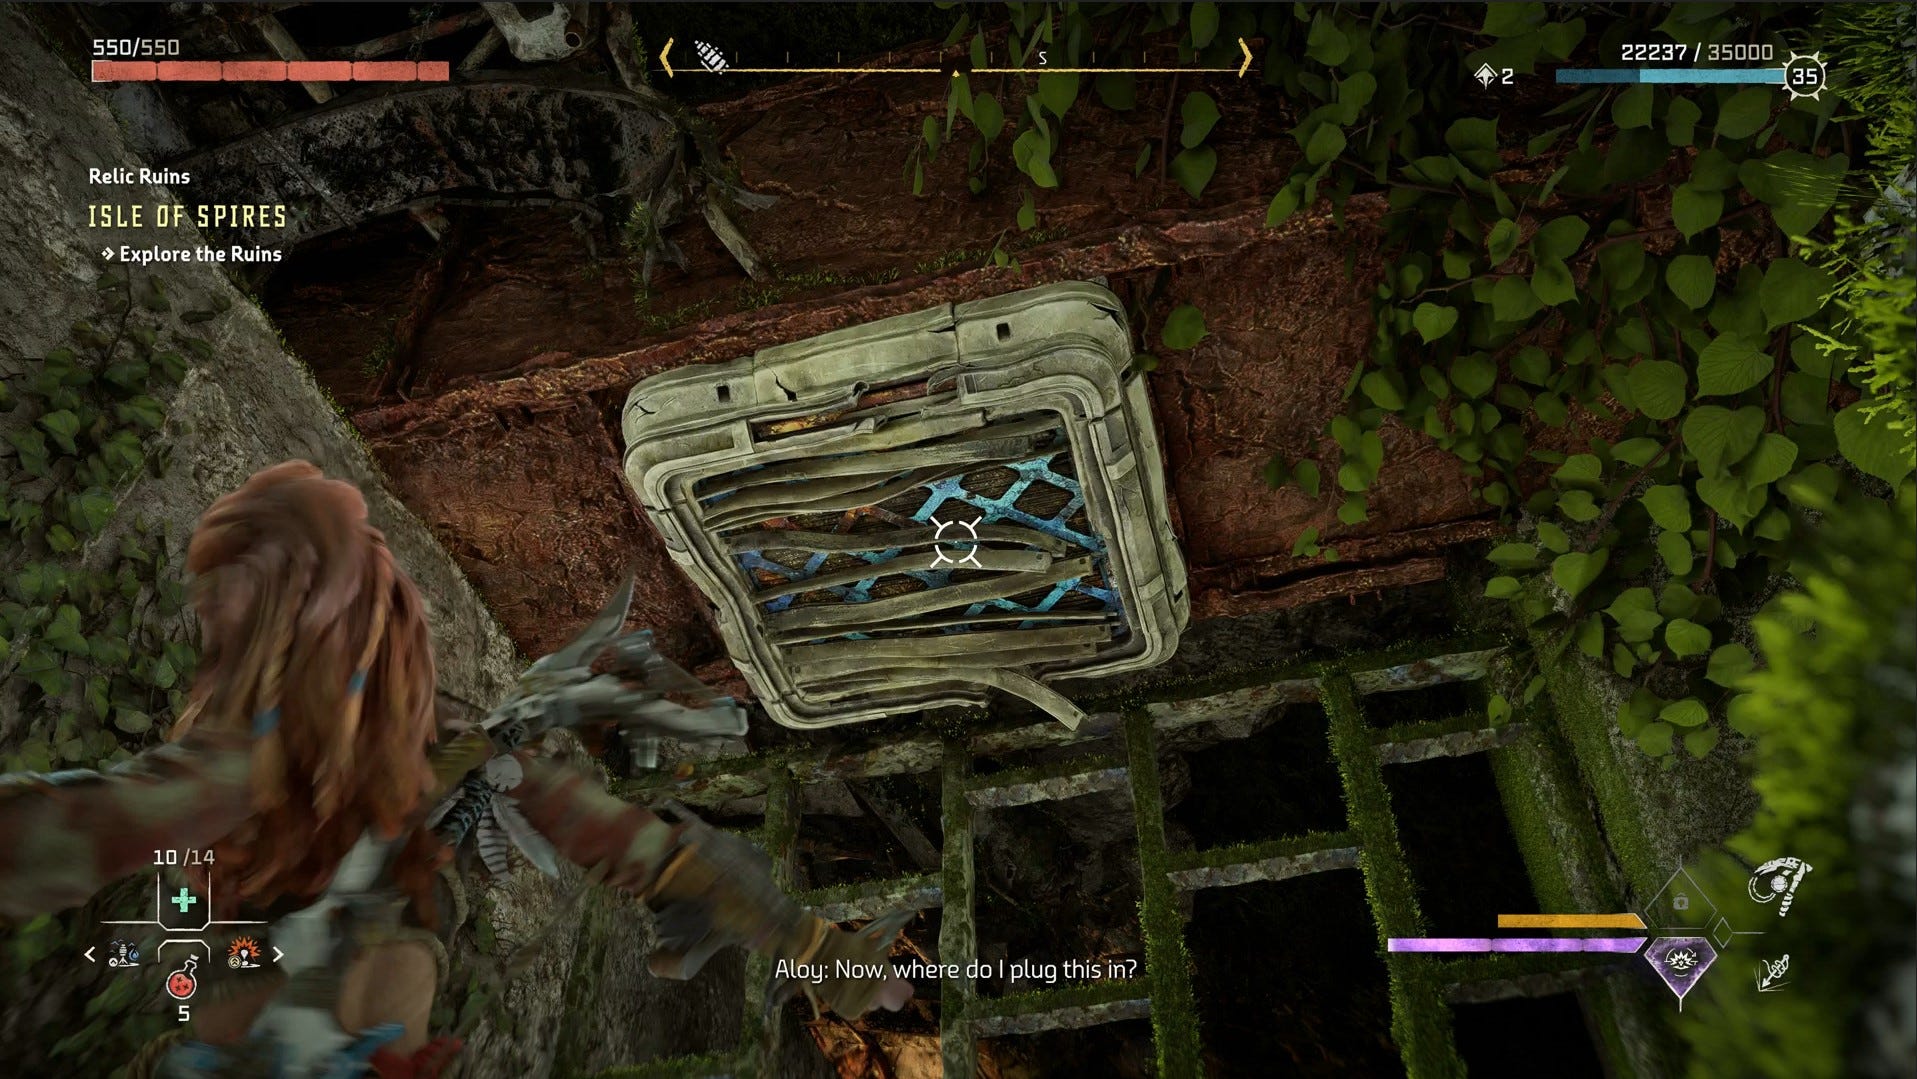
Continue even further into the ruins until you find a hatch that can be opened using your Pullcaster. Do this, and climb into it.
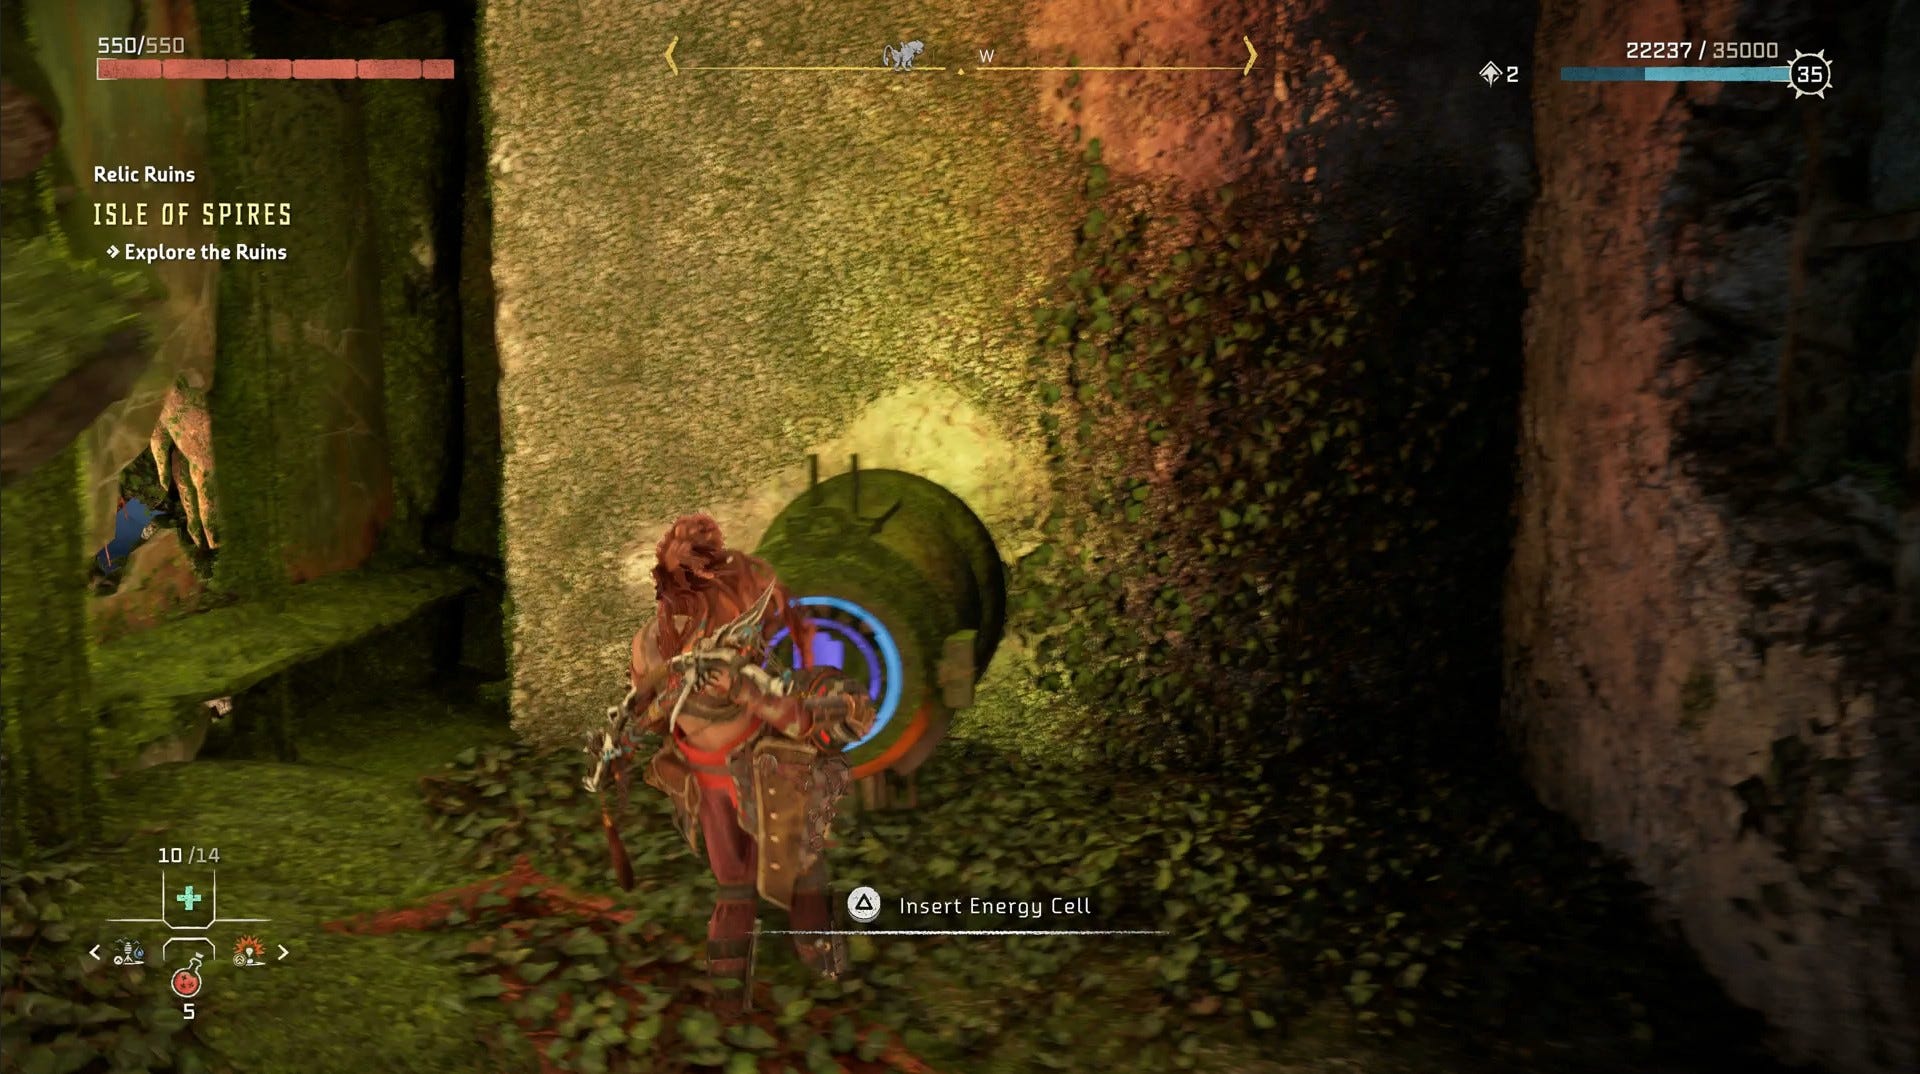
Climb through the vent and into another room with a Charging Station and Firegleam wall at either side. Place the Energy Cell to charge in this station - if you put it into the earlier station, it’ll run out of charge before reaching the elevator later.
Then, across the room, there is a Firegleam wall. Provided you have completed the Death’s Door Story Mission and have unlocked the Igniter, you can now blow up the Firegleam wall.
With the Energy Cell charged, and a new wall opened up, you can take the charged battery and use it to power an elevator.
Hop into the newly-powered elevator and ride down. At the bottom, there is another Firegleam wall ahead of you. Ignite it.
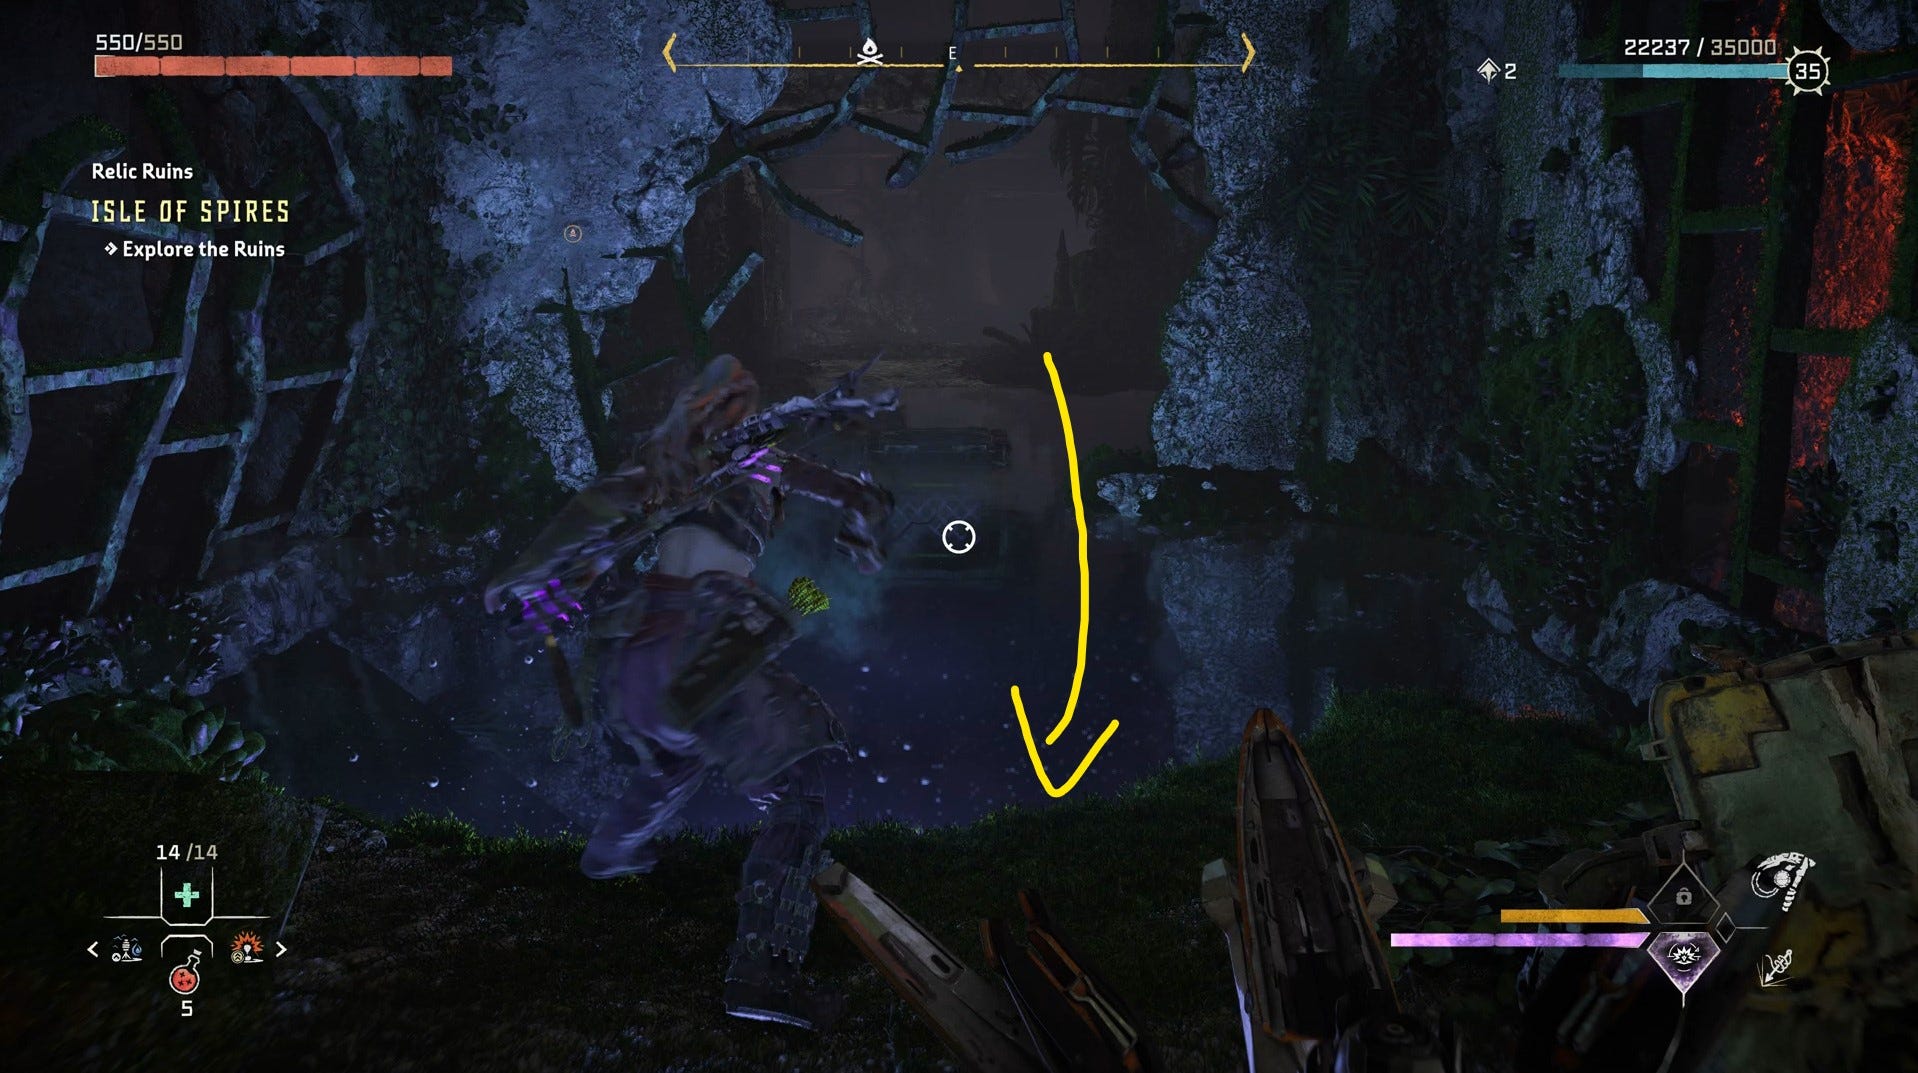
Directly behind you, there is a crate. To the right of the crate and beyond, there is an opening and water. Pull this crate further into the water and save it for later.
While you’re here, head through the water to the other side, where you can see a Metal Flower that needs clearing. To continue, you’ll need to have completed the Story Mission to clear Metal Flower Blocked Paths, and then destroy the Metal Flower.
Through the new opening, you’ll be outside again. Across the way is another Firegleam wall, ignite it to create a new opening.
Head back into the ruins and to where your crate it. Move it towards the destroyed Metal Flower.
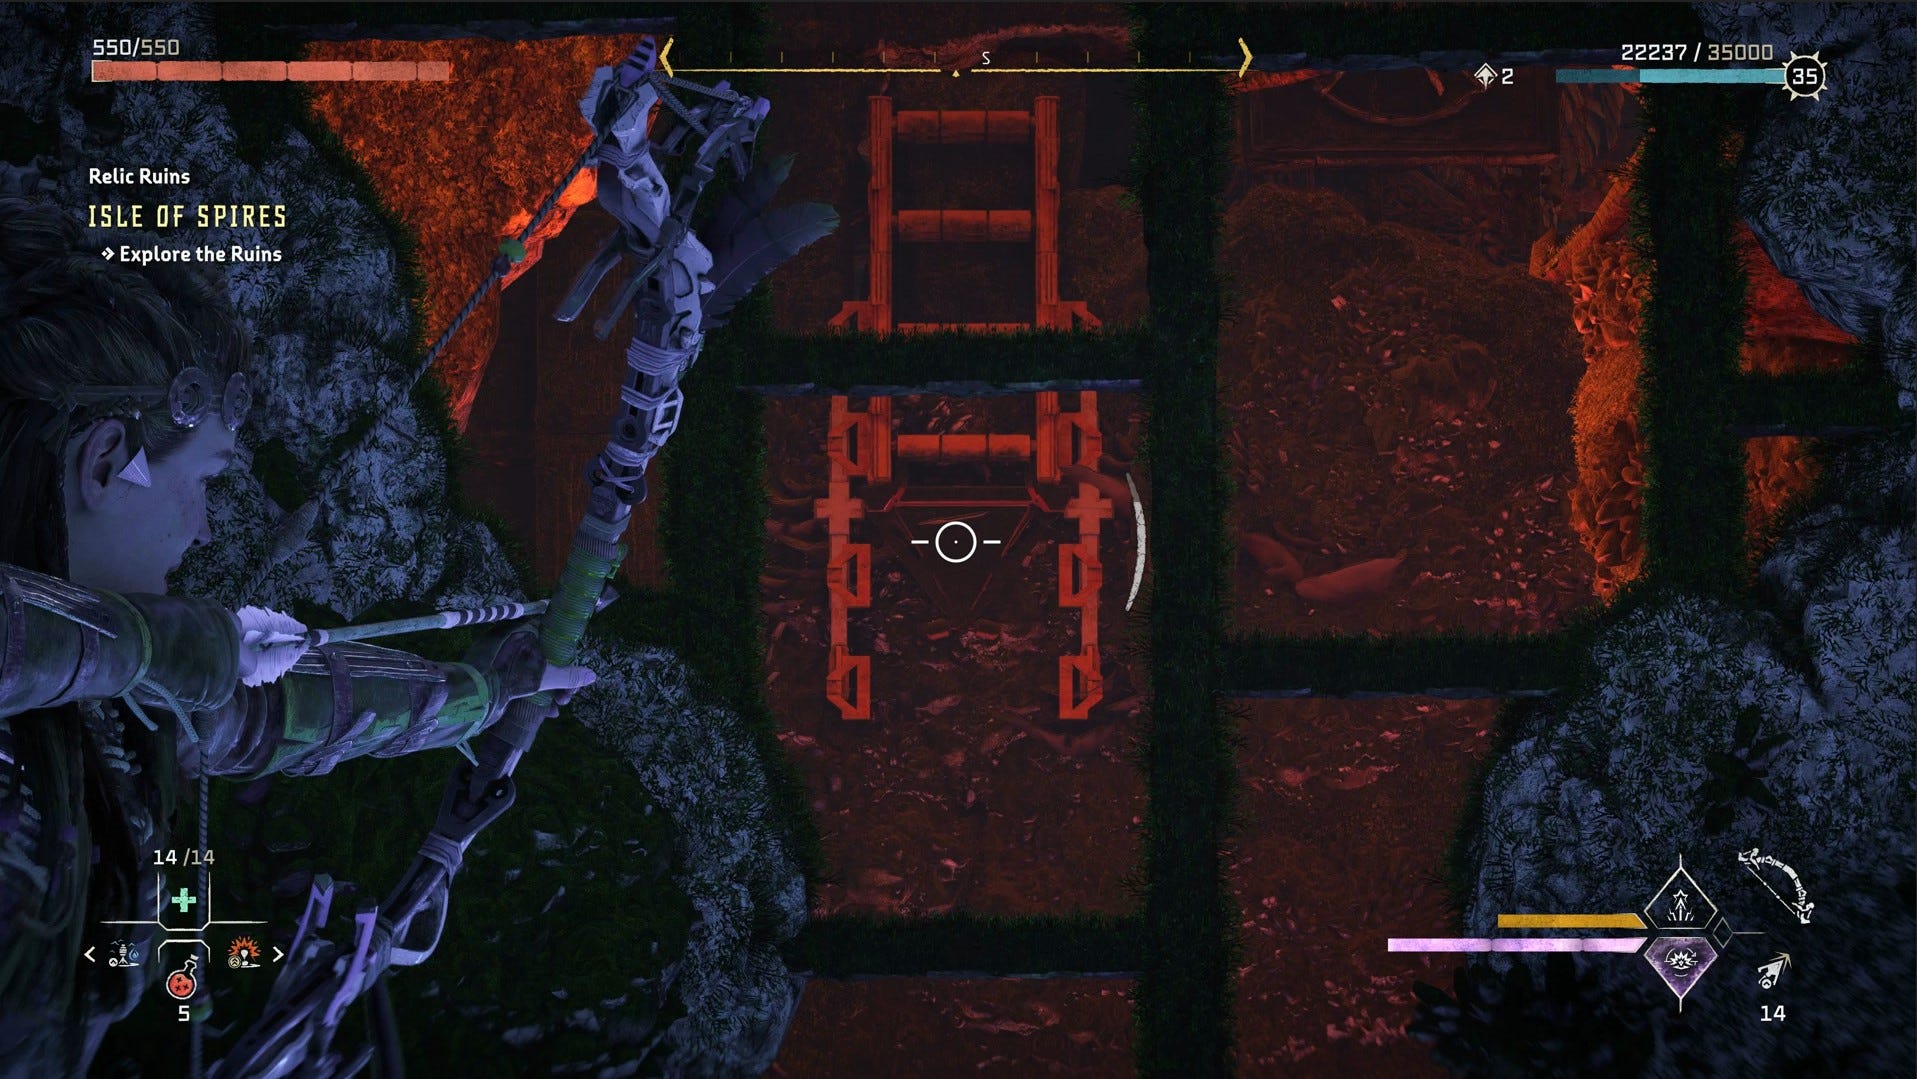
Climb atop the crate and shoot the locked ladder that you can see through the hole in the wall.
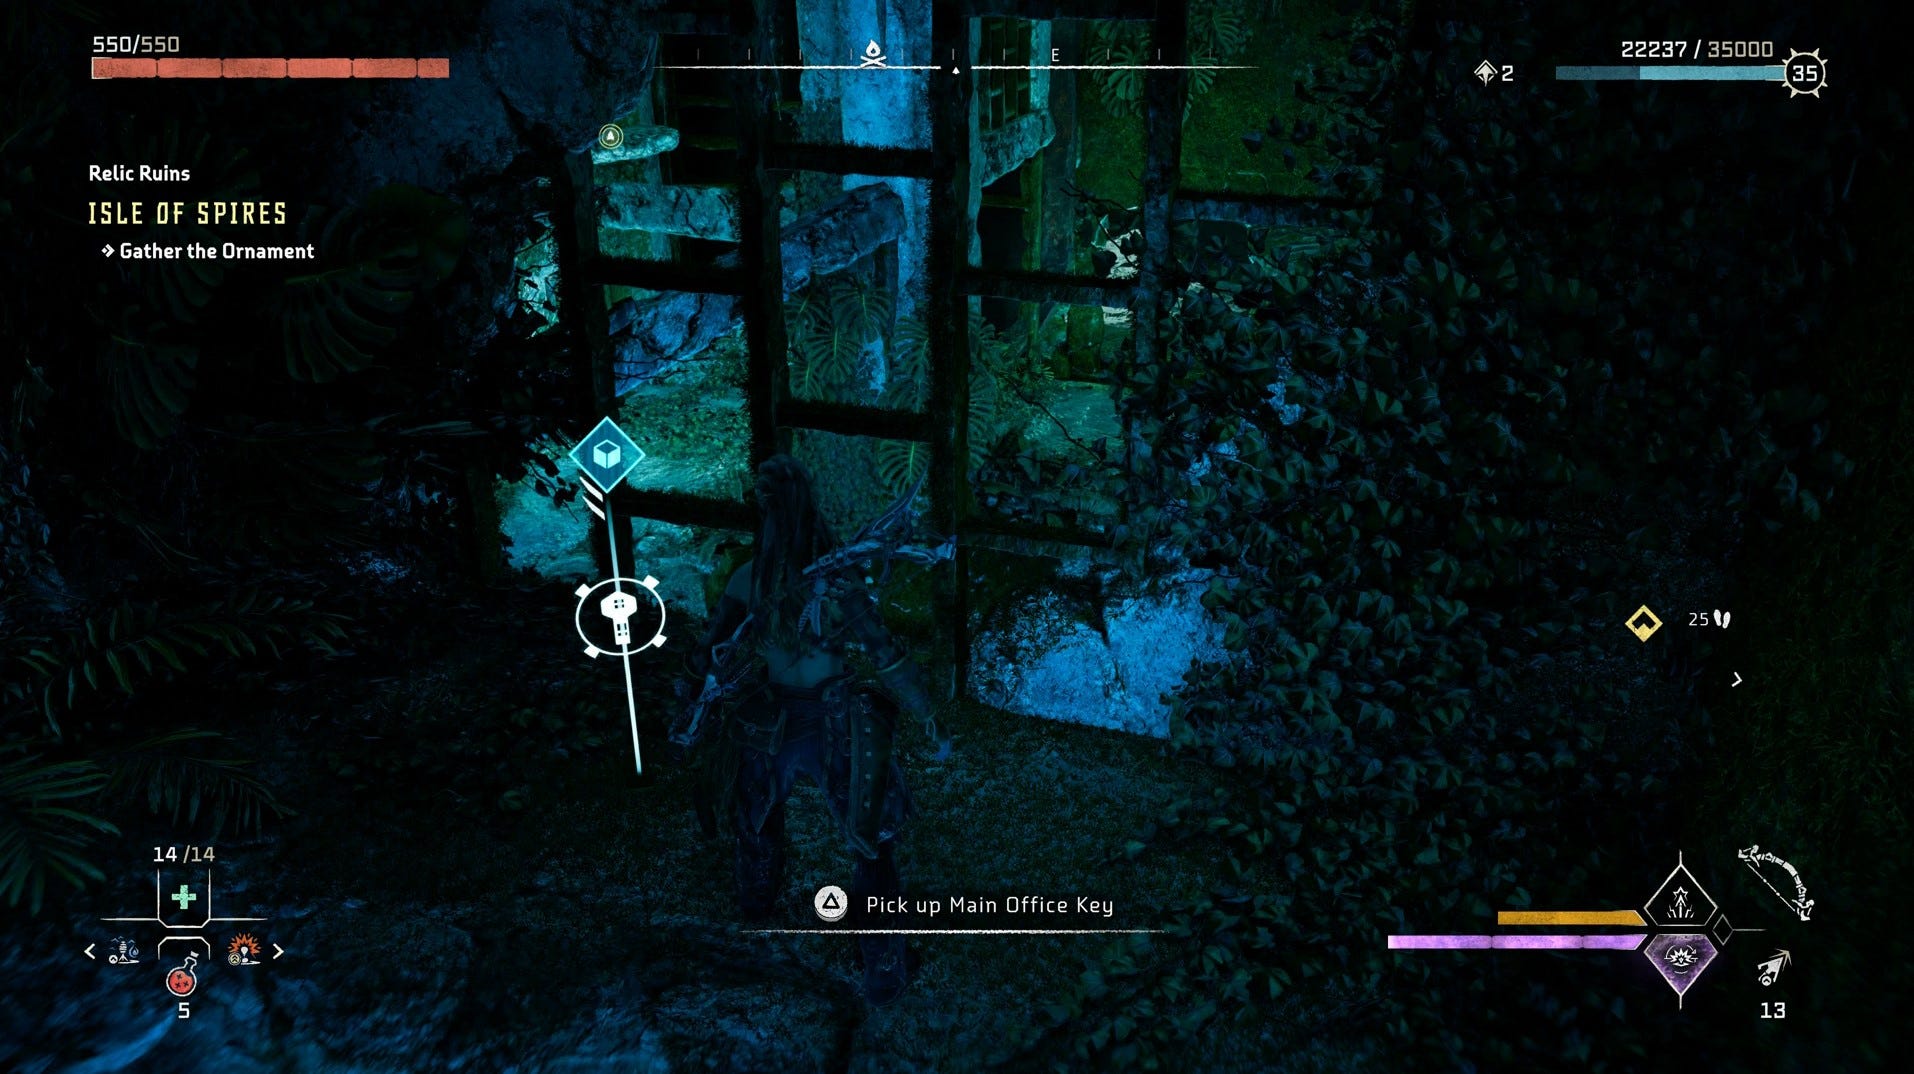
Go into the next area and climb the ladder you just shot down, and jump backwards by pressing ‘Circle’ at the top to reach another ledge. Here, there is a key.
Back up where the ladder is, and in the watery, mossy ruins surrounding it, you can grapple using a pillar in the centre to reach upper floors, and will soon notice that there are multiple doors on each level here.
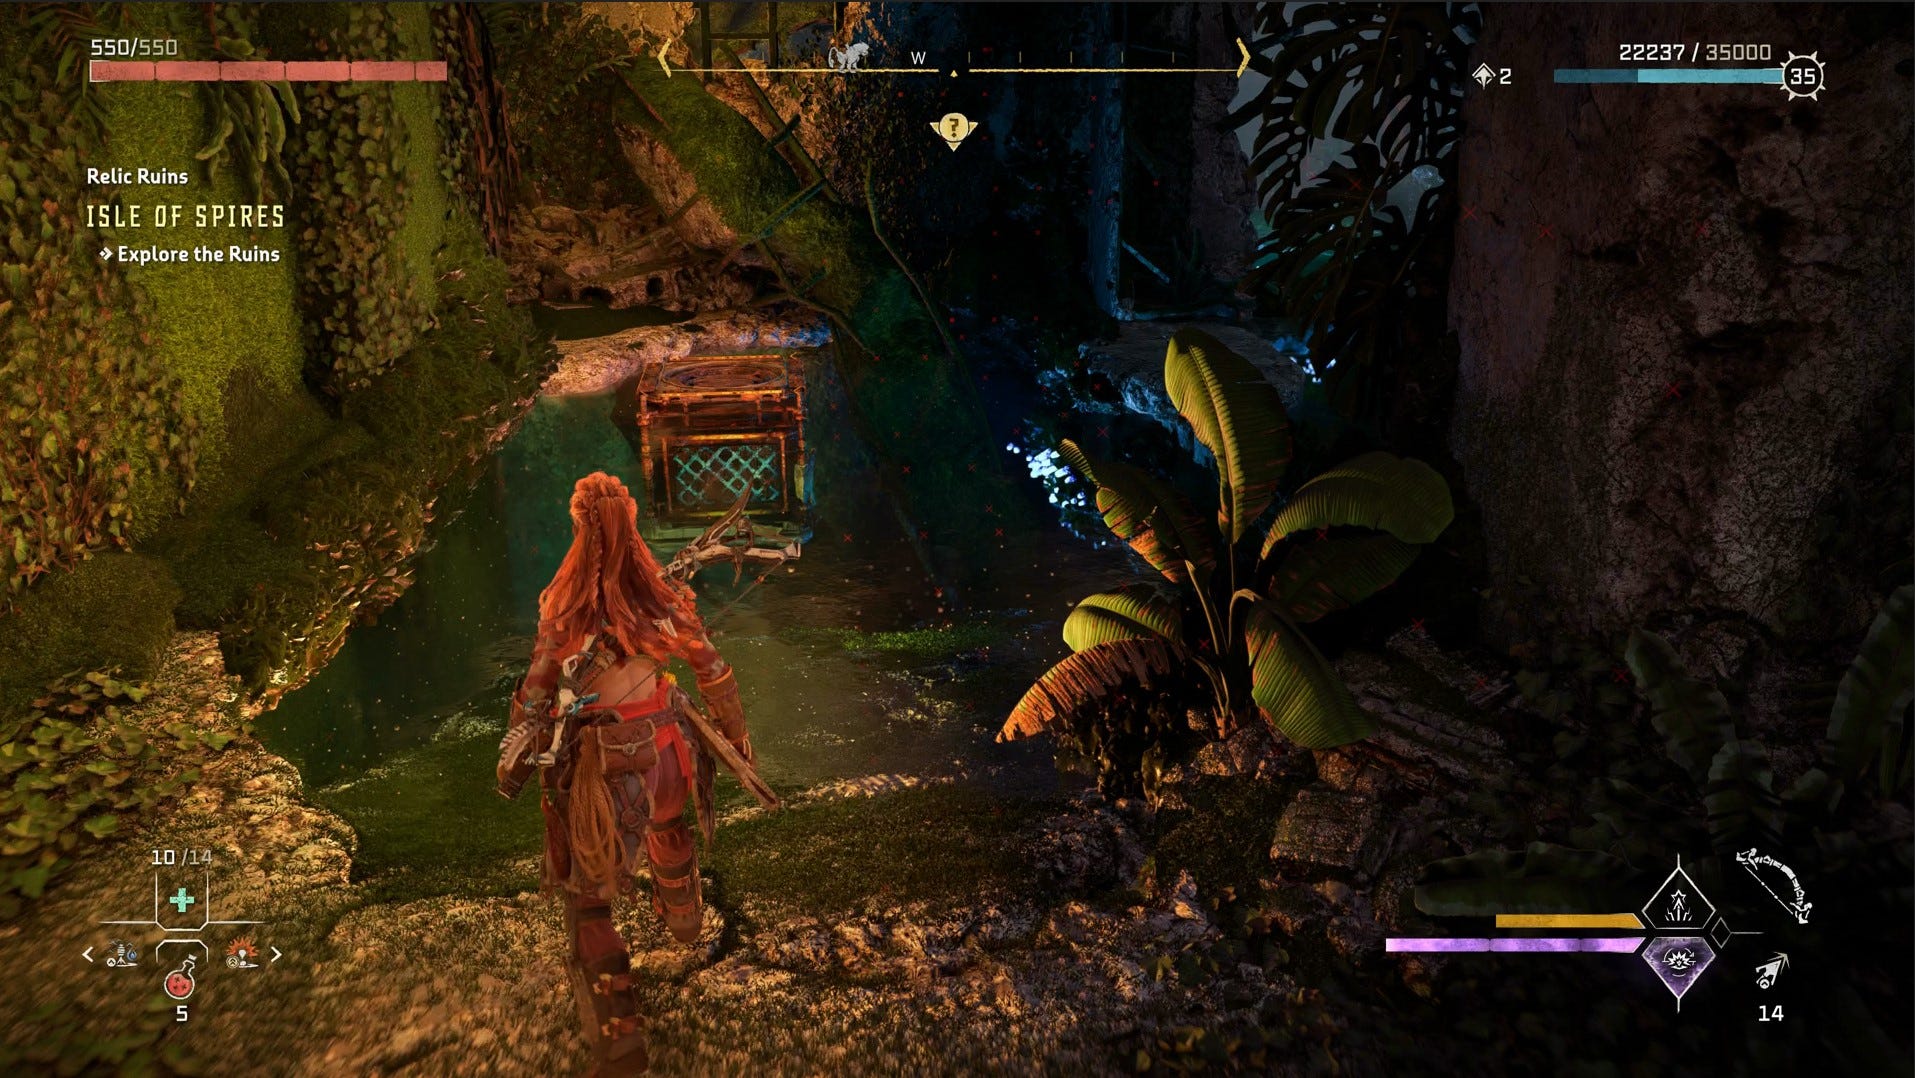
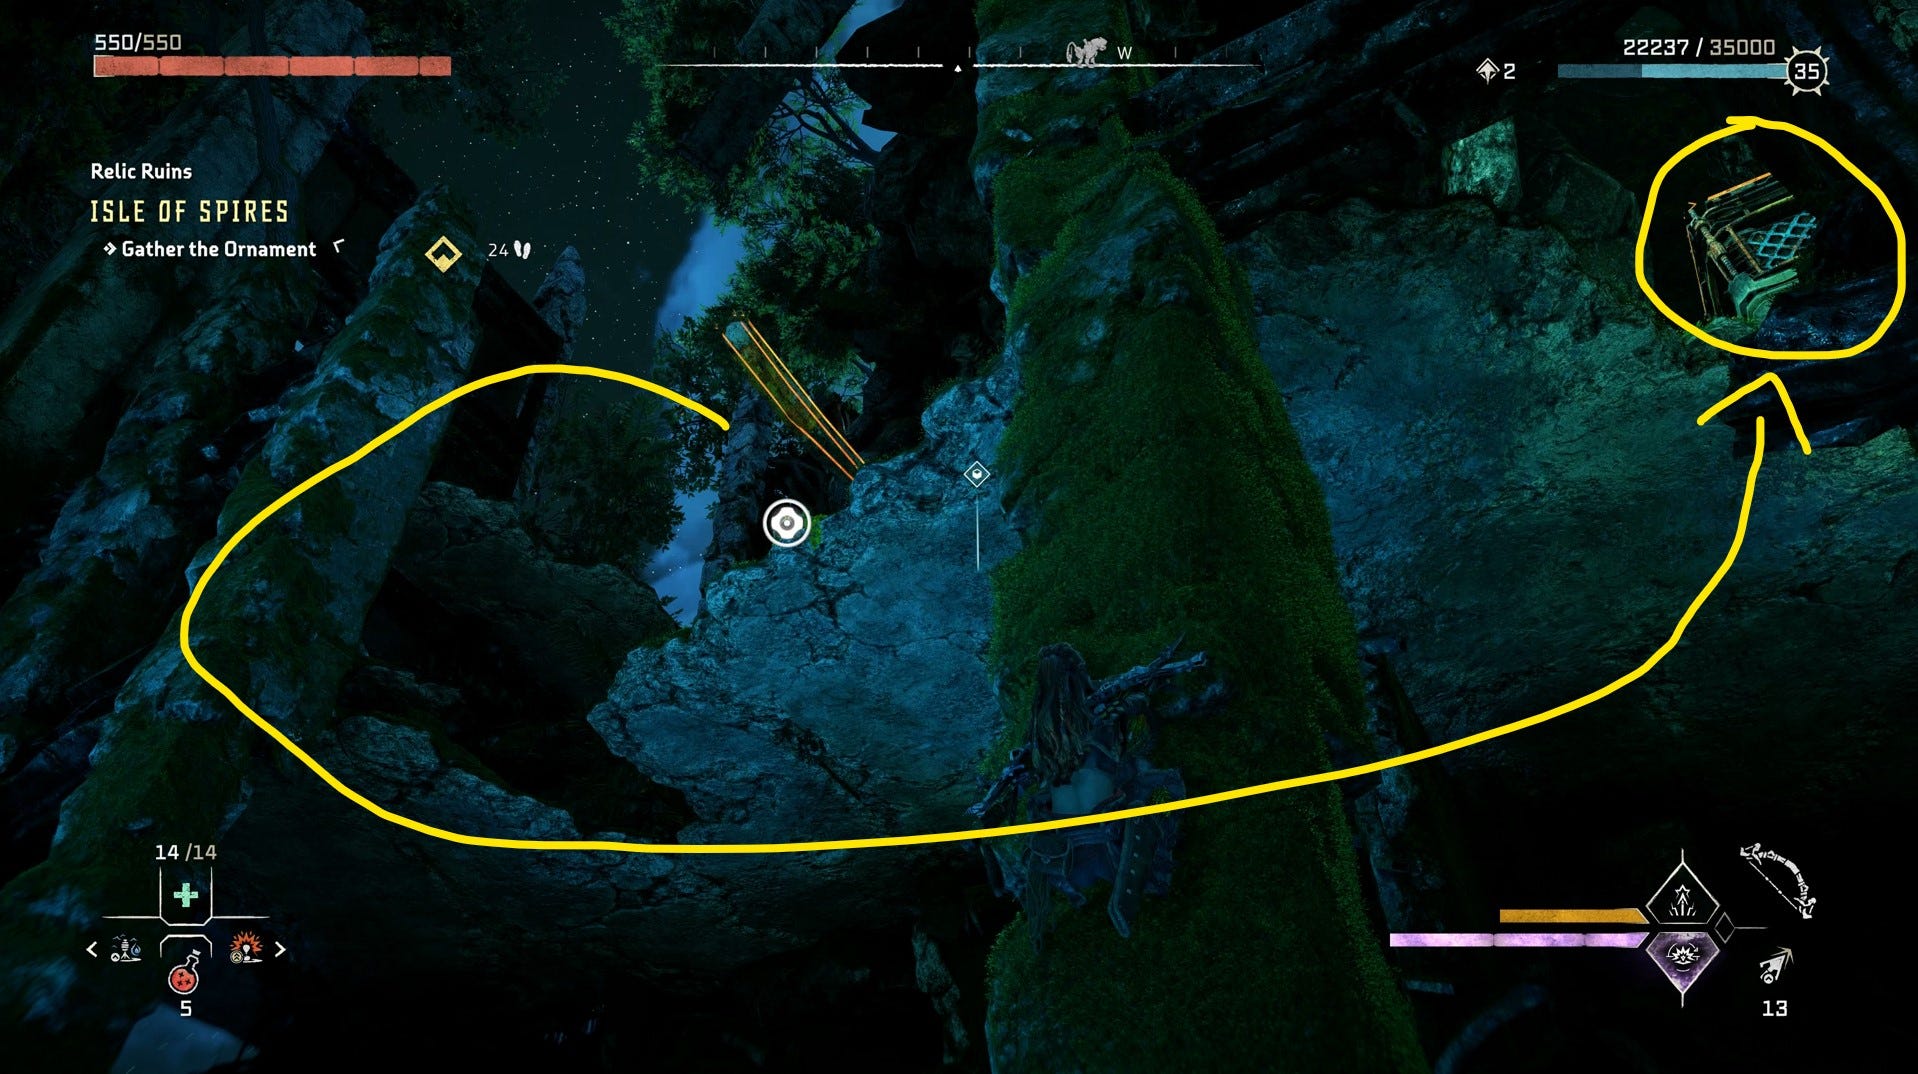
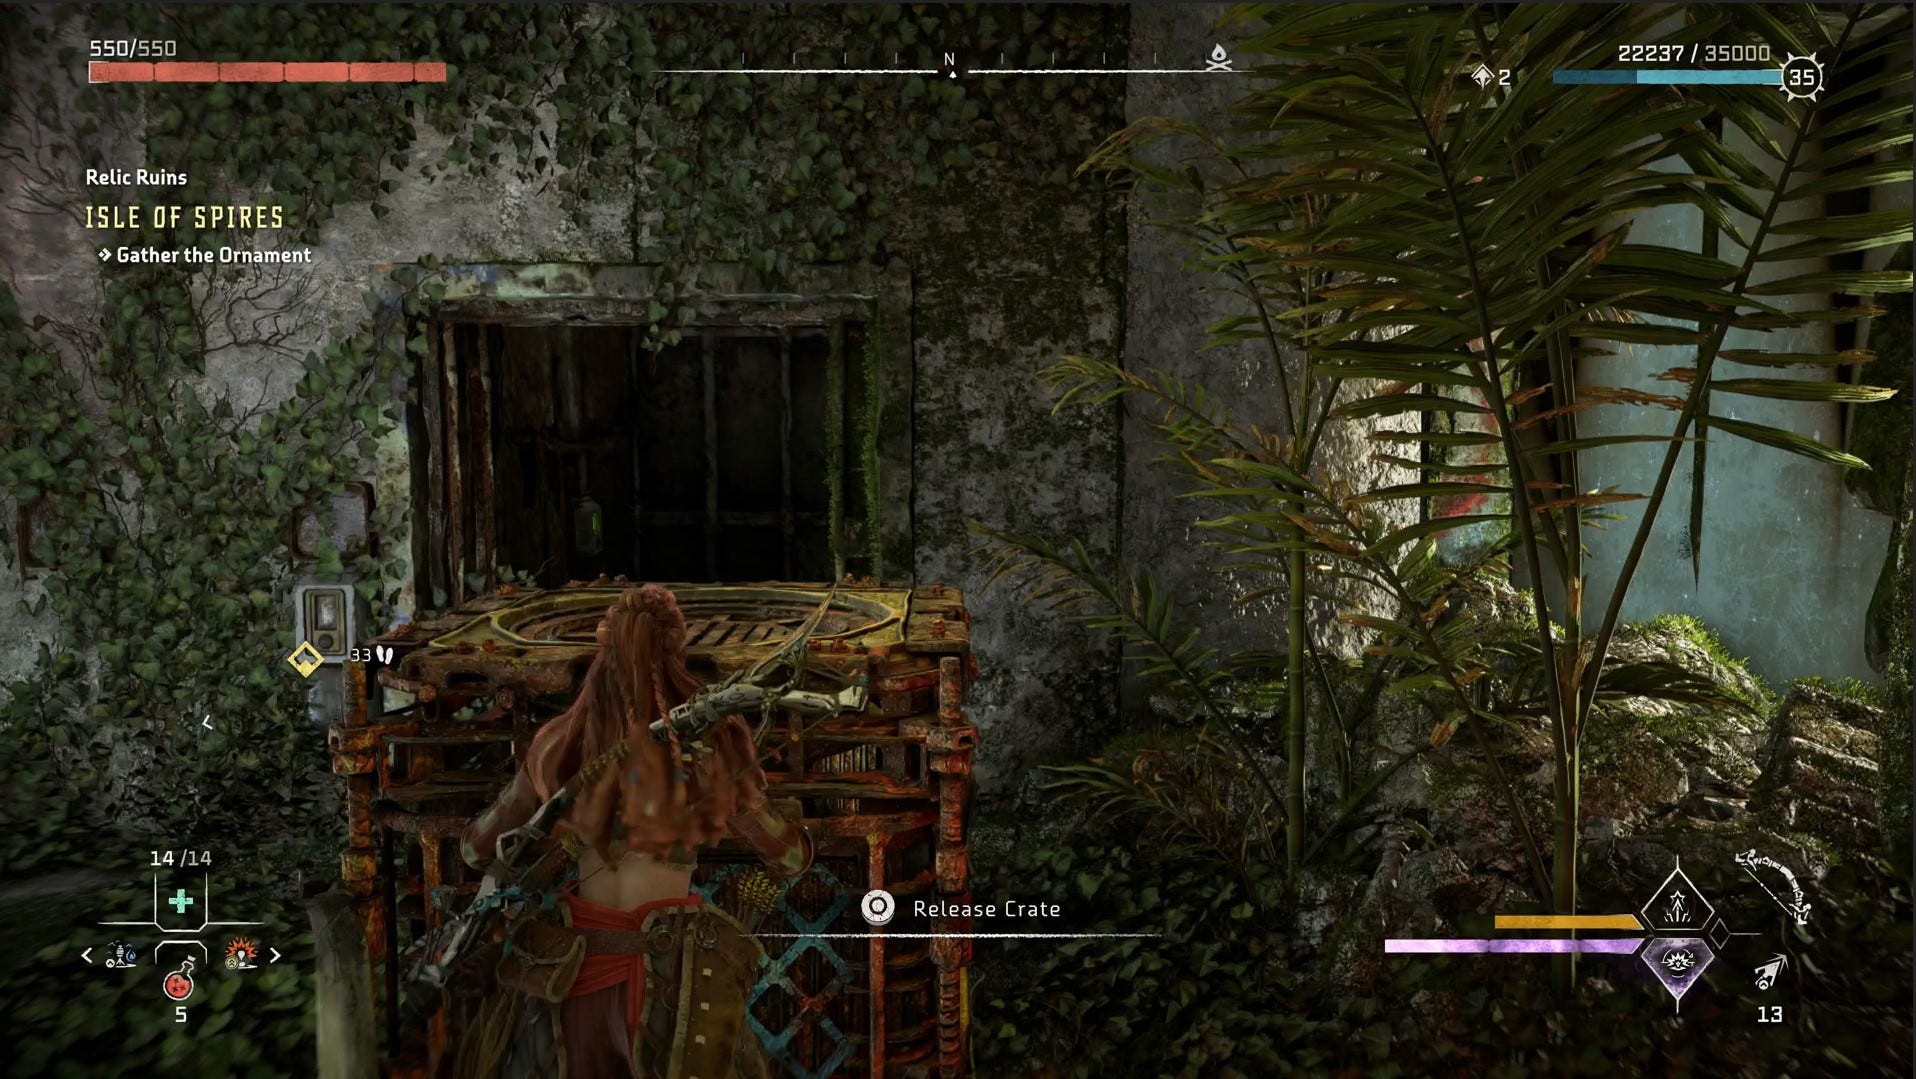
Across the way from the middle floor (marked by a blue, unlocked door), you will see a crate that can be pulled down into the water with your Pullcaster.
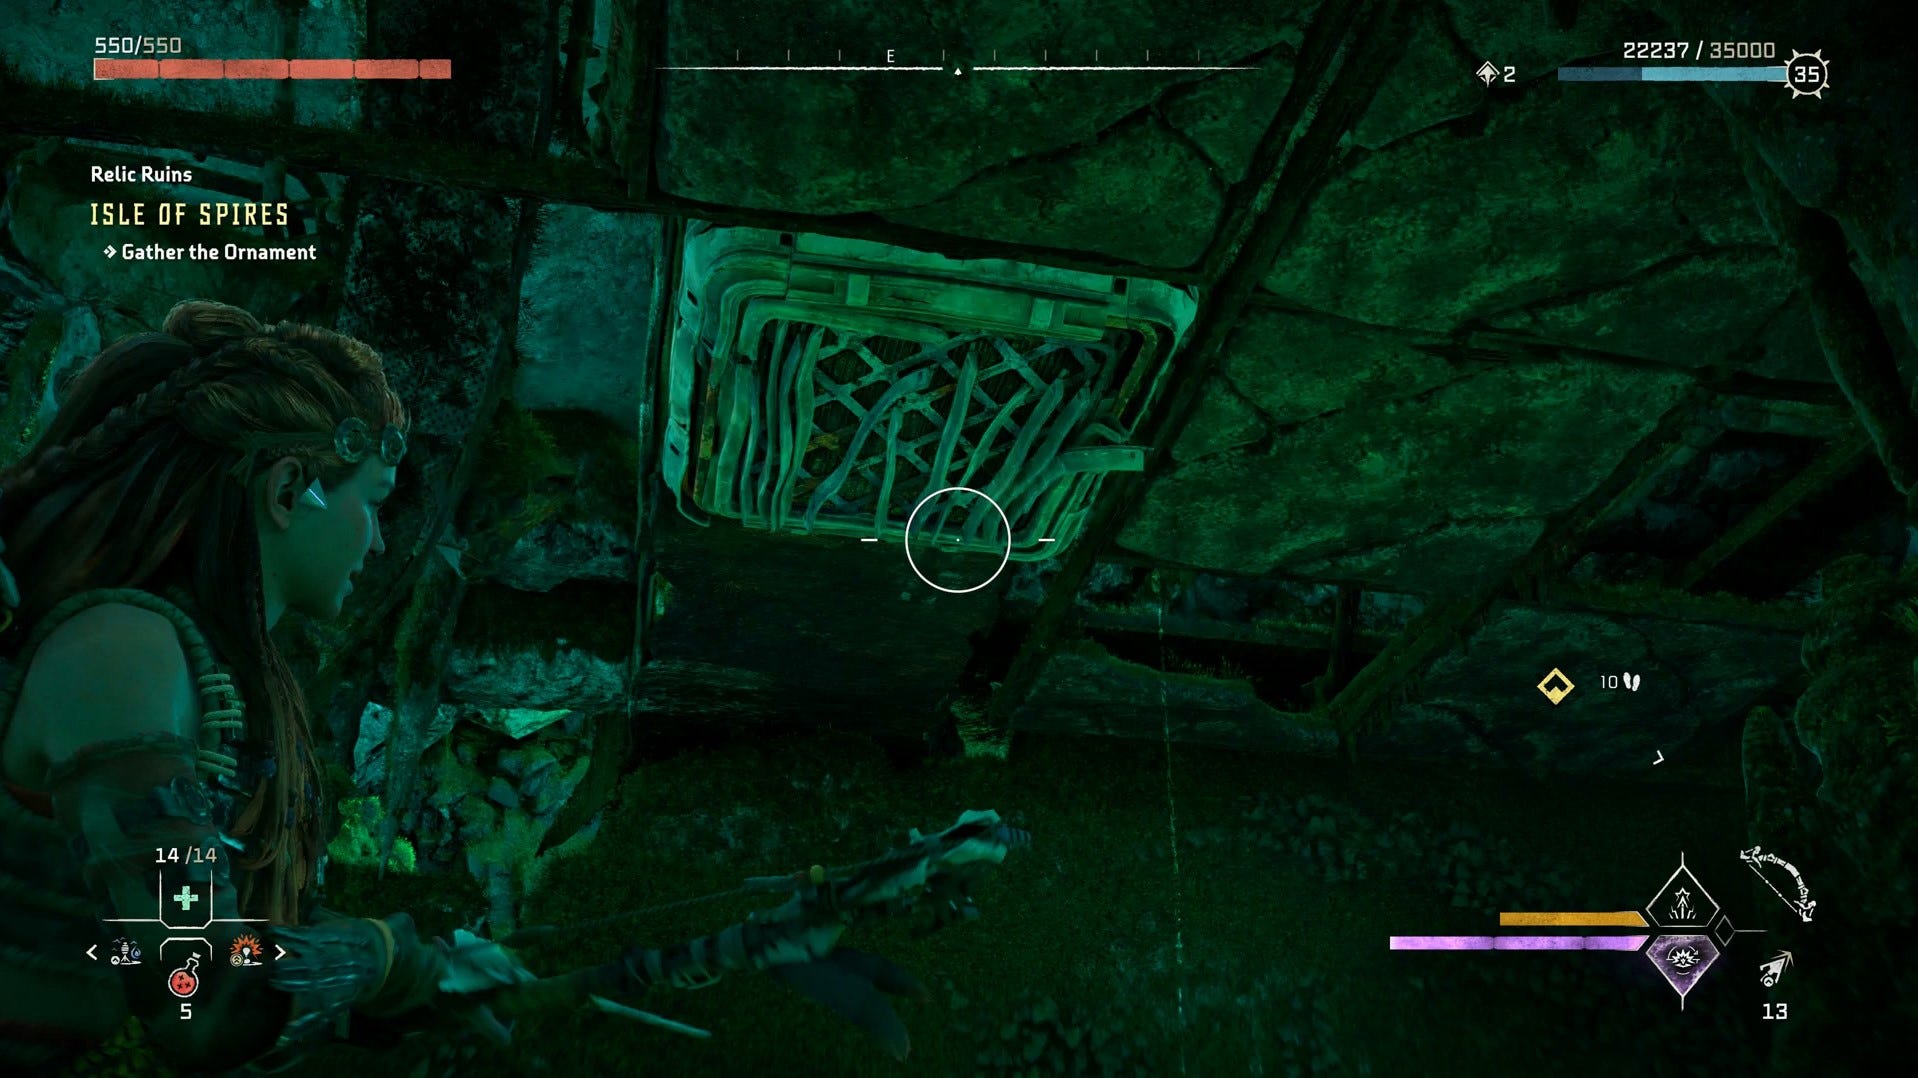
Jump down to the crate and find the room opposite it. You will find a hatch that you can use your Pullcaster on. Do this, pull it down, and then bring the crate with you.
Place the crate below the hatch to be able to climb into it.
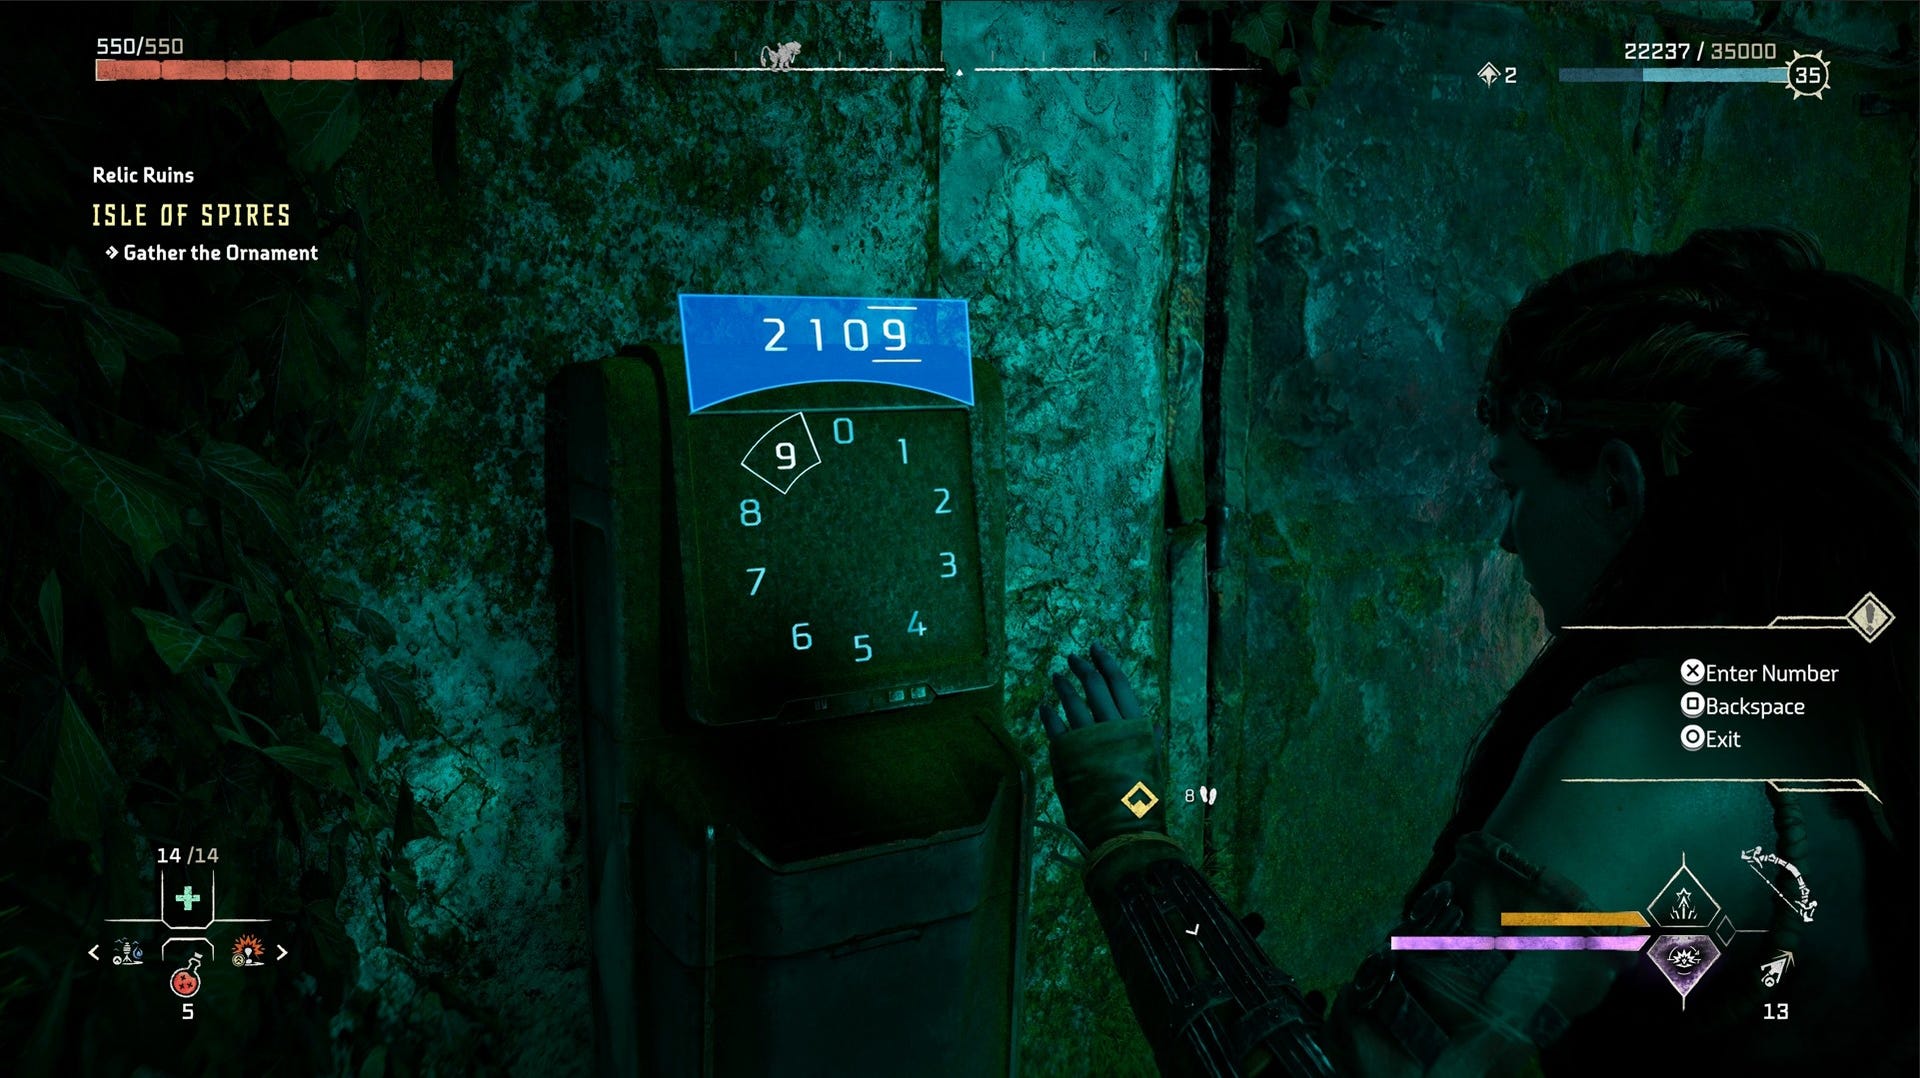
In the next room, there is a locked door. The Isle of Spires Relic Ruins Code for this door is: 2109.
Head back outside and scale the ruins again to end up where you first started, by the elevators.
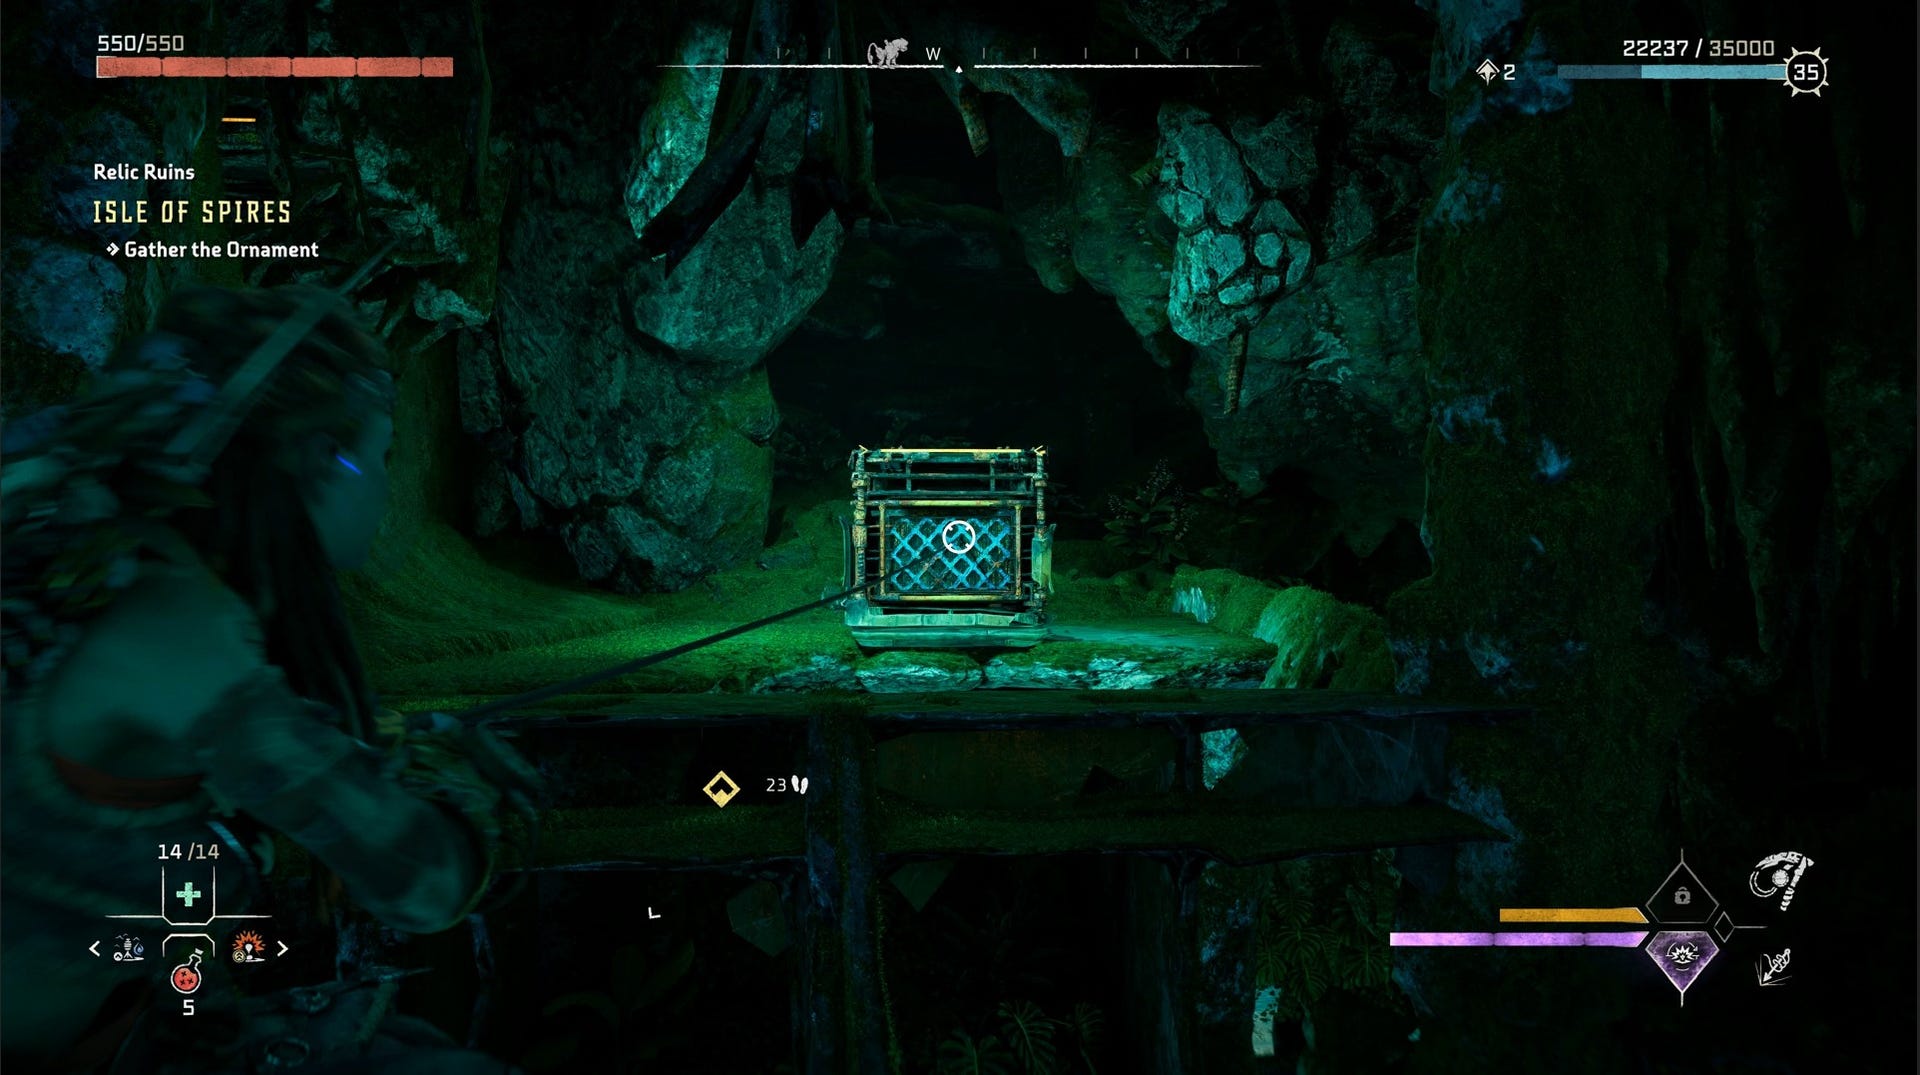
Take the crate from the water by the destroyed Metal Flower and pull it into the elevator.
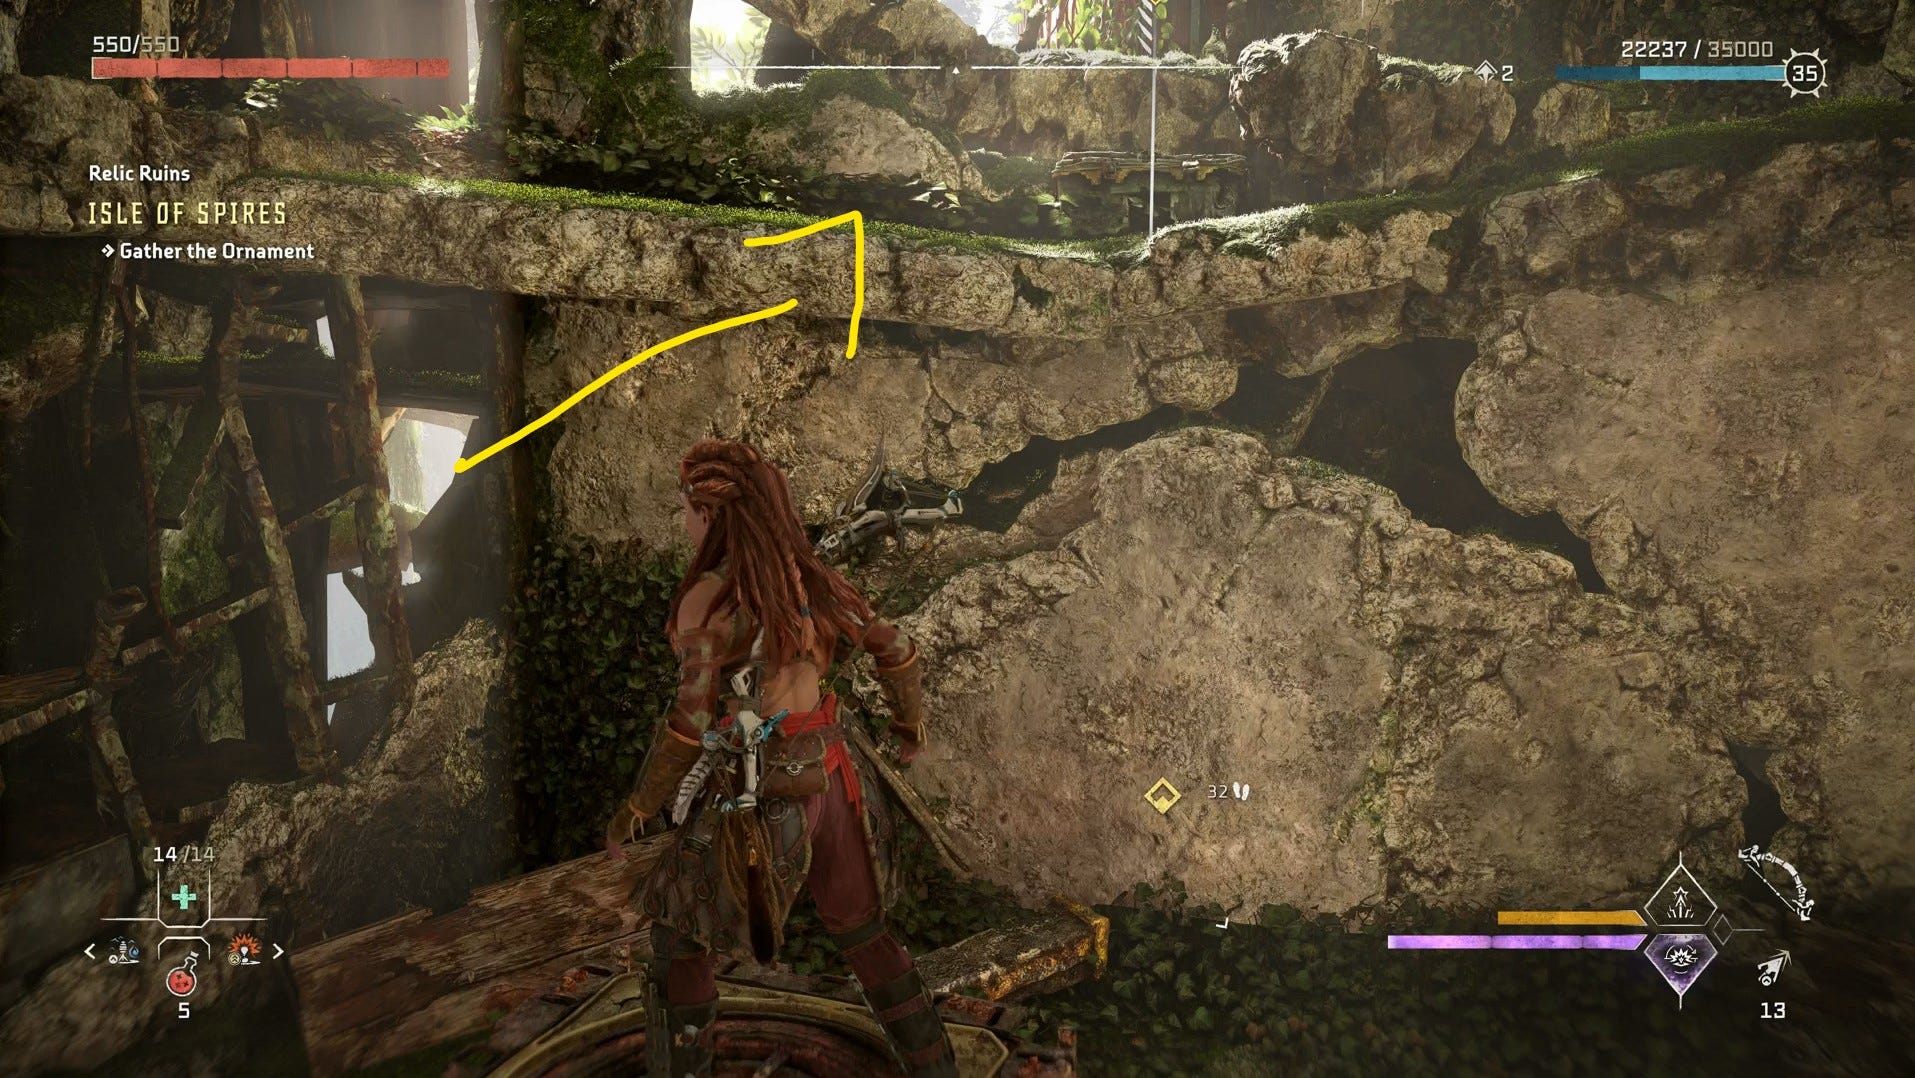
Head back up, and bring the crate out of the elevator. Position it like below, and you will be able to hop on top of it and reach some ledges above to take you onto the next part of the ruins.
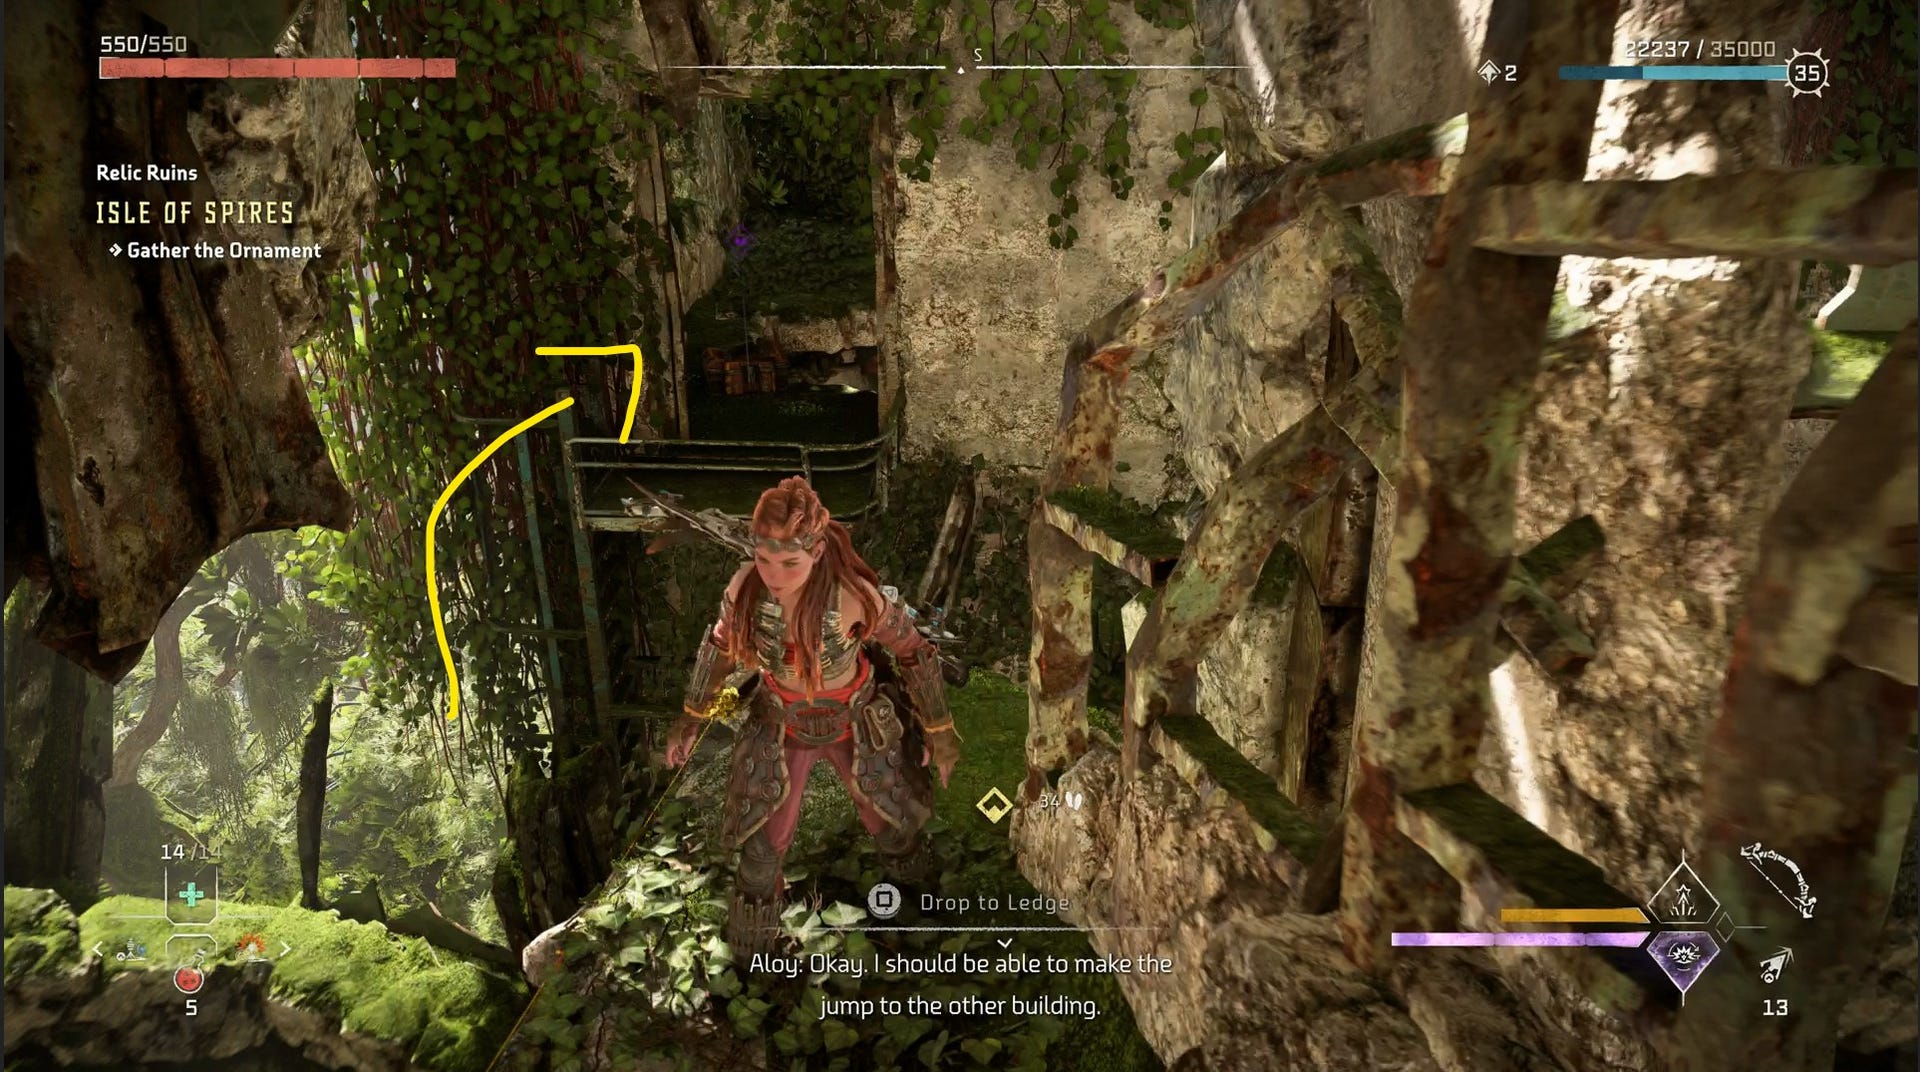
Climb upward, and Aloy will prompt you to jump into a building across from you. Here, you can jump down into another small room with a locked door.
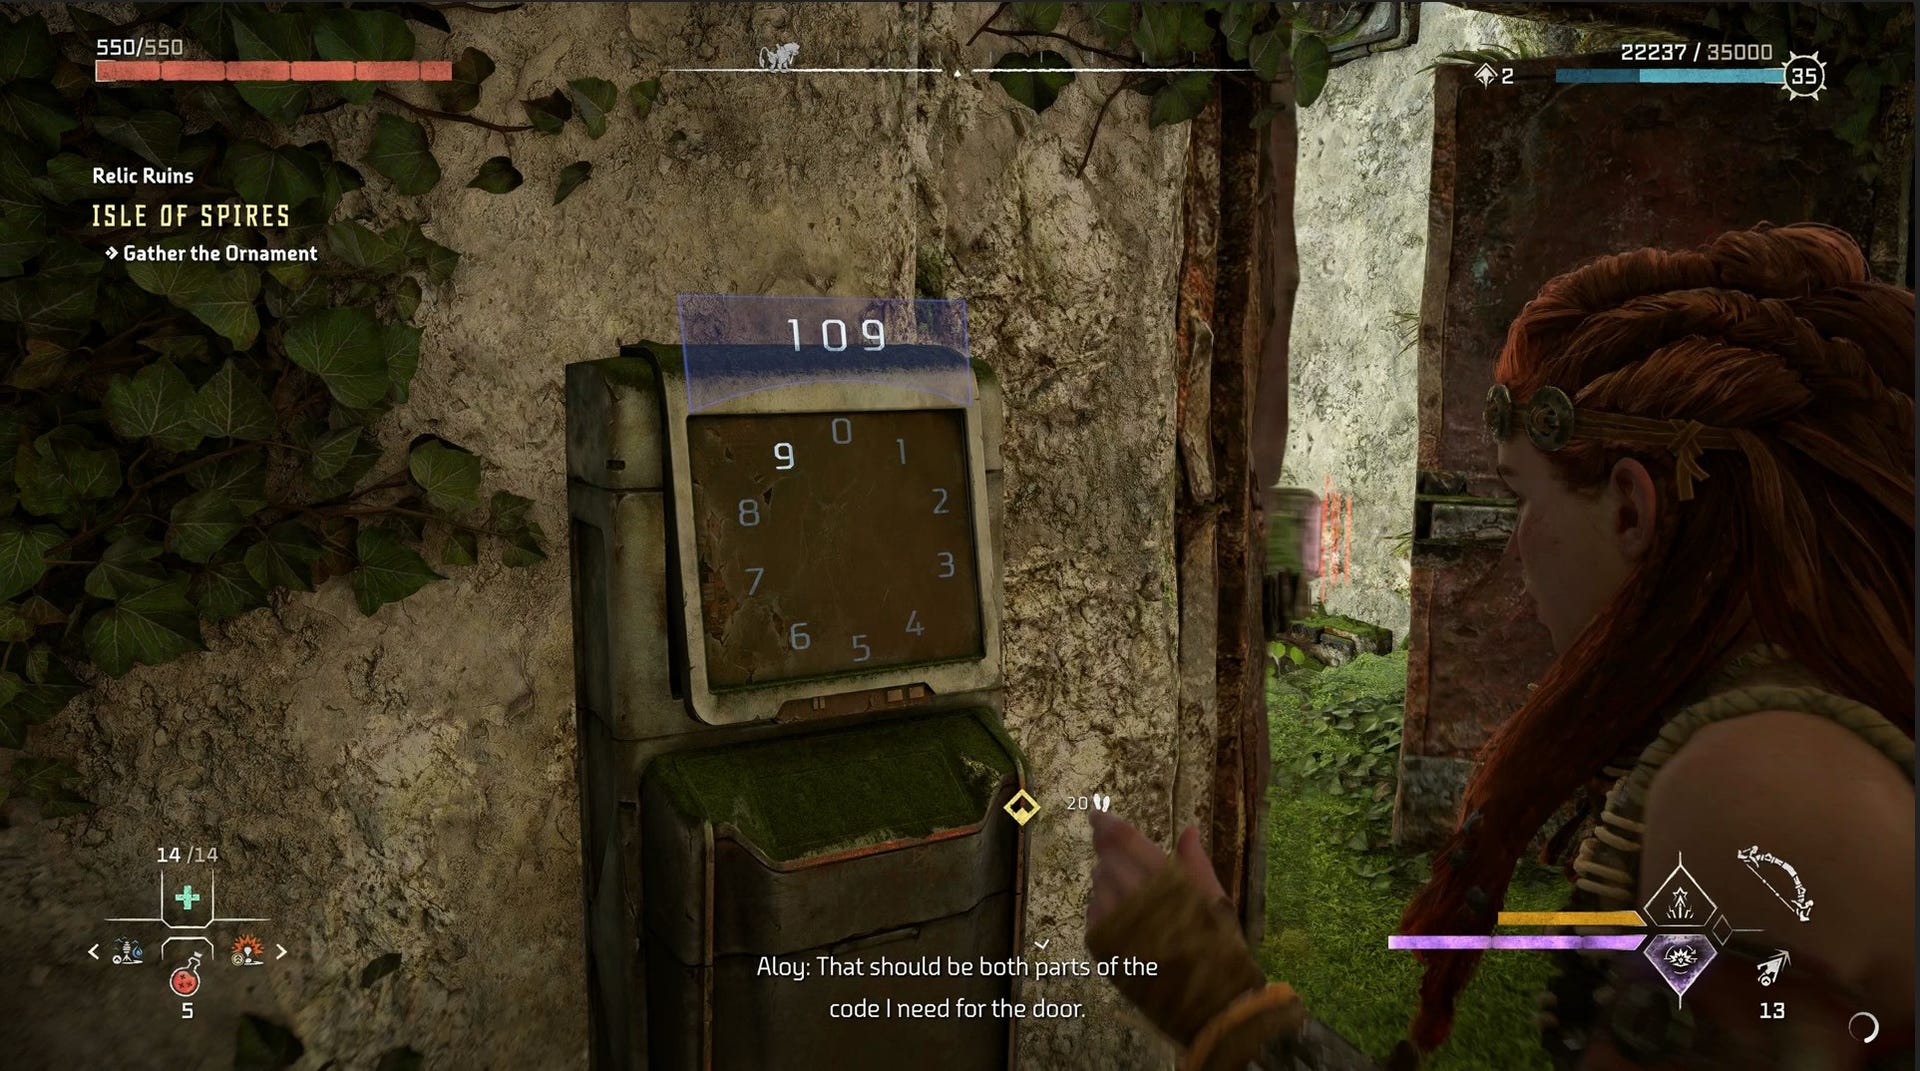
The Isle of Spires Relic Ruins Code for this door is: 109.
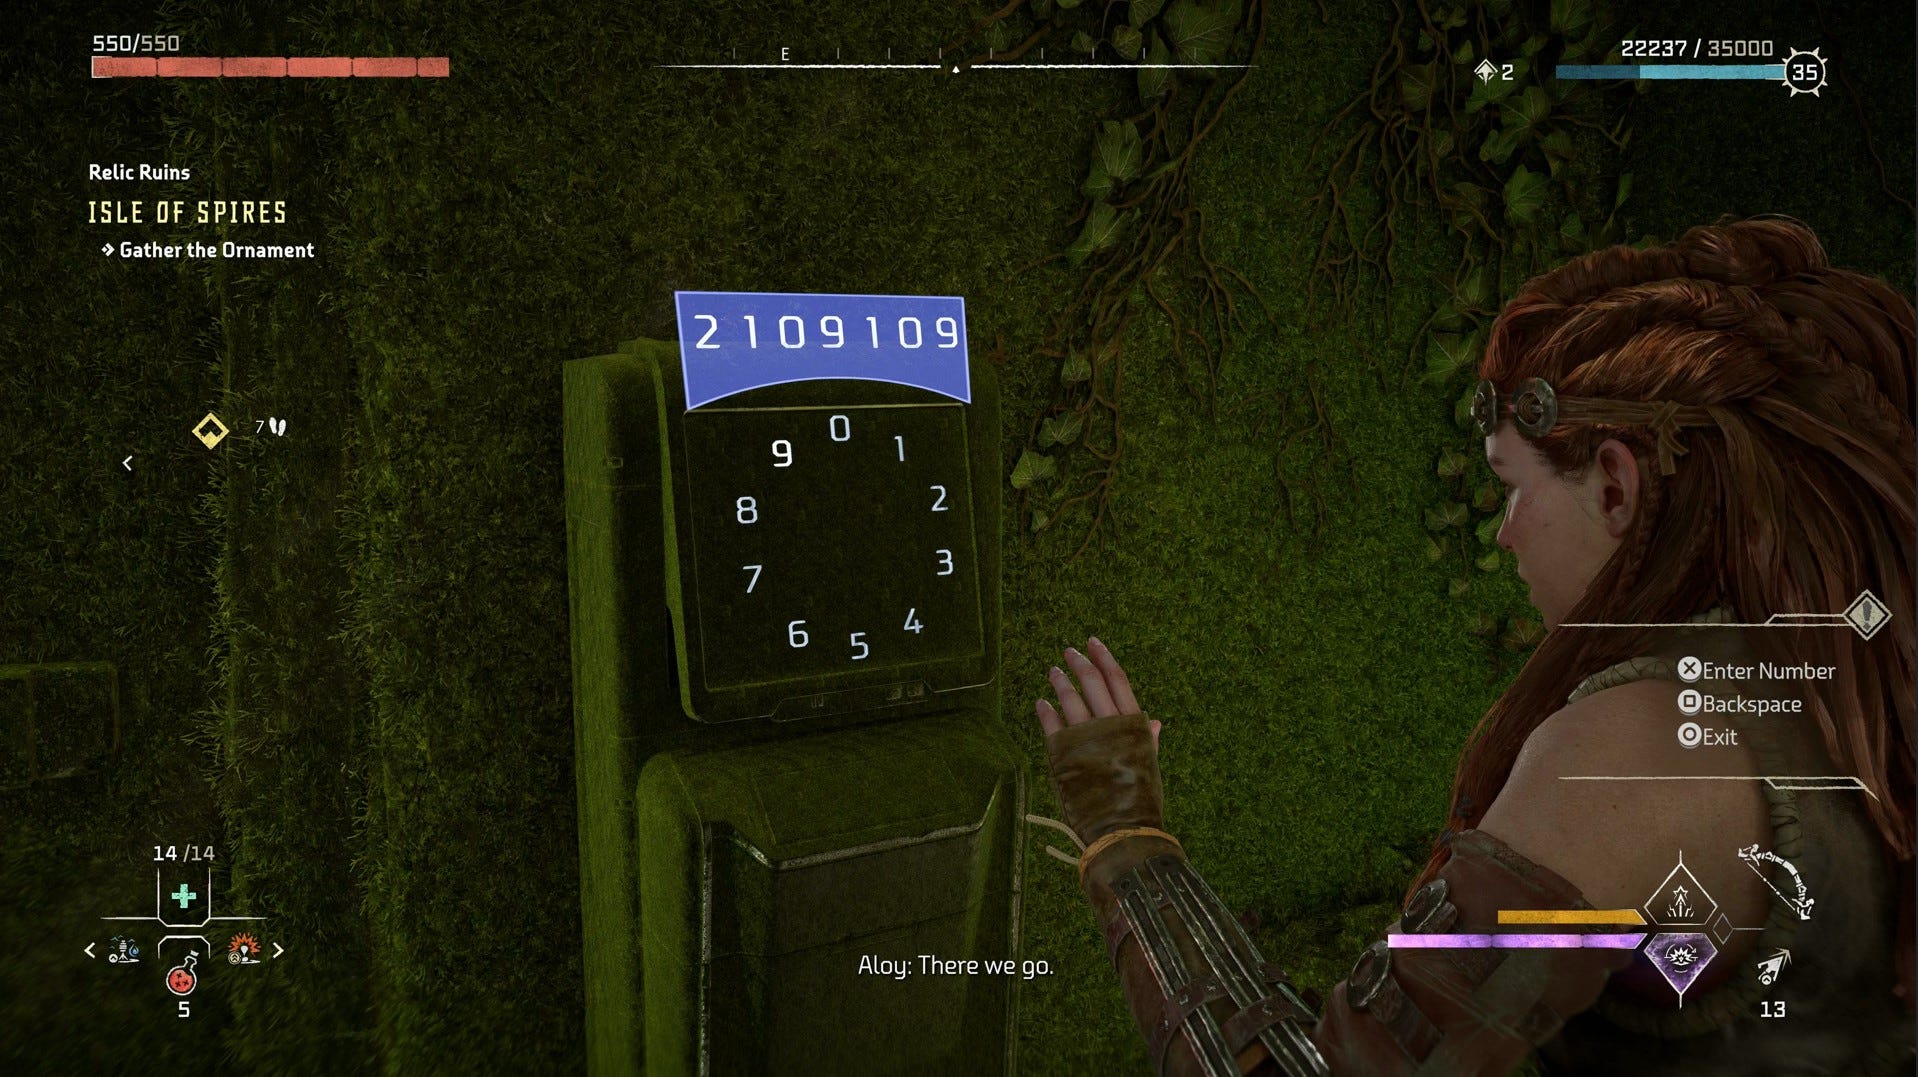
Head back down to the water, and there is one, final, locked door for you to face onto the bottom floor. Use the key that you found earlier, and then the Isle of Spires Relic Ruins Code for the third door is: 2109109.
Now, you have your hands on the Isle of Spires Relic Ruin ornament, ‘Golden Toucans’.
Horizon Forbidden West Hidden Ember Relic Ruin Puzzle and Door Code
The final Relic Ruin in Horizon Forbidden West is part of a quest given to you by Stemmur - on Oserman storyteller, who you’ll meet during the main story. This particular quest for the ninth ornament will take place in the Hidden Ember building.
Head underground into the building and follow the waypoints marked on your HUD until you reached a locked door. This will require a lot of gliding, and some rather scenic, cyber-looking ruins to travel through. Be sure to travel right past the large statue, as Stemmur advised.
The Hidden Ember Relic Ruin Code for the door you’ll soon find is: 739135.
The final relic is now all yours, ready for all of them to be returned to Stemmur. But what rewards may you reap?
Where do I take the Ornaments in Horizon Forbidden West and what do you get for completing all the Relic Ruins?
The true home of the Ornaments is in the south of Horizon Forbidden West’s vast map, in what’s first known as the Tower of Tears and later, Hidden Ember. If you've gathered your ninth Relic, you'll already know this.
Here, during a story quest, you will meet an Oseram storyteller named Stemmur. Once the quest is over and you make your return, you can trade in your Ornaments to him.
When you’ve gathered all nine, you’re given access to a bountiful reward stash which contains different sky effects for the desert, and in exchange for your ninth relic, you can get a unique and powerful Legendary Shredder Gauntlet.
For more on the puzzles and collectibles of the Tenakth tribe lands, check out our Horizon Forbidden West guide.