Dark Souls 3: The Ringed City walkthrough - Slave Knight Gael boss battle
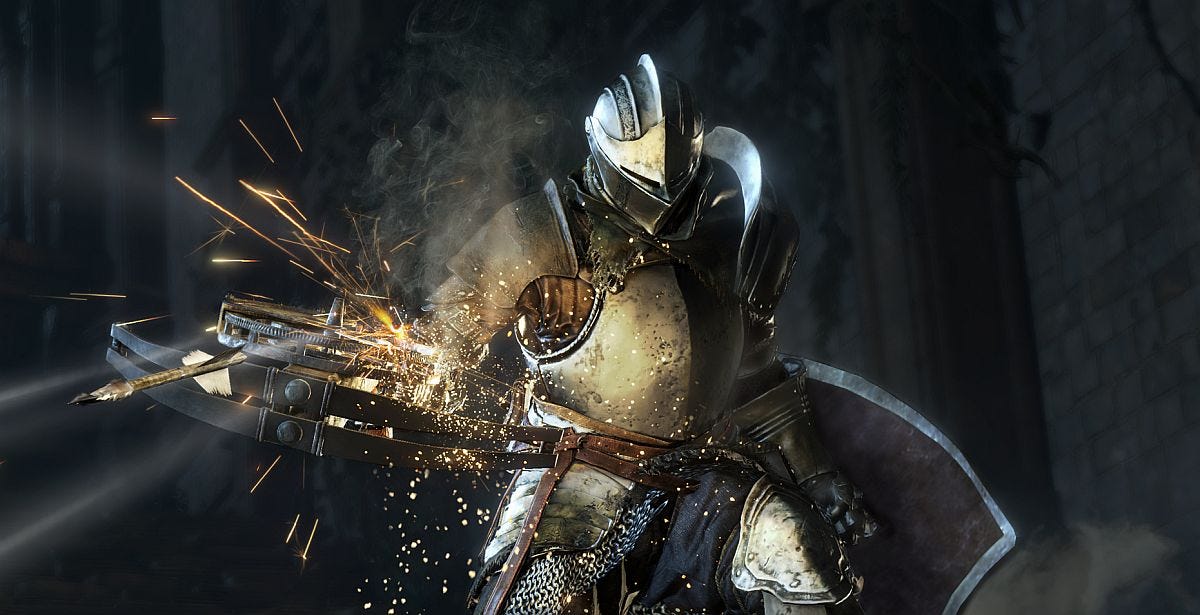

The final boss of Dark Souls 3: The Ringed City is our old pal, Slave Knight Gael.

If you've been following this Dark Souls 3: The Ringed City walkthrough, you won't have anything left to do in this DLC besides tackle the last boss.
Reach the Slave Knight Gael boss battle by following the drag marks in the ash outside the ruin sheltering the Filianore's Rest bonfire. Enter the arch to trigger a short cutscene and the battle itself.
In direct contrast to Darkeater Midir, Slave Knight Gael is a battle that favours range over tight circling.
Slave Knight Gael has several nice, slow melee combos you will find it easy enough to dodge even if you’re not much of a twitch-reflex fan, and if you keep a bit of distance between you it’s even easier.
However, you’ll also find he has some very fast and nasty attacks including a leap and dive move, and combo finishing overhead strike or lunge. These may take you unaware, but again, distance really helps. That extra breathing room on your rolls is everything.
The other big danger is Gael’s repeating crossbow. The projectiles aren’t too fast but there are generally a lot of them, and if your stamina is low you’ll be tempted to roll into Gael rather than sideways to evade them – which is pretty risky given distance is your friend here. Keep going sideways and wait it out.
On the offense side of things, use the distance and the gaps between Gael’s attacks to drop your shield, recharging your stamina - and to fire off a spell or an arrow. Just go for one, very conservatively, and only when you're sure he's in recovery from a combo. Then go straight back into moving away from the boss, kiting backwards and circling.
This is a nice big arena and apart from a few ruins and some structures you should break as soon as possible, there’s nothing to prevent you leading the boss around by his nose, chipping away at him in a nice comfortable war of attrition.
The second phase plays out nearly the same as the first, except that Gael adds some magic attacks to his repertoire - skulls flying through the air, for example. In general these are slow moving enough that you can easily dodge them unless you’re right on top of him – and as discussed, we’re never right on top of him.
This battle is made laughable with even one summon. Keep Gael on the hop by aggro’ing him, avoiding his attack while your friend pings his bottom, then aggro’ing him again. Blip him back and forth between you like a tennis ball.
Unless you’re a pure in-your-face melee type, the most dangerous part of this battle is a tendency to over-confidence; don’t get sloppy and let Gael hit you because you’re three quarters done and getting bored or cocky.
Tidying up loose ends
When Gael goes down, you’ll receive Soul of Slave Knight Gael and Blood of the Dark Soul.
Take Gael’s soul to Firelink Shrine to transpose it into Gael’s Greatsword or the Repeating Crossbow.
Take the Blood of the Dark Souls back to the Painter in the Attic near Sister Friede’s bonfire. You can choose to share your name with her, if you like; it’s not clear if this ahs any consequences.
If you visit the Dreg heap bonfire you’ll see the old woman here has died. You can collect her ashes to take to the Shrine Handmaiden, unlocking her inventory. It seems this old pilgrim may have ascended, as there’s a new angel in the area. It didn’t attack me as I explored but it’s on a pretty weird patrol so I might just have been lucky.
That’s everything triggered by finishing the DLC, I think. You may want to tidey up loose ends by exploring other pages within the guide.