Battlefield 5 Maps Guide - How to Win on Narvik, Rotterdam, Devastation, Twisted Steel, and More
Here's our complete Battlefield 5 guide, featuring tips and tricks, best weapons, best classes, building tips, and more.

Battlefield 5 is quite possibly the biggest game in the DICE series to date, featuring tons of massive maps taking place all across the world. In this Battlefield 5 maps guide, we'll be detailing everything you need to know heading into every battlefield in the game, including tips and tricks for the likes of Rotterdam, Narvik, Devastation, and more.
But if you instead need any additional information at all on the latest Battlefield game, you’ll want to head over to our Battlefield 5 guides hub. It’s on this page that you can find all the essential information, as well as tips and tricks, that you’ll need to hit the ground running.
Battlefield 5 Maps Guide
As we mentioned previously, there are eight total maps in the base version of Battlefield 5. The majority are wide open and incorporate vehicles heavily, like Arras, Narvik, and Twisted Steel, but others are more infantry focused, like Devastation and Fjell 652. Just below, we’ll be giving you some tips and tricks for each map in the game.
Narvik Tips
- It’s key to note that the northern portion of Narvik is at the top of a hill, while the southern section is at the bottom of the hill.
- We’d focus on taking the northern portion of the map first, since it’s easier to attack downhill than it is uphill.
- If you’ve taken the point on the southern bridge, try to avoid the trap of standing your ground and sniping up the hill, allowing the enemy team to inch closer towards you.
- Most of the fighting is going to take place in between the northern and southern points of this map. Use this to your advantage, to sneak round the northern border of the map and get the drop on points A and E.

Fjell 652 Tips
- This is a chaotic map, that takes place all around a mountain peak.
- The key to Fjell 652 is hitting hard and fast, never pausing in one area for too long.
- You ideally want to send two teams around both sides of the mountain, capturing points as they go, and leaving your enemy stranded in the middle point.
- Try to avoid using planes on this map, or wasting your time trying to shoot them down using cannons, since you’ve got very narrow windows of opportunity that come about rarely.
- Although it’s tempting, Fjell 652 is not a good map for the recon class to be sniping.
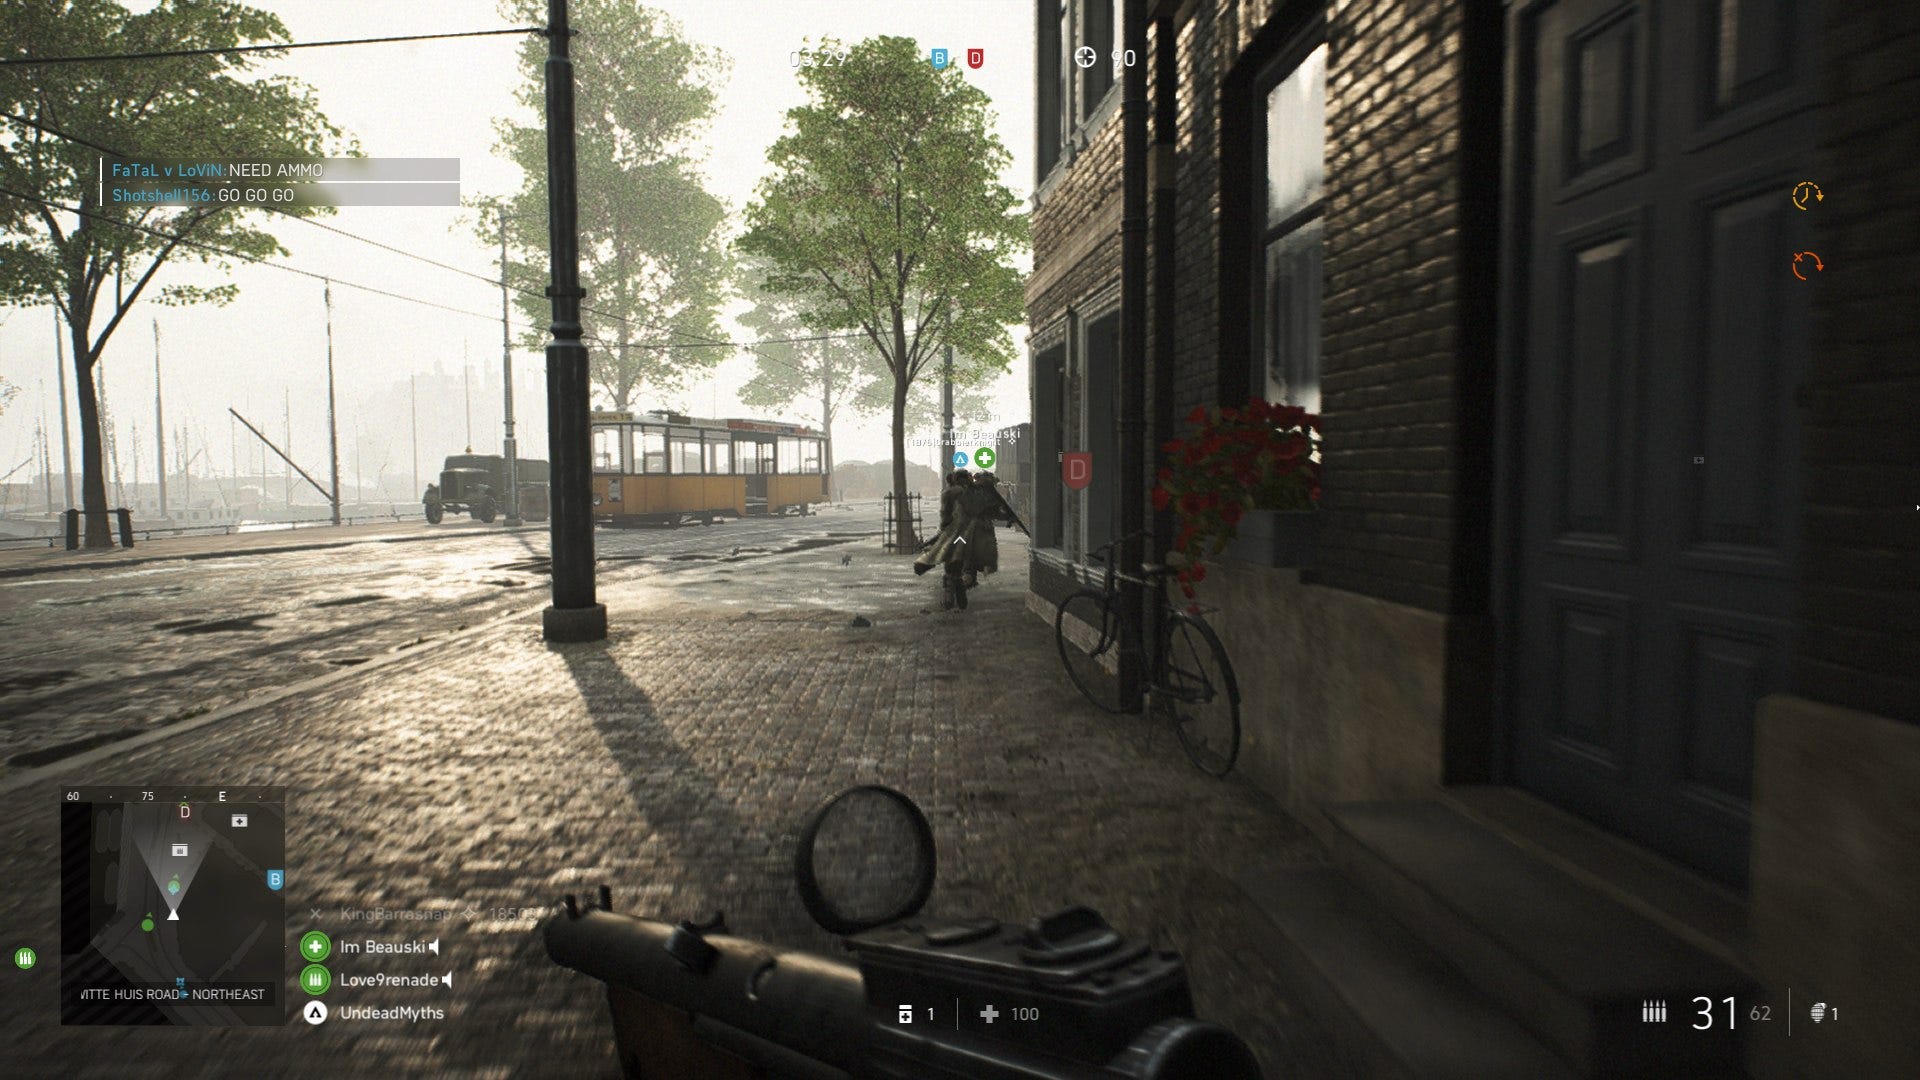
Rotterdam Tips
- The Rotterdam map is one that’s actually quite wide open, with vehicles and infantry alike running around.
- The point at the French white house to the north is an absolute stronghold in this map, and it’s a great point to fall back on and defend.
- Try to avoid pushing over any of the main bridges on Rotterdam, and instead use the back alleyways to surprise your enemies.
- The train tracks running above the map present a great opportunity for getting from one end of the map to the other incredibly quickly.
- Unlike Fjell 652, the Rotterdam map is a playground for snipers, especially if you can manage to get onto the train tracks above.
Devastation Tips
- This is the bombed-out version of the Rotterdam map, revolving around a massive church in the middle.
- With Devastation, try to push down the streets when you can, instead of getting caught up pushing through the main doors of the church.
- Medics are invaluable on Devastation. Leave the fighting to others where you can, and run around reviving your teammates.
- Playing support is also great for Devastation, especially if your team is pushed back and forced to defend a single point.

Twisted Steel Tips
- Twisted Steel is one of the biggest maps in Battlefield 5, with a central destroyed bridge running through the middle.
- Try to avoid focusing all your efforts on the bridge, as attacking from the side of the bridge after you’ve taken one of the north or south points is a great tactic.
- Once again, medics are the key to victory here, especially when you’re fighting in close quarters on the bridge.
- Use armored vehicles quickly and wisely, to get your team between points quickly than on foot.
- Since none of the points are under cover on Twisted Steel, calling in a rocket strike as a squad leader is always guaranteed to net you a few kills.
Arras Tips
- Another massive map in Battlefield 5, Arras takes place over French fields, with a congregation of buildings in the northern part of the map.
- Getting between points quickly on Arras is the key to winning, so make sure to use transport vehicles whenever you can.
- Holding point E is a great advantage on Arras, since it’s basically the only point on the map where you can actually hunker down and defend.
- If you’re going to attack point B, make sure to go via the river below, and avoid running along the southern road, and any other exposed areas.

Hamada Tips
- There are several gun emplacements around points on the Hamada map, which are great for defence if you can get them early and quickly.
- You should concentrate on taking the point on the map section of land in Hamada, as the other three points on the other side of the bridge are so cut off, that they’re difficult to push up from.
- Avoid using planes on Hamada, and if you’re going to use vehicles, make sure to squad up in a transport vehicle to get from point to point.
- All the points on Hamada are uncovered, meaning rocket strikes from squad leaders can be devastating.

Aerodrome Tips
- The hardest point to take on the Aerodrome map is definitely the hanger itself, which provides a great line of defence.
- Alternatively, you can easily trap the enemy team within the hangar, bombarding them with vehicles and snipers from the outside.
- A great tactic is to quickly take points either side of the hangar, and push inwards from both sides.
- Once again, use vehicles to quickly get your troops from one point to the next, especially if you plan on going between the northern and southern points on Aerodrome.
Now that we’re all done with this guide on the maps of Battlefield 5, you can check out our additional coverage of the game, here at USgamer. Head over to our best Battlefield 5 weapons guide, or our Battlefield 5 gun specializations guide for more.