The Witness - The Keep Puzzle Solution
Images and solutions for every puzzle in The Witness in this complete walkthrough and puzzle guide.
Activating the light beam for The Keep in The Witness is rather simple, as you only need to complete the first set of hedge maze puzzles in The Keep area. There is a second set of step platform puzzles in the back of The Keep, but these are not necessary for activating the light beam. We will include both sets of puzzles anyway in this Keep Puzzle Solutions Walkthrough, in case you need help with either.
The Witness - The Keep Puzzle Solution Walkthrough
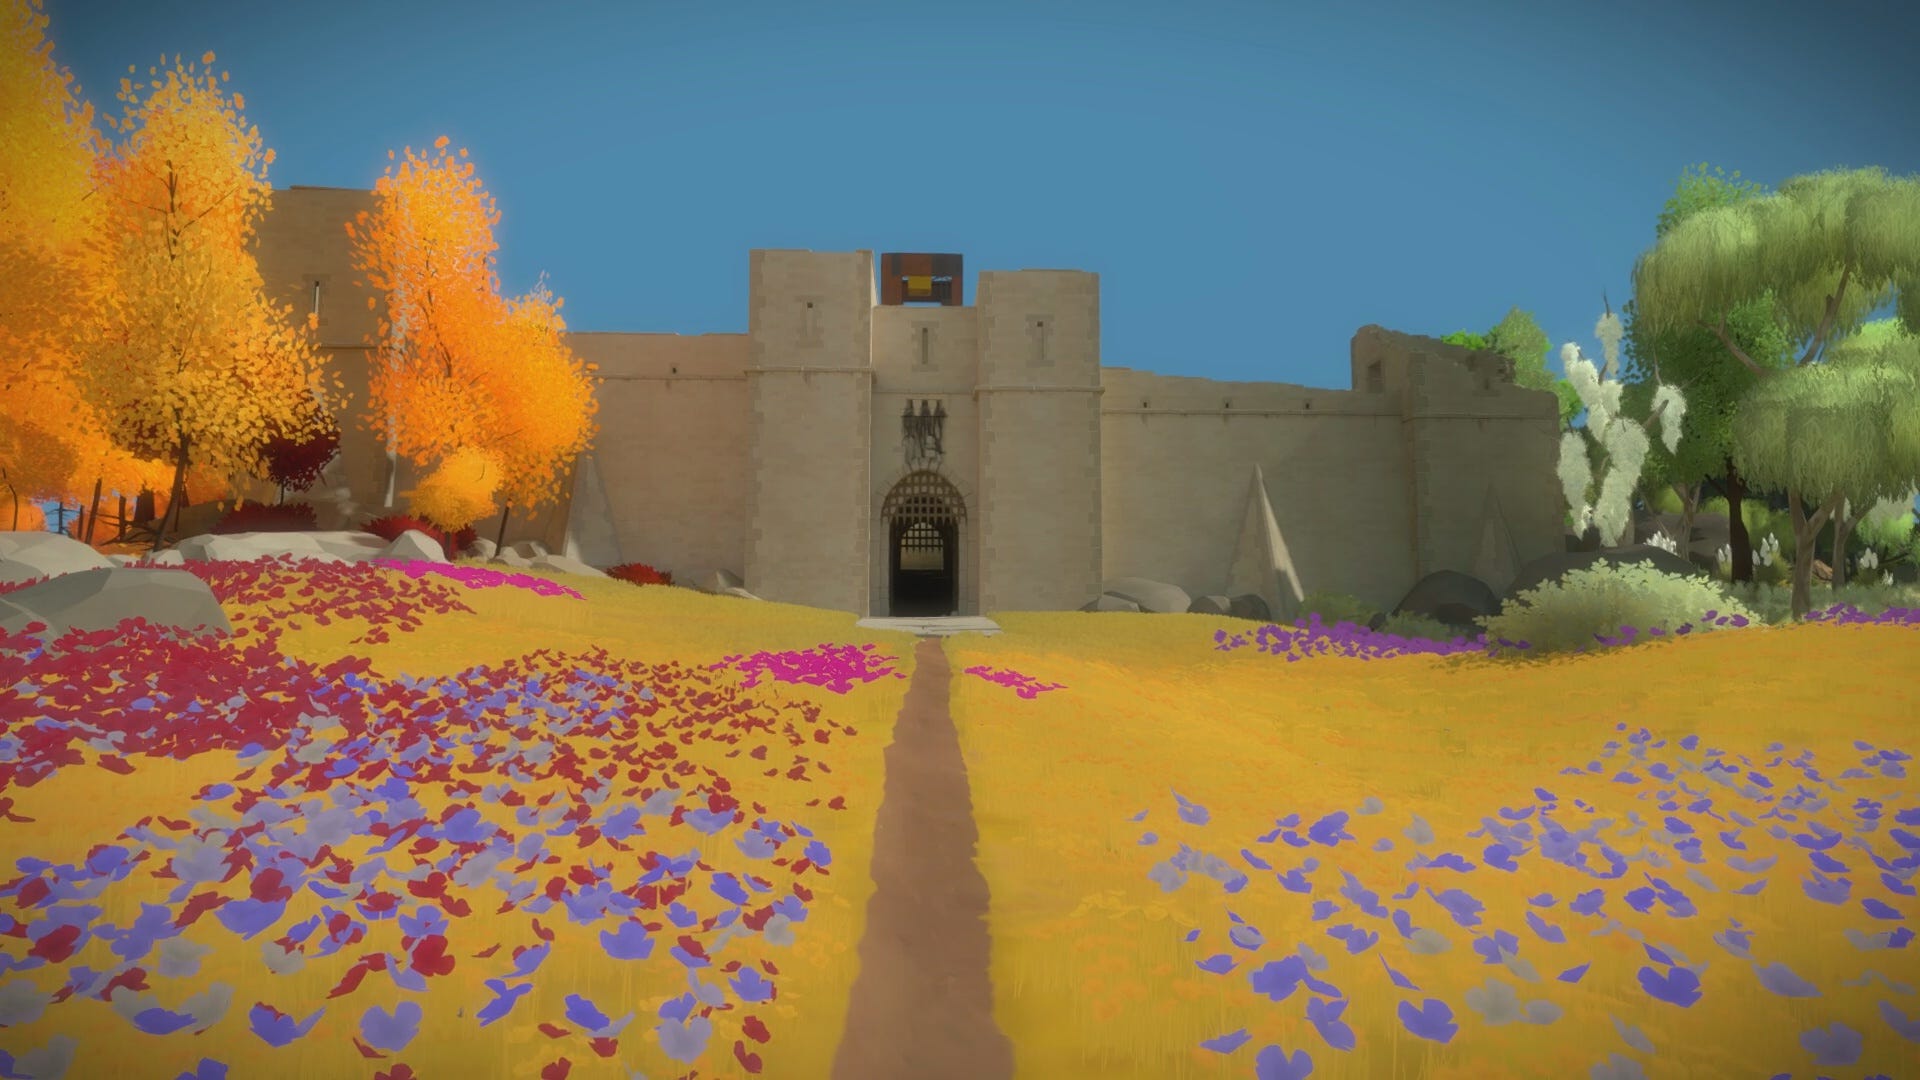
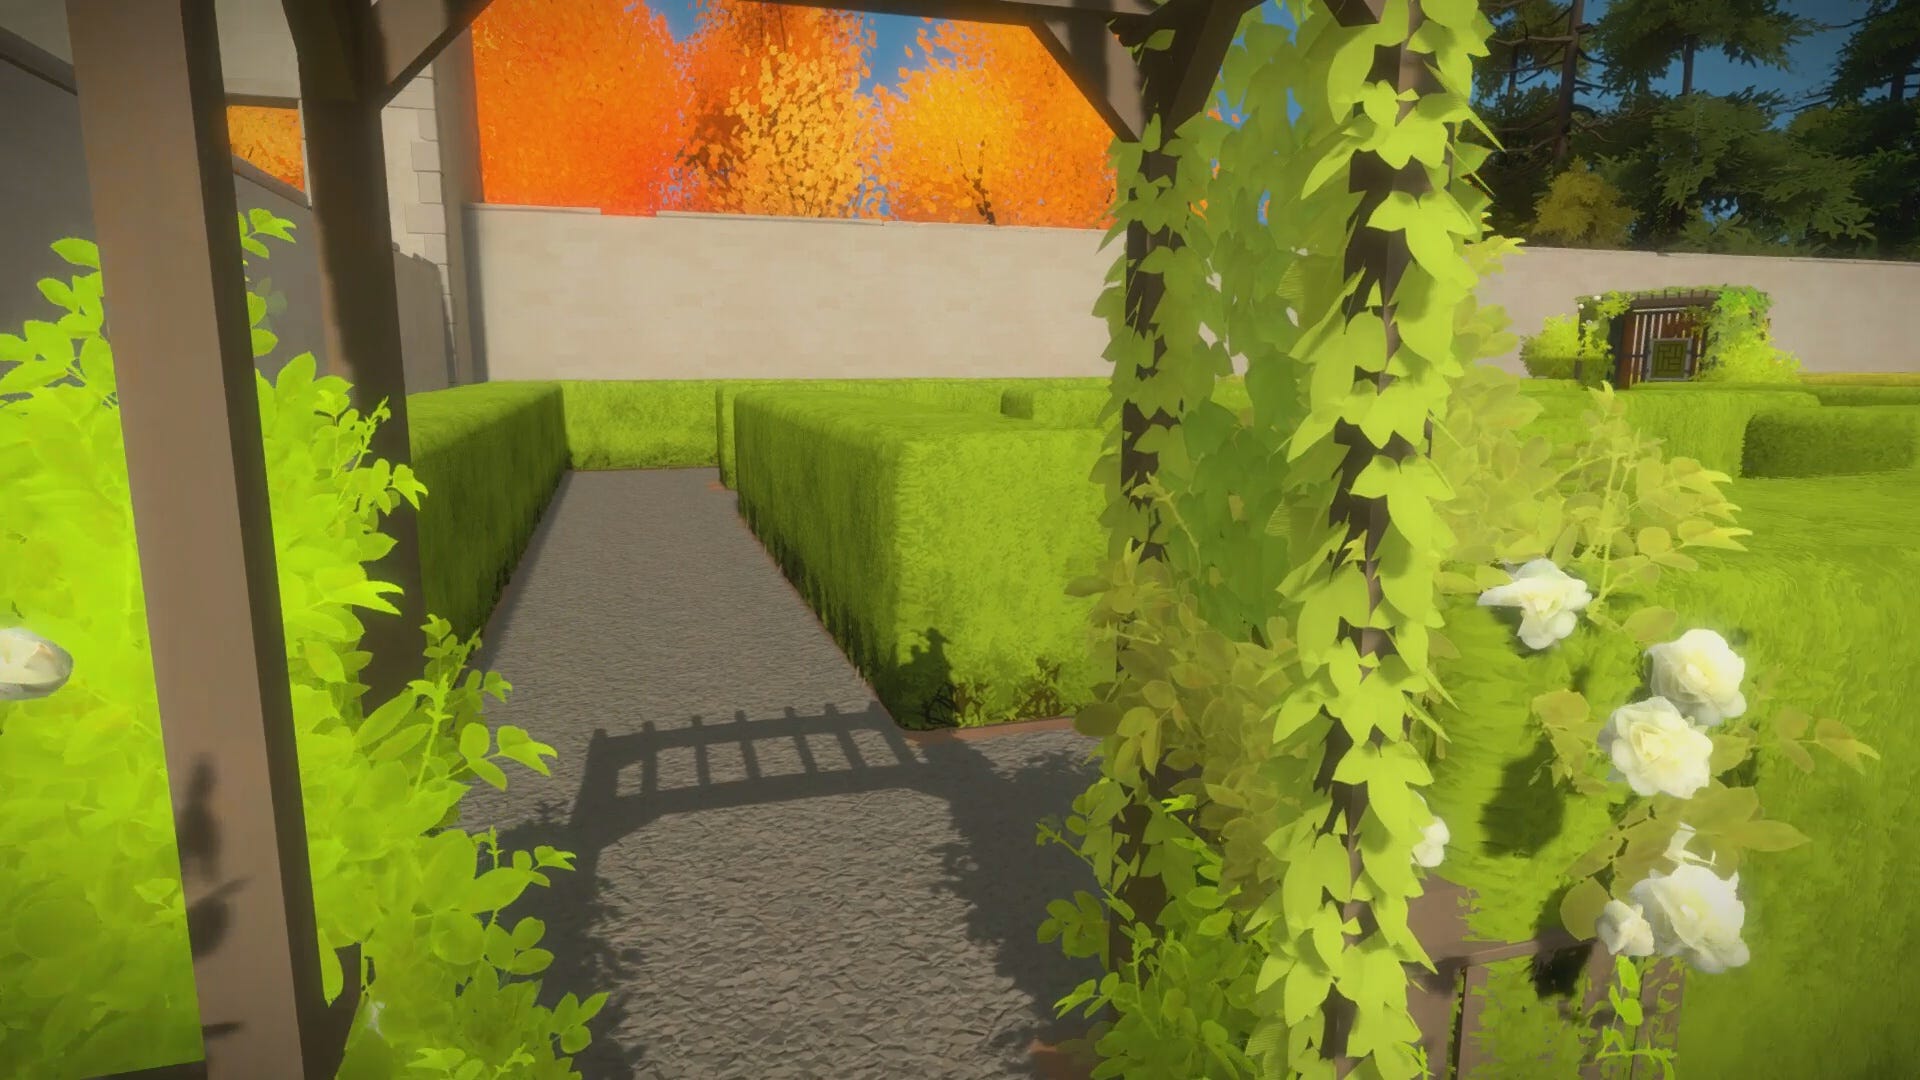
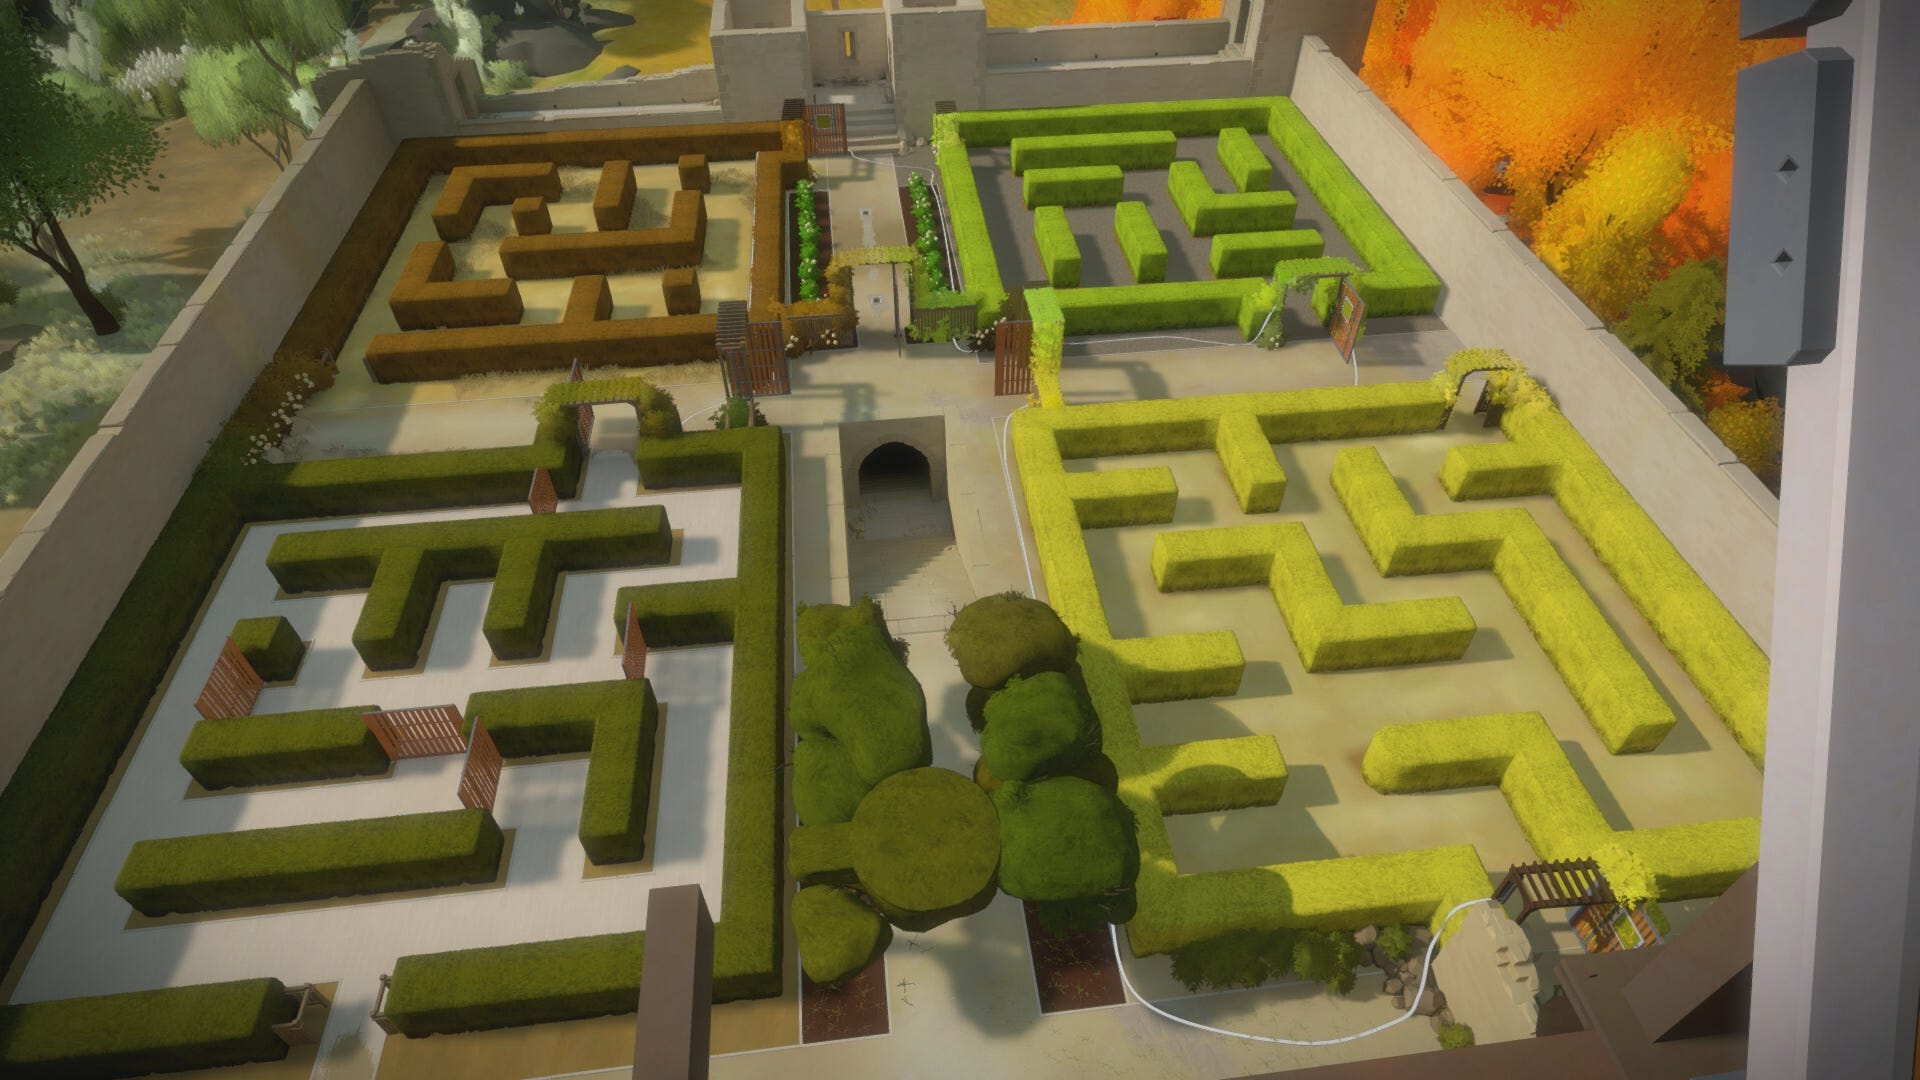
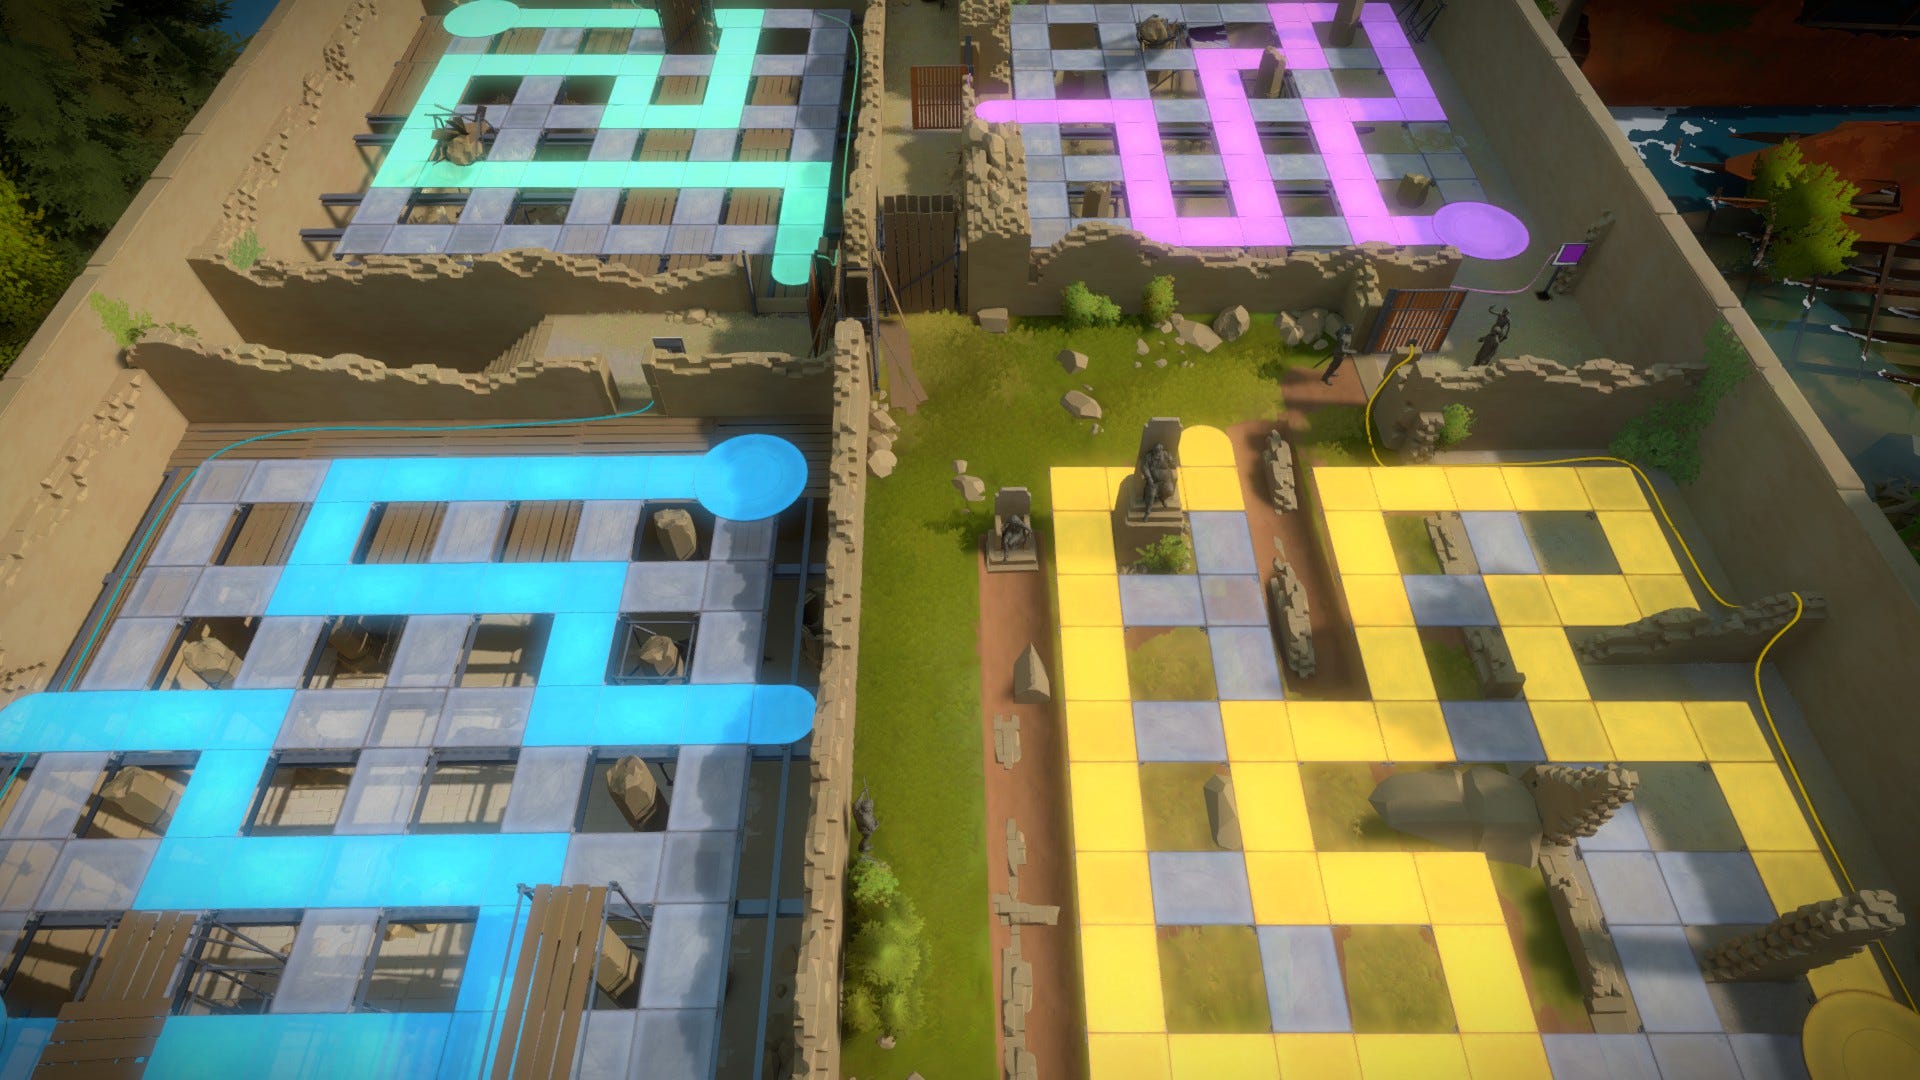
The Keep Puzzle entrance can be seen from the back gate of the Monastery, directly across the waterfall. Ascend the main staircase in the center. At the top of the stairs, you will notice the hedge maze section closest to you, at the front of the Keep tower.
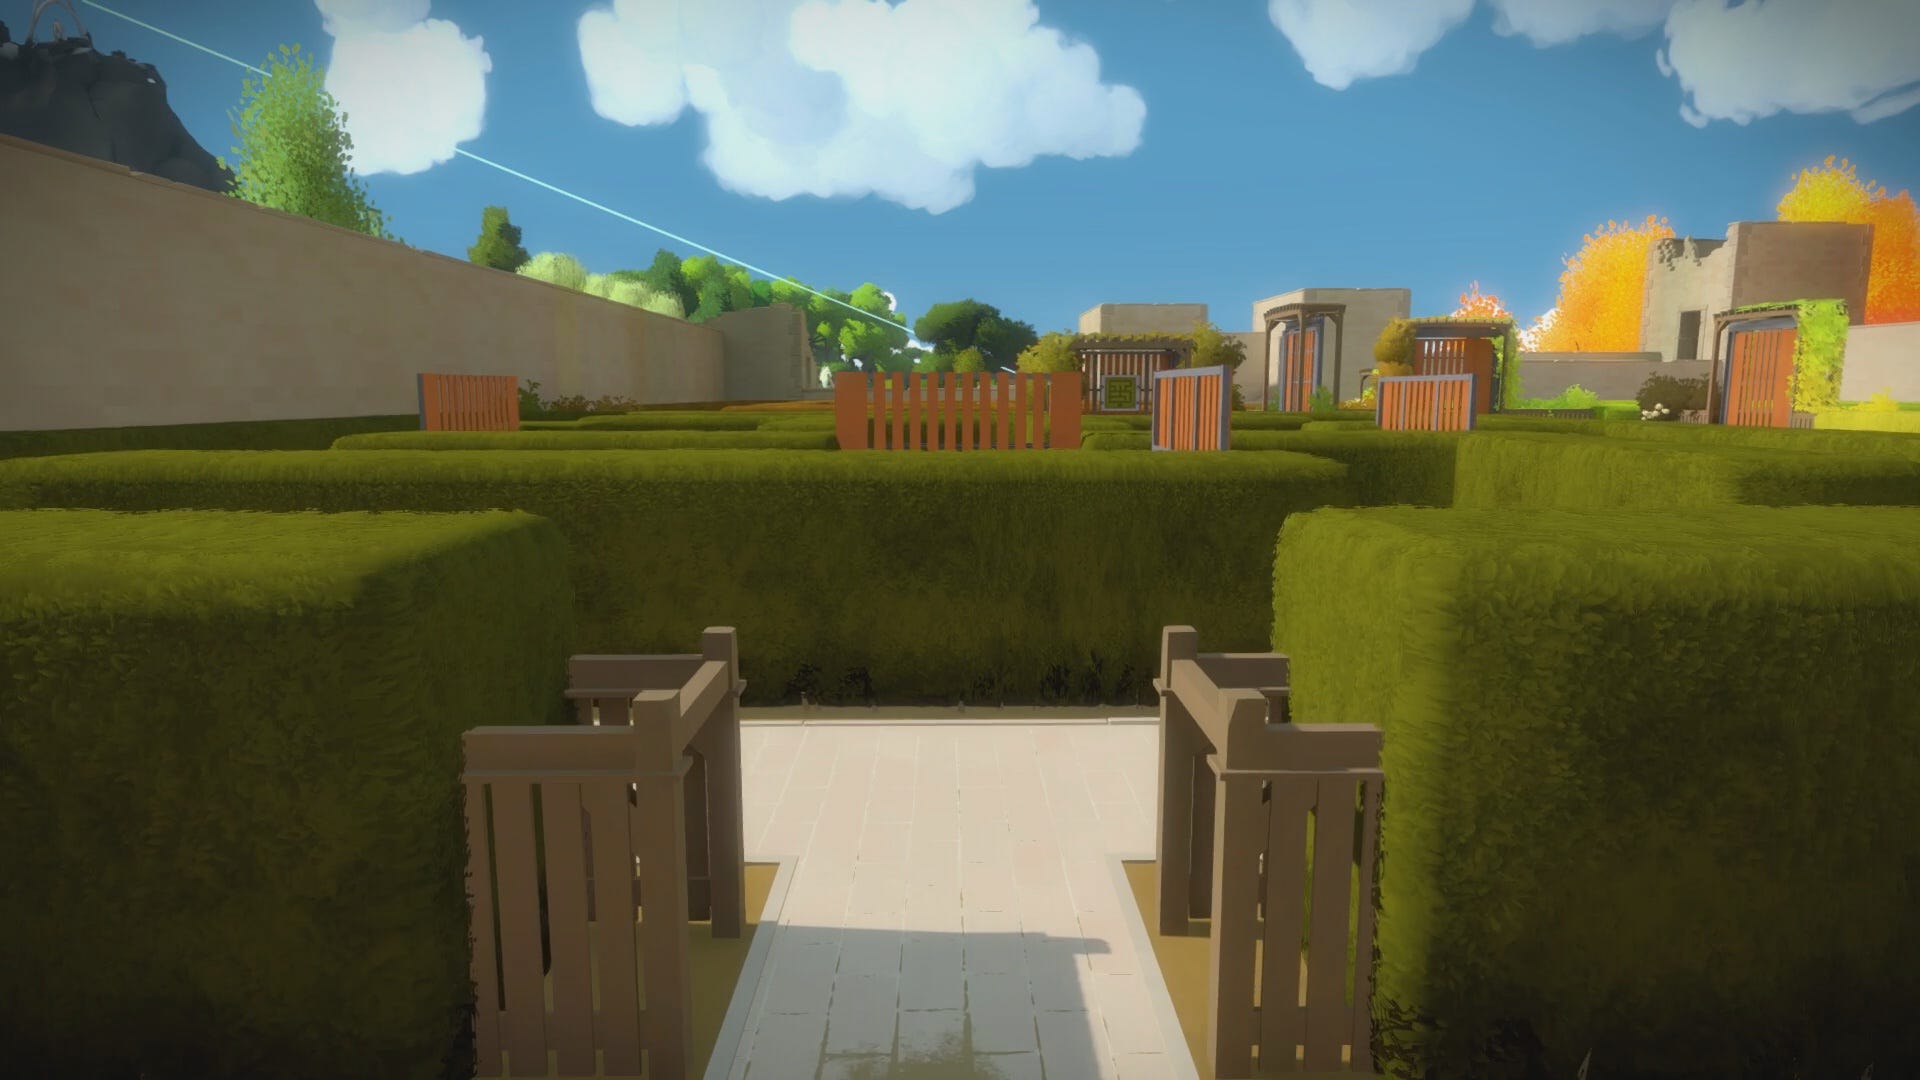
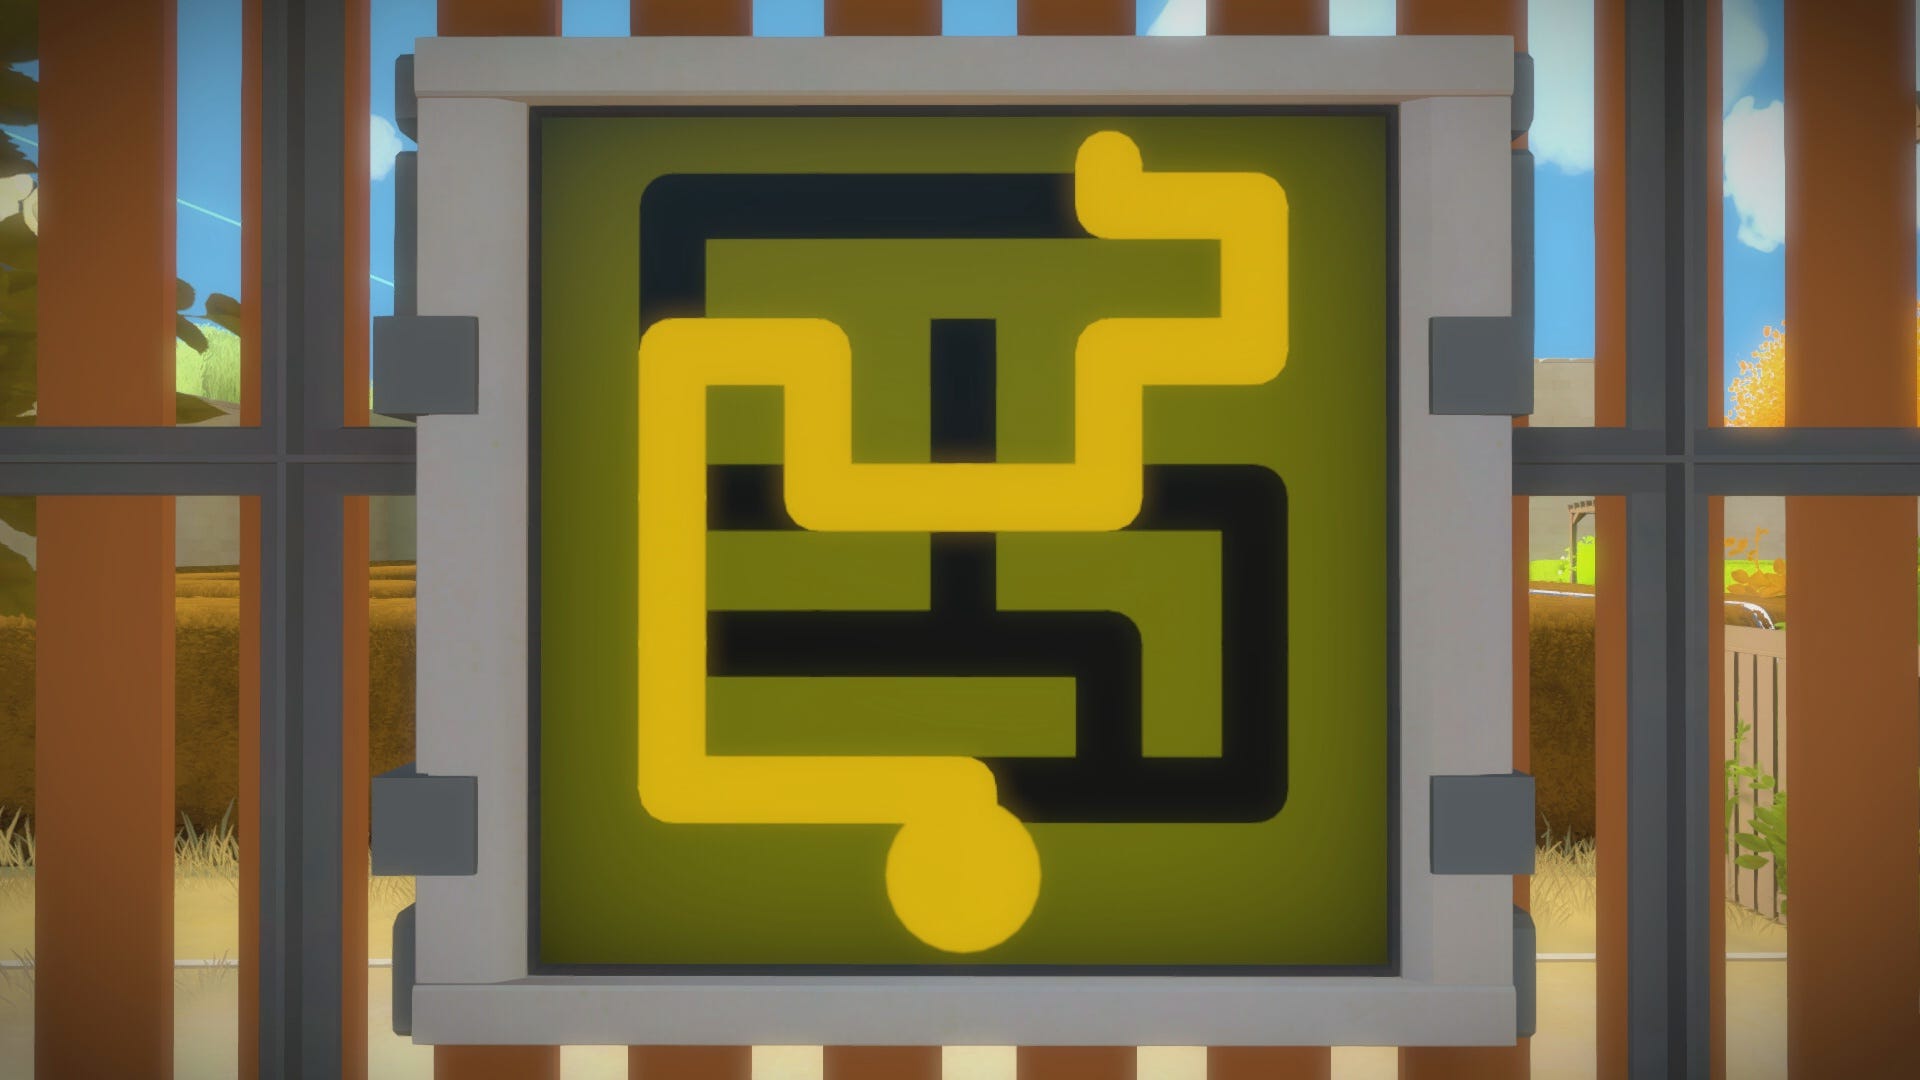
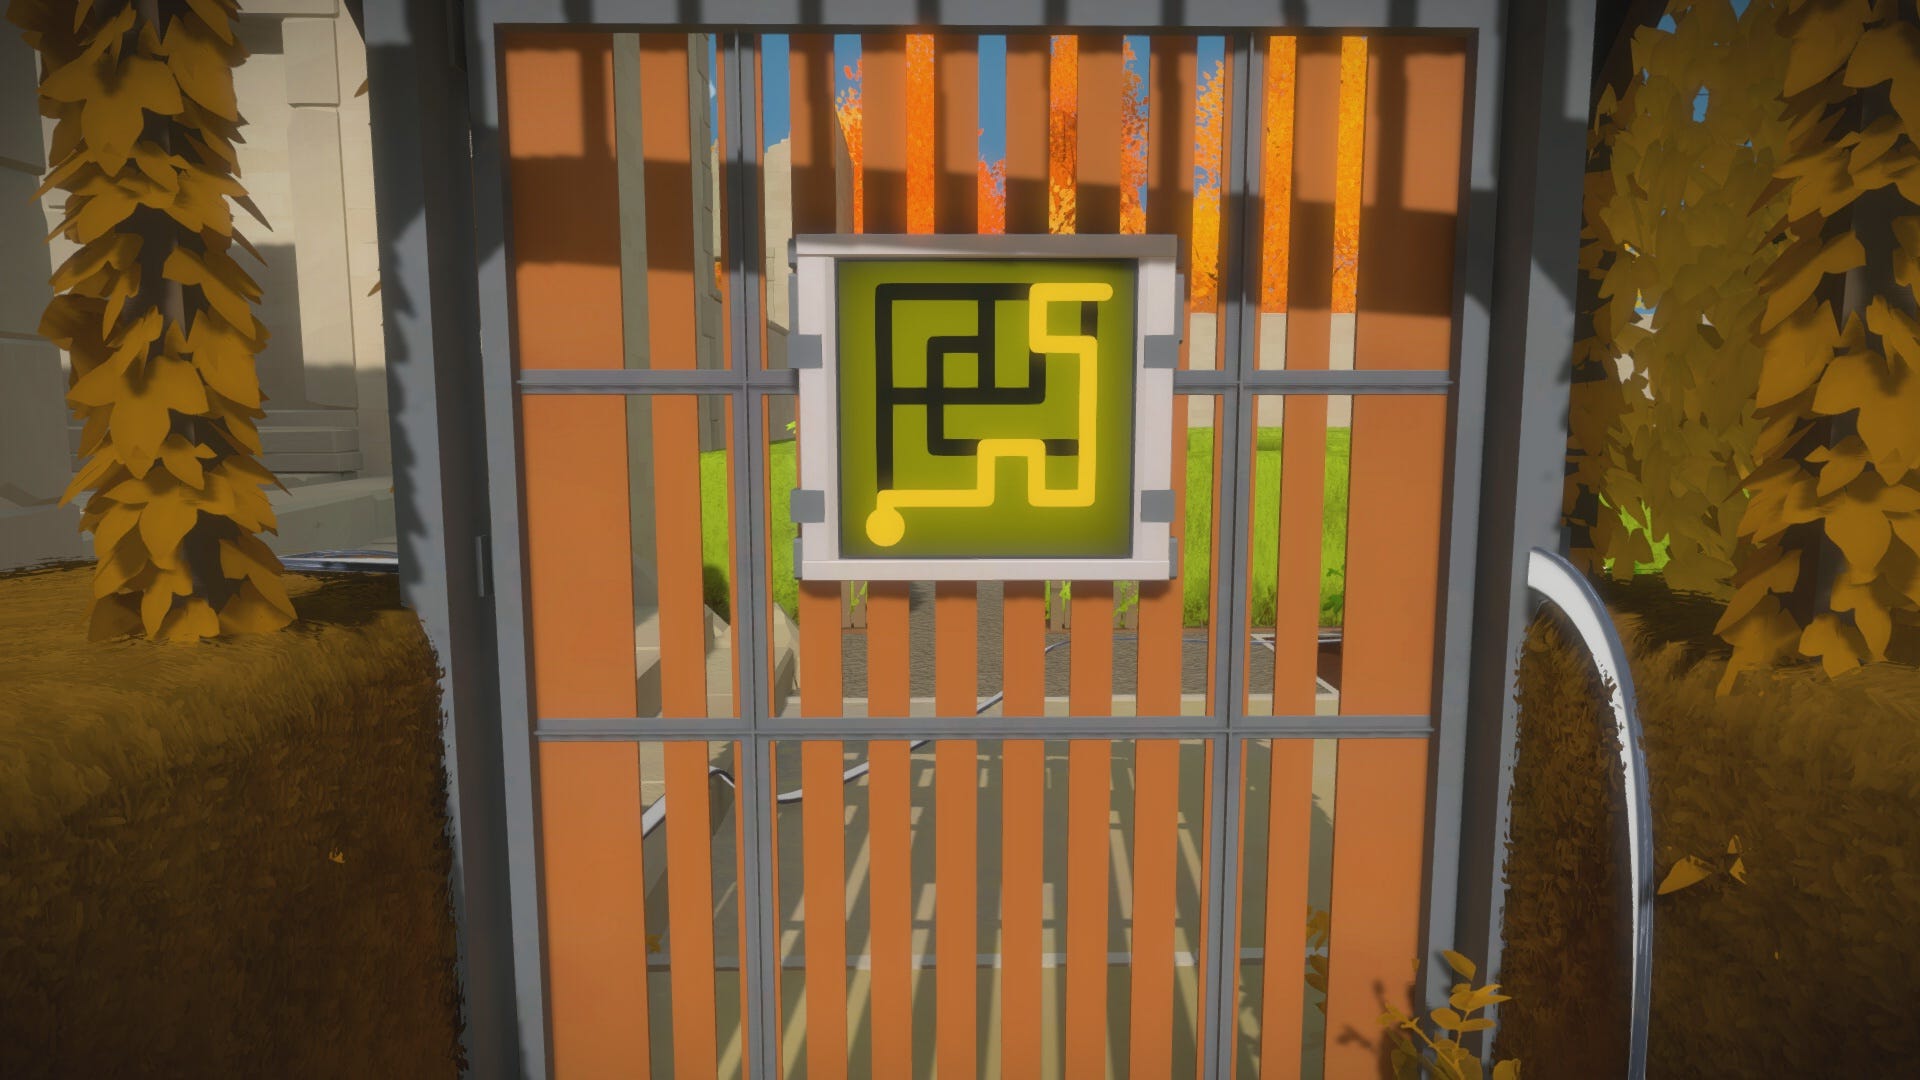
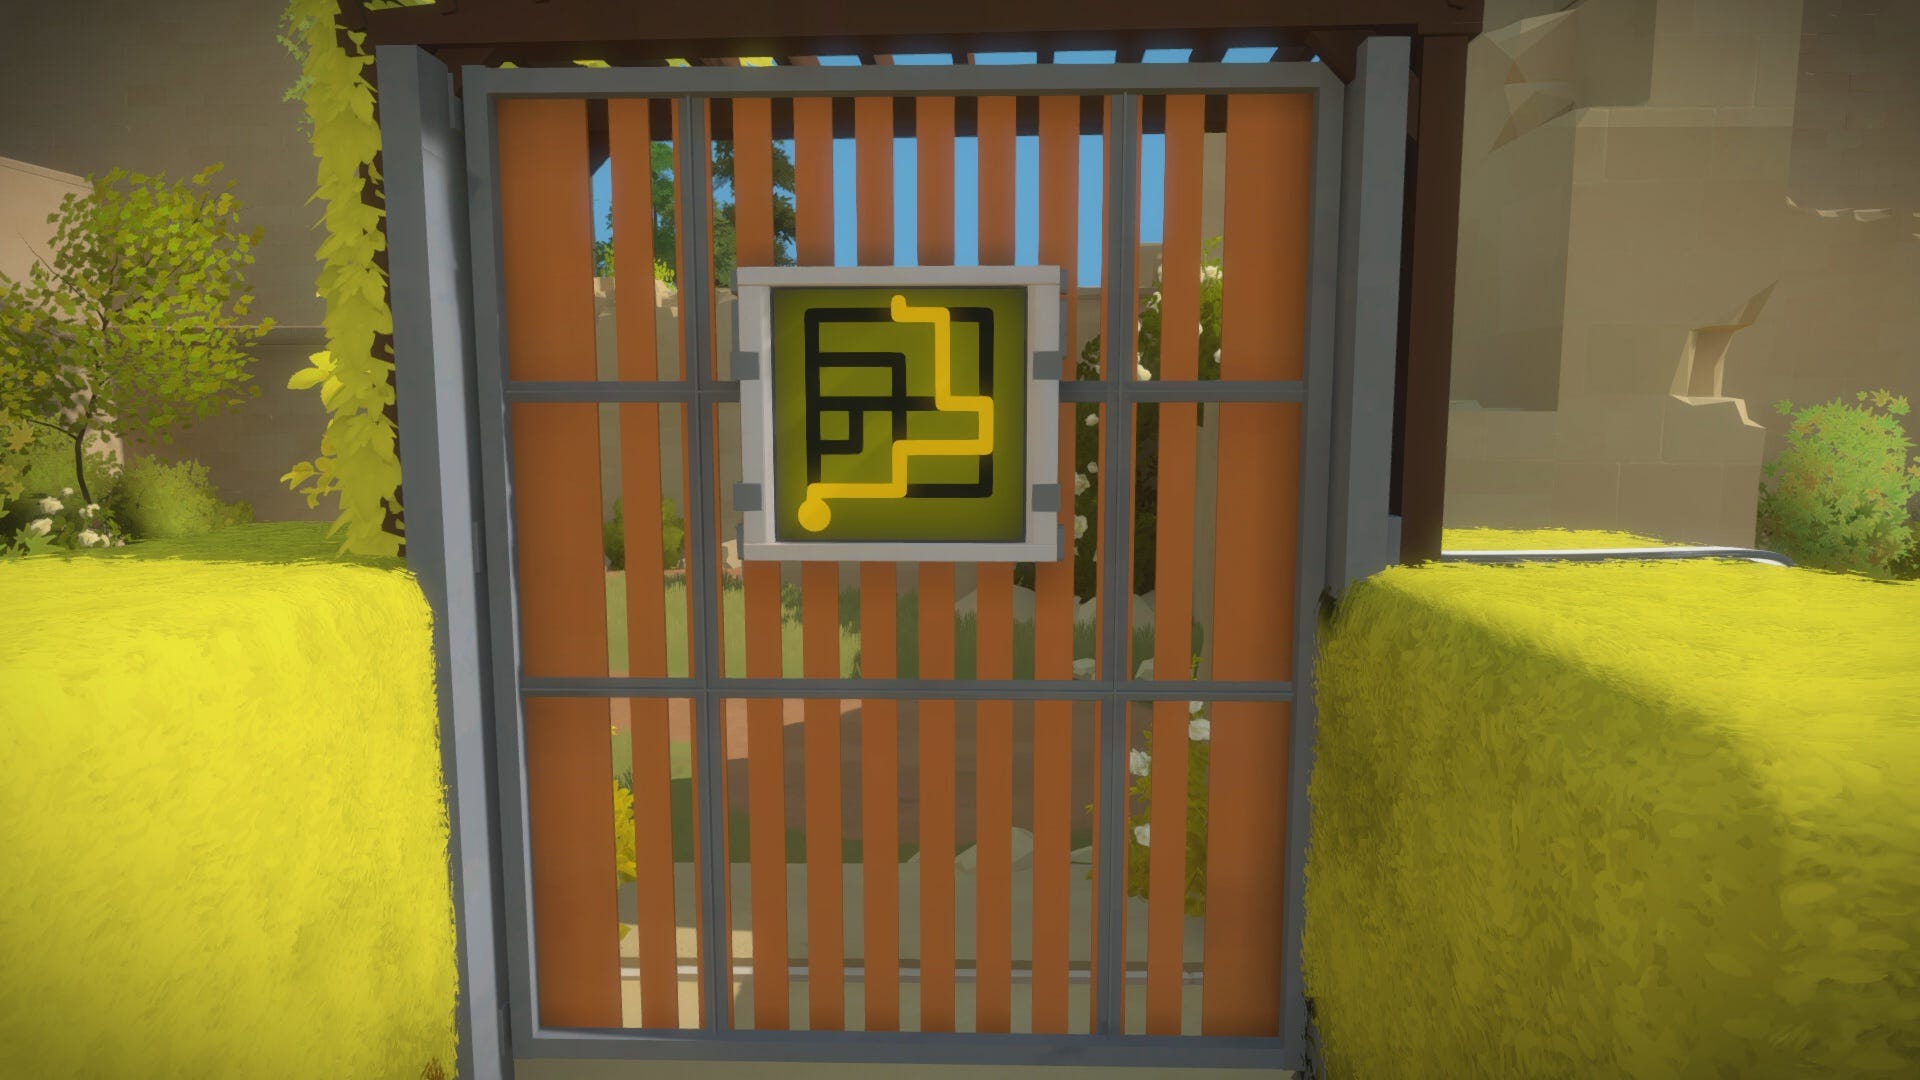
From the top of the center staircase, turn right to begin the first hedge maze. The mazes themselves are not difficult to navigate. However, the trick is finding the key to the correct path. The first dark green hedge maze is fairly simple. Navigate through the maze to reach the puzzle panel on the door at the other side, avoiding the wooden blockades. The solution is shown below.
At the panel, you must retrace the path you took through the maze. This will be the case for the other three hedge mazes as well. It’s a good idea to sketch your paths on a piece of paper throughout, in case you need to jog your memory.
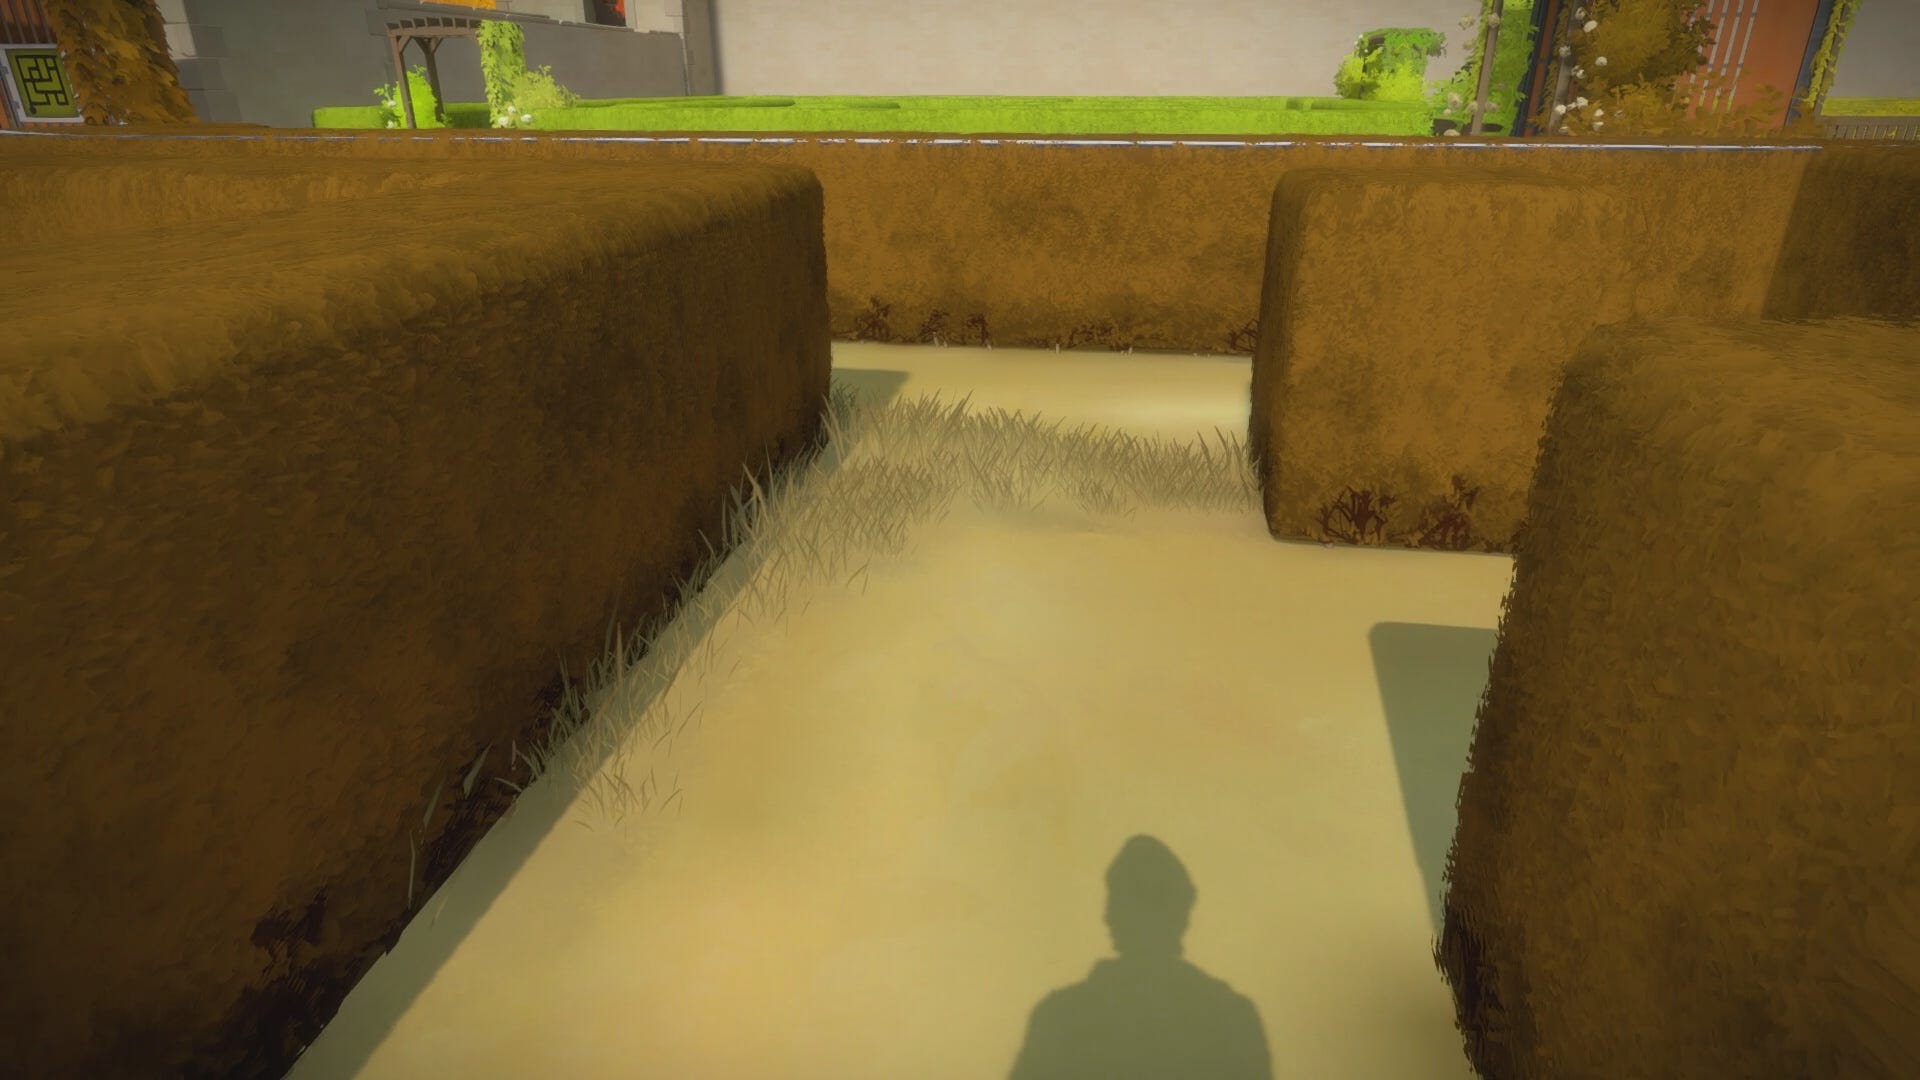
The next maze consists of brown hedges and a straw-colored path, with patches of dry grass throughout. The key to finding the correct path is actually the dry grass itself.
As you navigate through the maze, you must walk only on the straw-colored path, avoiding the grass patches. Think of the grass as subtle barricades. Once you reach the panel on the door, retrace your path, using our image below as a reference if needed.
The third puzzle has lime-green colored hedges, and consists of a path of loose gravel. If you’ve stepped on loose gravel before, you’ll know the familiar crunching sound it makes. Let that be your clue here.
As you navigate through the maze, turn up your volume and listen to the sound of the gravel beneath your footsteps. Areas that should be avoided will give off a loud crunch, compared to the correct path. Your path should look like the one below.
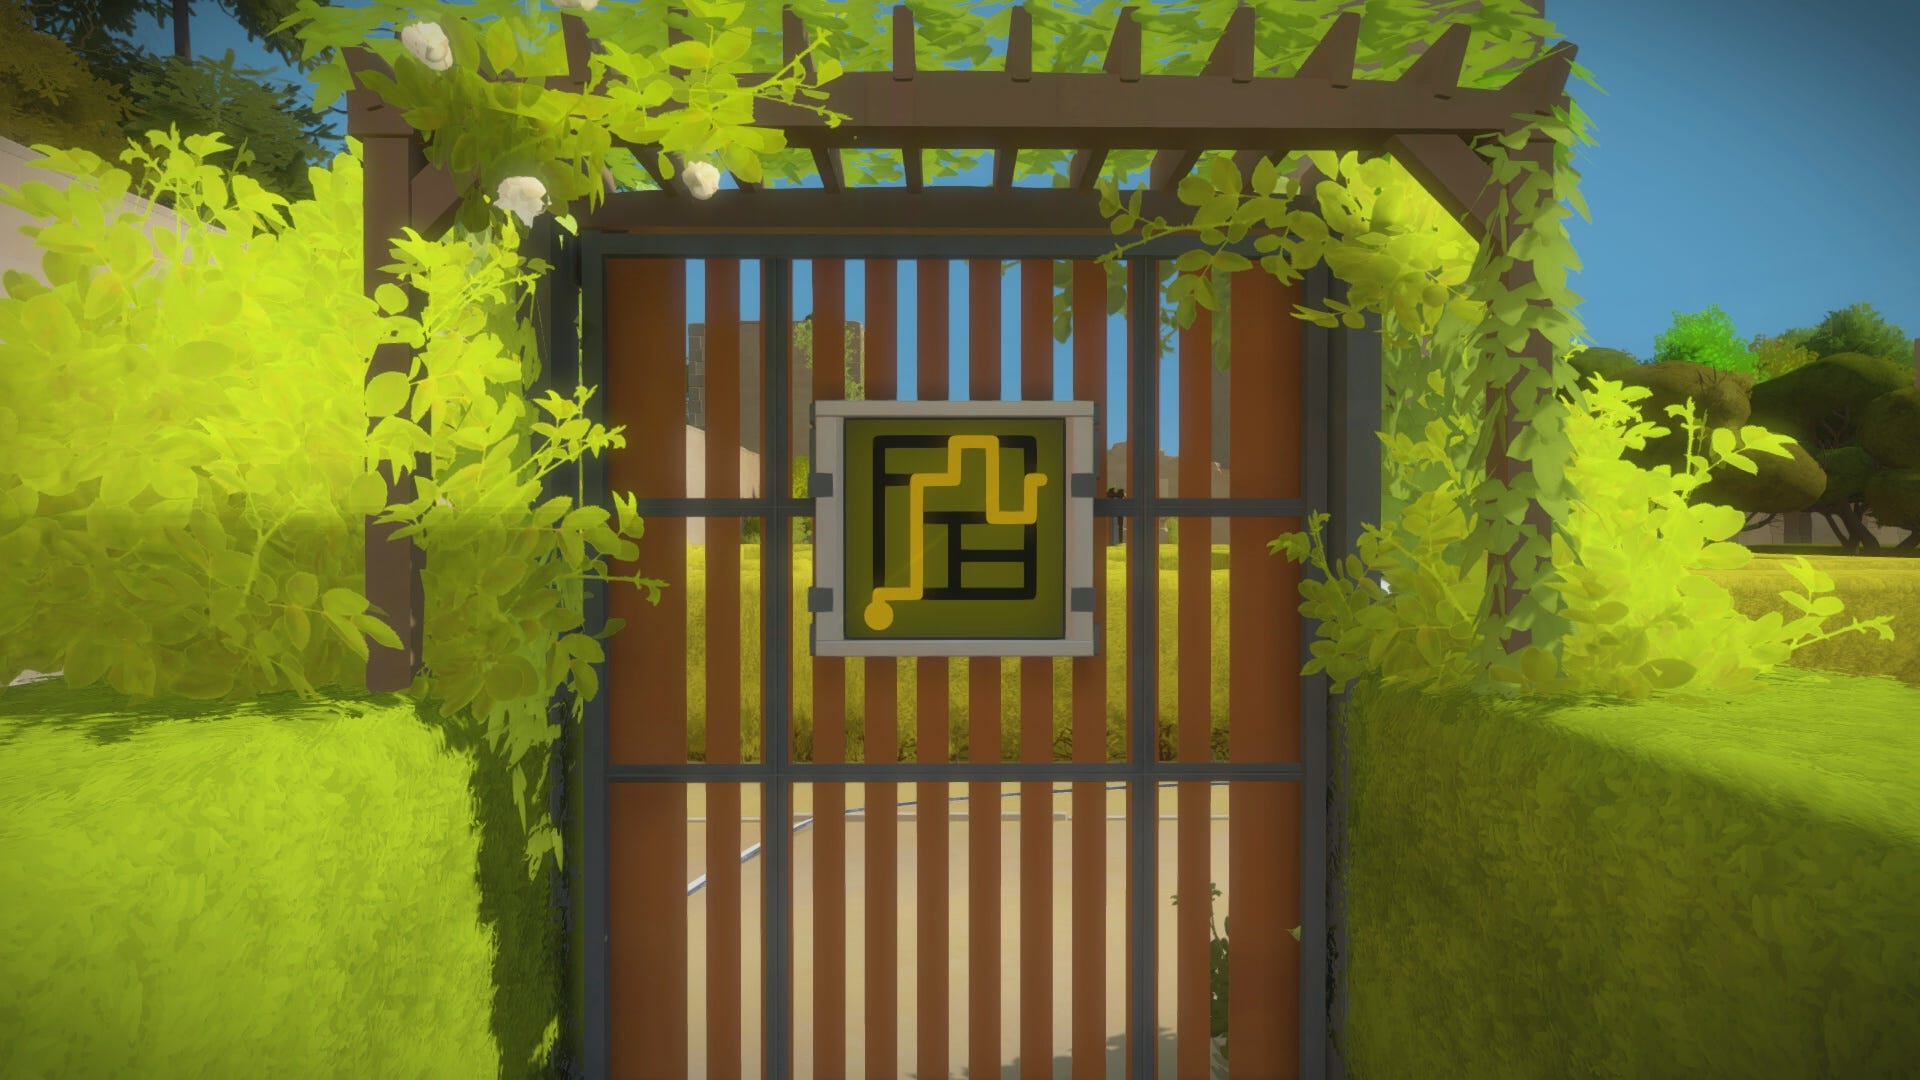
For the final, yellow hedge maze, we were somewhat unsure about the key to the correct path. USG reader Jamie Corry contacted us to say that the solution comes from the difference between the puzzle and the maze itself. From the side of the high tower you can look down and see the whole maze. Compare this to the puzzle and you'll see one path that is in both. Try it for yourself. If you get hopelessly stuck, take a peek at our solution here.
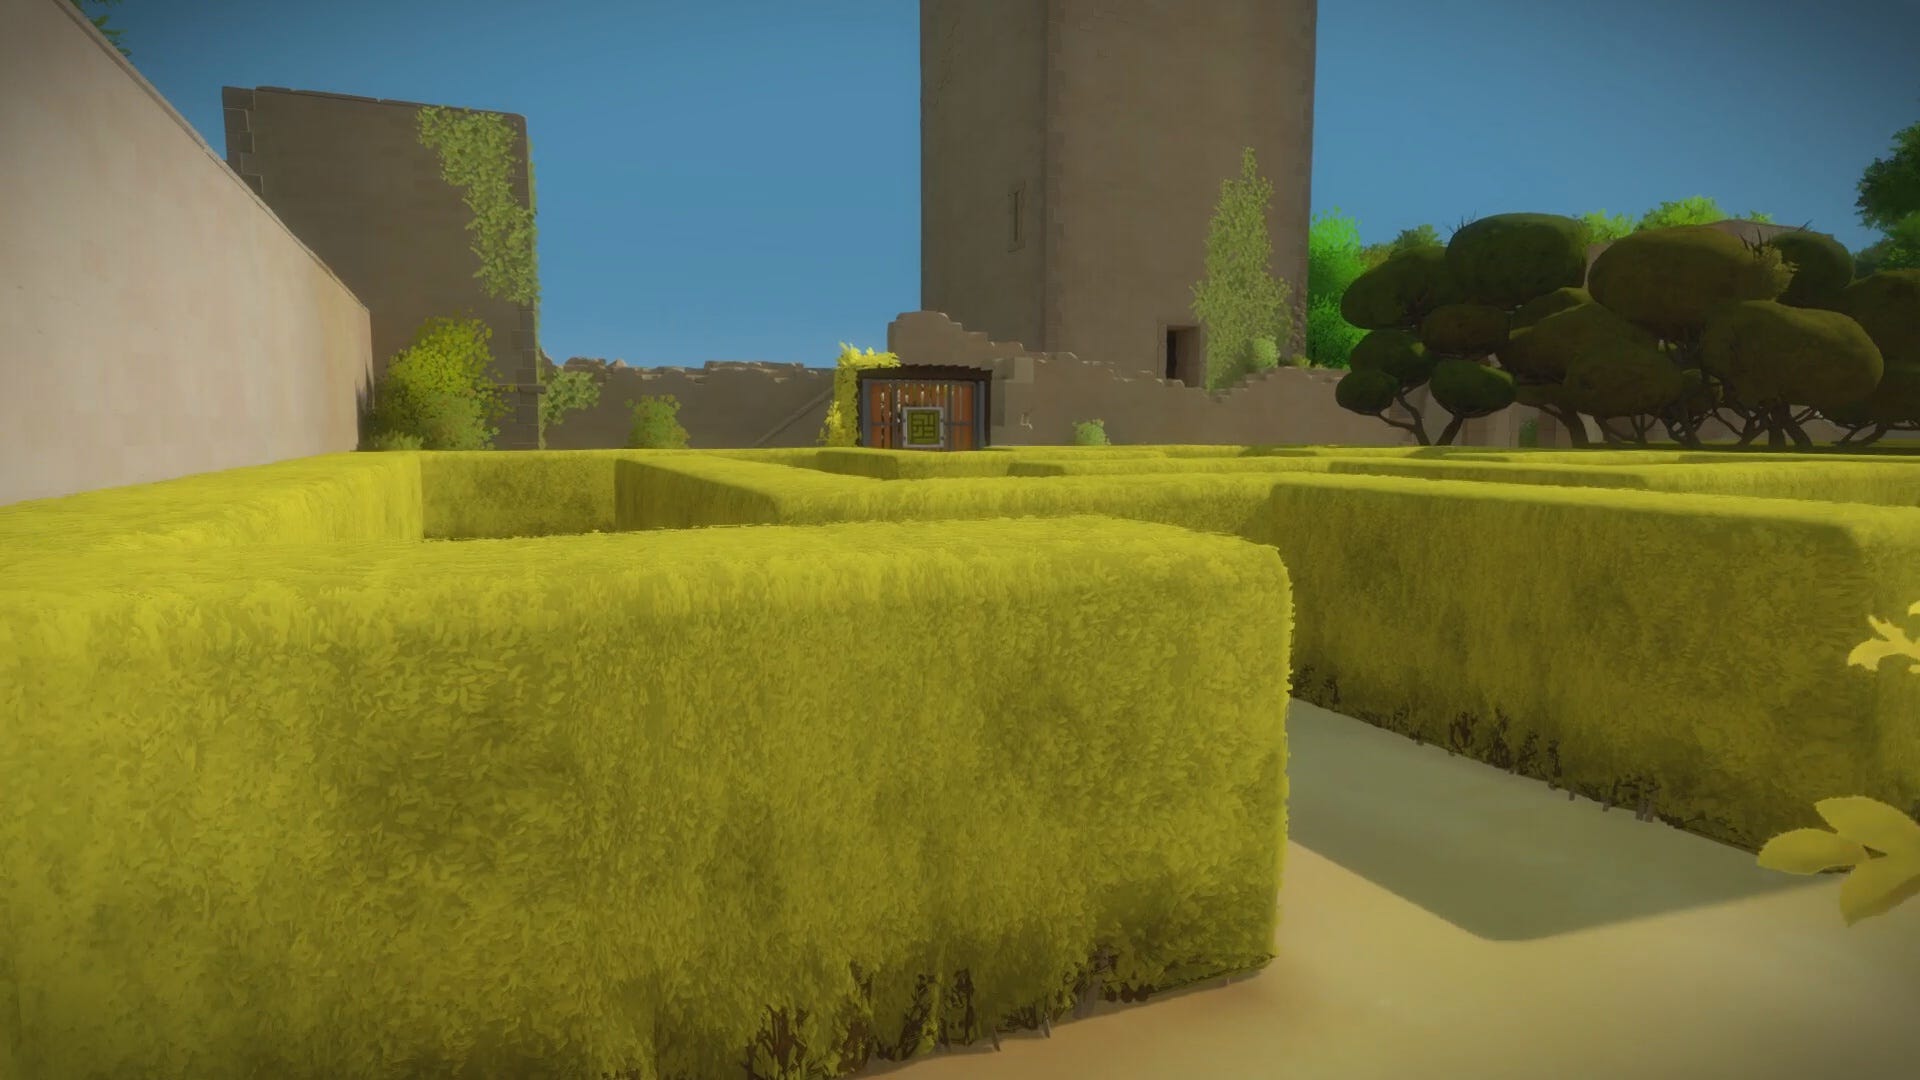
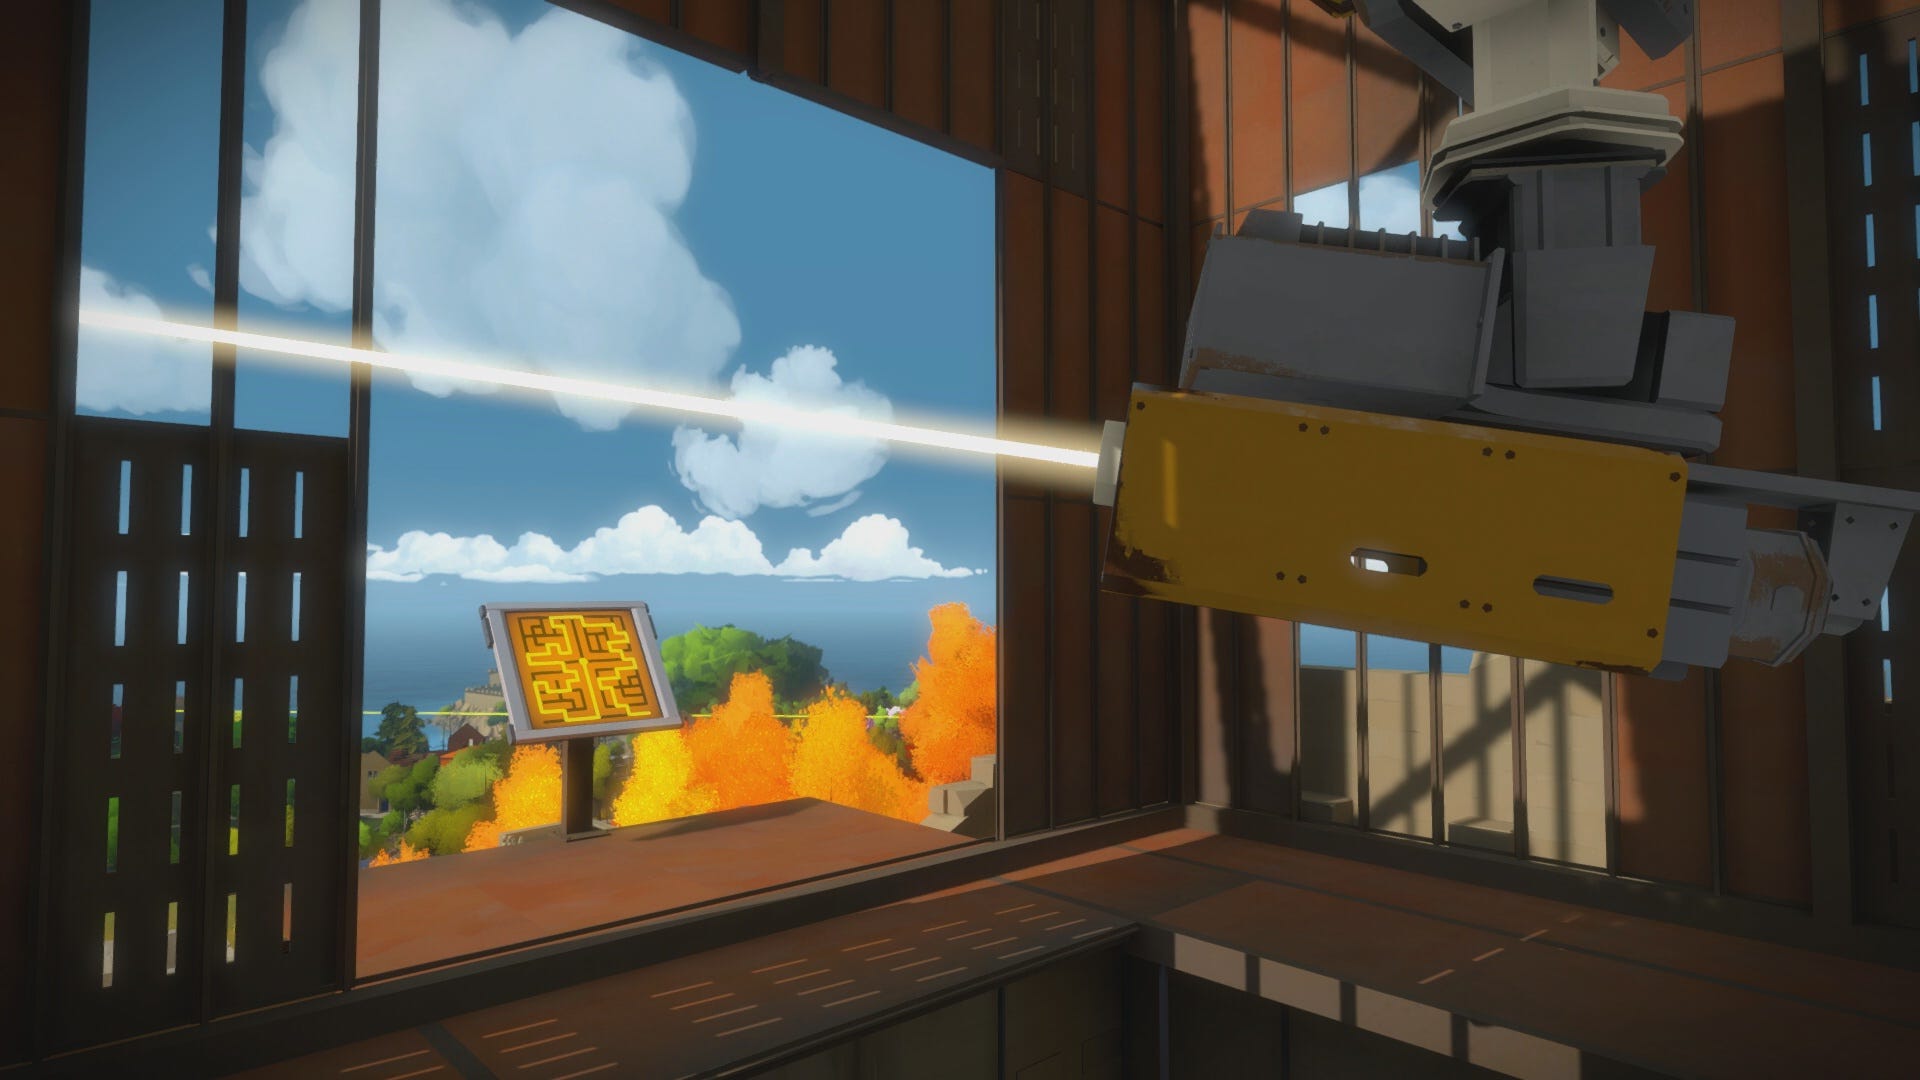
After completing the four hedge mazes, you have all the knowledge you need to activate the light beam in The Keep. Enter the tower in the center of the Keep, and climb along the spiral staircase all the way to the top. Here you will find a pair of puzzle panels, one of which is turned off.
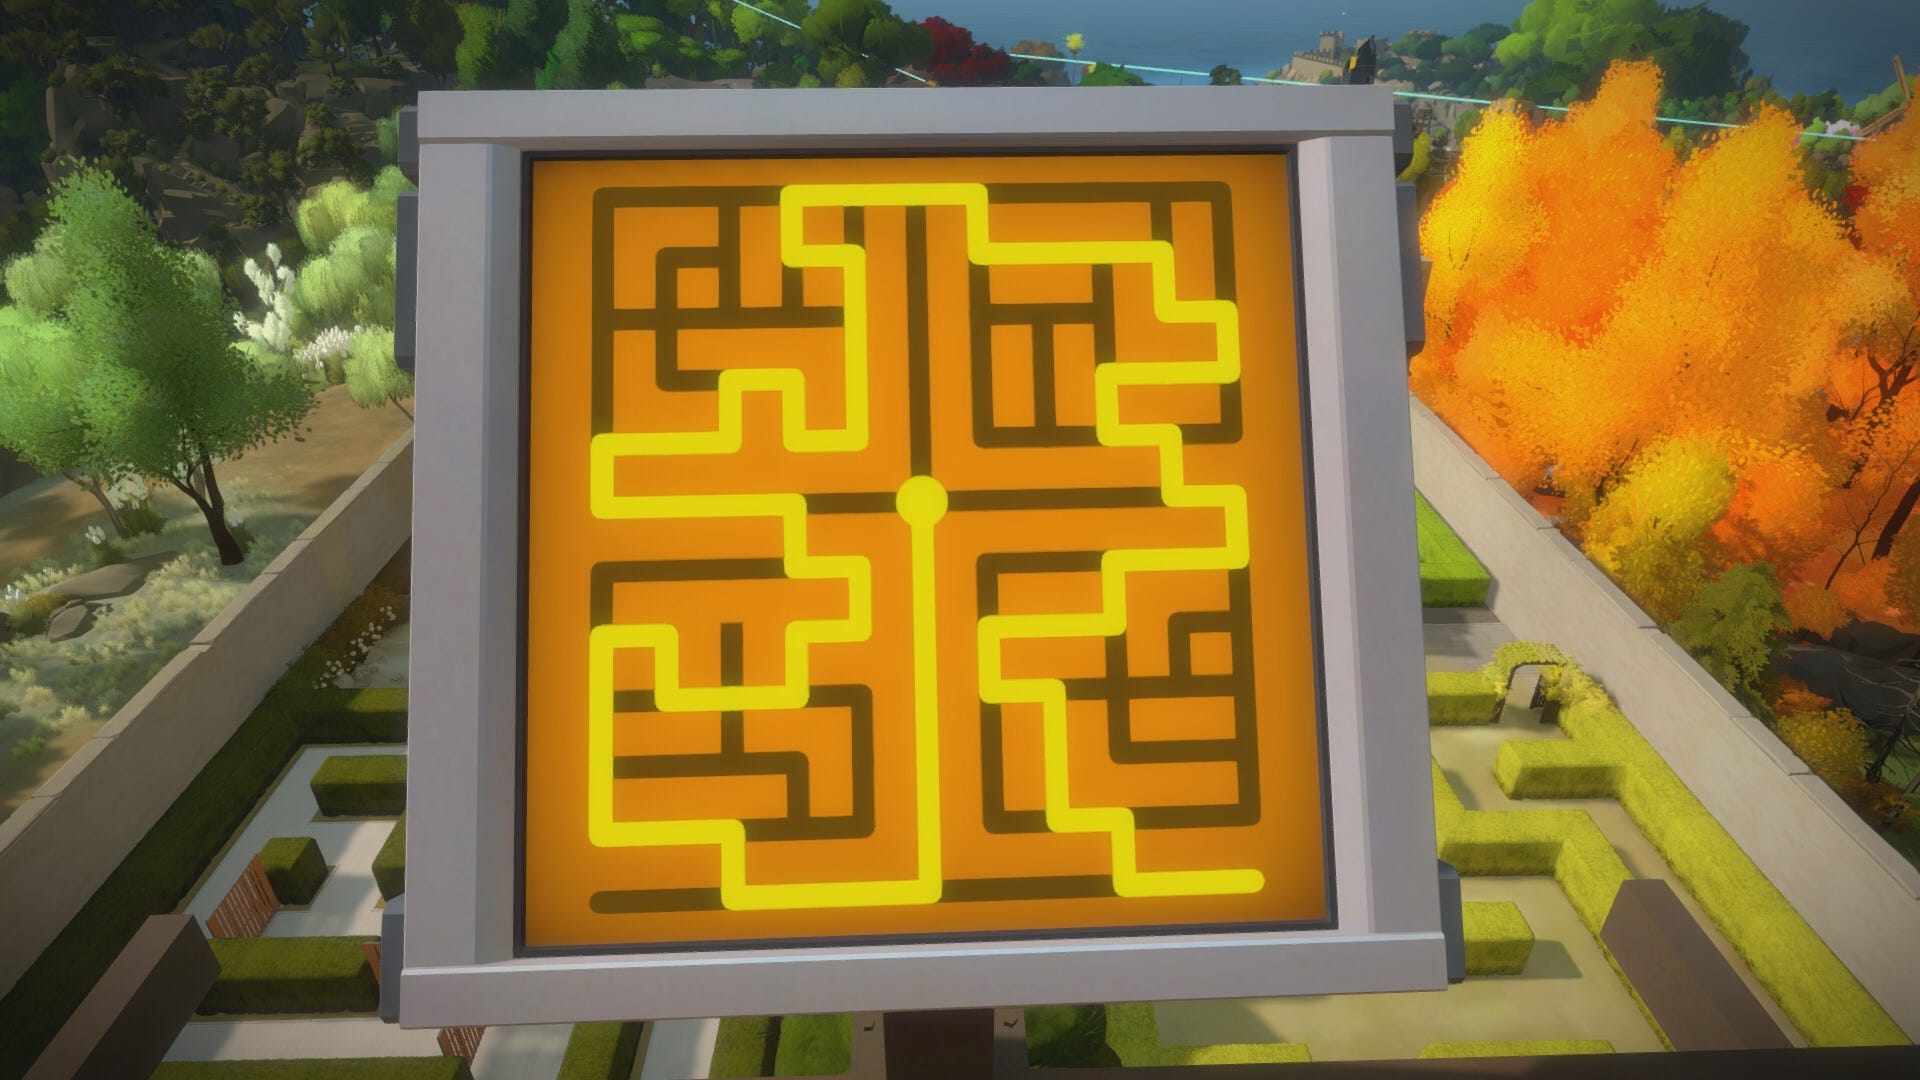
At the only available panel, you must retrace all of the paths you took through the entire hedge maze. Luckily, you have a nice vantage point overlooking the hedges if you need to refresh your memory. Starting from the center, trace a path through all four mazes. The correct solution will activate The Keep light beam.
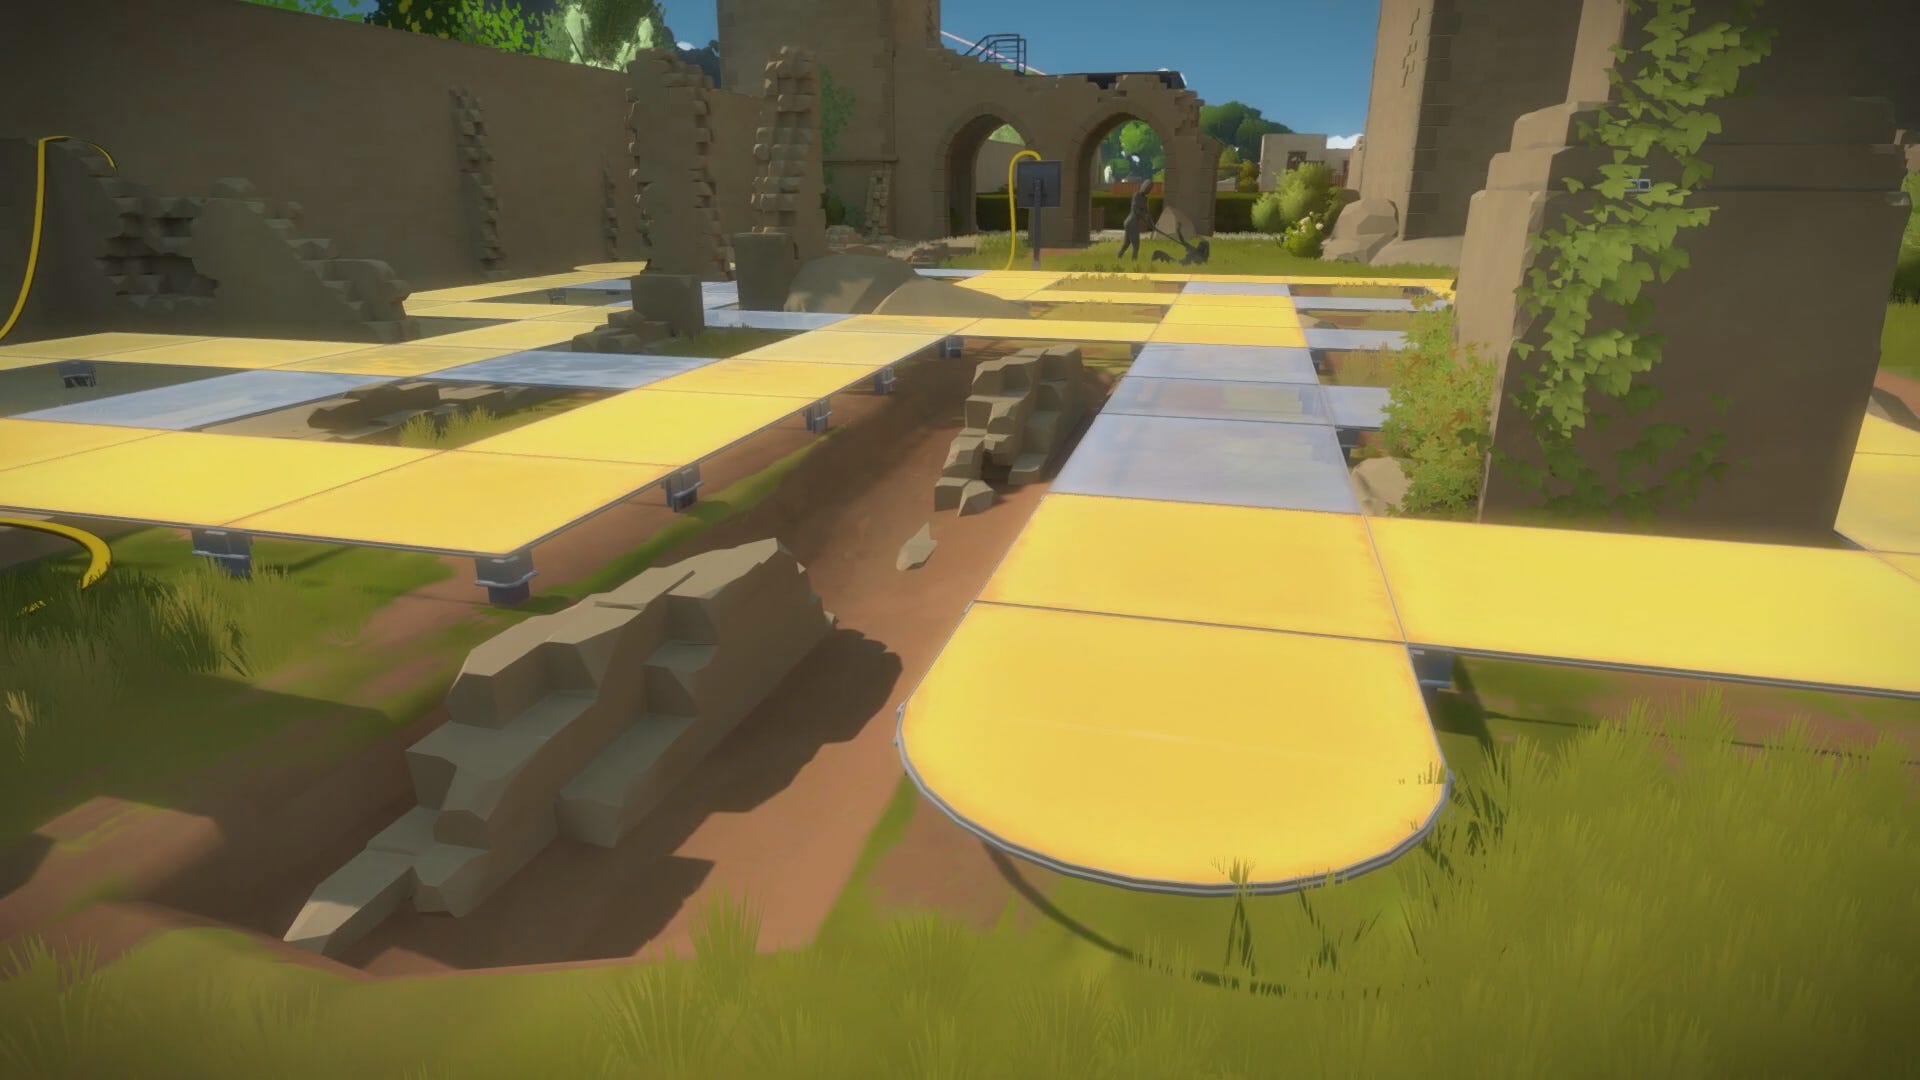
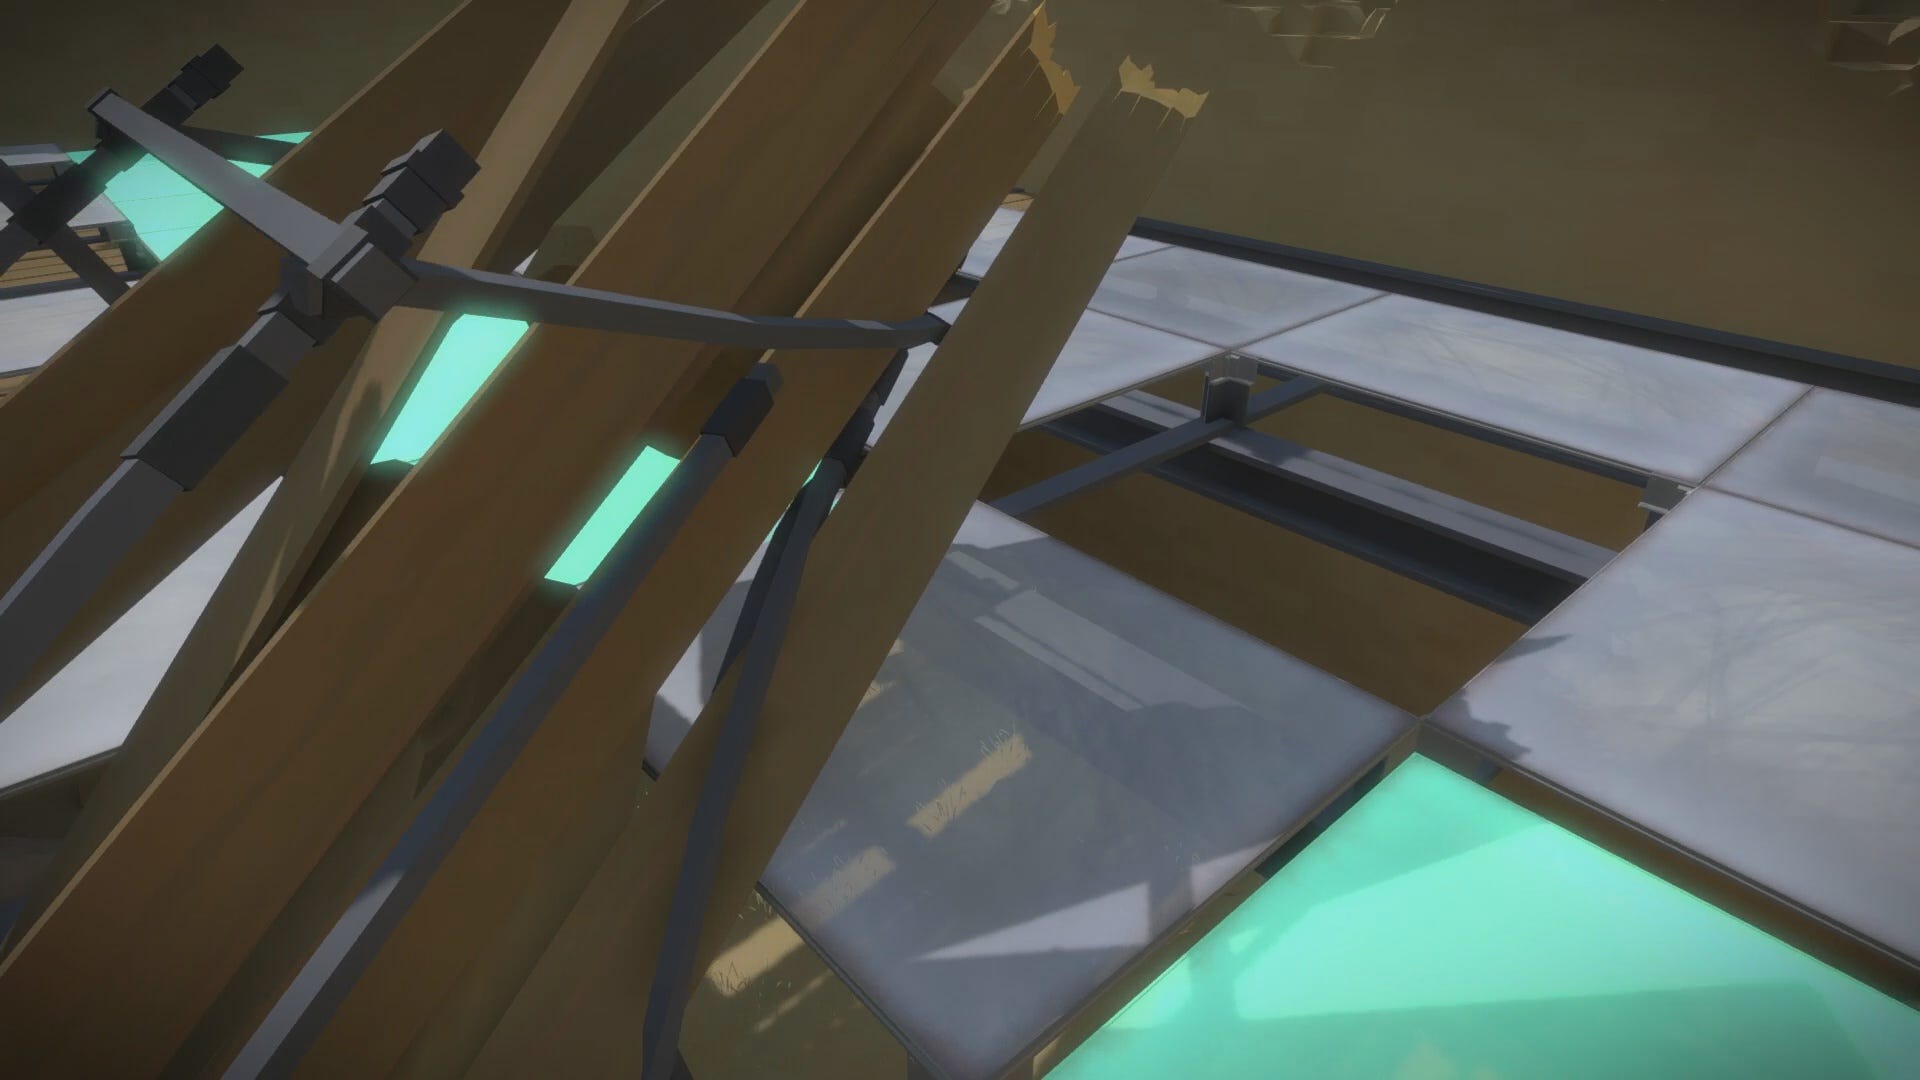
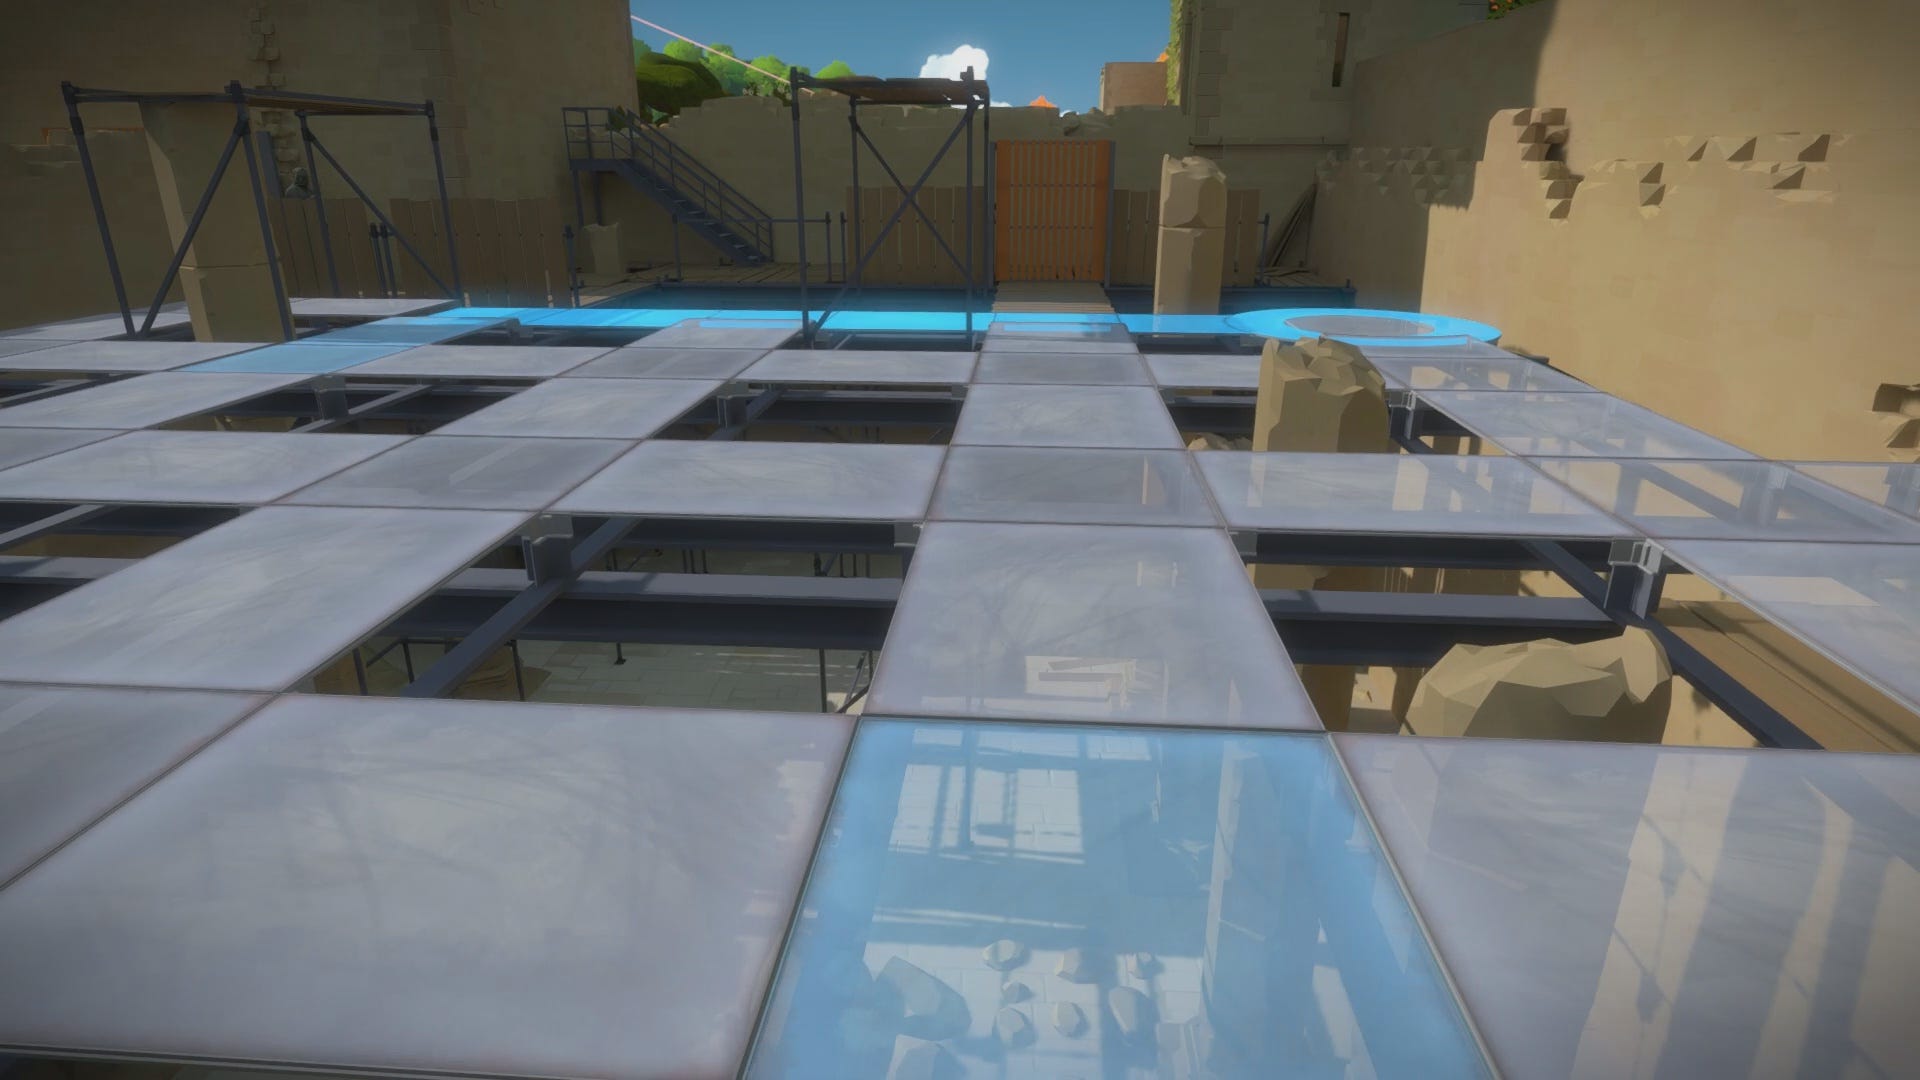
The next set of puzzles in The Keep are platform puzzles, where you must step on glass switches to input the solution on the puzzle panels. Since you have already activated the light beacon in The Keep, these platform puzzles are optional, at least for now.
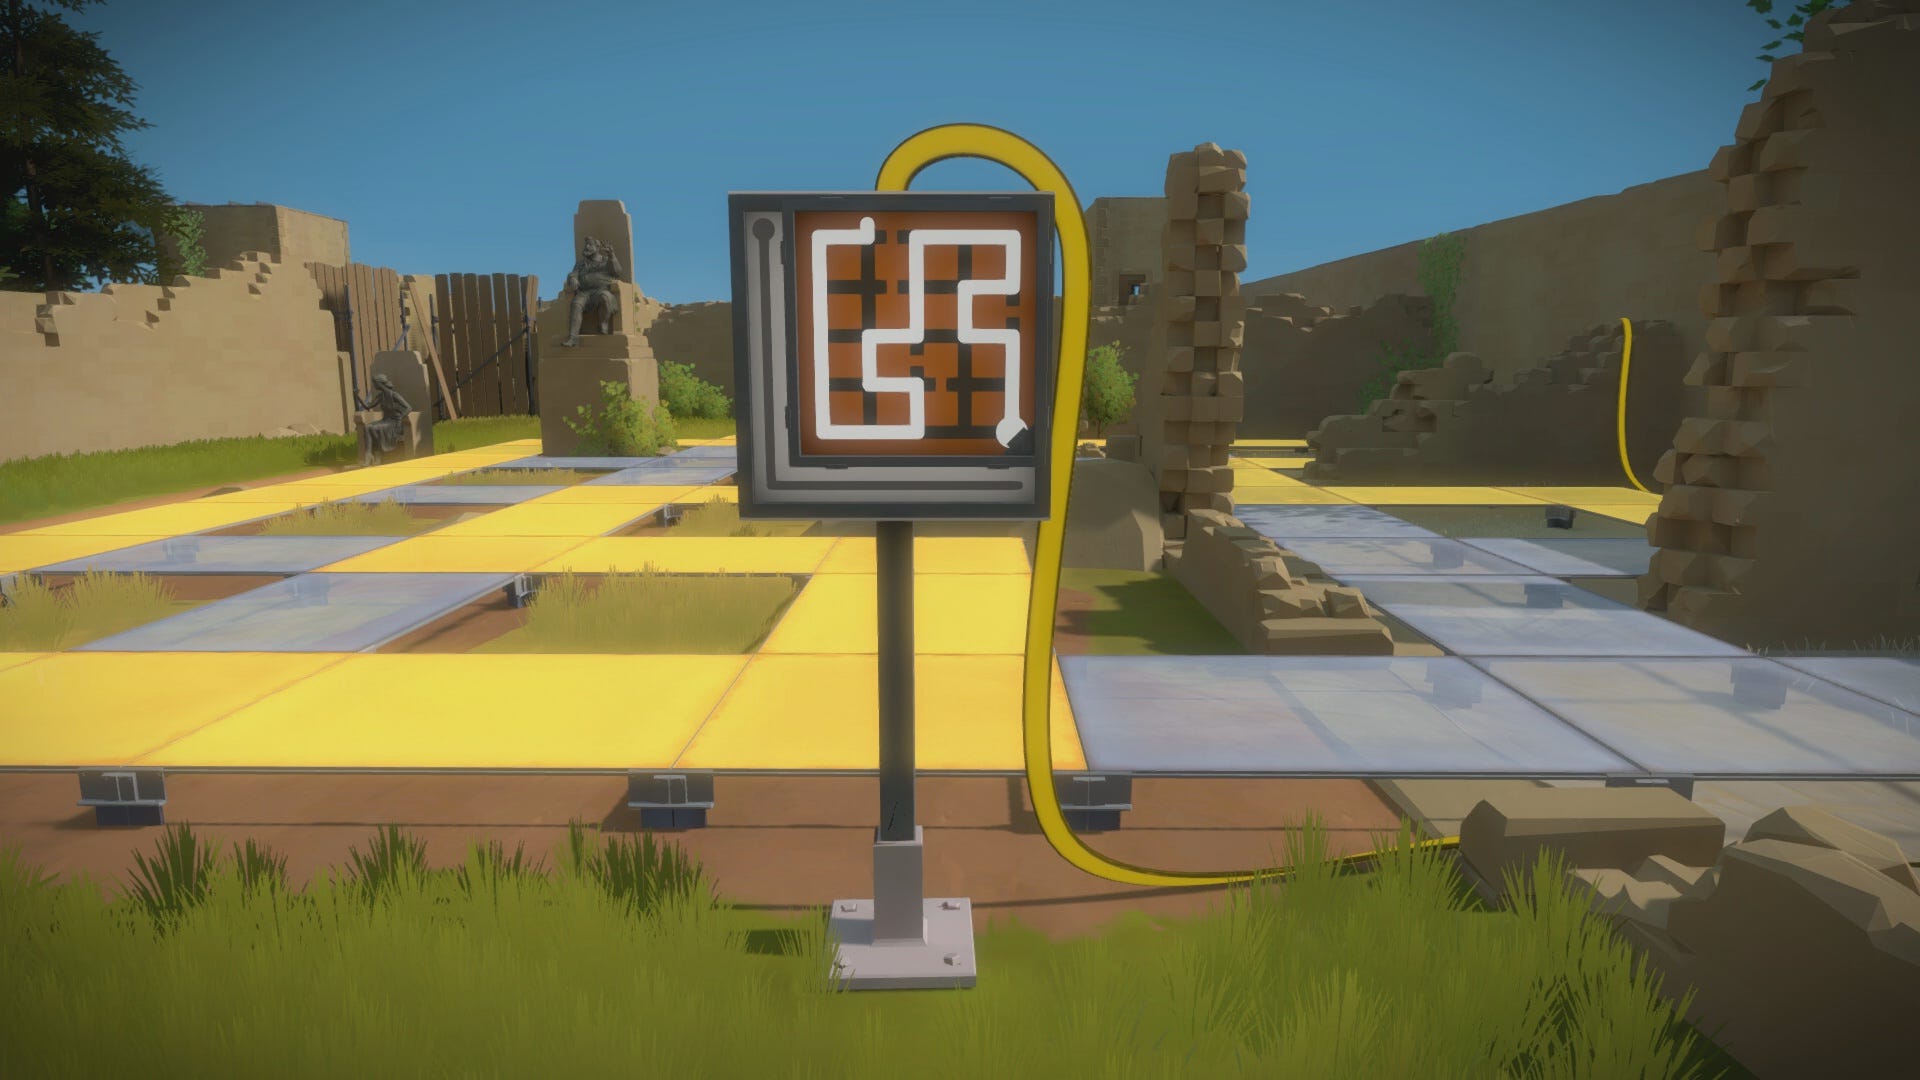
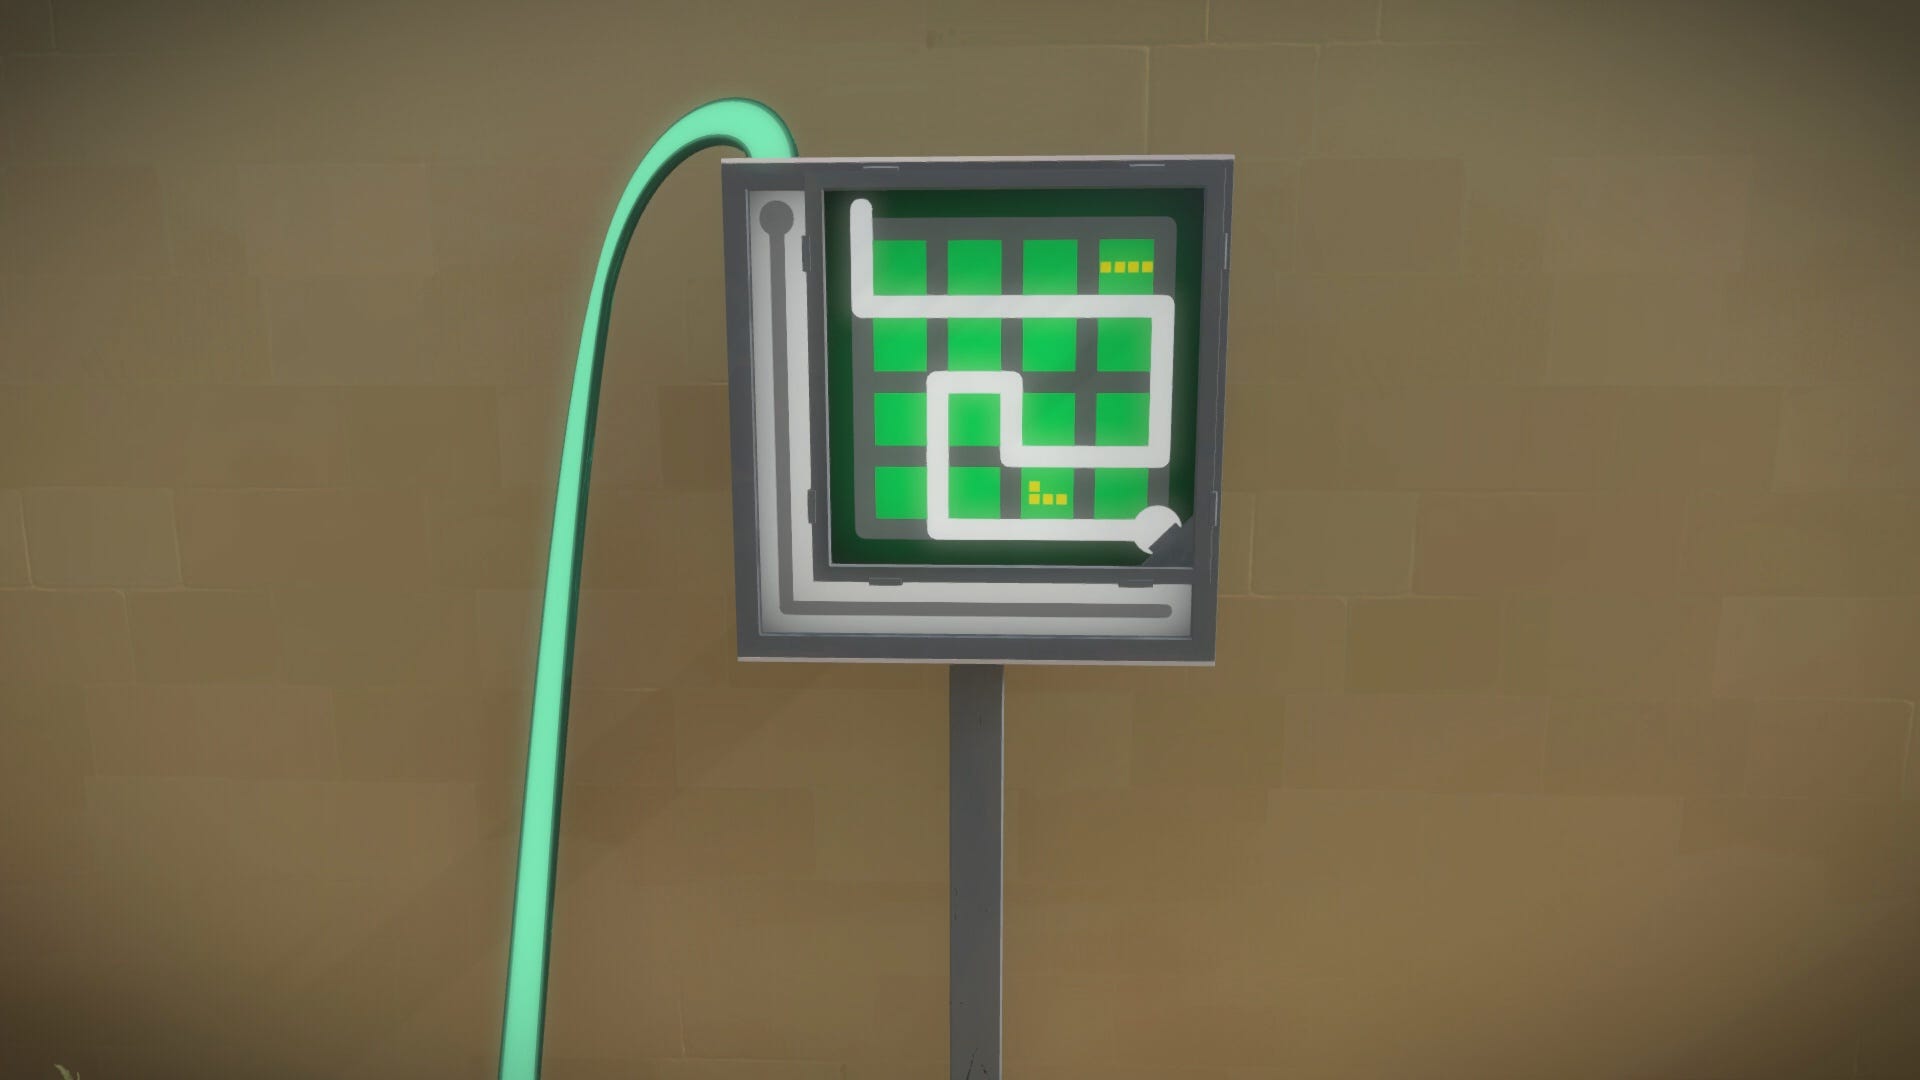
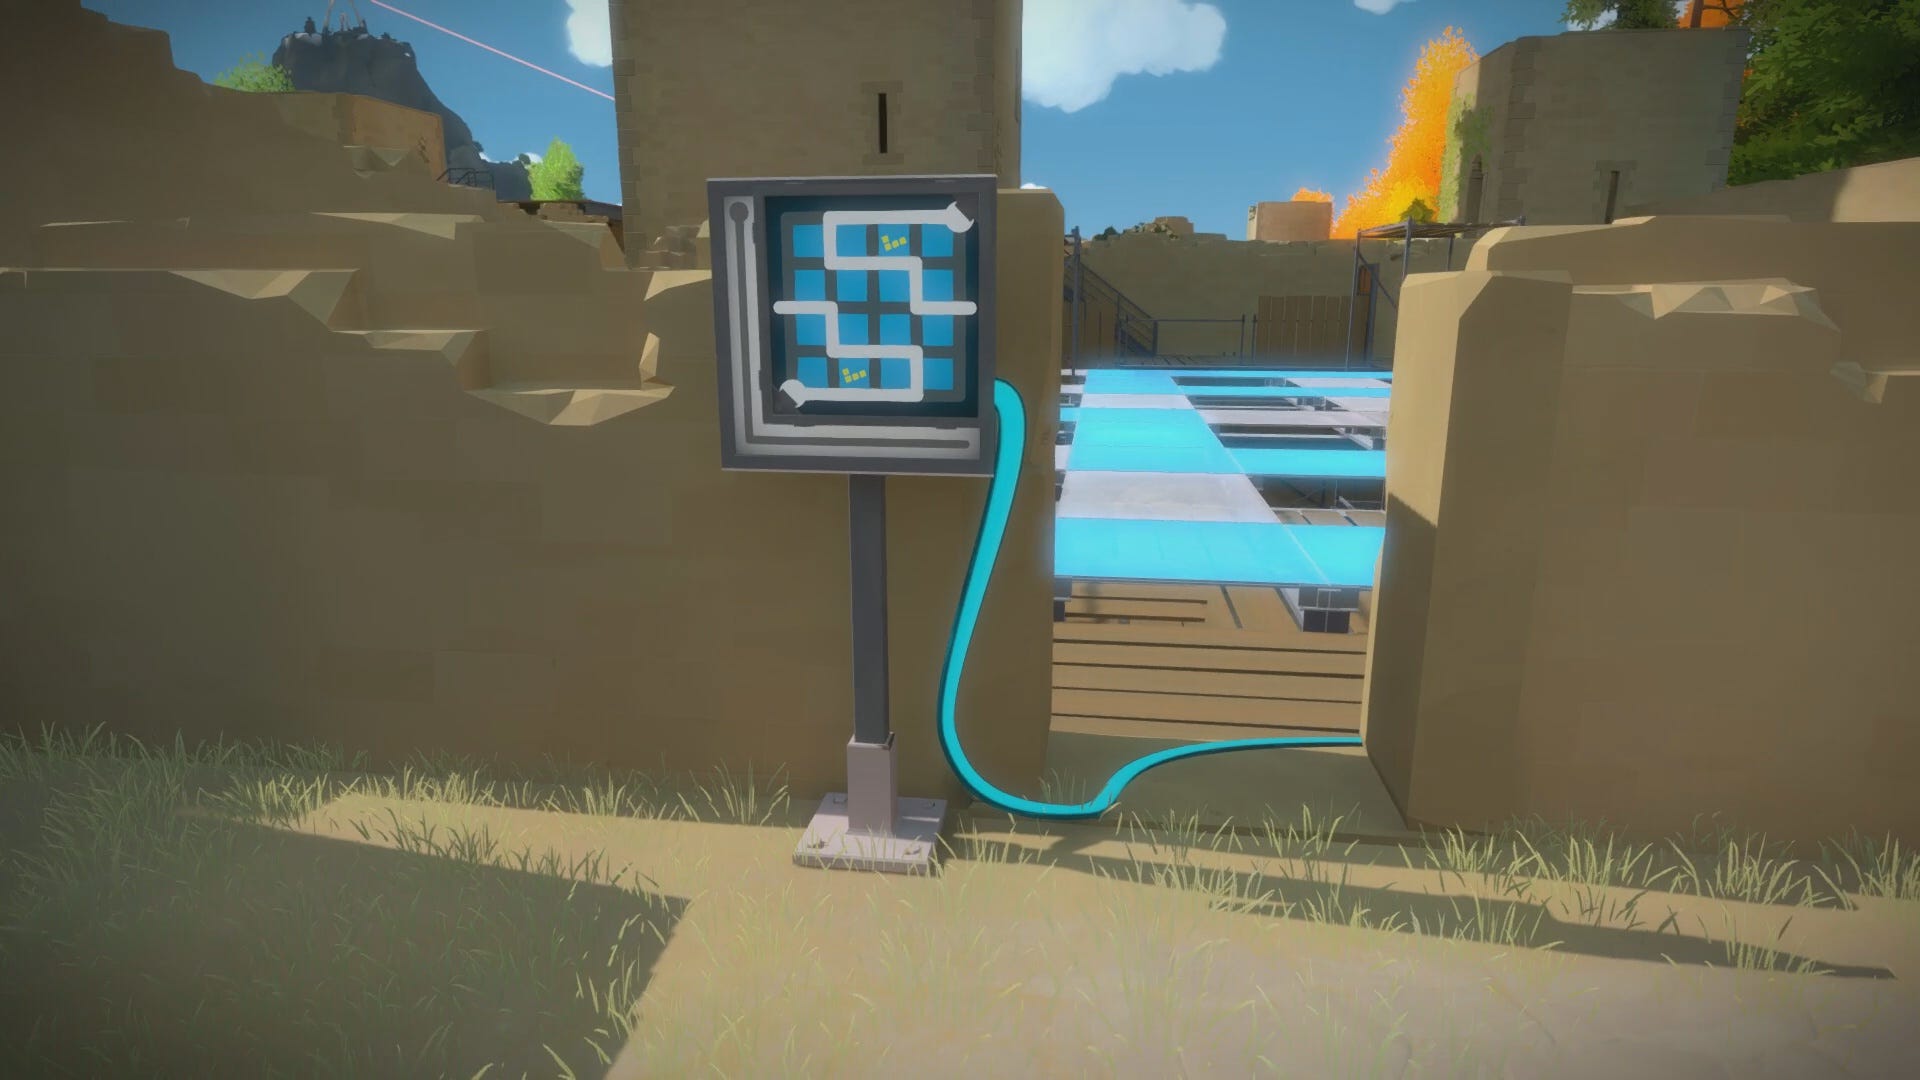
From the base of the tower, start at the puzzle closest to you on the right. The only way to sketch the solution on the panel is to walk across the glass platforms to illuminate them. We suggest solving the puzzle by hand on a piece of paper first, and then using that as a reference while walking on the platforms. If you make a mistake, you can go back to the main puzzle panel and use the L-shaped line to reset the platforms. The first solution is shown below.
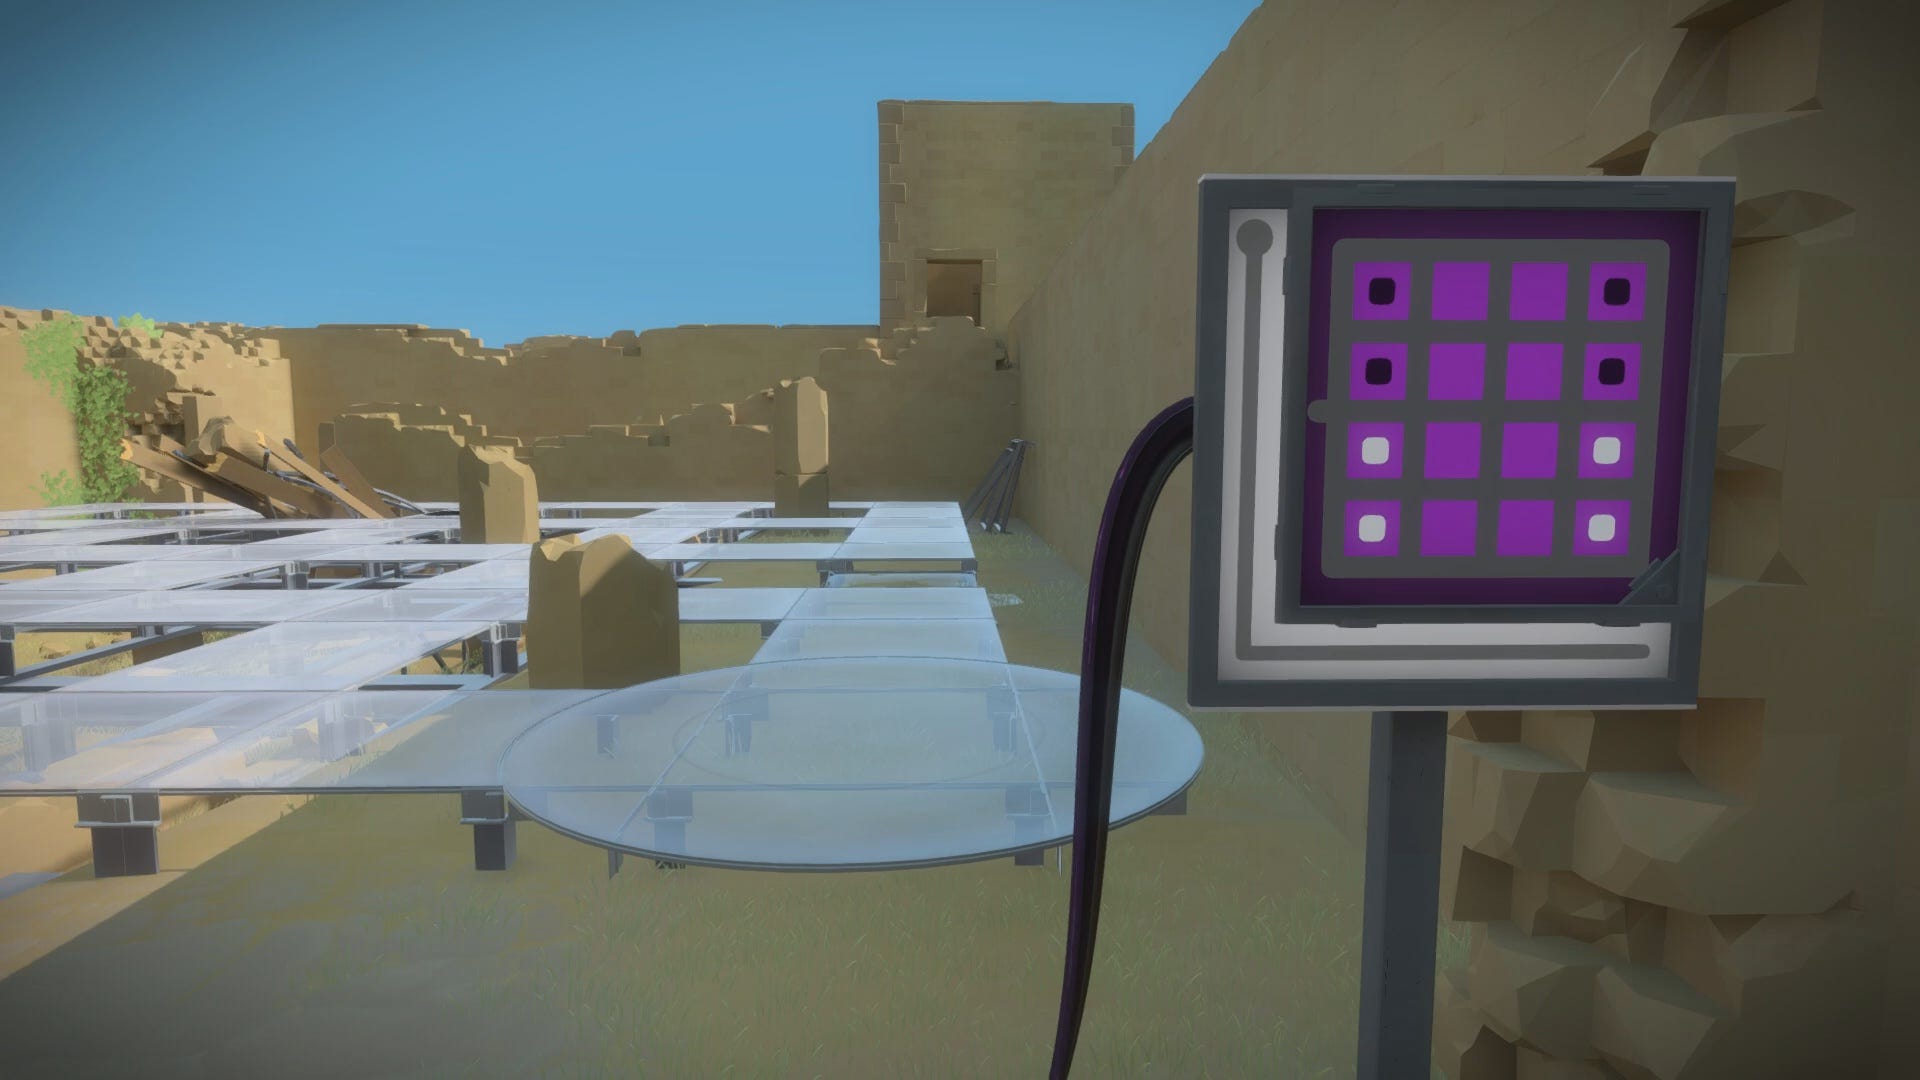
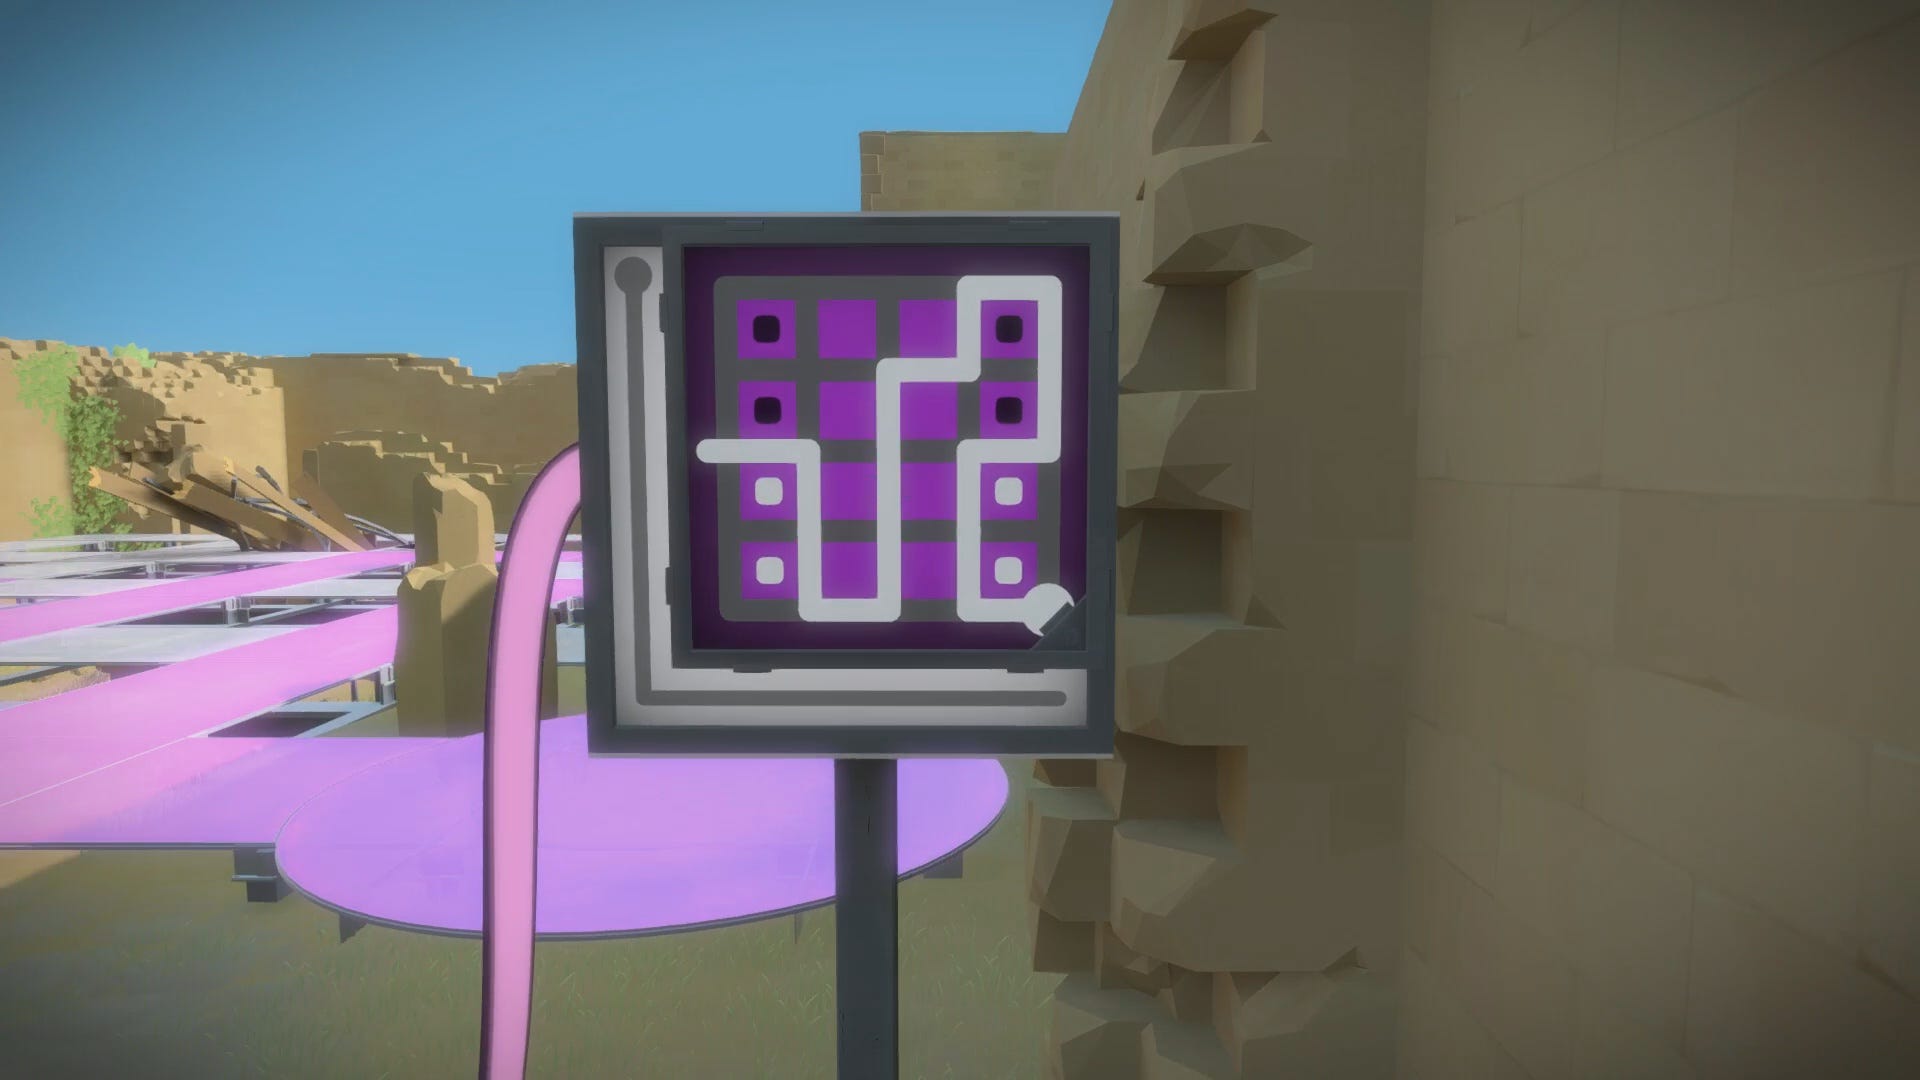
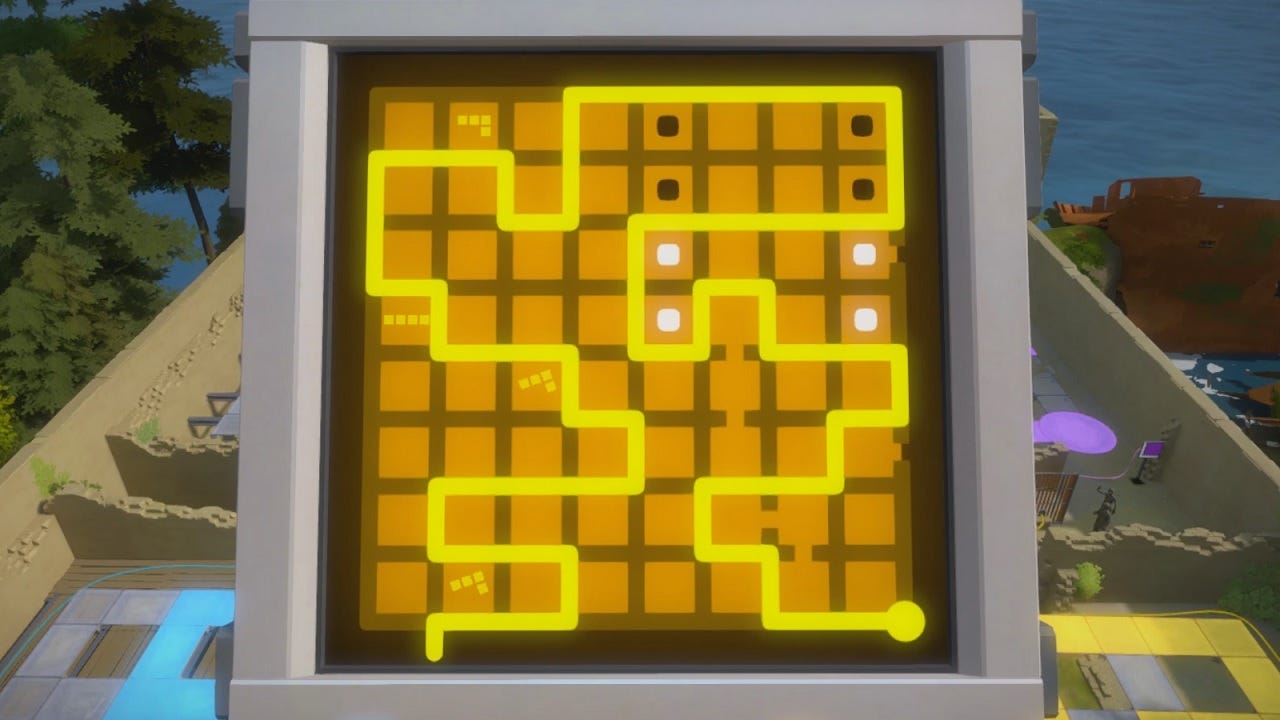
The same platform-pressing concept applies to all four of the puzzles in this section of The Keep. It’s the puzzle panels themselves that vary in type. The second platform puzzle is a dot isolation puzzle, which you may already be familiar with. The idea is to draw a path that separates sets of dots that differ from one another. If you need help with the solution, we’ve got you covered.
The third puzzle involves outlining a path that mimics the listed Tetris shapes on the puzzle graph. Draw the puzzle solution by hand before attempting to walk on the platforms. If you came up with the correct path, you will encounter a chunk of debris blocking your way across some of the platforms. Backtrack over the path you’ve taken, and use the wooden sections to avoid stepping on any unnecessary platforms while lighting your path. Your solution should look like the one below.
The final platform puzzle consists of another Symmetry puzzle, only this time you can’t see the mirrored path as you trace it on the puzzle panel. You can attempt to sketch this one by hand, but it seems somewhat easier to just eyeball the solution while stepping on the platforms. As you walk across the glass platforms, another path will be mirrored on the platforms across from you. Be mindful of any obstacles that the opposite path may encounter, and let those guide you to the solution.
After solving the four glass platform puzzles, head to the center of The Keep and ascend the tower once more. The puzzle panel that was previously turned off will now be available. The top of the tower overlooks all four platform puzzles and their solutions, so use these to trace the final solution on the panel here.
- Page 1: The First Puzzle and General Tips
- Page 2: The Symmetry Puzzle
- Page 3: The Desert Ruin Puzzle
- Page 4: The Monastery Puzzle
- Page 5: The Keep Puzzle
- Page 6: The Shady Trees Puzzle
- Page 7: The Marsh Puzzle
- Page 8: The Quarry Puzzle
- Page 9: The Jungle Puzzle
- Page 10: The Town Puzzle
- Page 11: The Bunker Puzzle
- Page 12: The Treehouse Puzzle
- Page 13: The Mountain Puzzle (Game Ending)