Destiny's April update: everything you need to know
Staff
7 years ago
Destiny April Update: Sterling Treasure patch coming today
Brenna Hillier
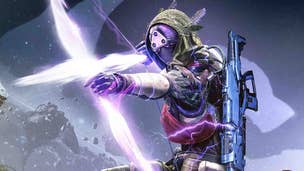
Destiny April update: a guide to hitting light level 335
Paul Davies
8 years ago
Destiny post-April update issues detailed, fall update teased
Sherif Saed
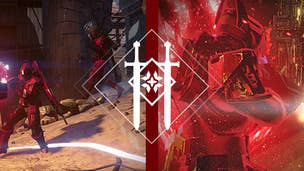
Destiny's Challenge of the Elders: How to beat Pilot Servitor
Destiny's Challenge of the Elders: How to beat Sylok the Defiled
Destiny's Challenge of the Elders: How to beat the Overmind Minotaur
Destiny: here are the known issues for the April update
Have a look at the patch notes for Destiny's April update 2.2.0
Stephany Nunneley-Jackson
Destiny: The Taken King's April update is live - go nuts
Destiny April update: how Bungie is evolving alongside its game
Destiny April update release time: get the info here
Destiny: here's a look at April's PlayStation-exclusive content
Destiny: here's the PlayStation-exclusive content coming with the April update
Destiny writing team gets another shake up as story creative lead exits
Today's Destiny maintenance period expected to last around five hours
Destiny: Crucible, Iron Banner, ammo, Exotic changes coming next week
Watch the final Destiny livestream detailing the April update here
Destiny's Zen Meteor is the new PlayStation-exclusive exotic weapon
Destiny's new reward packages won't end up as more useless Legendary Marks
Infusion changes, new gear, Sterling Treasure - everything from the Destiny stream
Destiny: Taken-style armor, weapons and new emotes coming next month
Watch the second Destiny livestream detailing the April update here
Destiny's April update fulfils an 18 month old promise
Destiny April update: here's a look at the new Strikes, Prison of Elders, quests
Destiny's April update has 335 Light, new Prison of Elders challenges, more
Watch the first Destiny livestream detailing April update here
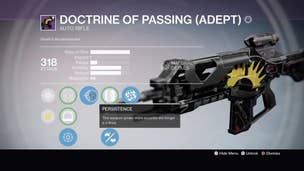
Destiny: Doctrine of Passing is the Crucible's new essential weapon
Bungie outlines schedule to reveal Spring Destiny update
Matt Martin
Taken Guardians? What to expect in Destiny's April Update
Destiny April update increases max Light, adds new PvE challenges and more
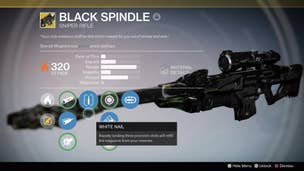
Destiny: the best sniper rifles for PvP
Destiny has great audio, and now we know why
Destiny: "Aggressive" anti-lag settings apply to all playlists next week
Destiny ridealong exposes design secrets of the Dreadnaught
Destiny is at its best in Iron Banner Clash
US PS Store sales knock some green off The Witcher 3, Destiny, Need for Speed, more
Destiny True Stories has become one of my favorite player created videos
Destiny Crimson Days 320 Ghosts yet to be delivered
Destiny update with less emphasis on SBMM rolls out
The Destiny road map has got me doing The Carlton dance
Halo 4 writer exits Mass Effect: Andromeda team to join Bungie
Destiny is getting its own Mega Bloks line
James O'Connor
Destiny: Crimson Doubles is a real heartbreaker
Destiny roadmap: spring update, expansion and 2017 sequel
Destiny: large new expansion separate from big spring update
Large new expansion for Destiny in 2016, full game sequel in 2017 - ActiBlizz Q4
Check out the sweet loot available in Destiny's Crimson Days event
Destiny Crimson Days emotes: Hotline Bling, Napoleon Dynamite, pricing
Destiny: February update and Crimson Days event live - here's the patch notes