Overwatch Orisa guide: kit, tactics, biggest threats and 28 other essential tips
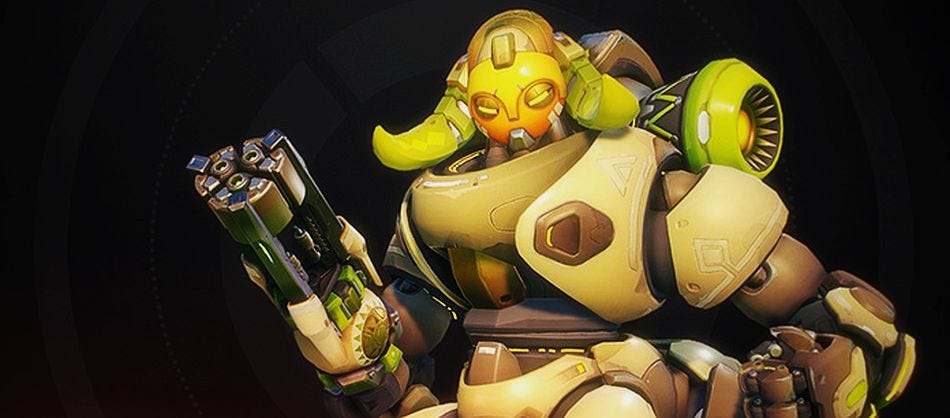

Orisa has finally been released after a fairly lengthy incubation period on the Public Test Region. Although she’s on restricted duties (no Ranked play for the next week!) we wanted to put together this guide for anyone looking to play her.
Orisa is an an anchor tank and is designed to wrestle for the same team place as Reinhardt. Her ability to erect protective barriers, mitigate incoming damage through Fortify and displace players thanks to her Halt! ensures she has a flexible kit.
What makes Orisa particularly strong, in the face of tough competition from Reinhardt, is the fact she can protect her team and still deal damage. Unlike her peer, she’s free to move and shoot with her Fusion Driver, from behind the safety of her Protective Barrier. Despite her barrier being weaker than Reinhardt’s equivalent, the ability to remain mobile and still look after your team shouldn’t be underestimated.

Let's begin by looking at her strengths, weaknesses, and kit.
Strengths
- Fusion Driver offers exceptional suppressing fire
- Fortify is fantastic for mitigating burst damage and avoiding crowd control
- Halt! is ridiculously strong on maps where players can be pulled off the edge
- Protective Barrier provides solid positional defence in enclosed spaces
- Supercharger is fantastic for a stationary team that’s defending
Weaknesses
- Fusion Driver has poor accuracy over long distances
- Protective Barrier is relatively poor in large, open areas
- Orisa is relatively slow - especially when firing - and becomes an easy target as a result
- Supercharger isn’t amazing when your team is trying to advance
- She isn’t great at being a solo “anchor tank”, unlike Reinhardt
Abilities
Fusion Driver
With an ammo count of 150 rounds, Fusion Driver should be constantly fired. Whether advancing or defending, only Soldier: 76 and Bastion can compete with its rate of fire. The one drawback to its abundance of ammunition is the fact its reload time is fairly lengthy at 2.5 seconds and you have reduced movement speed when firing. This makes Orisa particularly vulnerable when attempting to push forwards and unless she has her Protective Barrier and/or a pocket healer (preferably Mercy or Ana), she can be focused incredibly quickly.
Despite its mobility limitations and lack of ranged accuracy, the fact you can continually fire for over 10 seconds without the need to reload makes her fairly frustrating to deal with, especially if she’s bunkered down on a Control Point.
Halt!
Halt! fires a projectile that when detonated, or if it comes into contact with any surface, will pull enemies towards its centre within a 7.5 meter radius: those pulled are also slowed briefly. Unsurprisingly, the value of Halt! is opportunism in order to pull players out of safe positions or to drag them off the edge of the map. Although the projectile moves fairly slowly (20 meters per second) it can pass through barriers, but sadly won’t pull those on the other side.
Ideally, you want to position your shots so that Halt! passes along the outer edges of any barrier so that enemy players are still pulled when you choose to detonate. You’ll know when Halt! is within pull proximity to one or more players because it will cast a tether from itself, onto them; it’s at this point you should activate the ability again.

Fortify
Fortify reduces the damage Orisa receives by 50 percent and mitigates against all crowd control. Ana’s Sleep Dart, Roadhog’s Chain Hook or Reinhardt’s Earthshatter are some examples of abilities which won’t affect Orisa if she activates the ability in time. With a 10 second cooldown and 4 second duration however - with the cooldown only activating once the ability ends - you cannot afford to waste Fortify.
If you have a healer with you and unless you’re under serious pressure, try to save the ability for when an opponent utilises their Ultimate. The amount of damage reduction is higher than that of Bastion when in Sentry Mode, a level of defence not to be sniffed at. Be aware that even with Fortify active, Sombra can still hack you. It won’t cancel the effect, but will prevent further use of abilities once it expires, if the hack is still active.
Protective Barrier
Providing a small area shield, Protective Barrier is Orisa’s only means of defending herself and her team. With only 900 health and considering its limited width and height (certainly in comparison to Reinhardt’s Barrier Field) it’s easily killed and easy to flank around. Despite that, in confined spaces or when there’s little threat from the air, it’s undeniably useful.
Ideally you want to place the barrier so that if it is destroyed, you can still find cover or to use it as a brief stop-gap in order to creep forwards. Simply throwing the barrier down in the middle of a team fight will see it killed quickly and leave you and your team exposed. Unlike Winston, Orisa cannot drop her barrier down, deal damage and then escape with a giant leap, so it’s incredibly important that you fire her Protective Barrier out in key locations. I’ve found it works best in corridors or confined spaces where Pharah or Junkrat will struggle to fire over the top.
Supercharger
Supercharger increases the damage all allies deal by 50 percent as long as they remain within 25 meters of the device. The one downside to Supercharger however, is the fact it can be destroyed, lost (if you drop it off the edge of the map or down the Well in Ilios), or hacked (keep an eye out for Sombra). It’s best placed behind your Protective Barrier or behind fixed scenery that cannot be destroyed.
The line of sight required to receive the damage buff is fairly generous so you shouldn’t worry too much about placement or staying within its radius. As long as you don’t use it out in the open where it can be gunned down instantly, you and your team will benefit from it.
I would argue that Supercharger is fairly poor when on attack because the static nature of the buff - when your team is trying to advance - can be limiting. However, it’s often a good idea to drop it on a Payload (so it moves along with you) or to simply save it for when the enemy team are heavily cornered.

How to play Orisa
Orisa as an anchor tank relies heavily on her team. While she might be a competent hero on her own, packing significant fire-power with her Fusion Driver, she’s incredibly vulnerable to aerial attacks and being flanked. Her Protective Barrier, despite offering reasonable mitigation, is ill suited to open areas and instead is ideal for linear play in confined spaces.
"With her lack of mobility and inability to damage multiple enemies at once, Orisa needs to not only surround herself with her team, but she has to rely on them when she’s under attack from multiple angles."
With her lack of mobility and an inability to damage multiple enemies at once, Orisa needs to not only surround herself with her team, but she has to rely on them when she’s under attack from multiple angles (she’s a fairly easy target to hit due to her size).
Pairing with Zarya or Winston works exceptionally well as the layers of shielding these provide, combined with her Fortify, can allow Orisa to not only withstand large amounts of punishment, but to also creep forwards at a steady pace.
If you can, take side-routes to an objective as opposed to the wider, primary spaces, as this will not only prevent heroes such as Pharah and Tracer from attacking you, but will also maximize the effectiveness of your Protective Barrier and the relatively inaccurate fire of Fusion Driver from long distances.
On the subject of your Fusion Driver, the best thing you can do is lead your shots (your projectiles are relatively slow at maximum range) while resisting the urge to constantly reload. Its large magazine size and slow reload should see you empty the clip before attempting to keep your ammo topped up.
It’s also worth noting that if you’re trying to escape or move quickly from one location to another, resisting the urge to shoot is key if you don’t want to suffer the movement penalty.
Finally, the long cooldown of Halt! and its slow movement speed can make the ability challenging to use effectively. However, on maps such as Ilios or Lijiang Tower where there’s a significant quantity of opportunities to pull players to their deaths,
Orisa's 5 biggest threats
Pharah: Her aerial prowess makes Pharah difficult for Orisa to deal with. Orisa can return fire with Fusion Driver, but its relative inaccuracy at maximum distance still sees Pharah have the advantage. Unless you hug your Protective Barrier or have a Soldier: 76 on hand to pick her off, Pharah can be frustrating to deal with.
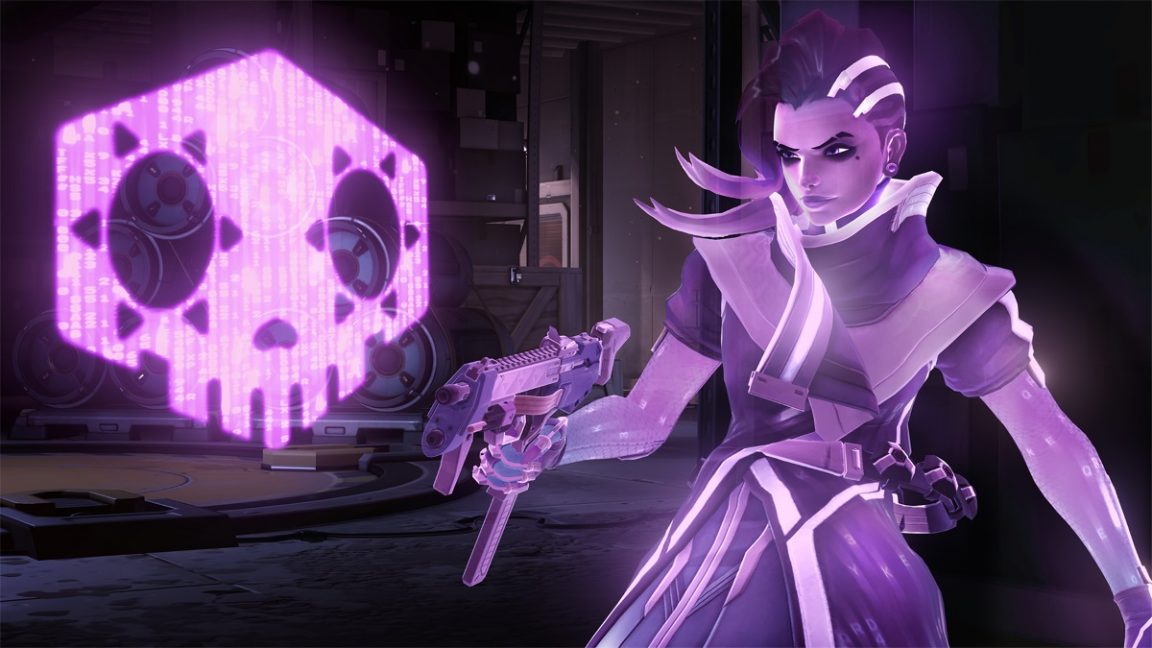
Sombra: With her recently improved kit, Sombra can make life fairly miserable for Orisa. Her large size makes landing a successful hack against her fairly easy. If you’re hacked your lack of mobility will see you focused incredibly quickly with little you can do but hope you find cover or have your team peel for you.
Junkrat: The small size of Protective Barrier and Orisa’s inability to cover above her (unlike Reinhardt who can angle his Barrier Field) allows Junkrat to cut her down fairly easily. He can rip through Protective Barrier incredibly quickly leaving you vulnerable and can use Concussion Mine to knock you away if you’re slow to use Fortify.
Soldier 76: Although your Protective Barrier has the potential to mitigate a large amount of incoming fire, a good Soldier: 76 will flank you often. When you do begin to use Fusion Driver, outside of the confines of your barrier, your large size combined with slow movement speed allows him to repeatedly land head-shots against you.
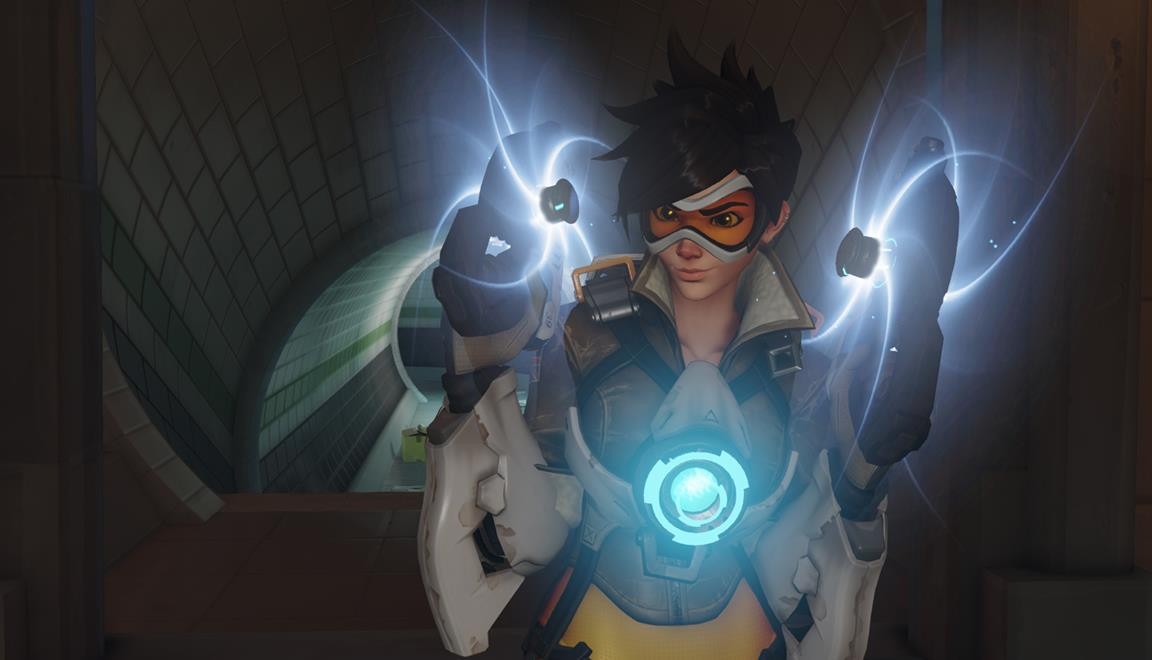
Tracer: As a final threat, Tracer can be particularly stressful to deal with. Her rapid attacks, Orisa’s slow movement speed and static Protective Barrier, allows Tracer to run rings around you. When you’re moving slowly while shooting, Orisa becomes one of the easiest targets for Tracer to land her Pulse Bomb on.
Recommended maps for Orisa
Watchpoint: Gibraltar: A relatively linear map that lacks width and without too much verticality, Orisa can zone well with her Protective Barrier. Its width can cover most of the Payload route, while heroes such as Pharah and Tracer are only troublesome at the final stage. As the map becomes enclosed through Control Point one and two, Orisa can really excel.
Hollywood: Whether attacking or defending, Orisa does well here across all stages. The first choke-point leading to the Control Point allows her to make excellent use of her Protective Barrier, while the moderate distance from the entrance to the Control Point itself really favors her Fusion Driver. There’s also opportunities here to make good use of Halt! to pull players from the buildings.
King’s Row: I would argue that King’s Row is her strongest map simply because it’s so confined, across all stages. The narrow streets, abundance of chokepoints and opportunities on the final stage to pull players to their deaths allows Orisa to excel whether she’s attacking or defending.
Ilios: Similarly to King’s Row, Ilios has lots of potential for using Halt! to pull players to their deaths, while Fortify is invaluable at ensuring you in turn aren’t knocked off. The enclosed spaces for each Control Point (with the exception of Well) ensures she can make amazing use of her Protective Barrier. Even on the final stage, she can still hold the Control Point and make use of the abundance of buildings to find cover and defend her team.
Lijiang Tower: With lots of cover and Control Points that - for the most part - have little aerial exposure, Orisa can comfortably attack and defend her team with little threat of being knocked off and with plenty of opportunities to use Halt!.
Essential tips for playing Orisa

Now you're fully up to speed with Orisa's kit and tactics, here's another 28 essential tips to help you win the match.
1. The movement speed slowdown when firing Fusion Driver is significant and makes Orisa a fairly easy target to hit (especially for Hanzo and Widowmaker). If you need to escape or want to quickly engage, it’s best to resist firing.
2. Most players I know have a constant habit of reloading. This isn’t ideal for Orisa as her magazine is huge (150 rounds) and the reload time is lengthy (almost 3 seconds). Resist the urge and instead fire until empty, unless you have a quiet moment.
3. Fusion Driver doesn’t suffer any fall-off damage at maximum range but is fairly inaccurate. Don’t be afraid to poke while leading shots when advancing.
4. Fusion Driver is strongest at close and medium ranges. The fact it fires 12 rounds per second can allow Orisa to rip through most heroes incredibly quickly (Headshots are also a possibility!)
5. Don’t just fire Halt! out in the hopes of grabbing someone. Look for players on balconies, buildings or near to the edge of the map so that they can be easily pulled off.
6. If the enemy team has anyone with a barrier, it’s best to always fire Halt! on the edge of said barrier so it can still pull when detonated.
7. Coordinating with your team as to when you’re going to use Halt! so that they can follow up can be challenging. Try to let them know over voice-chat so that they can prepare their Ultimates.
8. Fortify can block just about every single crowd control ability but it’s important to assess which you want to mitigate. I would suggest anything that would cause your death (Reinhardt’s Charge) or prevent you from functioning (Ana’s Sleep Dart) are a higher priority than McCree’s Flashbang or Symmetra’s Sentry Turrets.
9. If you use Fortify when Reinhardt is using Charge against you, he will be stunned - not you.
10. Fortify can allow Orisa to walk out of Zarya’s Ultimate - be sure to have it ready if she’s on the opposing team.
11. Damage reduction in Overwatch is limited to 50% - don’t ask for Nanoboost from Ana unless your Fortify is on cooldown.
12. Protective Barrier deploys in a similar fashion to Sombra’s Translocator (it’s lobbed out). The concave shield - shaped a little like a Hockey net - will be created on first contact with the floor and its cooldown begins the moment it’s fired.
13. It’s a good idea to fire Orisa’s Protective Barrier into the air. The cooldown will begin while the Protective Barrier is travelling and ideally - if you fired it straight up - will see you only have a 7 second cooldown when it touches the ground.
14. The remaining health of your Protective Barrier is displayed on your HUD. Keep an eye on it and find cover just before it breaks.
15. Orisa cannot have two Protective Barriers active at once. If she attempts to, the first will disappear.
16. If Orisa dies, her Protective Barrier will remain. If you know you’re about to bite the dust, be sure to cast a barrier out so your team can benefit from it while you respawn.
17. The small size and health pool of Protective Barrier pretty much ensures you and your team can’t use it for long and if you choose to, you’ll need to hug it very close. It’s best to look at the barrier as a temporary barricade that you can move to, before finding cover somewhere else.
18. Orisa’s Supercharger only has 200 health. Be sure to place it where it can’t be easily killed.
19. If the enemy team has Sombra, be sure to have eyes on her when you use Supercharger - she can hack it to prevent the damage bonus.
20. Supercharger cannot be destroyed by D.Va’s Defense Matrix as it isn’t considered a projectile. Don’t worry too much if she’s about.
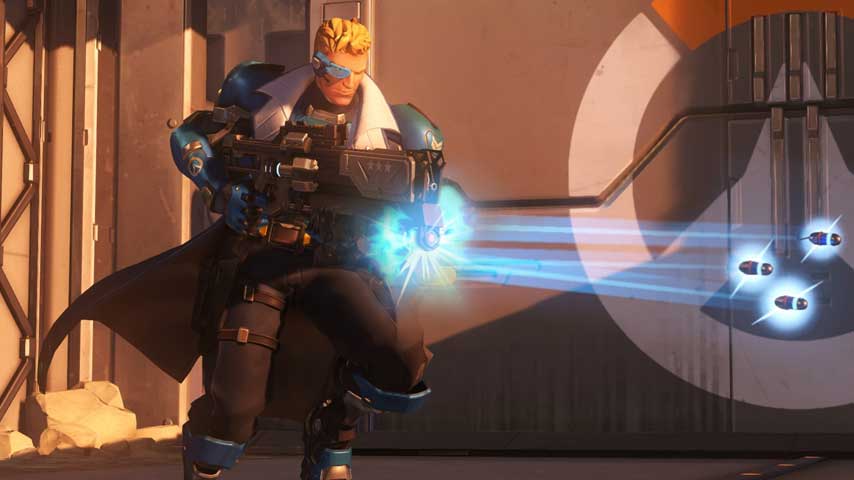
21. Supercharger stacks with Nano Boost so one player on your team - as long as they remain near the drum - can receive a damage increase of 100% (pick Soldier: 76!)
22. The line of sight for Supercharger is fairly generous but if half the drum is blocked, you won’t be tethered or receive the buff.
23. Mercy’s damage boost does not stack with Supercharger - I’m not sure why.
24. It’s best to place the drum behind fixed scenary that can’t be destroyed. Your team is then free to use your Protective Barrier while receiving the damage boost.
25. Don’t drop your Supercharger down the Well in Ilios. We’ve seen it done!
26. Orisa isn’t an amazing solo Tank (in comparison to Reinhardt) so I’d sincerely recommend you encourage your team to pick-up Zarya or Winston.
27. Orisa works best with Mercy or Ana but Lucio proves particularly useful with his speed-boost, which can offset your movement speed slow when firing.
28. Although we didn’t include Genji in our threat list (he’s fairly easy to deal with) be sure to engage your brain when fighting him. Don’t just unload your Fusion Driver into his deflect!
Have some advice for Orisa? Want to provide us with a tip for her gameplay? Let us know and we’ll add them to this guide!