Destiny: The Taken King - how to beat the Project S.A.B.E.R. Strike
Visit everyone's favourite grumpy Russian AI and take down an overgrown shank in the Project S.A.B.E.R. strike.
Destiny: The Taken King - how to beat the Project S.A.B.E.R. Strike
Project S.A.B.E.R. is a fun strike, taking us through new environments as we deal with an incursion against Rasputin, Earth's last known surviving Warmind.
The action kicks off on the Forgotten Shore, so grab your Sparrow and zoom off towards the Grottos. Head up the curving path towards the path to the Refinery and you should be prompted to wait for a warsat; get your ass off the path to avoid being hit.
This battle's much like a standard Public Event warsat defence, but the Taken are pretty tough opponents; if you've never faced them before, you should be especially careful of the Captains, which fire large blasts of energy that can pass through cover and will blind you briefly.
As ever, things go faster if all three of you stick to the upload zone, so do your best to stay close by, The time limit is pretty generous, though, so evacuate if you need to.
When the upload is complete, clear any remaining threats then head down to the base of the cliff - you may remember this bunker backdoor from hunting the Silent Fangs in House of Wolves. Head into the complex.
Inside you'll face the Taken, usually dominated by Vandals and Psion. The arenas are narrow, with limited cover and low ceilings, so there's little room for tactical manoeuvring. Stick together, move slowly, and clear threats at a distance wherever possible. Controlling grenades and supers can be a huge help, and any area of effect attacks will go down a treat. Just be wary of rockets in enclosed spaces!
How to open the door in Bunker War-2
When the first room is clear you'll be prompted to manually jumpstart Rasputin's systems. The radar indicates one end of the room where you should see a small opening in the wall. Lob a grenade down the tube; it's finicky but the explosion should open a pair of hatches at the other end of the room. Rockets can also work.
The hatches that just opened lead to two very tight corridors. About halfway along each one you'll see a bright orange trapdoor; shoot to open a fall into the next area.
Down here you'll see two tracks with two electrical currents travelling from the far end towards you. Advance to the far end along the middle track, ducking around the obstructions between blasts of electricity.
Duck into the alcove on the right and you should see an electrical gate blocking the path forward. Look for an interactive object in the alcove; one of you has to make the journey back to deposit it at the other end of the room to drop that gate. Don't worry, running with the current is much easier and you can just sprint it.
Once the gate is open pass through and continue on to the final boss room, battling any baddies you meet on the way.
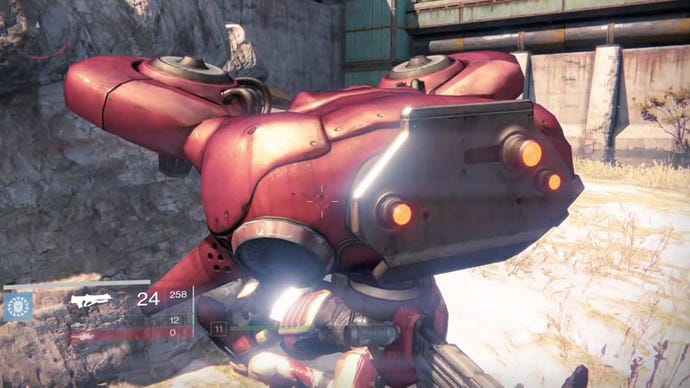
The boss is an overgrown Shank. It has a number of tricks but the most important one is that it can modify the arena around you. Watch for messages alerting you to these changes, and react accordingly - upright structures will become electrified, meaning it's not safe to hang around them, and cover will appear or fold away. Watch out for electrified floor panels, too.
The Shank's other favourite tactic is to call for reinforcements - normal-sized sniper, turret and explosive Shanks that pop out of hatches high on the walls. If you have a full fireteam, assign one Guardian to keep these pesky foes down, only occasionally lobbing a few shots at the boss, while the other two concentrate on bashing the Shank.
If you have a good awareness of what's happening in the arena this battle is a doddle; two of you can easily cat and mouse the Shank by attacking its back, then retreating to cover when it comes at you, leaving your partner paddles its bottom until it turns again.
The Shank has two little "feet" to either side of its "face" that will register critical damage. When these are destroyed it will have lost plenty of health, and will becomes more aggressive in its attacks. At this stage you can shoot the tiny window in the middle of its face for critical hits, but it's already pretty close to death, so spray and pray is effective enough.
That's it; you're done. Good work, guardian - and don't forget to collect your loot.


