Batman: Arkham Knight Most Wanted Side Missions
Complete all 14 Most Wanted side missions in Arkham Knight.
This page will act as the main walkthrough for all 14 of the Most Wanted side missions in Batman: Arkham Knight. This includes Armored and Dangerous, Campaign for Disarmament, Creature of the Night, Friend in Need, Gotham on Fire, Gunrunner, Heir to the Cowl, Lamb to the Slaughter, The Line of Duty, Occupy Gotham, Own the Roads, The Perfect Crime, Riddler’s Revenge, and Two-Faced Bandit.
Players should also take note that some of the Most Wanted side quests will not become available until after you pass a certain point in the City of Fear main quest line. If you’re not sure, we’ll list the details on how to unlock each Most Wanted side quest (as well as the rewards you’ll earn) with the walkthrough for each individual mission.
Armored and Dangerous
- Unlocked: Chapter 3 – After receiving the first Batmobile upgrade.
- Main Objective: Find and neutralize all of the militia’s APCs.
- Location: Random – There are three on each island.
- Reward: Nine Upgrade Points, one for each immobilized APC.
The APCs do not spawn at specific locations during this mission. They will appear near the Batmobile when this mission has been selected, assuming that all three have not been immobilized on your current island. It should also be noted that no matter what order you decide to tackle these, they become progressively harder to deal with, as you’ll notice things like speed increases, additional military escorts, different fire types, and even the rate of fire of their rockets.
When you are informed that you are near an APC, you should see the vehicle’s health in the top right corner of your HUD (Heads Up Display), as well as the number of escorts directly below that. You’ll also see a signal strength directly above your radar. A full green bar means the APC is extremely close to the Batmobile, while a decaying bar means that it’s moving away.
When you’ve locked in on one of the APCs, move in to take it out. You will gain one WayneTech Upgrade Point for each, but you’ll also earn XP for taking out the SUVs that are escorting it. Try side swiping the APC to eliminate it, or charge directly into it if you have the Batmobile Ram Charge unlocked and equipped.
Campaign for Disarmament
- Unlocked: Chapter 3 – While tracking the Arkham Knight’s vehicle.
- Main Objective – Find and defuse all explosive devices deployed by the militia.
- Location: Bleake Island (4), Miagani Island (6), Founder’s Island (5).
- Most Wanted Villain: Unknown.
- Reward: 14 Upgrade Points (1 per bomb defused), 3 for delivering Deathstroke.
Unless they leave it until the end of the game, players will not be able to complete this mission all at once. Some of the bombs will not become available until later in the game, but we’ll be sure to tell you at which point each one can be dealt with.
| Unlocked | Location | Security Level |
|---|---|---|
| Ch. 3 | Bleake Island: Cauldron, by Sionis Industries | Extreme |
| Ch. 3 | Bleake Island: Cauldron, by the train yard | Very Low |
| Ch. 3 | Miagani Island: Bristol, Near Botanical Gardens | Very Low |
| Ch. 3 | Miagani Island: North of Grand Avenue Station | Low |
| Ch. 5 | Miagani Island: Miagani Botanical Gardens | Low |
| Ch. 5 | Founders’ Island: Otisburg | Medium |
| Ch. 5 | Founders’ Island: Ryker Heights, Urbarail Station | Low |
| Ch. 5 | Founders’ Island: Ryker Heights | Extreme |
| Ch. 7 | Bleake Island: Chinatown, north of traffic circle | High |
| Ch. 7 | Miagani Island: Kingston, base of parking garage | Medium |
| Ch. 7 | Founders’ Island: Drescher, near Perdition Bridge | High |
| Ch. 9 | Bleake Island: Cauldron, near Panessa Studios | Extreme |
| Ch. 9 | Miagani Island: Kingston, near Bank of Gotham | High |
| Ch. 9 | Founders’ Island: Entrance of Port Adams | Extreme |
In addition to the locations above, each of these devices will show up on your radar when Batman gets near one. If our instructions to each bomb are not clear enough, head to the area and use your map to get the exact location.
As players are making their way through this Most Wanted mission, they will notice that the opposition can become quite tough. Make sure that you’re upgrading your Batmobile as you go so that you can deal with the increased difficulty.
The steps for handling each bomb are:
- Upload the Virus: Fire the Power Winch and begin the virus upload.
- Defend: Use the Batmobiles Battle Mode to clear out the enemies.
- Detonate the Bomb: Use the Power Winch to destroy the explosive.
After the Cloudburst tank is eliminated in Chapter 7, Deathstroke will take command of the army and must be taken out. Before you can do this, however, you must take care of the explosive devices that we mentioned above, as well as complete two other Most Wanted missions, Occupy Gotham and Own the Roads. Only after this is done can you battle Deathstroke in a boss fight.
When the actual battle begins, focus first on the Cobra Drones using your Missile Barrages. When all five of those are gone, turn your attention to Deathstroke. Maintain a decent distance between you and your target, focusing on avoiding his guided missiles, direct energy shot, and rockets. When Deathstroke is down the mission will be complete.
Creature of the Night
- Unlocked: Chapter 3
- Main Objective: Investigate the Winged Creature Stalking the Skies.
- Location: Bleake Island, near ACE Chemicals
- Most Wanted Villain: Man-Bat
- Reward: 6 Upgrade Points (1 per objective), 3 for Man-Bat
Following Chapter 3, you should have an icon on your map that gives you the approximate location of the winged creature that you need to track down during this side mission. Find a good place of elevation, and then use your Detective Mode to spot your target. Glide directly at it, taking it to the ground and snagging a sample of blood.
Make your way to Kirk Langstrom’s laboratory in the northern part of Bleake Island and find the entrance. Take an elevator ride to the basement and follow the hallway until you reach the lab. When you can, use the computer in the corner of the room to create a clean DNA sample, completing the mini-game when you reach 100 percent.
The tough part from here on out is finding the winged creature again. Glide and grapple through the city until you hear the beast screech. Track and tackle the beast a second time, administering part of the cure. Unfortunately, your target will escape. Track and tackle the winged creature again and finish the job. With this complete, Batman will toss Man-Bat into the back of the Batmobile, but you can’t complete the mission until the beginning of Chapter 8. You’ll need to make your way to the GCPD to play Dr. Langstrom in an isolation chamber. This will complete the side quest.
Friend in Need
- Unlocked: Chapter 7
- Main Objective: Investigate the Loss of Contact with Lucius Fox
- Location: Miagani Island, Wayne Tower
- Most Wanted Villain: Hush
- Reward: 3 Upgrade Points
This mission becomes available during Chapter 7 when Lucius Fox loses contact. If you want to tackle it, you need to make your way to Wayne Tower on Miagani Island. In this case you need to enter through the underground parking lot, which is accessed by traveling southeast from the Bank of Gotham. Just follow the signs and ride the elevator up once you’re there.
Head into the office and try to log into the computer using the retinal scanner. It won’t work, and shortly after you’ll notice that Bruce Wayne is already trying to access the system. Approach Thomas Elliot, who has a gun to Lucius Fox. Eventually he will turn his gun to Batman, and at that very second you must take him down. If you attempt the takedown too early, he shoots Lucius, and if you attempt too late he will shoot Bruce Wayne. Time it right and you’ll complete this mission and earn yourself three Upgrade Points.
Gotham on Fire
- Unlocked: Chapter 3
- Main Objective: Investigate Reports of an Arsonist Loose in Gotham
- Locations: Bristol Fire Station, Cauldron Fire Station, Otisburg Fire Station
- Most Wanted Villain: Firefly
- Reward: 7 Upgrade Points
After you check out the Arkham Knight’s crashed vehicle, Alfred will check in and notify you that there is a fire at the Bristol fire station on Miagani Island. Head that way and locate the electrical panel, and then attach the Power Winch and rev your engine. This will power the fire suppression system, at which point you will have to chase Firefly around the island. Make sure to avoid the fires that he sets, which should not be too difficult since they only take up half the road. Also, keep an eye on this fuel using the meter on the right side of your HUD (Heads Up Display). When the meter is empty, eject from the Batmobile and perform a takedown, and then a Beat Down before your foe escapes.
Head to Bleake Island and look for the smoke coming out of the Cauldron fire station. You need to use your Power Winch and rev your engine to get the fire suppression system working. This will trigger another chase, which really follows the same formula as the last. Let Firefly waste all of his fuel, then take him down, give him a Beat Down, and then watch as he escapes again (of course he does).
Take another trip in the Batmobile and make your way to Founders’ Island, and then to the fire station in Otisburg. Just like the first two instances, use the Power Winch and rev your engine. Chase Firefly when he bolts, once again tackling him when he runs out of fuel and delivering a Beat Down. This time, however, he won’t escape, and you can earn yourself an additional Upgrade Point (that will make seven for this side mission) for delivering him to GCPD.
Gunrunner
- Unlocked: Chapter 3
- Main Objective: Find and Destroy All of Penguin’s Weapon Caches
- Locations: Various
- Most Wanted Villain: Penguin
- Reward: 11 Upgrade Points (2 per Weapons Cache)
Chapter 3: Miagani Island – Kingston, Harold’s Repair - Batman will meet up with Nightwing during Chapter 3 of the City of Fear quest line. You’ll be informed of Penguin’s plan to smuggle weapons, and then must deal with six thugs that are meaning to start trouble. From there, fire the Disruptor at the first van, then knock on the back door so they’ll drive away. You can’t use your Batmobile here, so grapple and glide through the city as you chase them straight back to the cache.
The only way in is via the rooftop, but there are six armed foes and two Sentry Guns. Get to a high vantage point, and then use the Disruptor again to disarm three of the thugs. This should allow you to disable the Sentry Guns from behind, and then focus on removing the final three bad guys from the equation.
Use the roof hatch to get into the building, and then locate the vent on the wall and slide down to the grate at the ground level. Move behind Penguin and interrogate him, and then prepare to fight off 20 of his men when they attack. You should be able to switch between Batman and Nightwing, and take advantage of the Dual Team Takedown in certain situations.
When the area is clear, head into the vault and spray the highlighted crate in the back with the Explosive Gel, and then move back outside to detonate it. When you leave the area you’ll walk into an ambush. The best course of action here is to call the Batmobile, then drive to the top floor of the parking garage across the street, where you can bust up the Sentry Guns and soldiers.
Chapter 5: Bleake Island – Sionis Industries – After you exit Stagg’s Airship at the start of Chapter 5, select Gunrunner from the mission select screen to contact Nightwing. He’ll give you the truck location, allowing you to find the van and hit it with your Disruptor’s Tracker Ammo. Hit the back door to get it moving, and then follow it to Sionis Industries.
Open the door on the southwest corner of the building and use the Remote Hacking Device on the console to open the main gate. Two Gun Turrets are inside, so be careful not to wander too close. To overcome this obstacle, switch to the Batmobile Remote and bust up the Gun Turrets using your Heavy Cannon.
Move to the left and grapple through the hatch above. You must use the switch on the wall to open the rooftop shutters, then head back outside and grapple to the roof. You can then drop down into the room below and start dealing with the group of thugs and the brute. Nightwing should be able to help, as will the use of your Disruptor on the thugs. When all is clear, use the Explosive Gel on the weapon crate, back off to a safe distance and detonate it. That’s two of five weapon caches down, and four Upgrade Points so far.
Founders’ Island – The Grinning Fishmonger in Lower Tier – After you drop Ivy off at the Botanical Gardens, select the Gunrunner mission to get the truck location. You’ll need to take out a few thugs that are near the vehicle, and then shoot it with your Tracker Ammo. Tap the door to get it moving, then follow it until it leads you back to the weapon cache you’re looking for.
Make your way up to the small balcony and perform a Silent Takedown on the sniper who is on guard there. Climb up the steps, and then slide down the vent to find yourself below seven thugs. Move past the weak wall at the other end of the room, then place Explosive Gel and move next to the other two thugs. Detonate the Explosive Gel and then deal with whoever remains.
Remove the vent cover from the side wall, climbing inside and following it until you find yourself in a room with the weapons cache and more thugs. Do your thing with the thugs, and then use the Explosive Gel on the highlighted crate. Leave the vault, close the door, and then detonate the Explosive Gel to grab up two more Upgrade Points.
Bleake Island – Below Chinatown – In Sewers – After dissipating the Fear Toxin, bring up the Gunrunner missions and get the next truck location from Nightwing. It’s the same process you’ve been using through the entire game. When you arrive at the waypoint, take out a few bad guys, hit the truck with Tracker Ammo, and then bang on it to get it moving. Follow the truck until your path is blocked, getting out and dealing with the problematic soldiers, as well as using the control panel that lowers the blockade. This is found by grappling up to the walkway above.
Utilize the remote for the Batmobile and face the right wall. You can fire the Power Winch at the anchor point and pull back to create a hole, then grapple inside. As you might expect, some of Penguin’s goons will be waiting, but Nightwing won’t be there to assist you. Take out the baddies, and then place the Explosive Gel on the highlighted crate. Make sure to leave the vault and close the door before you detonate and complete this portion of the mission.
Founders’ Island – Otisburg, Amertek Building – Alfred will use Nightwing’s Tracker to locate him and add a waypoint for you. Follow this to arrive at the Amertek building. Grapple to the “Opening Soon” sign displayed on the west side of the roof. There is a Detective Mode jammer in place, so make your first order of business the sniper below, then spend a moment observing the rooftop. Deal with the rest of the group, then rip the cover off the yellow control box and hop down the elevator shaft. Get in the elevator and continue down until you find Penguin and Nightwing.
Find the opening ahead and step onto a beam in the back room. It’s guarded by a Gun Turret, but your Remote Hacking Device should disable it so you can get behind it and destroy the weapon. Remove the vent cover from the far wall and follow the vent shaft to the floor. Move past Nightwing, and then hop out behind the weak wall and save him.
Work with Nightwing to take out all the thugs and brutes, and then spray the Explosive Gel inside the final vault and close the door. Your not-so-good-buddy Penguin has taken Nightwing hostage and put a gun to his head, but it’s nothing that can’t be handled using a Dual Team Takedown. From there, detonate the last of the weapon caches, then deliver Penguin to the GCPD and lock him up to collect three more Upgrade Points. That will conclude the Gunrunner mission.
Heir to the Cowl
- Unlocked: Chapter 3
- Main Objective: Investigate reports of a masked vigilante in Gotham.
- Locations: Various
- Most Wanted Villain: N/A
- Reward: 8 Upgrade Points
Head to the first waypoint marked on your map to find a burning bat symbol and Azrael kneeling nearby. Speak with Azrael, then take control of the would-be Batman and take down the thugs that appear to challenge you. The trick is that you cannot take a hit in order to complete each of the challenges Batman lays out before you.
The second trial is located on Founders' Island on one of the rooftops in southwest Otisburg. Once again, look for the burning bat symbol. As soon as you spot it the mission indicator will be marked on your map.
This time around a brute joins the battle and the enemies will throw containers at you if left alone too long. Focus on the brute first, then finish off the others, keeping a close eye on any enemies on the outskirts of the battle. These are the enemies that will throw containers at you that must be dodged.
The third trial is located on Bleake Island, east of Chinatown and slightly west of the circular street intersection.
When you reach the rooftop speak with Azrael again for the next challenge. There are enemies with electrified armor in this set. Use the Batclaw (L2 / LT and Triangle / Y) when you see they have an electrical charge. Do not attack them in any other manner unless you want to use the Remote Electrical Charge, which can be a bit more tedious.
Complete the challenge then head to the small island in the middle of all of the islands to find the next burning bat symbol on top of the statue here.
There are ninja enemies here, which means you'll be countering quite often. You'll also have to deal with enemies that have blades, so be ready to avoid their attacks. Clear the enemies then head to the top of the clock tower and go in through the rooftop entrance. Access the computer in the middle of the room.
You need to find specific markers within the footage and scan them. The first is given to you at the start of the analysis. The second is at 5:52 in the third column from the left, second row down. The third is at 16:25 in the second column from the left, third row down. The fourth is at 28:54, back in the third column from the left, second row down. The final marker is at 41:35 one block down from the last one.
When you take control of Azrael after a short cut scene, pick up the sword to the right of the elevator entrance. Walk up behind Batman and make a choice. You can choose to kill Batman, which leads to Azrael going to GCPD to be locked up, or you can break the sword and remain free. If you choose to break the sword, walk toward the elevator and try to leave to complete the mission.
Lamb to the Slaughter
- Unlocked: Chapter 9
- Main Objective: Investigate the Lady of Gotham and bring Jack Ryder to safety.
- Locations: Lady of Gotham Island
- Most Wanted Villain: Random Preacher
- Reward: 3 Upgrade Points
Head to the Lady of Gotham statue in the middle of the city (on the small island between all the other islands). Move toward the area with all the men to initiate a cut scene, then you must defeat all of the men here in under three minutes. About halfway through the battle several men will appear with guns. Drop a smoke pellet and target them first so you don't have to deal with their gunfire.
Once all of the men have been defeated, use the Remote Electrical Charge device to power down the for generators under the large cage. Grapple to the side of the cage to get inside and take down the leader in a cinematic. This concludes the mission.
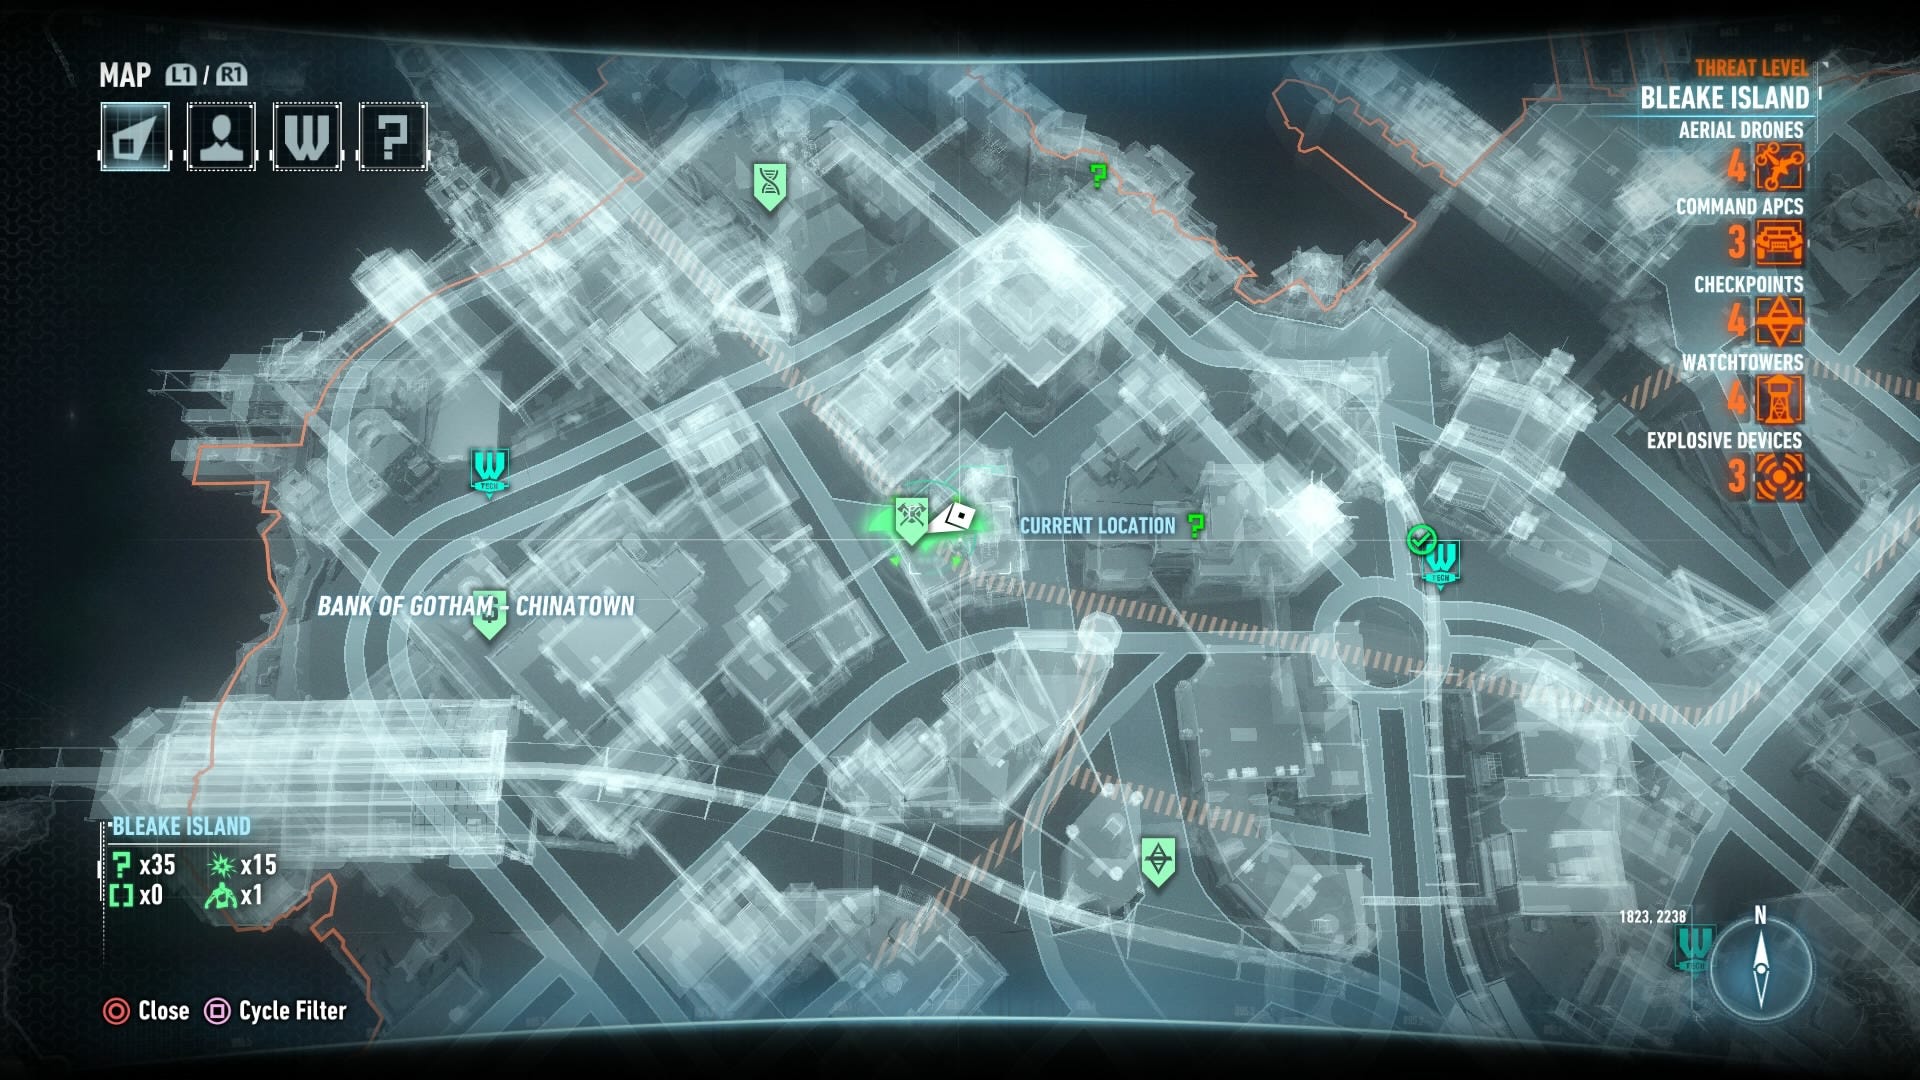
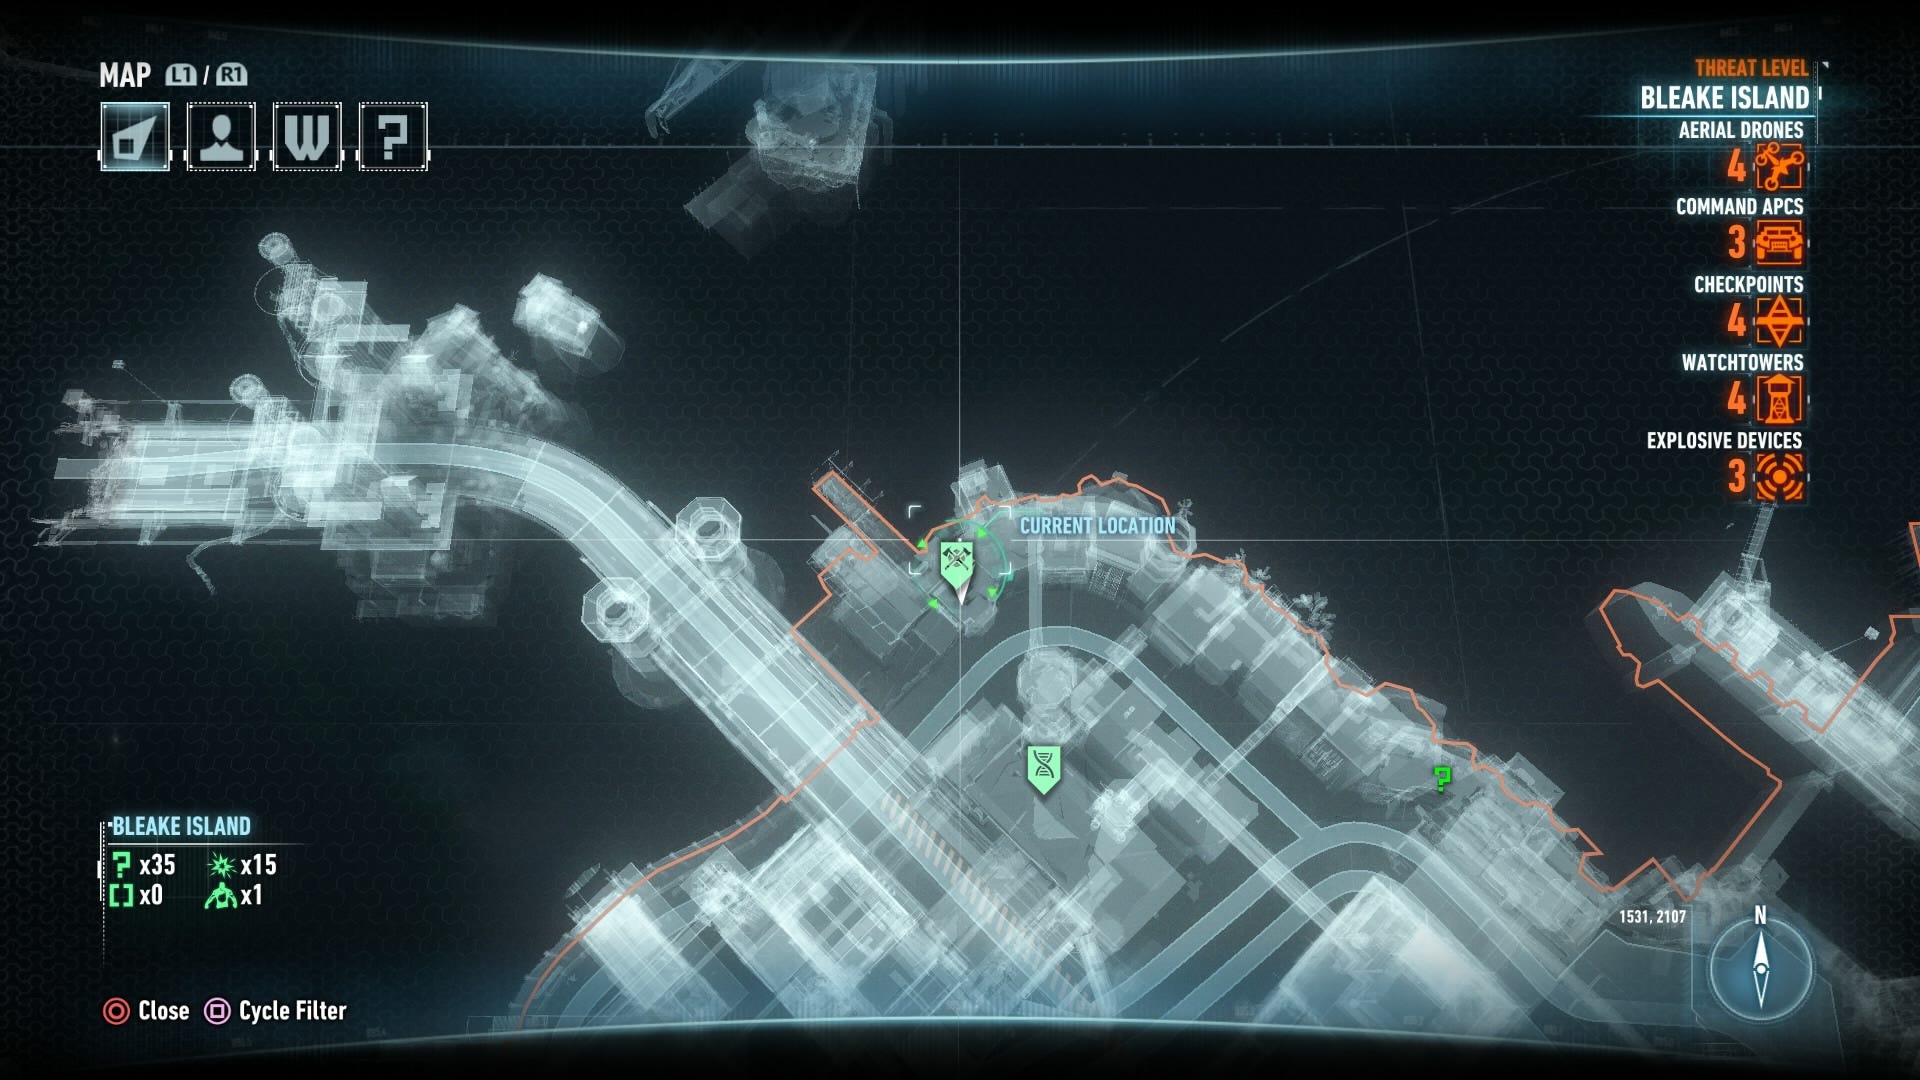
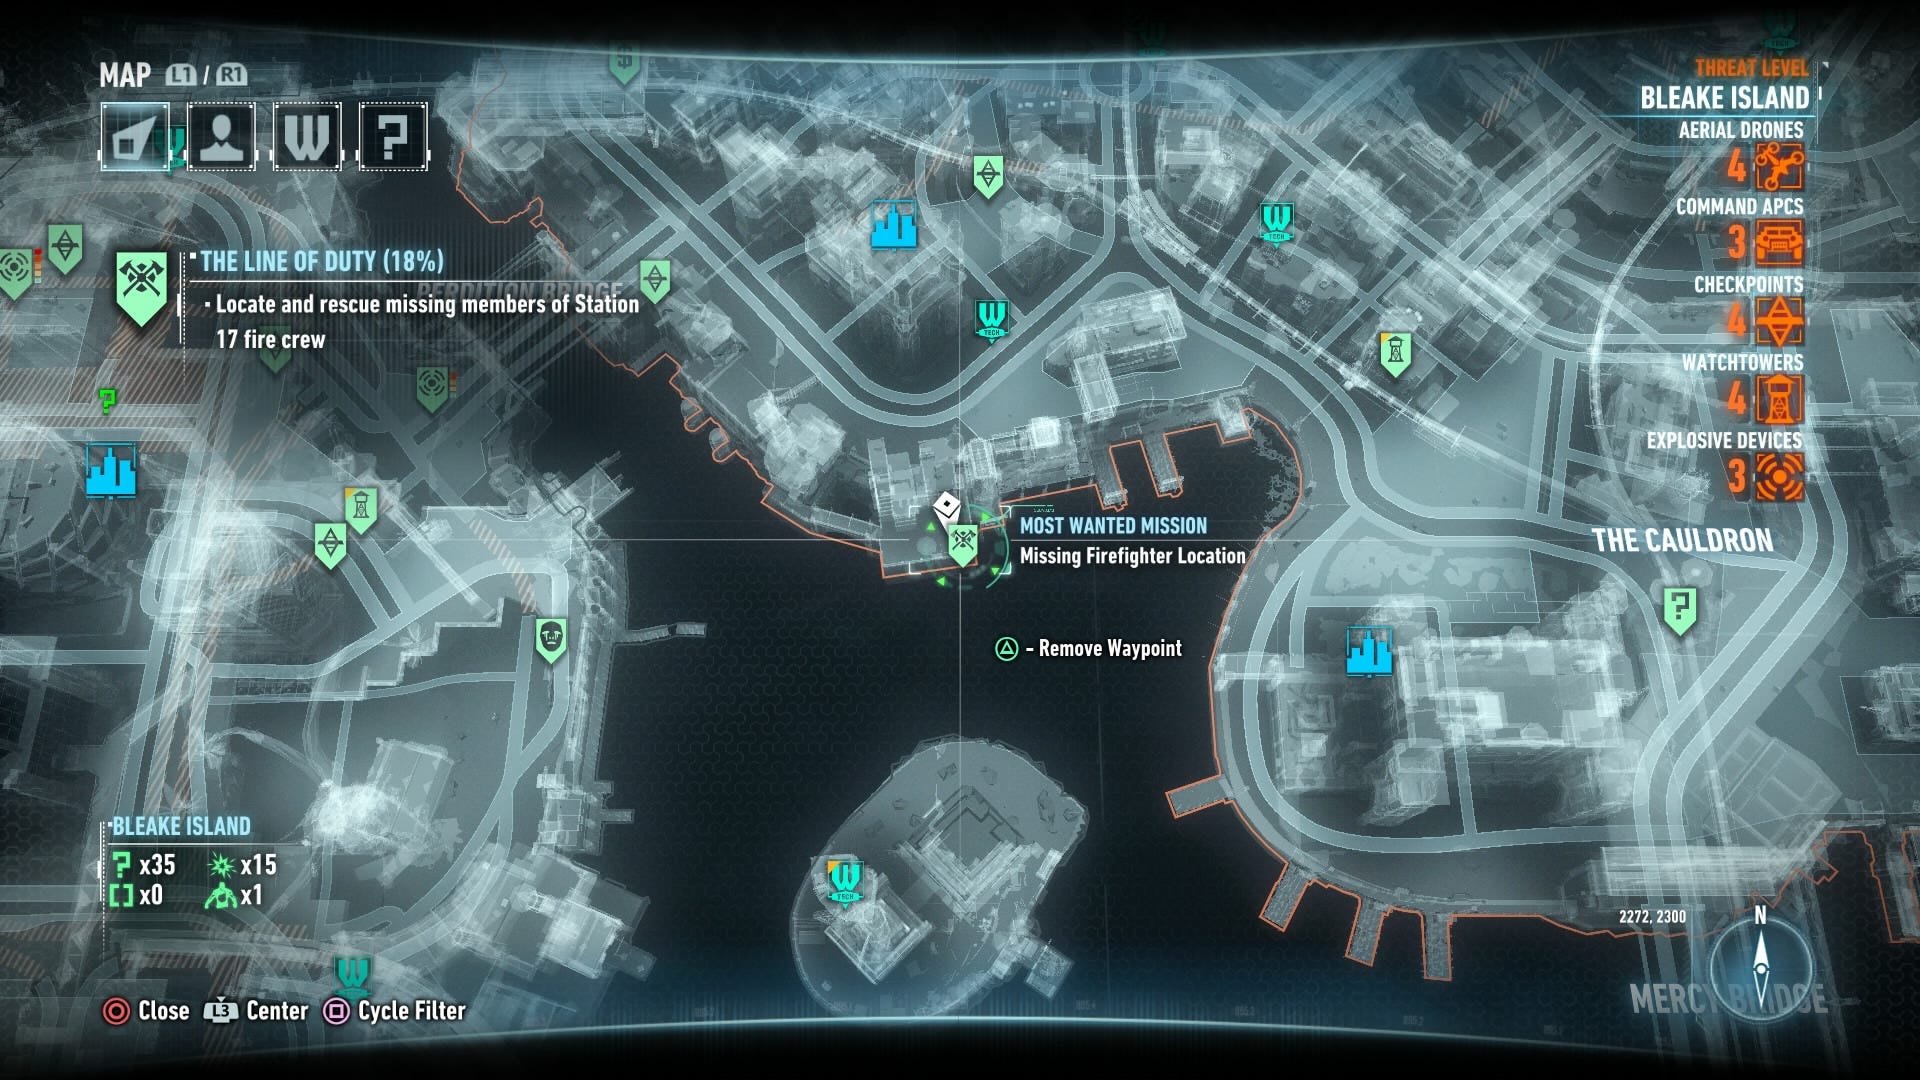
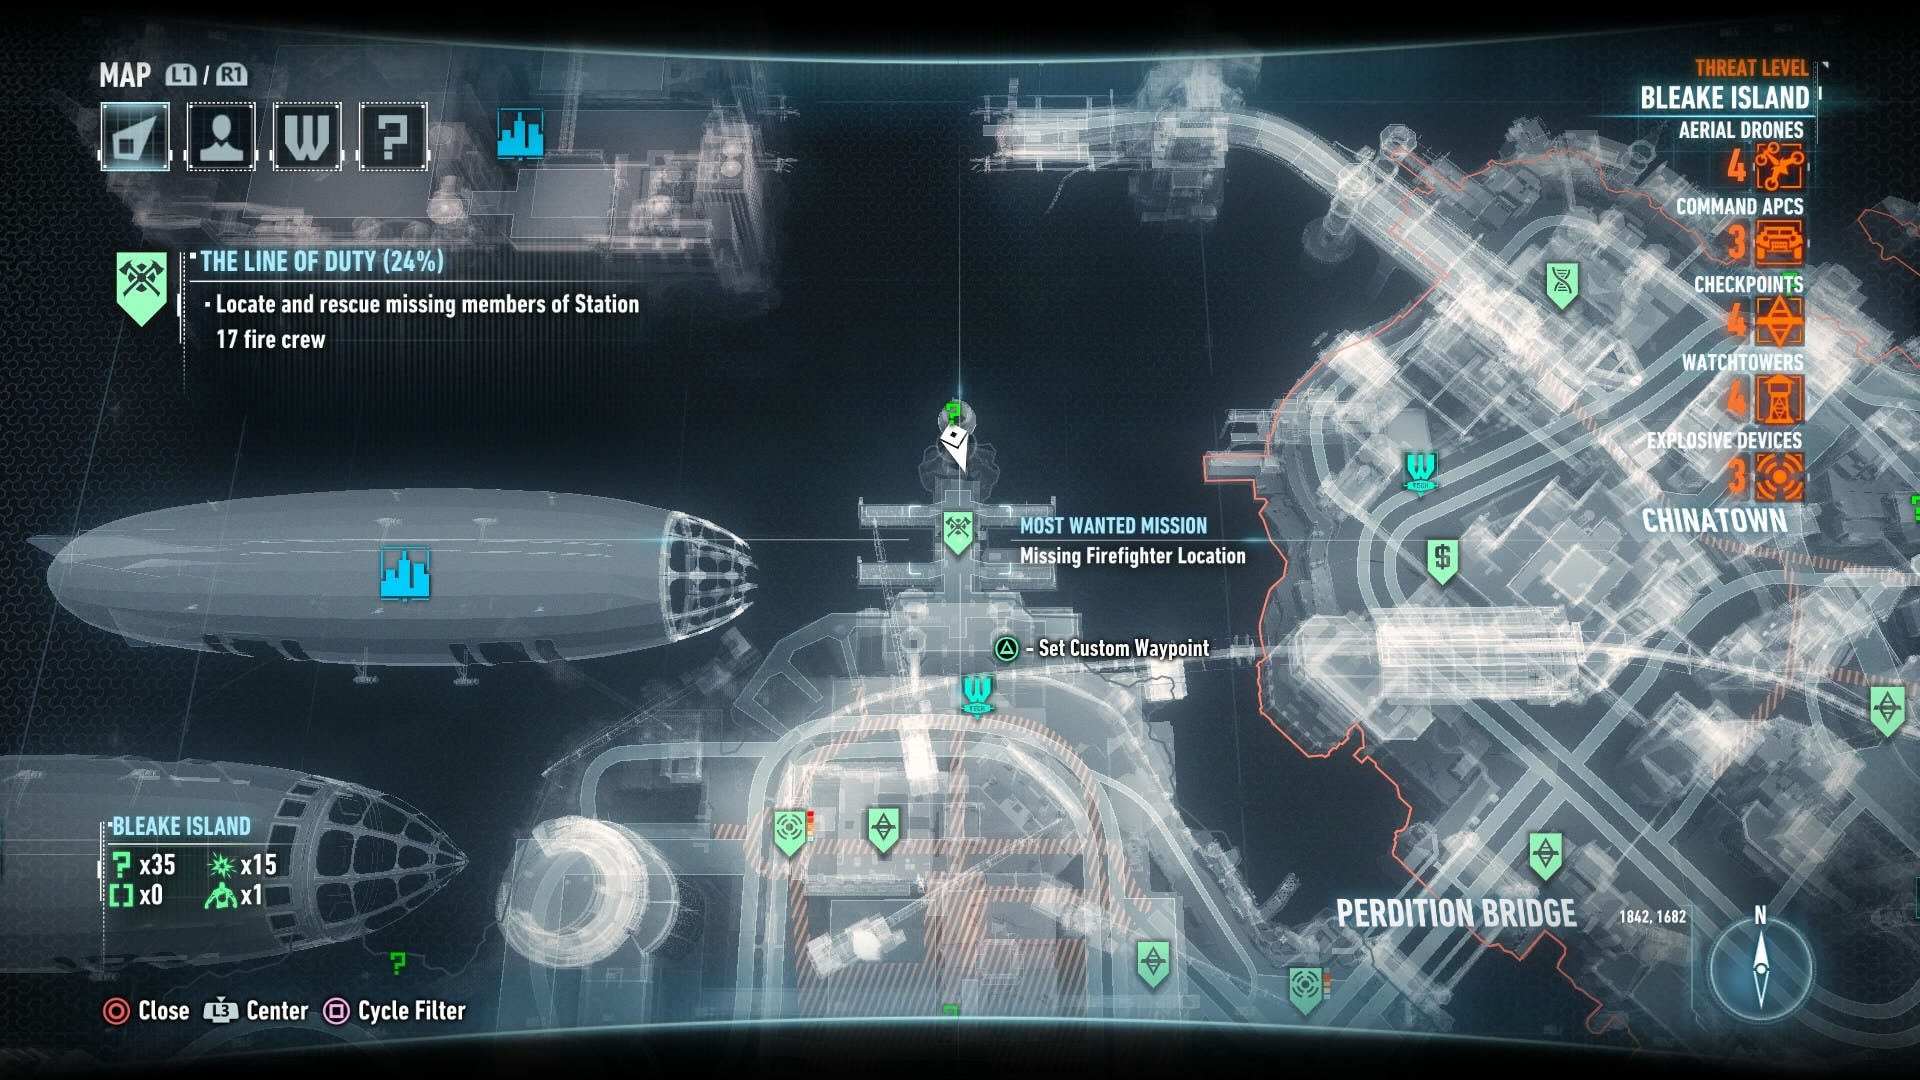
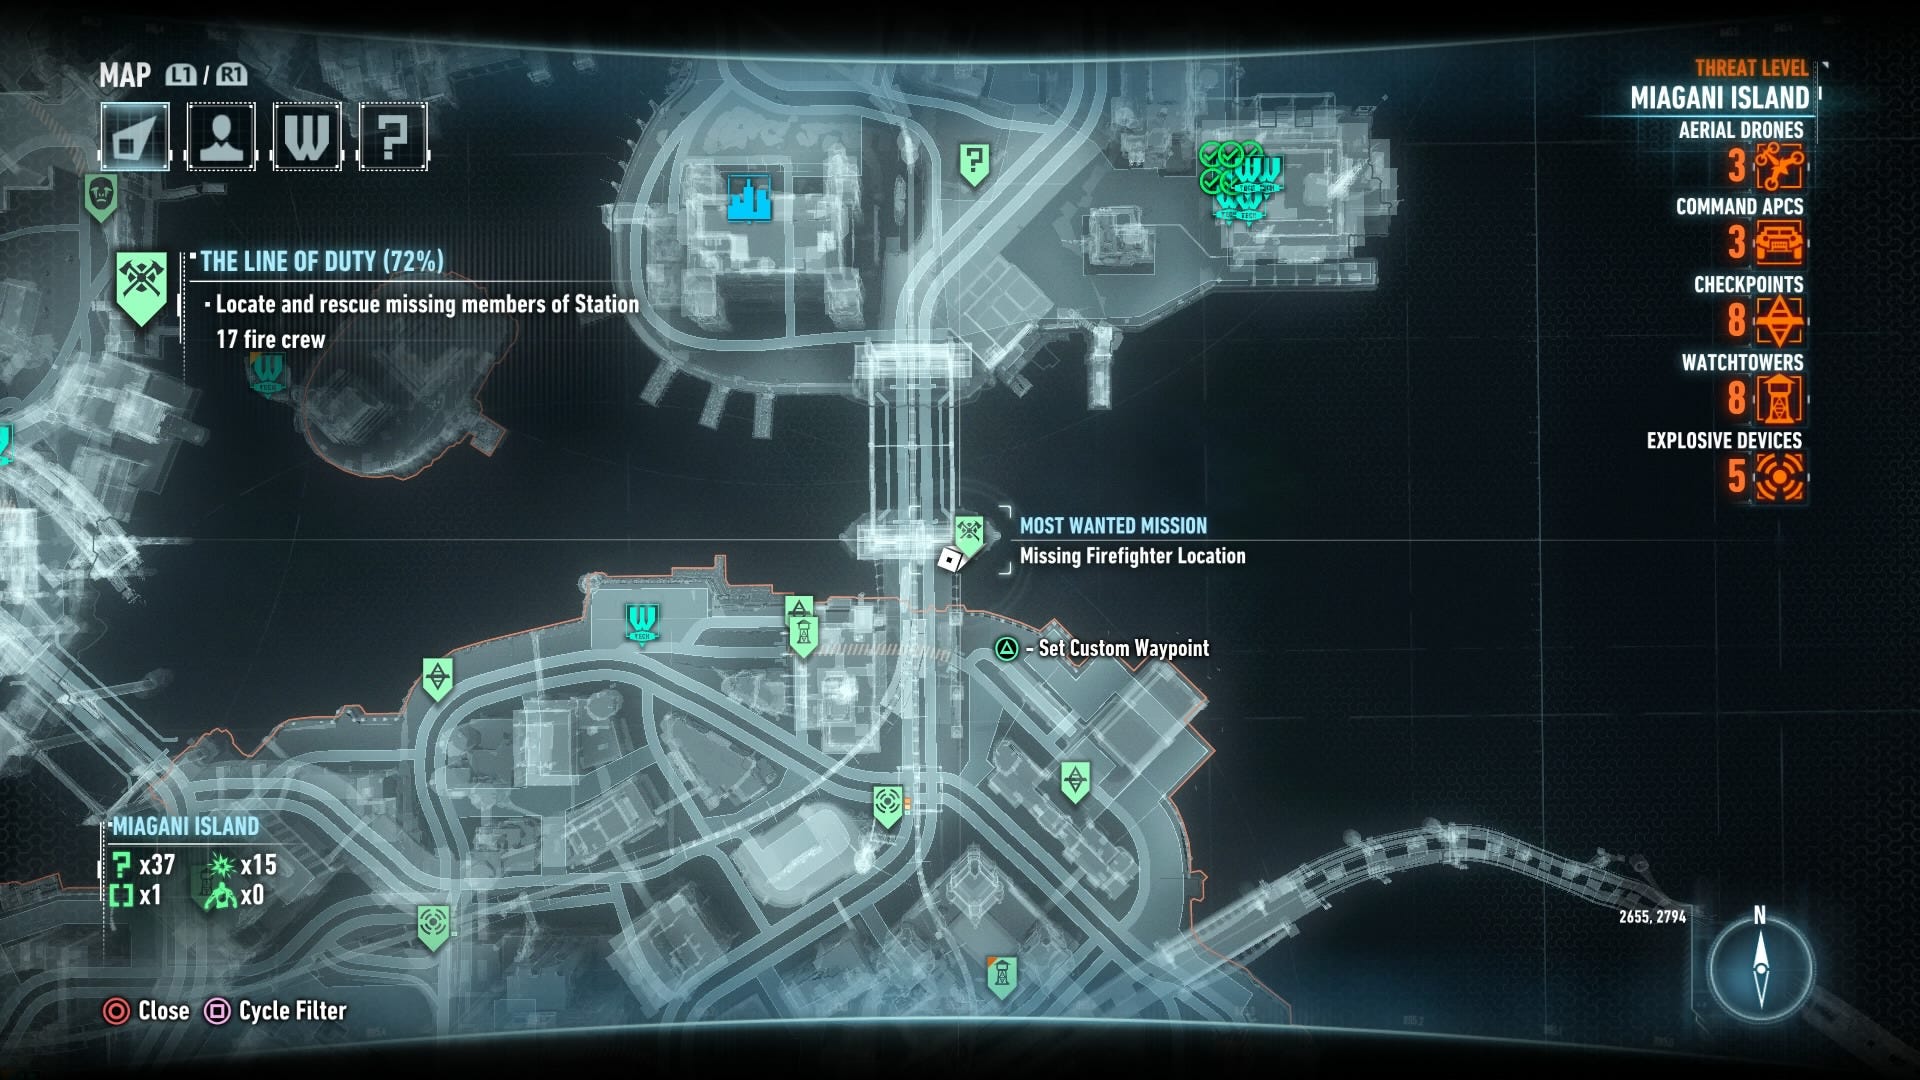
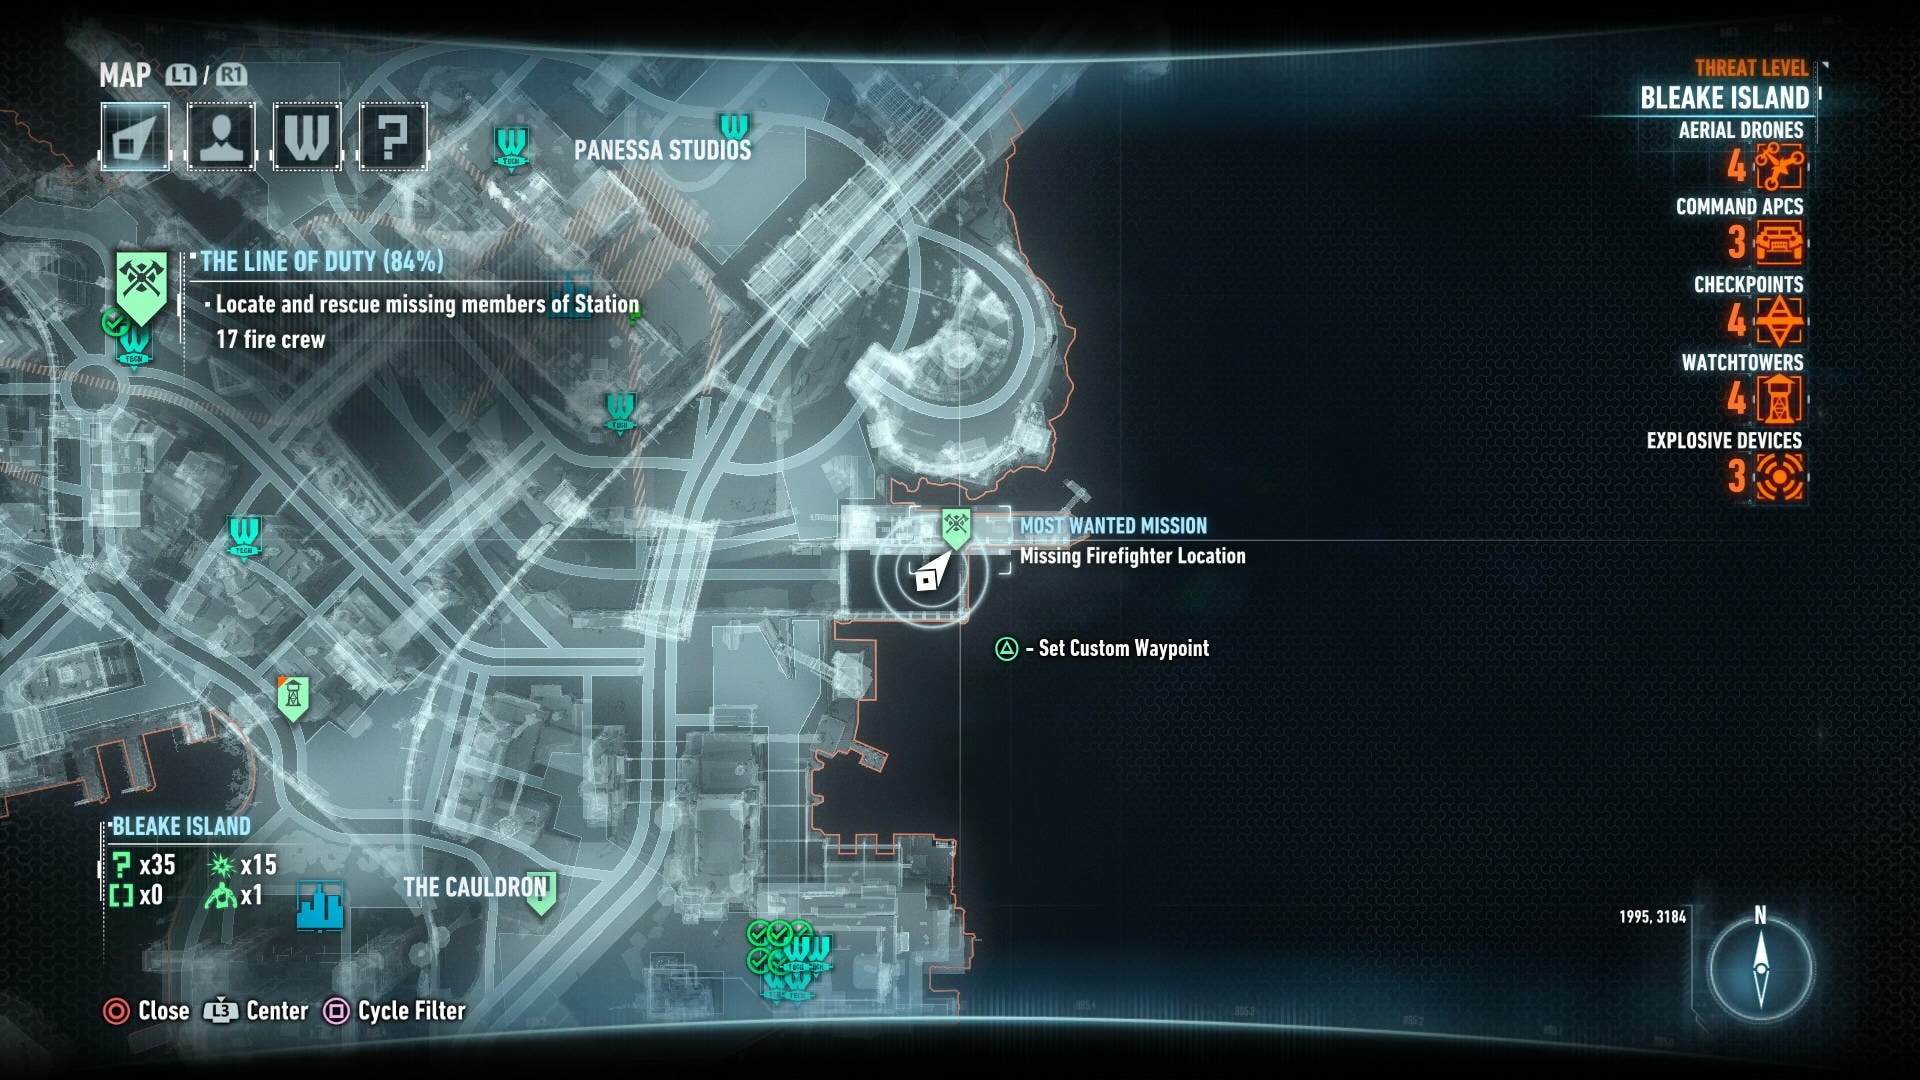
The Line of Duty
- Unlocked: Chapter 1
- Main Objective: Locate and rescue missing members of Station 17 fire crew.
- Locations: Various
- Most Wanted Villain: N/A
- Reward: 18 Upgrade Points
Head to the waypoint marked on your map and take down the handful of enemies inside. Rescue the firefighter, and then you'll have to find the other 16 and defeat the guards at each location.
The next closest firefighter is located in Chinatown on Bleake Island.
The next firefighter is northwest by the water.
The next firefighter is located south of the clock tower, behind the buildings there.
The next firefighter is due east of Stagg Airship Beta, but there's a sniper on the tower just north of there. Take out the sniper first, then handle the rest of the goons.
Head to the underground area in the northeast section of Ryker Heights on Founders' Island. Look for the Killinger's store to find a Power Winch point next door. Use the Batmobile to pull down the wall to reveal a doorway behind it. Head inside to find a gathering of thugs and your firefighter. Start the battle with a Fear Takedown to make things a little easier for yourself.
For the next firefighter, head to the second floor of the Urbarail Station in the middle of Ryker Heights. It's easier to get to the second floor if you stand on top of one of the taller buildings near the station and use Detective Mode to see exactly where the group of thugs is located.
Head to Wayne International Plaza, the large building due south of Stagg Airship Alpha. On the northwest side of the building you'll find another group of thugs surrounding a firefighter.
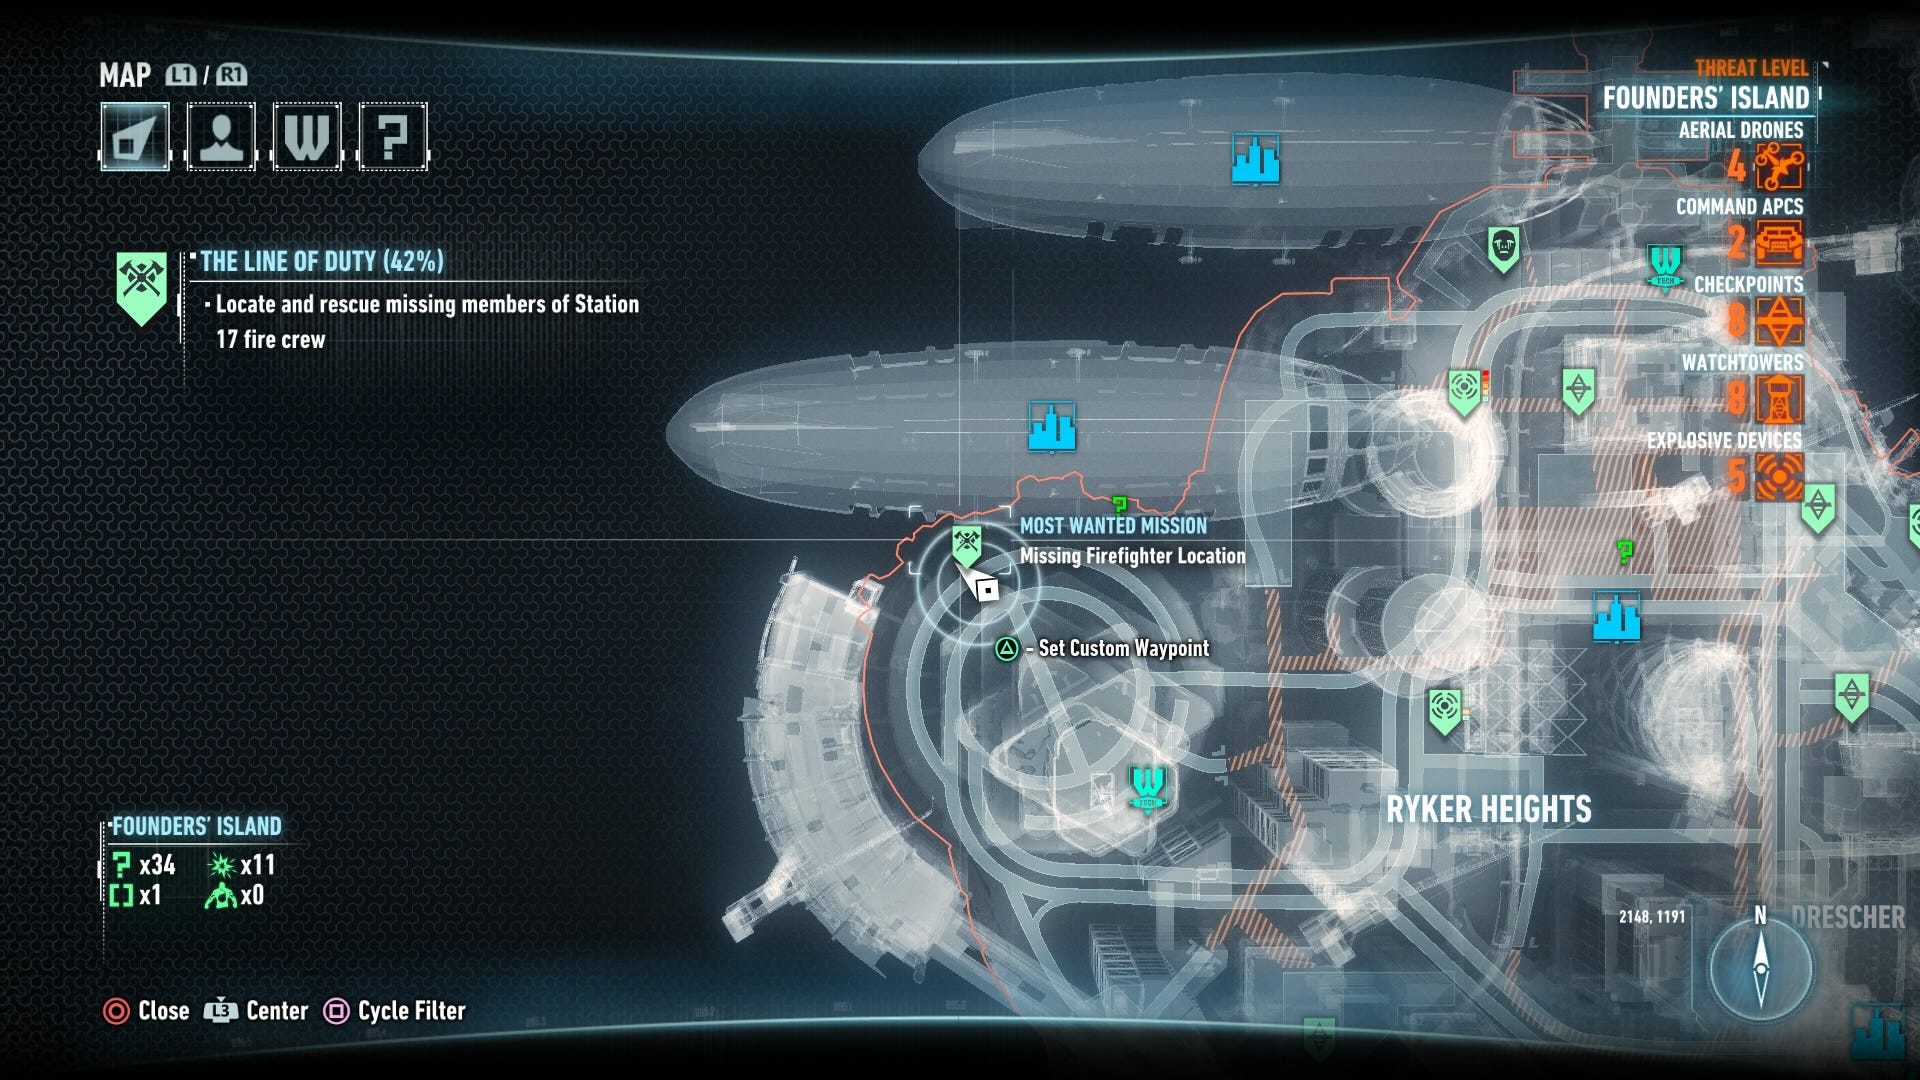
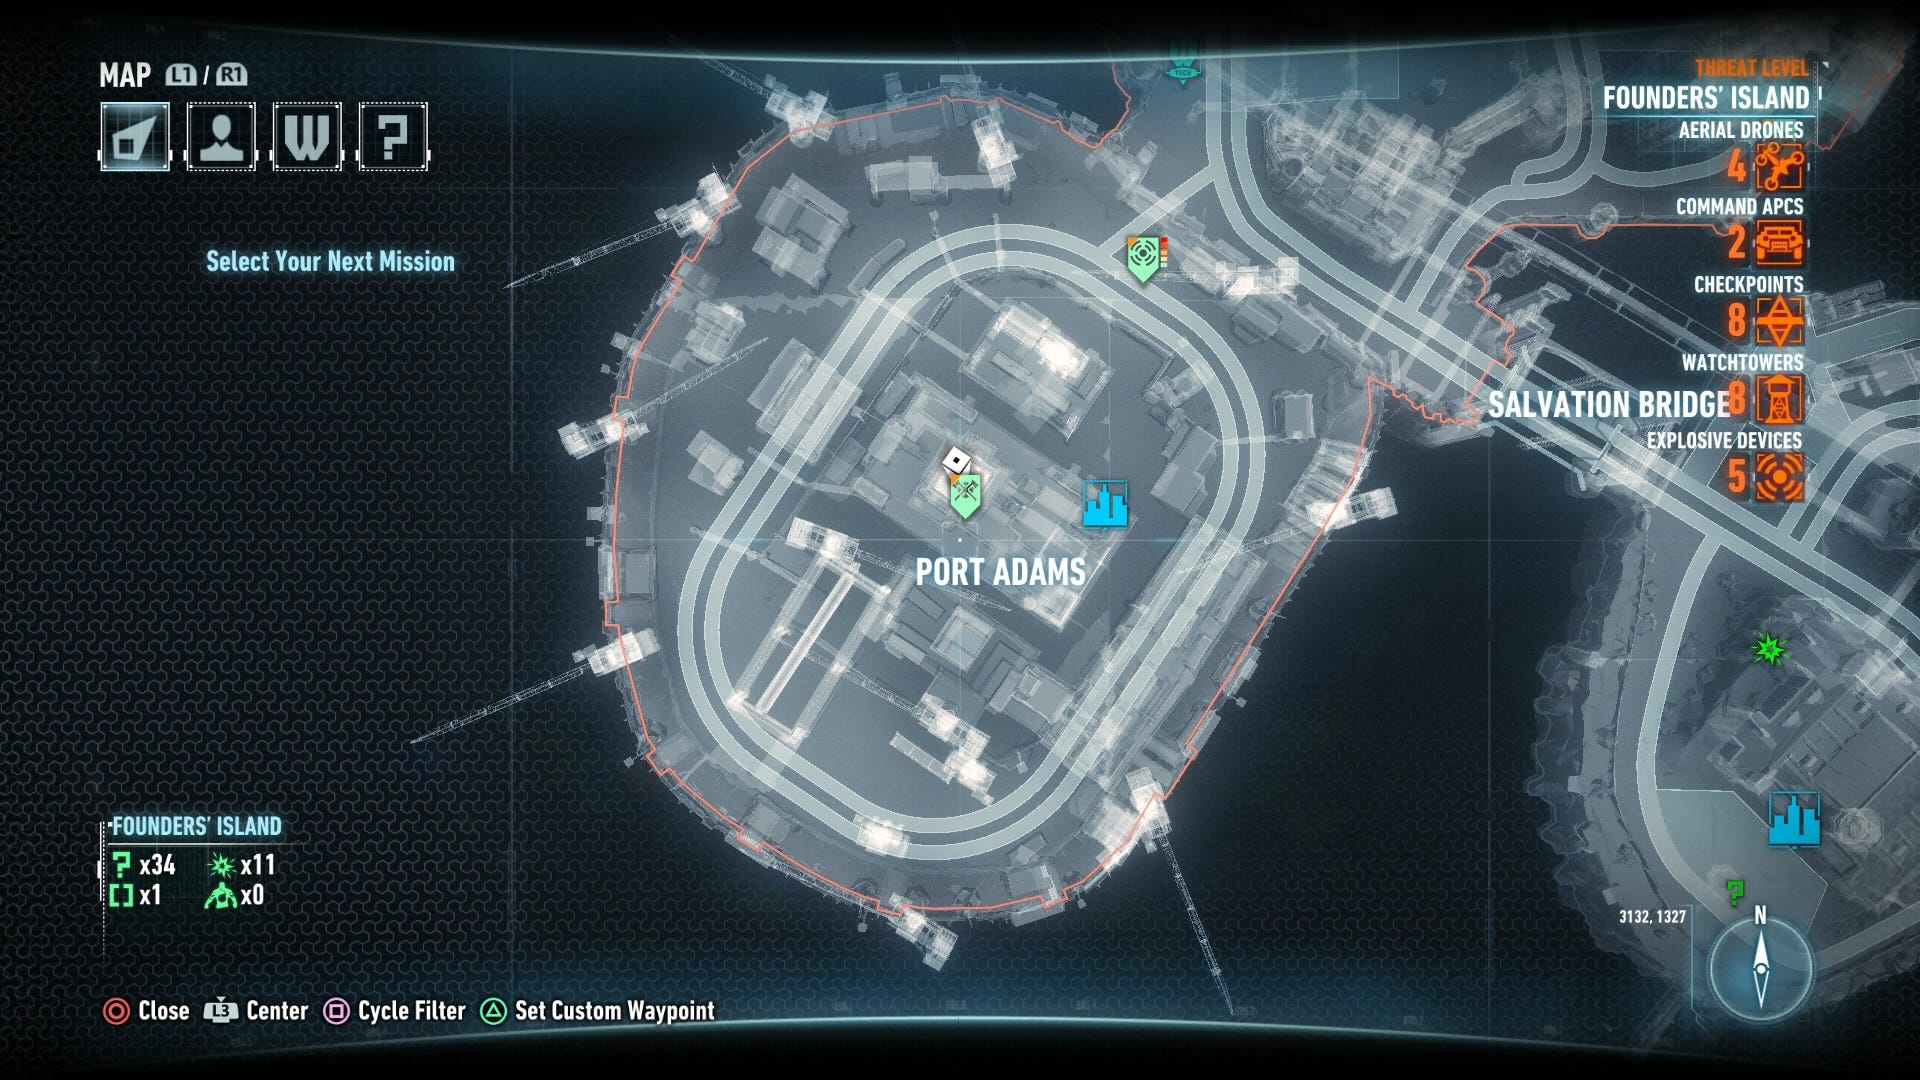
Go to the top of the building right in the center of Port Adams. Peer down to find another firefighter being held against his will. Use a Fear Takedown to finish off the three guards right next to the firefighter, then wait for the other men to move toward that location and take them out one at a time. You can then finish off any stragglers with ease.
Head to Wayne Tower on the southeast corner of Miagani Island. Move around to the southeast corner of the tower grounds to find another firefighter.

Go to Grand Avenue Station on the south side of Miagani Island. On the bottom floor there are several sentries and a few guards. Approach from the south to find a switch on the east side that opens a shutter door large enough to get the Batmobile through. Hack the switch and use the Batmobile to make this firefighter considerably easier to save.
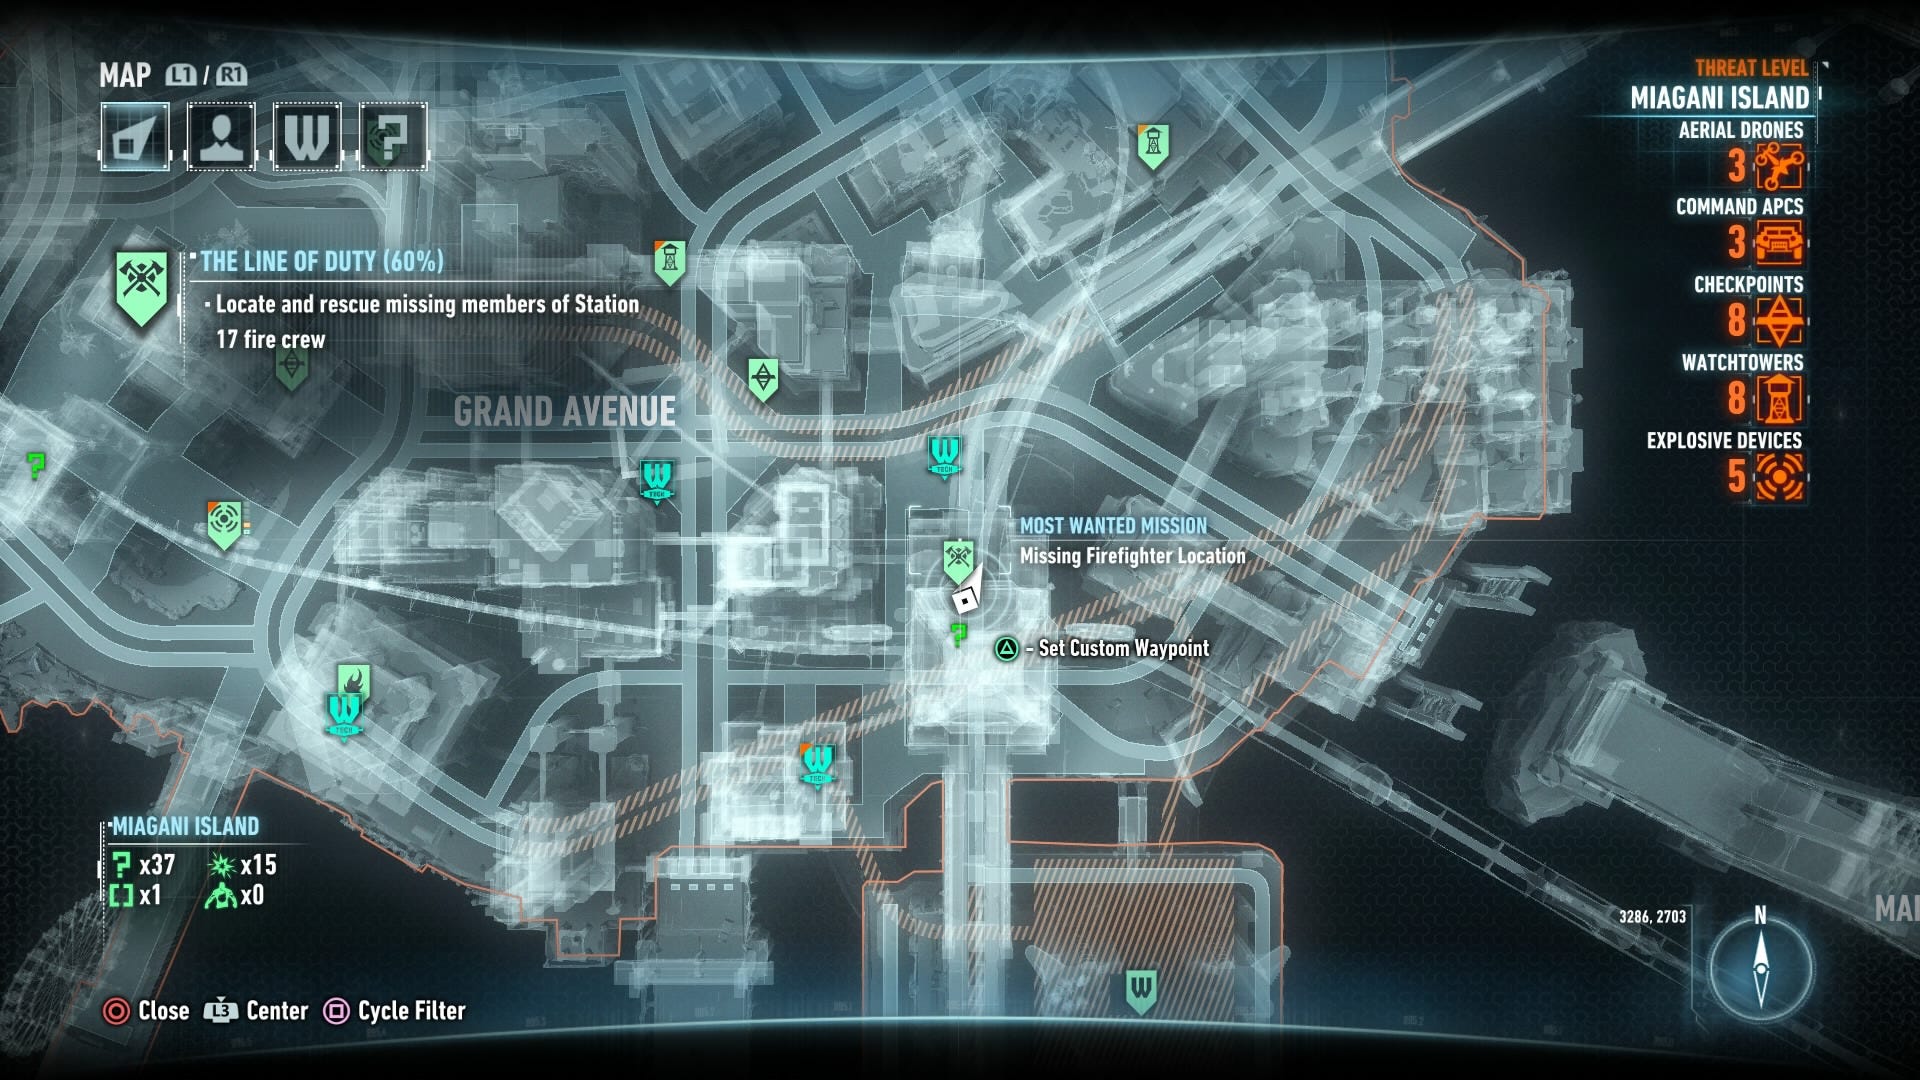
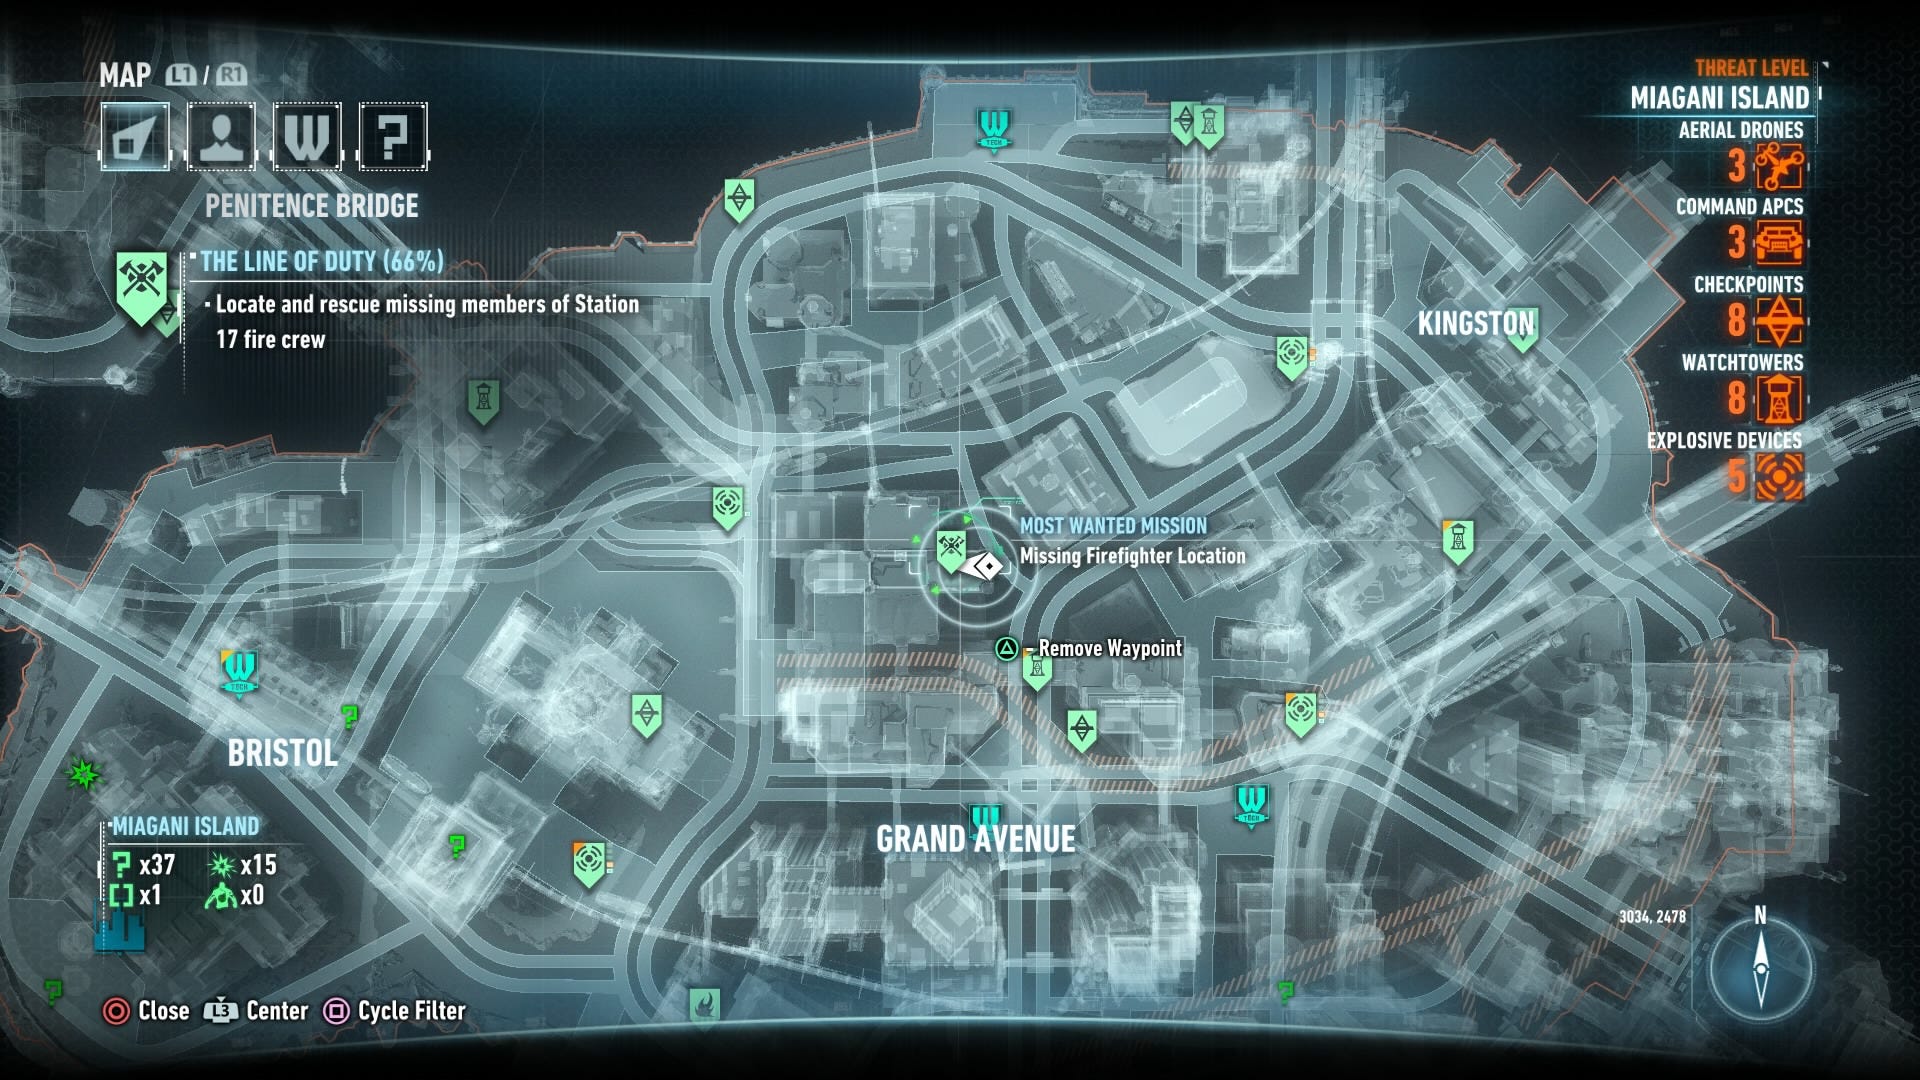
Find the Gotham Herald building right in the middle of Miagani Island. The firefighter is being held just outside of the second floor entrance. You can grapple up to the balcony from the street level.
Head to the Mercy Bridge that connects Miagani Island to Bleake Island. On the far east side of the bridge is where the firefighter is being held.
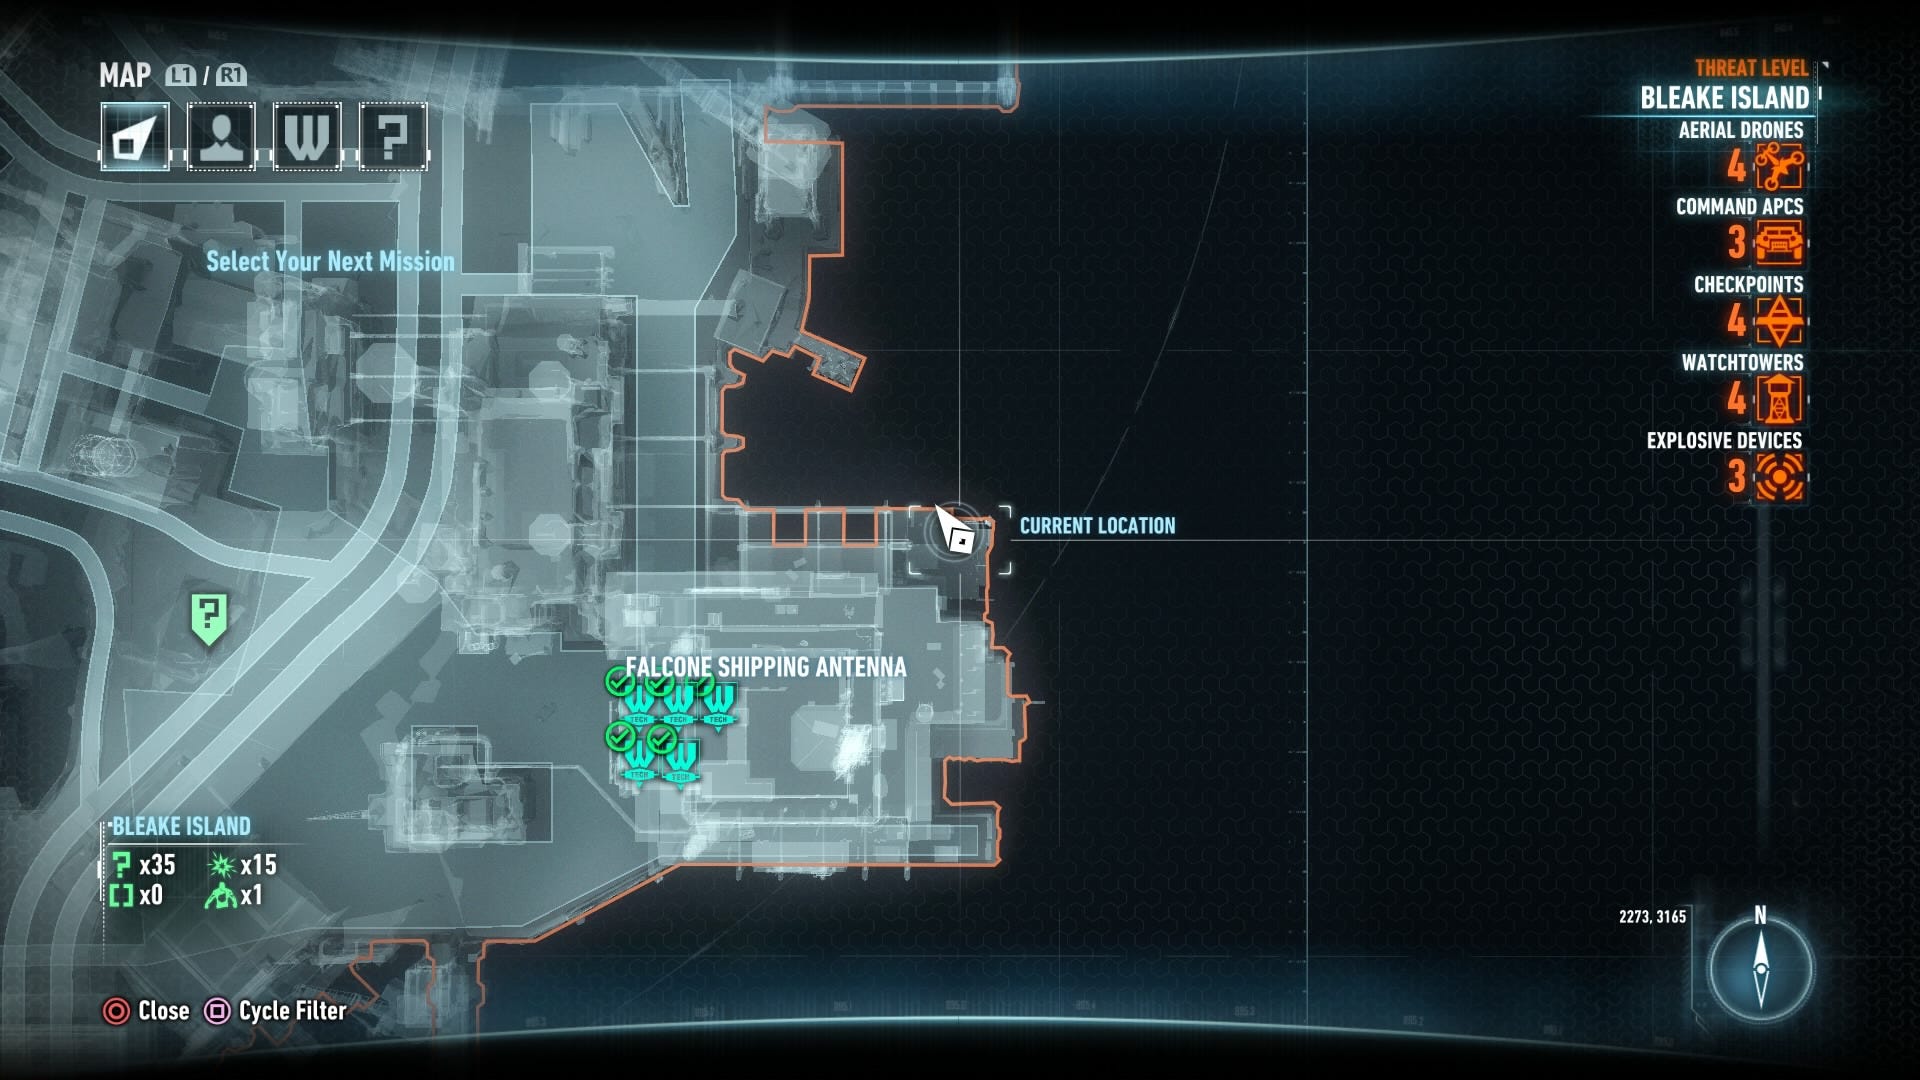
The next firefighter is being held on Bleake Island, on the northeast side of the Falcone Shipping building.
Head due north to the next ship yard to find another firefighter right in the middle of some thugs.
The final firefighter is the chief. You can find him near the north side of Founder's Island, on the top floor of the City Vision building. You can use the grates under the floor to take out most of the enemies under the cover of stealth. Once they're all down, rescue the chief, then drive him to the GCPD Lockup to complete the mission.
Occupy Gotham
- Unlocked: Chapter 3
- Main Objective: Neutralize the Militia Watchtowers
- Locations: Various
- Most Wanted Villain: Deathstroke
- Reward: 21 Upgrade Points
There are 21 watchtowers through the city that are all marked on your map. At each one you need to take out the soldiers guarding the location, then use explosive gel to destroy the computer terminal at each one. Once all 21 have been destroyed and you have taken care of the Own the Roads and Campaign for Disarmament Most Wanted missions, you can face off against Deathstroke. Take a look at our Campaign for Disarmament walkthrough for details on the final battle against Deathstroke.
Own the Roads
- Unlocked: Chapter 7
- Main Objective: Locate and Destroy the Militia Checkpoints
- Locations: Various
- Most Wanted Villain: Deathstroke
- Reward: 20 Upgrade Points
There are 20 checkpoints around Gotham City that are essentially small bases for the militia soldiers. Some will have temporary walls that you can pull down with the Batmobile to make your job considerably easier (just use the Batmobile to destroy everything), but others you'll have to take down using just Batman.
Once you defeat all of the enemies inside each checkpoint, activate Detective Mode to find which person is the commander. Walk over to the commander and crush the control module to deactivate the base. Do this to all 20 checkpoints, complete the Occupy Gotham and Campaign for Disarmament missions and you can face off against Deathstroke. Tips for that battle are located in the Campaign for Disarmament section.
The Perfect Crime
- Unlocked: Chapter 1
- Main Objective: Investigate posed mutilated body.
- Locations: Various
- Most Wanted Villain: N/A
- Reward: 9 Upgrade Points
Head to the waypoint marked on your map and investigate the hanging body. Activate the deep tissue scanner (tap up on the d-pad) and examine the middle of the body on the left side at the second scan level (muscle) to find a scar near the kidney. Scan at the deepest level (bone) to find a yellow spot on the side of the head, then scan at the highest level (skin) to find a yellow mark on the thigh.
At the next waypoint you find another body. Scan the lower thigh at skin level to find the first yellow mark. Scan the neck at the muscle level, then scan the hand at the bone level. On the third body, located at the next waypoint, scan the ear at the skin level for the yellow mark, look for a ring on the hip at the muscle level, and the other hip at the bone level.
The remaining three bodies are not marked by waypoints. Instead, you have to find them yourself. Luckily we did that work for you already. The first is located on Miagani Island, southwest of Mercy Bridge near on the north side of the island, near the middle. It's located on a rooftop, identified by the music that plays near each body.
At the skin level you need to examine the chest. Examine the arm at the muscle level to find a bullet, and the toes at the bone level. Collect the evidence, and then head to the south side of Bleake Island to find another body on top of the Gotham Herald building to the left of the sign.
Scan the arm at the skin level, chest at the muscle level and knee at the bone level. Head to the final body which is located on the far west side of Miagani Island, just east of the Salvation Bridge.
Scan the right side of the body at the skin level, the eye at the muscle level and the arm at the bone level. Now that you've found all six bodies another waypoint is marked on your map that leads to the Pretty Dolls Parlor. Go there and head inside.
Continue through the door in the back and use explosive gel to blow through the boarded up wall. Head down the stairs and circle around until you see an opening to the left that allows you to reach the middle of the area. A wave of enemies attacks that aren't much trouble. However, when the second wave attacks, Professor Pyg attacks alongside them.
Attack the enemies but keep the camera pointed toward Professor Pyg in the middle of the room. When he throws knives at you catch them and throw them back. This stuns the Professor and allows you to perform an environmental takedown if you're close enough. Clear the enemies and take out Pyg with an environmental takedown after a stun, then move to the side of the room and access the panel to free the other victims in the cages above. Pick up Profession Pyg then drive the Batmobile back to the GCPD Lockup to complete the mission.
Riddler's Revenge
- Unlocked: Chapter 3
- Main Objective: Defeat Riddler and rescue Catwoman.
- Locations: Various
- Most Wanted Villain: The Riddler
- Reward: 25 Upgrade Points
There are 10 trials that must be completed before you can rescue Catwoman. All 10 are marked by waypoints on your map.
Take the Batmobile to the first waypoint and enter The Riddler's garage here. In the basement you must race a three lap course with various obstacles along the way. The obstacles increase with each new lap, and if you fail to finish a lap in the allotted time you must race that lap over again. Watch the road and press Circle / B to activate or remove the Riddler obstacles as you come across them.
Once you've completed all three laps, you must take control of Catwoman and have her access the correct key. While in the Batmobile, you will see one light that's green, surrounded by red lights on the wall. This is in the same layout as what's in front of Catwoman. However, Catwoman may not be looking from the same perspective. You may have to walk around to the left side to see the same view Batman has. Either way, Catwoman needs to open the green key as seen from Batman's view. It's the first key of the middle row once you have Catwoman lined up so she has the same perspective as Batman.
Head to the next waypoint and down into the basement. Drive the Batmobile up the ramp to the left, over the green button at the top, then onto the next ramp to the right. There's a red button on one side of the ramp. Park the Batmobile on the opposite side and get out of the vehicle. Place Batman on the green button you just passed then take remote control of the Batmobile. If the ramp is being blocked by a green platform, press Circle / B to remove it and allow the ramp to reach the top, then press Circle / B again to put the green platform in place under the ramp so it doesn't move back down.
Continue to control the Batmobile remotely and press Circle / B to activate the red platform to the right. Drive across to the metal platform just beyond, then press Circle / B again to move the green platform ahead. Move onto the ramp to the right, but do not go all the way to the far side. As soon as the Batmobile is on the ramp, press Circle / B to remove the green platform, then again to remove the red platform, moving the far end of the ramp up thanks to the weight of the Batmobile.
Use the Afterburner to jump across to the far side. Drive around the corner and use the Power Winch to overload the circuit and lower that platform. Drive over to the green platform ahead, then switch to Catwoman and solve the puzzle just like you did before. Once again, you will likely need to walk around to the left side (as Catwoman) in order to make her perspective the same as Batman's. Once you have the correct perspective, access the left key in the first row.
Head back to the orphanage (the next waypoint) to find another puzzle just inside. There are three question marks here. Use a batarang to hit the dot on the left middle question marks three times each. This lines up the floor to take the shape of a question mark. Now back up until the light on the floor mirror create a point at the bottom of the question mark. Scan this image to continue.
Open the green door and place Batman on the purple switch on the right, and Catwoman on the red switch to the left. There's wall of question marks to the right of Catwoman and left of Batman. If you number the questions mark from left to right, 1 to 5, as Catwoman whip them in the order: 1 > 3 > 5 > 2 > 4, and as Batman use batarangs in the order: 3 > 1 > 4 > 5 > 2. This opens the surrounding cage and unleashes a group of enemies that are easily dispatched.
Go back to the main room and leave the orphanage. The next waypoint is located at a militia checkpoint for the Most Wanted missions, Own the Roads. If you haven't already done so, clear the checkpoint, then drive the Batmobile into the Riddler's garage.
The next challenge is another race. This time the obstacles come from the ceiling and some are automated. Take your time as you navigate three laps of this course. Even on the last lap you have plenty of time to work through the course so long as the Batmobile isn't destroyed in the process. Even if you destroy it a few times you can still make it if you hurry. At the end of the course, step on the green panel, then switch to Catwoman, walk around to the left and select the second key from the right, in the first row.
Head to the next waypoint, enter the garage and head down to the lower level. This challenge can be difficult depending on how adept you are at gliding from the Batmobile. You need to start at the elevator and race toward the guardrail ahead. Just before you hit the guardrail you need to launch Batman into the air (X X and hold X / A A and hold A) and hit the big green button on the wall ahead. If you miss you can grapple back to the Batmobile and try again.
If you do not launch Batman at the proper speed you won't get the height you need to hit the button on the wall. In addition, if you backup too far into the elevator, you'll activate it and have to start the challenge over.
Once you hit the first button, it opens the gate so you can hit the second button. You need to once again launch Batman at maximum velocity, then make a 180 degree turn to go down the next corridor and hit the button on the wall at the end. Do that and a narrow tunnel opens to the right of the second button. You need to launch Batman from the same position as before, make a 180 degree turn, then head into the tunnel. If you touch the walls of the tunnel, you'll have to start this last part over again. Once you're through the tunnel, glide to the right to see the third and final button on the far wall.
Hit all three buttons then go back to the Batmobile and drive onto the green platform to see the next Catwoman puzzle. Once again, you need to walk around to the left side to get the same perspective between Catwoman and Batman. Access the second key on the right, in the first row.
Head back up the elevator and make your way to the orphanage again. Make your way through the next green door and climb up onto the stage. There are three question mark switches on the ground and a question mark on the wall to the left. You need to move Batman and Catwoman between the switches as a current moves along the wall ahead. The current needs to reach the end to be successful.
Place Catwoman on the middle switch, then take control of Batman and place him on the left switch (facing the wall with the current). Use a batarang to hit the question mark to the left, then wait for the current to pass Batman. Once it does, move Batman to the far right switch and change characters to Catwoman. When the current passes Catwoman, move her to the third switch alongside Batman.
When the current moves to the lower path and changes direction, take Batman off the switch and move him to the middle switch. Once it passes Catwoman again, move her to the far left switch. When it passes Batman, have him join Catwoman on the left switch to complete the puzzle.
The floor is now electrified in the lower area, while an elevated switch appears on the right. Have Batman jump across to the switch to remove the electricity. Take control of Catwoman and move toward the key on the far left. Unfortunately, as you approach two sets of robots attack. Catwoman can only attack the red robots, while Batman can only attack the blue robots. Finish off the robots and grab the key to complete this task.
Head back outside and make your way to the next waypoint to find another Riddler garage. Move down to the lower level and use the Power Winch to lower the Batmobile into the pit ahead and try to move to the right in order to rotate the pit. Stop when the Batmobile is on the reserved parking spot, just before the spikes. This lines up an opening on the far side of the pit.
Eject from the Batmobile and glide into the opening to find a pressure plate at the end. Step on it to lower the water level, then get back into the Batmobile and go up to the main level again. Detach the Power Winch and drive over to the number two on the wall. Attach the Power Winch here and lower the Batmobile to just above the spikes at the bottom.
Attempt to move left to rotate the room once more. When you reach the reserved spot, the opening is now lined up with a cracked wall. Blast the crack with the 60mm cannon, then glide into it. Watch out for the electrified panel at the entrance to the opening and stand on the switch again. Several robots appear. Take them down without stepping on the electrified area, then grapple back over to the Batmobile.
Attempt to drive to the right until the Batmobile is right next to the blades, then head back up to the main level and drive over to number three. Anchor the Power Winch and drop down to just above the spikes at the bottom. Attempt to go right to rotate the wall until you're on the reserved parking spot, then eject and glide into the opening across the pit.
Step on the pressure switch at the end of the hole and two sentries appear near the entrance to the hole. Switch to remotely control of the Batmobile and take care of the sentries. Glide down to the pressure plate in the middle of the pit to see the next puzzle for Catwoman.
Take control of Catwoman and move around to the left to see the same perspective as Batman. Access the key in the middle row, second from the right. Switch back to Batman and leave the Riddler cave to get back to the main streets. Head back to the orphanage and enter the green doors one more time.
Move Batman onto the green pressure plate to the right, then switch to Catwoman jump onto the ceiling and move into the next room. Drop down and stand on the pressure plate here. As Batman, look at the large question mark panel ahead. The lower left corner is lit up, which indicates Catwoman's first move. Take control of Catwoman and move her to the first panel on the far right.
Look forward to see a similar question mark panel on Catwoman's side of the room. Follow the moves of each panel (Catwoman's panel governs Batman's moves and vice versa) until the panels start to spin. Continue to follow the lights, but keep in mind the bottom is always the point of the question mark.
Once both characters are on the plates at the end several more blue (Batman) and red (Catwoman) robots appear. Defeat them to gain access to the key on the far side of the room. Leave the orphanage and head to the next waypoint, then down to the lower level.
The next challenge is another race. Like the previous race you can control the obstacles as you make your way around three laps. However, on the final lap The Riddler takes control of the obstacles and it becomes more timing based. Enter battle mode to quickly stop or maneuver left or right to avoid the obstacles when necessary. If you don't completely crash, you can enter battle mode several times and still have enough time to complete the lap. When you need to driver along the side wall, stay close to the middle so it's easier to move left or right when needed.
Driver over the green platform at the end to activate the next solution for Catwoman's puzzle. Once again, walk Catwoman around to the left to get the same perspective as Batman. Select the key on the right in the second to last row. It's the only key in that row.
Head back to the orphanage and through the final green door. Make your way through the next door and into the room with the pressure switches. If you approach the switches a gate appears. Switch to Catwoman and jump to the ceiling to get over into the room with the switches. The room is lined with generators on the wall and a grid of switches on the floor. Two switches are missing from the gird and there's a red beam coming down from the ceiling.
Your objective here is to use the Remote Electrical Charge device to fire at the generators lining the far wall and the wall to the right. Doing so moves the rows of switches back and forth if there's an empty square in that row or column. Placing Catwoman on one of the switches will stop any switches behind her from moving (in relation to the empty square). You need to shoot the generators and move Catwoman around to get the empty square to line up with the red beam. After you do this, select Catwoman and jump onto the ceiling again to avoid the spikes that follow.
You need to line up the beam with the empty squares three times, with two beams appearing the second and third time. Once that's done, head into the previous room to get the key, then try to leave the orphanage. As you attempt to leave, The Riddler stops you and summons more robots. This time the robots randomly change color from red to blue. Make sure Batman attacks the blue robots while Catwoman takes on the red ones.
Defeat all of the robots to end the first fight against The Riddler, but the mission isn't over yet. At this point you need to collect all of the Riddler Trophies and solve all of the Riddler puzzles around Gotham, then go back to the Orphanage to confront The Riddler a second time.
Access the question mark console to engage Riddler and a bevy of robots attack. At first the robots are all blue, but eventually you'll find some red ones. Use the Remote Electrical Charge device to keep the red robots at bay and Catwoman will eventually show up. At this point you can switch to Catwoman to take down the red robots.
Riddler will crush the ground with the fist of his mech. The color of the fist indicates who can attack it. If it's red, Catwoman must attack it. If it's blue, use Batman. If the fist is green you can attack with either character. Continue to attack the fist until The Riddler has no health remaining, then drive him to GCPD in the Batmobile to complete the mission.
Two-Faced Bandit
- Unlocked: Chapter 5
- Main Objective: Stop Two-Face and His Men from Robbing Gotham’s Banks
- Location: Various
- Most Wanted Villain: Two-Face
- Reward: 7 Upgrade Points
Small Bank: Chinatown Branch
- Location: Bleake Island – Chinatown
- Robbers: 8
- Thugs After Alarm: 5
- Cash: $100,000,000
To begin this portion of the mission, take out the eight armed thugs that line the path between the vault and the truck. You can make some noise, but there is never a downside to keeping out of sight. Try to utilize your Fear Multi-Takedown if at all possible.
Medium Bank: Drescher Branch
- Location: Founders’ Island – Drescher
- Robbers: 10
- Thugs After Alarm: 8
- Cash: $200,000,000
The thugs in this bank will take the money from small offices on different floors, but using your Detective Mode should help you to pinpoint their locations. If you get a few grouped up, use the Fear Multi-Takedown to eliminate them. Eventually, more thugs will enter the bank and try to kill you, but at least this bank has the room for Batman to move around. Eliminate everyone to move on to the final bank in the mission.
Large Bank: Kingston Branch
- Location: Miagani Island – Kingston
- Robbers: 15
- Thugs After Alarm: 8
- Cash: $300,000,000
This bank is much bigger than the others, and again the money is spread out across multiple floors and in different vaults. Go about taking out Two-Face’s men, doing your best not to be seen. When they are all down, Two-Face will enter the bank with an entourage in an attempt to kill Batman. They have a Detective Mode Scanner and Detective Mode Jammer, so avoid that at all costs, at least until you eliminate it. Deal with all of the Thugs, and when the bank is clear you’ll be able to take Two-Face into custody and deliver him to the GCPD. For some more Upgrade Points and the conclusion of the mission.
More missions will be added frequently.