The Witness Walkthrough - All Witness Puzzle Solutions - Witness Guide
Images and solutions for every puzzle in The Witness in this complete walkthrough and puzzle guide.
This The Witness guide and Walkthrough will give you the solutions to all of the puzzles in The Witness. Since it would be rather hard to explain every line you might need to draw, we’ll be including a lot of images to guide you along. We also strongly suggest that you at least attempt these puzzles on your own, keeping our guide handy for when you simply cannot figure something out.
In order to use this The Witness Puzzle Solutions guide and walkthrough, keep in mind that the text that goes with each set of puzzles will be posted above the images, not below them. We’ll also try to give you hints that will allow you to figure the puzzle out for yourself, rather than simply copy the images that we’ve posted. If you’re still stuck, feel free to lean on us a little bit and let us help you through to the next section.
The Witness Tips and Tricks
You may have already read about our tips for The Witness, but if not you should do so. It might prevent you from getting stuck and using our guide. Here are a few more quick tips before you begin.
- You can move more quickly by pressing the L2/Left Trigger and your movement stick. This makes traveling a little faster.
- When in doubt, follow the wires. You often have to activate the next puzzle by solving the one before it.
- Use your surroundings to get some hints. The solution could be in the reflection of the light, or a broken branch on a tree behind the puzzle.
- Take a break. If you're stuck, walk away from the game for 10 minutes, get a drink, and then return with a fresh mind and set of eyes.
- Spend less time blindly spamming answers to the puzzles, and more time thinking about how the mechanics behind it work. Figure that out, and you're set to go.
The Witness Puzzle Solutions Walkthrough Guide
We have broken down our Witness walkthrough guide into separate pages, to make navigation a bit easier. There is one puzzle per page, and most of these puzzles result in the activation one of the light beams on the island upon completion. If you are looking for a specific puzzle, we have listed the puzzle name and corresponding page number in the links below.
- Page 2: The Symmetry Puzzle
- Page 3: The Desert Ruin Puzzle
- Page 4: The Monastery Puzzle
- Page 5: The Keep Puzzle
- Page 6: The Shady Trees Puzzle
- Page 7: The Marsh Puzzle
- Page 8: The Quarry Puzzle
- Page 9: The Jungle Puzzle
- Page 10: The Town Puzzle
- Page 11: The Bunker Puzzle
- Page 12: The Treehouse Puzzle
- Page 13: The Mountain Puzzle (Game Ending)
We've also got a complete guide to The Witness Windmill Puzzles. Head over there if you're struggling to figure out what to do.
The First Puzzle in The Witness
Most of the puzzles in The Witness have a trophy that pops when you complete that section, or at least that is our experience so far. The first one, however, does not. Here is what you need to do to get through the first section.
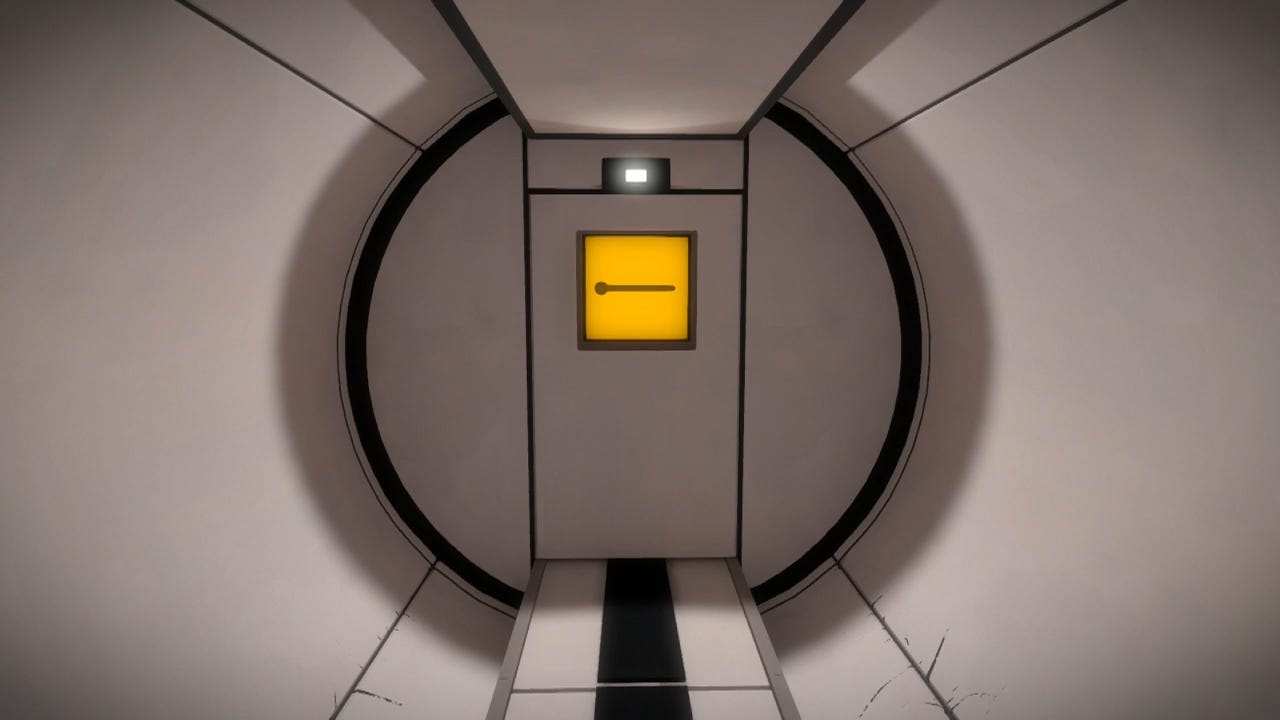
You’ll begin in a long, dark hallway. Move forward to the end and press in the indicated button to interact with this very simple puzzle, drawing a line from left to right. Press the indicated button to open the door.
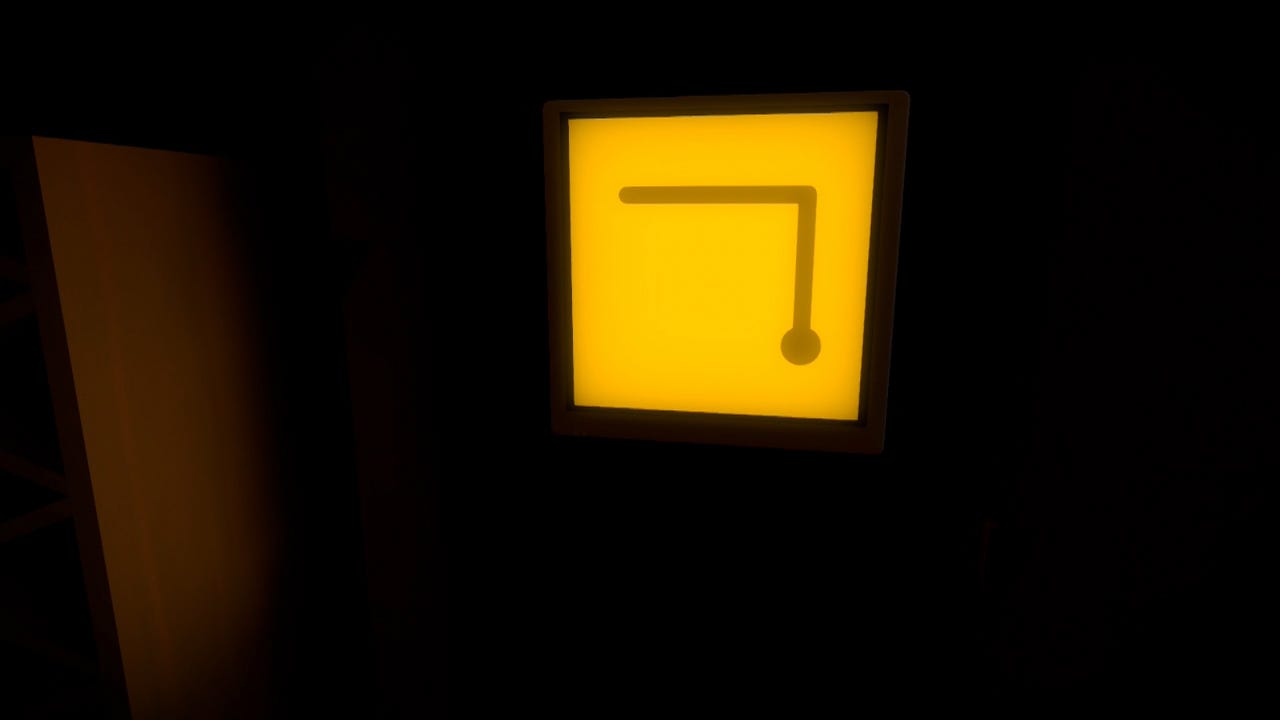
Once you’re through, look to your left and do the exact same thing one more time. Interacting and drawing a line from the bottom right to the top left. Notice how the game doesn’t give you hints this time? This is its way of encouraging you to learn more complex puzzles by figuring out the mechanics of basic ones.
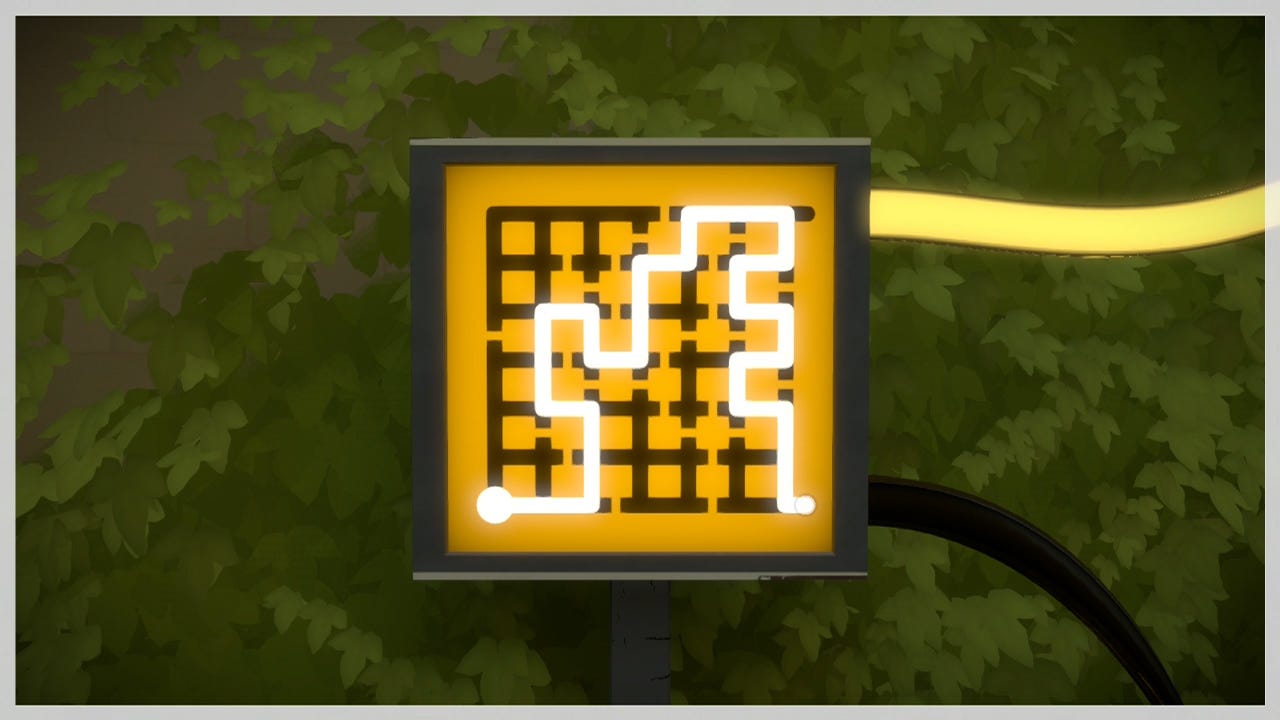
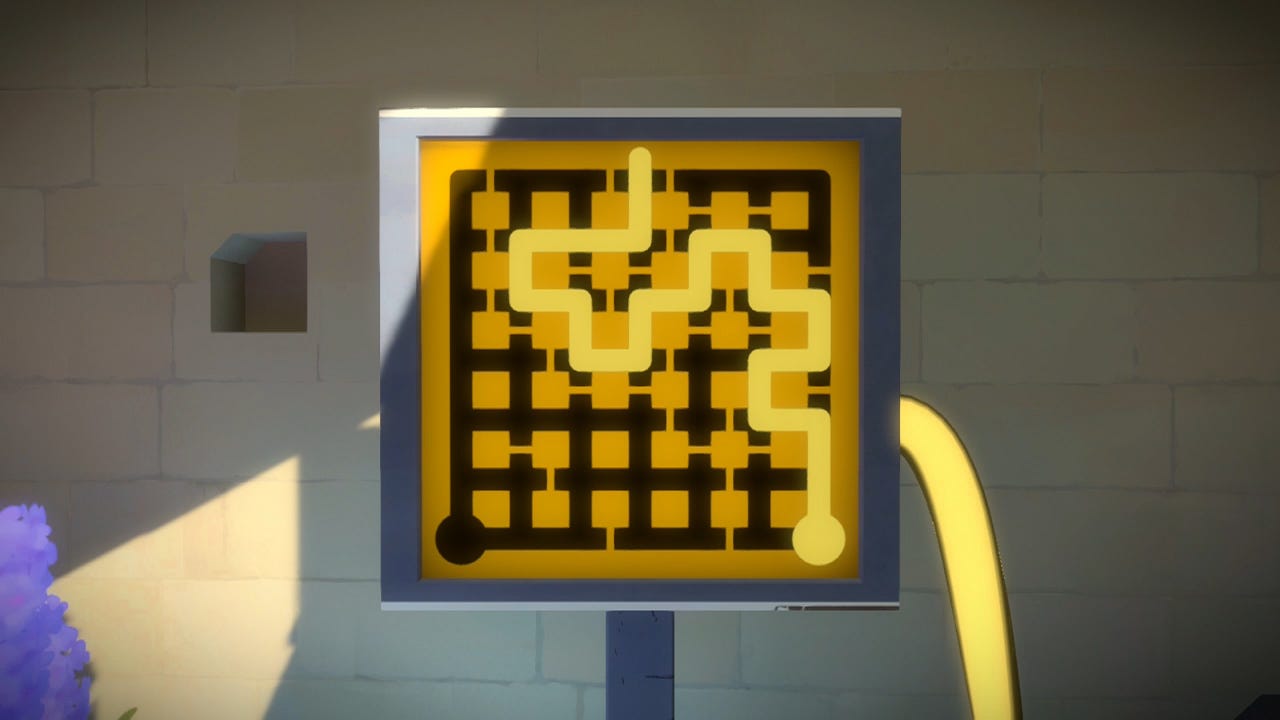
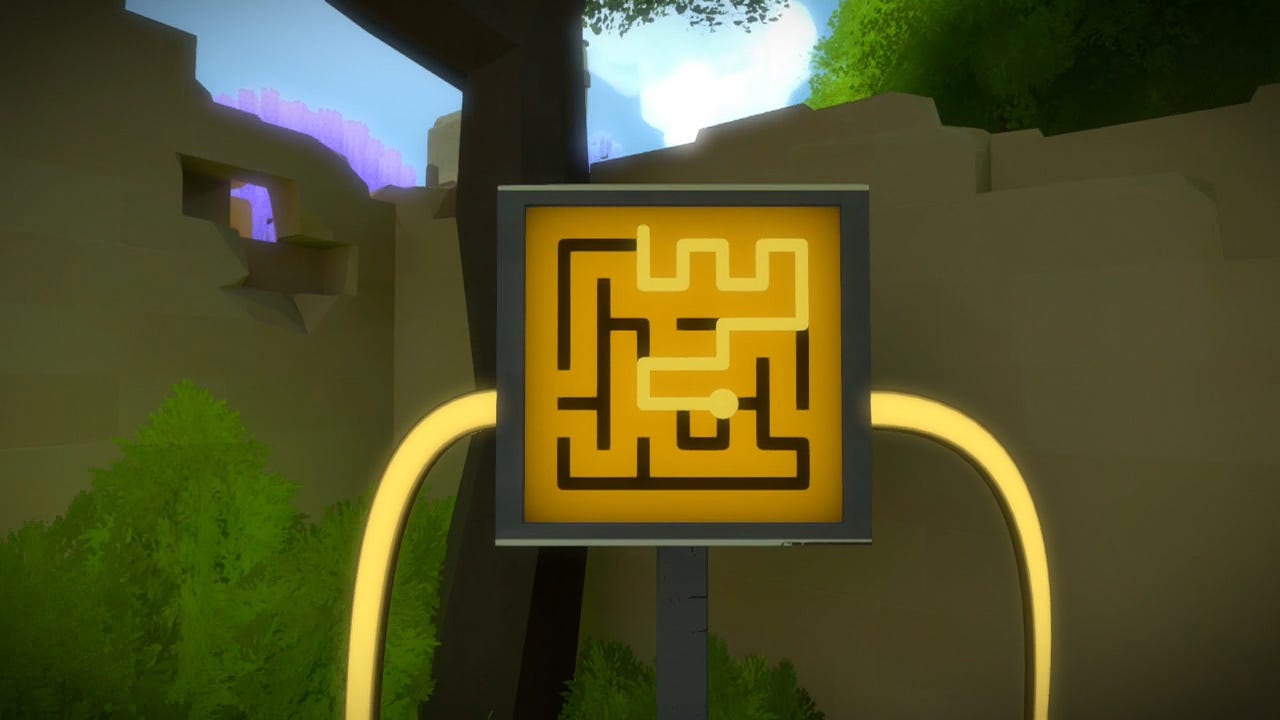
Head up the stairs, exit through the door, and immediately turn to your left after walking a few feet forward. Follow the path until you move into a building that is in the back left corner of the complex from where you entered. You want to begin by first activating the wire on the bottom right, which you can do using the solutions in the image below. Leave the top right wire alone for now.
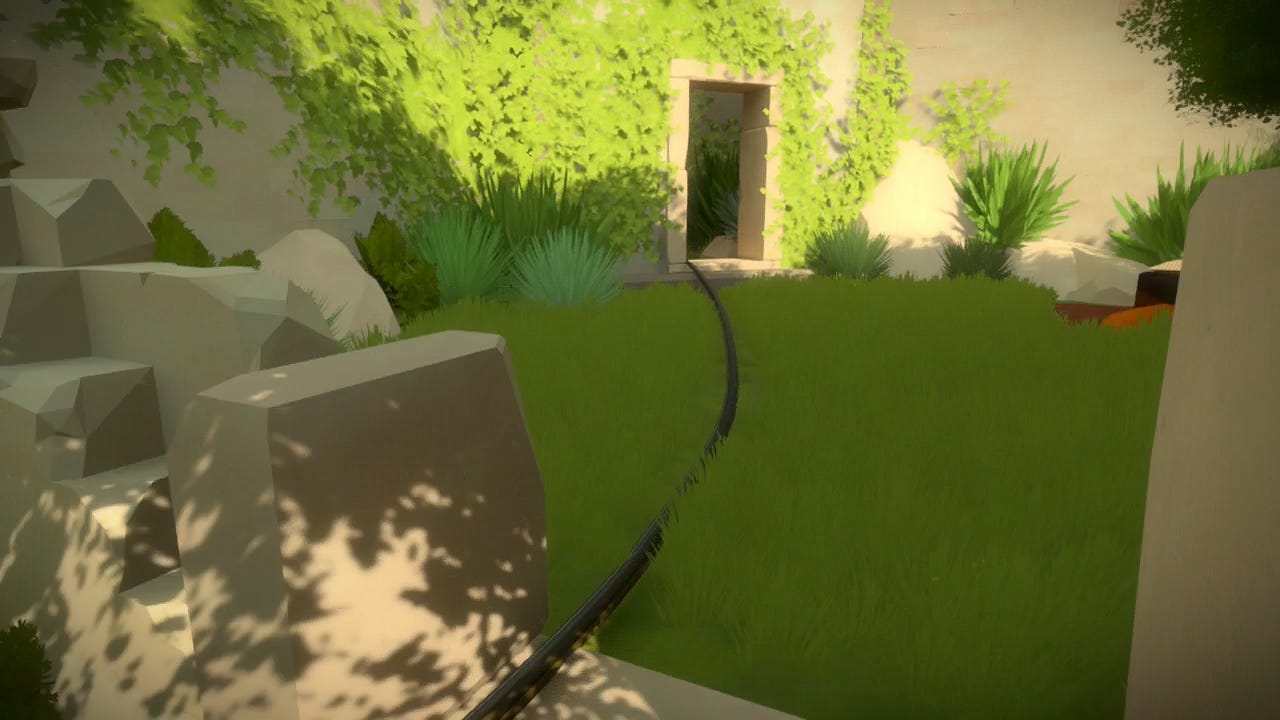
If you follow the now active wire, you’ll see that it leads you to a gate that you cannot pass through. You will also notice that the bottom panel to the right of the gate is open. That’s what you just did by solving that first puzzle.
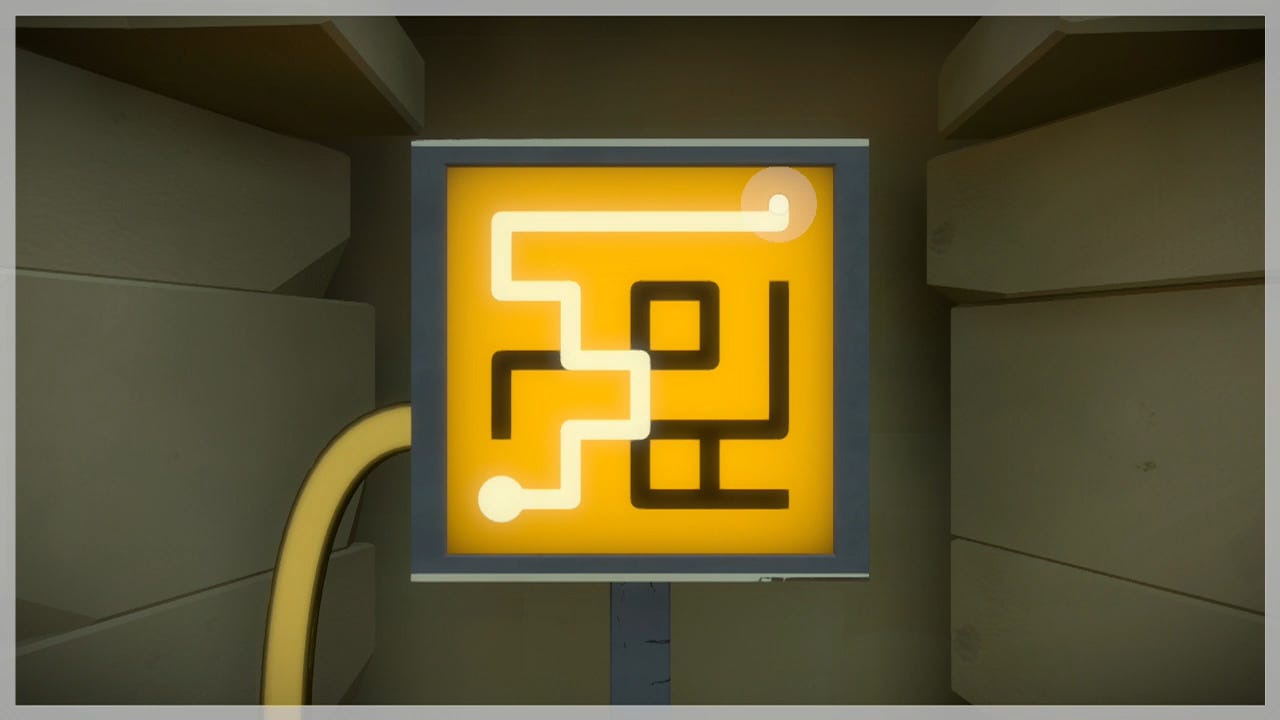
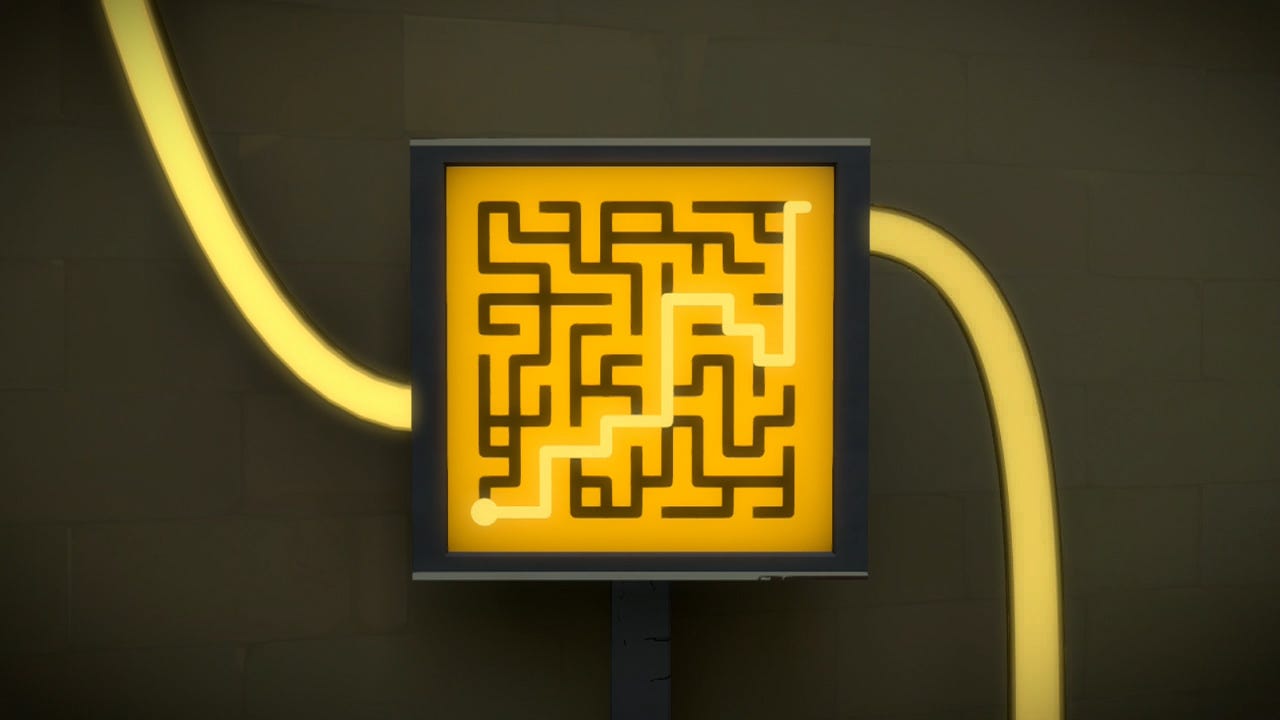
To activate the middle wire, follow it from this panel to the room in the back right of the complex from where you entered this area through the door at the top of the stairs. You can find that puzzle solution below.
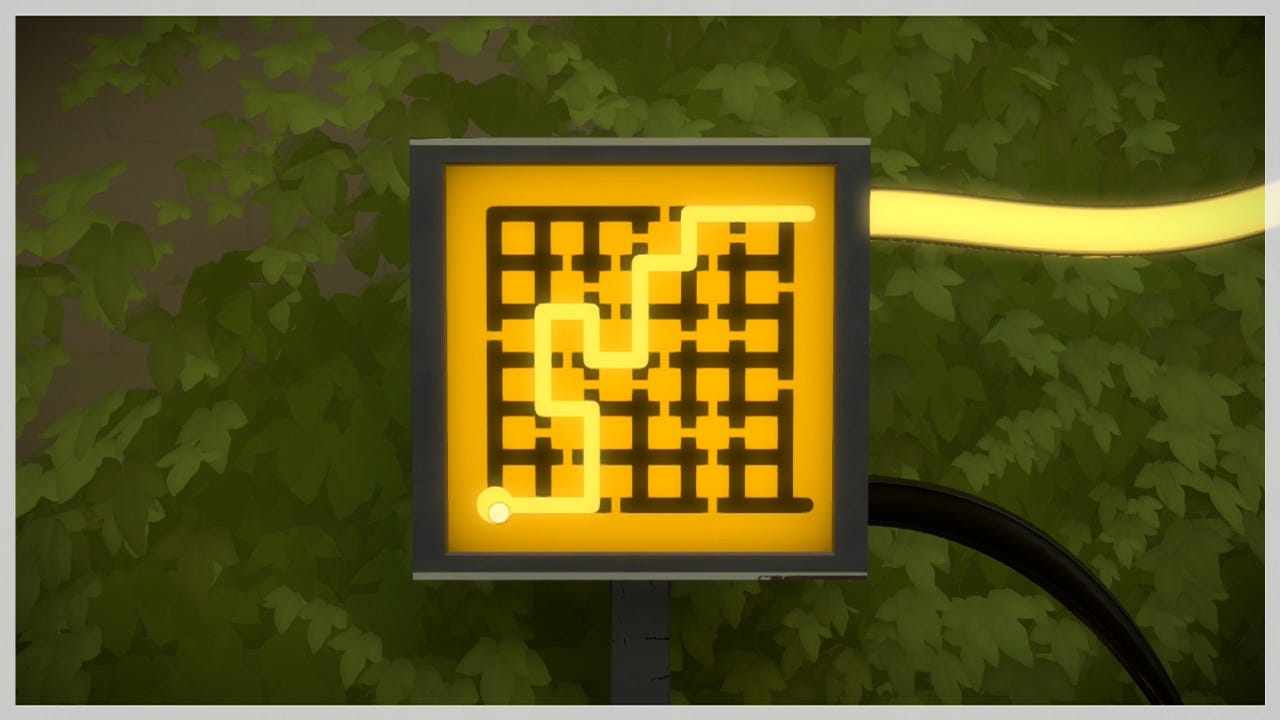
The final wire is controlled by several puzzles, each one activating a wire that leads to another. You can view the puzzles you need to solve, and the solutions to each, below. Of course, we’ve posted them in order.
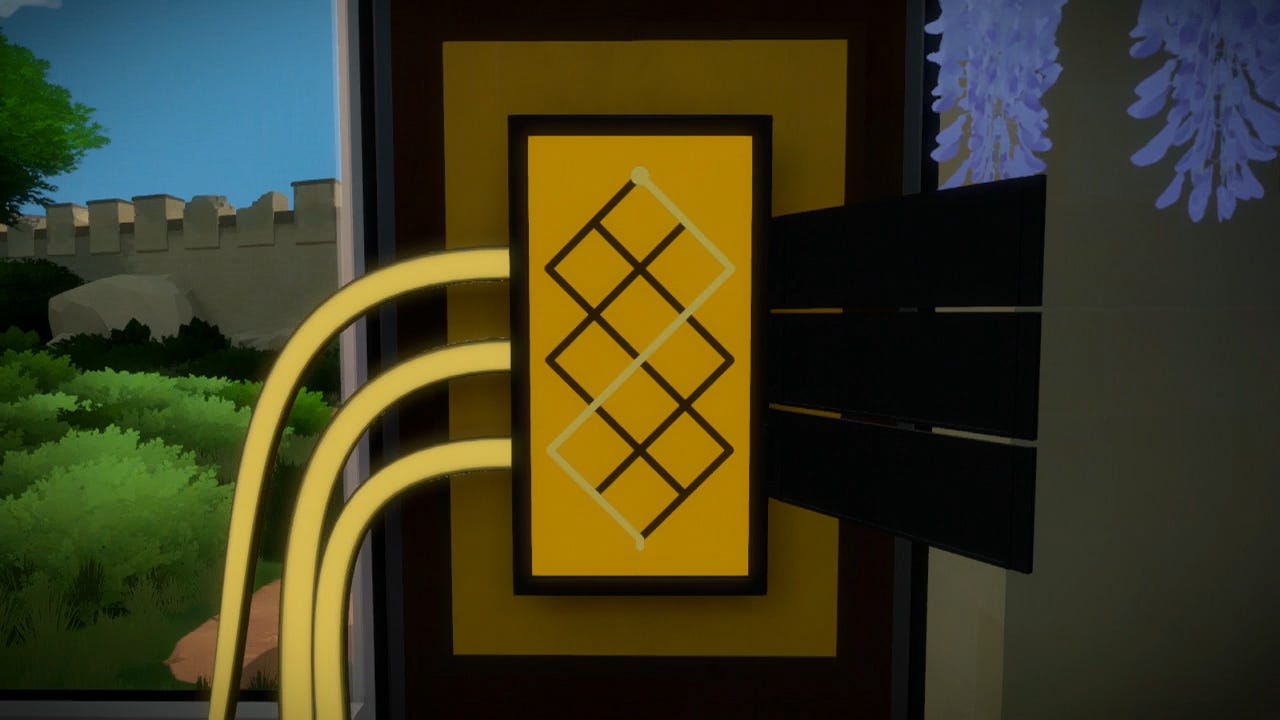
You will now be able to solve the puzzle at the gate itself, which is quite simple to do. Still, here’s the solution if you need it.
With the gate open, return to the very first puzzle that we helped you solve, in the back left corner of the complex from where you entered the area through the door at the top of the stairs. You now need to do the puzzle again, this time activating the top wire.
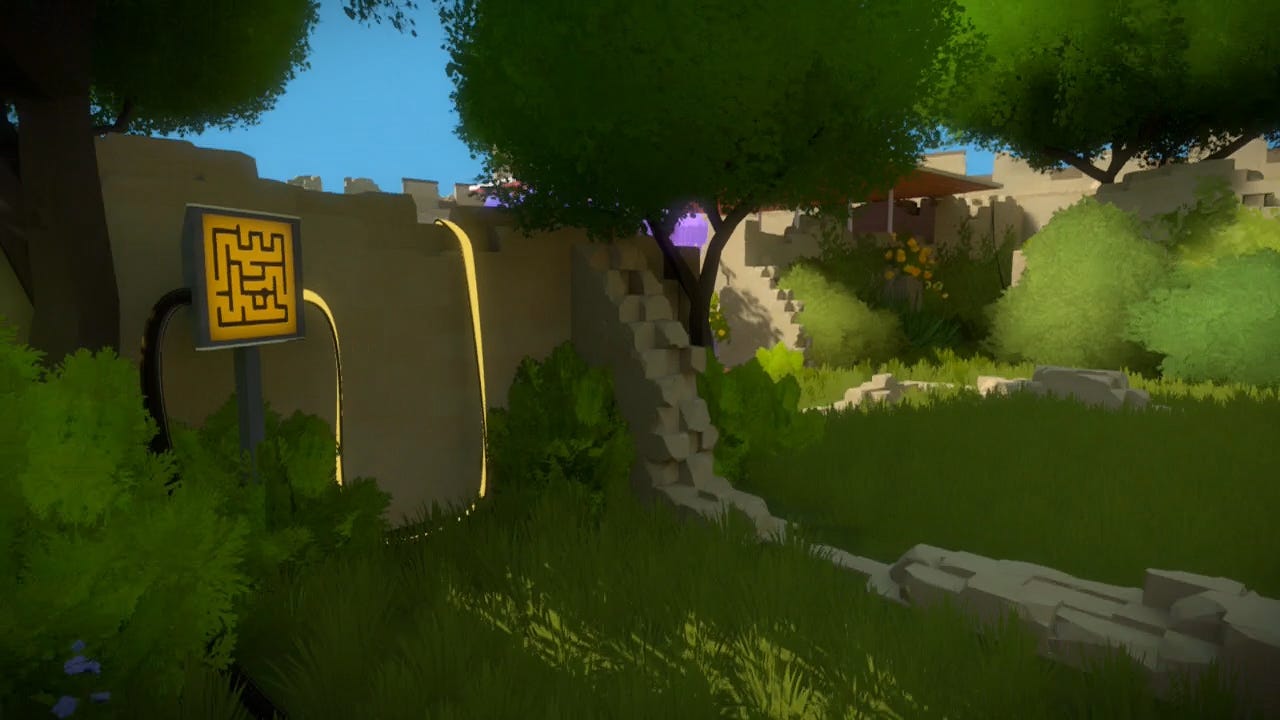
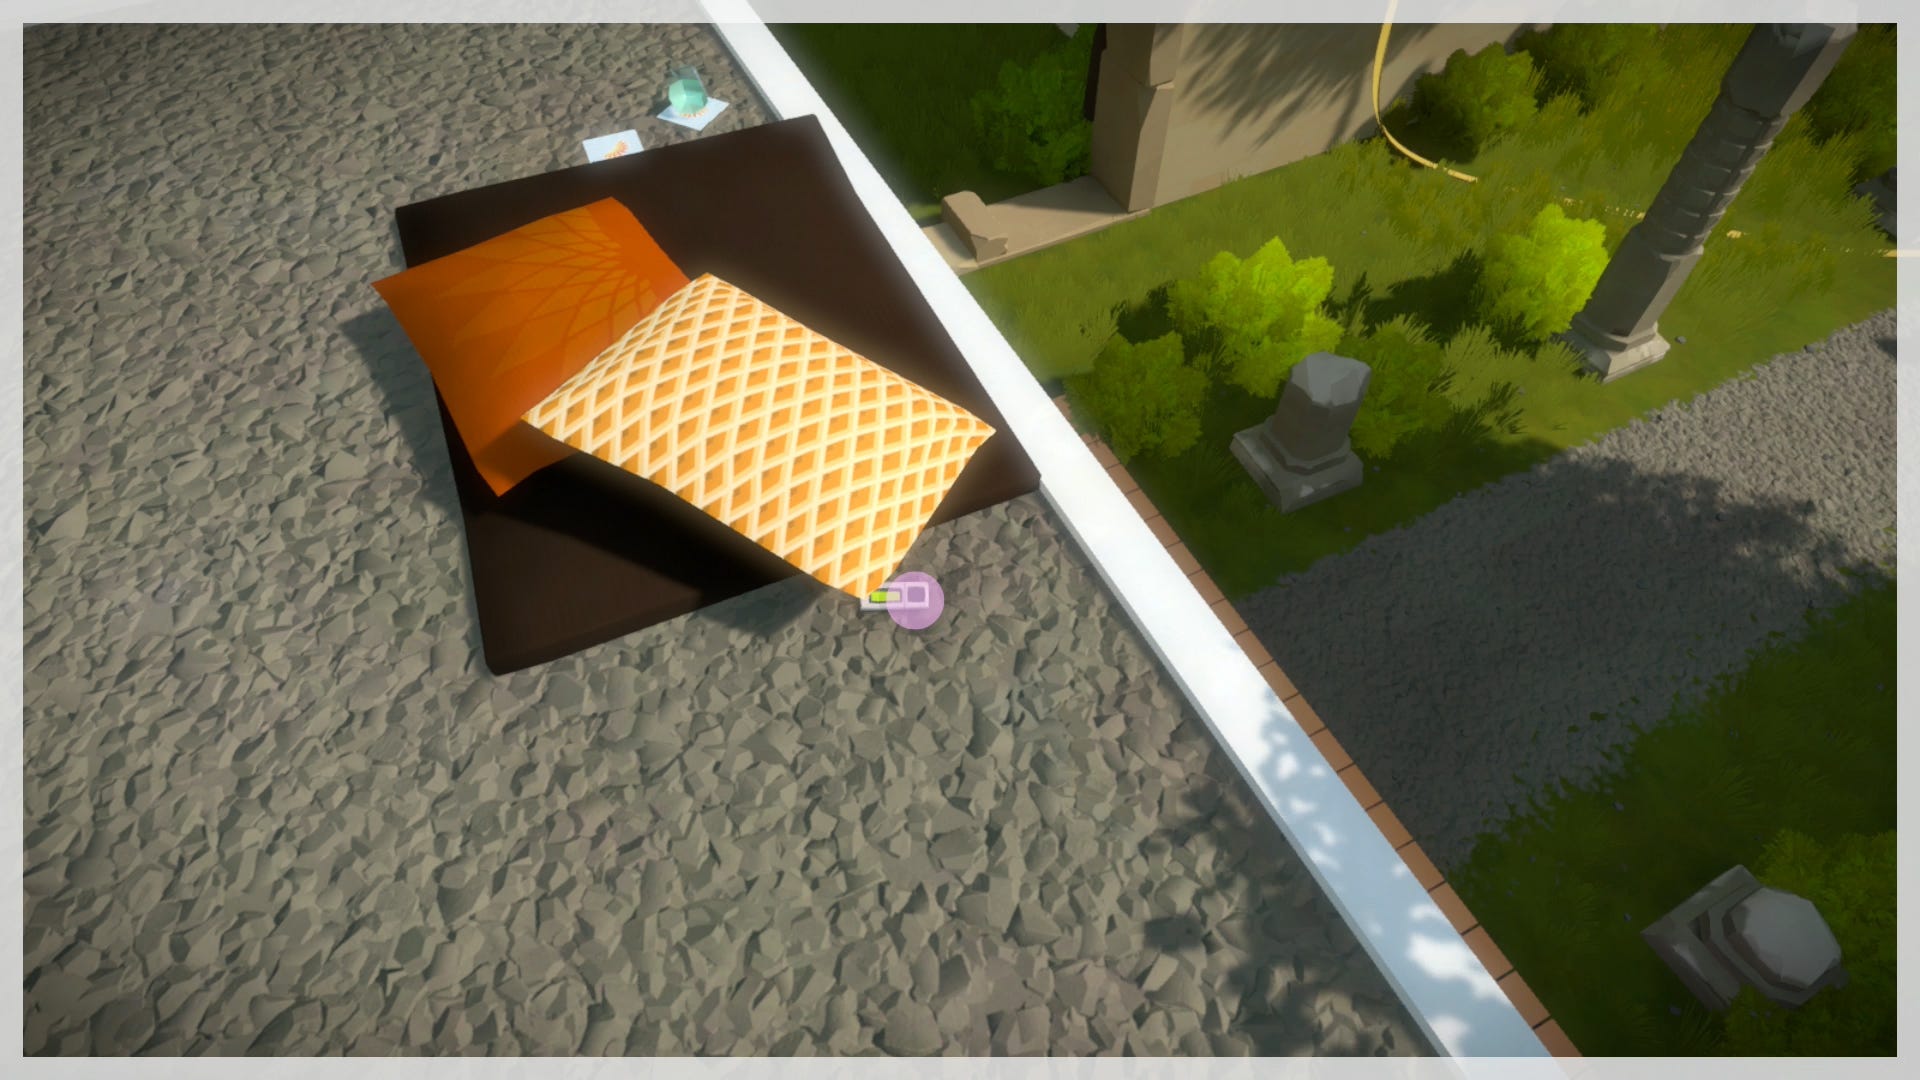
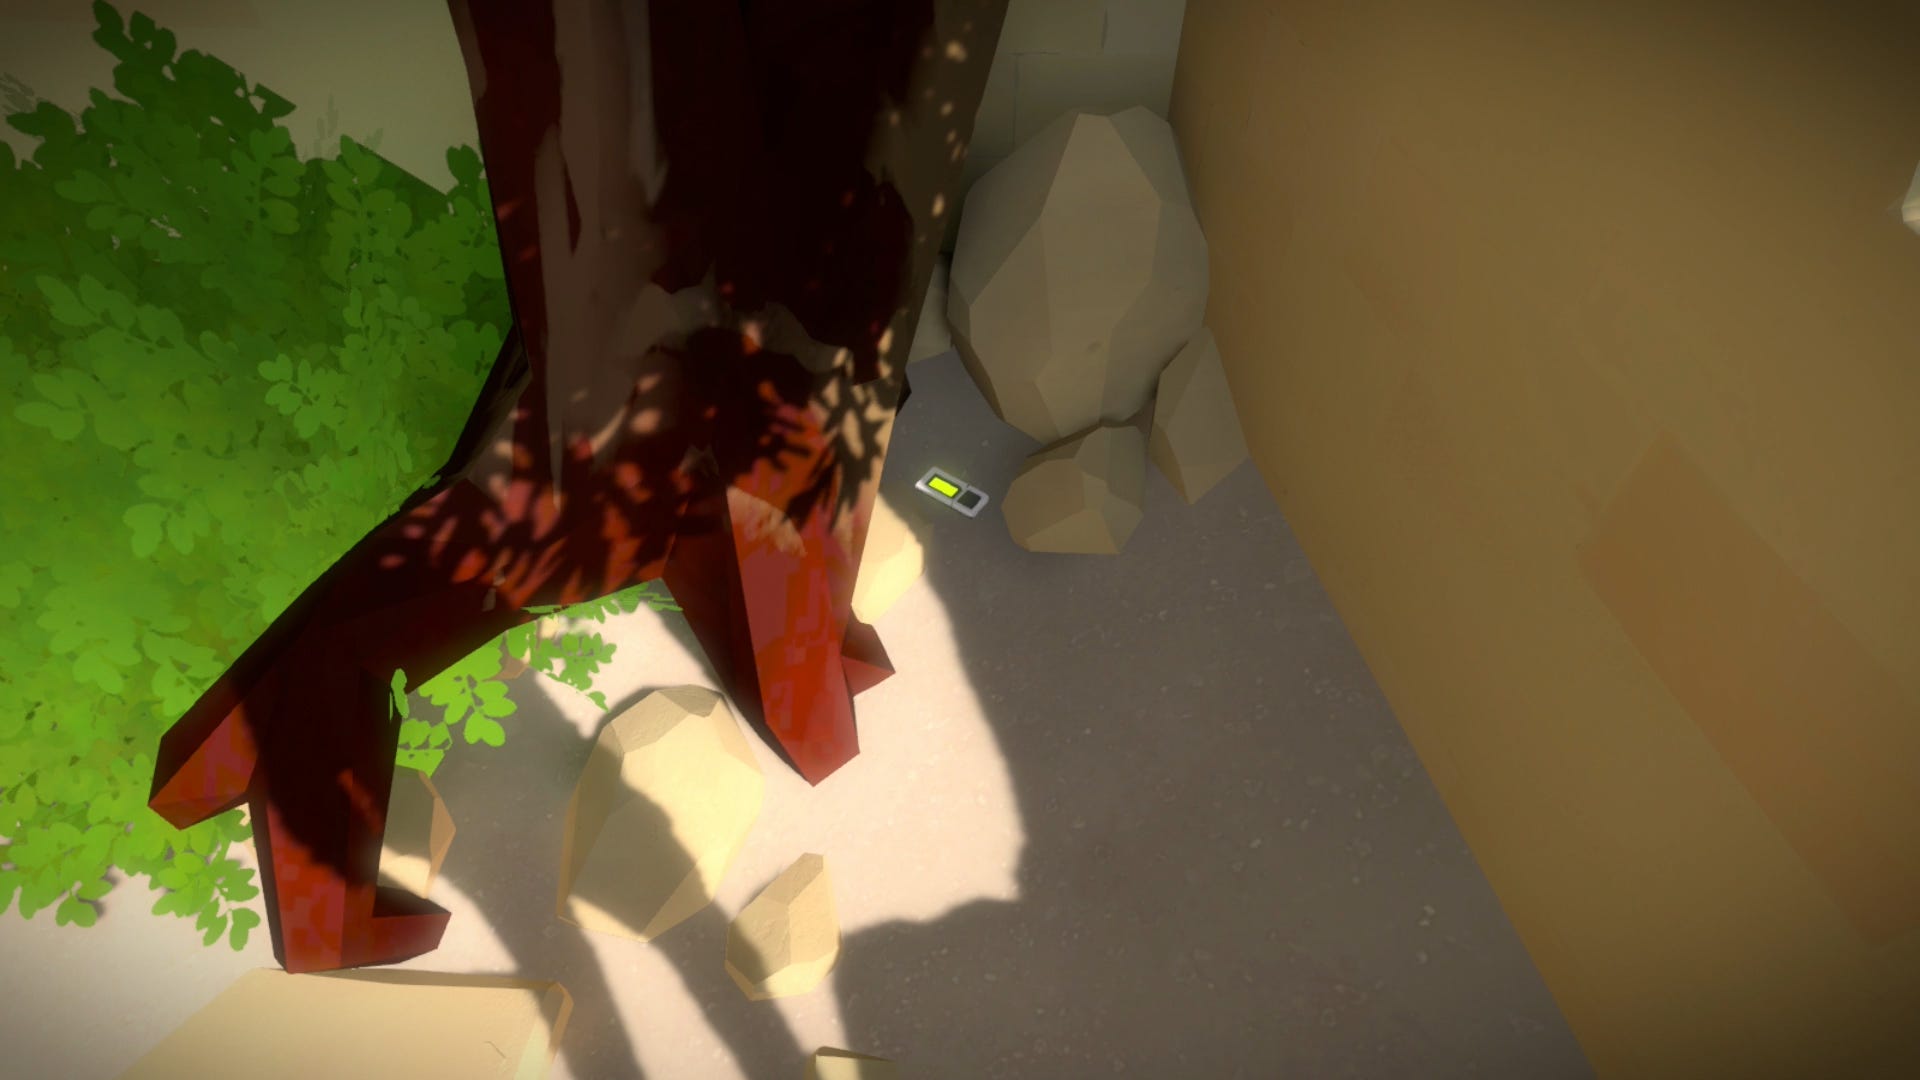
Exit the complex through the now opened gate. Turn to your left and hug the wall, going up the hill and to the wall that overlooked the complex you were just in. Follow the wall counter-clockwise until you reach a platform that hangs over the main path. Under some pillows will be an audio log that you should pick up.
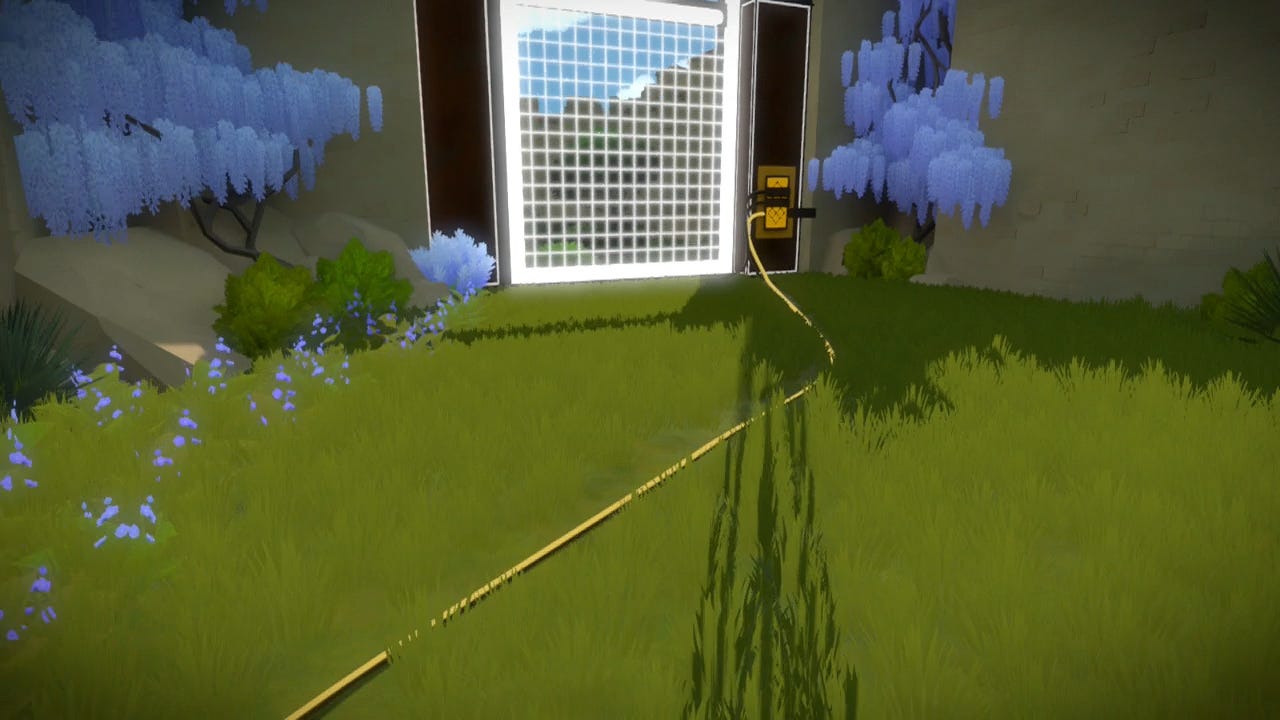
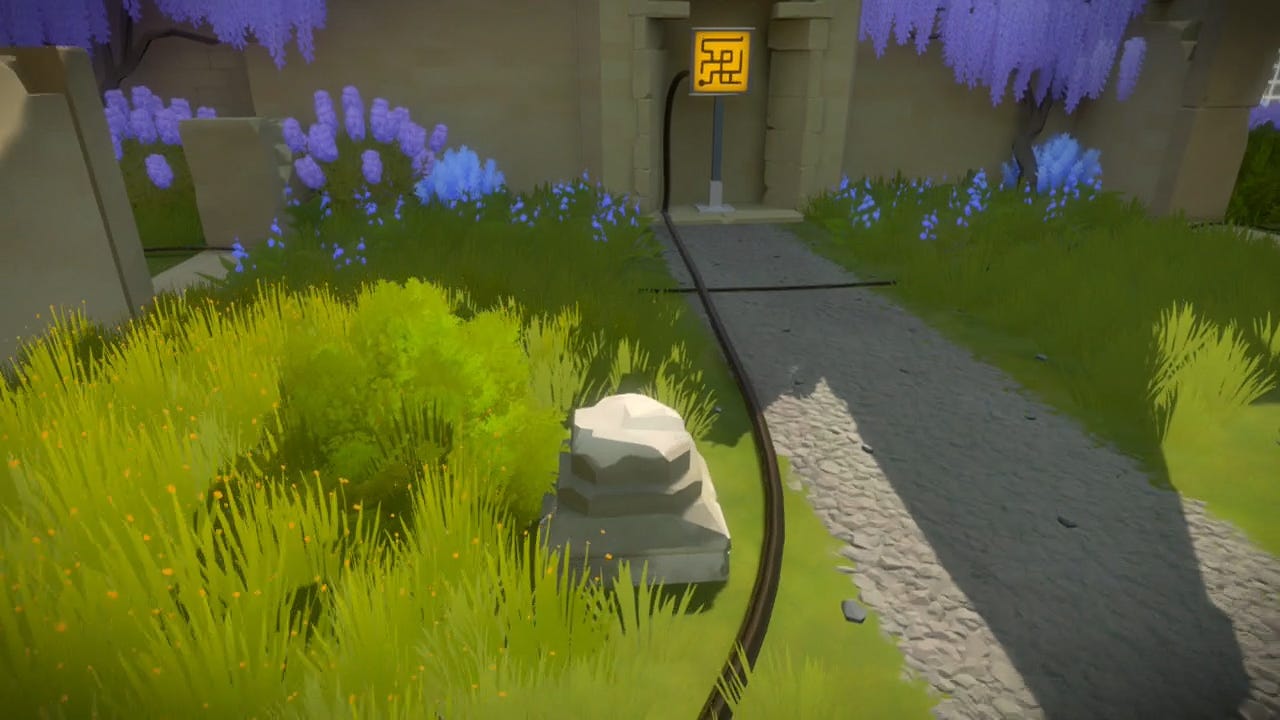
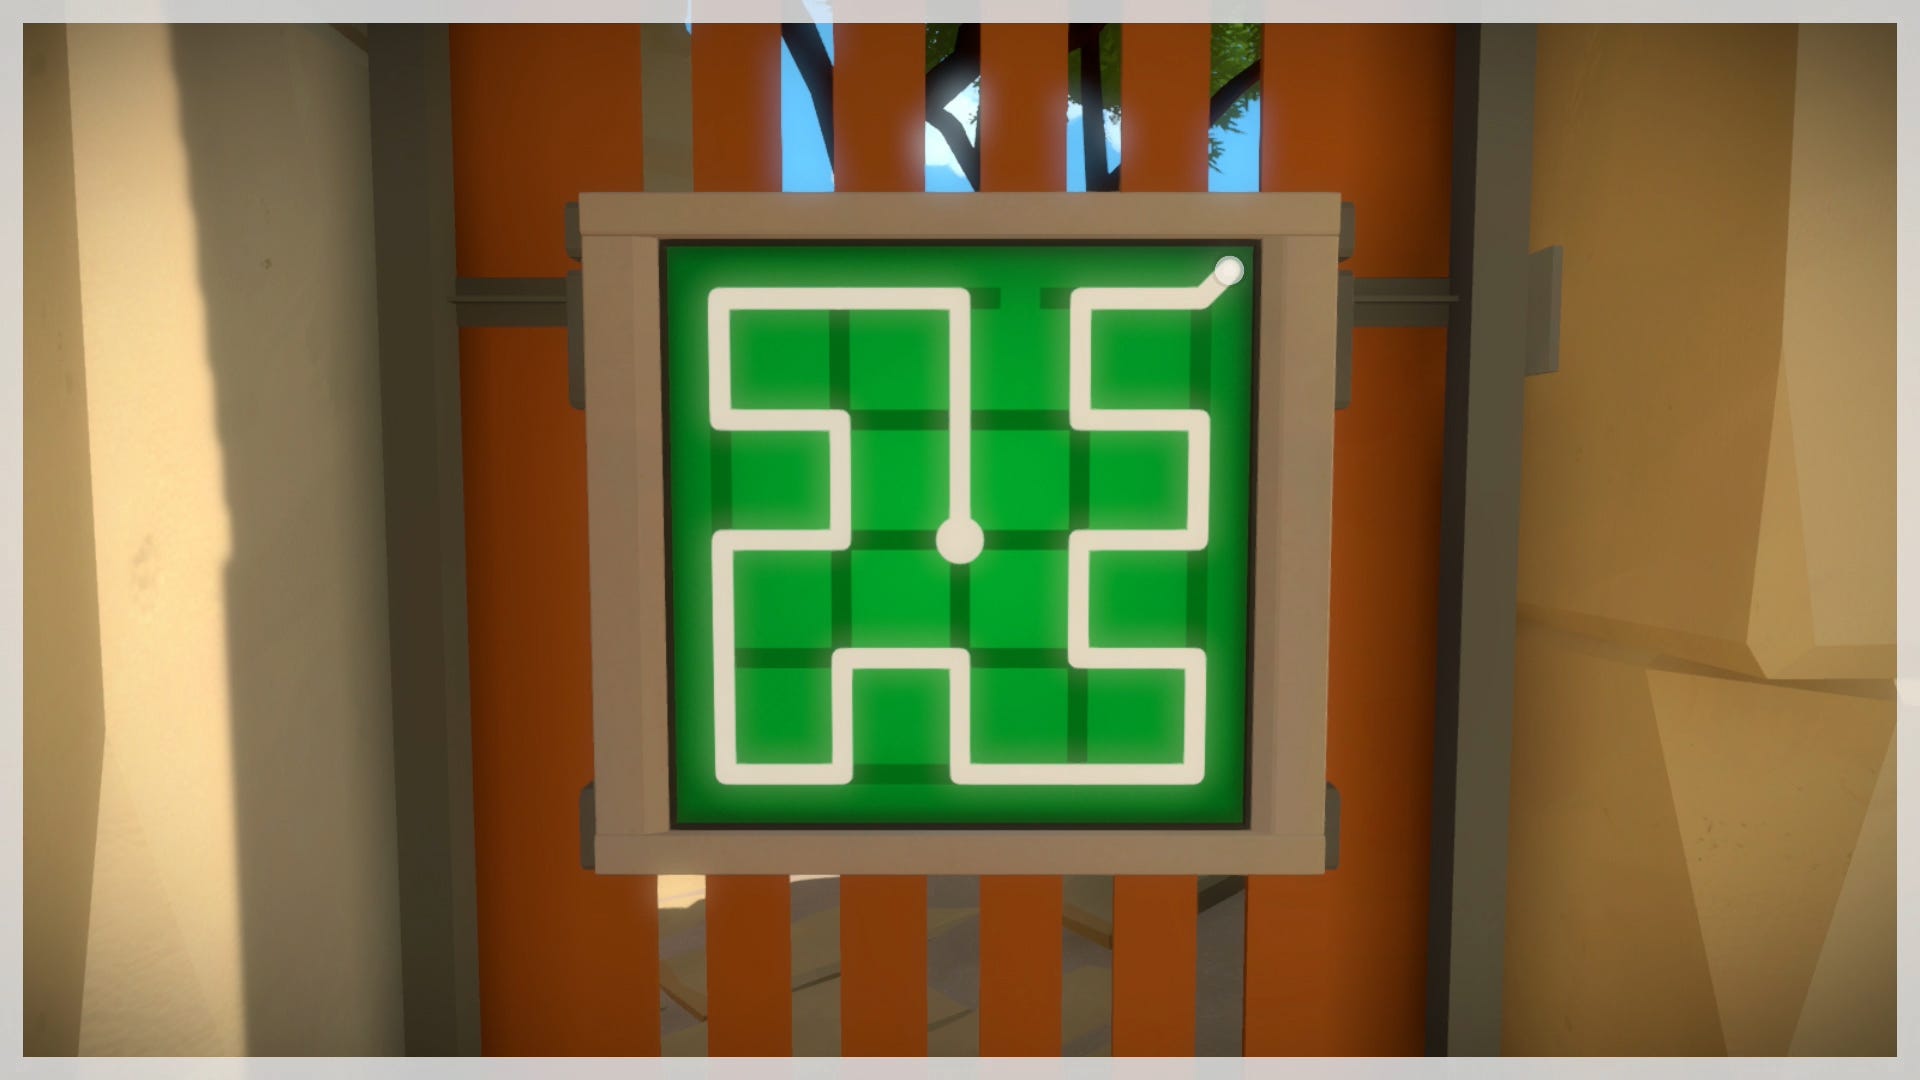
Backtrack out of the complex the same way you just entered, turning left again and following the outter wall counter-clockwise as it surrounds the complex. This will take you through an open gate. If the gate is closed, the first puzzle you solved is done incorrectly. The wire should be lit up. Continue through the gate and follow the linear path along the water’s edge. When you reach a locked door with a puzzle on it, below is how you solve it.
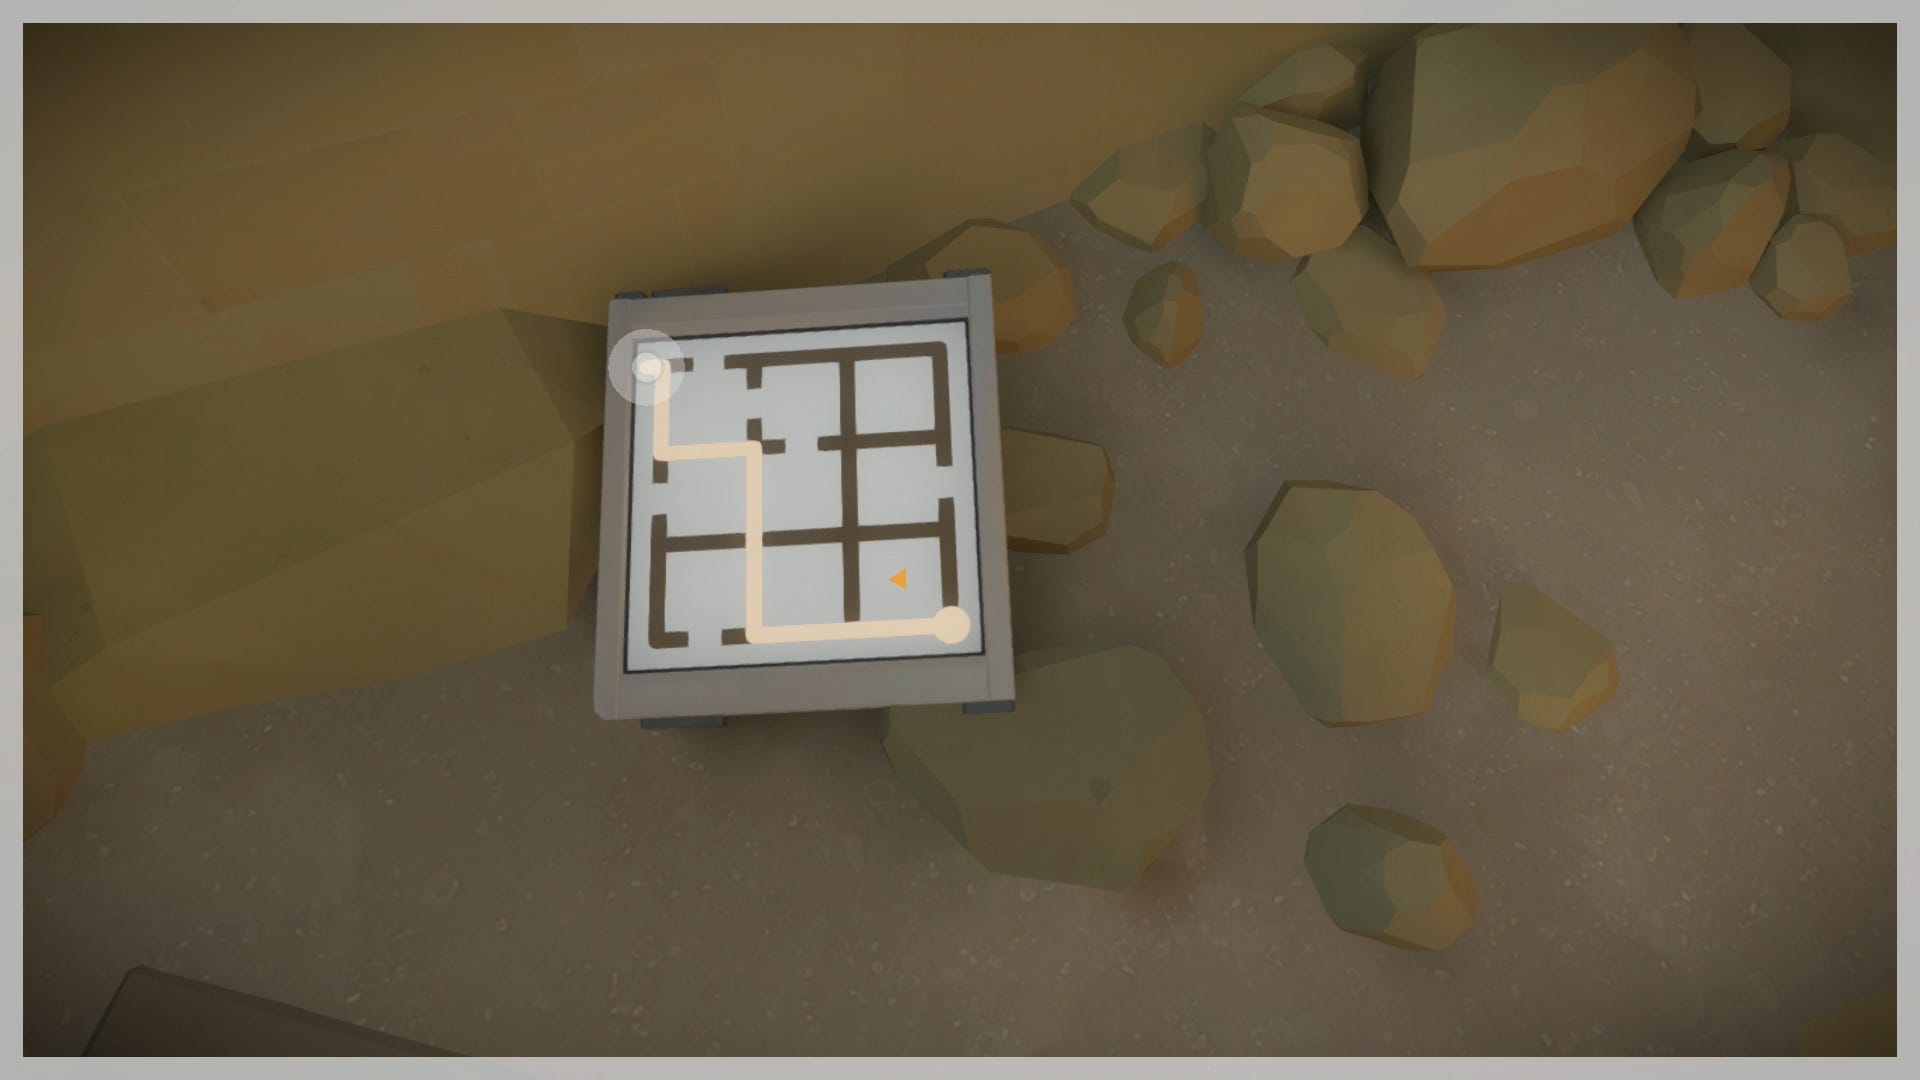
Through that door and directly on your right will be another puzzle that must be solved. It’s on the ground.
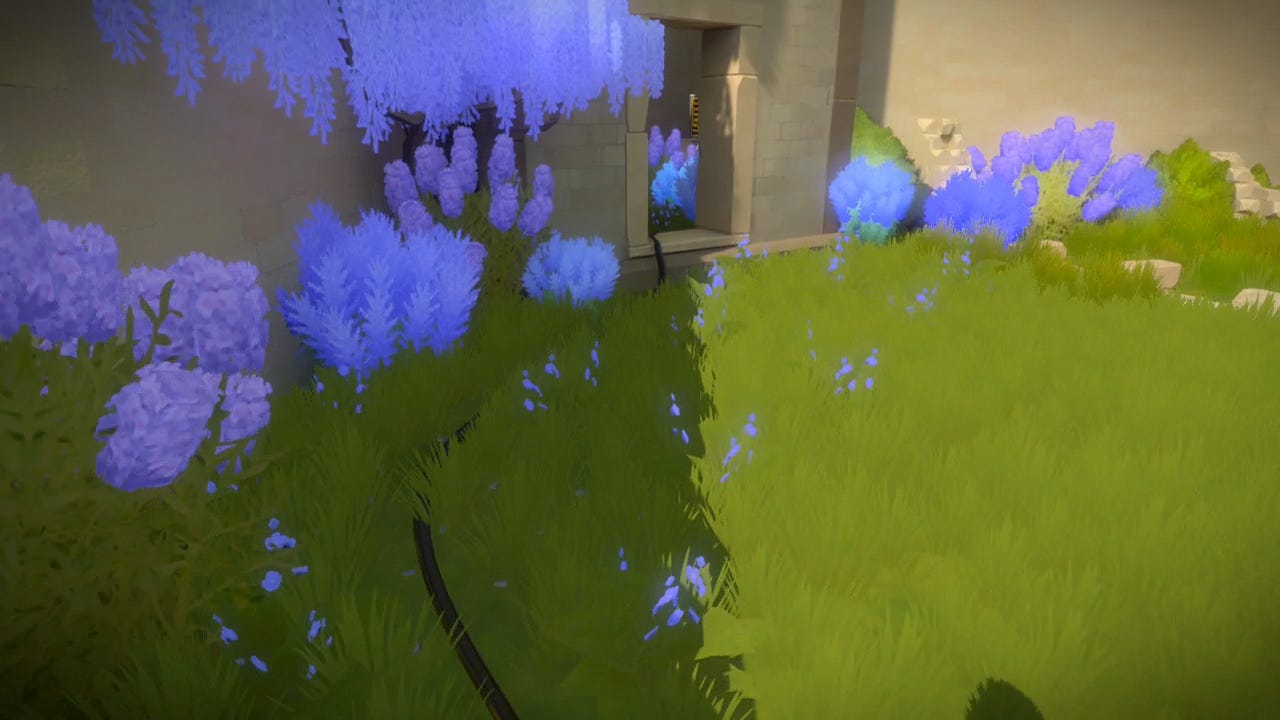
If you turn around from there and look behind the tree, you’ll find your second audio log. To leave this area, look for another door with a puzzle that must be solved.

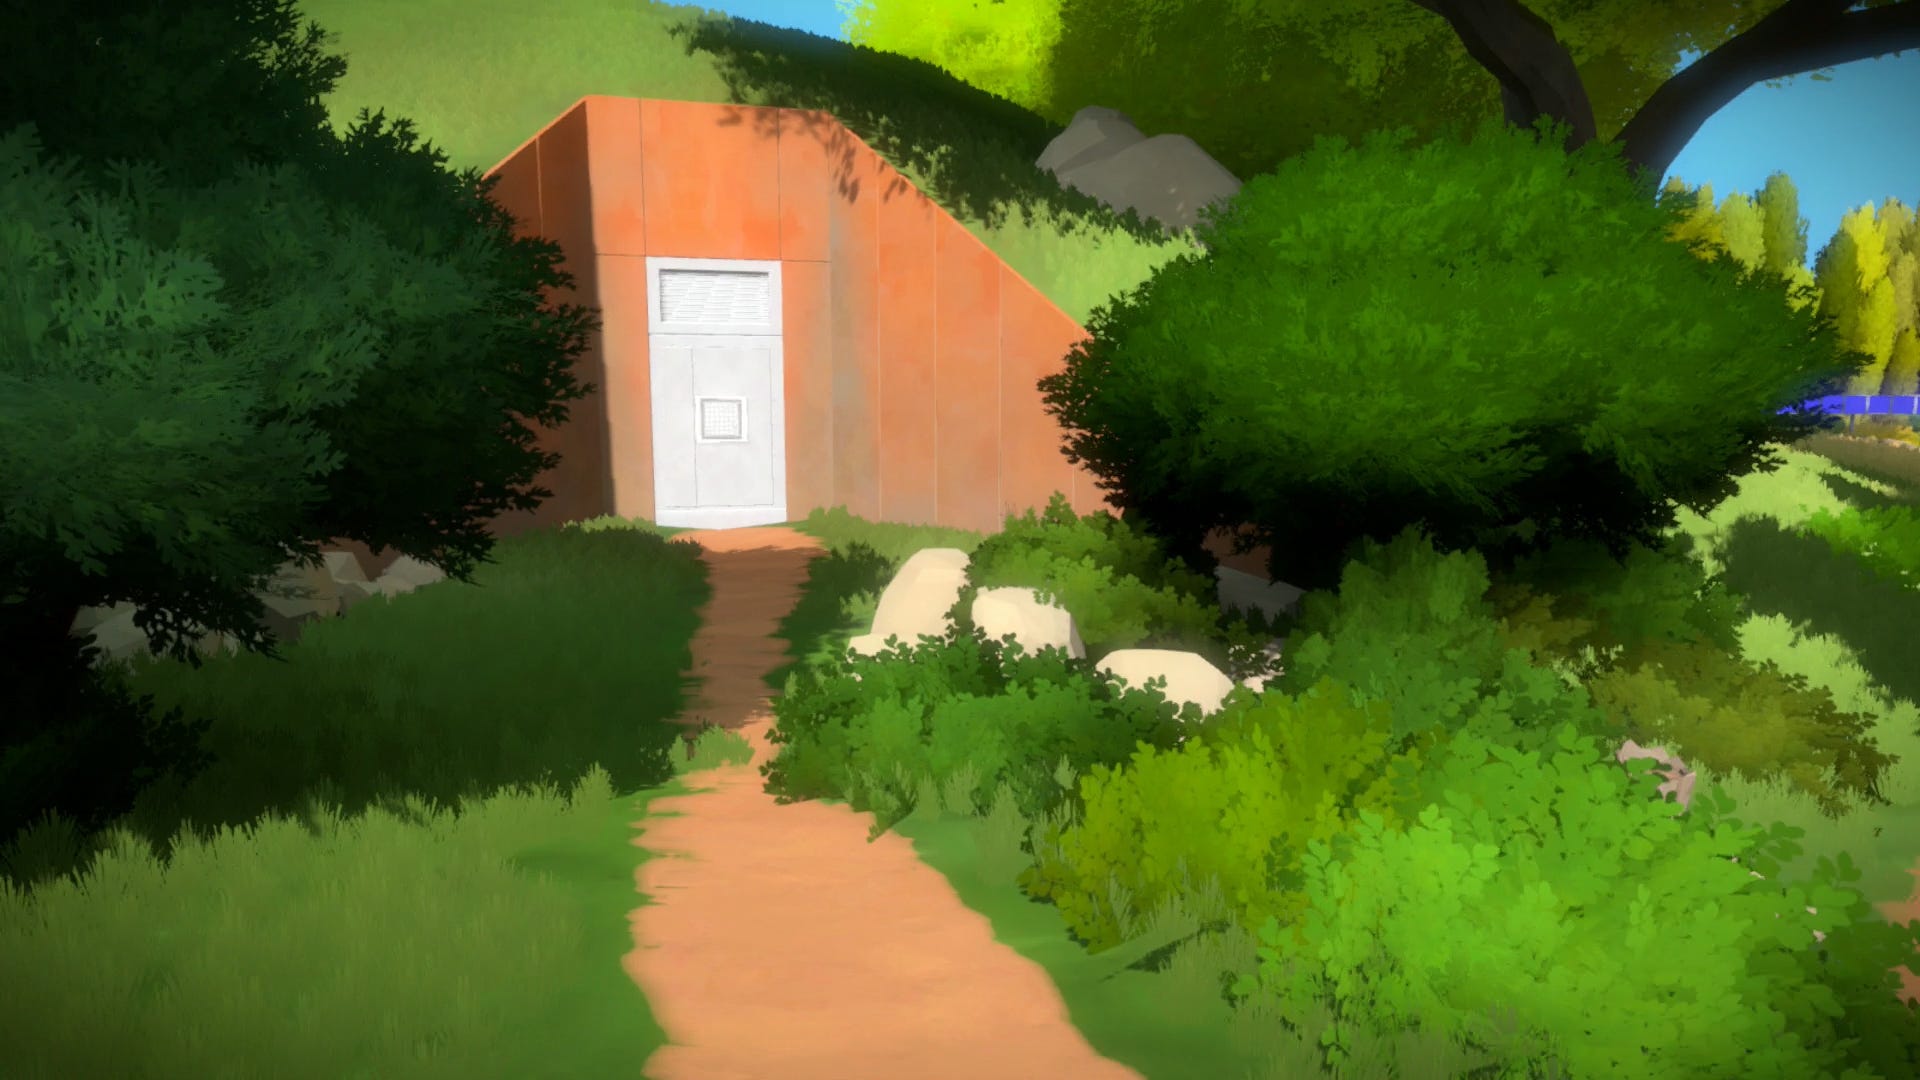
You’re now back on the main path, with the gate to the complex on your left and the direction you need to travel being to the right. Turn right, keeping an eye out for the bunker door on your left. Solve the puzzle on it to get inside.
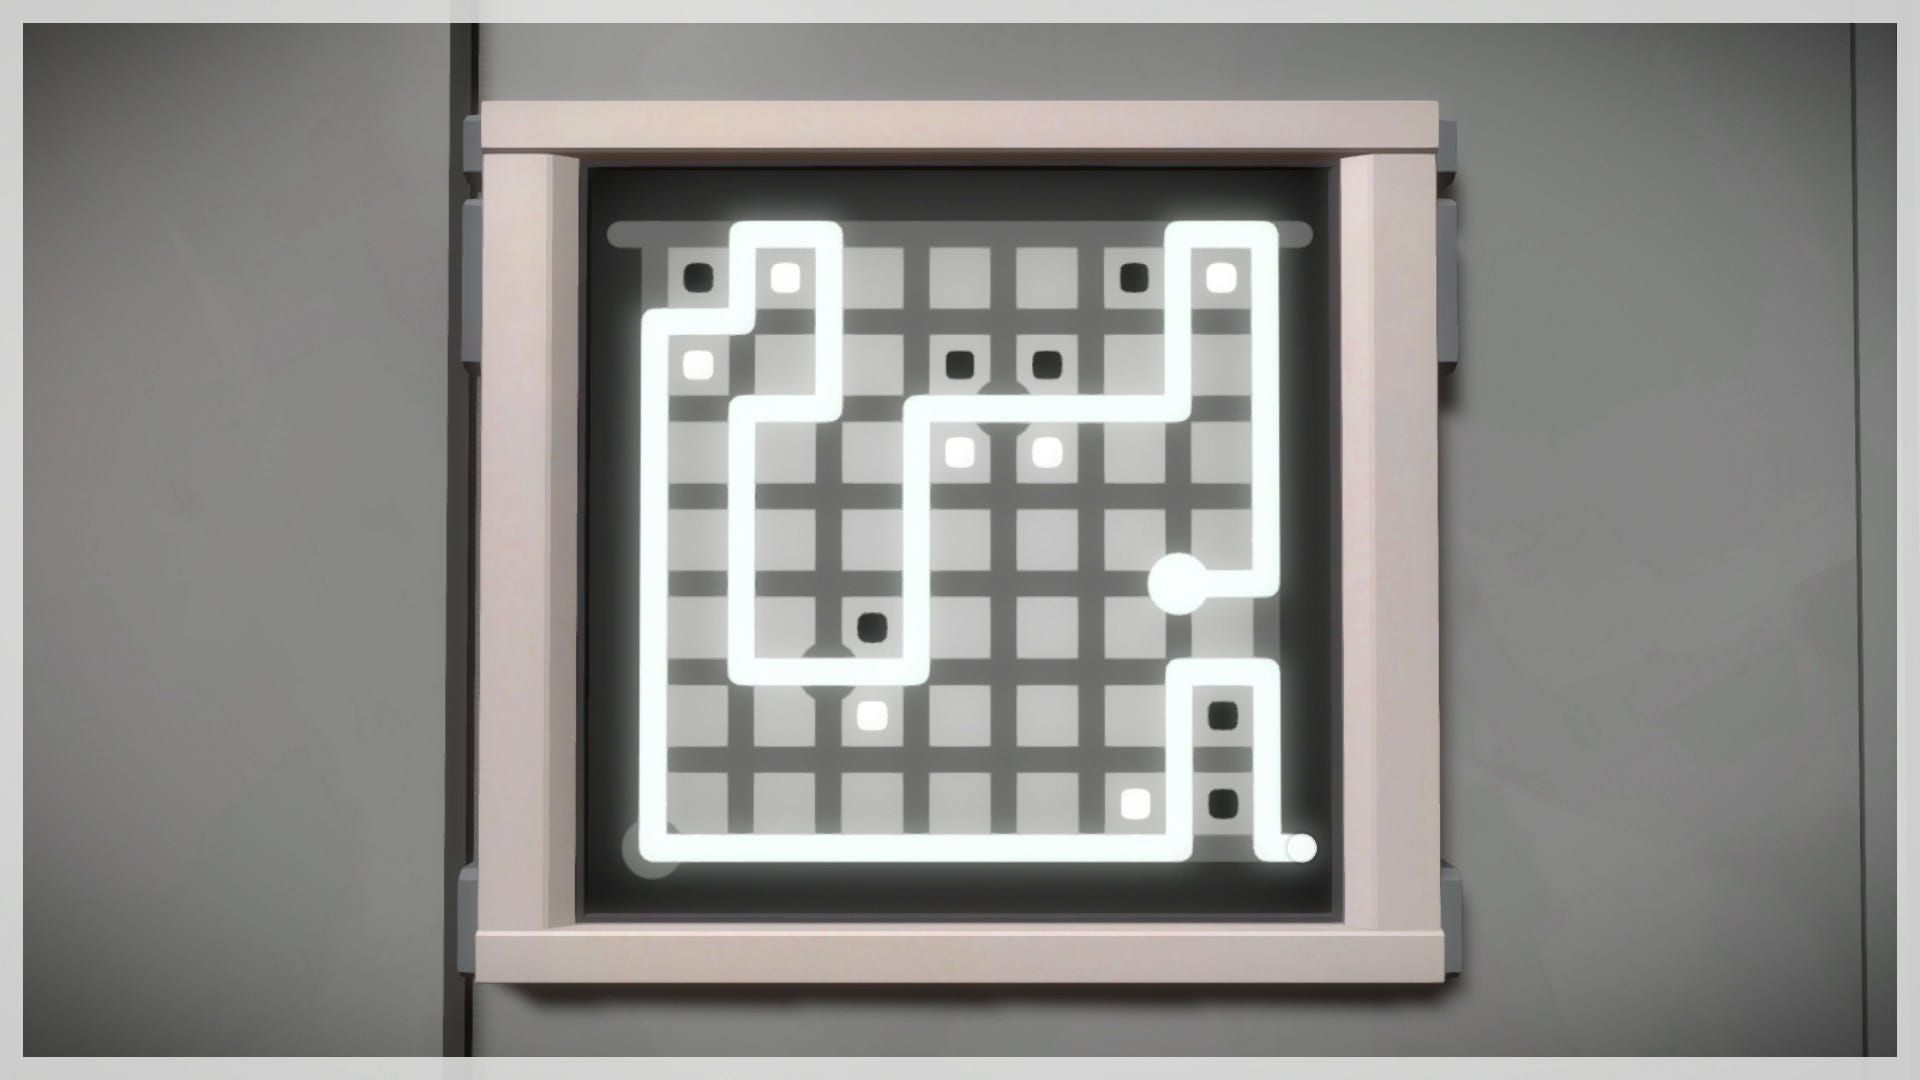
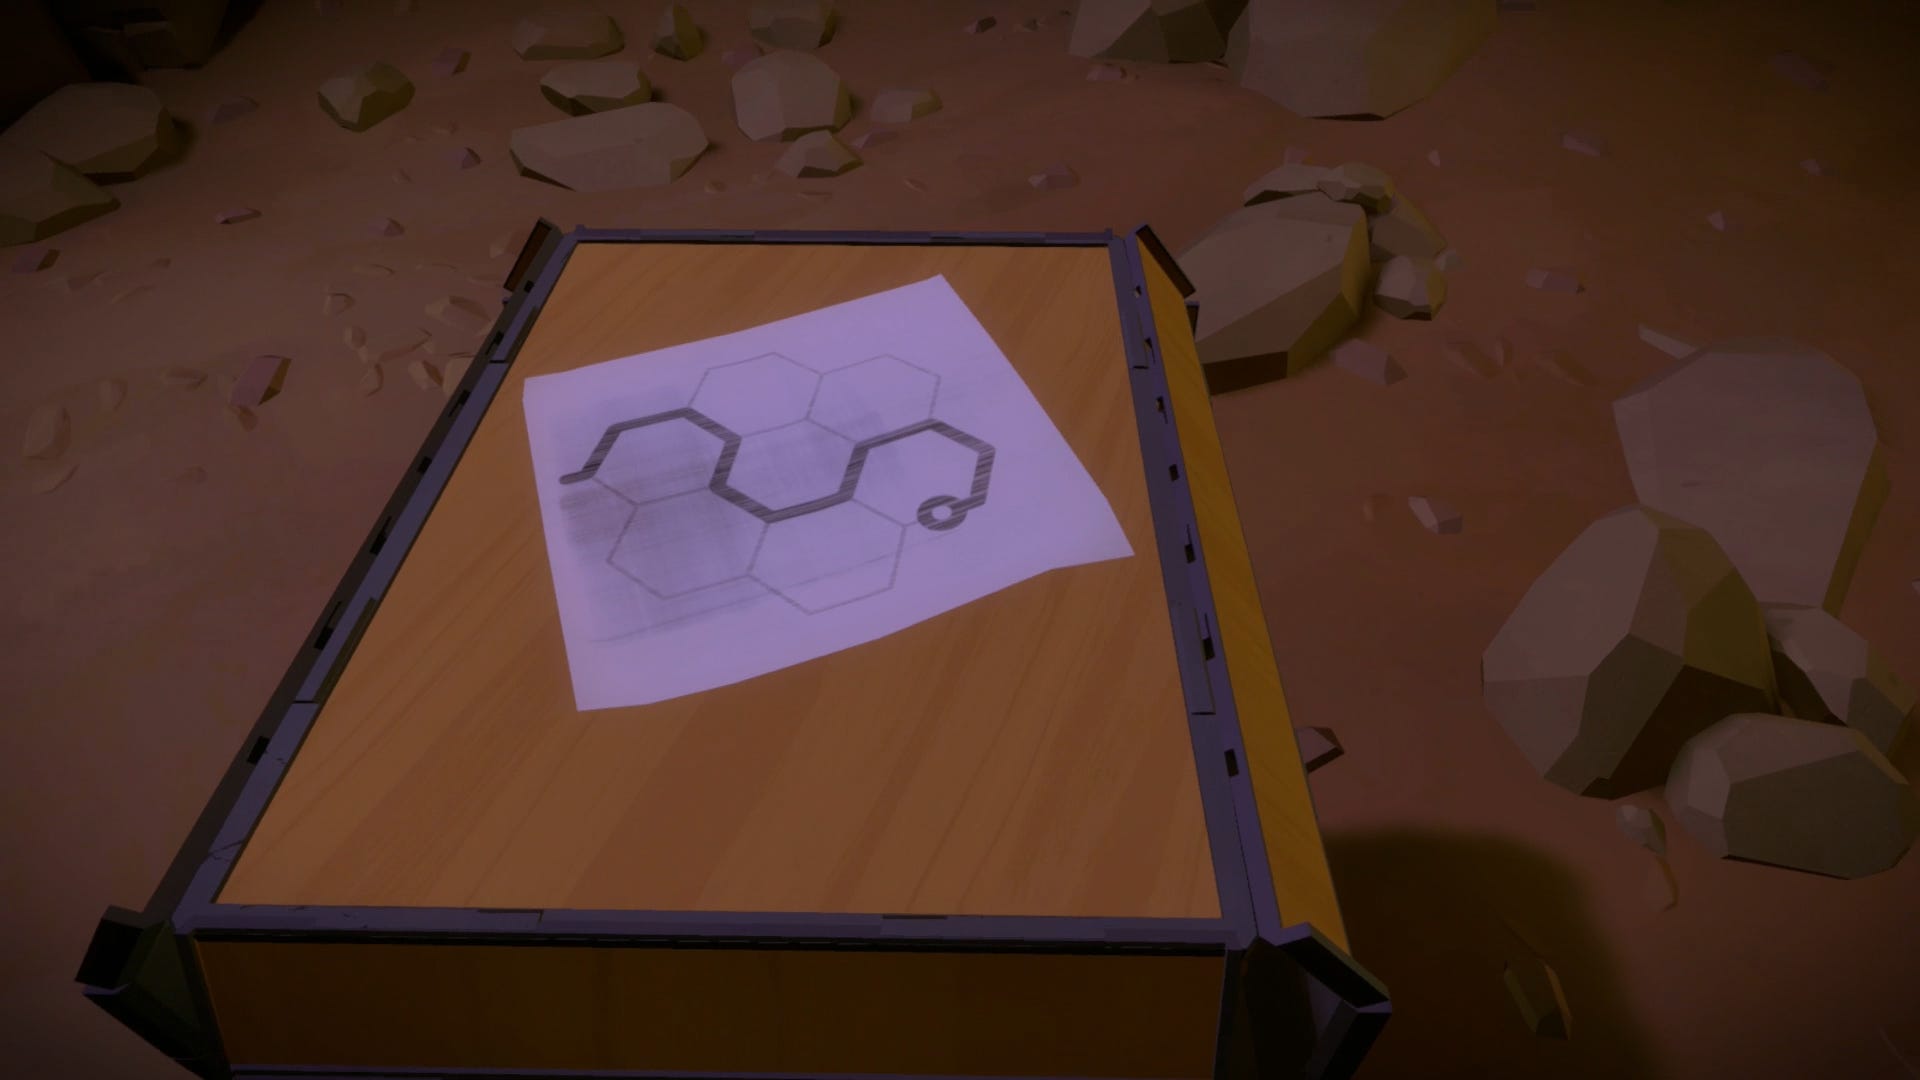
Inside this door will be a box. At the back is a very simple puzzle to open it. Do so, and then memorize the image that you see when looking inside the box. This will be the final puzzle for this section.