A Guide to Getting the Most Out of Your Nintendo Switch
You have a Nintendo Switch. Now what?

This article first appeared on USgamer, a partner publication of VG247. Some content, such as this article, has been migrated to VG247 for posterity after USgamer's closure - but it has not been edited or further vetted by the VG247 team.
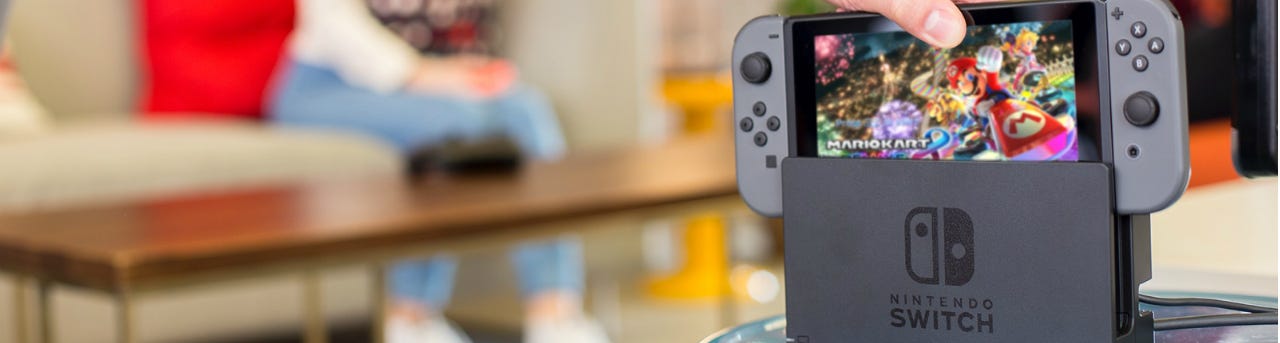
You're one of the bright and shining chosen few. You've picked up the brand-new Nintendo Switch at your local retail outlet. You've pulled it out of the box and charged it. Maybe you've loaded up The Legend of Zelda: Breath of the Wild or one of the other launch titles. What now?
We here at USgamer want to help you get the most out of your Nintendo Switch. You might know how to play a game on your new system, but there's more you need know to help it reach its maximum capacity. Here's some helpful tips to make your purchase sing.
Set Up Your Nintendo Account
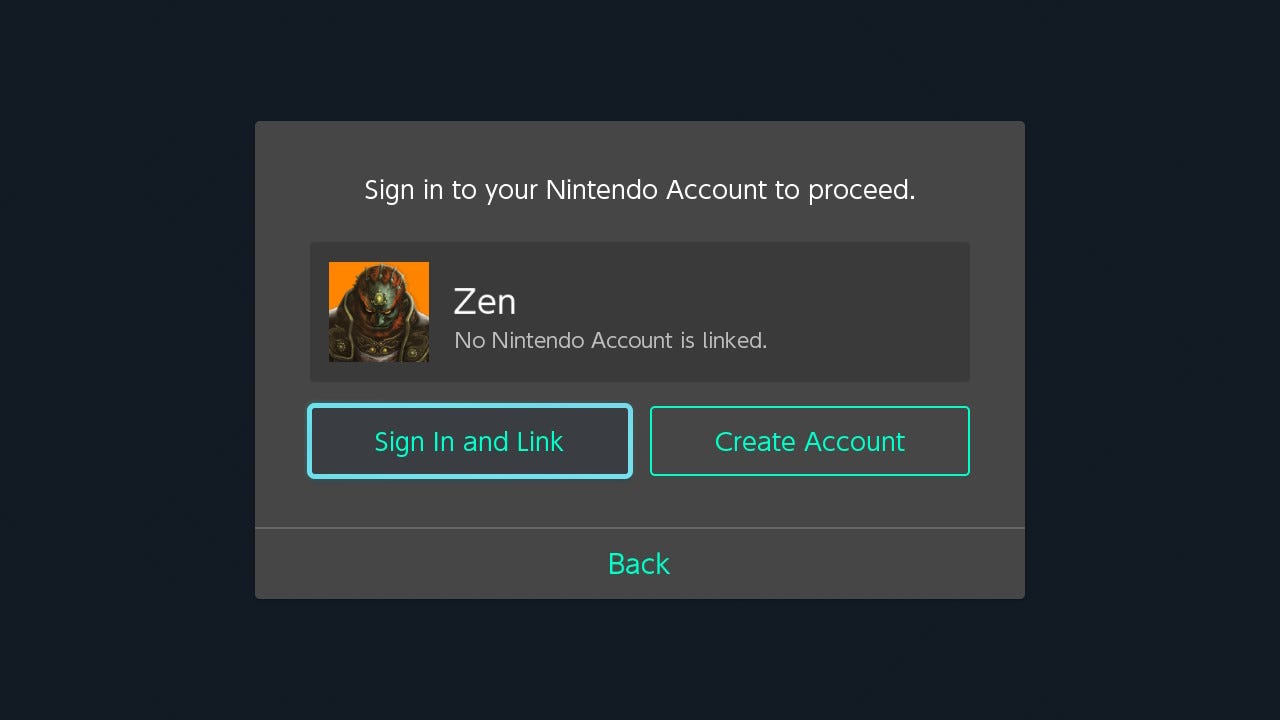
One core part of the the Nintendo Switch is the new Nintendo Account system. Without a Nintendo Account, you're locked out for most of the system's online features, including online play, adding to your friends list, and the Nintendo eShop.
If you have a Nintendo Network ID from the company's previous systems, you can use that to create a Nintendo Account, or you can sign up for a new Nintendo Account. Once you made your Nintendo Account, you'll want to boot up your Nintendo Switch. Select "System Settings" in the Home menu, scroll down until you find "Users". Pick the User that you want to link, and select "Link Nintendo Account".
This will open the system's online features. You can connect to online multiplayer, add friends to your list, and more.
Adding Friends With Friend Codes
You have the Switch, but you want to be connected to your Switch-owning friends so you can play Super Bomberman R or Fast RMX online with them. It's time to add them to your Friends List. To do so either you or your friends needs a Friend Code.
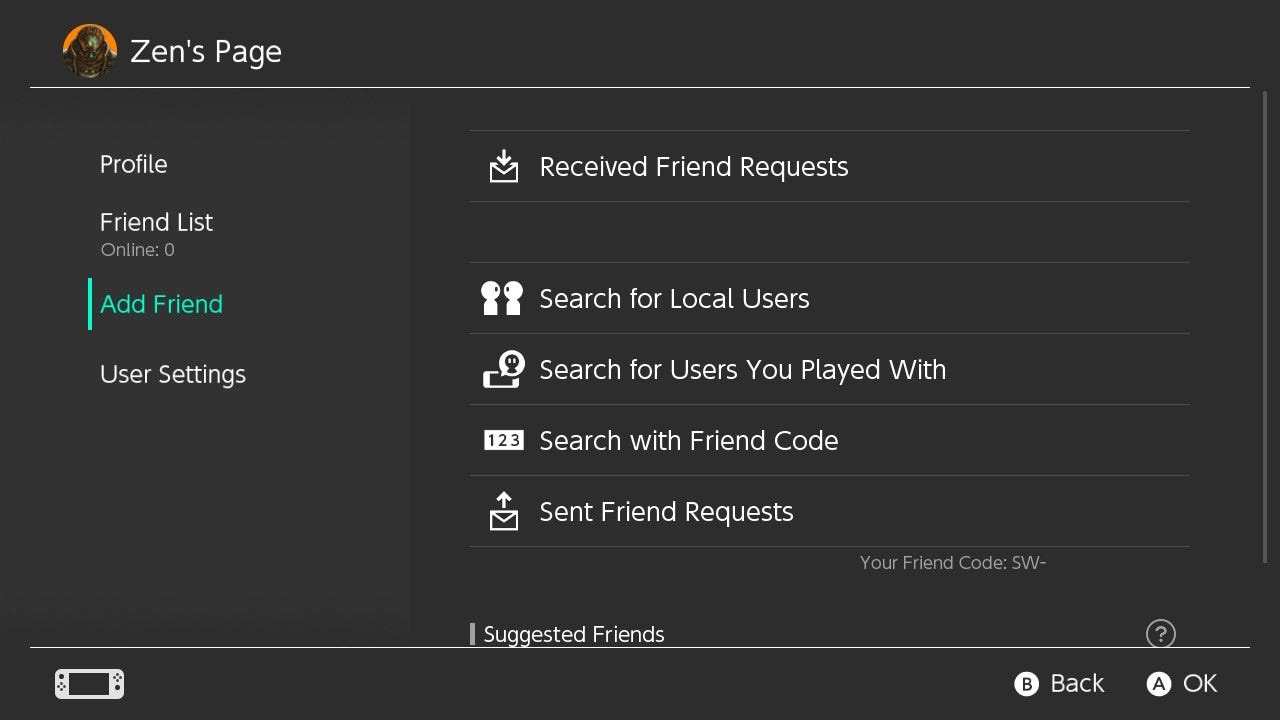
From the Home menu, click your User icon in the top left corner. On your User Page, scroll down to Add Friend. Under the entry saying "Sent Friend Requests", you'll see some faint text. This is your Friend Code. From here, there's two ways to proceed.
If your Friend gives you a Friend Code, you go to "Search with Friend Code" and enter their Friend Code there. From there, you have option to send them a Friend Request. Once they agree to your request, you become friends! Until sent, it'll appear under "Sent Friend Requests".
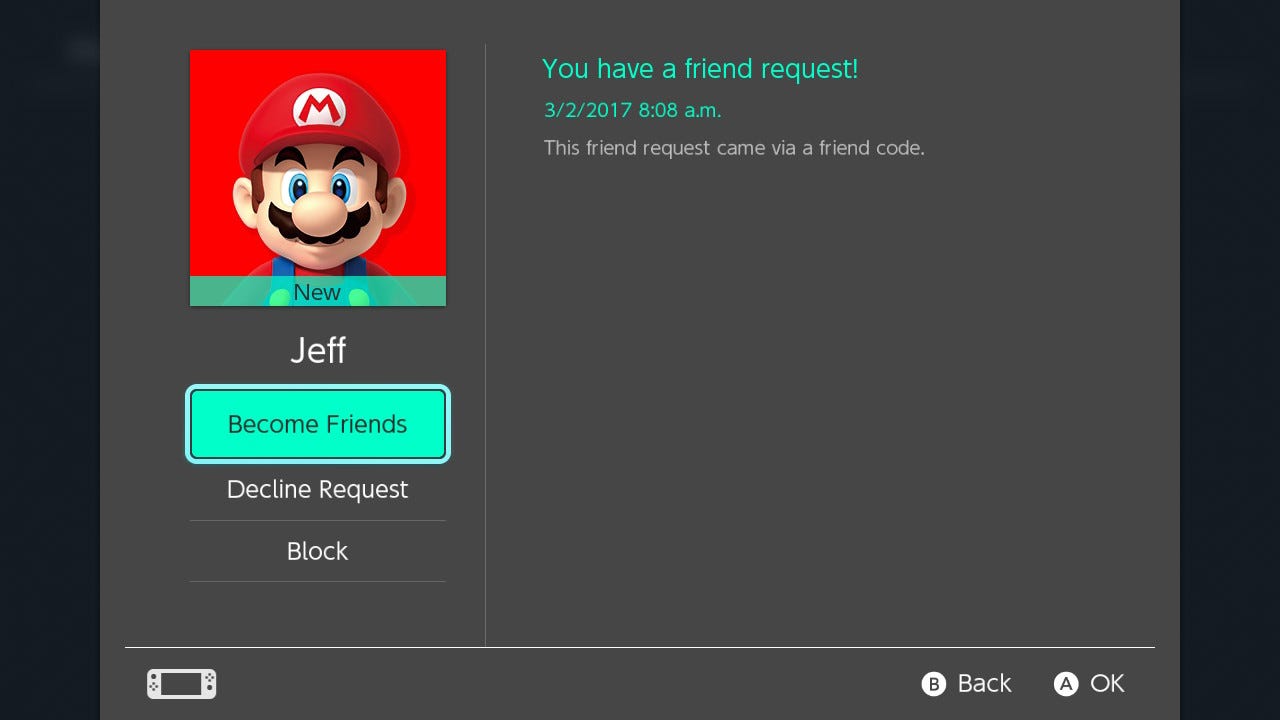
Alternatively, you can give your friend your Friend Code and they can follow the instructions above. In this method, you'll see their Friend Request under "Received Friend Requests". You'll have the option to make them your friend, decline the friend request, or block them completely.
If the last two options seem perplexing, they're there because of the other two "Add Friend" options, "Search for Local Users" and "Search for Users You Played With". "Search for Local Users" allows you to search for other Switch owners in the immediate area. "Search for Users You Played With" allows you to add friends based on random players you've recently played an online game with. In both cases, you may receive Friend Requests from folks you don't know and don't want to be friends with. You're allowed to decline!
There's also "Suggested Friends", which pulls friends connected to you through Nintendo's mobile apps Super Mario Run and Miiverse.
Using the Nintendo eShop and Downloading Games
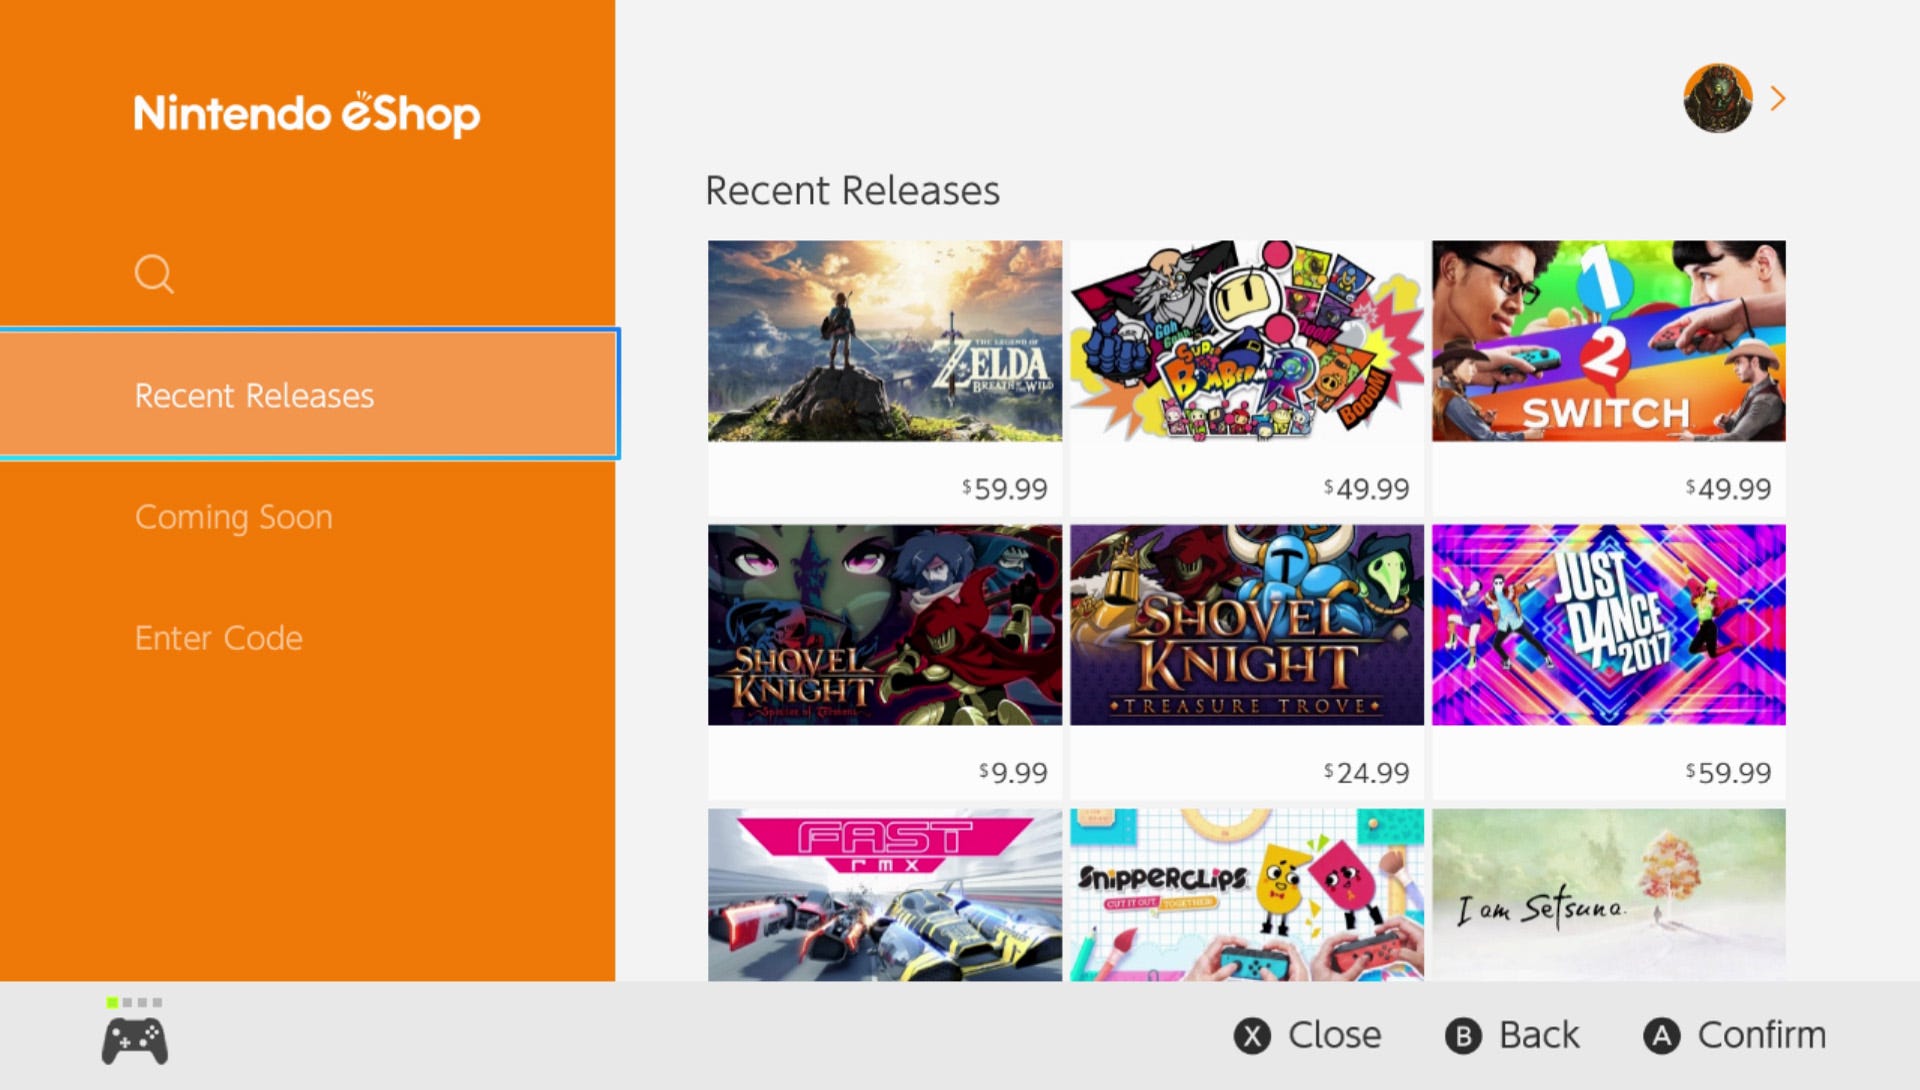
The Nintendo eShop is where you can pick up digital games for your new Switch! Sure, you could buy physical copies for all of your games, but there will always be a selection of additional digital titles you can't buy in stores. The eShop offers up standard retail prices for the latest titles, lets you know what games are coming soon, and even offers up demos for some games!
Once you've linked your Nintendo Account, the Nintendo eShop will be available in the second icon on the Home Screen.
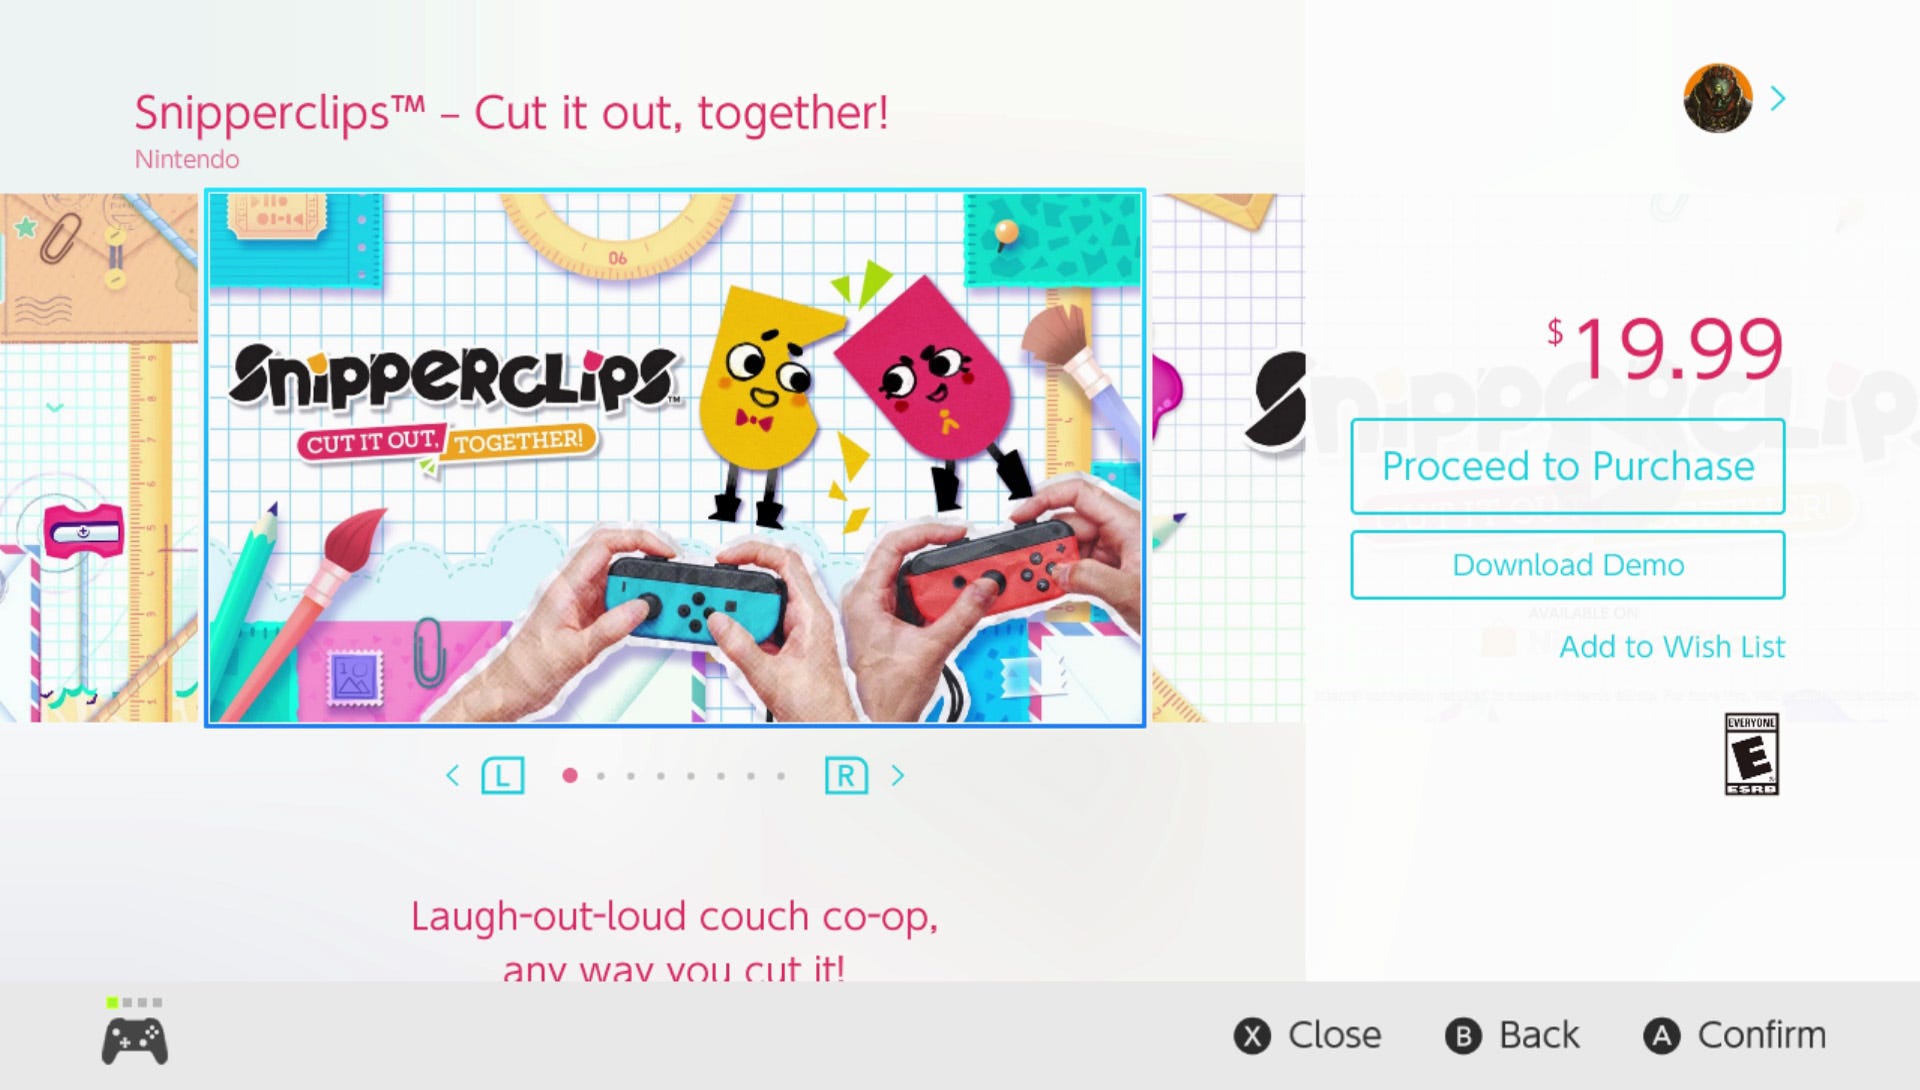
Under each game entry in the eShop, you'll be given screenshots, trailers, and pricing information for the game. If you want buy the game, choose "Proceed to Purchase". If you have funds on your Nintendo Account wallet, the purchase price of the game will be subtracted from those first. If you don't have funds, you have two options: credit card or prepaid code.
If you're adding funds via credit card, choose "Add Funds", then "Credit Card". Choose the amount of funds you wish to add to your wallet - $10, $20, $50, or $100 - and then enter your credit card number, expiration date, security code, and billing zip code. Select "Confirm", the "Add". The price of the game will be subtracted from these funds.
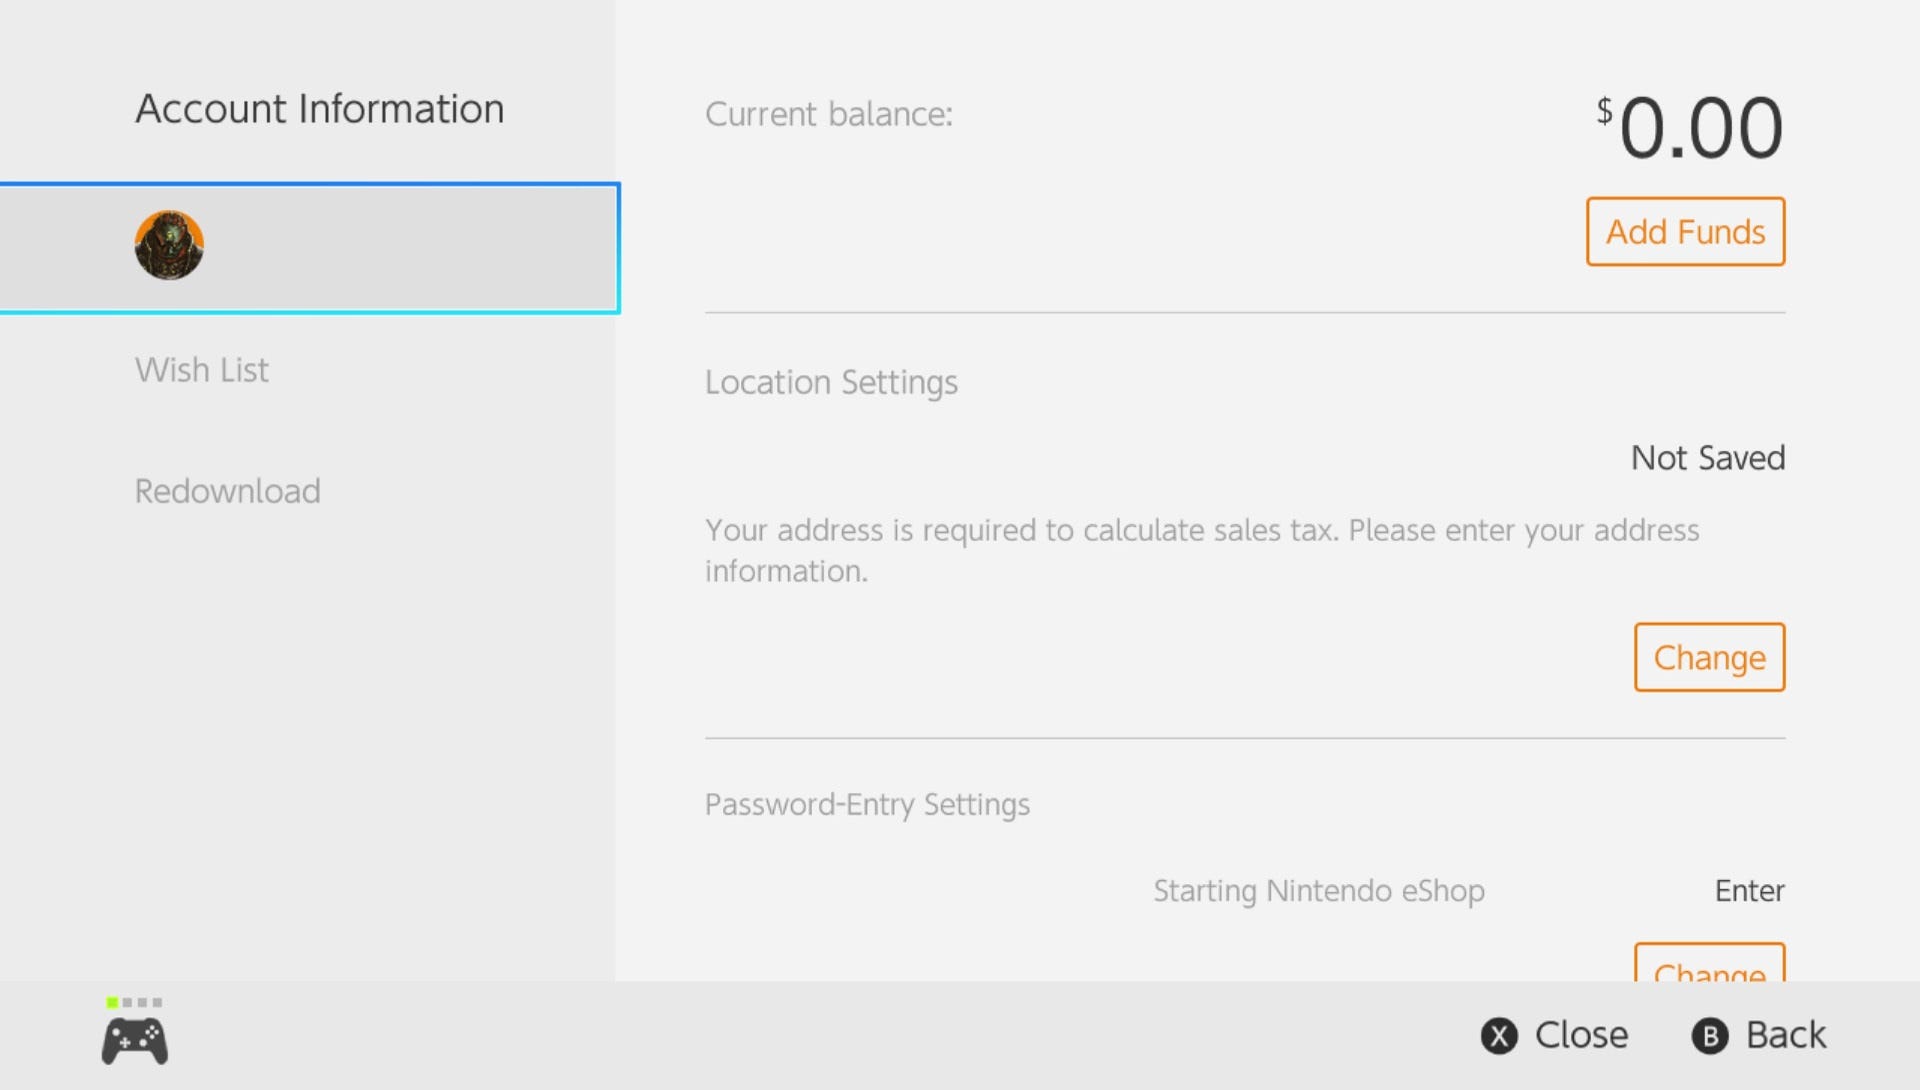
If you have a prepaid Nintendo eShop card, select "Add Funds" and then "Nintendo eShop Card". Enter in the 16-character code from the card and hit "send". The funds should be added to your wallet.
There's some great games out there that are worth picking up on the eShop right now. Snipperclips from Nintendo and SFB Games is well-worth the $19.99. If you love classic 2D platformers, you can also buy Shovel Knight: Treasure Trove for $24.99, offering three awesome games for the price of one. Racing fanatics will want to grab the scifi-style Fast RMX. Here's the entire list of currently available games for Nintendo Switch.
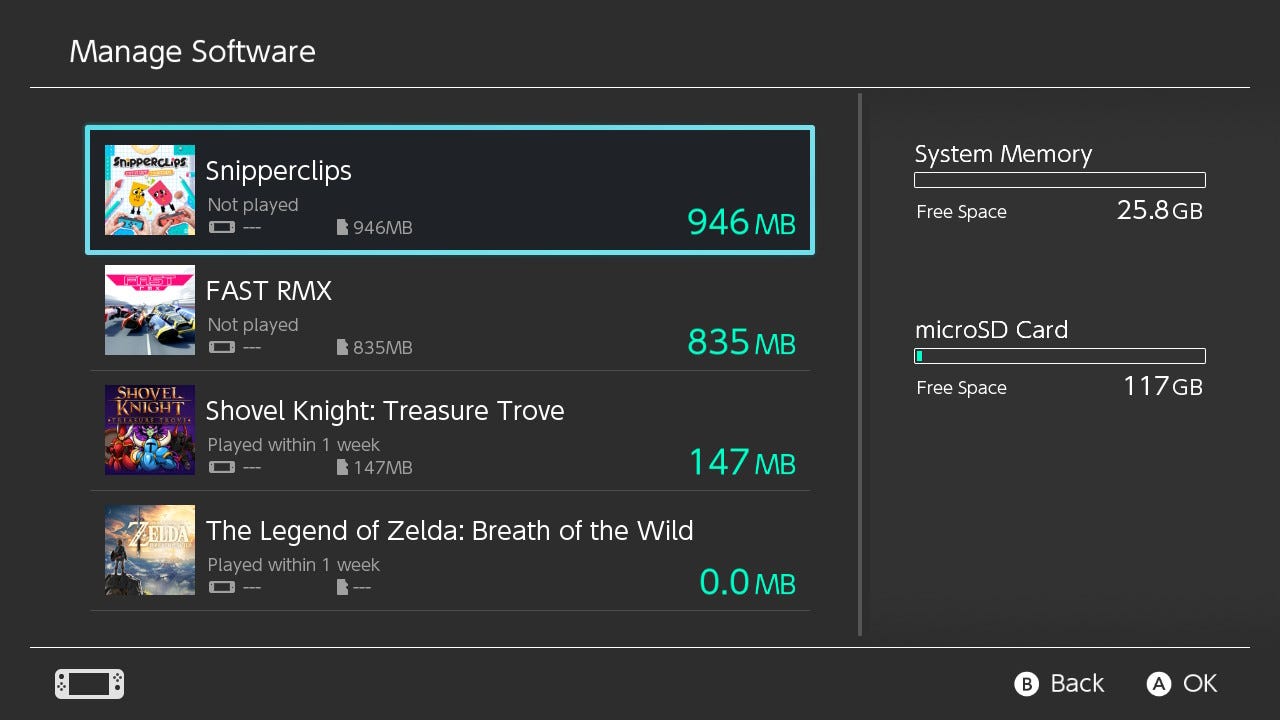
Beefing Up Your Storage Space
You've linked your Nintendo Account and begun to download games to your Nintendo Switch! Awesome. It might not be a problem now, but eventually, you will fill up the system's internal storage space, which comes to 25.9 GB of space after the operating system takes its due.
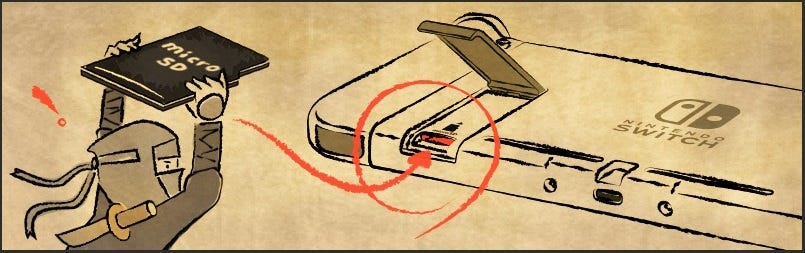
You'll want to pick up from additional storage. The Nintendo Switch accepts two kinds of portable storage, microSDHC and microSDXC. You can pick up any microSD card, though the microSDXC cards won't work without a system update. The microSD cards go into a slot you'll find underneath the kickstand on the back of the Switch.
There's a few options out there, but here's two to get you started:
- SanDisk Ultra 128GB microSDXC - $40.99
- SanDisk Ultra 200GB microSDXC - $72.99
The 128 GB should be enough space for all but the most avid of digital gamers. If you think you're going to go big, the 200GB is out there for just a bit more.
If you don't have a microSD card inserted, any digital games, digital games save files, and physical game save files will be saved to internal storage. If there is an microSD card inserted, any digital games will download to the SD card and their save files will end up there as well. Physical game save files will stay on internal storage. Warning: Save files on the Nintendo Switch itself can not be moved. If you lose your Switch or have to replace it, those save files will be lost.
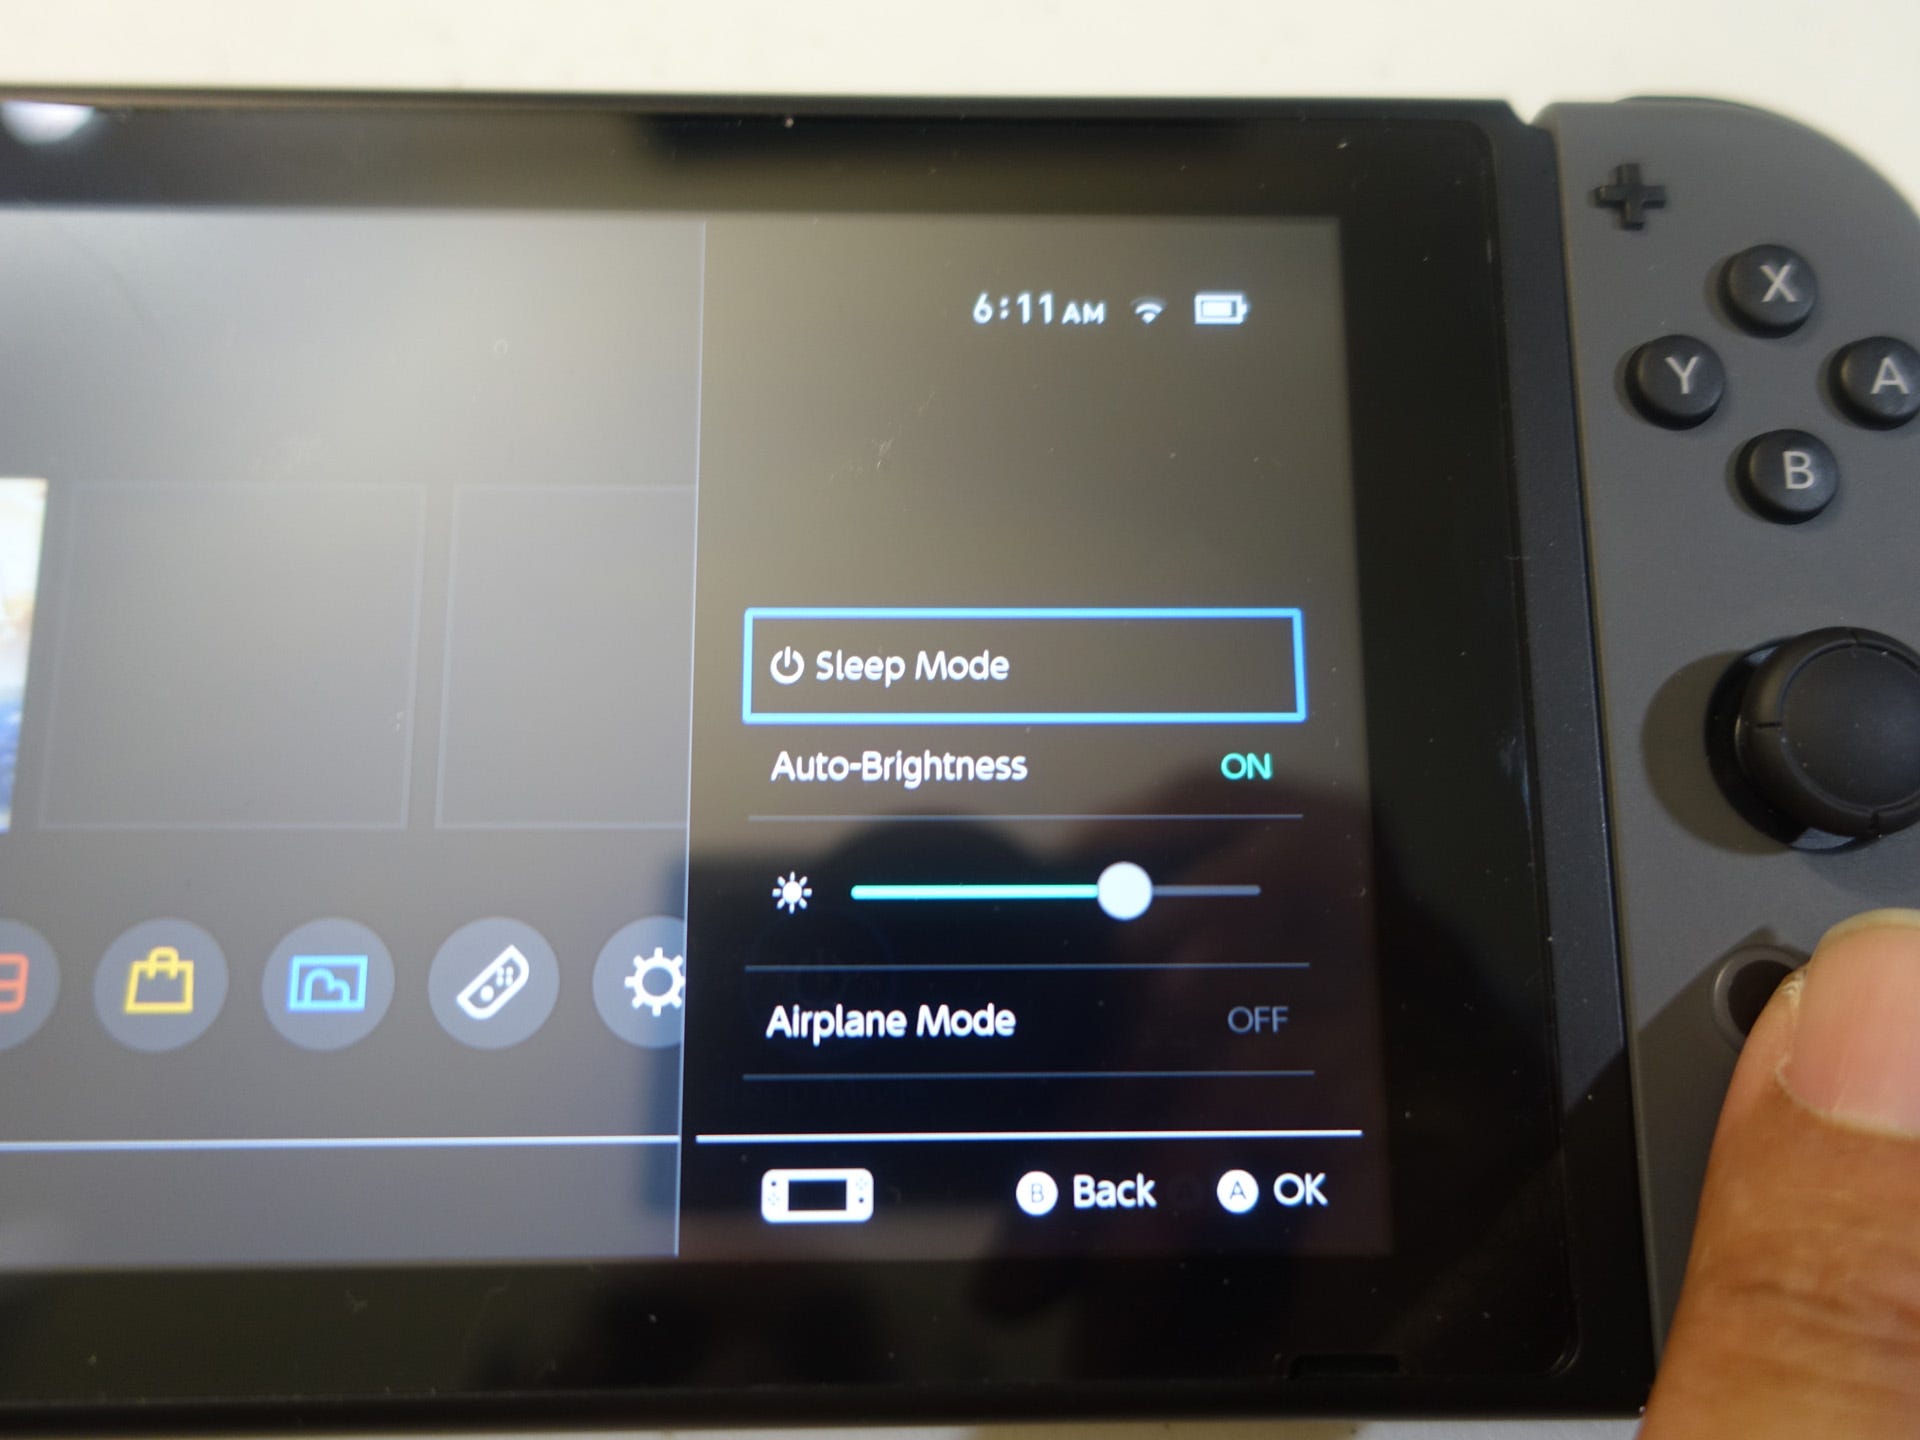
Maximizing Your System's Battery Life
So, the Nintendo Switch is rated for 2.5 - 6.5 hours of playtime in portable. We here at USgamer have tested the system with The Legend of Zelda: Breath of the Wild and found a runtime of 2 hours and 26 minutes with Max Brightness and Wi-Fi.
You can stretch the runtime out a bit by playing with the settings a bit. If you hold the Home button, you'll be taken to the Quick Menu. Here, you can turn off Auto-Brightness and lower the brightness of the portable screen. Bring it down to a level where you can still see what you're playing, but aren't using the maximum brightness of the system. Likewise, when you don't need the internet, you should turn off the Wi-Fi connection. In the Quick Menu, turn on Airplane Mode, which will such off your Wi-Fi completely.
You can also extend your portable runtime by picking up a Power Bank. With the rise in smartphone use and the lack of smartphone juice, power banks have taken off and the Nintendo Switch can use them just like a phone can. This is one example of a good power bank is the RAVPower 20100mAh Portable Charger for $49.99. (You'll also need a USB-C cable, like this one.)
Additional Accessories
You may also want to pick up a few additional accessories for your new Nintendo Switch. One of these is for portable play, while the other is for those who use their Switch at home more often.
Carrying Case and Screen Protector
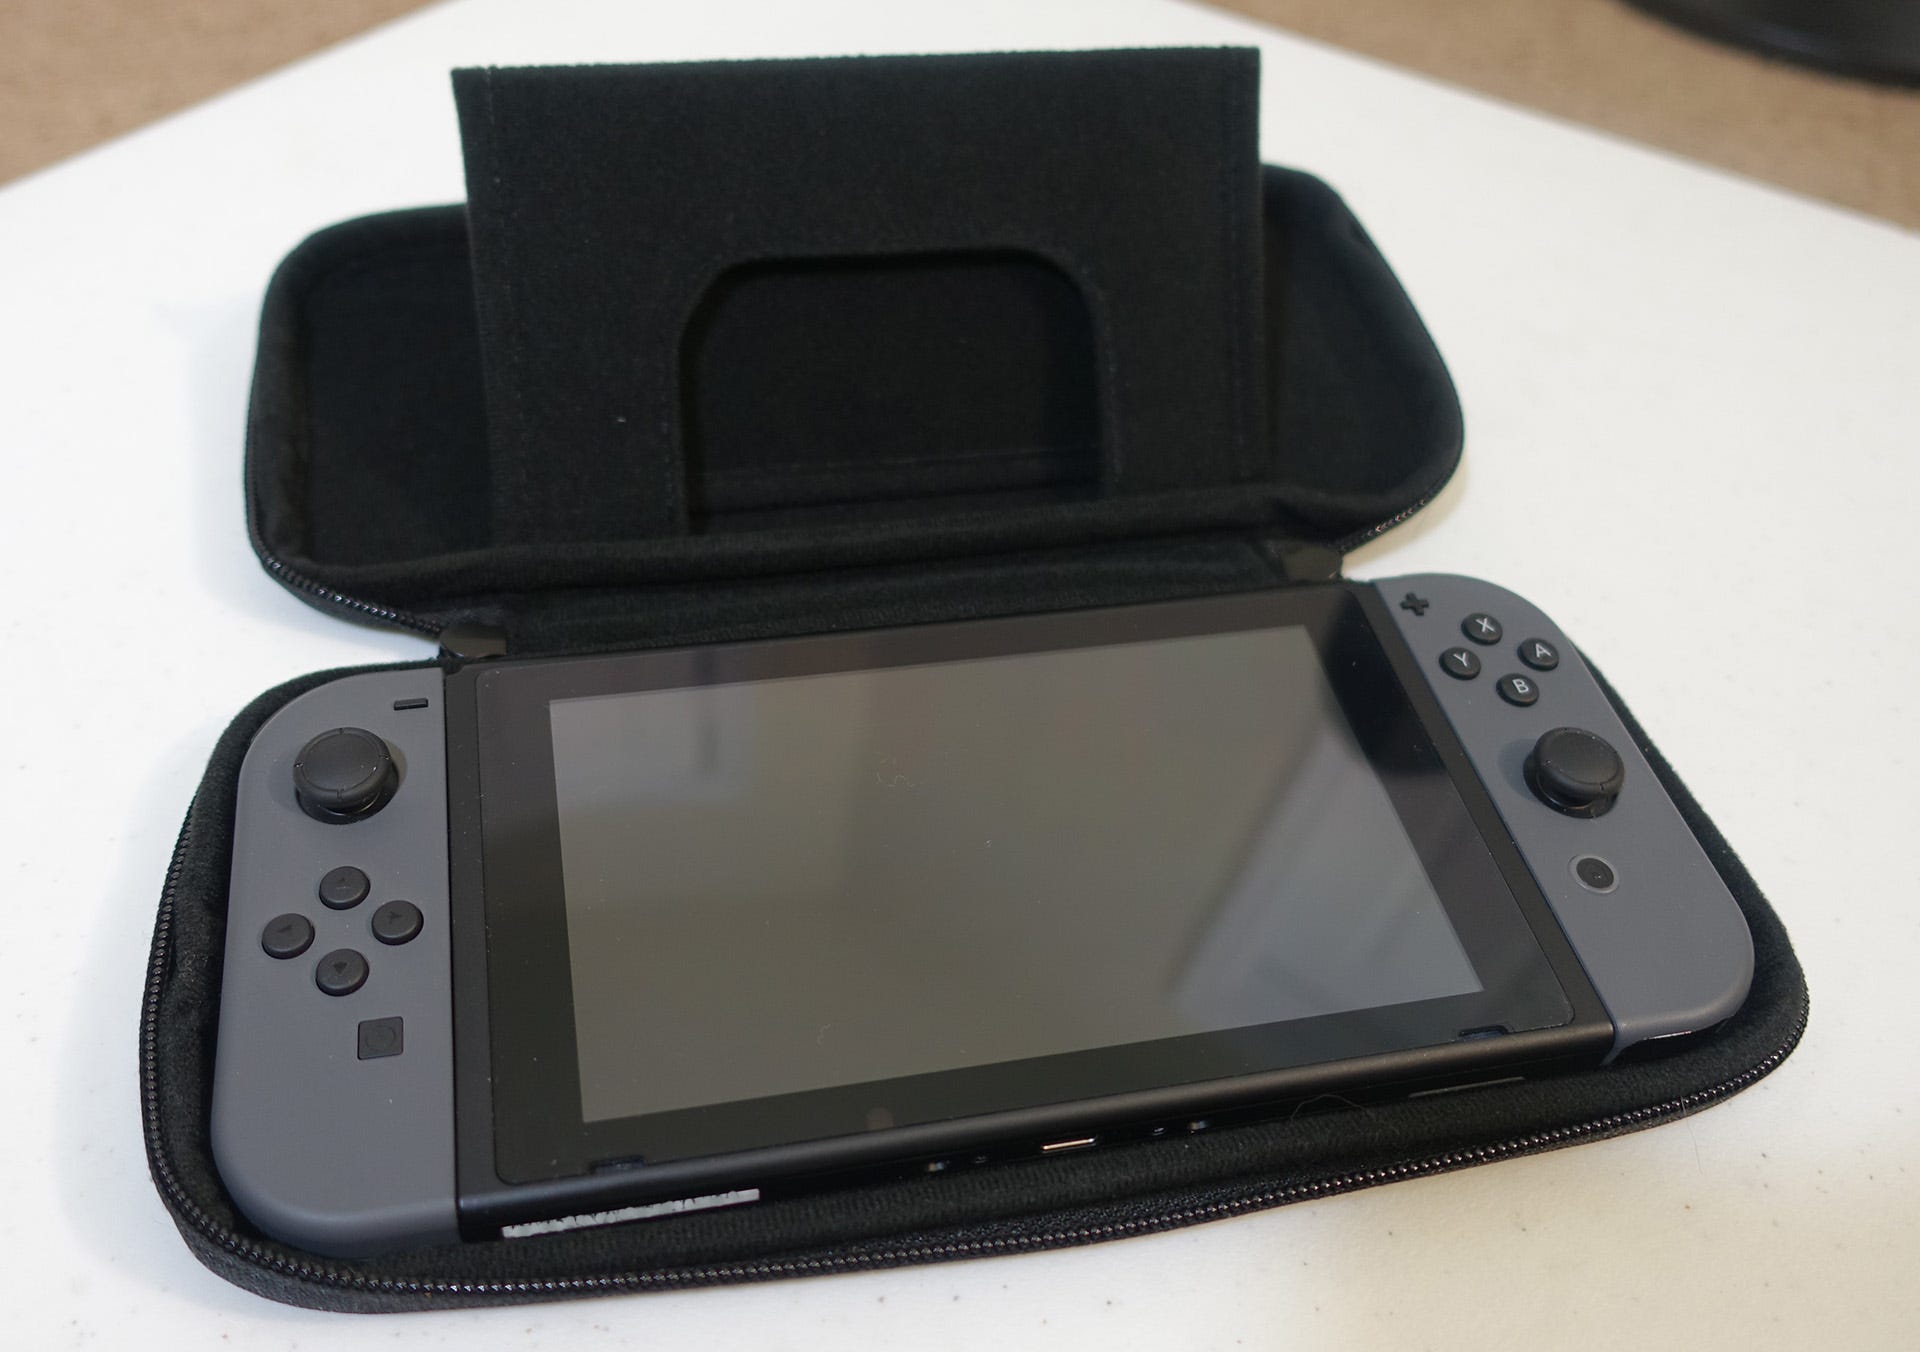
The Nintendo Switch is a premium product! That means if you drop it, you might be out $300 and your shiny new electronic device. The Carrying Case is the answer for that problem. The soft case is built to house the Switch with Joy-Cons attached. It also contains an fold-out insert to hold up to five games snugly in place and a few more in a mesh pocket.
More importantly, the Carrying Case comes with a screen protector! You get a screen protector sized correctly for the Switch, keeping your screen nice and unscratched in the future. With reports of the Dock potentially scratching Switch screens, this is worthwhile.
Nintendo Switch Pro Controller
If you don't want to get by with just the Joy-Cons at home the Pro Controller is the answer for you. Taller, bigger analog sticks, soft-touch handles, bigger buttons, and a real D-pad add up to a great controller for home Switch play. The Pro Controller comes with a USB-C male to USB 2.0 cable for charging it in the Switch dock. It's a bit pricey at $70, so only pick this up if you're planning to invest heavily in your Switch home experience.
There's all you need to know to kick off your Nintendo Switch ownership in the right way! As new information becomes available, we'll update this article. Enjoy!