The Sims 4 Interior Decorator gigs | How to finish all Gig Tasks


Even if you're well-versed in The Sims 4's various job options, the Interior Decorator path added in the Dream Home Decorator game pack will likely have some features you're unfamiliar with. In particular, Gig Tasks in this career include a bit more direct player control than previous additions.
While the new gigs don't include too many brand new elements, you'll be using Build Mode and the photography skill in slightly new ways, as well as managing a gig budget and putting together a dramatic 'Reveal' to showcase your hard work to your Sim's clients.
Here's everything you need to know about carrying out Gig Tasks in The Sims 4: Dream Home Decorator.
- How to send the client away in The Sims 4: Dream Home Decorator
- How to take before-and-after photos in The Sims 4: Dream Home Decorator
- How to use Build Mode during a gig in The Sims 4: Dream Home Decorator
- How to manage your gig budget in The Sims 4: Dream Home Decorator
- How to increase your gig budget
- How to complete the Reveal in The Sims 4: Dream Home Decorator
How to send the client away in The Sims 4: Dream Home Decorator
Interior Decorator gigs are bookended by social tasks. After you start the Interior Decorator career, you begin by interviewing the client(s) about their likes and dislikes using the social menu, and end with the Reveal of your hard work.
However, in order to actually carry out the main part of the gig, you need the client to leave the property. It's going to be hard to renovate the living room with them sitting on the couch, after all.
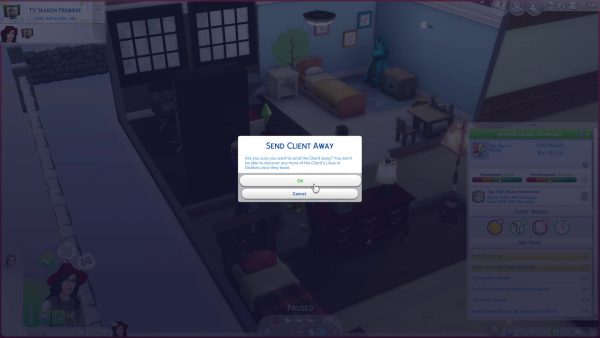
After you've learned everything you care to know about your clients' preferences, use the Send Client Away social interaction to gently boot the entire household off the lot. They'll stay gone until you call them back (or time runs out on the gig).
It's not until you've sent the clients away that you can access Build Mode on their property, so this step — while not an actual Gig Task — is very important.
How to take before-and-after photos in The Sims 4: Dream Home Decorator
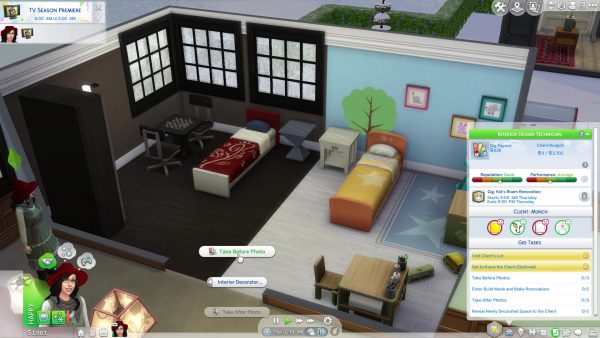
Taking before and after photographs are two separate tasks you must complete in order to finish the gig. The option to take before photos becomes available once you've sent the clients away.
You can take these photographs by using the Entertainment > Take Photo option on your Sim's phone, as in ordinary gameplay. But alternatively, during an active Interior Designer gig you can click on the floor and choose Interior Decorator > Take Before/After Photo from the options menu.
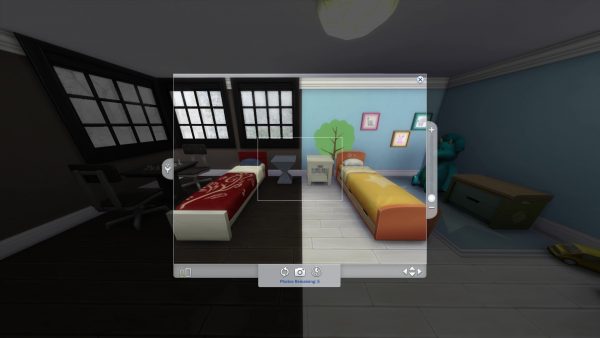
When taking before and after photos, you have the usual photography options: you can apply filters, flip the camera, and take up to five versions of each picture. You also seem to have a bit more freedom than usual to pan and zoom to frame the photo exactly to your liking, saving you the hassle of multiple attempts to set up the correct shot.
After completing your renovation project, you need to take after photos. Ideally these match up to the areas you used for the before photos at the start of the renovation, but as far as I can tell this isn't actually tracked in any way that affects gig score, so don't worry about lining things up exactly.
Once you have all the before and after photos you need, there is one more step that isn't mentioned on the gig tasks list. Go to your Sim's inventory and click the Memory Card. You'll see the option to Manage Current Gig Photos.
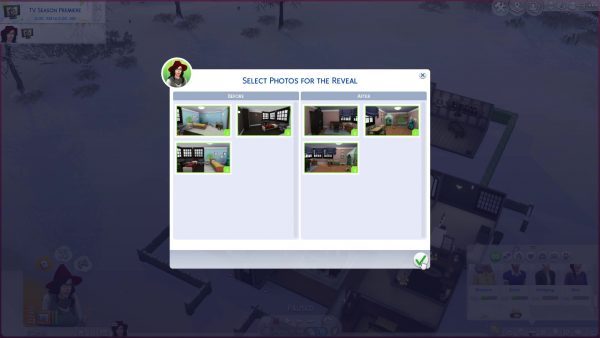
Clicking this option opens a pop-up window where you can match up the before and after photos you took. Pairing up a Before photo with an After photo gives them a shared number, indicating that you consider them to be the "Before and After" shots of the same area. You can also use this time to delete any photos you don't want to include in your slideshow.
Don't worry if you forget to do this, however; you'll be prompted to arrange and finalise your slides before the big Reveal.
How to use Build Mode during a gig in The Sims 4: Dream Home Decorator
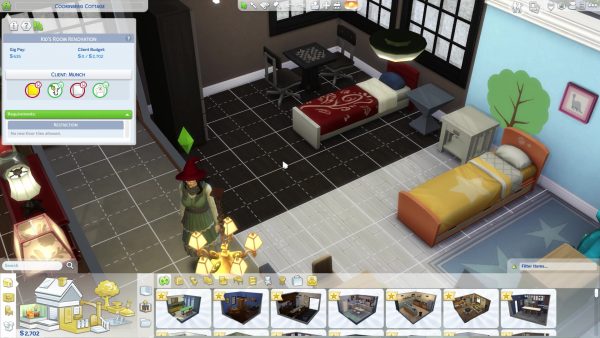
Unlike any other active profession in The Sims 4, the Interior Decorator career requires you to perform some tasks outside of Live Mode. As the whole theme of the pack would suggest, you'll actually do the majority of the renovation gig in Build Mode.
You can only enter Build Mode once the clients have left the lot. Entering this mode pauses the gameplay in Live Mode, just as it would during ordinary gameplay.
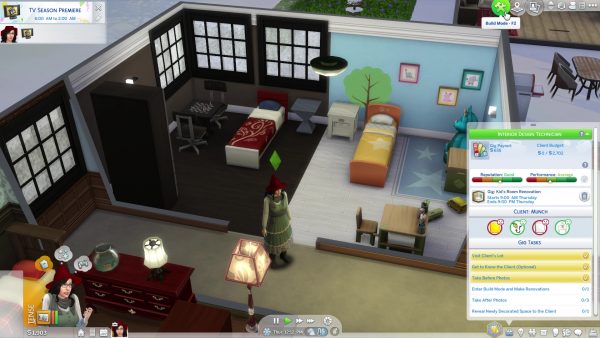
In the top left corner of the screen you'll see the lot details panel, which now includes a new Gig Details tab where you can keep track of the renovation project while in this mode.
On this panel you can view the gig description and pay-out; a running tab of how much money you've spent against your budget; and the client's Likes and Dislikes as you discovered them during the social stage at the start of the gig.
Below this information, you'll also see a list of requirements. These aren't always mentioned elsewhere, and include restrictions such as parts of the building that the client specifically doesn't want changed in any way. Later on in your Sim's career, you might see details such as brand deals listed here, which require you to include items from specific in-game companies in your renovation.
The game will consider the renovation task complete as soon as you enter and exit Build Mode for the first time during the gig. It will be marked off your task list, and the option to take after photos will appear at this point. However, you don't have to stop renovating at that point, and can freely re-enter Build Mode as often as you want to make further changes while the gig is active.
How to manage your gig budget in The Sims 4: Dream Home Decorator
Another feature that makes Interior Decorator gigs slightly different from other similar careers is the budget.
Other gig-based careers assume that your active Sim pays any expenses they might incur out of their own pocket. This is not the case for Interior Decorators, who have been handed a chunk of the client's change to perform the renovations with.
There are two ways of tracking your remaining budget during a gig. The first is in the lot info panel in the top left of the screen, where you can see what you've spent so far and the total remaining under the Client Budget heading.
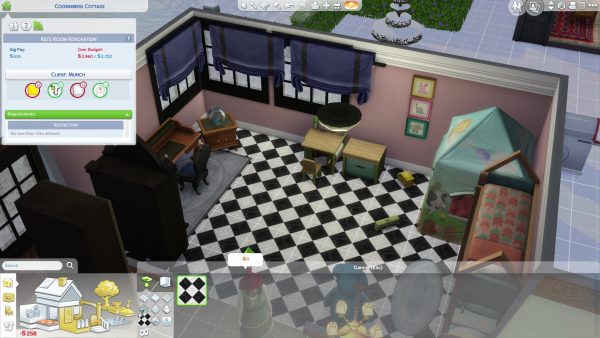
If you check the bottom left hand corner of the screen, you'll see that your active Sim's household funds have been temporarily replaced by the gig funds. This shows you the actual amount of budget you have remaining to work with. Unlike in ordinary gameplay, you can go into negative funds during a gig and keep buying things — but going too far over budget will negatively impact your job performance and reputation.
While managing the budget doesn't directly affect any Gig Tasks, it has a significant impact on how well the gig is scored overall.
How to increase your gig budget
There are a couple of things you can do to add to your budget during gigs:
- Sell any of the client's possessions that you want to replace, since this will add the value of that item back into the gig funds. You can only ever replenish your budget to its original maximum, however; so to make the most of this, make sure you only sell items once you can collect their full value.
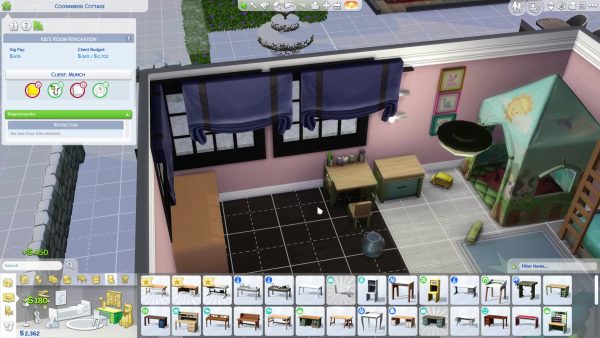
- Remember that recolouring already-owned items using the Design Tool (represented by a sample card icon, third from the left on the top menu bar) is free. This includes replacing walls and flooring with the same covering in a different colour swatch.
It's quite easy to keep a simple design refresh under budget in this way. However, things get a lot trickier at higher levels — especially if you're tasked with undertaking major renovations, such as adding additional rooms and levels. So don't neglect your budget management skills, even if you're consistently coming in under-budget during your first few gigs.
How to complete the Reveal in The Sims 4: Dream Home Decorator
Once you've completed the renovations to your satisfaction and taken all the photos, it's time for the final task of the gig: the Reveal.
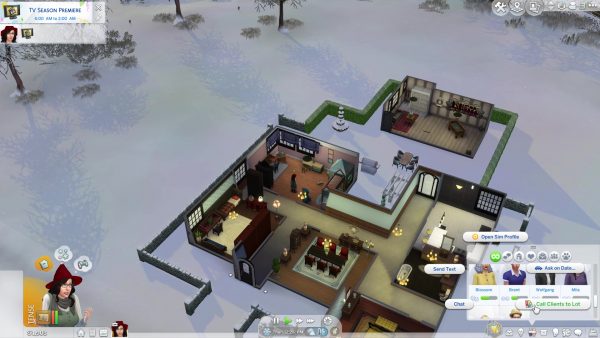
To start with, you need to Call Clients Back to Lot. You can do this either under the social tab on your Sim's phone, or by directly clicking on the client's portrait in the Relationship panel. Before the clients arrive, you'll be prompted to get your before-and-after photos lined up and ready to go.
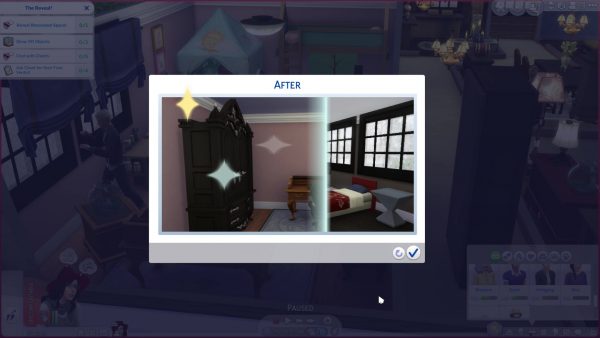
The client's household will promptly arrive back on the lot and a goaled event called "The Reveal!" will begin. At this point, you won't be able to interact with the client(s) except with the Reveal Renovations to Client social interaction. Initiate this to get started and see a very sweet slideshow of your photos, set to some stirring music.
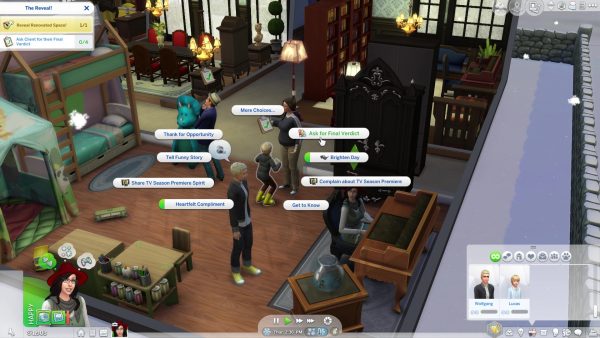
Your main goal in this event is called Reveal Renovated Space!. To complete it, you need to complete the goals listed under it by chatting with the clients, showing off objects you want to highlight, and — once everyone in the client household has had the chance to have a good look around — asking for their final verdict. You'll know when they're ready for the latter, as they'll display a clipboard icon with a green check mark above their heads.
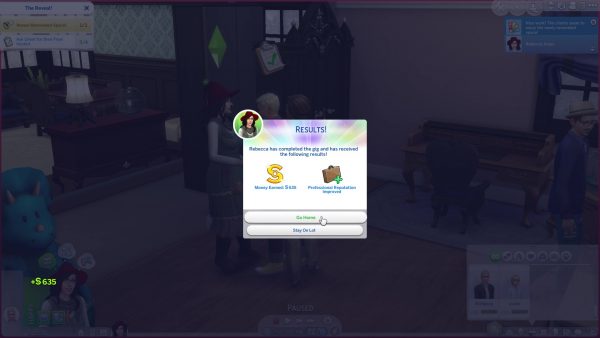
Finishing every goal in the Reveal event automatically ends the gig. Your Sim will receive their pay, and you'll be appraised of any increases or decreases in Performance and Reputation. You can choose to stay on the lot and schmooze with the clients some more — it can't hurt your chances for a repeat customer — or head straight home and have the rest of the day to yourself.
For more on The Sims 4: Dream Home Decorator, see our beginner's guide to getting started as an Interior Decorator.