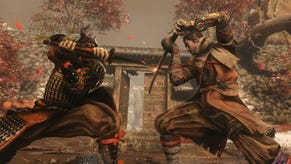
Sekiro: Shadows Die Twice boss guide
Playing Sekiro is a bit like punching yourself in the head - you’ll knock yourself out eventually, but it’s gonna take some time and it’s gonna be painful.
The biggest roadblock to completion are the boss battles in Sekiro. Even some of the minibosses can be a pain in the arse. That’s why we’ve rounded up some of the most troublesome, provided video footage of how to beat a few, and given you some pointers with our best strategies.
We've now updated the list with pretty much every major boss in the game, including those towards the end of your adventure.
We've tried to place them in chronological order, but that's not always straightforward in such a non-linear game - consider this your spoiler warning.
Sekiro boss guide
Sekiro Jozuo the Drunkard guide
He might technically only be a miniboss, but Jozuo the Drunkard can be a proper pain in the arse to take down. It’s mainly because he’s surrounded by loads of normal mobs, making it easy to be overwhelmed. In this strategy, I’ll explain how to cheese him so the fight is much easier.
First, you need to thin the herd. There’s a route on the left that allows you to creep around to Jozuo. Do your best not to trigger the nearby NPC - instead, creep around to the left. Take out the guards stationed there and make your way to the main group. Now it’s guerrilla tactics time: get a stealth kill, get a couple of quick, cheeky kills on the mobs, then run back around the same route. The idea is to make them all split up and cut down any stragglers.
You’ll soon thin the herd. At some point, if you keep movement dynamic, you’ll also cause Juzou to lose track of you - that’s your chance to get a stealth stab in and take down one of his two health bars. As soon as you do this, leg it to the NPC and talk to him, causing him to fight alongside you. Now it’s just a case of hitting Juzou in the back whenever his attention is on the NPC. It’s what a ninja would do.
Sekiro Lady Butterfly guide
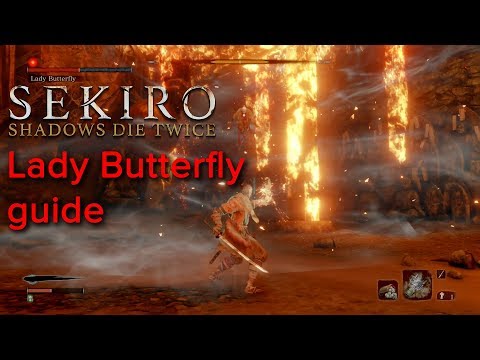
The trick to beating Lady Butterfly is to be aggressive and don’t let up. Get in close and hit her with two strikes, parry, then immediately follow up with two strikes. Try to keep it going as much as possible and you’ll soon push her posture gauge up. Ideally, you want to come into the fight with the shuriken prosthetic. When she gets into the air, use those to knock her back down to earth. If you fail to knock her out of the sky, get ready to dodge - if she lands her mid-air grab she might kill you outright, but it’s telegraphed well. Here are some more tips for beating her:
- Contrary to what the NPC says on the way to her, you don’t need Snap Seeds to win. When she calls her illusions, just run to the other end of the room and she will recall them. When she does this they turn into energy that homes in and damages you. Stand on the other side of a wooden pillar to block them.
- Remember to jump her sweep attack. If you manage to jump off her as well, you will do big posture damage.
Sekiro Headless guide
Much like the Shichimen, this is a recurring miniboss that seems intimidating but doesn’t really put up much of a fuss when you know what you’re doing. You’re going to want Divine Confetti and terror-resistant items for this one, too. For the one in the forest, we definitely recommend killing the Mist Noble before taking him on.
- Once you’re near him, he’ll use an area-of-effect smoke spell that substantially limits your mobility. As such, you’re going to need to deflect his attacks. The timing can be a little strange at first because he’s so slow, but once you hit him with a couple of strikes, the fog will clear and you can move freely again.
- The fog also causes his attacks to inflict small amounts of terror on you, even if you deflect, so you might need to use your purple gourd or a Contact Medicine to clear that between phases. Besides that, this is mostly just a matter of dealing out a lot of punishment quickly.
Sekiro Gyoubu Oniwa guide
The easiest way to beat this mounted foe is with the Firecracker prosthetic. You get this from a merchant who’s on a mountainside just after the gate behind the first miniboss. The easiest way to get to him is to backtrack from the chained ogre and climb upwards. There’s another merchant at ground level not far away - it’s not him. Once you have it, go back to the hub and fit it, then equip it from the menu and head to the boss. Here’s some tips for beating him:
- Try to only use the firecrackers a couple of times in the first phase because the second phase is much harder without firecrackers. Get in close and do damage.
- When he starts using the whip, close the distance and it won’t hurt you. It’s a good opportunity to do some free damage.
- In his second phase, he will attack you shortly after a firecracker stun. It’s important to not get too greedy with getting in hits. A couple will do, then back off and do it again.
Sekiro Blazing Bull guide
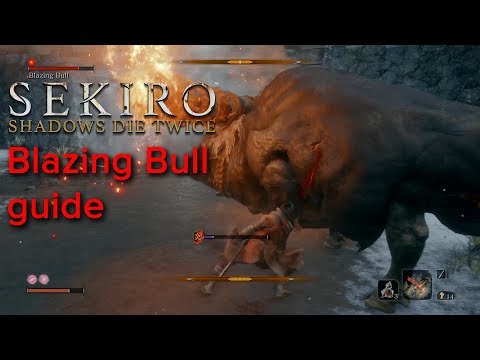
The easiest way to deal with the Blazing Bull is to be aggressive and make sure you have the firecracker prosthetic equipped. Get in close to the bull, don’t lock on, and stay near its rear leg, to its side. It will keep trying to gouge you, but you can happily swing away as long as you keep correcting yourself as it turns. Just hack away and dodge forwards to maintain position. After a while, it will hop off in a rage. Get in before it can cause any damage, use the fireworks to make it buck, and finish it off.
Seven Achina Spears – Shikibu Toshikatsu Yamauchi guide
This guy isn’t really a boss, but there are a number of minibosses that share his style and moveset throughout the game, and this strategy applies to all of them. For one thing, you should be sneaking around the back of the reservoir through the tall grass to deathblow him once, it makes this fight far easier. Also, if you don’t want to have to clear out his half-dozen or so friends every time you want to take a crack at him, just make sure he stays within the area around the pagoda.
If you’re one of the Souls veterans who’s trying to dodge your way through the entirety of the game, this guy is going to be a major roadblock for you. But if you’re willing to try to learn the timing on his strikes, you’ll get him down in no time. If you don’t have the Mikiri Counter skill unlocked, you’re going to want to get it for this fight.
- The timing can be a little confusing, but when the red rune appears above his head, you’re going to want to listen for a sound cue. When that sound cue ends, you want to hammer on the dodge button. Wolf should move towards the Seven Spears and step on his weapon, dealing massive posture damage.
- From then on, it’s just a matter of being aggressive. He also does a Perilous sweep from time to time that summons the rune, so jump over that and kick him in the face.
- If you get in his face and slice into his guard, he’ll eventually do a move where he spins his naginata around for a full second before sweeping outward. This is his most punishable attack, so hit him 2-3 times as he spins then deflect the sweep, then keep on slicing. You can easily corner him and force him into doing this infinitely, so if you can get it right, you’ll be slaying him in no time.
- If you get a big opening - such as by step-dodging to the side instead of Mikiri-ing one of his telegraphed mega-stabs - go for the axe, it’ll do considerable damage to him.
Shichimen Warrior guide
Like the Seven Spears, this is a recurring miniboss in the game. These guys look intimidating, but they’re actually a cinch once you’re properly equipped. You want to make sure that you have at least 2 Divine Confetti before taking them on. You can find small amounts of Divine Confetti hidden throughout the game, but if you run out, you can wait until you get an endgame item called the Dragon’s Tally Board that unlocks the Confetti for purchase from the Memorial Mob. You’re also going to want some Pacifying Agent or, better yet, the Mottled Purple Gourd that the Mob sells near the Mibu Village to deal with the Terror status ailment.
Once you have all that, this fight is fairly straightforward. Use the Divine Confetti and start hacking away at this guy. If the ground around him starts glowing, back off - he’s hitting you with an area-of-effect aura that increases your Terror. Wait for it to fade away and start in again.
When you’re in his face, he’ll probably try to hit you with a two-hit combo with his staff. Learn the timing and deflect both hits.
Eventually, after you inflict a ton of damage, he’ll teleport across the map and start to gather energy for a beam attack. You can’t avoid this one by normal means, so run to his left while he charges, then sprint to the right to avoid the beam as best you can. Then run up to him and keep wailing. He’ll go down in no time.
Sekiro Armored Warrior guide
This guy can be extremely annoying if you don’t know what you’re doing. Initially, I thought you had to break his armour because I listened in on a couple of soldiers who seemed to suggest as such. However, you don’t need to use the spear prosthetic attachment at all for this fight. All you need is your sword, your axe, and some patience.
It doesn’t matter how many times you do a finishing blow on this guy, he’ll keep coming back. The idea is to get him to destroy the walls of the walkway and finish him off near one of the exposed sides, kicking him into the abyss. Armour isn’t much good against a 200 foot drop, it turns out. Here are some general combat tips for the battle:
- Use your axe at every opportunity. The axe does big posture damage and the Armored Warrior often goes for big swings that leave him exposed - take those opportunities to use the axe when you can.
- Keep circling him as you fight and you’ll get plenty of opportunities to strike at his back.
- If you get a danger warning, that means he’s about to lunge. The best way to avoid it is to take a couple of quick backstep dodges.
- If you see him crouch down and scream as if he’s going to pounce, simply back up as far as you can. He’ll slash at the floor a few times and then finish up with a lunging thrust that can reach quite far. Just keep your distance and it’s easy to avoid.
Sekiro Genichiro Ashina guide
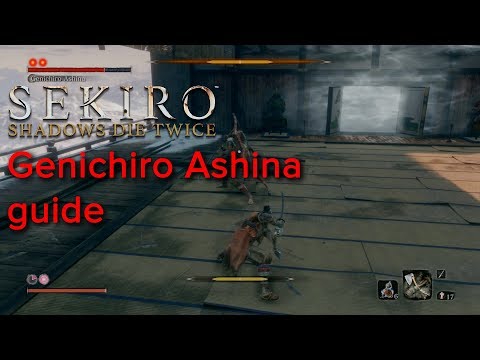
This is one of the most difficult bosses in the game because it’s a war of attrition. He doesn’t take much time to beat, but three forms makes for a demoralising loss when he does get you. Like Lady Butterfly, he really doesn’t like it when you play aggressively. Here are some tips for taking Genichiro Ashina down:
- Use your axe whenever you get a chance, and follow it up with a normal attack to turn it into a combo. His posture can’t stand much of this.
- In his first two forms, he will fire an arrow at you whenever you heal. Luckily, it takes him longer to draw the arrow than it does for you to drink the potion, so just do a quick sidestep dodge as soon as it’s down the hatch.
- In his first form, most of his unblockable attacks are thrusts. Use these as an opportunity to sidestep and hit him in the back. In his second and third forms, his sweeps can be dangerous, but you can jump over them and jump off him for big posture damage.
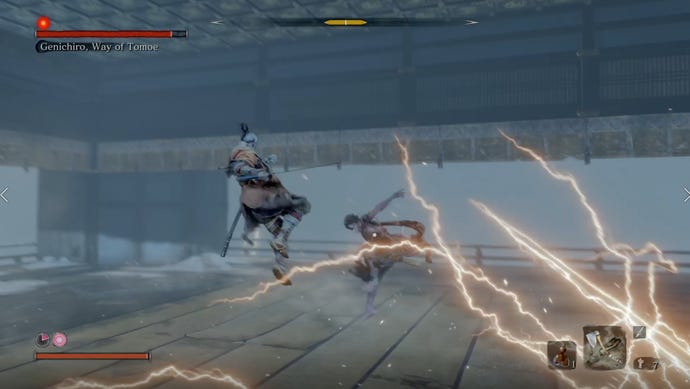
- His third form is intimidating, but it has weak posture on account of having no armour. Use this to your advantage and don’t let him breath. Make sure you’re in the air when he throws lightning and be ready to hit as soon as you land for a big counter.
Corrupted Monk guide
The eight-hit combo that he starts the fight with might scare you, but there’s a lot of ways to ruin this monk’s day. Since she’s a ghost, she has their usual weaknesses: if you can spare some Divine Confetti, it’s going to boost your damage against her, and Snap Seeds create an opening. That said, to be honest, you can easily get her down without using any resources if you learn her moveset.
- She has two Perilous attacks you need to watch for - a thrust and a sweep. Her posture is very hard to break, so it’s actually worth step-dodging instead of Mikiri-ing the thrust early on in the fight to get those clean slices in. With the sweep, just jump and kick her in the face. Once you have these two down, the fight becomes almost trivial.
- Besides her unblockables, she has two major genres of attack - sweeping horizontal strikes that combo into each other and big overhead strikes. Deflect the horizontal strikes, wait for the big hit, then step dodge and hit her two or three times.
- She's open at the end of her combos, so just as they finish, sprint in towards her and land a hit or two, then sprint back out. Make use of Whirlwind Strike if you're struggling to land hits through her guard.
- If you can get around to her back, it’s free damage, so watch for those openings.
Folding Screen Monkeys guide
Depending on how you feel about “puzzle bosses,” this is either a welcome respite from the constant carnage or a pain in the neck. Either way, here’s how to deal with these pesky monkeys.
- Orange Monkey: This one is by far the most annoying, since he’s the one that alerts the other monkeys to your presence. There’s no real trick to this one, but since he’s way worse at detecting you than his comrades, just sneakily follow his footsteps across a few rooftops and stealth-kill him.
- Purple Monkey: Look around the left side of the hall, and you should find a door with a note. Open the door and let in the wind in. If you wander around for a bit around this area, the purple monkey will eventually enter this room. The wind means he can’t see you anymore, so sneak up on him and stealth kill him.
- Green Monkey: Use the Illusive Hall Bell to reset their positions. Grapple up to the rooftops and slowly make your way around their perimeter, avoiding the central tree where the monkey spawns. Make your way to the back and ring the bell. Quickly grapple your way to the tree and stealth-kill him - he won’t be able to hear you.
- Invisible Monkey: Reset their positions again. Use the Firecrackers, and wait for the deathblow icon to appear behind or near you, then stab him up.
Sekiro Guardian Ape guide
This boss seems impossible at first, but he’s not as bad as you think once you learn its attack patterns. Here’s how to deal with its first phase:
- Most of its flurried attacks can be jumped over or parried. You ideally want to get yourself into position behind him and deliver punishment as often as possible. It’s also vulnerable just after it lands from throwing its poop - easily parried or dodged - as well as after it finishes thrashing on its back.
- Repeated hits will cause the Guardian Ape to flinch, so keep up the punishment. Use your firecracker prosthetic to create big openings. The first time you use the firecracker, he will flop to the floor where you can get in a bunch of free hits. The next few times, he will try to flop on you, so don’t run in to attack too early.
- When he backs off and roars, you can actually grapple onto the sword handle sticking out of his head. This is another way to create a window for some free attacks.
Here’s how to deal with phase two:
- The biggest threat to phase two of the Guardian Ape is his terror-inducing roar. It’s a large area of effect attack that can kill you outright by filling your terror meter. Whenever a kanji appears just run away as fast as possible. If you do get caught a bit, make sure to use some pacifying agent to lower your terror in case he does it again.
- Most of his sword swings can be parried, but the easiest opening comes when he does a diving forward lunge with his sword. Jump straight over it, get in close, and bring the pain.
- Jump - a lot. Many of his attacks come low and horizontally so keep hopping around like a, well, ape.
Sekiro Twin Guardian Apes guide
Well, you probably thought you were done with this guy after cutting his head off and extracting the vermin inside him, but here we go again. This is easily one of Sekiro’s most frustrating fights thanks to its second phase, but if you’ve made it this far, you can definitely pull it off. For the first half, this isn’t anything you already haven’t seen, just avoid the area-of-effect scream and punish his overhead pounds. For his second phase, however, you’re going to have to fight both forms of the ape at the same time, oh joy.
- Forget deflecting your foe’s every attack like a badass shinobi - you should be sprinting around like mad during this phase. The key to success is that the headless ape isn’t that mobile, but his more primal friend will be chasing you around far more often. You want to create distance between them, back off while you wait for the brown ape to go into one of her long attack routines, then punish, punish, punish during the generous attack window at the end. If you manage to put up enough burst damage, you can posture-break the brown ape within ten seconds of its spawn, making this fight much, much easier.
- If you’re having issues avoiding the brown ape’s attacks, use the charged-up Firecrackers to stagger her for easy damage. This can be tough to pull off under pressure, however.
- The brown ape doesn’t actually take that many hits to kill, and you can stagger her with enough damage, but you need to be watching the headless ape’s attack routine at all times. If he goes for the Perilous aerial dive or the flop-forward swipe, you’re going to want to get out of there.
- After the brown ape bites the bullet, it’s just you against the first form again. Stay patient and you’ll have him down in no time. Also, make sure to sever his immortality with the Mortal Blade after the fight is over.
Sekiro Great Shinobi Owl guide
Your dear old dad is no pushover, and as such this is one of the stiffest challenges you’ll face in Sekiro. In general, this is the point in the game where it’s starting to test you on whether or not you’re playing it the way Miyazaki wants you to. For this and many of the fights to come, you want to be in the boss’s face swinging wildly until they deflect one of your slices - look for the yellow sparks. Then, you want to be on the defensive until they finish their strikes, parrying their blows until you see an opening for a clean hit. Rinse and repeat, essentially.
- As with many of the game’s toughest boss fights, Owl’s posture recharges comically fast when he has full health, so go for clean strikes against his vitality on some of his heavier moves early in the fight, then go in for the posture break.
- If Owl breaks your posture, he’s going to go for a turnaround grab attack that instantly kills most of the time, so dodge backwards as frantically as you can muster. You should be able to just get out of it and hit him once or twice.
- When he throws shurikens at you, he’s going for a front-flip overhead smash that you leaves a massive opening. Deflect the stars and step dodge as he lands, then punish.
- When Owl does the multi-hit combo where he turns around and hits you with his back, he’s going to shower you with firecrackers and slice you. Don’t try to deflect, simply dodge backwards when he does this, wait for the slice, and hit him for serious damage.
- When Owl goes for the massive overhead slice, step-dodge to the right or left as he brings it down and punish him.
- His wide swings might seem slow and easy to dodge, but they cover a wide space, so it’s better to deflect them to build up his Posture gauge.
- When he puts down the green area-of-effect gaseous bomb, it might be tempting to run forward and mess him up, but don’t fall for it. The range on it is deceptively wide, and it prevents you from using any of your consumables for a very long time, so resist the urge and wait for his next attack. It’s best to sprint-circle to the right or left to make sure it doesn’t hit you.
- When he backflips away from you and throws shurikens at you, deflect them and sprint up to him. He’ll likely go for one of his run-by slice attacks that leave him wide open, which you can stagger him out of with one or two hits. During his second phase, he replaces the shurikens with poison gas, so wait for him to come to you instead.
- During his second phase, when he raises his left arm above his head to throw a smoke bomb down, dodge away and look around with the right-stick. You should be able to see his run-by slash coming. If you stay in his face at the instant the smoke hits, you’ll get stunned for a moment and you’ll be open to attack, so get away.
True Corrupted Monk guide
Another foe that you probably didn’t expect to see again, but she remains one of the easier fights in the game once you know what you’re doing. If you’re struggling, you can easily cheese this boss by grappling to one of the tall trees before she spawns and deathblowing her as you jump off of it. Do that twice, then use the Firecrackers to stunlock her third phase. For those of us who prefer an honest fight, however, she isn’t that different this time around.
- If it’s been a while since you fought her less-corporeal form, scroll up and read about her basic moveset. In general, you want to deflect her comboing horizontal attacks, dodge and punish her vertical ones, and watch for and counter her two Perilous attacks.
- She has a few new tricks. In her second phase, she does her best Wet Nurse impression and summons spectral versions of herself to hit you. You want to do your best to deflect all of these, while watching your back to make sure one doesn’t spawn behind you. If it does, dodge away.
- In her third phase, she starts ending most of her combos by leaning forward and letting the centipede in her head slice you up. While this might seem intimidating at first, it actually gives you more of an opening than almost any of her other attacks. Just deflect her strikes, watch for the headbutt, then step-dodge and slice her backside four or five times when she goes for it, and she’ll be down in no time. If you can’t get the timing down, use the Firecrackers to stun her and hit her in the back.
Divine Dragon guide
For our money, this is by far the easiest boss in the game once you figure out what to do (other than maybe the Long-armed Centipede). For the first phase, sprint up to the nearest grouping of dragon-heads and slice them up. The ideal strategy is to leave multiple ones at the very point of death so you can chain together the invulnerability frames of your deathblows, but it’s not required. Eventually, darker dragons will spawn to try to attack you, but as long as you stay mobile, you should be fine. You can watch for the huge tree that slams down on you and dodge away, but you’ll be getting so much health back from dozens of deathblows that it hardly matters.
In the second phase, things get a little more serious, but not very. The dragon telegraphs all of its attacks, so simply deflect the vertical strikes and jump over the horizontal ones. Sprint up to the row of trees, and grapple onto the one that has sparks around it. Harness the lightning and aim it at the dragon to damage it. Repeat several times.
Eventually, the dragon will unleash a barrage of attacks. Deflect or jump over as many as you can, healing as necessary. When it runs out of stamina, grapple the glowing tree again and keep pressing attack to finish it off.
Demon of Hatred guide
This is Sekiro’s major secret boss, and in the glorious tradition of Lawrence and Kalameet before it, it’s one heck of a challenge. Before you even engage him, you need to realize that this fight breaks many of the rules that the game has held you to for so many battles up to this point.
For one thing, owing in part to its size, deflecting this boss’s attacks isn’t an effective strategy, as many of them still inflict flame damage to you even if you time them perfectly. Furthermore, trying to inflict posture damage on this boss is almost pointless unless its vitality is extremely low, so you want to revert to the tried-and-true Souls strategy of playing extremely defensively, avoiding his every attack and punishing them as thoroughly as you can.
- This might go without saying to some of you, but unless you want to be holding the sprint button for pretty much this entire fight, circling to the left or right at point-blank range.
- As with many of the most challenging FromSoft bosses, it can be useful to count out the number of strikes you’re able to get off after avoiding each of the Demon’s attacks. It might make your significant other or pet think you’re a nutjob, but it’s an effective way of making sure that you’re optimizing every opening.
- It might seem counterintuitive, but the Demon is actually at its most deadly when you’re far away from it, since it can rain fire down on you or whip you with impunity. As such, you should be running up into its face at every opportunity.
- When you’re close to him, you want to watch Demon’s Perilous charge. Jump when the rune appears above his head, and sprint up to where he stops. In his third phase, he’ll start doing it twice, back to back, so watch for that.
- When he sets himself on fire and jumps up, you want to sprint backwards. (If you’re really bold, you can get two hits before he launches and still get away, but this isn’t the safest strategy.) At the instant he lands, jump and grapple towards him. You should get a couple of hits this way.
- When the Demon jumps away from you, it’s probably going to go for one of its ranged attacks, such as its fire-throw or whip combo, which leaves his belly wide open. Sprint forward, watch for its telltale sign, then hit him with four or five strikes.
- Across its every phase, the Demon’s most punishable attack by far is his long-range overhead whip strike. Wait for it, step dodge to the left or right, then slice him five or six times.
- When you’re up in his face, the Demon has a handful of attacks that he likes to use, all of which are highly exploitable. If he goes for one of his big stomps, try to circle in the direction of the foot he’s not using. He should miss wildly, giving you an opening. If it looks like you can’t avoid the strike, simply stand still and deflect the blow - you’ll still be able to slice him once or twice, and it’s better than losing three-fourths of your health.
- When he goes for the quick double stomp, dodge backward and wait for the second one to finish, then dart forward and slice.
- Of his close-range options, his four-hit sweep/stomp combo is by far his most deadly. You can jump over the first two hits if you’re really quick, but for a reliable option, we recommend deflecting the first two hits, taking minor chip damage from the fire arm, deflecting the telegraphed heavy stomp, then immediately sprinting to the left. The final hit should just miss you, allowing you to hit him a couple of times.
- In his second phase, following his fiery launch, the Demon likes to get up on either of its side legs and stomp down with both, unleashing an inferno right in front of him. When you see him rear up, start sprinting to the right or left and towards him. At the instant his hooves come down, you want to jump, grapple him, and hit him.
At the opening of his third phase, the Demon starts to spin in circles, surrounding himself with columns of flame. For this version of the attack, we recommend running away, as the strike that follows this is extremely easy to dodge from far away. When he goes for it again, you should be so close to him that it doesn’t matter anyway, so just keep slicing. - If the Demon starts to send fireballs from afar at you, sprint to the left or right and towards him. After the eighth and final one, he’s very open to attack.
- The Demon has tackle and palm thrust attacks that he doesn’t use very often, but they can mess you up if you’re not expecting them. If you feel like you’re in a bad position, try to deflect instead of dodge - it’ll probably save you a chunk of health.
Owl (Father) guide
If you thought Owl was a worthy opponent the first time, you haven’t seen anything yet. Though he has a handful of new attacks, most of the guide to the original fight applies to this one, but here are a few additional tips to deal with his new tricks:
- As with the first fight, the key to winning is to be aggressive. If you’re deflecting or countering his attacks and keeping the meter filled with guarded strikes, you can posture break him far faster than simply chipping down his vitality.
- While Owl’s standing overhead strike was previously one of his easiest attacks to step-dodge and exploit, he now has about a 50% chance of turning it into a underhand slash combo that covers a large amount of room if you’re close. Don’t commit early to dodging, and you’ll eventually be able to deflect it every time.
- Every now and then, Owl will throw a sheath of firecrackers in front of him. When this happens, dodge backward and wait for his run-by slash or his Perilous thrust attack. With the former, just deflect. With the latter, you can step dodge to the right or left to get some vitality damage in, or Mikiri it for posture damage.
- He has a new Perilous sweep attack that he rolls out of, often into the standing overhead strike. If you jump the sweep and kick him in the face during it, you can interrupt the animation and get some slices in.
- During his second phase, when he disappears, use the right stick to follow the owl as it flies around - that’s where he’ll come from. Eventually, Owl the man will try to hit you with an overhead smash that you can dodge easily if you’re following the bird’s path.
- During his second phase, when the owl glows with fire, jump when it swoops in. He’ll be charging his Perilous thrust attack, so step-dodge or Mikiri it. You can also sprint backwards and slice him when he stops short.
Final boss guide
Whether or not Isshin Ashina is the hardest boss in Sekiro is a matter of personal taste, but there’s no denying that four phases is quite a lot, even for From Software.
As such, you’re going to want to absolutely master the first two phases to give you a chance against the absolute brutality of the last two. With Genichiro, though it’s been a while since you’ve fought him, you should be able to mess him up with relative ease by this point. He only has one new attack with the Mortal Blade, and you can simply run behind him to avoid the first slice and step dodge to get out of the way of the second. His five-hit combo remains extremely exploitable if you can deflect every strike, and you can dodge out of the way of his jumping thrust, just watch out for the Perilous sweep that he sometimes follows it up with.
- For Isshin’s first phase, you want to watch out for two Perilous strikes. When he thrusts forward with two hands on his sword and the rune appears above his head, he’s going to try to thrust again. Deflect the first blow and Mikiri it or dodge the second.
- When he sheaths his sword, he’s probably going to thrust up once and then sweep. Deflect the first blow and then jump-kick him for significant posture damage when the rune appears.
- His bread-and-butter during this phase is a methodical combo of four slow sword-strikes. If you can deflect all of those, you’ll have him down in no time.
- When he charges up his sword in his sheath, wait until the last second, then jump-kick him during the 360-sweep.
- When he sheaths his sword then ducks for a moment, he’s not going for the sweep - instead, he’s unleashing a two hit combo that’ll do chip damage even if you deflect it. Dodge away instead.
- Isshin’s second phase is arguably the hardest in the game, so don’t be surprised if you’re stuck on him for a while. That said, he has quite a few weaknesses. For one, he really loves to use his overhead naginata strike and stab, which you can easily dodge and punish.
- For another thing, he tends to end all of his combos with either a naginata thrust or sweep, which you can exploit once you learn the tells. Good luck with that, though.
- His charge-up sweep looks intimidating, but it’s easy to counter when you know the timing. Just jump and kick him in the face.
- One of his most pesky attacks during this phase comes when he jumps back and sweeps his naginata at you, but you can get a fair bit of damage off it, too. Deflect, then run towards him. He’ll likely be pulling out his gun at this point, so dodge to the side and slice him up.
- His third phase might look like a nightmare, but it’s actually a lot easier than the second if you can exploit his lightning fusillades, a la the first Genichiro fight. When he leaps backward up in the air, watch for the rune and see if his weapon gets wreathed in light. If it does, jump, take the hit, and press attack to smite him for a comical amount of damage. Then get in his face and slice him some more. Stick to the second-phase strategies that got you here, and you’ll win the day.
Sekiro: Shadows Die Twice guides
- Sekiro: Shadows Die Twice walkthroughs
- Sekiro: Shadows Die Twice walkthrough Part 1 - Yamauchi, General Naomori Kawarada
- Sekiro: Shadows Die Twice walkthrough Part 2 - Chained Ogre
- Sekiro: Shadows Die Twice walkthrough Part 3 - Find the Flame vent, Shinobi Axe and fight General Tenzen Yamauchi
- Sekiro: Shadows Die Twice walkthrough Part 4 - Find the Shinobi Firecracker and fight the horse-rider
- Sekiro: Shadows Die Twice Part 5 - How to reach Ashina Castle
- Sekiro: Shadows Die Twice Part 6 – finishing the Hirata Estate
- Sekiro: Shadows Die Twice Part 7 – Ashina Reservoir
- Sekiro: Shadows Die Twice part 8 - Senpou Temple, Long-Armed Centipede Sen'un
- Sekiro: Shadows Die Twice Walkthrough Part 9 - Ashina Castle Upper Tower
- Sekiro: Shadows Die Twice Part 10 – Where to find Lord Isshin
- Sekiro: Shadows Die Twice Part 11 – Ashina Depths and Hidden Forest
- Sekiro: Shadows Die Twice Part 12 – Mibu Village, Corrupted Monk Spirit, Screen Monkeys
- Sekiro: Shadows Die Twice Part 13 – Sunken Valley, Gun Fort and Bodhisattva Valley
- Sekiro: Shadows Die Twice Part 14 – Owl and Fountainhead Monk Cheese
- Sekiro: Shadows Die Twice Part 15 – Finding a Persimmon and collecting the Frozen Tears
- Sekiro: Shadows Die Twice Part 16 – Mibu Manor, Fountainhead Pot Noble and Dragon
- Sekiro: Shadows Die Twice Part 17 – Clean up and Isshin Sword Saint Cheese
- Sekrio: Shadows Die Twice - best ending guide
- Sekiro: Shadows Die Twice skills and combat
- Sekiro: Shadows Die Twice - top combat tips
- Sekiro: Shadows Die Twice - best skills
- Sekiro: Shadows Die Twice - Boss guide
- Sekiro: Shadows Die Twice crafting and items
- Sekiro: Shadows Die Twice - how to remove Rot Essence and cure the Dragonrot
- Sekiro: Shadows Die Twice - crafting and upgrade materials guide
- Sekiro: Shadows Die Twice - Gourd Seeds and Prayer Beads locations
- Sekiro: Shadows Die Twice - Treasure Carp Scales Guide
- Sekiro: Shadows Die Twice - Mask Fragment Guide
- Sekiro: Shadows Die Twice - where to find more Divine Confetti and Snapseeds
