Dishonored 2 M05: The Royal Conservatory - Cyria Gardens and Royal Conservatory
Dishonored 2 turns up the supernatural elements in this tense mission.
The Void and The Dreadful Wale
The mission starts with a quick trek through the Void. There’s nothing to collect and no actions you can take, so just walk and look.
When you end up back at The Dreadful Wale, collect Document: Thank You from your desk. You can also climb right up to the top of the central staircase to read a new version of Book: Meagan Foster’s Notebook.
If Dr Hypatia is aboard, collect Document: Letter from Lucia Pastor from her room. You can also have a chat with her.
In the meeting room, grab Document: Trip to the Markets near the galley door, Document: Temporary Closure of the Conservatory from the pinboard, and Book: Anton Sokolov’s Diary - Started painting again from near the portrait of Delilah. Speak to Sokolov or Meagan to trigger a cutscene which unlocks the next mission.
Here’s an interesting branch point: if you did not break the tank in Sokolov’s room, killing the bloodflies inside in your quest to collect the dried husk in there, there’ll now be a document on the tank you can collect, unlocking an optional objective to clear an infestation in the engine room. If you did kill the bloodflies, this doesn’t happen at all - but in both cases you can find some incendiary bolts down there if you go have a look.
Head to the skiff and interact and Meagan will appear to take you to the next area - Cyria Gardens and the Royal Conservatory.
The Royal Conservatory key items and objectives
- Eliminate Breanna Ashworth
- Uncover Ashworth’s role
- Find out what Bryne knows (optional)
- Locate the shopkeeper's associate (optional)
- Shrewd Negotiations (special action)
- Parley with Delilah (special action)
- Witch No More (special action)
- Black Market Heist (special action)
- Spying Overseers (special action)
- Rune x 5
- Bonecharms x 9
- Outsider shrine x 1
- Painting: Ashworth Within An Existential Graph
- Painting: My Fires Burn Within Breanna’s Marrow
- Painting: Her Heart I Bathed in Poison.
- Blueprint: Reverberation Tubing
- Blueprint: Triggered Housing
- Blueprint: Configurable Grooving
General layout and tips
To get to the Royal Conservatory you have to pass through Cyria Gardens, which hosts two walls of light. One divides the town from the Royal Conservatory surrounds, while the other is at the Royal Conservatory gates themselves. The Black Market Shop is found before the first wall of light.
Cyria Gardens is patrolled by guards, elite guards, howlers and a few civilians. There is also a nestkeeper.
The map above shows the layout of the Royal Conservatory; here's a zoomed-in version.
The Royal Conservatory consists of a basement, three primary floors, and a smaller fourth floor. Floors 2 and 3 open around a large central gallery. There's a lift and staircase at the east end linking the three primary floors. The basement is accessible via elevator or stairs from the main lobby.
Witches and gravehounds patrol the Royal Conservatory. You'll also find bloodbriar, which won't detect you if you sneak around them.
There are three paintings, three blueprints, five runes, one outsider shrine and nine bonecharms to be found in this level. To get all the blueprints you must complete a side mission for the Black Market Shopkeeper, which will not be available if you rob or otherwise aggravate him.
Special action Shrewd Negotiator is completed via a side mission; visit the Black Market Shop to initiate it, and complete it after visiting the Royal Conservatory. Parley with Delilah is completed in the Royal Conservatory. Witch No More is the non-lethal elimination special action. Spying Overseers involves collecting multiple lore items in Cyria Gardens and the Royal Conservatory, and must be completed before Ashwood is eliminated.
Walkthrough
We begin in Cyria Gardens. There are heaps of guards here. We'll only mention those likely to cause you trouble; you'll simply avoid most of them.
Collect some loot and a rewire tool from the little storage room on the right as you advance. From the room look up and right to spot a lamp. Zip on top of it and then vault the low wall to land in a little grassy area whence you can observe the layout at your leisure. The guard by the noticeboard patrols the street immediately below, but this doesn’t trigger till you move further into the area; zip across the street and you can then zip back for an easy ambush when he reaches the furthest point from the noticeboard.
Speaking of the noticeboard, sneak over there so you’re standing behind it, hidden from the guards ahead, and then turn left, getting up on the low wall, to follow the darker street along. When you come to the end you’ll find a path to your right - but don’t go through! Zip up above it and walk carefully along the beams, not knocking the bottles and stuff, to observe a very cute little ambush. There are three howlers here; dispatch them as you please. Domino and Slow Time are the easiest options.
With that done, visit the Black Market Shop through the door at the bottom of the stairs. As usual, only buy upgrades - we’ll steal the rest after we finish the side mission unlocked by speaking to the shop keeper.
Enter the building across the alley from the Black Market Shop and climb to the second floor. The door here leads into the Overseer’s Outpost, but it’s locked. Continue up to the third floor. Advance through the dark, ransacked apartment and onto the balcony outside. There are two guards and an elite guard on the next balcony over, but they spend forever just staring into the distance so it’s pretty easy to knock them all down. Grab some minor loot and Book: Windmill Operation from their barricade.
Walk past the barricade and drop quietly into the room below through the open skylight. Loot and optionally knock out the overseer sleeping in the chair. Loot the Silver Precious Urn item from the mantel, collect Document: Note to the Overseer, and unlatch the door for easy access.
Be careful advancing into the next room - there’s a trap on the table you should disarm and loot. You can then safely collect Book: On the Oracular order, by Douglas Harwickle, Historian, the Royal Conservatory map, and Audiograph: Ashworth Connected to the Occult? This last one is especially important for completing optional objectives. There’s only minor loot in here otherwise.
Stand on the balcony where the guards were and look across the street to spot another tempting balcony. Zip over there and enter - mind the sleeping civilian on the bed. Collect Document: Mine Collapses - Numerous Casualties and some minor loot from the backrooms, then head out the door and go right up the stairs. Look right, around the corner, to spot a higher balcony. Use that as a stepping stone to get up on the roof.
We’re going to explore the rooftop and building opposite, then head around the corner along the black pipe. There’s nothing of note in the corner off in the other direction, except two witches lying in ambush - unpleasant.
So: stand at the edge of the roof looking into the area you haven’t visited yet and look across, right and down to spot a rooftop with a table and chair. Zip over for Document: Leave Karnaca and some tasty loot.
Go back over to the rooftop and get up on the black pipes. Follow them along scanning the other side of the street for a balcony on a blue building. Go over and enter, but be very careful as you advance as this area is riddled with tripwires. Disarm and loot them, then climb up the broken floor to the next level to grab the two runes on the Outsider shrine. You’ll also find Book: Traditional Serkonan Songs [3] up here.
Go back to the pipes and this time go all the way around to a rooftop bar, where an elite guard is chatting to a civilian. Take the guard out after they separate and stash the body where the civvy won't be upset by it (don't worry, when the guard wakes up they run off into the sunset together, I'm certain). Go inside the building (the door is behind the bar) and go down one story. There’s a bonecharm on a table just inside and Document: More Woes Afflict “Dust District” Residents on the bar. Otherwise, there’s only minor loot in this whole building.
Go back to the rooftop of the bar and look for the big “condemned due to infestation” sign. Enter this building through the open windows, but be very careful - there’s a nestkeeper here. When he’s down you can deal with the bloodfly nests as normal, then loot his desk for Document: Pilfered Safe Combination and some cash, and grab Painting: Ashworth Within An Existential Graph from above it. Don’t worry about the safe - we’ll come back to it - but do grab the corrupt bonecharm on the floor next to it.
Go out on one of the balconies opposite where you came into this building and have a good look around. There should be a watchtower on your left, near a second wall of light. Our goal is in the opposite direction - right down the end of the street past the cart loaded with lumber. If you zip onto the top of the cart, there are two guards chatting ahead and left, one guard patrolling ahead and right, and an elite guard patrolling on your right and slightly behind.
You want to move ahead and right, aiming for a doorway right at the end of the area. It’s pretty easy to get past the guards with Far Reach/Blink. The two civilians inside will ignore you and have nothing worth robbing. Go upstairs until you hit a barrier, and climb over it. Be wary of multiple tripwires as you continue up to the top apartment.
In this apartment you’ll find a bonecharm, Document: Opportunity, Blueprint: Reverberation Tubing, some minor loot and a bunch of ammo and consumables. You’ll also find a handy sneaky path out the window - pipes leading to the Royal Conservatory. There are many ways in (like the pipe out of the fountain) but since we’re here, cross over and move along the ledge on the front of the building till you can climb in a window. Save before you go in!
Royal Conservatory
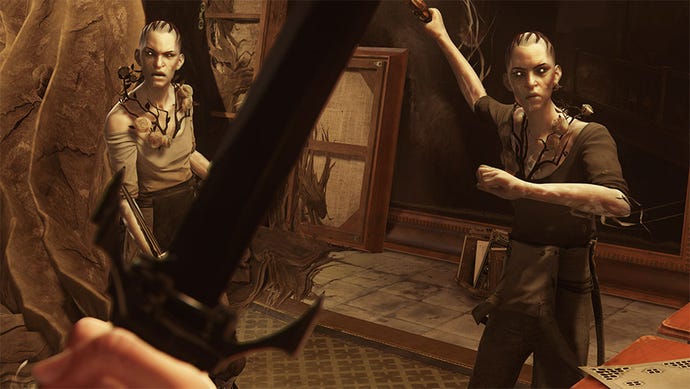
Let's have a quick chat about this place. It's patrolled by witches and gravehounds. Gravehounds are immortal and raise alarms, and witches tend to sit and stand in the worst possible places. Make good use of powers like Domino and Slow Time, and just avoid the gravehounds altogether. When we eliminate Breanna Ashwood all the baddies will vanish instantly, and then you can explore to your heart's content.
Collect the raw whalebone on your right as you enter through the window. Just inside the Royal Conservatory you’ll hear two witches chatting. Wait a while and one will start patrolling while the other sits on a perch overlooking the corridor. The good news is the patrolling one goes a long way to the right and stands still facing away for several beats, so you can grab her first and then hit the other, no fancy tricks required.
With these two down, loot this set of rooms. Watch for the Silver Egg loot item, Book: On Natural Philosophers, by Kenneth Obernshaw and Document: Unfinished Letter to Abigail in the makeshift dormitory, some sleep darts (always handy) from the body in the lab near the window entrance and a rune in the sitting room.
There are three exits from this area - a stairwell and two doors leading deeper into the conservatory. Take the east door leading to a room full of display cases with stuffed animals, notably fish. In one corner of this first little room is a door requiring the security key. Zip through the gap above it but don't pick up the prototype until you rewire the security system, or all the alarms go off. If you don't have a rewire tool you can loot one from this area later on.
Leave the security room and move to the balcony railing so you can examine the area. Note the stairs and elevator off to your right. You're on the second of three primary floors. Ignore the bottom floor for now; it's very bad news.
Concentrate on floor 2: this area has six witches. One is patrolling on the gallery opposite, two are sitting on a light fixture, one is working beneath the same light fixture, one is having a chat with someone but joins the patrol when they're done, and one is on floor 3 but will spot you gadding about on floor 2, unfortunately.
Wait for the chatting to end, then take out the two patrollers by the bookshelves. Go around to the stairs at the far end of the room on the opposite side from the two on the light to take out the one upstairs. The other three can be safely ignored for now, unless you mean to make a great deal of noise.
Go up to level three, approach the elevator by the stairs and call it; you’ll need to hide if any of the witches are still around, because at least one will investigate. When she wanders off again, climb up through the hatch and get to the little gap in the bricks for some loot and a black bonecharm as well as Book: The Foreign Curse, Written and Researched by Tabitha Alba. Eat the food on the plate to find some minor loot.
Crawl through the nearby tunnel and then walk around the ledge to the far side of the room, grabbing Document: The Silver Spike - Genius Inventor Can Barely Recall His Own Name (or high chaos equivalent) on the far side. Go through the open window and be very stealthy so you can eavesdrop on the conversation between Delilah and Brenna. Open the door immediately on your right to grab another black bonecharm and Document: Black Bonecharm Notes.
Stay quiet and loot the other rooms up here. Notable items: loads of raw whalebone, Book: My Effigies of the Oracular Sisters, and most importantly Document: Breanna Ashworth’s Notes and the Discarded Lenses item; these last two are required for the optional objectives and non-lethal kill. If you grab Audiograph: Meeting Delilah, it will draw attention from below - a gravehound will likely come up to investigate. Just hide in the side room till it leaves again, you'll be fine.
If you want to complete the optional objectives you also need the documents from Breanna’s desk before you take her out - and getting them is tricky. I had luck going down one level, smashing a case, and zipping up the top again. As Breanna and the gravehounds went to investigate, I zipped down to the desk and looted it for Document: Done Straightening Up and Document: Unfinished Letter to Delilah. I also grabbed Painting: My Fires Burn Within Breanna’s Marrow, which you can do without a distraction.
Eliminate Breanna
There is heaps more loot in this level but we can make our lives so much easier by dropping Breanna now and going treasure hunting in a minute. Head back to floor 2 and get rid of any remaining witches, then approach the weird device. Interact with the centre of it to add your lenses to it, then pull the lever.
Breanna is pulled into the area and loses her powers, which makes every witch, gravehound and bloodbriar vanish. This completes special action Witch No More, and is fantastic. If you then kill her or knock her out with a sleep dart (she cannot be strangled, unfortunately), you can loot her for two bonecharms.
Clearing out the Royal Conservatory
Return to Breanna's office and speak to the statue of Delilah to complete special action Parley with Delilah. Go up to the upper level of the office and take the broken whalebone sword item. Go outside through the door here and collect the rune and sleep darts from the back wall; previously there were two bloodbriar and two gravehounds here, and you avoided that whole mess.
Go back inside and head to the ground floor. In one corner of the bottom floor is a room with a wall of light and Blueprint: Triggered Housing. The only other thing of note on this level is two cash registers in the lobby.
Do go to the lobby, and take the stairs down to the basement. Hug the right wall and climb some boxes to go outside, then drop back inside a few steps to the right to get inside the locked room. Collect Document: Vermin Problem, a bonecharm in a glass case, and the Archive Key. Cut your way out the door.
Staying on the basement level, move out into the bloofly infested area. there are three flammable bottles in this area which should help, and all the nests drop blood amber. Be careful not to set any unconscious witches on fire if you're going for merciful. Enter the archives about halfway along this corridor and collect Audiograph: Bringing Back Delilah to tick off another objective, then look up: you can get one top of the bookshelves to either side of the desk with the audiograph on it, and drop down to a hidden area to collect Painting: Her Heart I Bathed in Poison.
Take the stairs or lift up to floor 3, and circle clockwise, passing through the first door on your left. Continue along the passage dealing with the bloodfly nests - all four drop blood amber. In the rooms nearby find a bonecharm and the Magoli Forest Plateau loot item. There’s another bloodfly nest with blood amber in the stairwell nearby.
Go back to the door near the lift and continue along the corridor. Grab the Pindo’s Passage and Shirra Pirate Cove loot items from some desk on your left as you advance, and smash a glass case on your right from some minor loot a little further on. Interact with the Jessamine portrait for some comments from your character, then loot out the balcony outside Breanna's office for a few goodies.
Back to the Black Market Shop
The easiest route back to Cyria Gardens is to walk out the main lobby doors to the courtyard with the tortoise statue, then out to the main gate - the one with the wall of light. You can zip up on top of the wall of light, and then onto the watchtower. From here, zip onto the streetlight thing in the middle of the street, and then to the balcony of the nestkeeper's apartment. Retrace your steps back along the black pipe and through the apartment complex so you can zip across to the safe end of the street and the Black Market Shop.
Talk to the shopkeeper and hand over the prototype to receive the Blueprint: Configurable Grooving along with some silver ingots. This completes special action Shrewd Negotiations.
Now let's rob him. Move towards the exit but stop just inside the door and peer through the barred window to your left. Get out your crossbow and shoot the red canister on the chain at the back of the storage room.
Go back into the shop and grab the crank wheel sitting against the wall opposite the counter. Carry it outside to the little boat (don't get too close; they don't like it) and look for a pedestal you can attach it to. Turn the wheel to open the nearby gate and swim through to find a chain dangling into the water. Climb up (spin around if you can't get through the trapdoor) and sneak up on the shopkeeper to knock him out. Help yourself to everything behind the shutters, especially the rune and Document: Safe Combination.
There's a lot of loot in the storage room so grab that, too, being sure to empty the safe and grab Book: Shopkeeper’s Journal. Mind out for the sticky grenade in a glass case though - bashing it with your sword is a bad idea.
One last thing before we go - make your way back to the nestkeeper's apartment and clear out the safe. I forgot to do this so I can't tell you what's in it! Speak to Meagan at the boat to end the level.
