Dishonored 2 M02: Edge of the World part 2 - Dockyard Quarter and Addermire Station

Make your way through the heavily-guarded streets of Kernaca on your way to Dishonored 2's first real elimination mission - not this one, unfortunately.
- Dockyard Quarter and Addermire Station key items and objectives
- Board the Carriage for Addermire Estate
- Locate the Black Market Shop (optional)
- A Fresh Grave (special action)
- Get Help From Mindy (optional)
- Enter the Overseers Outpost (optional)
- The Nest Keeper (special action)
- Try to Unlock Me (special action)
- Dr Hypatia's Apartment (special action)
- Painting: ??
- Painting: The Outsider in Conditional Dreams
- Painting: The Isometry of High Overseer Thaddeus Campbell
- Painting: Hypatia's Projective Gaze
- Blueprint: Dispersed Incendiary Release
- Blueprint: Fire Hardening Treatment
- Runes x 7
- Bonecharm x 6
- Outsider Shrine x 1
General layout and tips
This level introduces the concept of neutral territory. As long as you avoid damaging or scaring civilians, you can wander freely around the starting area. You'll be notified when you cross into an area with guards.
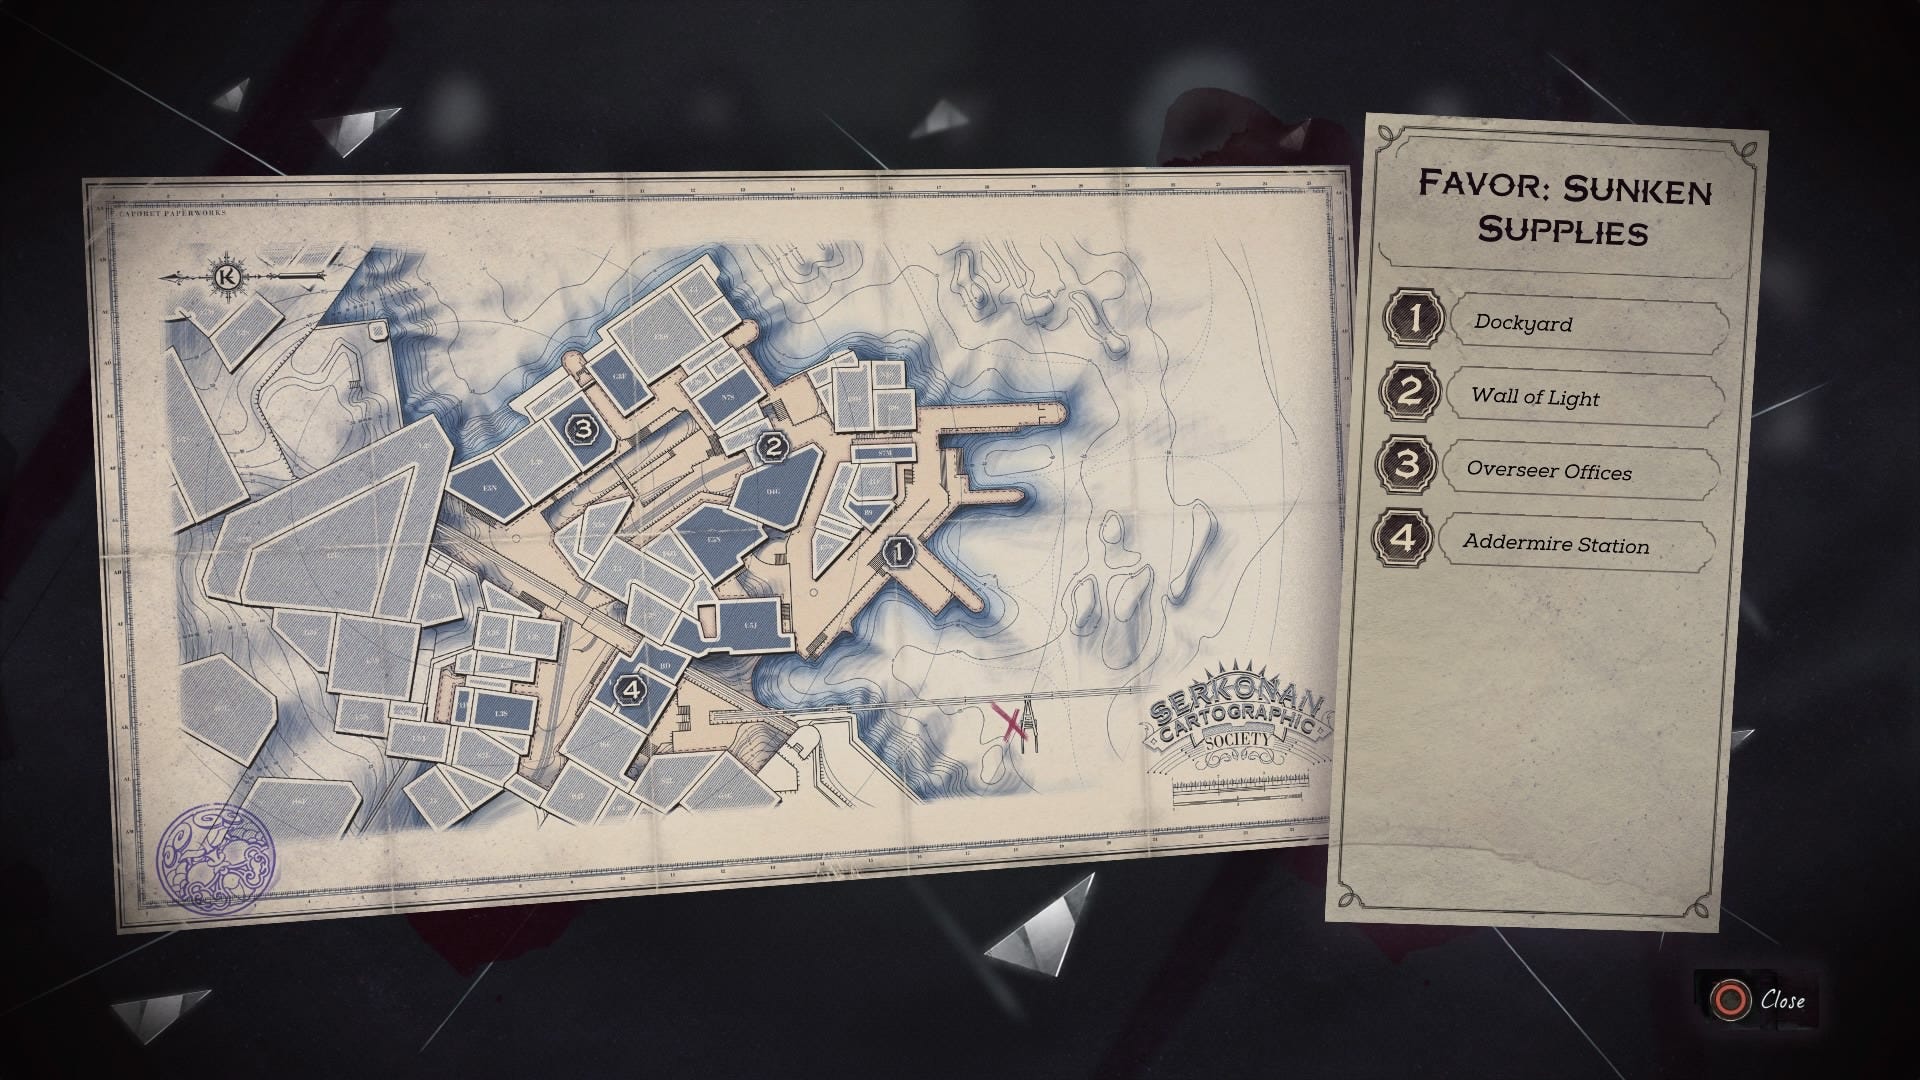
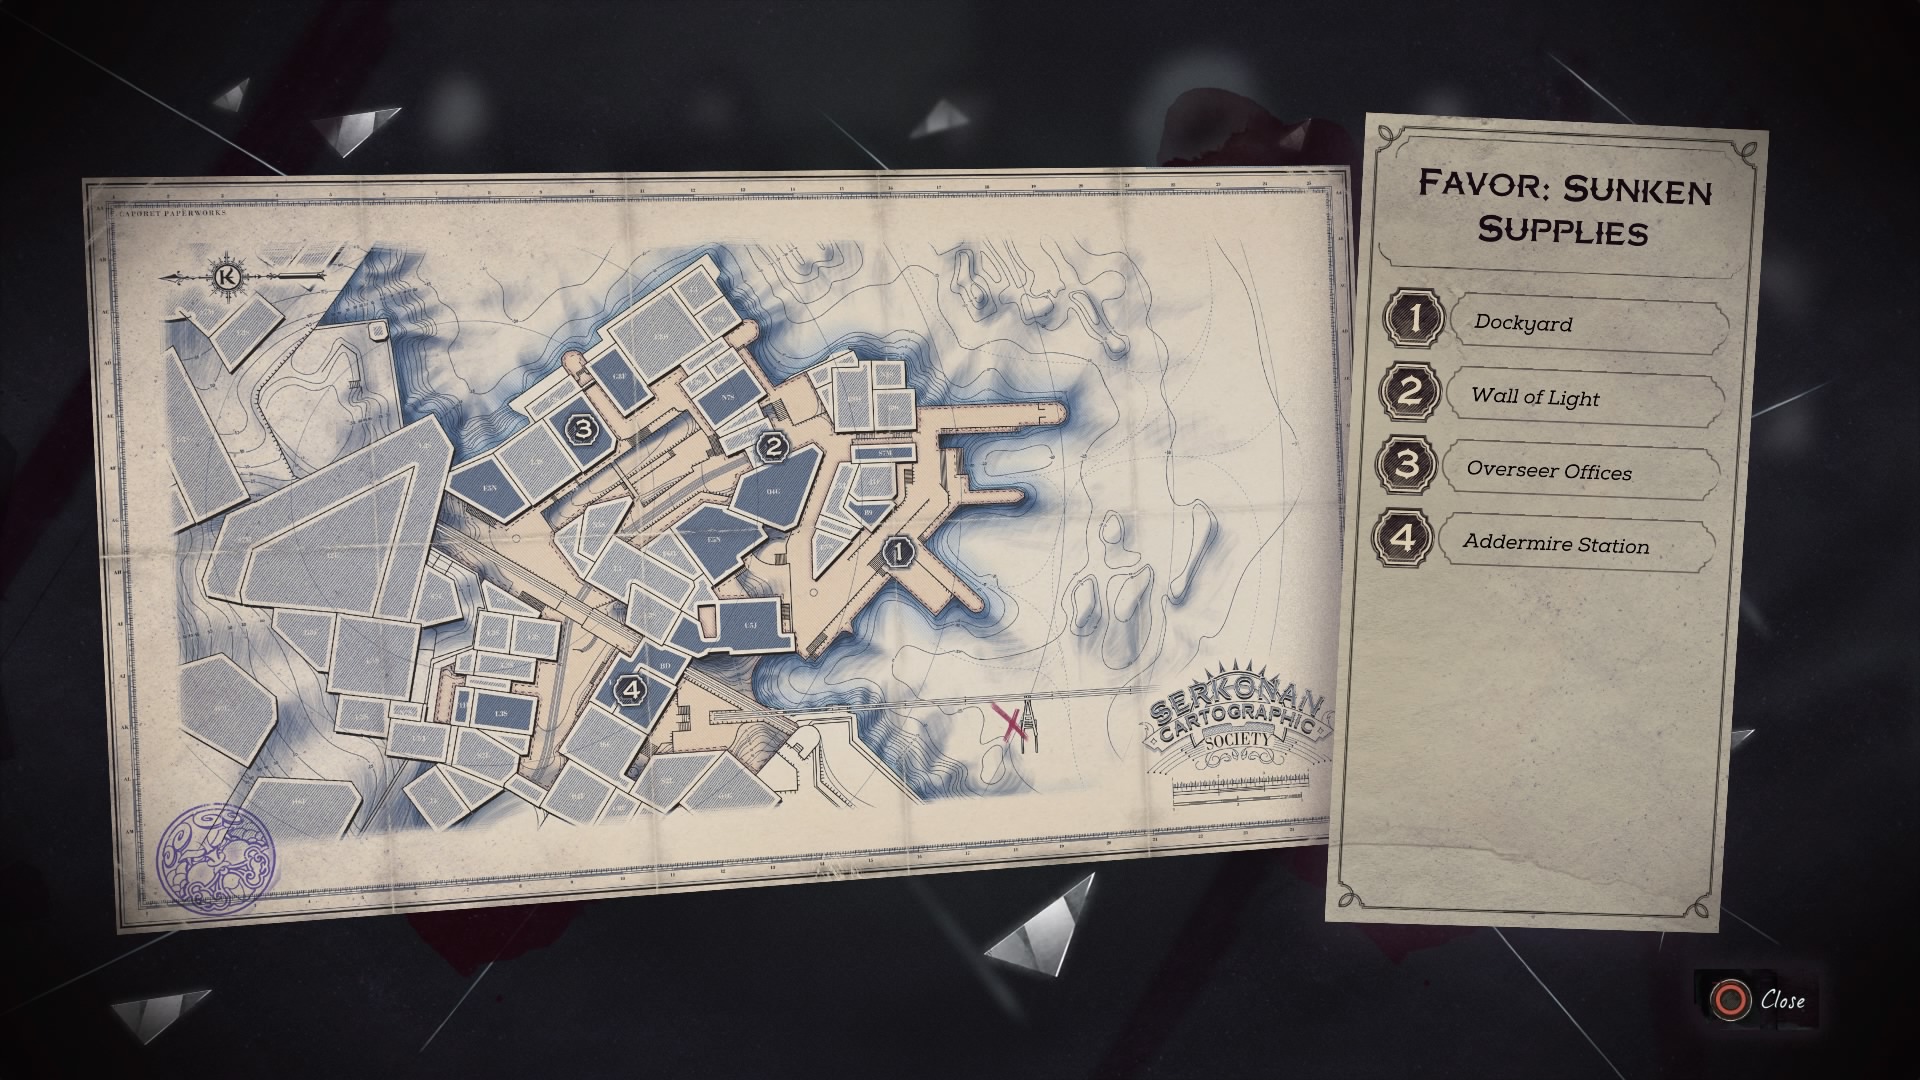
The map above shows the layout of this level; here's a zoomed-in version without the key so you can see finer detail if desired.
The level begins on the docks, which is neutral territory, and ends on the far side of Addermire Station. The goal is to pass through two checkpoints in order to reach a carriage at the station and board. There is an Overseer's Outpost between the two checkpoints.
There are three routes through the first checkpoint - through the infested building, through the heretic's house, and through the disabled wall of light. There are four routes through the second checkpoint - along the rails (requires special action), over the roof, through the station, and through the disabled wall of light.
The optional objective Find the Black Market Shop is completed before you pass into hostile territory. The Nest Keeper is completed before passing through the first checkpoint. A Fresh Grave is initiated before passing into hostile territory and completed in and near the Overseer's Outpost. Try to Unlock Me is completed between the two checkpoints. Dr Hypatia's Apartment is completed between the two checkpoints.
Walkthrough
Collect the Dockyard Quarter map and Document: Note to Purlos from the notice board near where the level starts.
Head South along the docks to find a bar. Collect Document: Former Empress on the Run! from the bar. Continue on to find a dead whale pulled out on shore. Collect a rune from its mouth. There's some raw whalebone on a nearby table. Climb into the boat docked nearby to collect Audiograph: Miner Recruitment and the Whaling Territories loot item. If you like, swim out to the southernmost buoy and dive down to find a number of mines and ammunition - but be wary of the hostile fish that will come for you eventually.
Return to the bar and look up to spot some nearby awnings; climb up to reach an open window (you'll need to use Blink or Far Reach). There are no guards inside but there is one civilian who will alert if he stops you trespassing. He cannot summon guards, though. Inside, collect Document: Letter from Rebecca Fletcher from the desk, then open the safe for the Blueprint: Dispersed Incendiary Release and a Blood Amber Whale Statue loot item.
Go back outside and stay on the awning. Facing the sea, look left to spot a round fan thing on the wall. Blink or Far Reach to it, then jump onto the nearby balcony to enter the witch's house. Collect a Painting and Book: Document of a Witch.
Return to ground level and head to the south end of the docks. Search the streets nearby to locate a man cutting up fish; there's some more raw whalebone here. Explore the corridors here to complete optional objective Locate the Black Market Shop; look for the sign of two hands. Don't buy anything except upgrades! We can get all the items for free shortly, and you don't need the map.
Behind the Black Market Shop, speak to Mindy Fletcher to unlock new optional objectives: Get Help From Mindy and Enter the Overseers Outpost. Go into the basement under the Black Market Shop and give the Beggar five coins to get a tip. Do not take any of his things from the little room he's sitting in, or he'll stop speaking to you (and he might be important later).
Unlatch the door at the front of the Black Market Shop to reach an outdoor kitchen area. Eavesdrop on the conversation, then collect Document: Bloodfly Situation and Book: The Fishmonger’s Cookbook. Look for a body hanging through a window and loot it for Document: Clearing Bloodfly Nests.
Facing the window with the body, look up at the buildings to your left. Blink or Far reach up to the open window, then pass through the small room, collecting Book: Abandoned Diary - 2nd Day, Month of Wind, 1851 and out the other window. Blink or Far reach across to another open window to enter another apartment. Loot the apartment of various minor treasures and Document: Letter to Mr Wetherby, then unlatch the door back to the Black Market Shop.
This is everything you can do in neutral territory. There are three paths from here to the far side of the first checkpoint. You can take any of them, but you'll want to complete at least two of the three in order to collect everything.
Through the infested building
Take the body out of the window of the infested house and drop it immediately so you can climb through the window. Move slowly and in stealth mode, keeping as far from the nest as possible, until you can hop the bar. Grab any of the bottles of liquid marked flammable (high-proof liquor or rum), and lob it at the nest. This kills the bloodflies and allows you to collect Book: Traditional Serkonan Songs [1].
There are enough bottles of flammable liquid in here to deal with all the nests, but not the swarms - so make sure you're not wasting them as you move through the house. There are a couple of bottles by the bar, a couple on the first landing of the stairs, and a couple in the back rooms. If you run out, you can sue incendiary bolts; the Black Market Shop has them for sale if you need extra. Don't forget to pick up any Blood Amber dropped when you destroy a nest.
Climb to the second floor and destroy the bloodfly nest so you can collect the bonecharm. Move to the third floor, destroying nests as needed, then pass into the back rooms. Chop the boards over the door and open it to arrive on the far side of the first checkpoint.
Before leaving, you can optionally face a nasty enemy and get the key to the Black Market Shop, allowing you to loot it of everything for free. In the room with the piano, look for a barricaded door with a gap at the top. Jump and climb through.
Collect Document: Note to Neighbours from near the corpse, and collect the incendiary bolts if you don't have any. Equip them. Climb the stairs and collect Document: Letter from Mr Wetherby. A bloodfly nest keeper is shambling about in here; deal with him and with the nest on the roof. You can then loot the area and collect Book: Bloodfly Experiment Notes. Deal with the second nest in the glass case to grab the Black Market Shop key.
Now's a good time to head back to the Black Market Shop and loot it by unlocking the back door and dealing with the owner. If Mindy is still sitting in the courtyard, be sure to close the door behind you so she doesn't see you and turn hostile. Open the shutters to grab everything you want, and don't forget to loot the shelves and the cash register, too.
If you want to keep exploring, move back through the house to the docks and continue with the next section. If you'd rather move on, skip down to the Markets section.
Through the heretic's house
Move cautiously up the alley leading away from the Black Market Shop and the docks. You'll hear a scene with a couple of guards. While they're busy, Blink or Far Reach (or sneak) to the far side, climb up onto the rooftop with the windmill and lone guard, and continue past to enter a house on your left.
As you enter you'll here an overseer chatting with a civilian. Wait for them to finish and for the civilian to come down the stairs, then sneak up and take out the overseer. Proceed into the next room and ambush the second overseer. Loot or pickpocket this second enemy for Document: Secret Letter to Brother Harold.
Now that the room is clear, loot the heck out of it. Collect a bonecharm, Painting: The Outsider in Conditional Dreams, and Document: Letter from Mindy, then activate the Outsider Shrine, which awards three runes after a short cutscene.
Open the window on the far side of the heretic's house to open a path to the next area. If you'd like to keep exploring, return to area with the windmill. If you'd rather proceed immediately, skip down to the Markets section.
Through the disabled wall of light
There are only three guards at the first wall of light and they're easily dispatched. Take the one on the rooftop by the windmill first, as he has the best view of the area. Collect Document: Servicing the Windmill but don't deactivate the windmill yet - it upsets the guards.
Look over the edge to see one guard sitting in a chair and another patrolling. Take the patroller first, then the other. This leaves you free to explore the area. There's some minor loot around the place, notably a Blood Amber Fish statue in the guard rooms right by the wall of light.
You can now use rat form or even just climb up to the window above the wall of light to get through unnoticed. But if you want to, Blink or Far Reach up to the platform on the windmill and pull the lever to deactivate the wall of light. You can then just saunter through, if you fancy, although we suggest returning to go through the heretic's house instead; it puts you in a better position for the next section.
Markets
Now that you're past the first checkpoint, you're in a dangerous area. There are loads of guards and Overseers here, and if a civilian sees something violent happen, they'll call an alert and more will turn up - even if you think you've cleared them all. As such, a stealth approach is highly recommended.
To start with, let's loot the place out. In the north east corner (right by the window to the heretic's house) is an alley lined with shops and covered by a high glass ceiling. Use the awnings and balconies to get on top of this roof, and head away from the markets. At the end of these roofs you'll find several Bloodflies guarding a bonecharm and Document: Abandoned Notebook. You can easily clear them just by slashing with your sword.
Staying on the rooftops, head back in the opposite direction till you reach the gap, then search around for Document: Weekly Fee near a cosy drinking spot. Now's a good time to tackle the Overseer's Oupost if you fancy it; if not, skip down to Markets, continued.

Overseer's Outpost
There's a lot of good loot in the Overseer's Outpost, and you'll need to go in to complete some optional objectives, which opens an easy path to the end of the mission, among other things. There's a map above, and you can see a zoomed-in version here.
It's tempting to go for the Overseers outside at the base of the building first, as they're guarding some great loot, but since they're the hardest to clear without an alert I'd leave them for the next section - along with the one just above them, if you can.
Facing the Overseer's Outpost from the rooftops nearby, Far Reach or Blink to the upper left balcony. You should see an Overseer in a chair at a desk, with his back to you; this is Floor 3. Enter the room (this completes optional objective Enter the Overseer's Outpost) and sneak up on his left side so you can take him out silently. Collect Blueprint: Fire Hardening Treatment, Book: Reports from the Oracle and Document: Unsent Letter to the High Overseer from his desk; the book is in the shelves on the right side as you stand behind it and the blue print is on the hutch.
From the desk, move stealthily into the room with the safe and collect Book: The Seven Strictures. Open the door and sneak down the corridor by the stairs, then loop around to come up behind a second Overseer. Take him out then hug the left wall to find a small prayer room where a third Overseer awaits.
With the Overseers down, be sure to grab Painting: The Isometry of High Overseer Thaddeus Campbell from the wall, as well as collect Book: Litany on the White Cliff in the prayer room and then Book: The Ancient Music and Document: Strictures to Keep You Safe from the central table.
The document, together with the Seven Strictures book, will give you the safe combination; check the mission clues section of the journal menu for your particular answer. Our combination was 563. Open the safe for several silver ingots, a rune and some raw whalebone.
Sneak up the stairs to the interrogation level (Floor 4) and you'll hear two overseers talking. Hide behind the desks (grab Book: Selected Sayings of the Overseer while you wait) and one will patrol out. Get rid of him, and then go for the other one, who stays at the desk, reading. Pickpocket him for the interrogation room key (you can also enter in rat form if you have that power). Collect Document: Excerpt from an Overseer Interrogation Report from the desks, then a corrupted bonecharm and Document: Secret Date from inside the interrogation room itself. There's also some minor loot here.
Pick up the body in the chair and go out the window by the desk on this floor. Jump, Blink or Far Reach between the awnings and balcony, aiming to get to the end of the buildings and quickly drop down to the shelter of some stairs that lead below ground. Be quick as civilians can spot you from the street and will run to alert guards; if you Blink or Far Reach after they alert the guards usually don't think to come down the stairs to search for you.
Go down into the basement and place the body in the grave. This completes A Fresh Grave and Get Help from Mindy, as she sends her gang to deactivate the electrified rails for you.
With that task done we can finish clearing the markets of loot.
Markets, continued
Head back to the Overseer's Outpost; since we don't need to sneak a dead body out of here any more, it's okay to risk a bit of a fuss. Your goal is the rune, bonecharm and raw whalebone being guarded by two overseers plus a third overseer above.
There are several ways to manage this, depending on which powers you've unlocked and upgraded:
- Bare bones: take out the guard above, then grab a bottle or glass and chuck it to send the other two overseers scurrying. Grab the loot while they're gone and hightail it away. High risk of alert.
- They all fall down: link the three overseers together with Domino and take out the one on the balcony. Nip down and grab the loot before reinforcements arrive. Medium risk of alert.
- Stealth mode: use your Shadow form to walk up and take the loot, then zip away. Low risk of alert.
Or whatever you like! In any case you can increase your chances of success by taking out the guard just around the corner from this position, by the canal.
Speaking of the canal, jump in and swim to where water is pouring in. Shoot the plank blocking the flow of water and a rune will wash out toward you.
In addition to the key items above, there are several more finds worth making in this area. Feel free to look out the following before moving on to the next objective:
- Stand by the Overseer's Outpost and look across the canal to spot a building you can enter. Go inside to collect Document: Doctor’s Notes.
- Look for a balcony high up along the path between the Overseer's Outpost and Mindy's location. Enter for Document: To My Brother and a stack of minor loot.
- Sneak very carefully along the rails running from the wall of light to the market square to collect Document: Duke Abele Essential in Dunwall Coup.
- Enter the shop behind the buskers for Document: Special Fruit Delivery.
- Climb up to the elevated platform by Mindy to find Document: Note on Abandoned Luggage on, uh, some luggage.
Winslow's Safes and Dr Hypatia's Apartment
With the market clear we need only make it through the second checkpoint to end the mission - but it's well worth the effort to tick off just one more special action.
The second checkpoint is in the station on the far side of the raised tracks, and this area has plenty of guards, including many elite units. You on't need to tangle with them yet, but there's even one walking around on the roof of the station, so be careful as you explore.
Your goal is a building directly opposite the station. The bottom floor is given over to Winslow's Safe, while Dr Hypatia's home is on the top floor, accesible via the stairs at the back of the shop. There are a couple of ways into the apartment: you can take the key from the back room of Winslow's Safes, collecting Document: Note from Dr Hypatia as you do, or you can climb up to her door but then exit onto the rear balcony, then use the pipes at the side of the building to walk up to her balcony and let yourself in the window.
Going inside clears the Dr Hypatia's Apartment special action. Collect Painting: Hypatia’s Projective Gaze, Audiograph: Aiding the Miners and Document: Nest Keeper, and don't miss the Blood Amber Bloodfly Statue loot item, either.
Back on the bottom floor, open the cash register near the door and loot Document: Safe Contest Combination. It shows the combination for the big safe in the middle of the shop, under the stairs; we got 291. It's full of silver and even gold, and there's a bonecharm inside.
Addermire Station
There are multiple ways to get through Addermire Station and reach the carriage you need to activate to complete the mission. There are only a couple of guards on the far side, so once you're through you're practically golden.
Here are the options:
- Walk along the elevated track. Mindy switches the electricity off if you complete A Fresh Grave. There's very little risk of detection but watch for guards on the station roof.
- Go over the roof. You're very exposed here and will need to be very cautious of guards on the roof.
- Deactivate the wall of light. This is a matter of taking the whale oil canister out of the system at the end of the red cable. There are multiple guards in here, so it's not easy to do undetected, and the guards will replace the whale oil canister with one of the spares unless you destroy them all, which is a lot of effort to no good purpose.
- Go through the station. There's a window open on the second floor where you can climb through. Again, there are lots of guards.
However you ultimately choose to navigate Addermire Station, you might want to get in and grab a few items. Look for Document: The Silver Spire – We demand the cure! at the desk inside, and Document: Cracked Engine Plate upstairs. There's also a Baleton Expedition loot item on the second floor.
When you're ready, make your way to the carriage and interact to end the mission. If you don't mind an alert you can just sprint up and do it; the enemies can't hurt you once you hit that button.