Uncharted 4 guide: all treasure, secrets and collectibles in every chapter

Find all 109 treasures in Uncharted 4 with this step-by-step visual guide.

Navigation:
Page 1: Chapters 1-9
Page 2: Chapters 10-13
Page 3: Chapters 14-17
Page 4: Chapters 18-22
As well as being a pretty damn solid action-adventure romp, Uncharted 4 has quite a bit of optional stuff for you to sink your teeth into. One major component for that is the collectable – and there’s quite a number of them in this game.
In this guide, we’ll cover one of the major collectable types in the game – treasures. As with previous Uncharted games, these are little rarities you can pillage from each level of the game, and each comes with a snazzy 3D model that you can then view in the menus after the fact. When you get them all, there’s also a trophy in it for you.
This guide will be as spoiler-free as possible – so we might mention geographical details about locations, but we won’t spoil plot points or mention characters. So, without further ado, here’s the treasures for Uncharted 4: A Thief's End
Note: we'll be updating this as we go and adding more chapters over the next 24-48 hours.
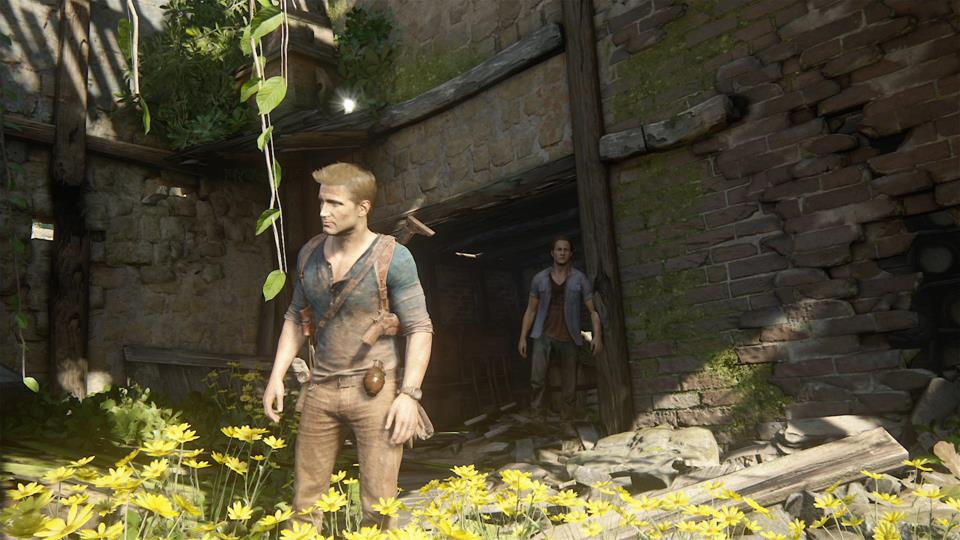
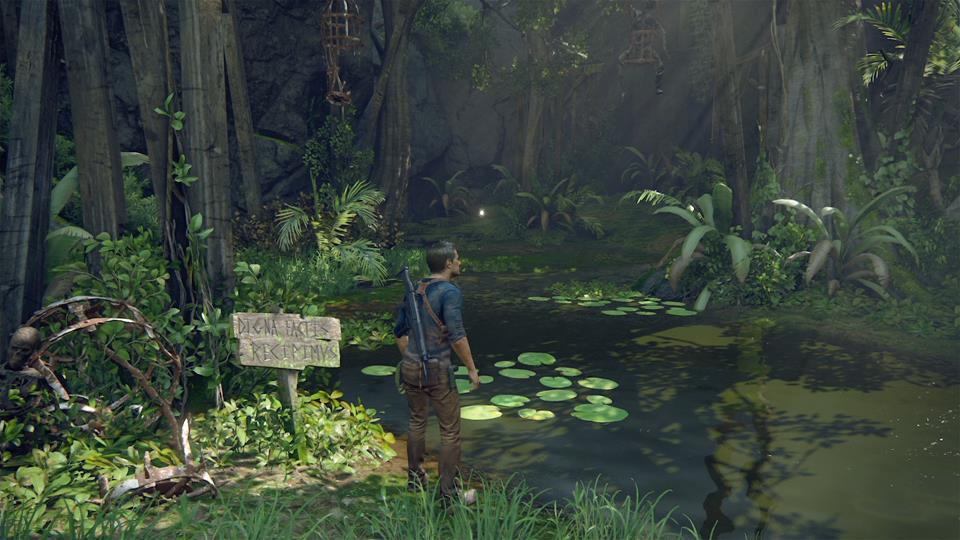
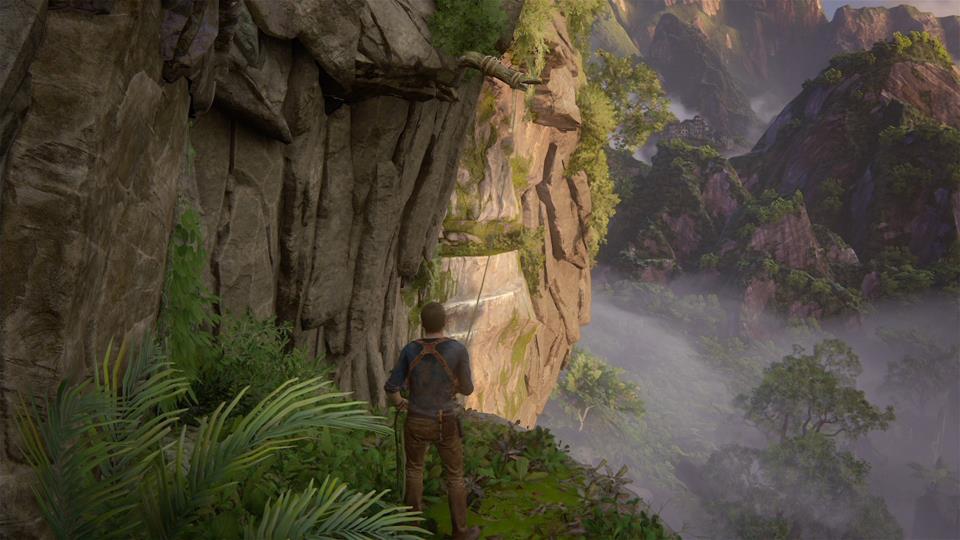
Prologue & Chapter 1 - The Lure of Adventure
There’s nothing to see here! Move along, people.
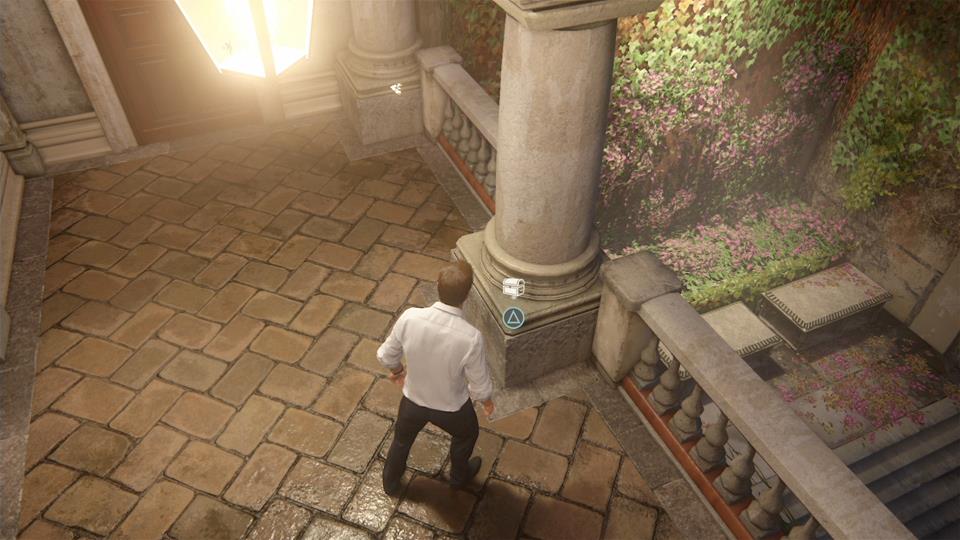
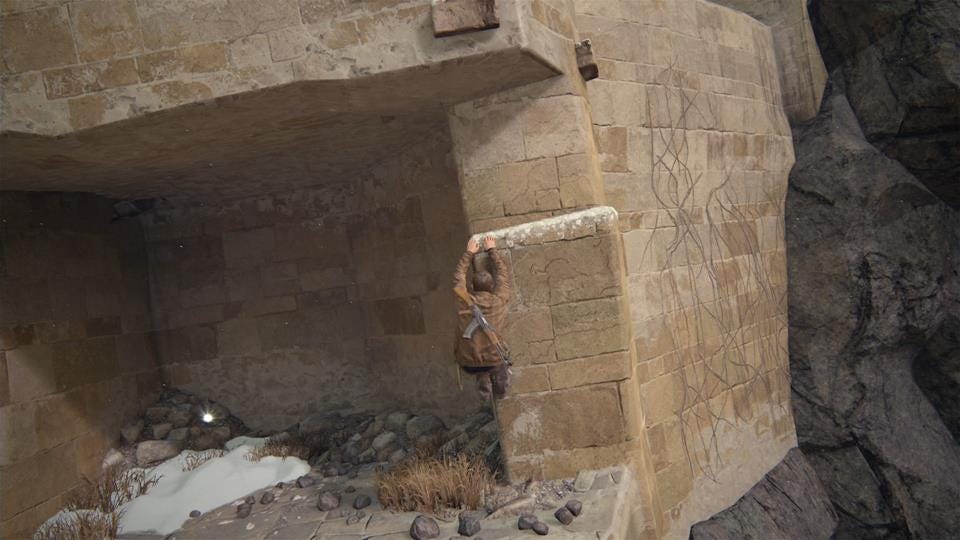
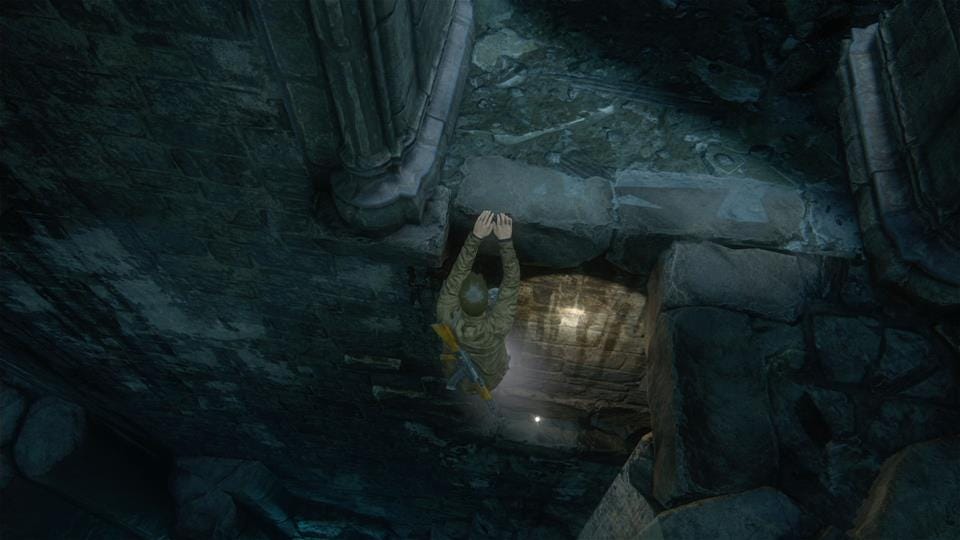
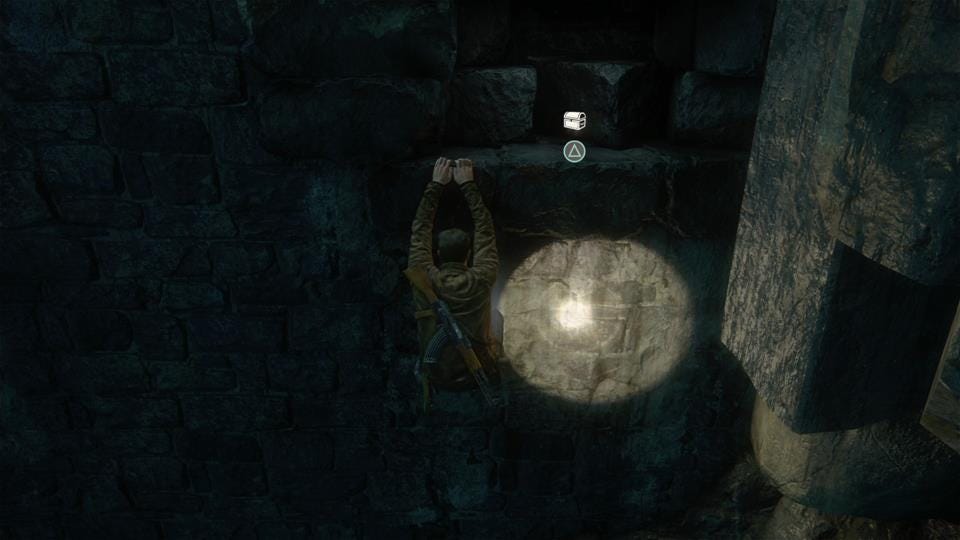
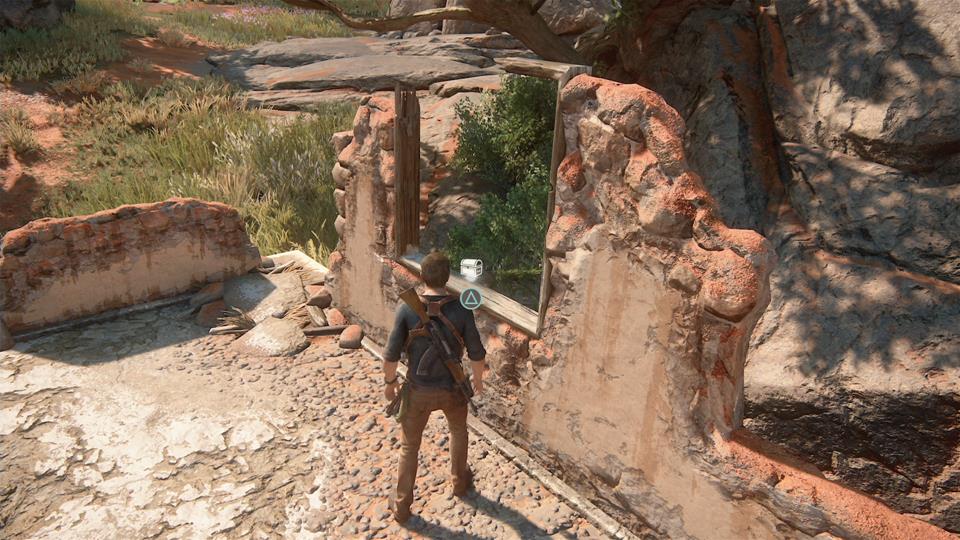
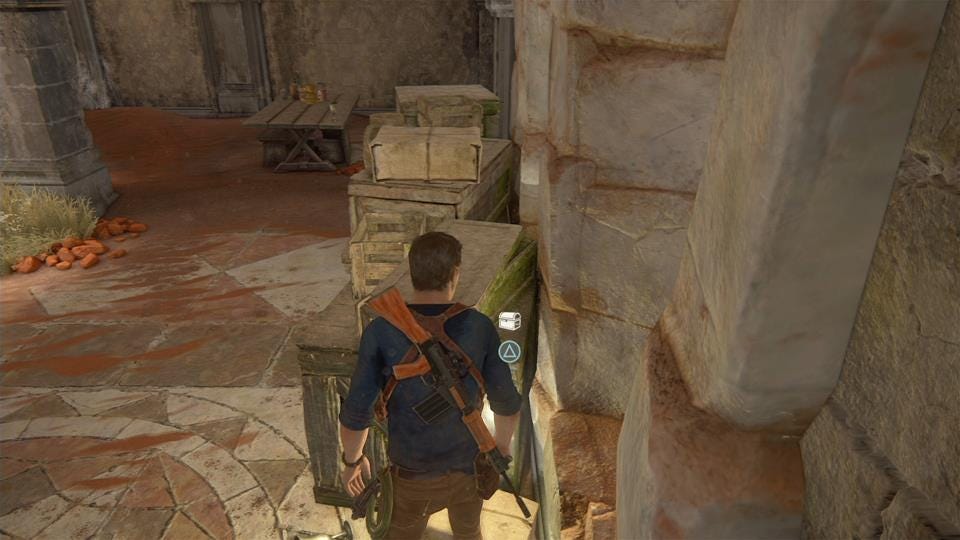
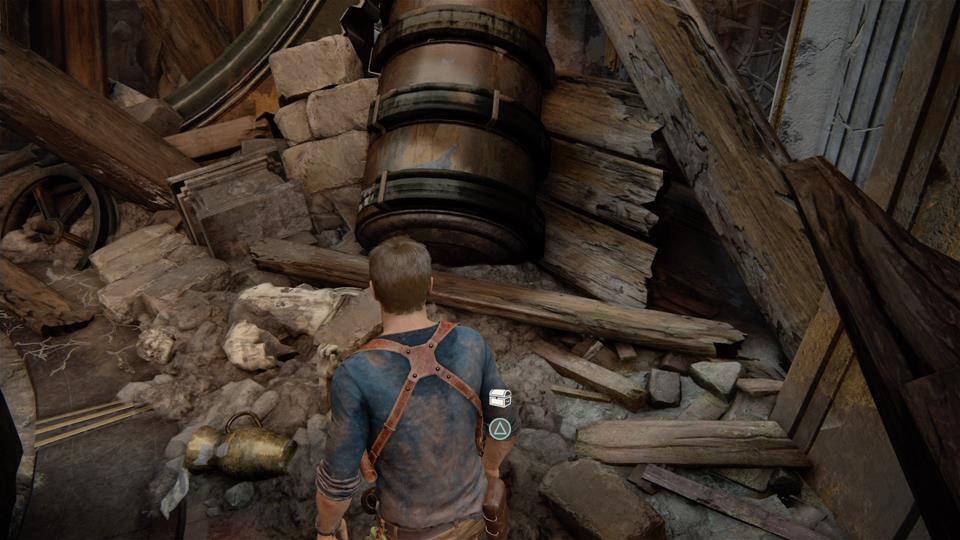
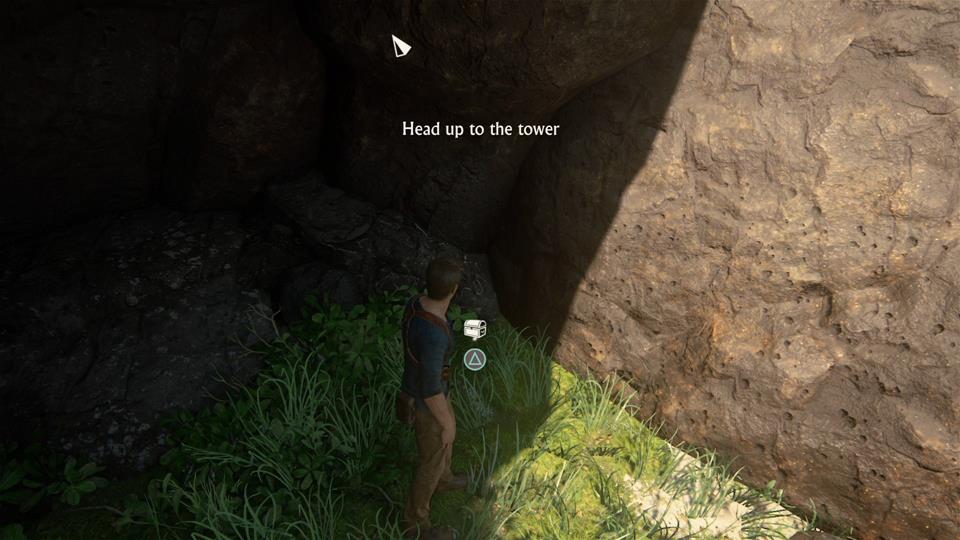
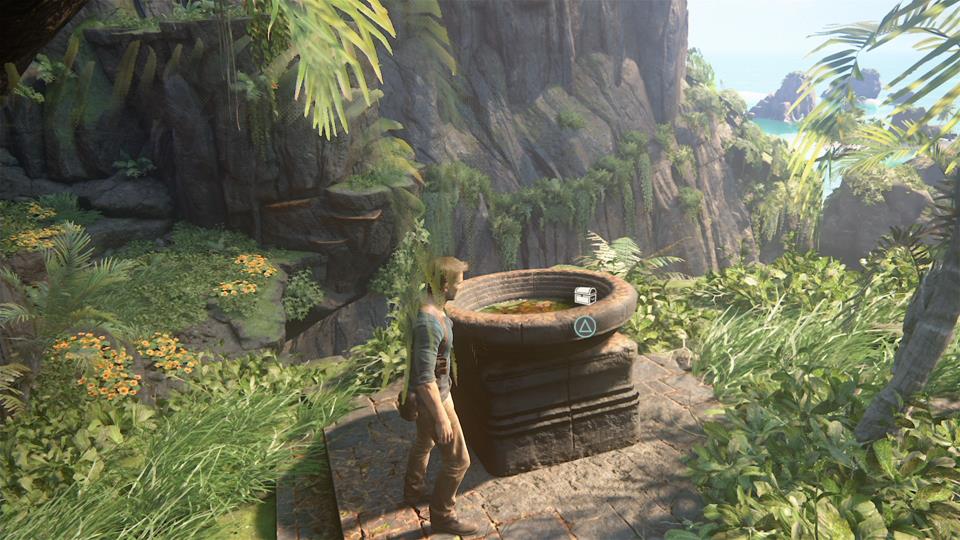
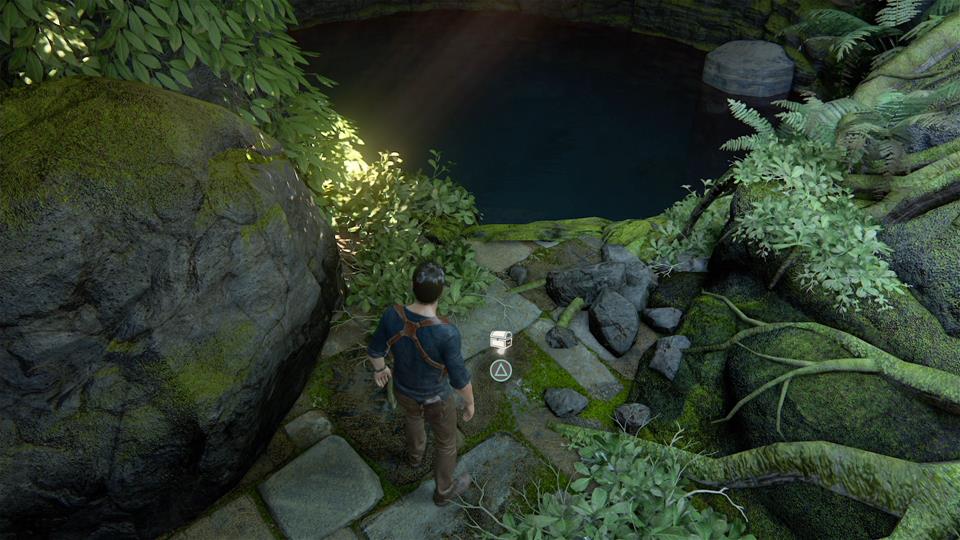
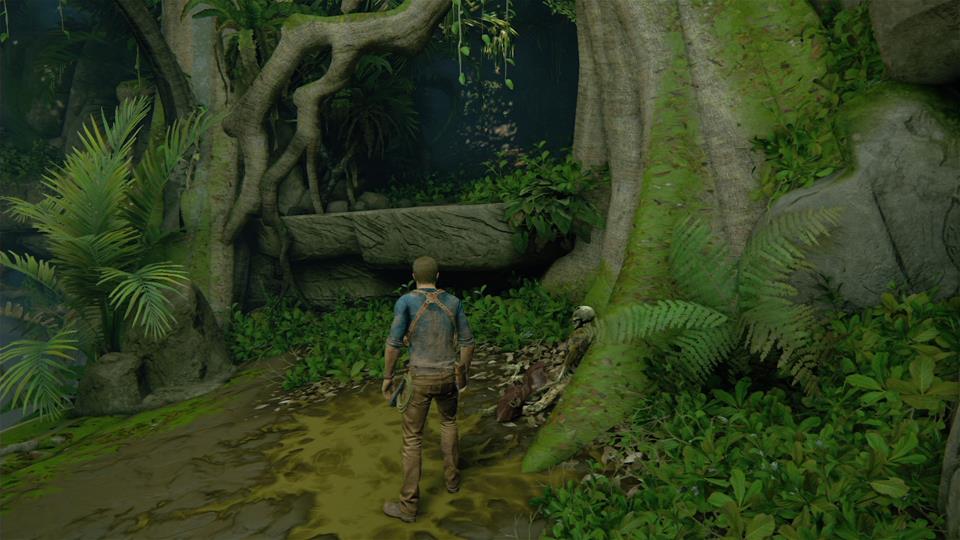
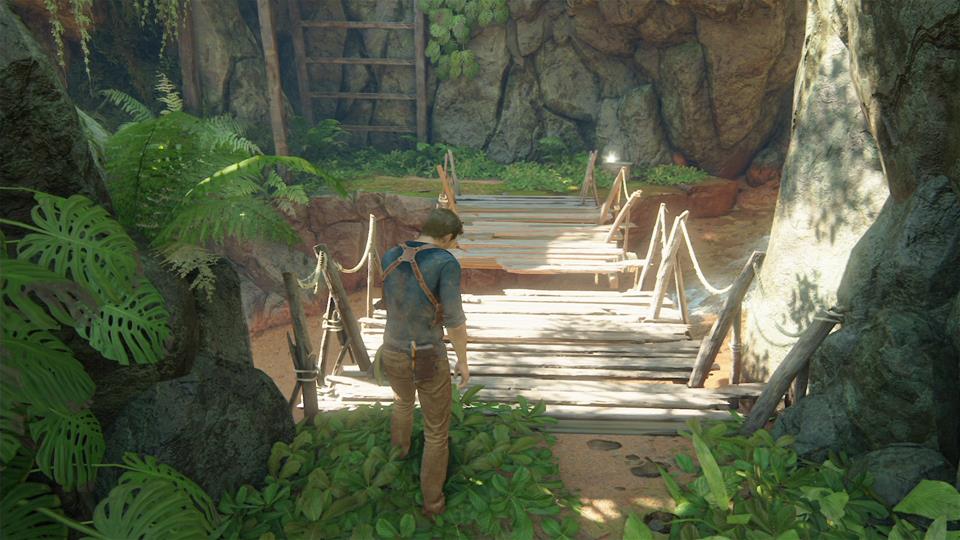
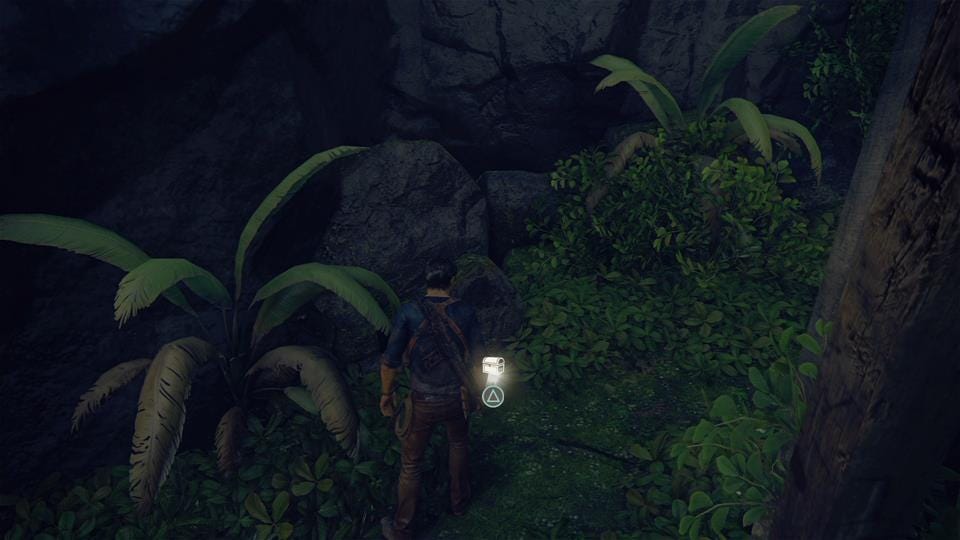
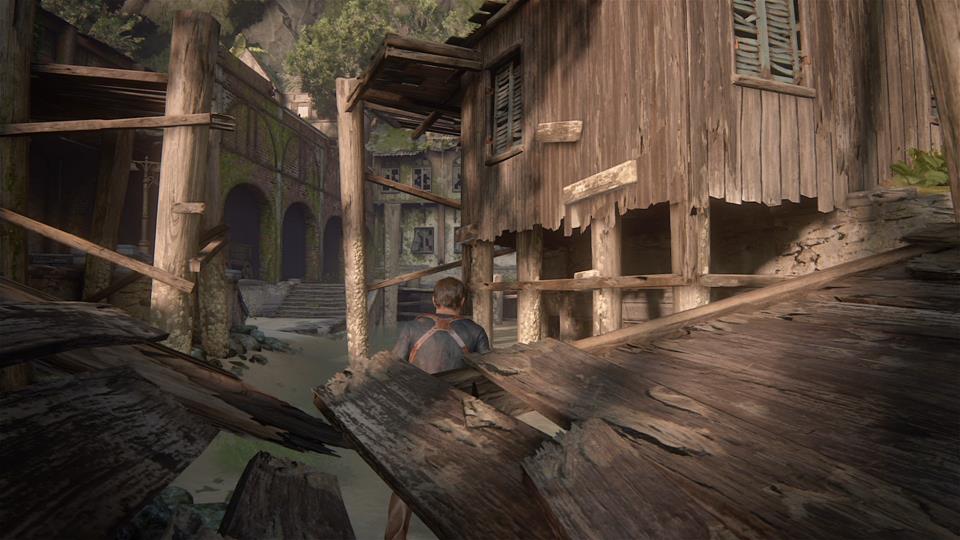
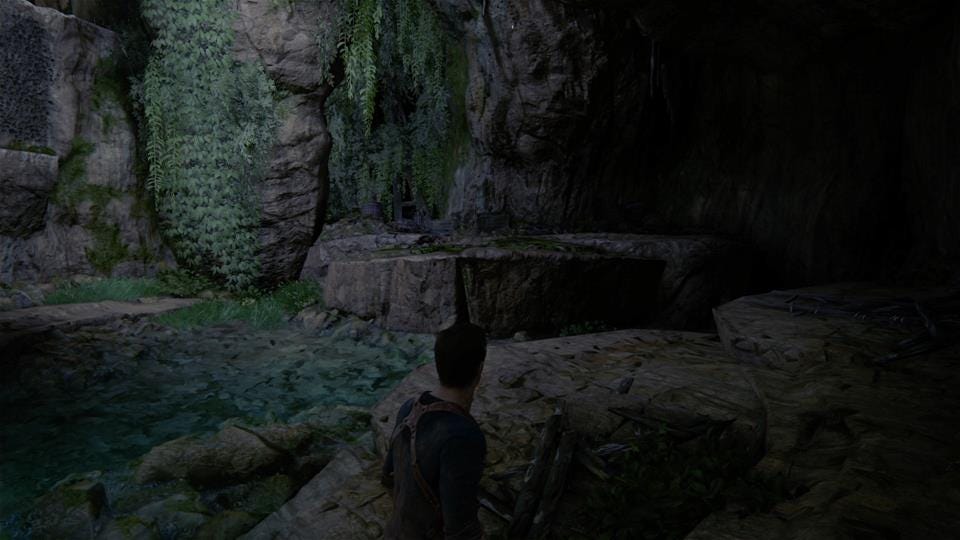
Chapter 2 – Infernal Place
Panamanian Cat Pendant

When you gain full control of Drake, you’ll be told to go pick up some things by the crates. Immediately next top that is an old well. Drop down it and look in the tunnel that’s attached to the bottom of it. Here you’ll find the first treasure.
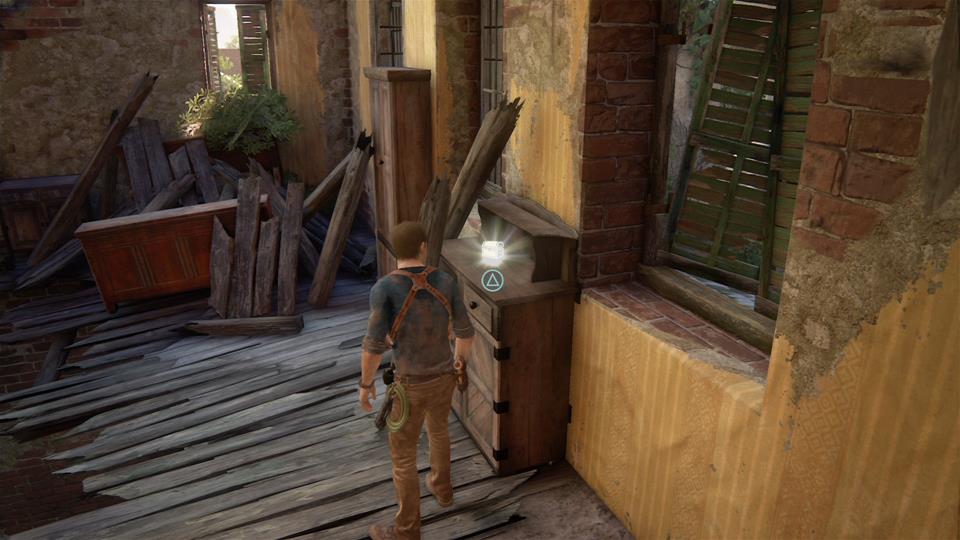
Navaja Folding Knife

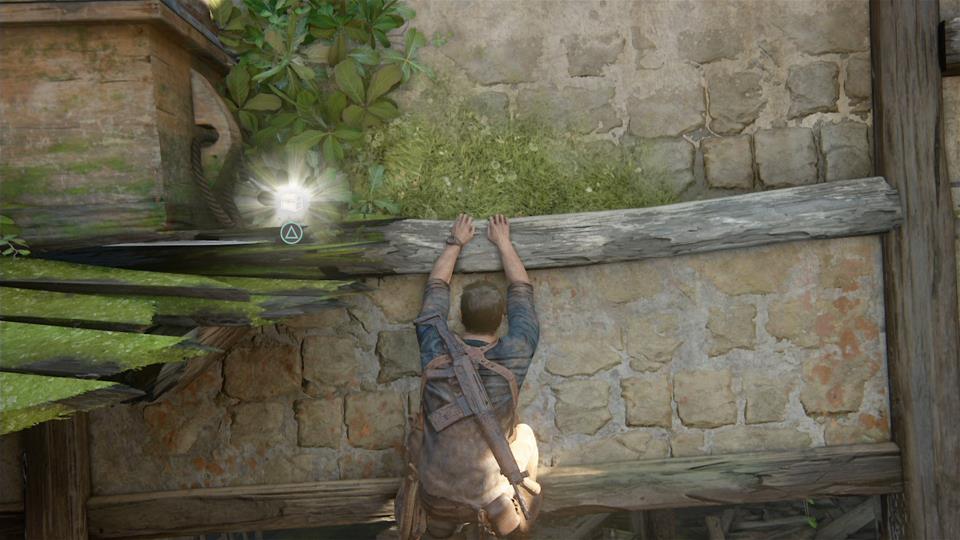
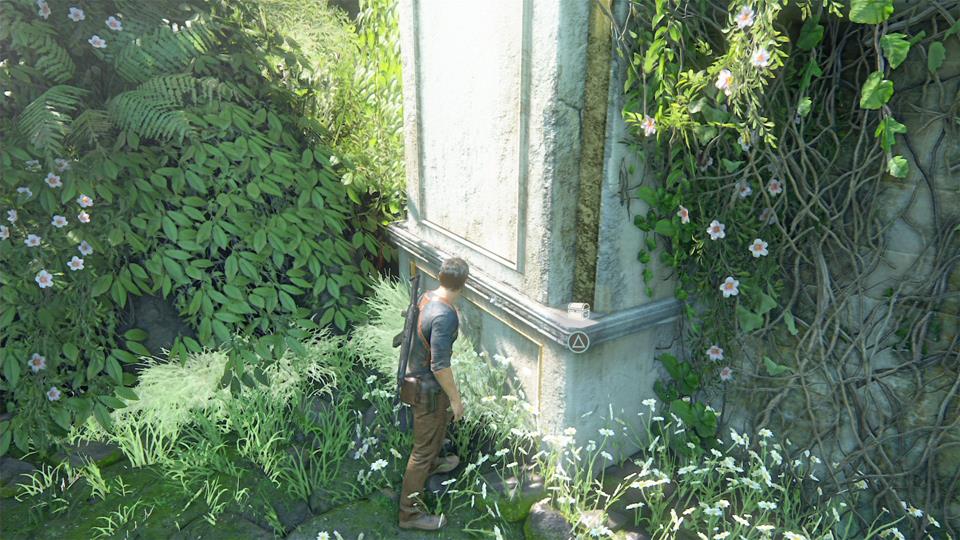
When you first clamber through a window into the prison tower, stop for a moment. Your next in-game task is to pull down a boarded-up window to clamber through it – before you do that, though, search the pillar immediately in front of and to the side of this window to find this treasure.
Chapter 3 – The Malaysia Job
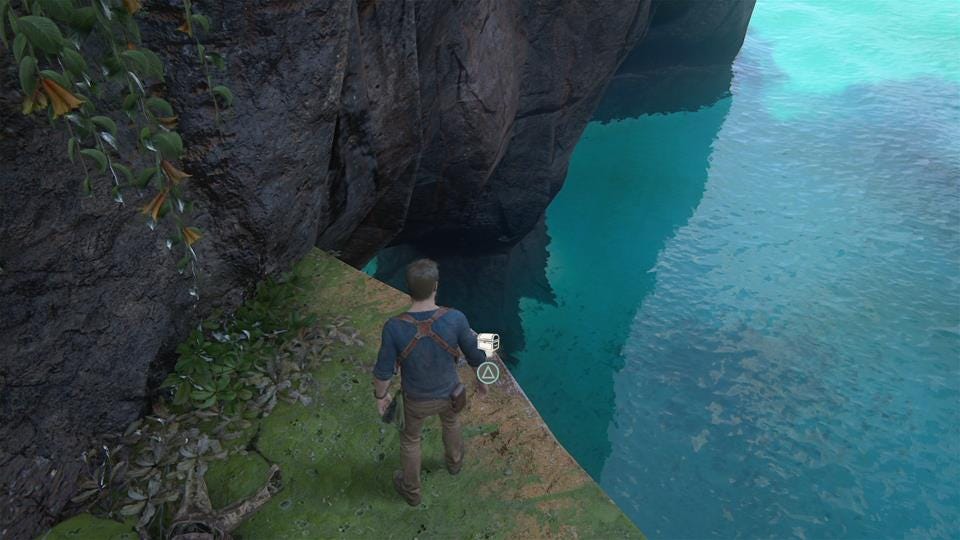
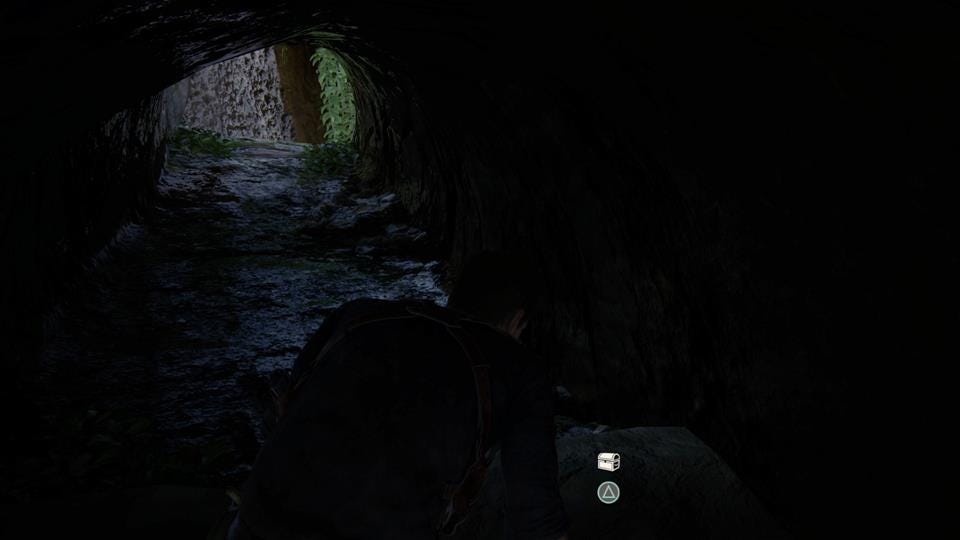
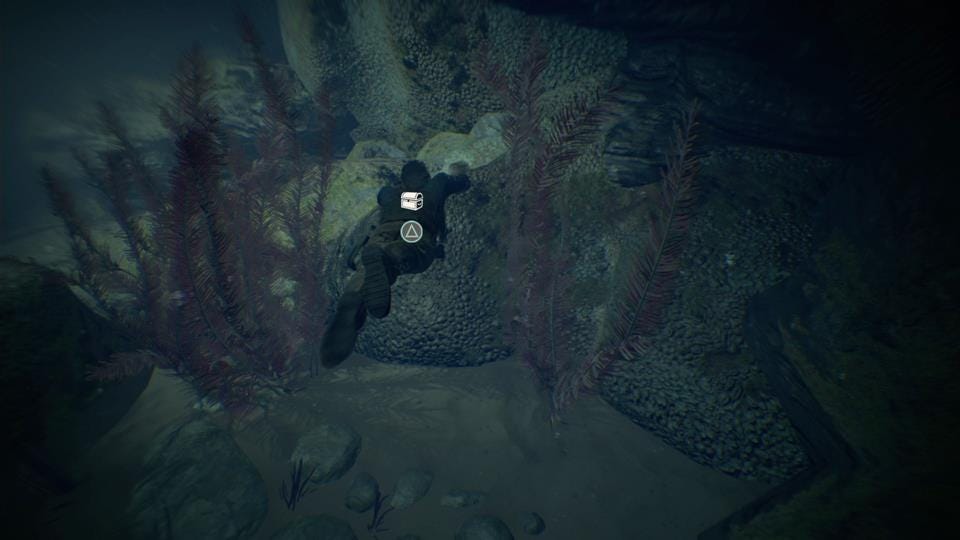
Antique Padlock

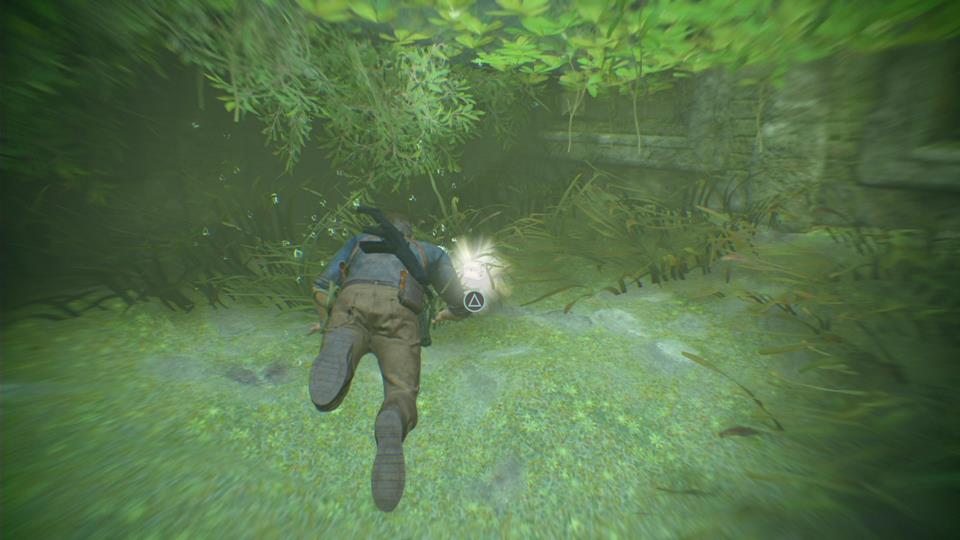
When you gain control of Drake underwater, immediately move off towards the right through the reeds. Here a log is resting across two rocks, and in the small space beneath the log is this treasure.
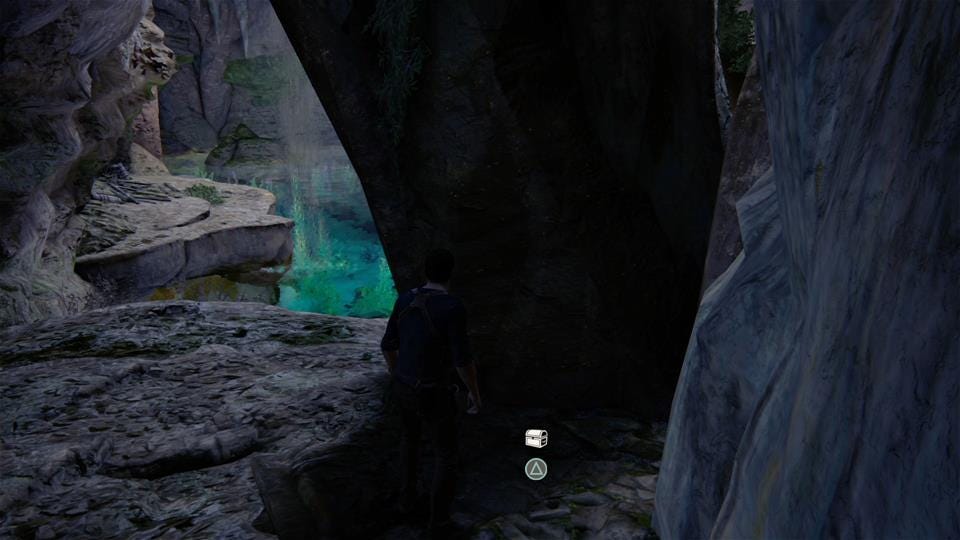
Chiriqui Shark Trinket

After finding the Padlock, you’ll swim into a narrower underwater area. Within that area there are a number of rock arches you’ll swim through. Swim through the leftmost one; you’ll find this collectable to the immediate left as you begin to exit the arch. You may also find it easier to find if you swim through the arches then turn around.
Antique Pocketwatch

As you enter the area where Drake will find the bountiful treasure of a sunken cargo transport box, head to your far right until you hit the wall. Follow the wall around; eventually you’ll find a jutting out ledge and on it the Antique Pocketwatch. Done!
Antique Arcade Token

Up on the ship you’ll find this particularly rare and impressive treasure on some shelving in the centre part of the barge. If only Way of the Warrior had got an Arcade release…
Chapter 4 - A Normal Live, Chapter 5 - Hector Alcazar
Once again, these chapters are linear story-only affairs, so there’s no collectable items to be found.
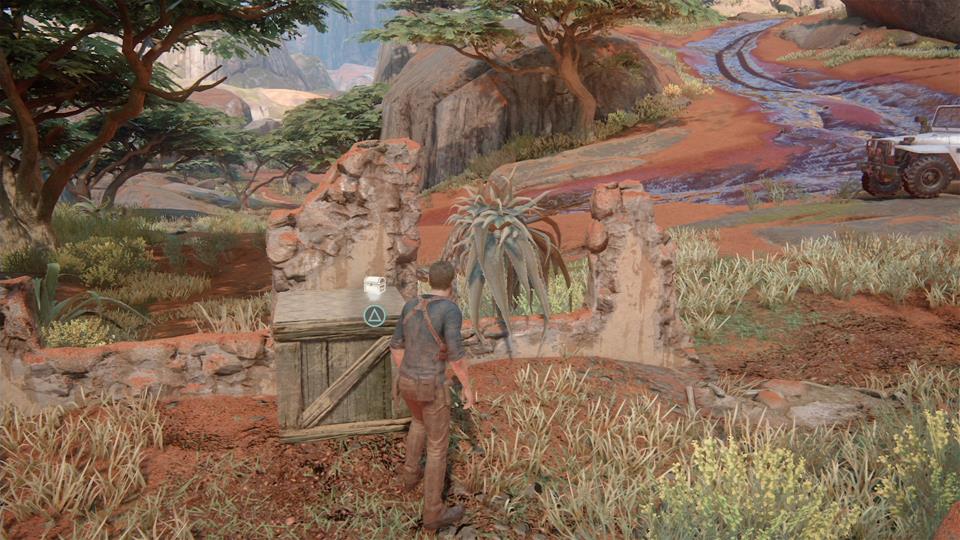
Chapter 6 – Once a Thief...
Mughal Water Container

At the start of the level, walk through the grassy area until the game clearly expects you to jump across to a building. Here, you want to head as far left in the area as you can. On a ledge you’ll find this lovely piece just, y’know… sitting on the ground.
Nephrite Brass Cup

You’ll encounter your first guards and avoid them by hanging from a ledge. When you pull up into the area with the lemon trees, head to the far right corner; this cup will be sitting on the windowsill of a building you otherwise can’t enter.
Viking Cloak Clasp

This one is a little sneakily hidden – after the cutscene where you meet an old friend, turn right back around as soon as you get control and head back into the room behind you. In there, you’ll find the clasp on a desk.
Mother of Pearl Horn

After picking up the cloak clasp (after the cutscene), you’ll have to push past a small group of people. Instead of heading forwards after that, turn sharp right. Out on this balcony you’ll find this treasure against the wall.
Persian Bronze Bowl

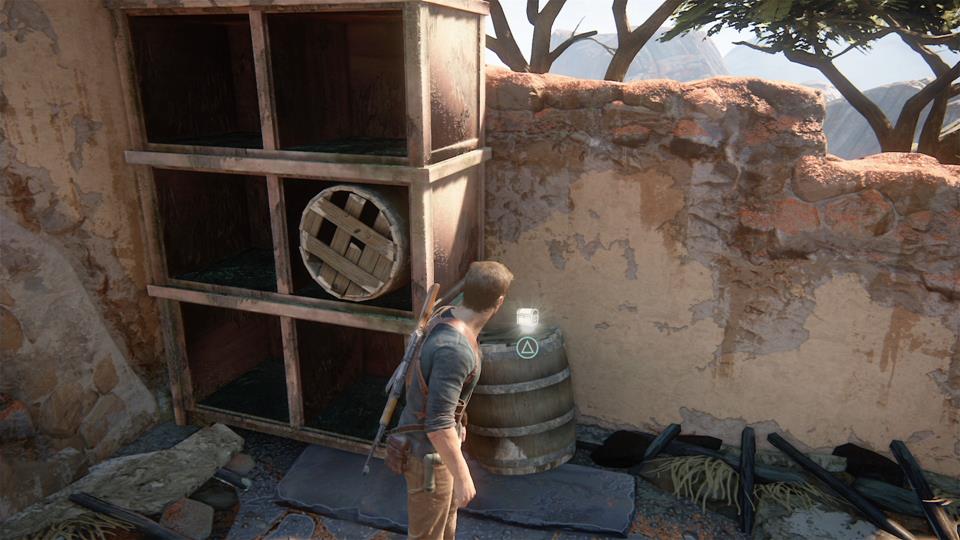
After you’re introduced to Nadine for the first time in a cutscene, you’ll be in a series of store rooms. In one of these store rooms, a bunch of collapsed circular wooden tables are stacked against the wall. This store room is also particularly brightly lit. In the corner you’ll find this treasure.
Brass Barber’s Bowl

Immediately after the door with the small window in it you’ll descend some stairs. Turn around and check beneath these stairs once you reach the bottom – you’ll find the Brass Barber’s Bowl here.
Syrian Vase
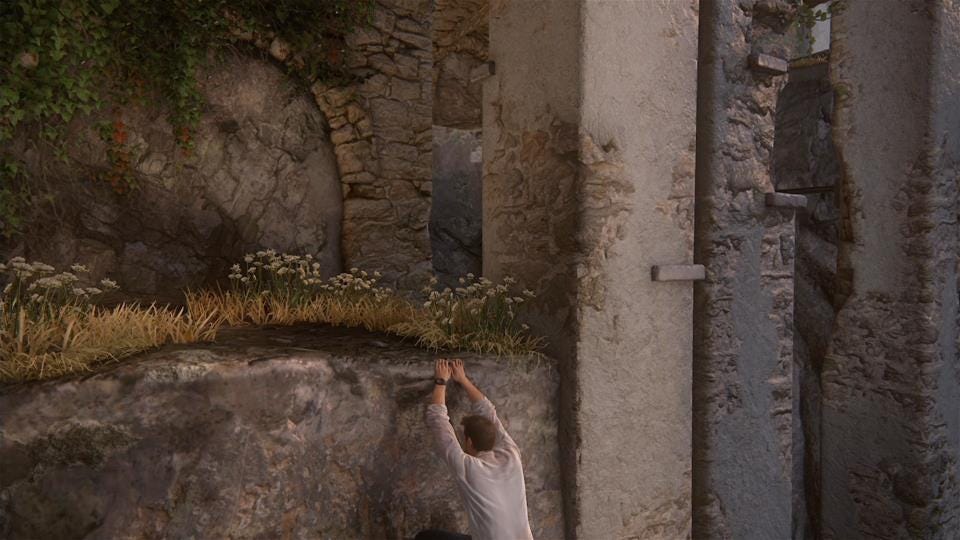
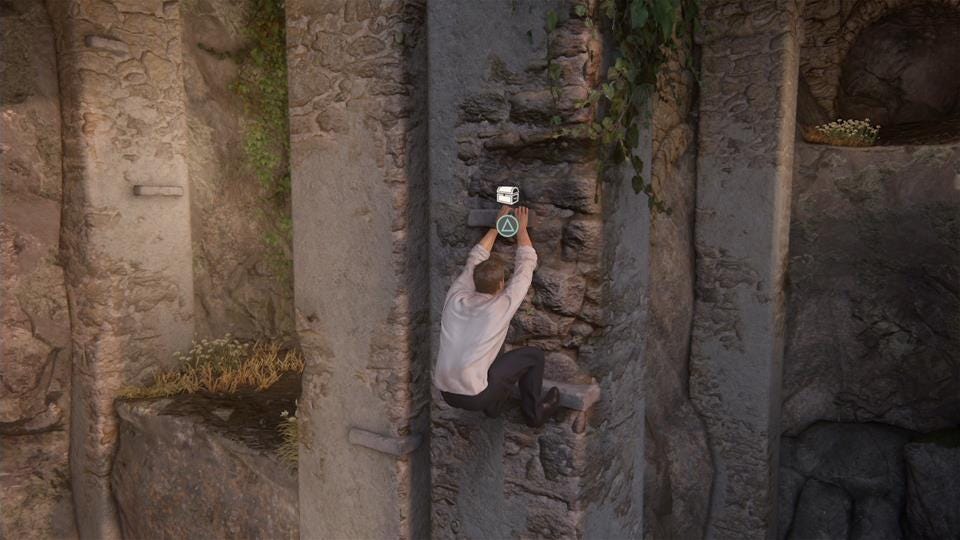
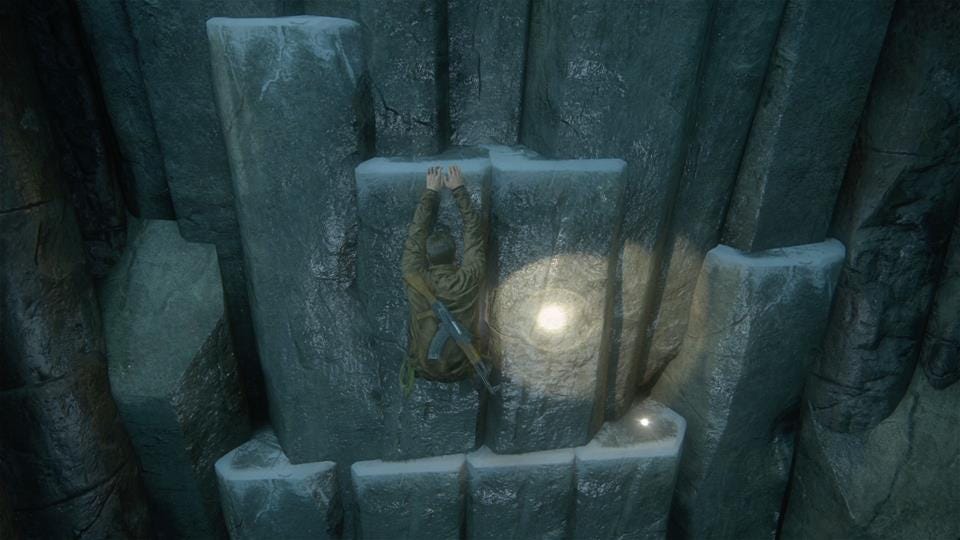
This treasure is the first in the game that’s more trickily. When you emerge from the vents, turn left immediately and climb down to the lower courtyard area. Walk around here until you see a fire escape ladder. Climb this, then the drainpipe, heading around and to the right. This will enable you to reach a small rooftop, on which you’ll find this treasure.
Persian Candlestick
This is another slightly tricky one. When your companion knocks the ladder down for you, turn left once you’ve climbed up. Directly in front of you will be an ornate arch entrance way. Climb up this, then on top of the entrance. From here you’ll want to turn right and try to make a jump to the nearby balcony railing. On that balcony, you’ll find the candlestick treasure.
Mughal Dagger
You’ll swing from a pole and almost fall, and then a cutscene will automatically play. When you regain control, jump across to the pole in front of you until you end up on solid ground. On the solid ground, drop down to the edge of the nearby ledge. Clamber around to the side to find a dead-end climbing path that holds this treasure as a reward.
Chapter 7 - Lights Out
This chapter is all about blasting baddies, so it’s all action and no collectables here.
Chapter 8 - The Grave of Henry Avery
Redware and Silver Jug Flask

When you start the level, look for thick snowy paths uphill away from your ultimate destination of the church. At the top of one of these tracks of snow is the Silver Jug Flask. Grab it.
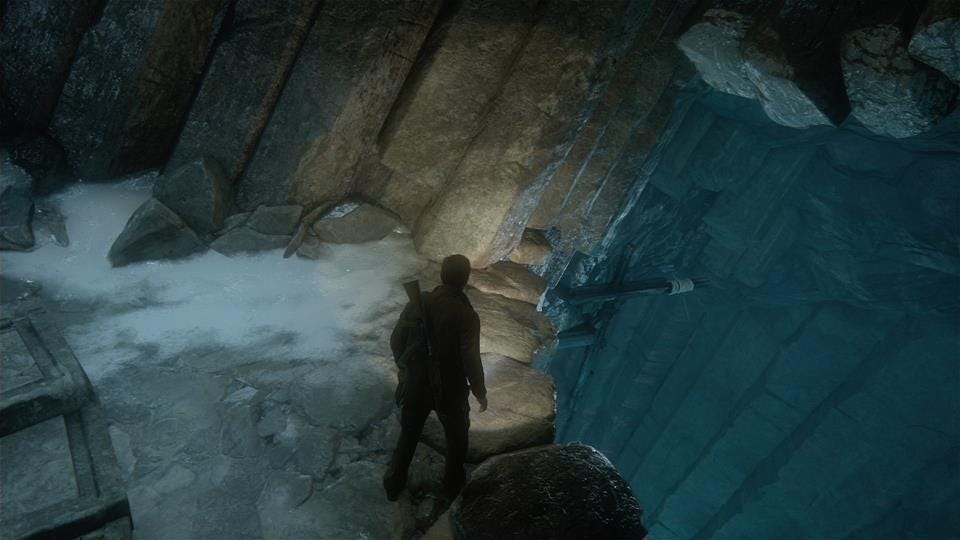
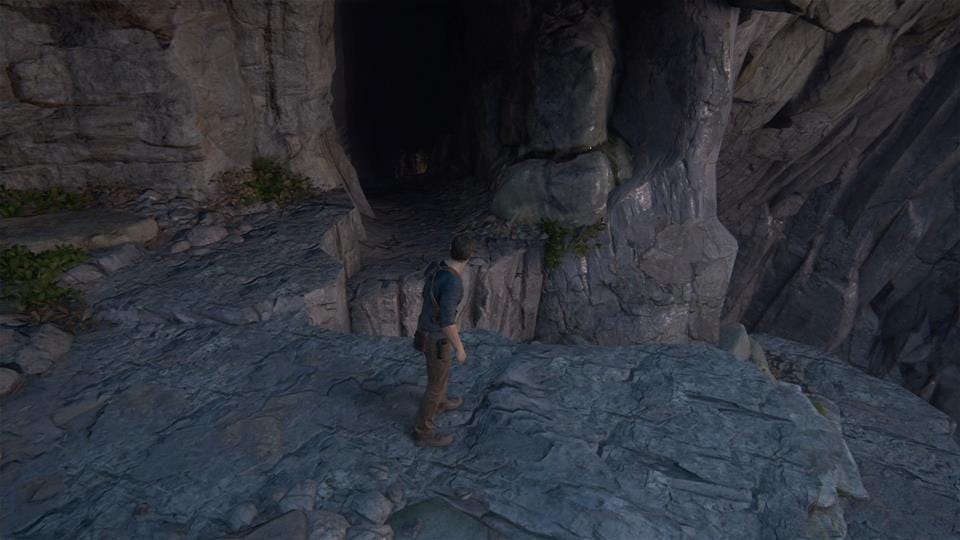
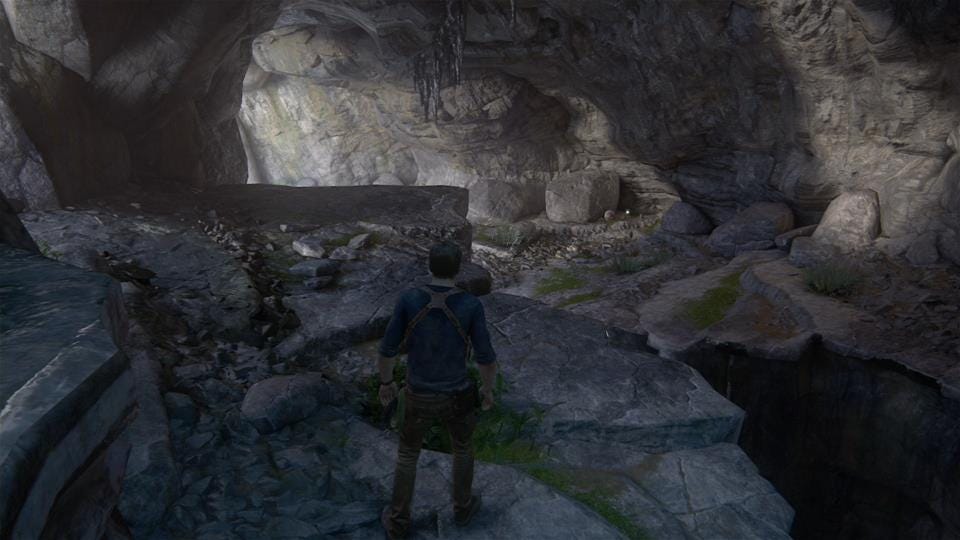
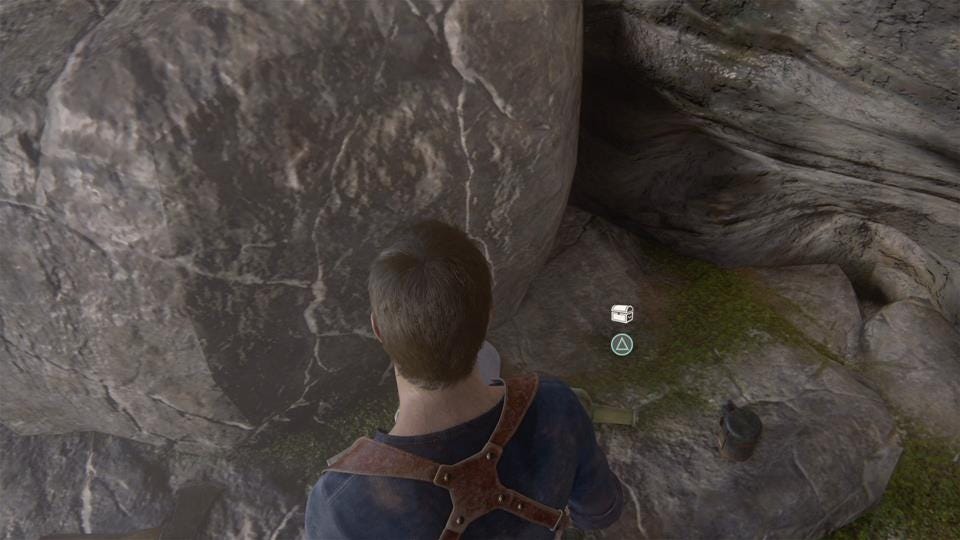
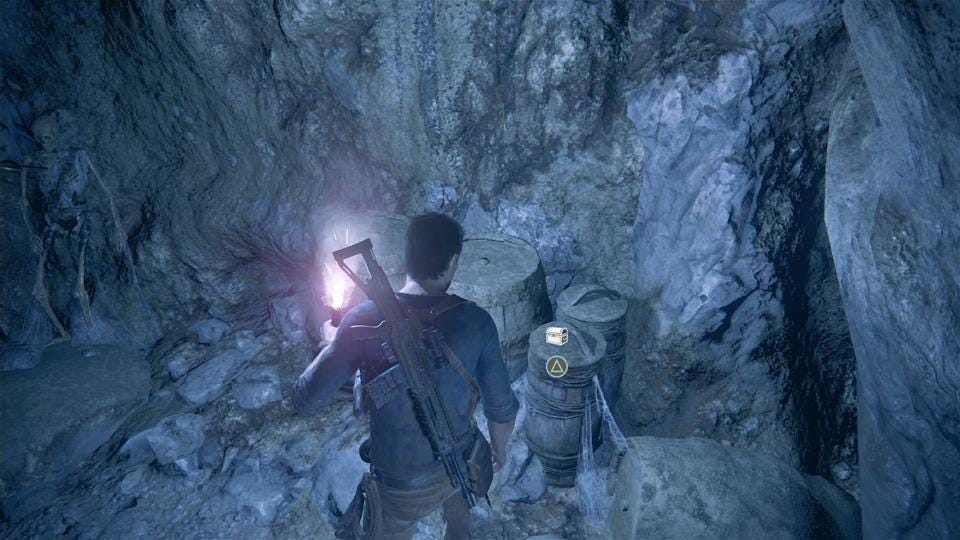
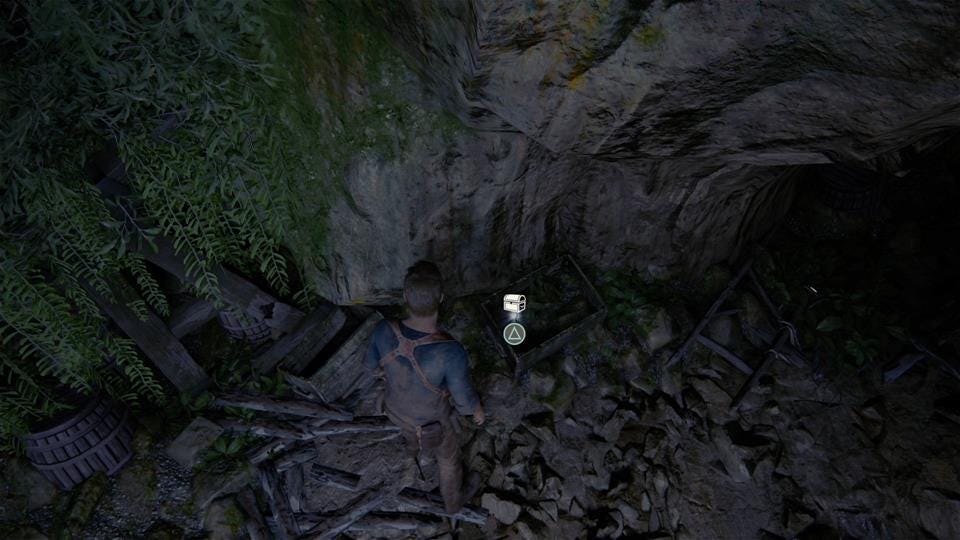
Bronze Boar
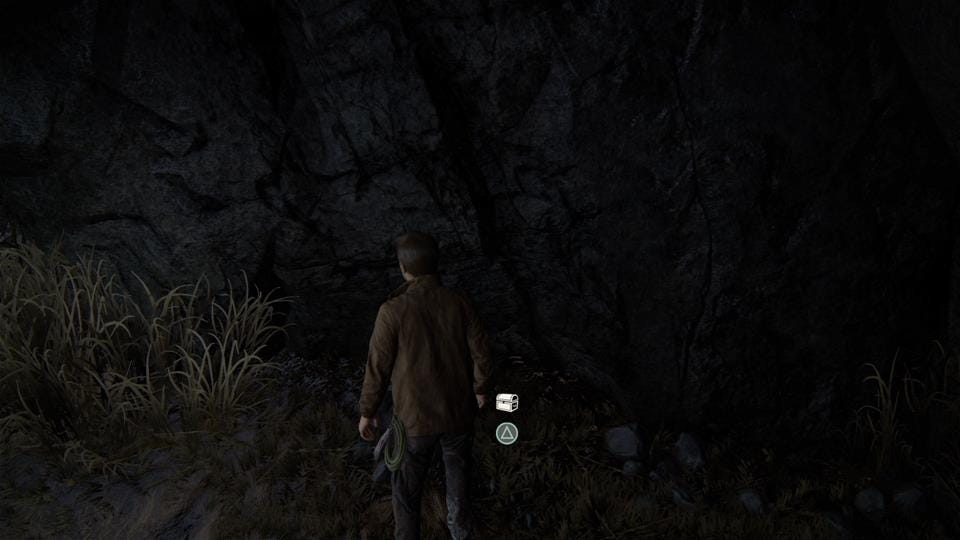
At the very start of the level, hug the far right cliff edge and head down until you reach a cave. Inside is the Bronze Boar, just sitting there.
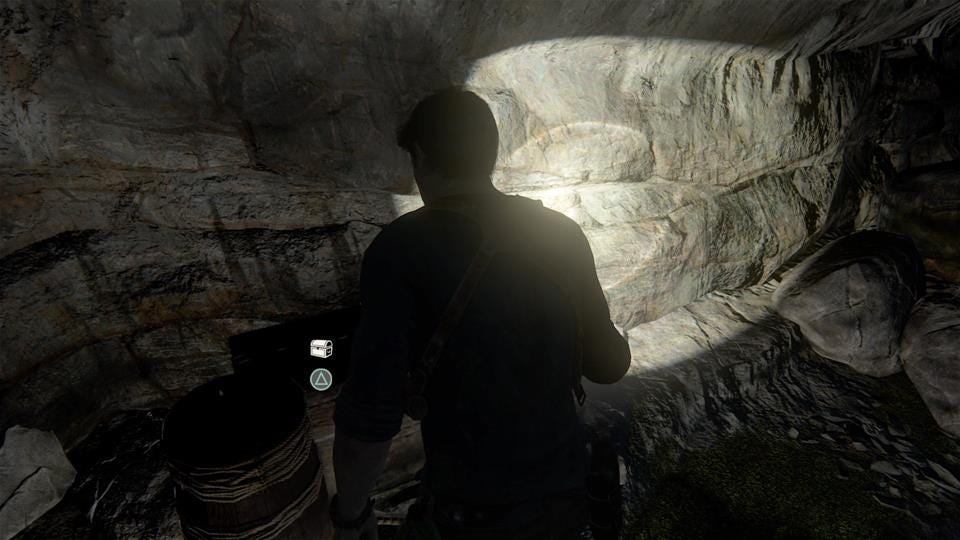
Carved Wood Kashkul
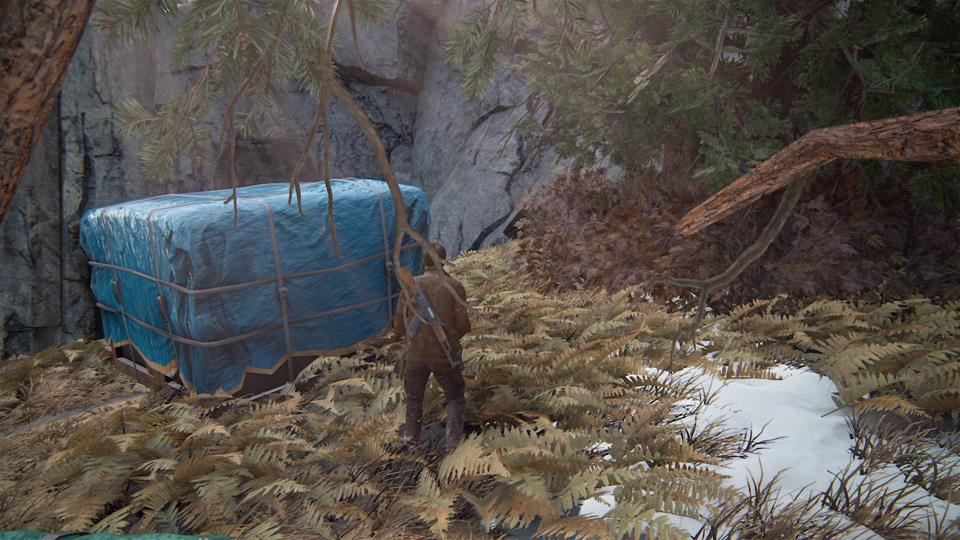
When you reach the outpost where you find the dynamite and fight some Shoreline goons, look for the rock wall in the far edge of the outpost, opposite the main doors you have to blow open to continue. Here there’s a stack of stuff with a blue tarp thrown over it – the treasure is just behind it.
Carved Nut Bottle


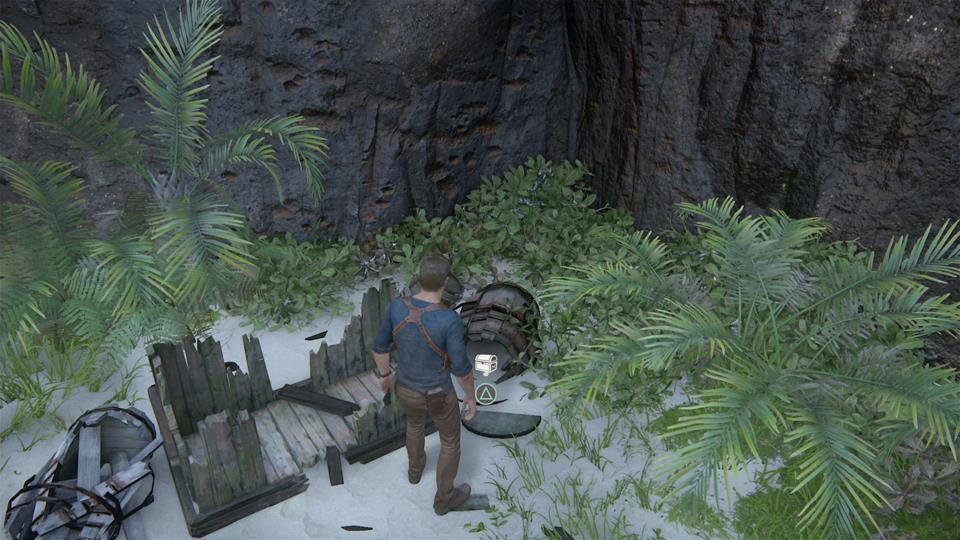
Here’s another one that’s fairly sneakily hidden. Once you use the cart to climb up to a higher level, look right in front of you for a low hanging cave. Crates block the entrance. Toss a stick of dynamite in there to blast the crates away, then crouch-walk inside, where you’ll find this treasure.
Travelling Inkwell with Seal
In the area where you slide about and jump from pillar to pillar a lot, in the far corner there’s a raised area you otherwise don’t have to go to. On here, you can drop down the ledge and find a little alcove hidden beneath – and of course, it contains a treasure.
Carved Ivory Vanitas
When you get to a door you need to open with your partner, don’t. Instead, look for climbing handholds to its left. Climb up the fairly linear path here to find a carved skull of sorts sitting in a hidden room.
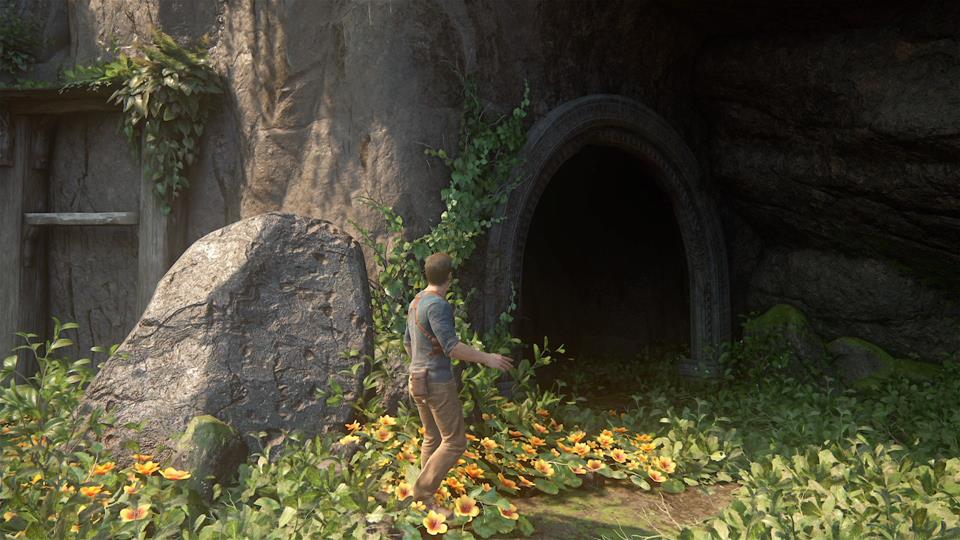
Scottish Ha’penny

When you first enter the crypt, keep an eye out for a small alcove to your left after descending some stairs into the chamber that contains a puzzle. Within that alcove, obvious to see, is this treasure.
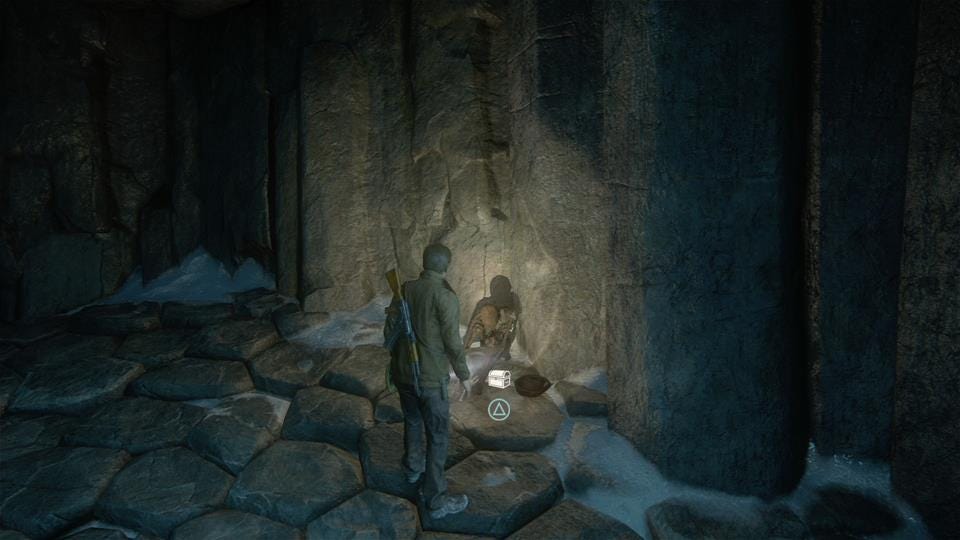
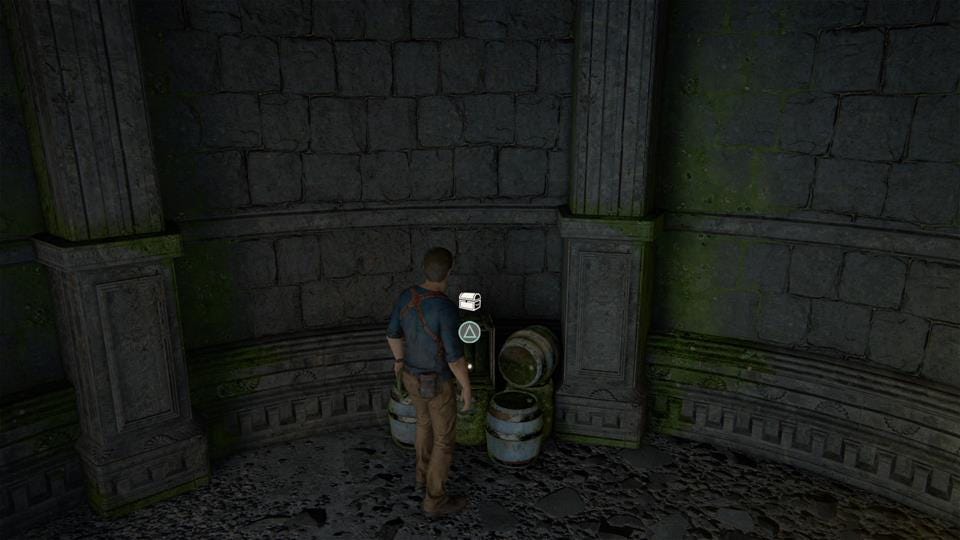
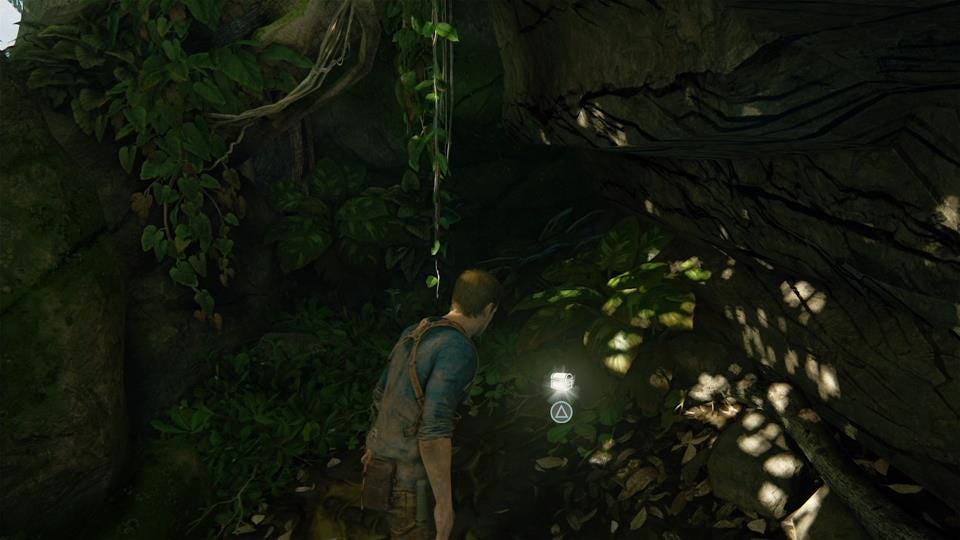
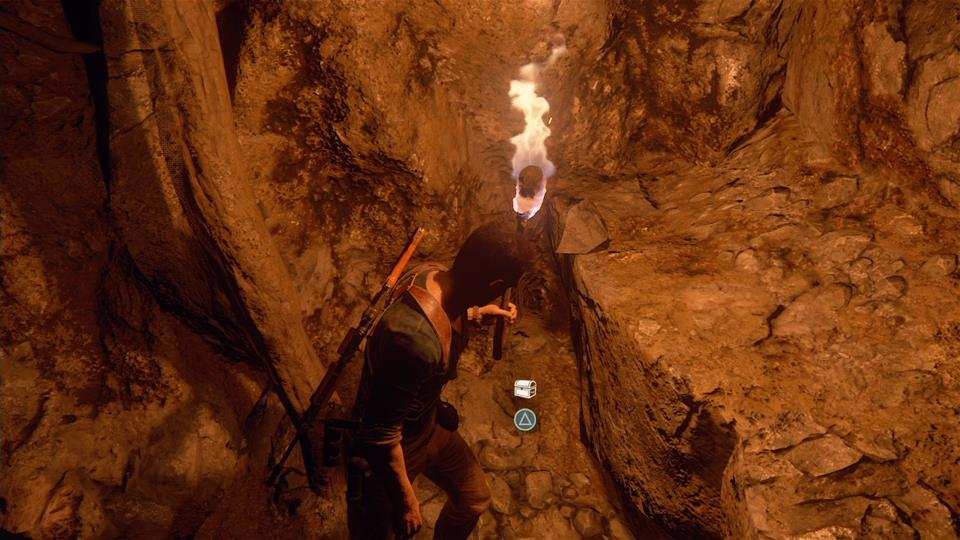
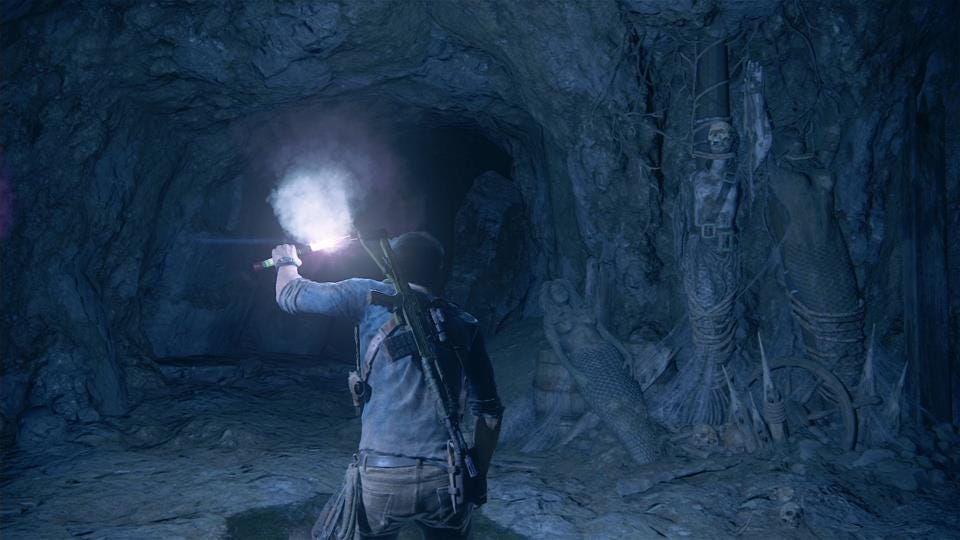
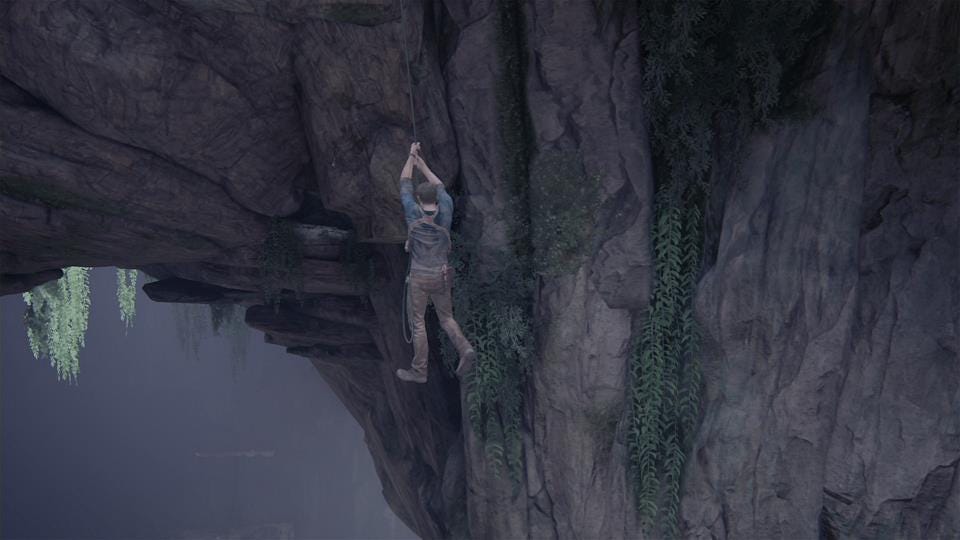
Slipjoint Clasp Knife
When you swing across a grapple point for the first time after exiting the crypt, you’ll notice a cave dead ahead. Where you actually need to go is up, but head on into this cave and follow it to the end – in here you’ll find this treasure, plus a useful flintlock pistol, which is very powerful.
Pewter Singing Bird Box

Right after the last treasure, you’ll find a broken rope ladder you need to clamber in order to continue. Ignore it – turn around from it and jump to the ledge opposite. There you’ll find this treasure inside a small cave.
Tortoise Shell Snuff Box
Your trigger for this one is when your partner pulls you up from a ledge. When he does, walk left and then hang off the ledge. Look for a route down; at the bottom you’ll find a piece of treasure, and then you can easily climb right back on up.
Persian Tailoring Scissors

When you end up in an area with lots of dilapidated wooden stairs, look around underneath the middle set of stairs. Here you’ll find this item hidden away in the darkness, just to the right.
Chapter 9 – Those Who Prove Worthy
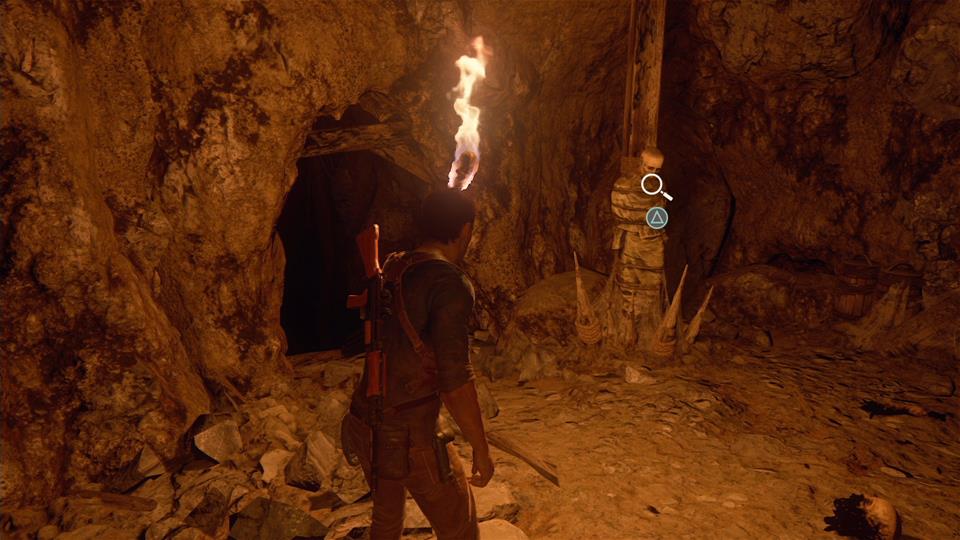
Lantern Mounted Flintlock

Right way in this chapter you’ll walk around and be presented with a rickety wooden bridge. Instead of crossing it, turn left at it and hop down several rocks to find a small cave. In it there’s an unfortunate pirate chap who appeared to cling to his custom weapon until the bitter end.
Strange Pendant
This one is easy to miss. When you leave the puzzle room with the three crosses, head towards a ledge on the right hand side. You’ll spy, just in sight but out of reach, a grapple point. You need to jump off in a leap of faith, grapple mid-jump, and then you’ll be able to swing down into a hidden lower cave where this treasure is. You use the same grapple point to get back up again.
Amatory Box
You’ll grapple swing across to a new area with a broken ladder, and your partner will push down a box for you. Ignore all that and turn around; find the rightmost column, and hang off the nearby edge. Here you can drop down and shimmy across to find this treasure hidden in the wall.
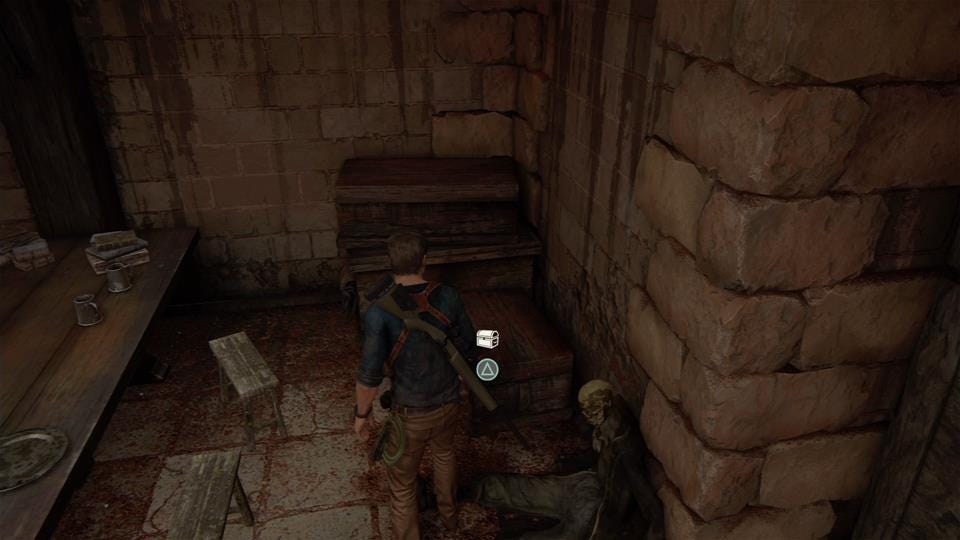
Pewter Box

After you eavesdrop on your enemies in a cutscene, carry on and look for a room off to your left. In here there’s a collapsed statue. You’ll need to roll under it by hitting circle, and behind it is this nifty little Pewter Box. Grave robbing; I love it!
Memento Mori Skull Watch
You’ll use a rolling crate to reach an otherwise unreachable ledge after some banter about trampolines. Once you’re up, turn a sharp right. Hang off the ledge here and you’ll see the treasure just below you. Drop down, grab it, then climb back up.
Scottish Tipstaff

When you hook the heavy crate to swing to the other side of an area, look behind the little counter that’s set up here. This treasure is among this pile of junk.
Navigation:
Page 1: Chapters 1-9
Page 2: Chapters 10-13
Page 3: Chapters 14-17
Page 4: Chapters 18-22
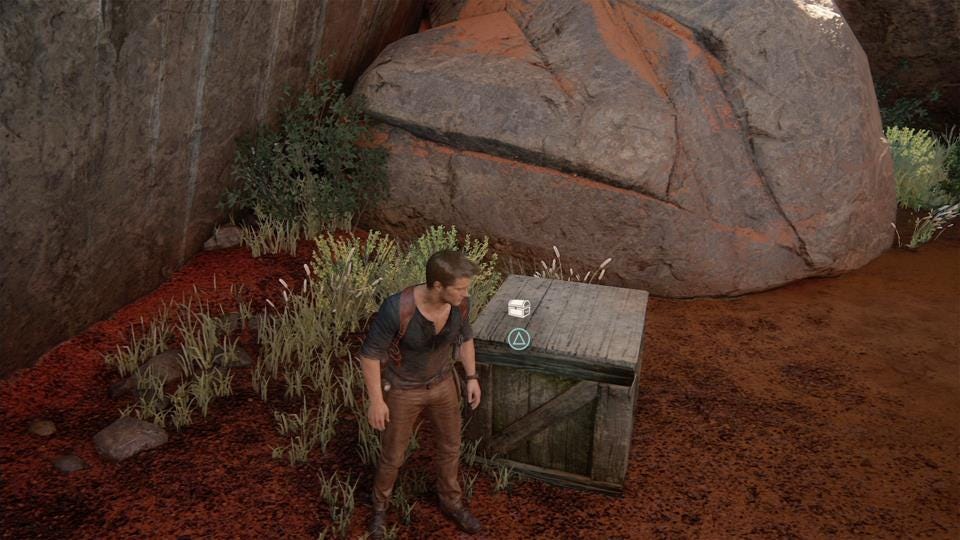
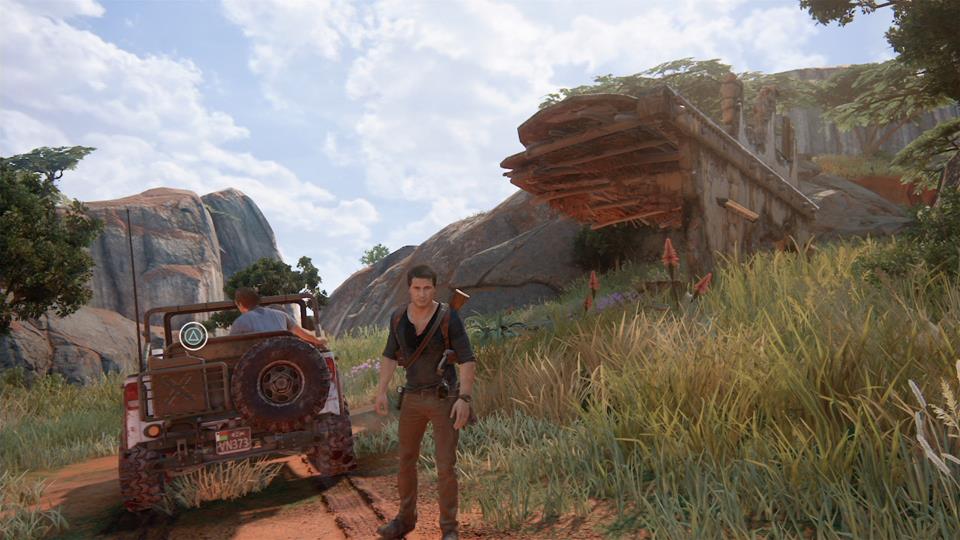
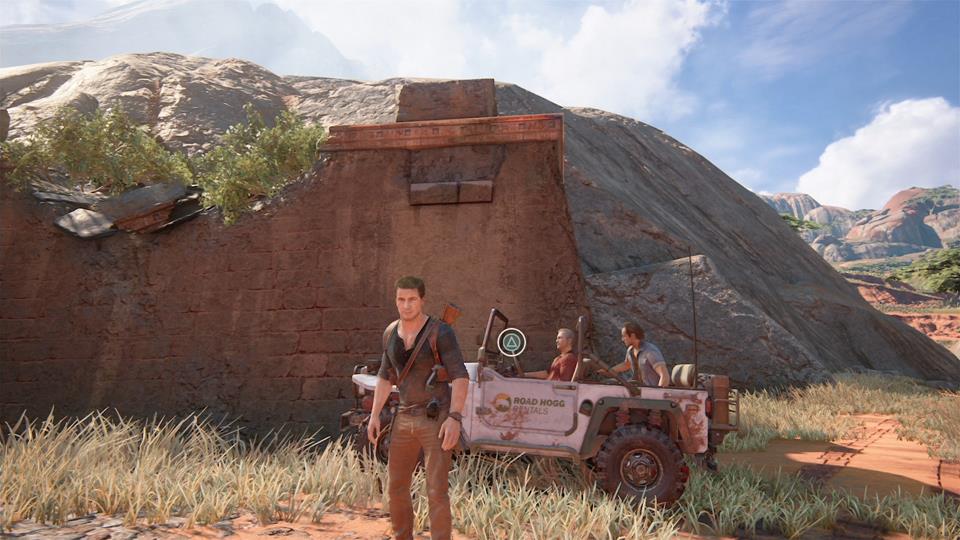
Chapter 10 - The Twelve Towers
Sawasa Ware Tobacco Box

Drive the jeep along the only route that makes sense for the story. A short way in you’ll come across a small outpost. Climb up to the top of it and you’ll find this tobacco box just hanging out high up.
Eroded Flintlock Pistol

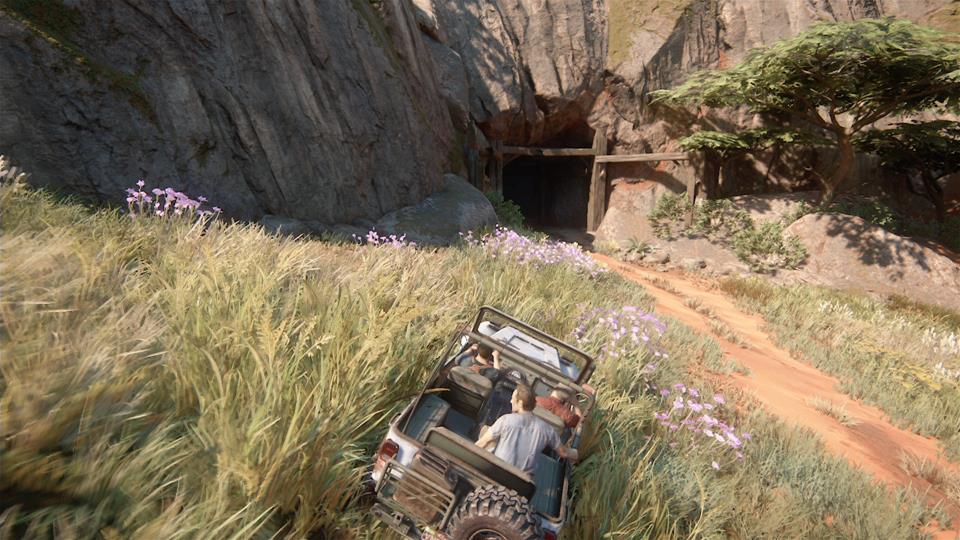
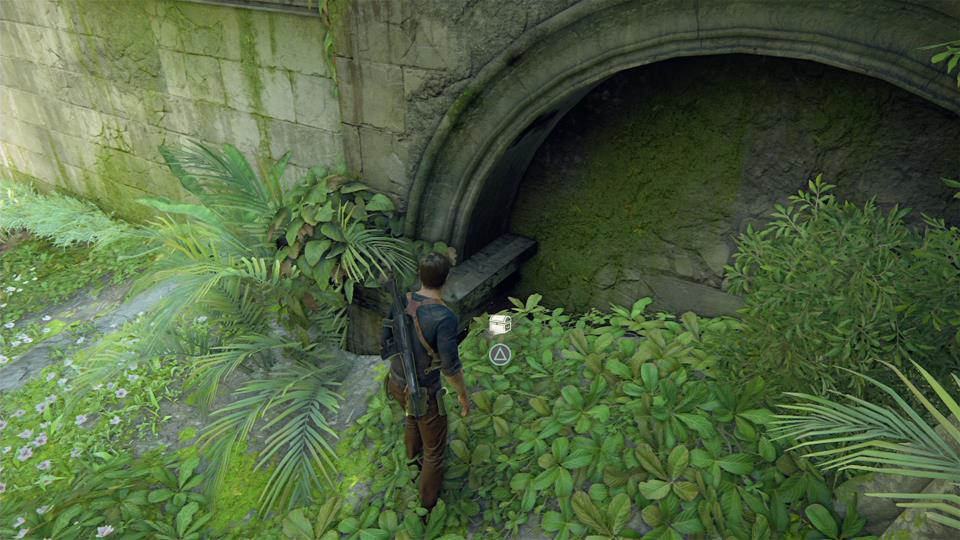
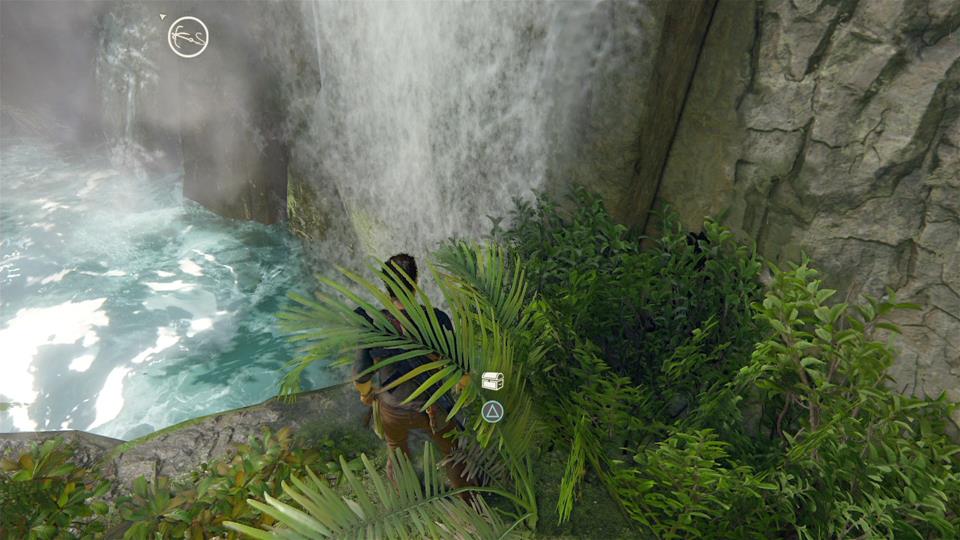
When you drive through a puddle and out into a wide open area, look out for a waterfall in front of you. Drive towards it, and then get out and walk right through it. Inside the waterfall there’s a hidden cave. Pull down the crate from the upper platform, use it to climb up to higher ground, and grab this treasure up there. You’ll also find a journal entry up there, if you’re collecting those.
Mughal Ivory Power Flask

In the spot where you use the vehicle’s winch to drag yourself up the steep hill, clamber to the top of the nearby ruined tower. You’ll have to climb into the building’s lower floor to climb up it; there’s no way up from outside. Up there you’ll find this treasure.
Parchment Scroll
After the previous treasure, you’ll enter a wide open area where the characters will remark on the view. Look forwards and to the left, and you’ll see a building that’s barely still standing. Among these ruins on top of a crate is this treasure.
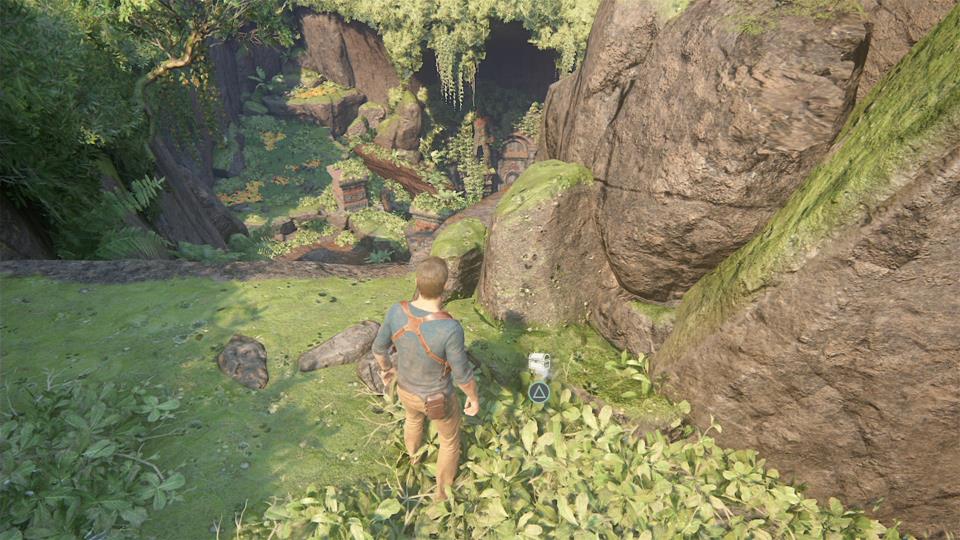
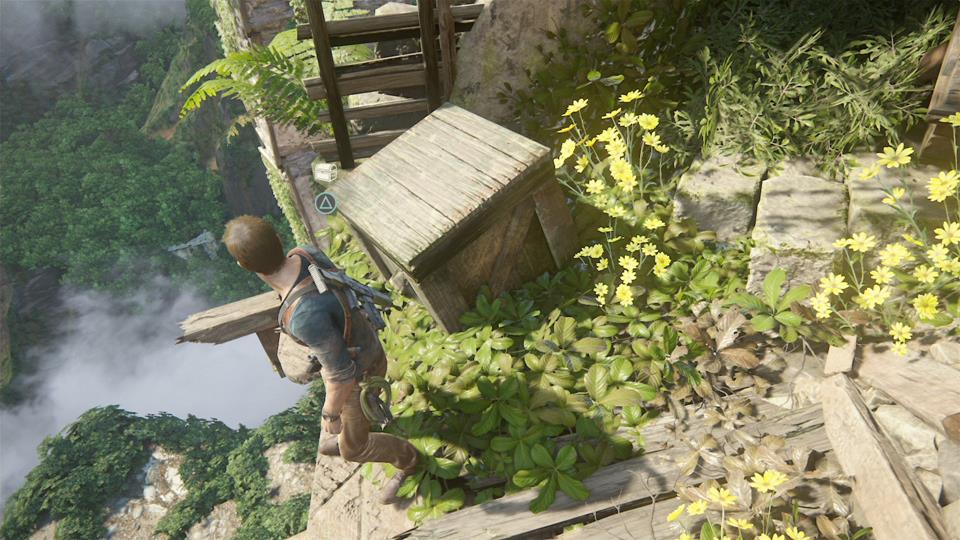
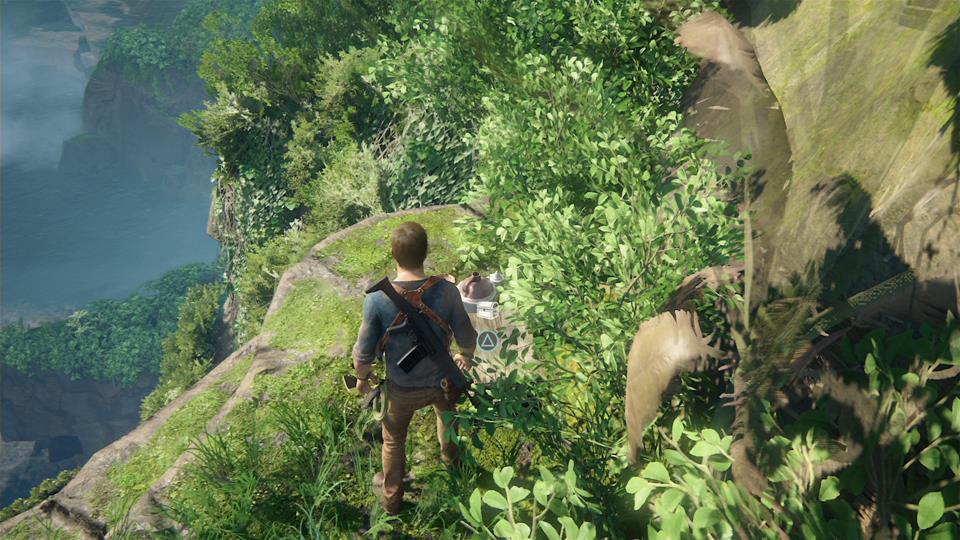
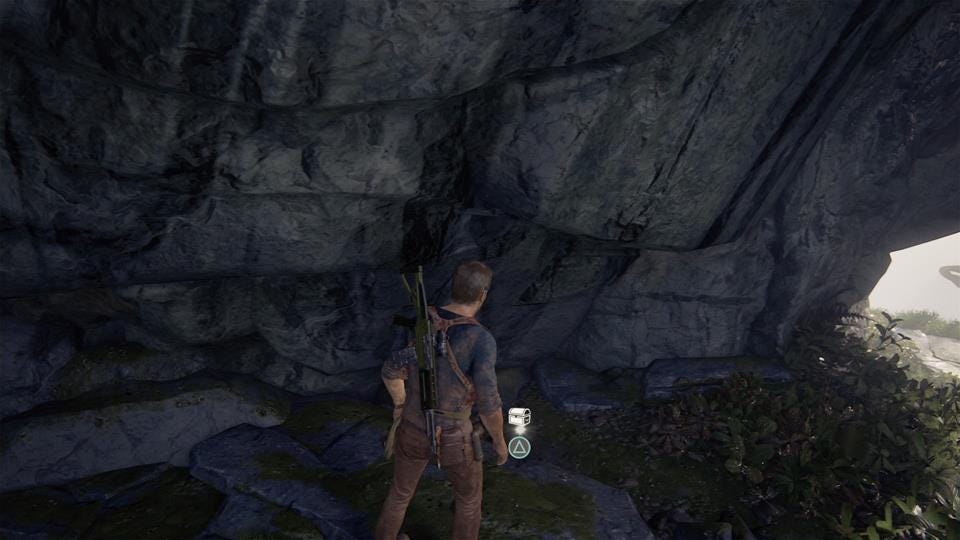
Ancient Fertility Idol
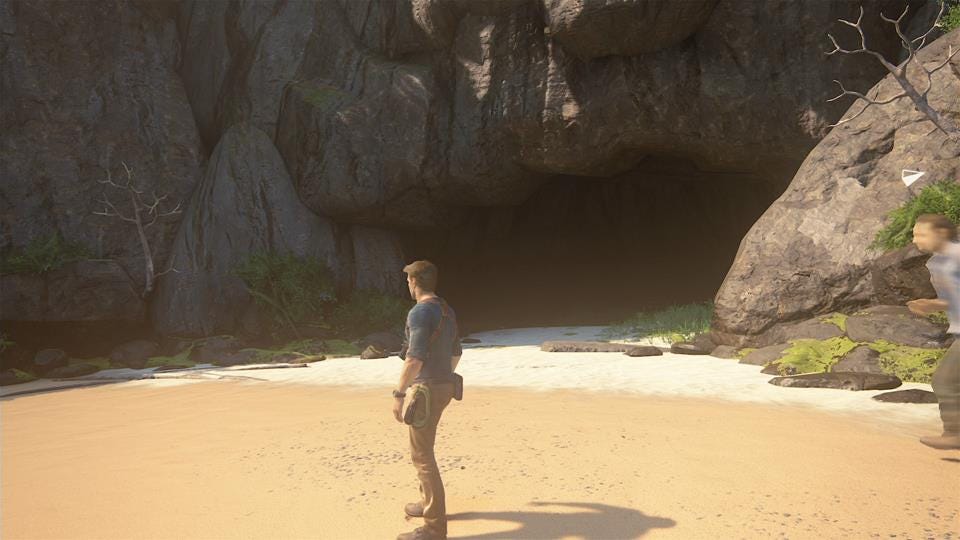
On your journey around to the next story objective, you’ll pass through a shallow puddle and then up a curving incline. Keep an eye out for a small cave here, as pictured. Get out of your car and go inside to find this treasure ready for the taking.
Pocket Celestial Map
After the big encounter with some enemies and pulling down a bridge to make a ramp, you’ll drive through a greener area. In this area, look for a ruined house and climb up the back wall, which is still intact, to reach what was once the second floor. Up there you’ll find this treasure resting on a windowsill.
Pewter Letter Cylinder
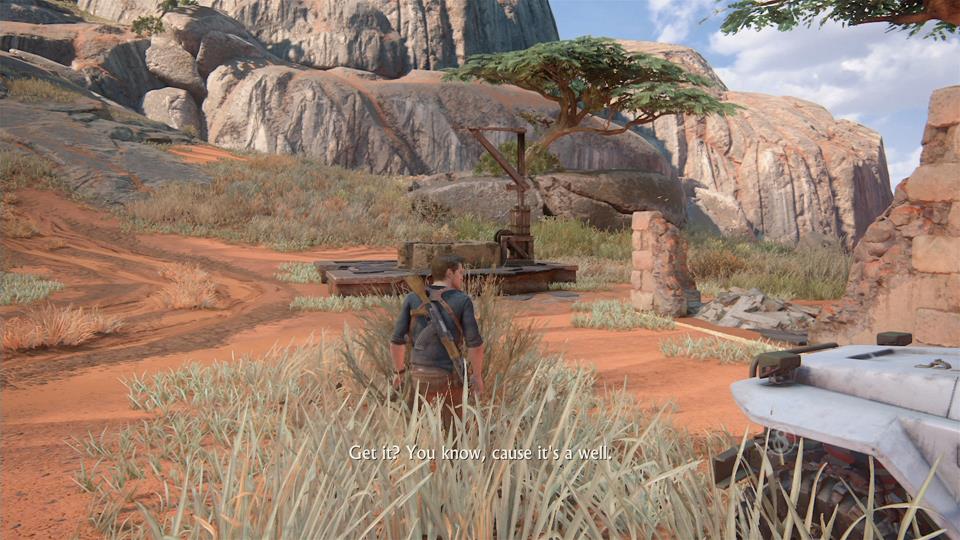

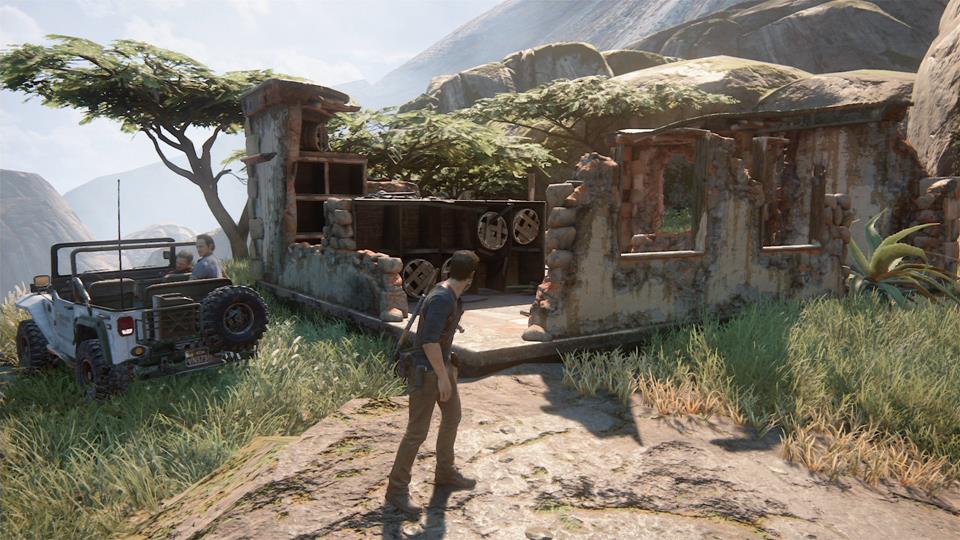
When you arrive in another large open area and your companions talk about Shoreline, hook right and drive on the obvious path. In the furthest right part of the area before it loops back around in a turn you’ll find a well. This is a really neat little treasure to get, as it actually involves using the car winch mechanic. Take the winch with you from the front of the car, then hop down into the well. Inside, there’s a wooden support you can pull down with the winch. Once that’s pulled down, it’ll make a pathway to a raised area where you’ll find this treasure.
English Ale Bottle

Also in the big valley, on the far left, is a mostly-intact building that’s difficult to miss. The only hand-ledge on it is too high for you to reach alone, so slam your car up against it with no regard for the paintwork, then hop on the car to get a leg up. On top of the building are two explosive crates around a suspicious-looking entrance… hmm. Do what any careful, preservation-minded archaeologist would do and blow them up, and then enter. Inside you’ll find this treasure, plus as a bonus a power weapon for your trouble.
Mughal Box
Drive up a stony path and find a ruined house at the top, to the left of the main route after you begin to drive through a particularly off-road area. It’s difficult to miss. In this house, you’ll find this treasure.
English Musket Bandolier
In the next wide open area after the Mughal Box treasure, look out for a tunnel (pictured). Drive on through – it’ll lead to a Shoreline outpost. Kill those present, and then blow up an explosive barrel in the centre of the outpost if you didn’t in the fight. This will again blow some conspicuous wooden doors off a cellar type place, and inside there you’ll find this treasure.
Antique Tea Tin
Just up the road when you turn right from the tunnel you likely just exited is another Shoreline base. Deploy Nathan Drake’s slaughter talents on them, and then look for a detonator outside the main ruined building. This’ll blow the doors off another building, and inside you’ll find this treasure.
Scottish Two-Pence Coin

You can’t miss this tower along the main story critical path, so just make sure you climb it using the limited hand holds available to reach the top and nab this rusty old coin.
Scottish Snuff Mull

When you reach your destination – the big, showy watch tower that the game’s camera makes a big point of introducing – walk past the obvious entrance you have to bash open and turn left. There’s a pile of crates, and amongst them, this treasure.
Muff Pistol

When you reach the room with the spiral staircase, one of your partners rushes off and encourages you to hurry up. Don’t – ignore him. Instead, search this room. First off, there’s a pile of crates. Blow the crates away with a grenade or just gunfire and beneath them is this treasure.
Brass and Ivory Tankard
In the same room as the muff pistol, look for some boxes and crates against one wall. Search around the side of these to find this difficult-to-see treasure. Chapter done! Phew.
Chapter 11 - Hidden in Plain Sight
Earthenware Mug
After you gain control of Nate, head down the stairs and then turn immediately left. The big building there that’s open has another set of stairs around the back of it. Follow those down into an alleyway, and in the far corner you’ll find this mug for the taking.
“Antique” Compass

This is a bit of a weird one – as you walk through the market, on the right hand side from your starting point there’s a vendor selling trinkets. You can press triangle three times, haggling, and eventually Drake will agree to buy this treasure for $300. The fee is purely cosmetic; it doesn’t impact you in-game in any way.
Nephrite and Jade Bowl

After you enter the tower, you’ll find a sigil on the floor. There’s a small room attached to this main entrance hall type place, and resting against a statue in that room is this treasure.
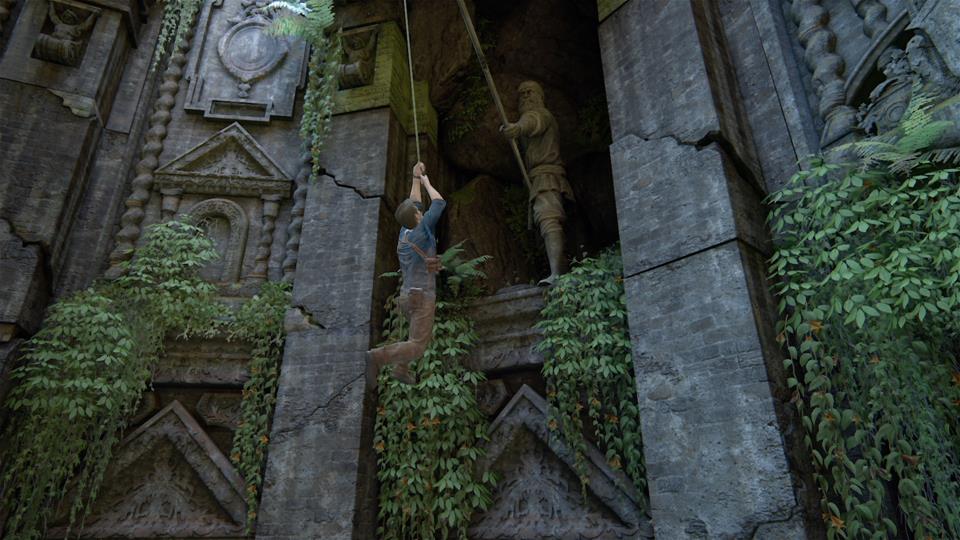
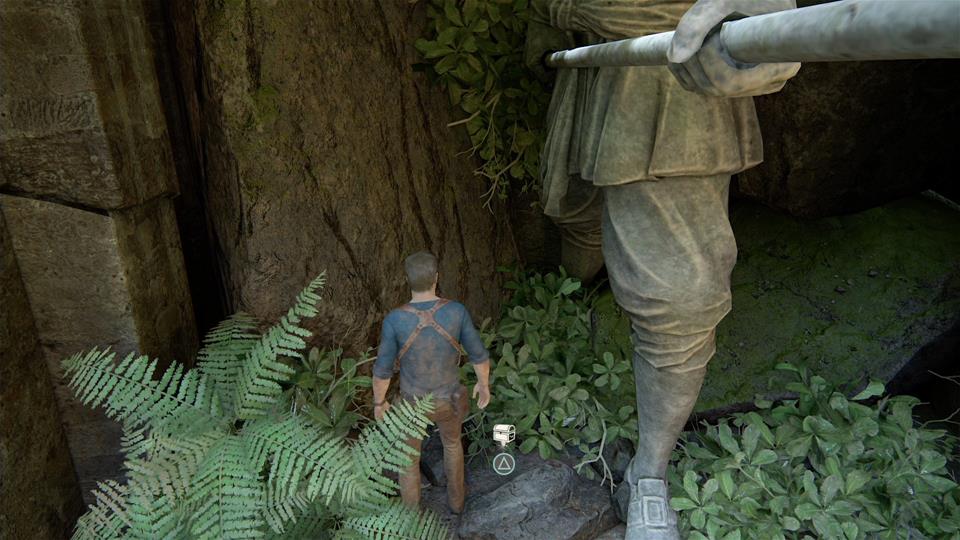
Ivory Handle Dagger


When you’re heading up to ring the bell, follow the story as you’d expect. When you reach the bell tower, though, stop! To the right of the entrance to ring the bell are some additional hand-holds. Use these to climb even higher still – up in these rafters you’ll find this treasure. In addition, you can climb even higher still from here for a one-off trophy, ‘I can see my house from here’.
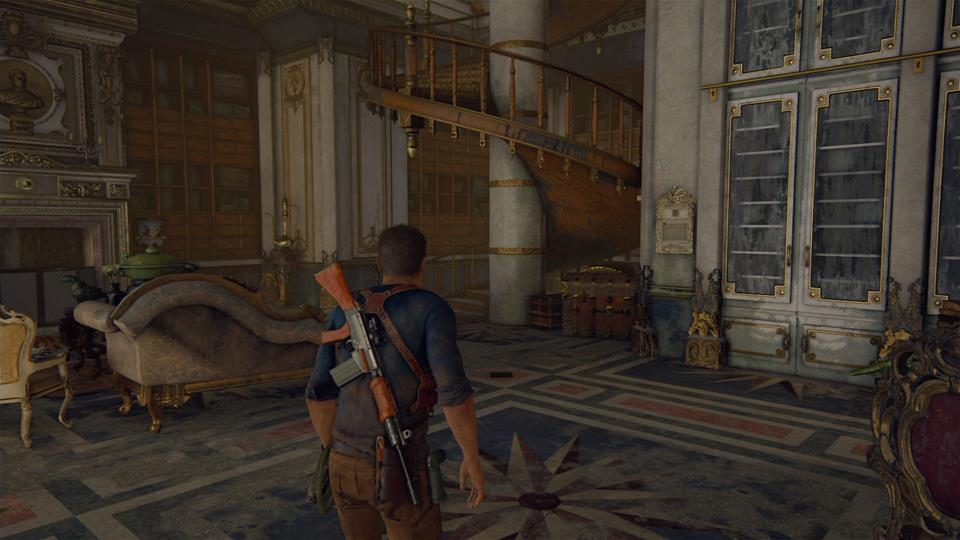
Brass Globe Hand Warmer
As is typical in Uncharted, everything goes a bit wrong for poor old Nathan and he barely escapes with his life. After the ground floor is all but destroyed by the falling bell, search around in the rubble – you’ll discover this trinket among it. With the rest of this chapter based around action, that’s it for this one. The next one is a big one, though…
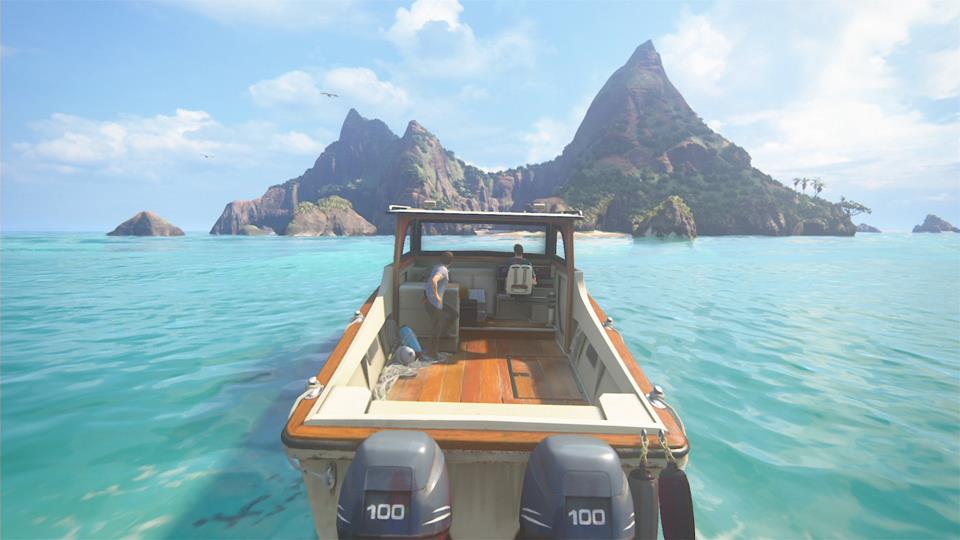
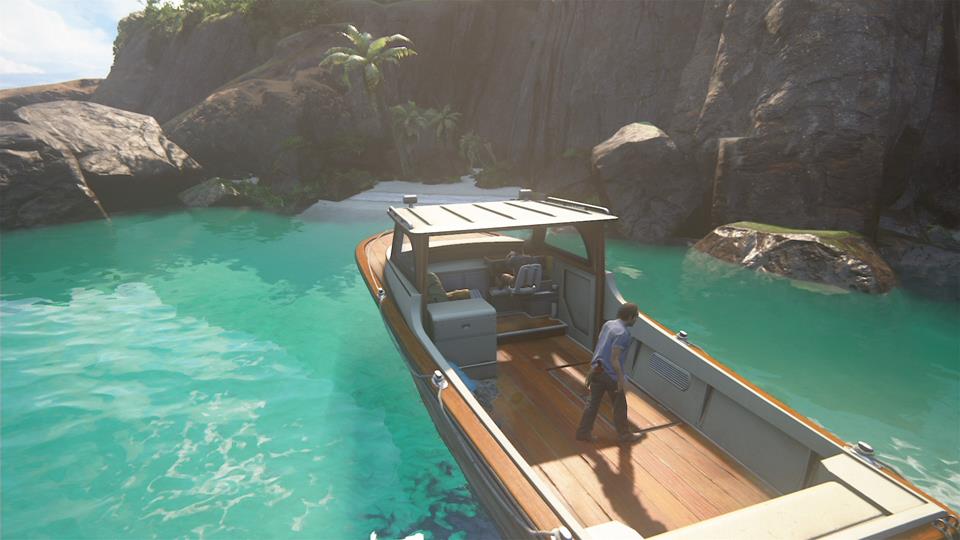
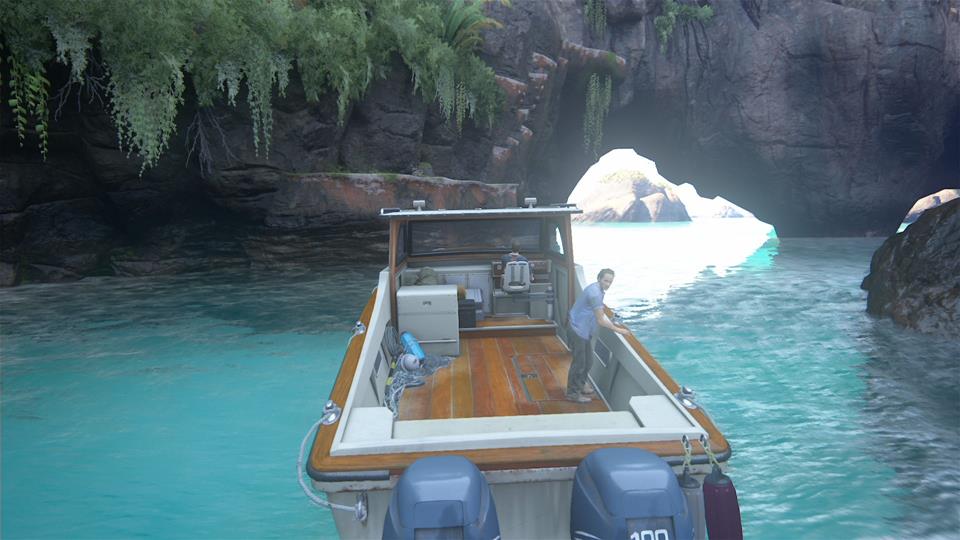
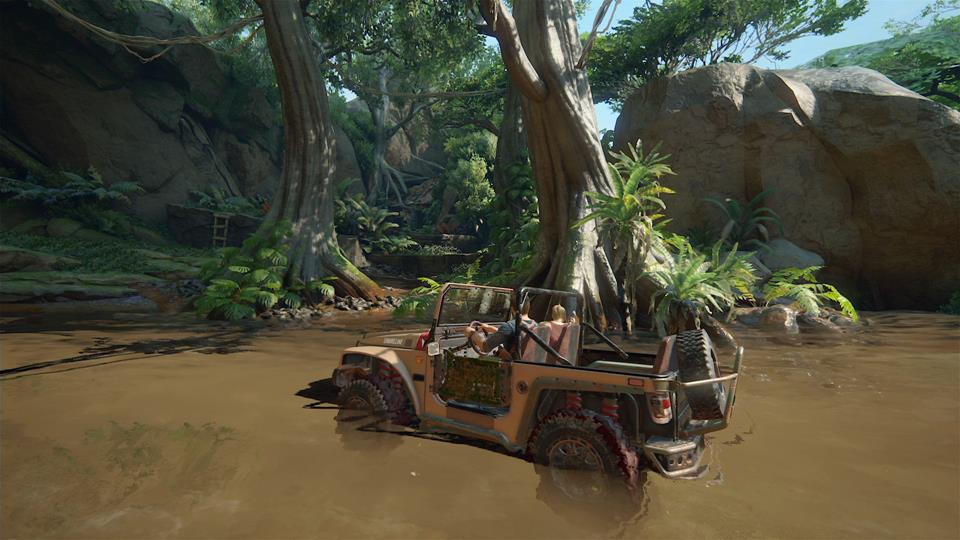
Chapter 12 – At Sea
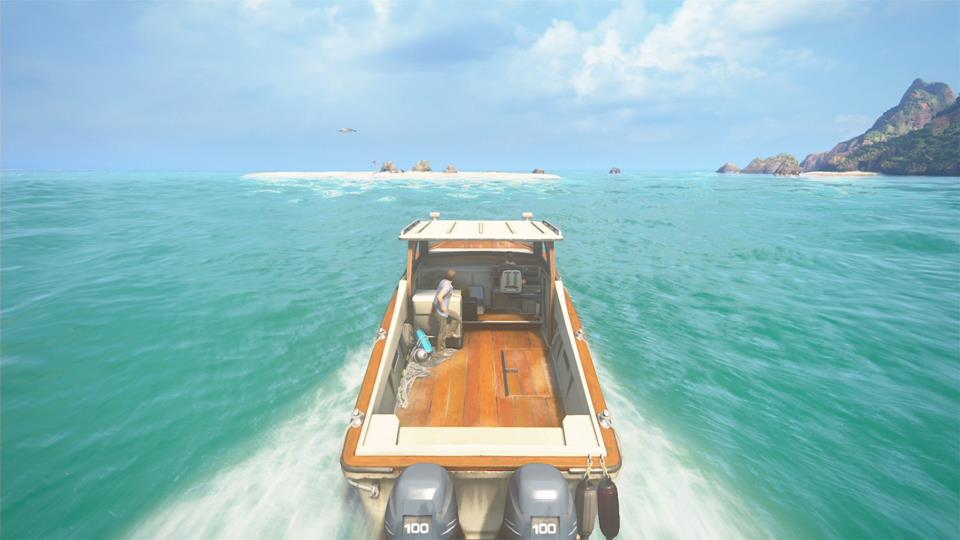
This chapter is the first where I’m going to write a little preface to the whole thing, because this is a little complicated. While there’s less treasures hidden here than in Chapter 10, this is still somewhat that chapter turned up to 11 in that you have a vehicle and a wide open area within which to explore. This time it’s a ship, and you’re island-hopping. The story of the chapter will take you to a variety of islands in a certain order, but you’ll need to stray off the beaten path to find all the treasures. Here we go:
Brass Pocket Sundial
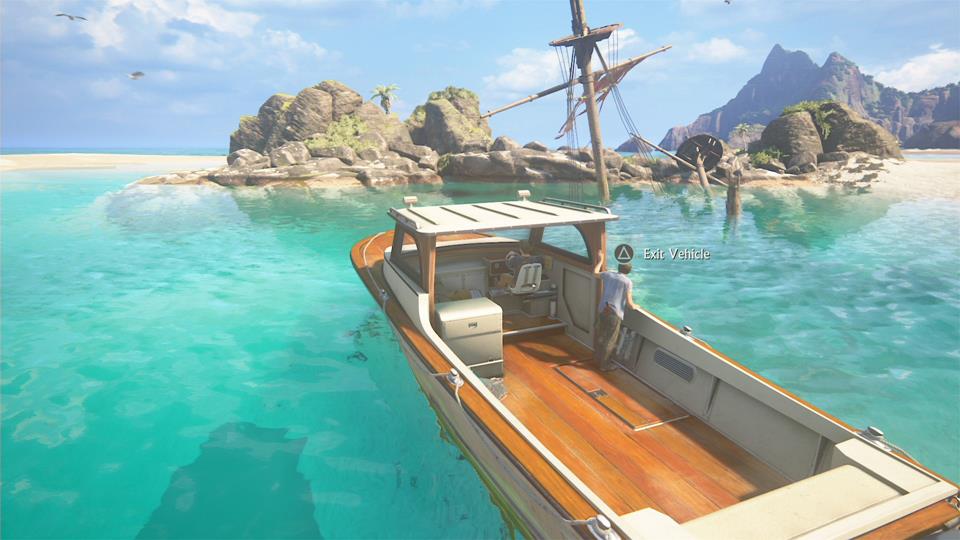
Ahead of you when you start will be one larger island, your obvious destination. Instead, follow a course to the left of that island. Here you’ll find some much smaller islands. Visible is a sunken ship, its mast rising out of the order. Park your boat, jump out, and dive down – you’ll be able to swim through a hole in the ship to find this treasure in the hold.
Combination Lock Tobacco Box
If you’ve followed the directions to and found the previous treasure, you’ll now be around the left hand side of the main island from where you started. Look to that main island: there’s a little beach. Head there, disembark, and walk around a rocky formation to find an area packed with vegetation. Eventually you’ll find a pile of junk, and this box is found among it.
Silver and Wood Tankard

While there’s other optional things out there, such as journal entries, now’s the time when if you’re strictly hunting treasures you’ll want to return to the beaten path. When you land on the island with the tower, look for a skeleton tied to a cross on the northern side of the island. Turn around and to your left there’s a tiny rock alcove; this treasure is on the floor beneath it.
Persian Silver Pen Box
From our skeleton friend mentioned in the previous treasure’s entry, turn right from facing him and follow the edge of the island around. You’ll discover a small cave. There’s some misleading junk in here, but away from that if you trace the cave wall around you’ll eventually stumble upon this treasure among some grass.
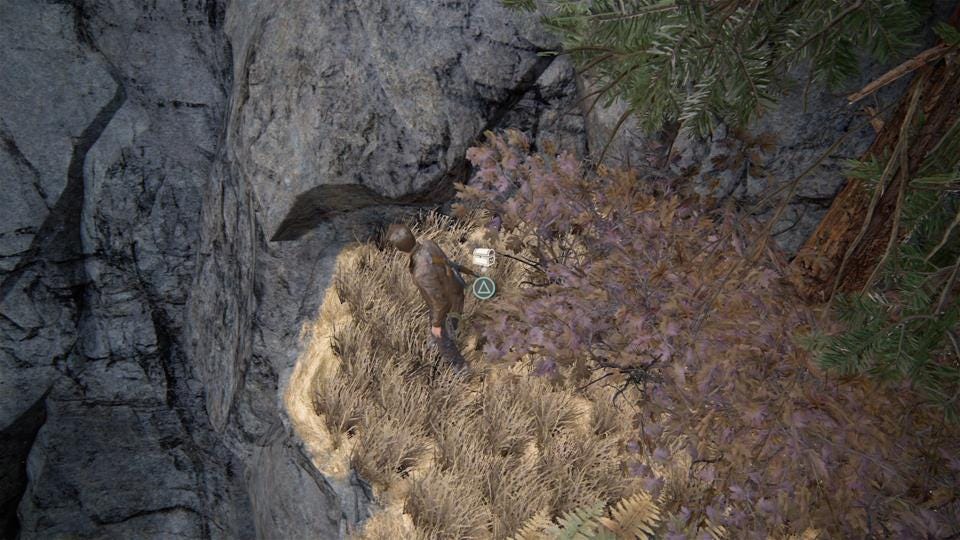
Panamanian Pendant
When you return to your boat to follow the stone arrow, follow the first arrow in direction but then continue to hug the outer edge of the island you just left. Just around the corner you’ll find a tiny beach, as pictured, and a little in-land you’ll find this pendant.
Persian Leather Notebook Case
As you follow the stone arrows to continue to your next story objective, keep one eye on the left hand side of the larger island you’re looping around. You’ll notice some obvious hand-climbing holds. Park the boat up and clamber on its roof to meet these, then climb up. On the ledge it leads to you’ll find this treasure.
Deccani Bronze Spouted Bowl

In the area where you find the gigantic doors inside the island after swinging across a gap and leaving the boat behind, there’s a small cave on the right-hand-side of the area. This difficult-to-miss treasure is on the floor in that cave, and you pretty much have to pass right by it to progress.
Mughal Elephant Carving

You’ll boost your companion up a ladder, they’ll destroy a bridge, and then you’ll climb up it. The critical path will take you up onto a ledge, then from there onto a wooden platform. Before getting onto the wooden area, hook right; there’s a small cave here and inside is this treasure.
Ottoman Helmet

When you reach the ruined tower and it’s remarked “How the hell did nobody find this?” don’t just do as the game pushes you to and climb the tower right away. Instead, explore its bottom floor, which can be entered through a hole. Inside, you’ll find this treasure.
Deccani Bronze Vase

When you swing from the previously-mentioned ruined tower, right in front of you is a fun looking mud slide… but don’t hit it! Not yet. Keep those pants clean for a second. Instead, look left for a ledge. Grab it, shimmy around, and then search the area it leads to. You’ll find this.
Strange Relic

Okay, now you can ride the mud slide. But only to the bottom! When you get to the bottom, don’t go any further; look to your left. A forested pathway leads to some climbing. When you reach the top, look for a stone basin on the other side. That’s your target. Now comes the interesting bit: take a running leap of faith. Mid-jump, the grapple icon should appear. Hit it, grapple across… and find this treasure. Careful with your timing, as it’s easy to fall to your death here.
Hamsa Mythical Goose
After grabbing the previous relic, return to the mud slide. Slide down both now, and then you’ll grapple off a statue holding a spear. Continue down by swinging to the obvious platform, then you’ll have to grapple on another statue. Stop! Don’t jump, don’t fall. Instead, turn on the rope until you can see the statue. Now climb up the rope a bit to be level with the statue, and swing towards it. Drake will reach his hand out to indicate he can grab that ledge. Jump there, climb up, and pilfer this treasure – then drop down to continue the story path.
Pique Tortoise Shell Box
When you’re in the rooms that were clearly used to plan the founding of the Pirate Colony, you’ll find the room with supplies in it has some water at the back. Jump in and swim far in, then look to your right. There’s a ramp that leads up to some raised land, and there you’ll find this treasure.
Chapter 13: Marooned
This chapter starts with Nate injured; you won’t have to do anything treasure-related until he regains full movement after you fall in a scripted sequence, pass out, and wake up several hours later, once the storm has passed.
Persian Ring
You’ll find this on the first cliff face you climb after waking up. Follow the route, but when the game gives you an obvious opportunity to climb up, don’t take it. Instead, continue around to the right until you spy this treasure glinting… and then grab it. Done.
Wood Tankard
For this treasure, look out for the moment when Nathan lands on a platform from a swing and it partially collapses but doesn’t entirely break away to leave him in mortal peril. He quips that he didn’t expect that. Right in front of you, you’ll see multiple routes into a cave that’s your next story destination. Take the first one, the most left, and then hook left once you get in there. This treasure is then a short jump across a ravine away, and can be spotted glinting in the distance pretty much as soon as you enter.
Spy Glass
Shortly after the last treasure you’ll slide down a rock slide, jump to safety, then begin to wade upstream. As you do, keep an eye out for a pile of crates and a skeleton in front of you and slightly to the left. Among the crates is this spy glass.
Dress Dirk
After a large encounter with Shoreline mercs, you’ll enter a denser forested area. On the critical path here you’ll find a skeleton with a journal note; turn left from him to see a darkened pathway through the trees. This path is a dead-end, but at the end of it you’ll find this treasure.
Frechen Bearded Bottle
When you lift a crate in the ruined house, look around of a room with a hole in the floor before going any further. You can crawl beneath the floorboards via that hole and make it to an otherwise out-of-reach room, within which you’ll find this treasure.
Navigation:
Page 1: Chapters 1-9
Page 2: Chapters 10-13
Page 3: Chapters 14-17
Page 4: Chapters 18-22
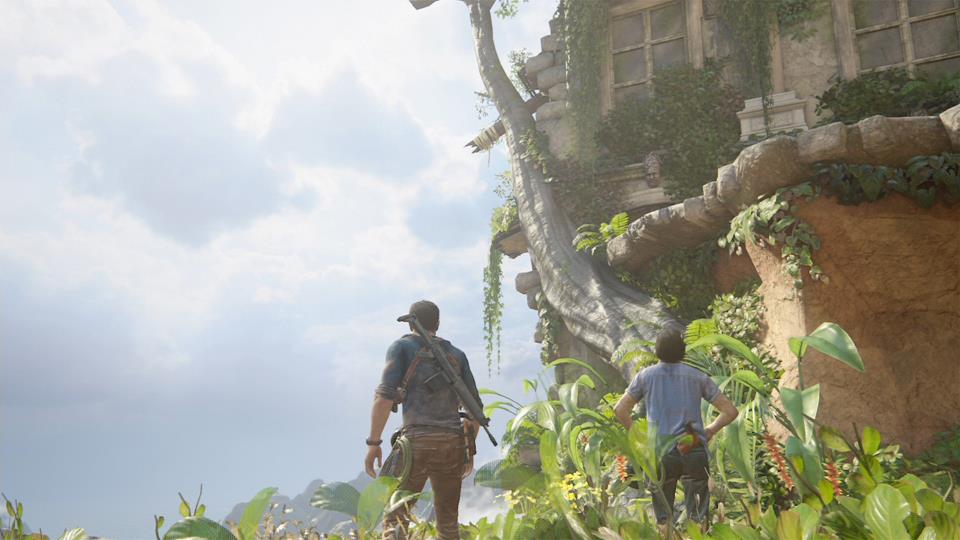
Chapter 14 – Join Me in Paradise
This chapter features one wide open area with a few treasures for the taking, then some combat encounters, then treasure, then combat, then treasure – it’s an ebb-and-flow sort of chapter. Here we go:
Carved Horn Bird Sculpture

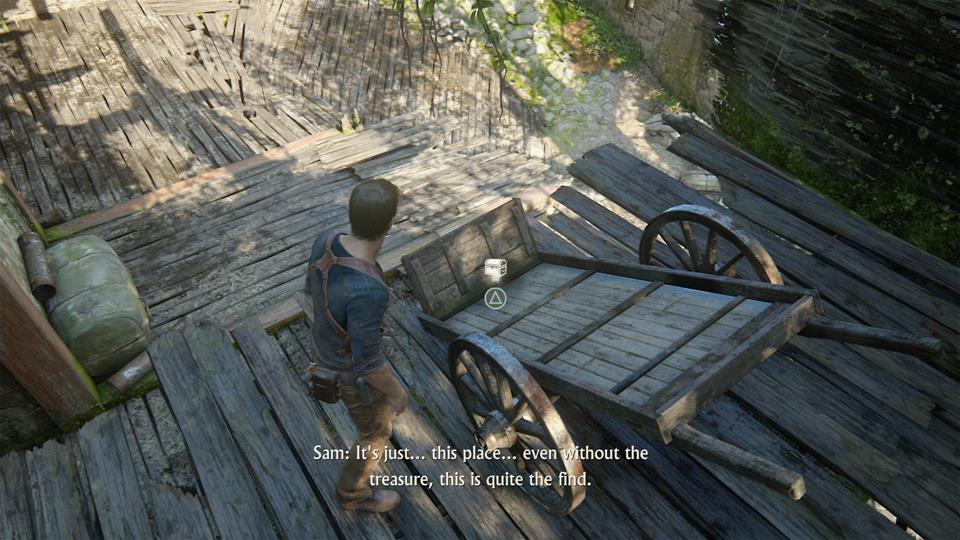
Immediately after starting, turn to your right. Don’t walk off this starting platform, there’s no way back up! If you look at the wall to your right, you’ll see a high window. Clamber through and then around; this treasure is resting on the cart here.
Mughal Vase

By the stables and just over from the blacksmith is what appears to be the ruins of a store. Enter it and wander to the back of the store – there, you’ll find this vase just sitting in what looks like an old store room.
Ancient Stone Pot
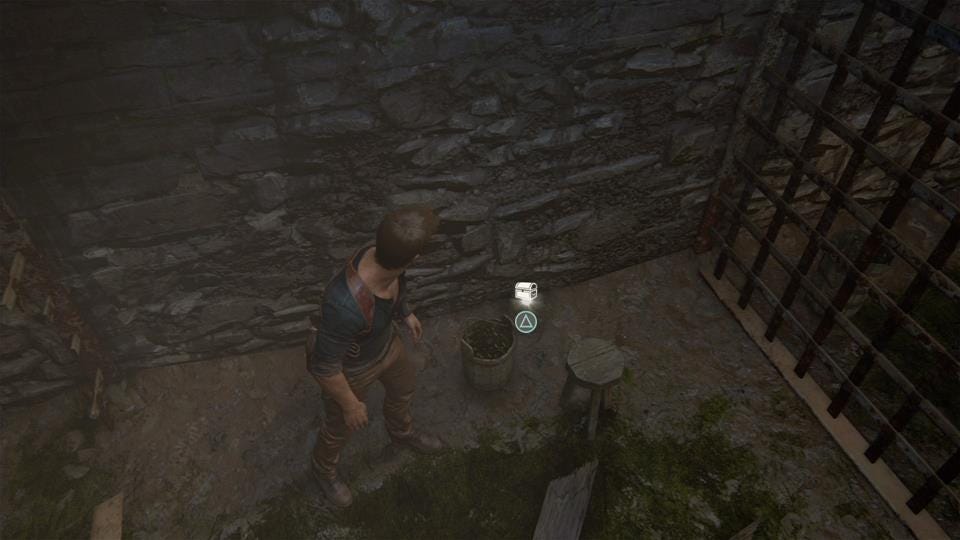
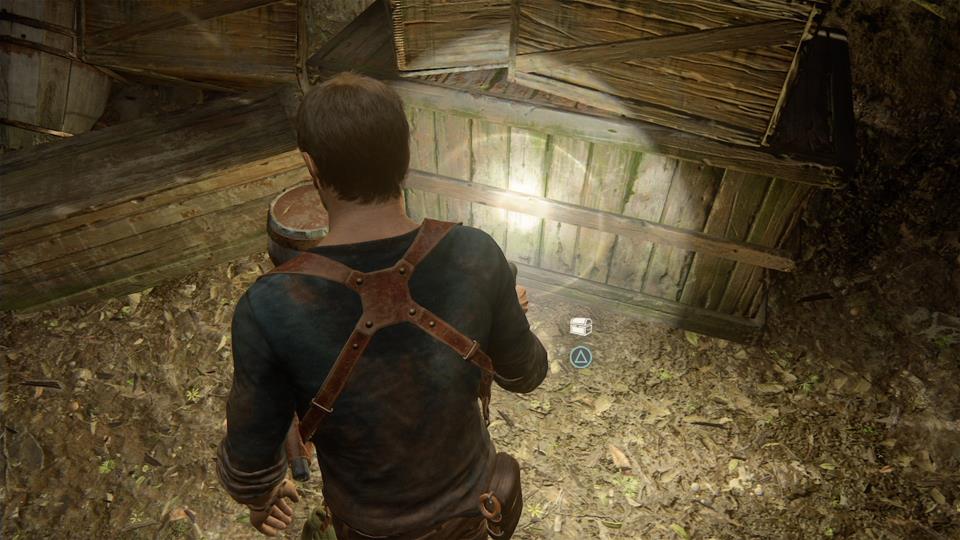
Enter the jail as you walk past it – the building with stocks outside it – and head through to where the cells are. The furthest cell has a hole in it that’ll get you through to the cell next door, and in there is this treasure.
Painted Copper Bottle

This one is a lovely easy one – when you climb the ladder in the secret hideout, there’s two pathways at the top – left and right. Take the right, and at the end of it this treasure is just sitting on the ground. Then head back and take the left path to continue the story.
Mughal Jade Bottle
After a major combat encounter which culminates in two snipers in a tower, you’ll land in a building where you’ll find a note you can add to your journal. There’s an outside platform; stand on this and climb around and up from here to find this treasure.
Slipjoint Claspknife
After yet another combat encounter, you’ll boost your partner up and then follow them. Eventually, you’ll grapple swing across towards a big, regal looking building built from white brick. After this grapple swing, turn immediately right on the following path. You’ll notice another grapple point; use it to reach another platform around the corner and to the right. This treasure rests there.
Large Bronze Boar


When you enter the big white building, you’ll have to swing across a gap. Drake will say “follow my lead.” When you cross this gap, the main path is obviously to the right, but you can shimmy across to an open door to the left. Inside this room is this treasure, just sitting on a table.
Stout Vase


When you slide down into the building proper, immediately head up the stairs to your right, and take the right hand side of that staircase. There’s a gap you can hop here, as pictured. Hop it – Drake will ironically remark “nothing up here,” the dumbass, but you’ll find this treasure next to a bust on a table.
Mughal Serving Vase

When you reach the scene with the bodies and barricades, search the right hand side of this courtyard. Among some of the wreckage, next to a pillar, is this treasure, the last of the chapter.
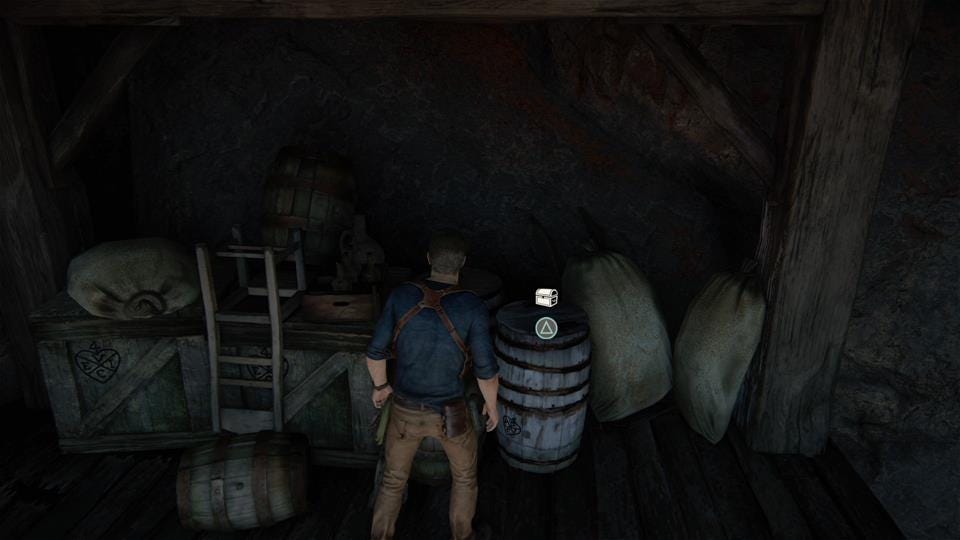
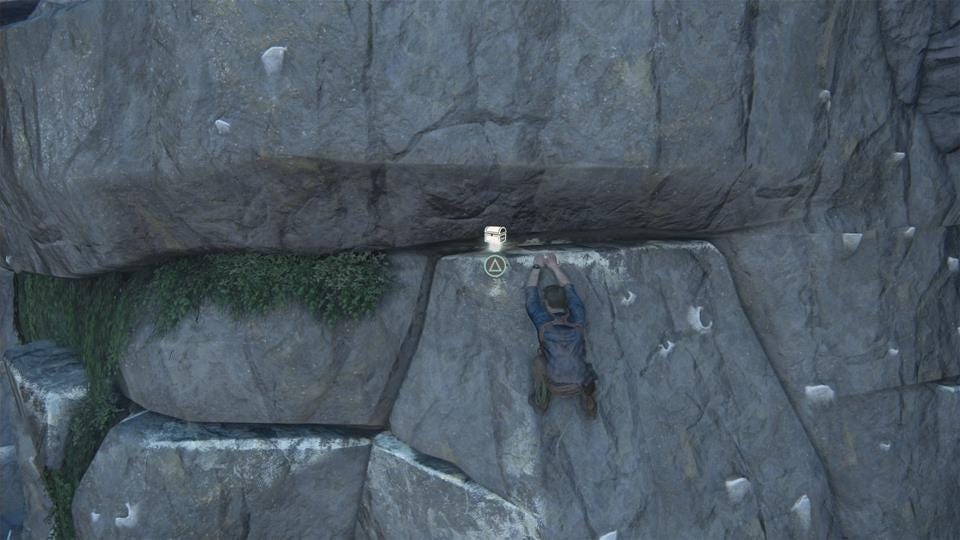
Chapter 15: The Thieves of Libertalia
Emerald Flask
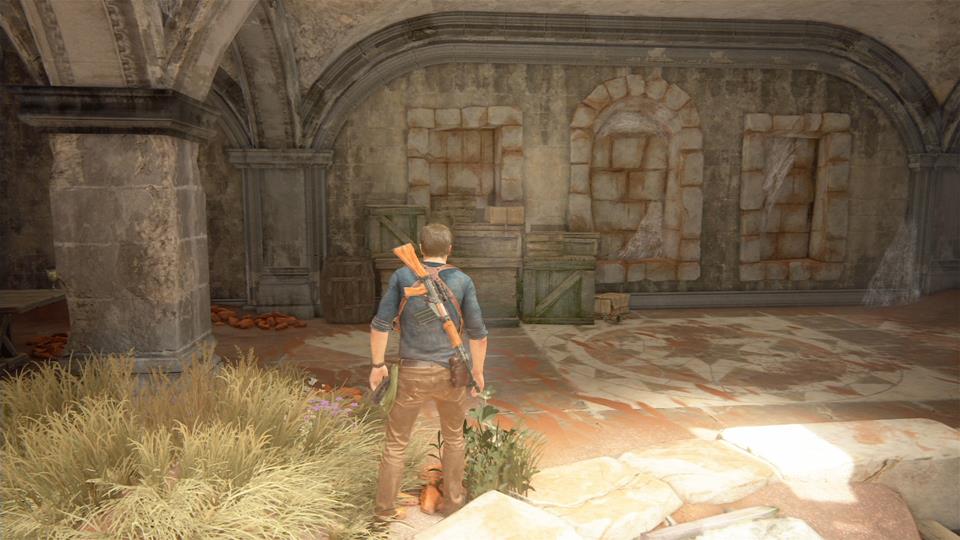
There’s mercifully only one treasure in this chapter, which is mostly about exposition and shooting. The Emerald Flask is also found right at the start; to the left of where you start is a collapsed shelf/bookcase. Head past it and turn around; you’ll be able to crawl underneath it and nab this beauty.
Chapter 16: The Brothers Drake
Toy Soldier

When you start the level, walk straight. The game will try to push you towards an entrance, but ignore that. Just head straight. There’s a fountain, and on one side of it, there’s a bench. This considerably childish treasure is on the bench.
Toy Seaplane

When you enter the room with the sarcophagus, look for the staircase to your right that’ll lead back up to the attic. The door is locked, but at the top of the stairs you’ll find this treasure instead.
Pirate Snowglobe
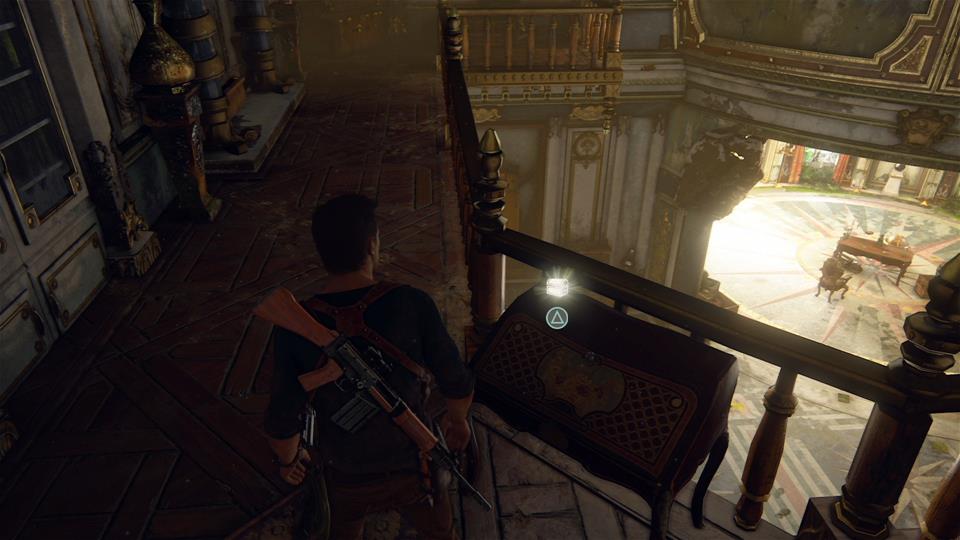
When you push the bookcase to climb up, climb upwards but then don’t go left or right. If you look behind Nate, you’ll see there’s a balcony that’s otherwise blocked – the spiral staircase in the room leads there, but it’s too cluttered to climb. From above the bookcase you can jump over to the railing, climb over it, and find this treasure chilling out on a sofa.
Chapter 17: For Better or Worse
Mughal Flared Vase

After you boost up your partner and climb a kicked-down ladder, your companion will turn to face you for an optional conversation. If you indulge them or not, turn left here rather than right; there’s a sheer drop back to the starting point here, but just on the edge of said drop is this treasure.
Mughal Hinged Box

You’ll first spot this on the other side of a bridge, in an obvious position. The bridge collapses, and you can’t get it. Damn! After taking out two goons, with Nate complimenting his buddy on their moves, search the area for a half-collapsed set of stairs. This will lead to the other side of the collapsed bridge; nab this treasure and be done with it.
Jade Serving Bowl

When your partner uses the car to pull down a balcony with the car winch to make a path to climb, climb up into the room. When you get up there, there’s a balcony out to your left. On that balcony: This treasure. And a lovely view to boot.
Ancient Stone Bowl

There’s a nice easy clue for this one: when your badass companion mows down a couple of grunts with your 4x4, walk right past the car and around the right hand corner. There, on the edge of a cliff and among some rubble, you’ll find this treasure.
Pewter Incense Burner
After you jump over the broken bridge with your vehicle, you’ll begin forging upstream. Keep an eye out for a forested area on the right of the stream. Drive up to it and get out; you’ll find a small house that’s in ruin. Walk through it, then climb through a window at the back of the house – you’ll find this treasure on the other side.
18th Century Combination Lock
Just up the road from the previous treasure you’ll come across another elevator. Before putting the car into it, look to the right – you’ll see another ruined building. Head around the back of it to find handholds to climb up, and on the upper floor you’ll find this treasure.
Navigation:
Page 1: Chapters 1-9
Page 2: Chapters 10-13
Page 3: Chapters 14-17
Page 4: Chapters 18-22
Chapter 18: New Devon
Mughal Stout Vase
Boy, am I getting tired of typing the word ‘Mughal’… but we’re almost there. Home stretch! When you’re in the grim courtyard of New Devon with all the caged corpses, look for the ‘Digna Factis Recipimus’ sign. To the left of the main entrance to New Devon and beyond that sign is this treasure, just sitting on the ground surrounded by greenery.
Small Mughal Dagger
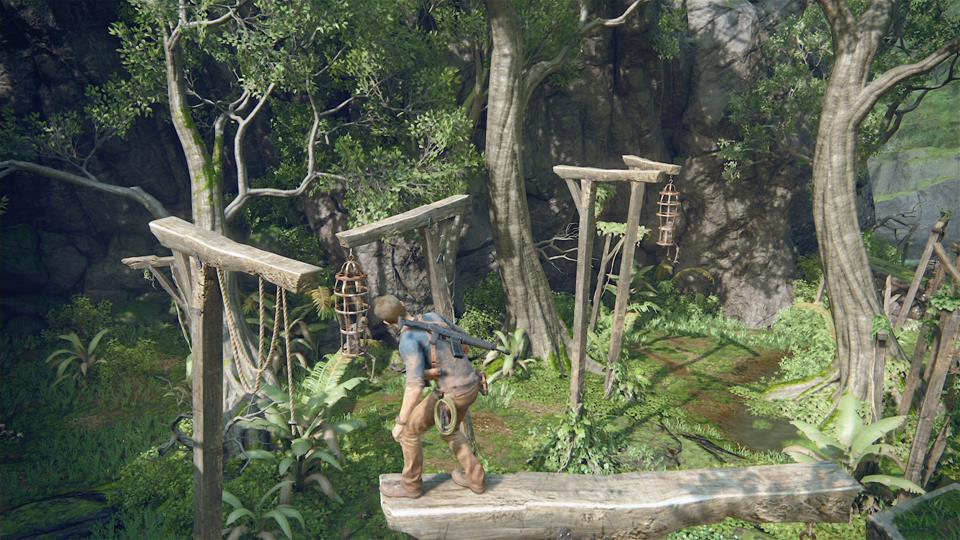
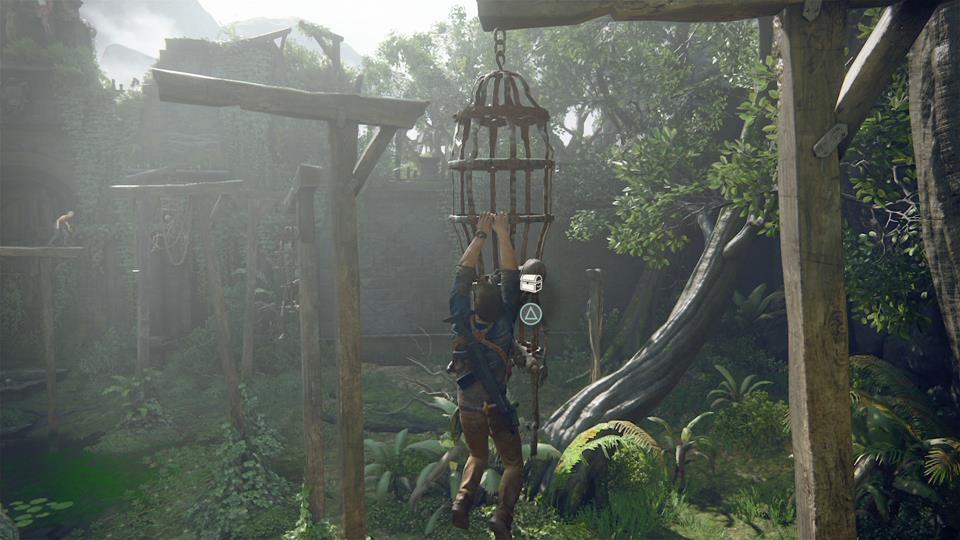
This is one of the better hidden treasures in the game, I think – when you climb up the crossbeams that hang the bodies in the cages, if you look around you’ll spot a cage at the end of a pathway of these crosses that doesn’t lead towards New Devon proper. Clamber on over there from beam to beam, then drop down on that cage and shimmy around it – this treasure, which is really difficult to see from the ground, is inside the cage.
Mughal Candle Holder

When you first enter New Devon you’ll dive into the water. To your immediate left is a semi-submerged statue and a building. Head around the left of the statue and the building, as far up as you can go, out of the water. In the corner, against the outer wall, you’ll find this treasure.
Mughal Circular Box
After the combat encounter you’ll swim through some caves and arrive near more houses. You’re greeted by a skeleton – turn left from that, and look across the fast running stream. Quickly jump and swim to the other side. In the far, far corner you’ll find this treasure.
Mughal Headdress
After a classic everything-collapses-and-you-fall Uncharted moment, you’ll wind up in some water. There’s an obvious path ahead, past an angel statue and into a building. Before you enter the building, dive underwater near it and search in the corner of the building to find this treasure underwater there.
Spanish Brass Chalice

Inside the house you’ll end up on the second floor and in a room with some ornate pillars. When you see the pillars, loop around one and pull a U-turn – at the other end of the room are some rotting sofas, and this treasure can be found hiding behind one of these on the right-hand side.
Mughal Painted Elephant
When you finally reach Avery’s mansion, don’t walk right through the entrance straight away! It’s exciting, I know, but instead walk past the entrance. Here there’s some cannons, and to the left of the cannons, resting against a wall, is this treasure.
Mughal Dinnerware
When you finally reach Avery’s study, look for the spiral staircase – you can’t really miss it. There’s nothing for you up here story-wise, but there is this treasure, just sitting on a table. Nab it, and that’s it for this chapter.
Chapter 19: Avery’s Descent
Ancient Stone Vessel
This one takes a while to reach in the level, but after a while you’ll slide down a hill and encounter two exploding mummies on each side. After all the explosions are done, a single non-explosive mummy is left. There’s a dead-end passageway to the mummy’s left, but scrabble around in here and you’ll find this treasure.
Mughal Decorative Cudgel
Eventually you’ll reach a room with some half-naked mermaid statues. Nate will remark these aren’t as creepy as the exploding mummies; here there’s a branching path. Take the left hand path and down here you’ll find this treasure, concluding this chapter’s hunt.
Chapter 20: No Escape
Jade Flower Pendant
Here we are! Number 100, Chapter 20... and the final stretch. From the start of the chapter, head up until Nate remarks ‘holy crap’ at all the ships. You’ll round a corner and walk along a narrow-ish ledge. You can then climb up a small ledge. Get up there and turn around – behind you, there’s a piton area you couldn’t reach with a raw jump. Take a running jump – and this is a tricky one – land your piton in there, then clamber on up. The treasure is up there.
Stoneware Bearded Jug

When you reunite with all of your allies, look out for some stairs that you descend into a town-like area. Turn left at the bottom of these stairs – away from your ultimate objectives – and enter the building here. This treasure is just inside.
Stout Jade Vase

When you come to a broken wooden bridge over some shallow water, drop down into the water and turn to the right. Here there’s a hole in a sort of balcony area of a building over water, as pictured. Climb up into it – the only way into this building – and grab this treasure.
Painted Spouted Vase
Once you’re in pursuit of one of your allies, head in the obvious direction. You’ll head under an arch. There’s a few houses here that you can enter. Do so, and look for stairs to the second floor – this vase will be found up there, on top of a cabinet.
Mughal Perfume Bottle

When you reach the plaza with the statue of our good friend Avery, turn immediately left and look for a building with a hole blown out of the corner. Walk inside, and the treasure here completes this chapter.
Chapter 21: Brother’s Keeper
Mughal Enamel Bird

This one is a bit cheeky – when you find footprints, this treasure is directly above you… but you can’t reach it. Ahead of you is a grapple point towards the next story location – what you need to do is grapple, then swing yourself back and forth until you gain enough height to jump back the way you came, but to a higher ledge. Up there is this bad boy.
Stone Vase
You’ll go down two mud slides and have to grapple swing off the second one, then crawl through a very narrow tunnel that leads into a larger cave. In a raised platform in front of you and to the right as you enter are some barrels and crates – this treasure is among them.
Strange Fruit
Eventually you’re going to grapple a point and lower yourself down and – wow – you get quite a view of a long-lost ship. Don’t drop or swing! Don’t do anything, in fact. Look around and up a bit; we’re looking for a tiny white ledge, obscured by rock. This ledge is difficult to get, but you need to swing to it carefully avoiding the nearby rocks and grab for it. The window to do so is very small, but you can do it, and the reward is this… strange relic. Wait, is that what I think it is?!
Rajasthan Box

After some hair-raising sliding and swinging, Nate will fall into water and question if his companions could really manage to do all that. Here, you’re expected to dive to get to your destination, but instead look for a path out of the water next to a small waterfall. Climb up, and hidden away here is this piece of treasure.
Chapter 22: A Thief’s End
Mughal Egg Pendant

This is the final treasure, and of course it’s some Mughal thing or other. When the chapter starts you’ll have to get out from under the dock, and then when you do the natural thing to do is to run for the ship like a mad man. Don’t. In the middle of the lagoon, between the dock and the ship, is a little underwater cave. Find it, find this treasure, and complete the set. That’s all of them! Phew.