Fallout 4: Far Harbor DLC - Best Left Forgotten

A long, arduous quest with puzzles, religious weirdness and then even more generalised weirdness.

Fallout 4: Far Harbor DLC - Best left Forgotten
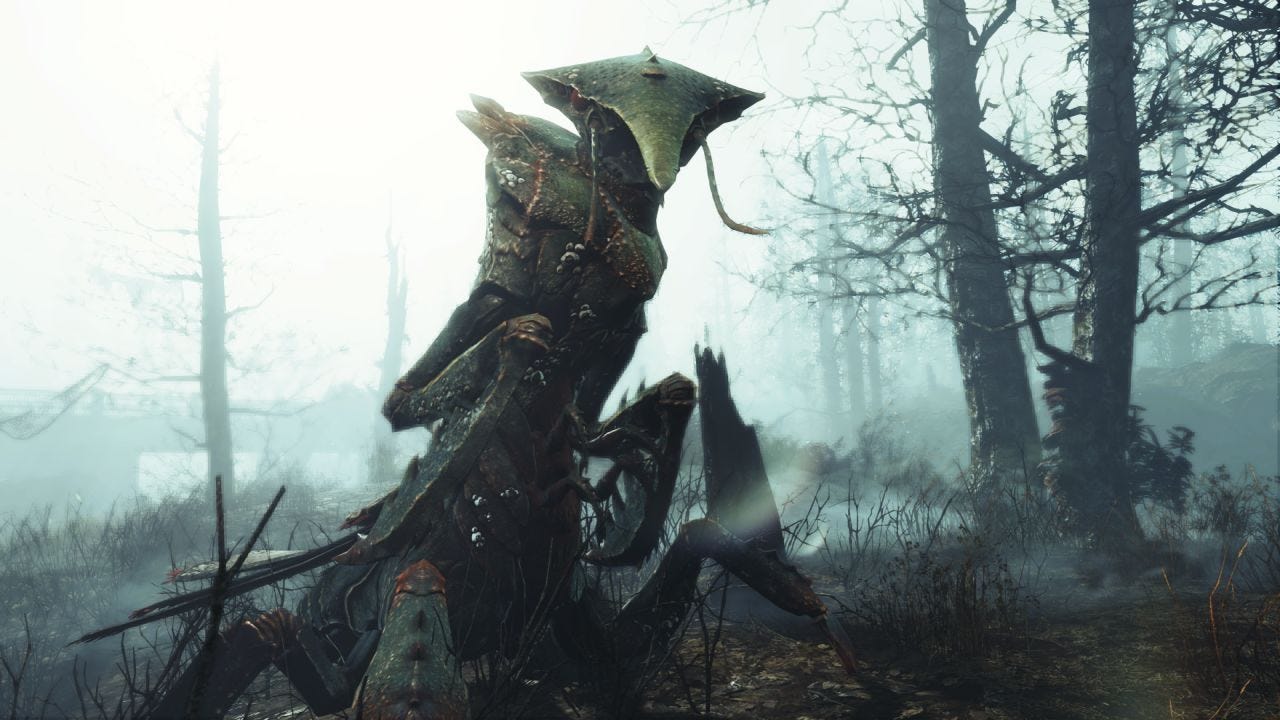
The road to the Nucleus is long and hazardous. If you have the map marker, the easiest way to approach is to follow the road leading south from the Tannery; you’ll pass through a nest of Young Gulpers and maybe some random encounters, but it’s otherwise pretty safe. Travel south past the Nucleus icon on your map and look for a path on your left which loops back around to the main entrance; be wary of a possible Fog Crawler encounter in the water on your right.
When you arrive at the Nucleus complex you can either fight your way in or present yourself as an initiate. We’ll assume the latter. This starts the Visions in the Fog quest, which we'll outline below.
Cross the water to the west by way of the rickety bridge, and then just follow the ramshackle path to the right and across to the spring. You do need to trek through the swamp but look for causeways of rubbish rather than swimming. Drink from the spring and a figure will appear standing above the little waterfall. Follow it – none of the creatures you see will attack, so just leg it. You can talk to the figure a little bit but it doesn’t say much.
At the end of your jog you’ll be at a shrine. Go around the other side, fighting off a number of ghouls, to enter. Check the terminal, then look at the shelves on the right for a text. You can then look at some graffiti near the periodic table on the opposite wall for the password, allowing you to unlock the security doors. Collect the icon from inside the unlocked room, and return to the Nucleus.
Speaking to Richter and agreeing to join the Children of the Atom ends the Visions in the Fog quest and begins What Atom Requires, but you don’t need to pursue this for the main quest. The main point is: you can now enter the base.
Read the “repairs in progress” note on your left as you proceed to add another optional objective to a side quest. You can chat with her at the store to obtain Ablutions. As you walk around you may overhear someone mention Ware and Devin; speak to Ware to unlock to obtain the Trial of Brother Devin. Speak to Richter to obtain The Heretic, although this may offend your companion. There’s also a doctor here you can visit.
If you want to progress Child of Atom quests continue into the submarine hatch labelled The Vessel and speak to the High Confessor for a couple more side quests and to tick off one of the What Atom Requires objectives. Our real goal here is DiMA’s terminal, though. It’s in the Command Center, which you can access it via the stairs behind the shop.
Inside, the path to the right just leads to crafting loot. You need to go forward through the trapped corridor. You can just time your way through, but if you have a companion it’s easier just to disarm all the tripwires. They’re in pairs, so be sure to do both sides. There’s a really exciting number of turrets on the roof which will activate if you trip the traps, and a Lieutenant Gutsy will charge from around the corner.
If you make it through by stealth, watch out for the turret in the corridor ahead, and the Lietenant Gusty beyond. There’s another turret looking over the next corridor, and a Protrectron a little further on. There’s another Protrectron in the kitchen on your left as you advance. Even further on you’ll meat an Assaultron Dominator, which is bad news, and another Protectron who will aggro if you charge the Assaultron; less than ideal.
There are two turrets in the final room. Take them out, then use the terminal to open the maglocks. Open the security gate and head around the back of the terminal.
Save before you flick the switch to restore auxillary power, because this also powers up an Assaultron – potentially a Legendary. In this close quarters area you can’t use explosives to take it out quickly, and it’s very deadly with its melee attacks. It charges out of the locked, non-interactive door to the left as you face the terminal from the last room; if you lay some mines down in front of the door and tell your companion to stand behind the security door at the other end of the room, the Assaultron will take a few moments to move into the caged area. This means you have time to slip into the alcove to the right of the one with the switch (closer to the Assaultron), where there’s less light and you have a clear shot, to start the encounter with some stealth attacks. If you can knock out a leg quickly you can use the environment to your advantage, which is a big help. It explodes after death; don’t get caught in the blast.
When it’s all over, access the terminal and use Faraday’s program. Only one memory is accessible at first.
Memory puzzle solutions
This is a sort of, uh, tower defence Lemmings style affair, using the same interface as settlement building. Store any spare code blocks you find (they’re a slightly different shade of blue) for starters. Don’t plug the gaps yet; just jump.
You need to direct the green beam through the red walls to knock them down by removing obstacles and spinning the decoder relay blocks so the beam goes the right way. Then you can lay blocks down to allow your little green bugs to reach the data source. They also need to make it back, and they’ll be attacked by drones; place two turrets near the memory source and two near the decoder beam source for best results, as this is where the drones spawn. Return to the real world by closing the workshop menu, or just step into the memory source to go to the next memory in the sequence.
Memory #2
To complete the next memory, drop off the left side right after the spawn point and store take the decoder relay block, allowing the decoder beam through. Climb back up to the main path and clear any blocks in the beam’s path, collecting any spare code blocks you encounter from both sides of the path. There’s another decoder relay around the corner near the next firewall, which you can place on a tower of two code blocks. Place some turrets near the memory source and some near the goal zone, then lay a bridge between the last relay decoder and the memory source.
Memory #3
The third memory awaits. Store the blocks between the decoder and the firewall and jump the gap. Look left and up; build a staircase to reach the gap, and grab the code blocks and decoder relay. Back at ground level, build a tower of two blocks in the path of the decoder beam and place the relay to blast the firewall on your left. Grab all the locks inside, then move the decoder relay so it powers the next decoder beam array. Climb up to the upper reaches and follow the beam until you reach the obvious spot for another decoder relay block to smack the firewall. Climb down, place turrets near drone points, and build a path for the bugs.
Memory #4
The fourth memory is a bit trickier. Start by grabbing the blocks on the right, then build over the hole in the floor so you can send the decoder beam into the firewall on the left. Once you’ve retrieved the materials inside, move the first decoder relay so it fires straight ahead, at the next firewall – but place the second decoder between so it redirects to the kill switch on the right.
With the first two firewalls down, erase everything you’ve built so the beam shoots straight down. Drop off the right side of the path past where the second firewall was, and use the two decoder relays to send the beam towards the next decoder array (the big green line). Plonk some turrets down near the memory source (the only place drones spawn in this one), and build a path for your bugs.
Memory #5
The fifth memory is a doozy. Start by gathering all the blocks around the edge of the starting platform. Face away from the firewall blocking your bugs, and build a bridge to the platform. Collect all the spare blocks, including a few above you and on top of the structure if you climb the outside. Move the decoder array in here up one square and turn it so it kills the firewall to one side. When the firewall is down, build a bridge and collect the decoder relay block. Build a second decoder relay on a tower three blocks high so the decoder beam kills the firewall in the back corner.
You may need to raid nearby platforms and destroy your bridges so you can build over to the next platform; remember blocks will hang in mid air after you erase their supports, so feel free to cannibalise. You need to place the next decoder relay so it sends the beam, across to the opposite corner, and it can be really tricky to place without falling off unless you erect extensive scaffolding. With this done you can return to the starting platform, cannibalising your bridges behind you; there’s no need to visit the back platforms unless you need more blocks.
From the starting platform, build a bridge to the left platform (as you face the bugs at the firewall) and collect the decoder relay just sitting here. Use the nearby stairs to climb up and over to where the beam is firing straight up, and place a decoder relay so the beam shoots through the hole in the wall towards the next firewall. Collect the decoder relay that was trapped behind it, then build a stair case to the platform above to grab a second decoder relay.
Now what you want to do is build three decoder arrays so that the beam is sent first to the lower platform in this area, and then across to the central starting platform. Start with the end relay middle relay so you can aim for it; it needs to be three blocks off ground level (so standing on a tower of two blocks), and you must place it to one side of the goal circle, since you can’t build the next tower on the goal point.
When the end and middle relays are up, head over to the beam source and plonk your relay down; I found it easiest to climb the stairs then build a bridge over, as it’s difficult to judge the right height otherwise. When you have it in the right place you’ll know because the beam will shoot off and knock down the firewall. Collect any spare blocks around you and jump off the side to get back to the central platform most easily; you don’t lose anything by “dying”. Now it’s just a matter of turrets and filling in the path for the bugs. Well done!
Moving on
With all five memories in hand, it’s time to get out of here. Once you exit the simulation, have a chat with Valentine about his relationship with DiMA and show him the memories you found.
There are three more objectives before Best Left Forgotten is complete, and they’ll take you all over the island. You might want to collect a stack of side quests and check their markers before you set out, as there are a couple of useful overlaps.
Let’s start with the one in the middle of nowhere and get it over with; aim for Recover the Wind Farm Kill Switch Code. You need to do a bit of swimming and wading to reach the island where the marker is, and you will face Anglers multiple times along the way.
There’s no dungeon at the end of this marker; just some disturbed earth. Interact with it, and then retrieve the cache. This kicks off Cleansing the Land, which we’ll tackle next, along with The Way Life Should Be. Best Left Forgotten will complete as we go on, don't worry.