The Witness - The Mountain (Game Ending) Solution
Images and solutions for every puzzle in The Witness in this complete walkthrough and puzzle guide.
After activating all of the light beams throughout the island, the Mountain is the final puzzle area you must complete in order to finish The Witness. As you can guess, the Mountain is quite challenging, and utilizes all of the various puzzle mechanics that were introduced to you throughout the island. Use this Mountain Puzzle Solution Walkthrough to complete the game.
The Witness - The Mountain Puzzle (Game Ending) Solution Walkthrough
Some puzzles within the Mountain are difficult to explain through images, or are completely random. We will do our best to explain all of the puzzles in this final section so that you can earn the coveted Endgame achievement. The Mountain is also where the Challenge takes place, but this guide will only cover the puzzles needed to complete the Mountain and end the game.
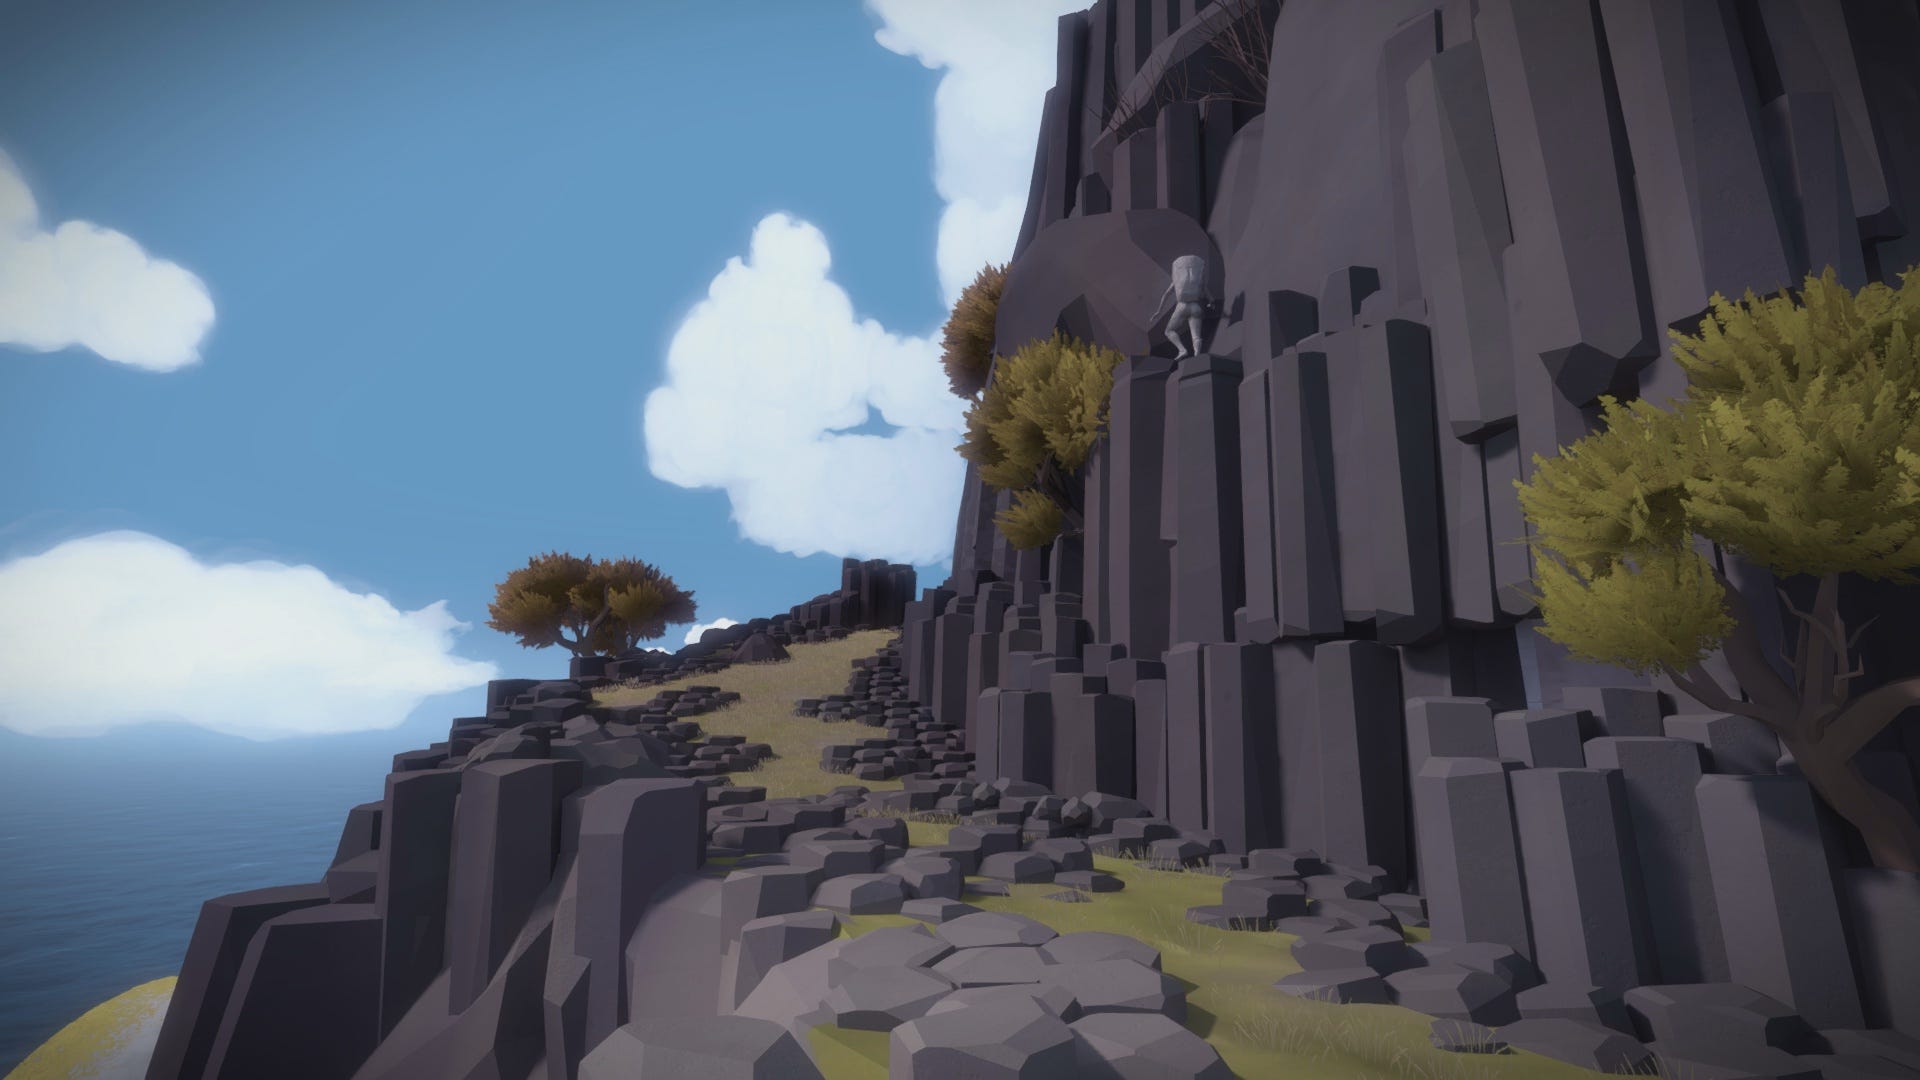
To begin the Mountain puzzles, you must first reach the top of the Mountain. Start at the Bunker, and walk along a path around the back side of the Mountain. The path will gradually begin to get more snow-covered as you get closer to the top. Once you reach the peak, keep an eye out for environmental puzzles and an audio recording near the first statue.
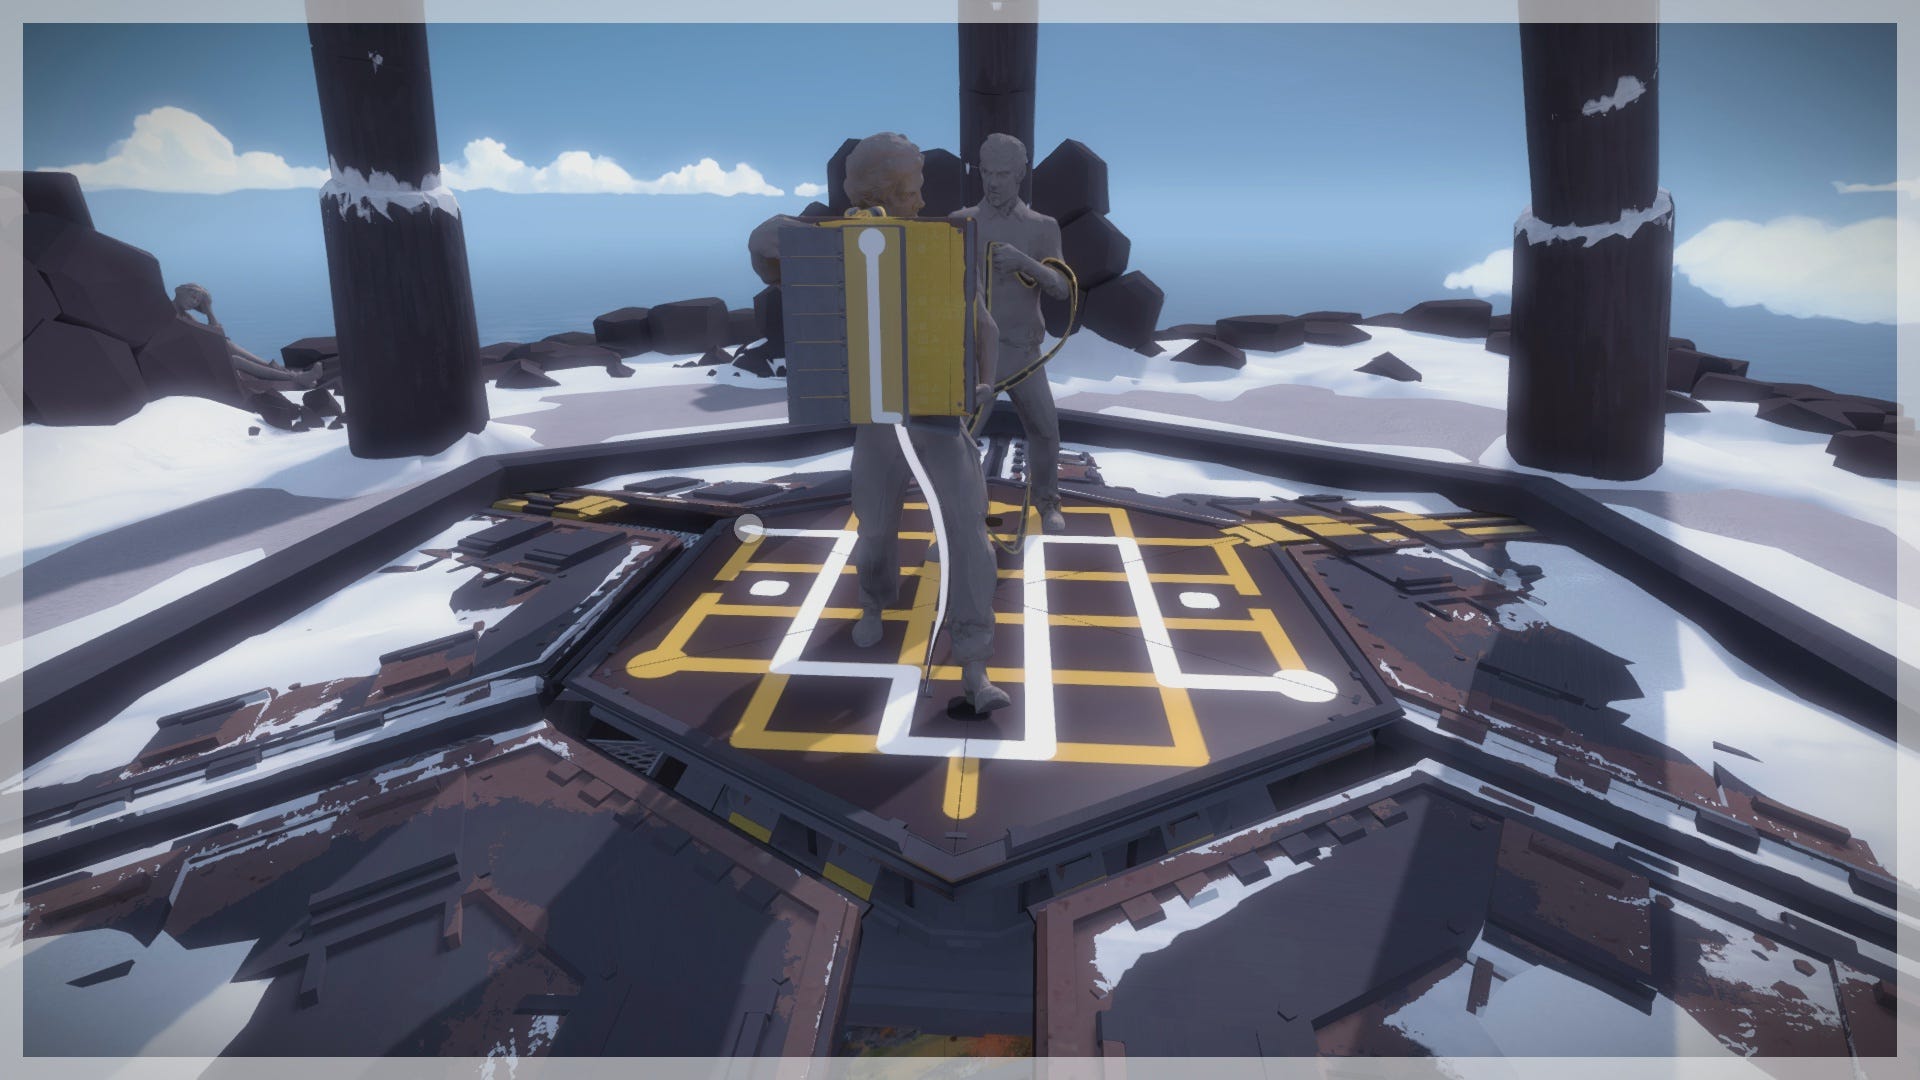
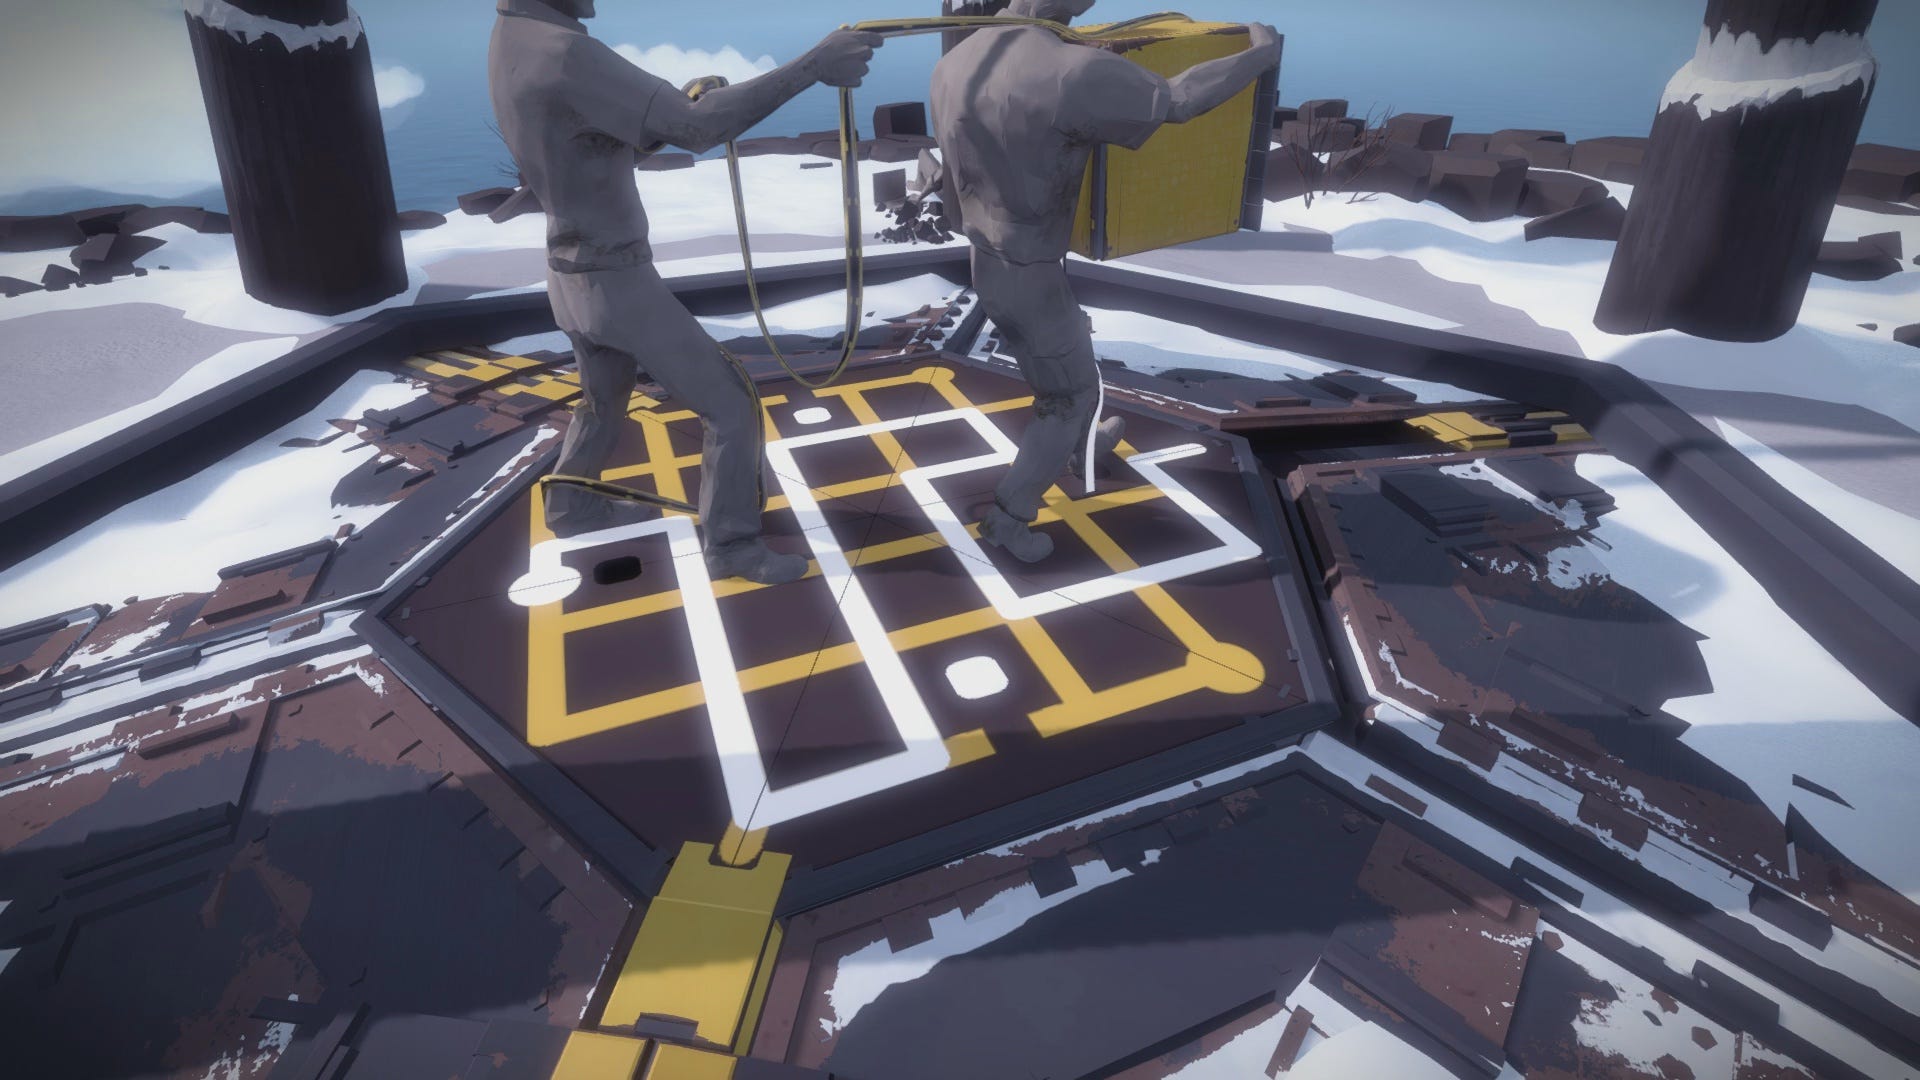
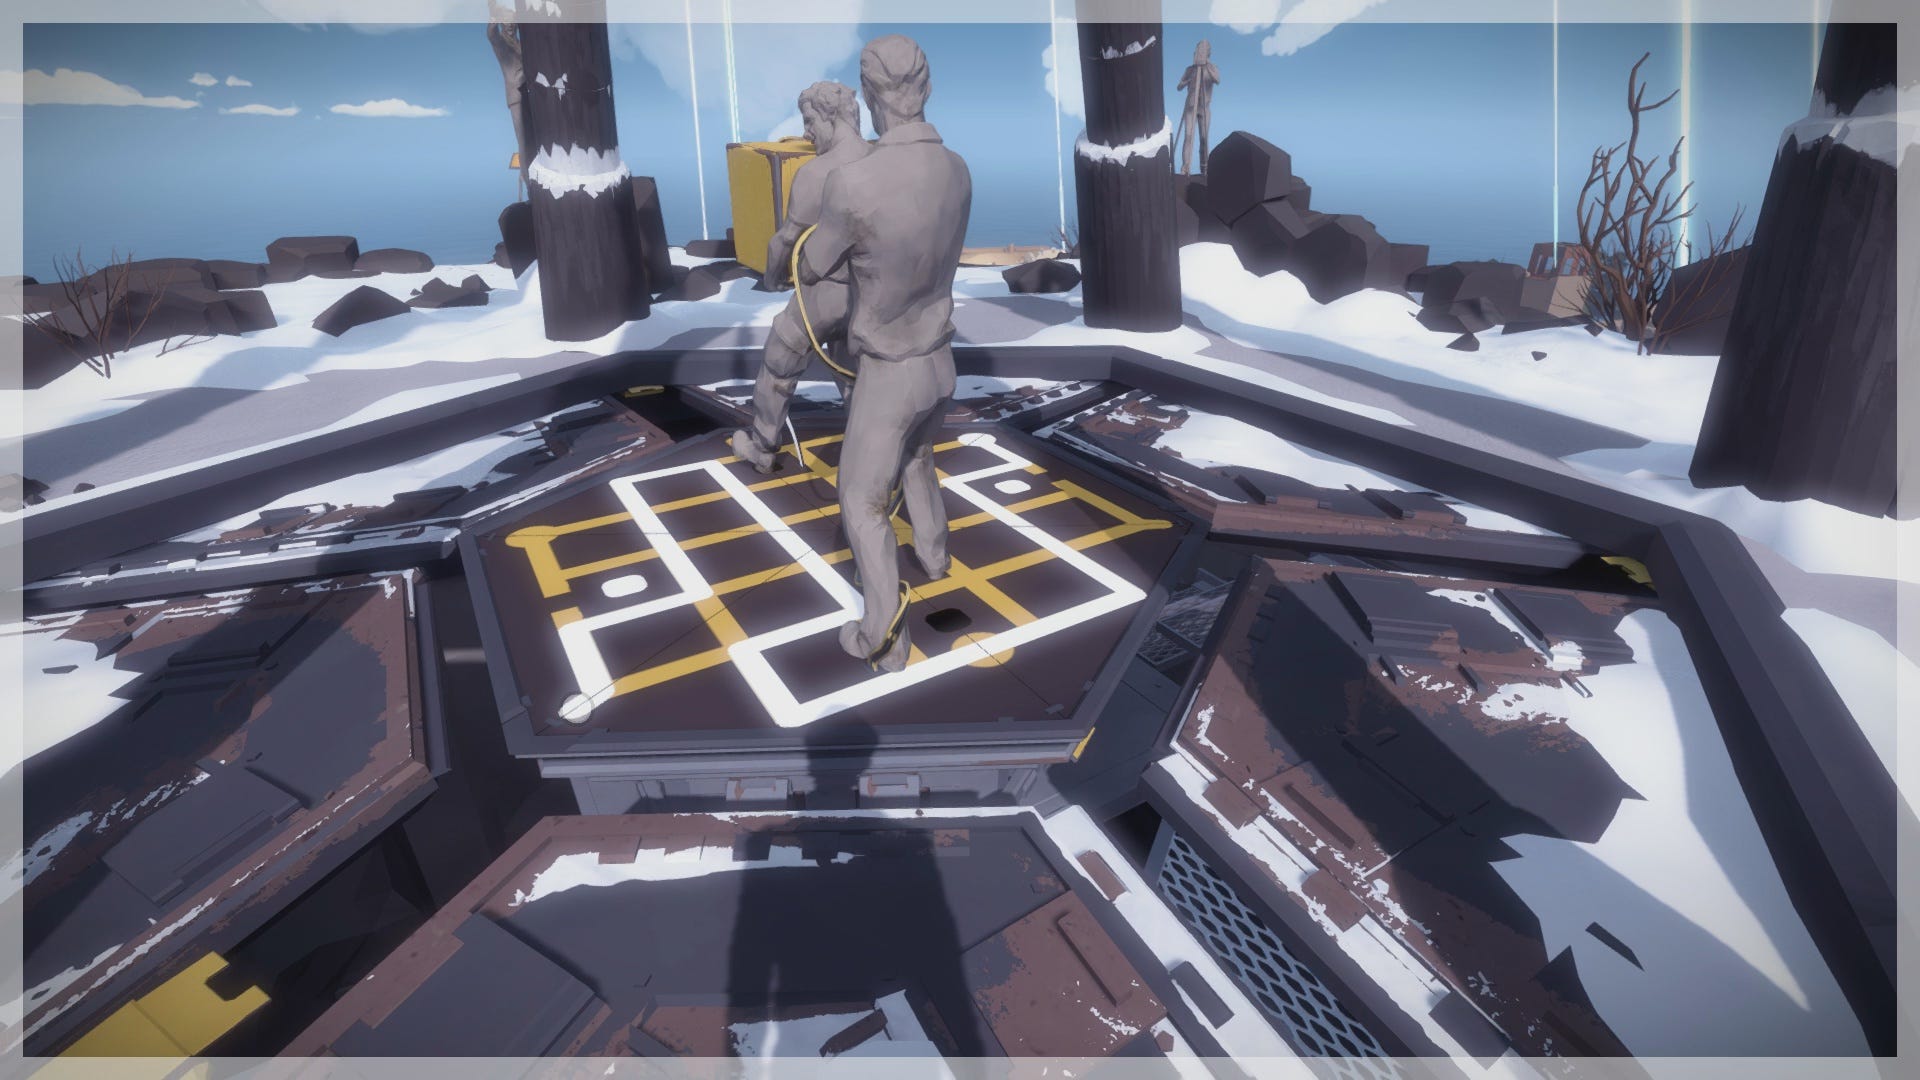
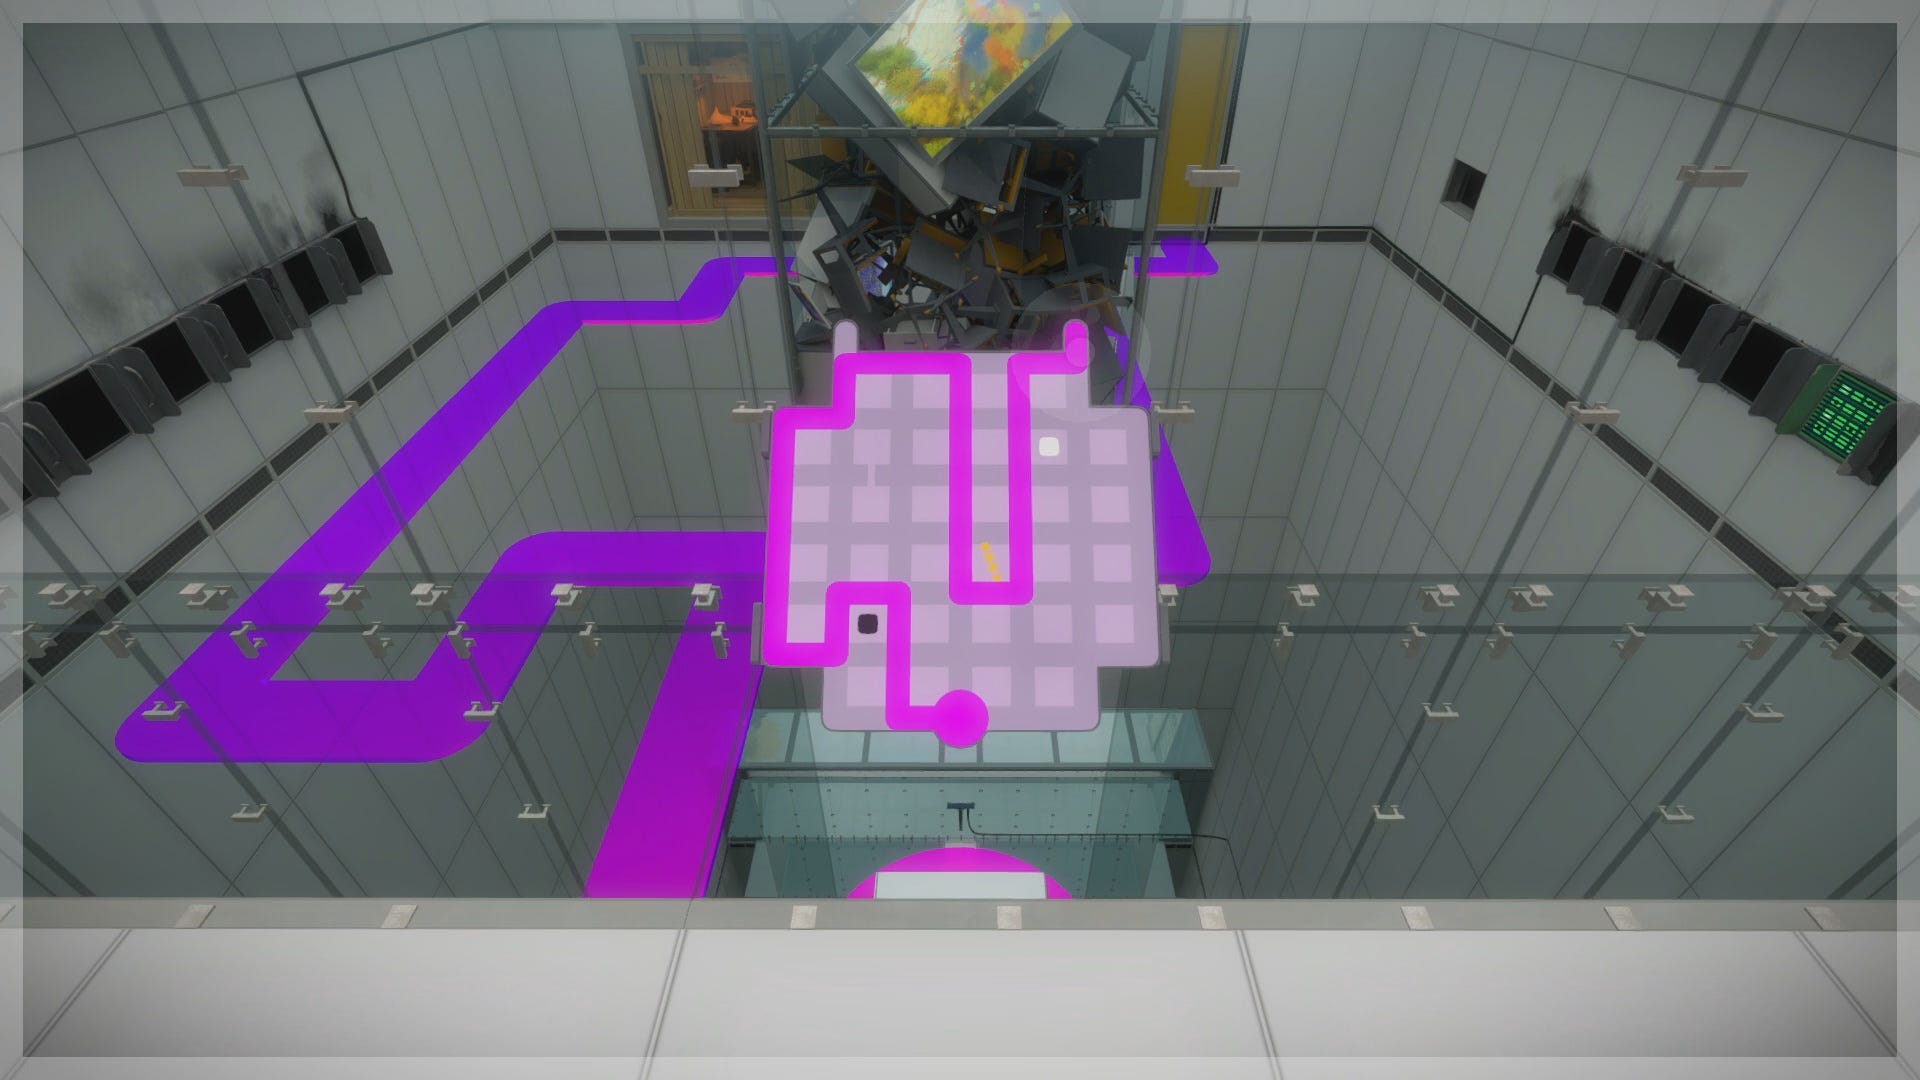
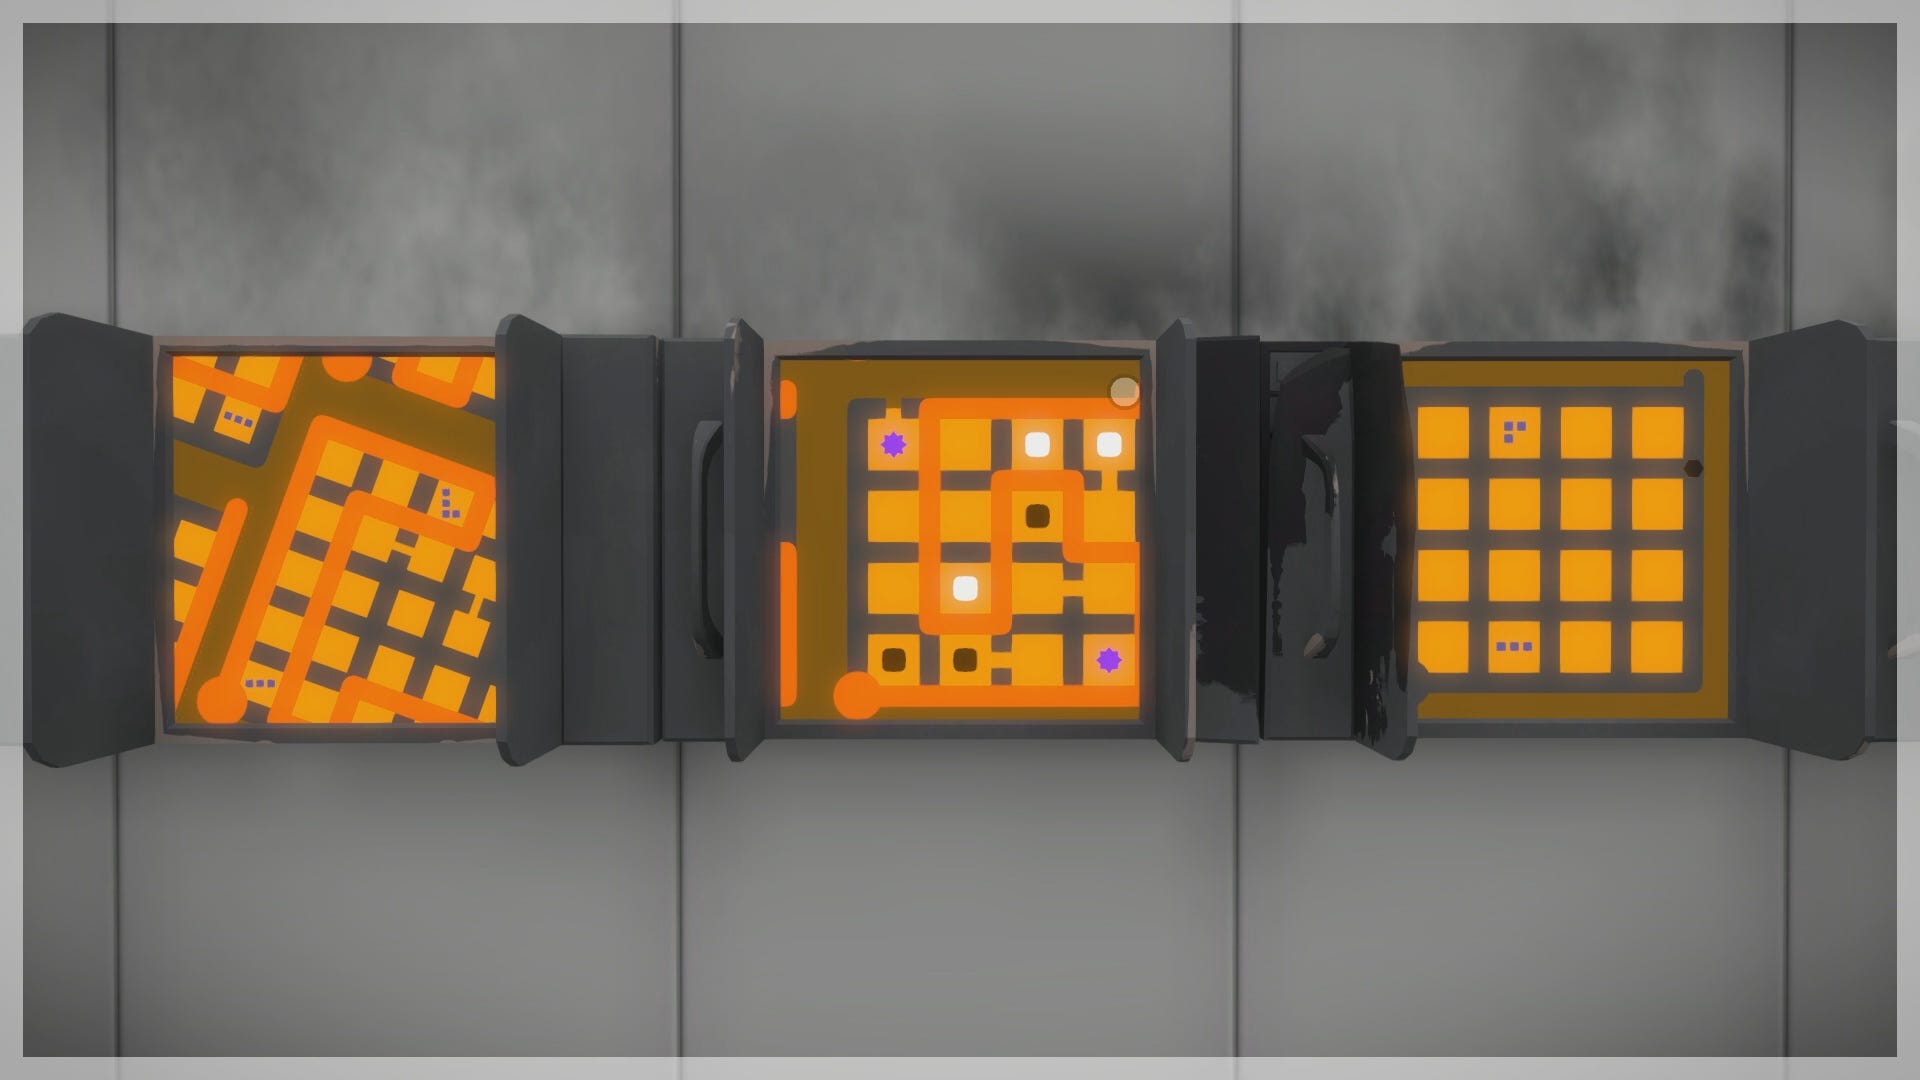
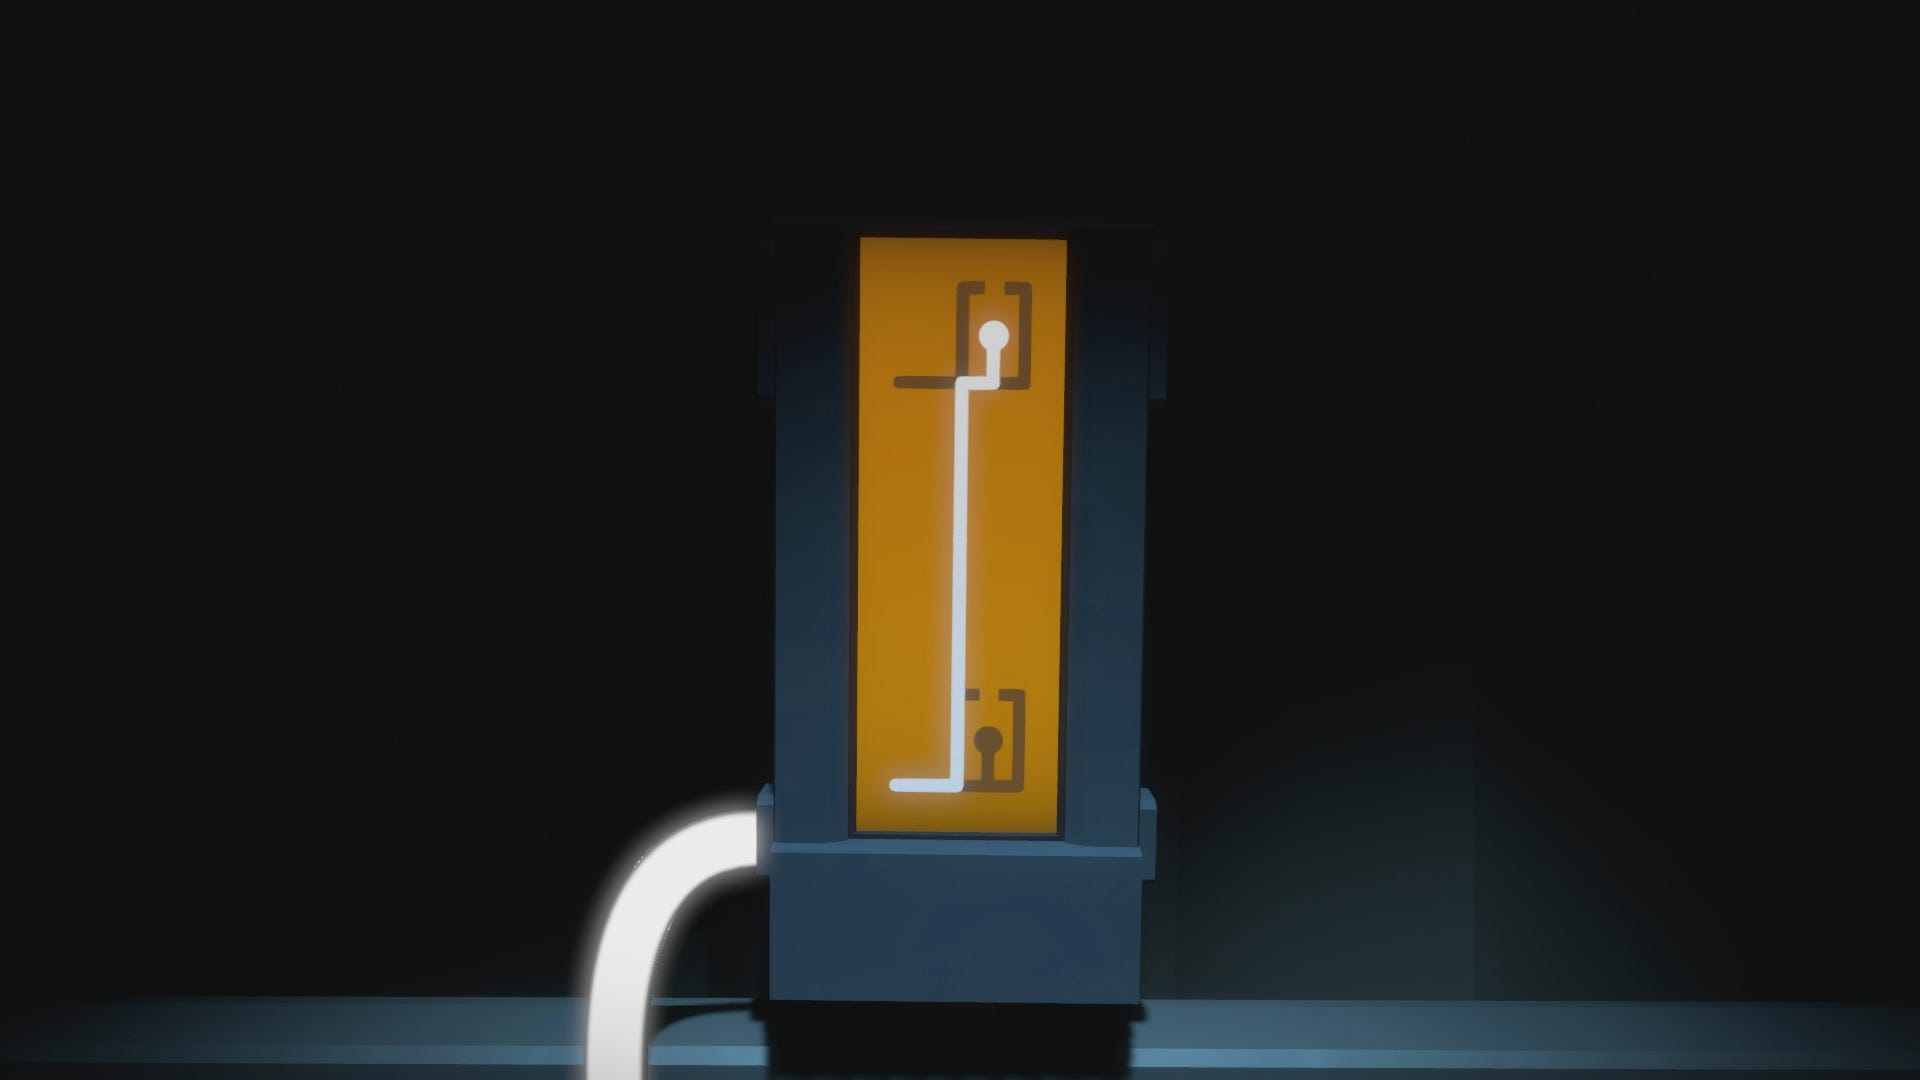
To enter the Mountain, you must solve the hexagonal puzzle in the center to unlock the hatch. Start by completing the line switch to activate the puzzle grid. To unlock the hatch, you must draw three different solutions on the grid. Each solution will have a different endpoint, which causes a segment of the hatch to open.
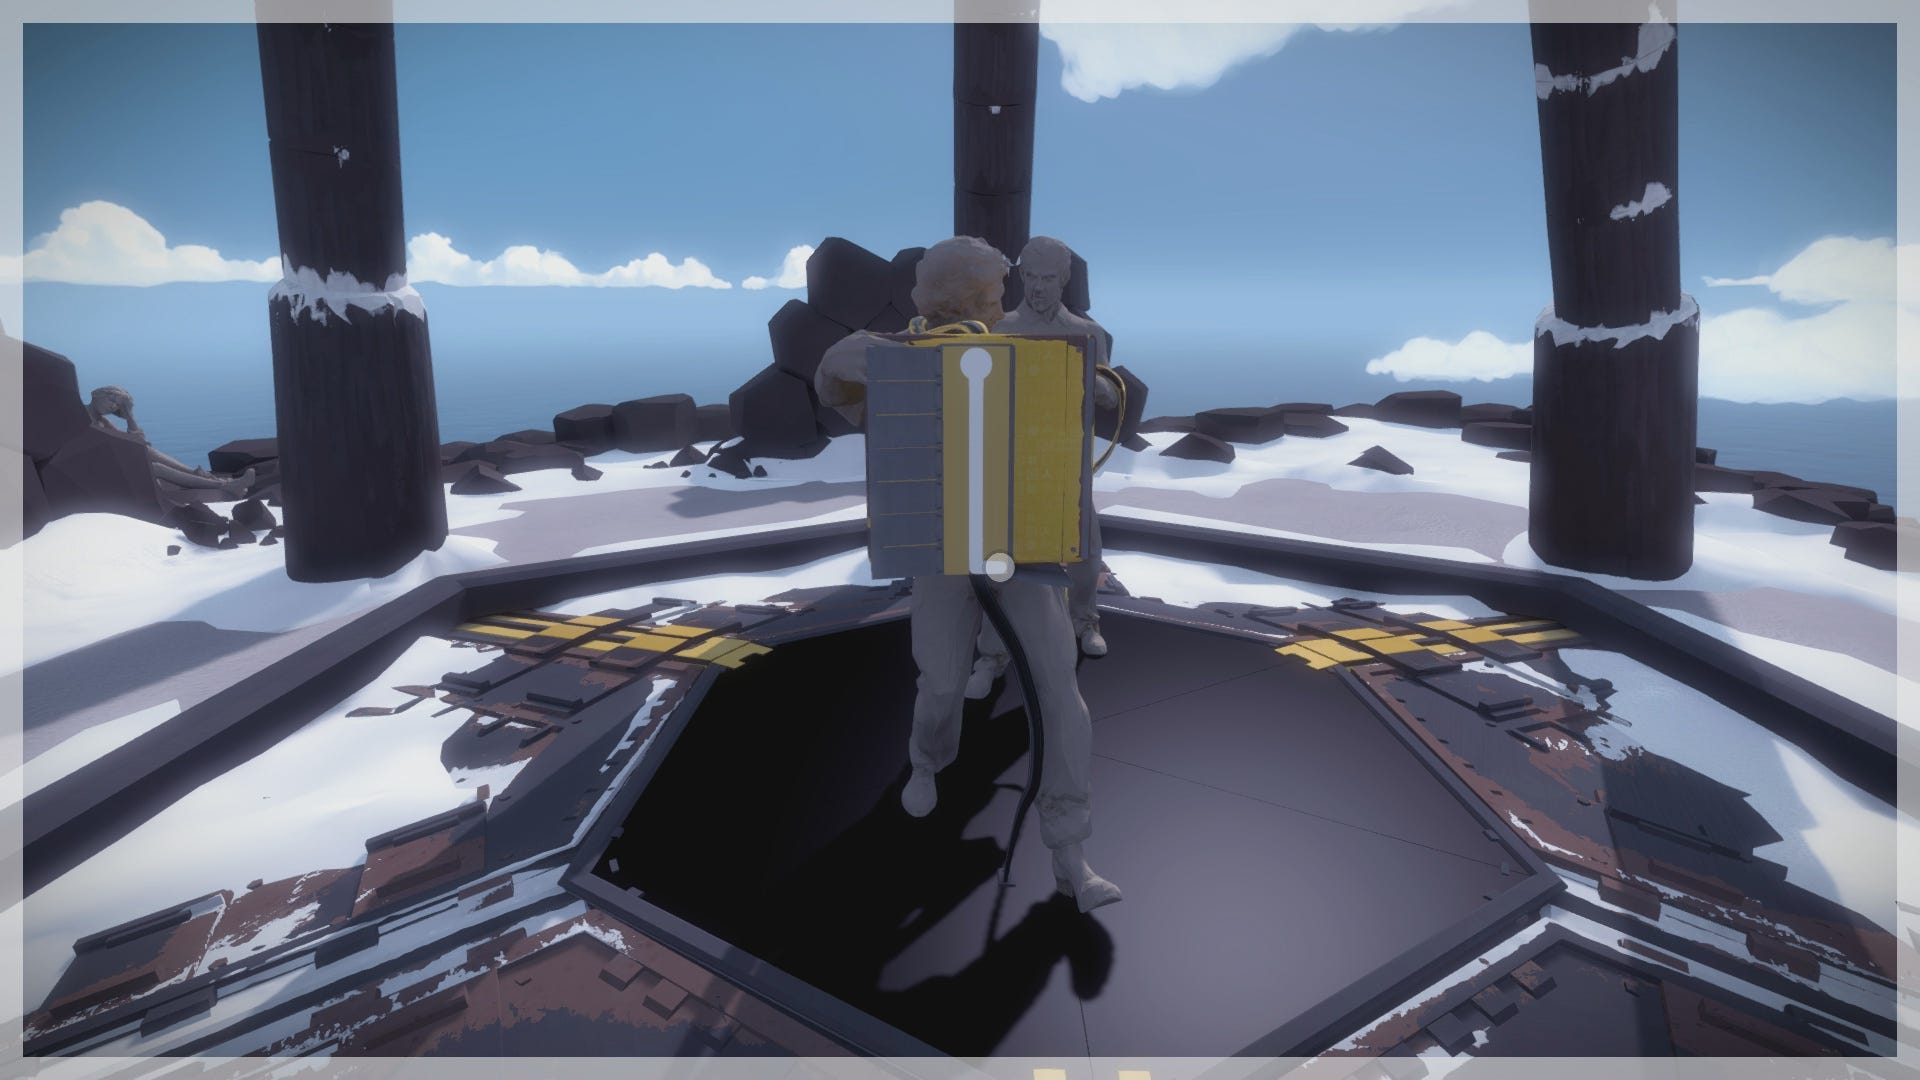
Since the statues in the center create a bit of an obstacle, you will need to position yourself at certain angles around the hatch in order to draw the solutions without obstruction. We’ve provided our solutions below.
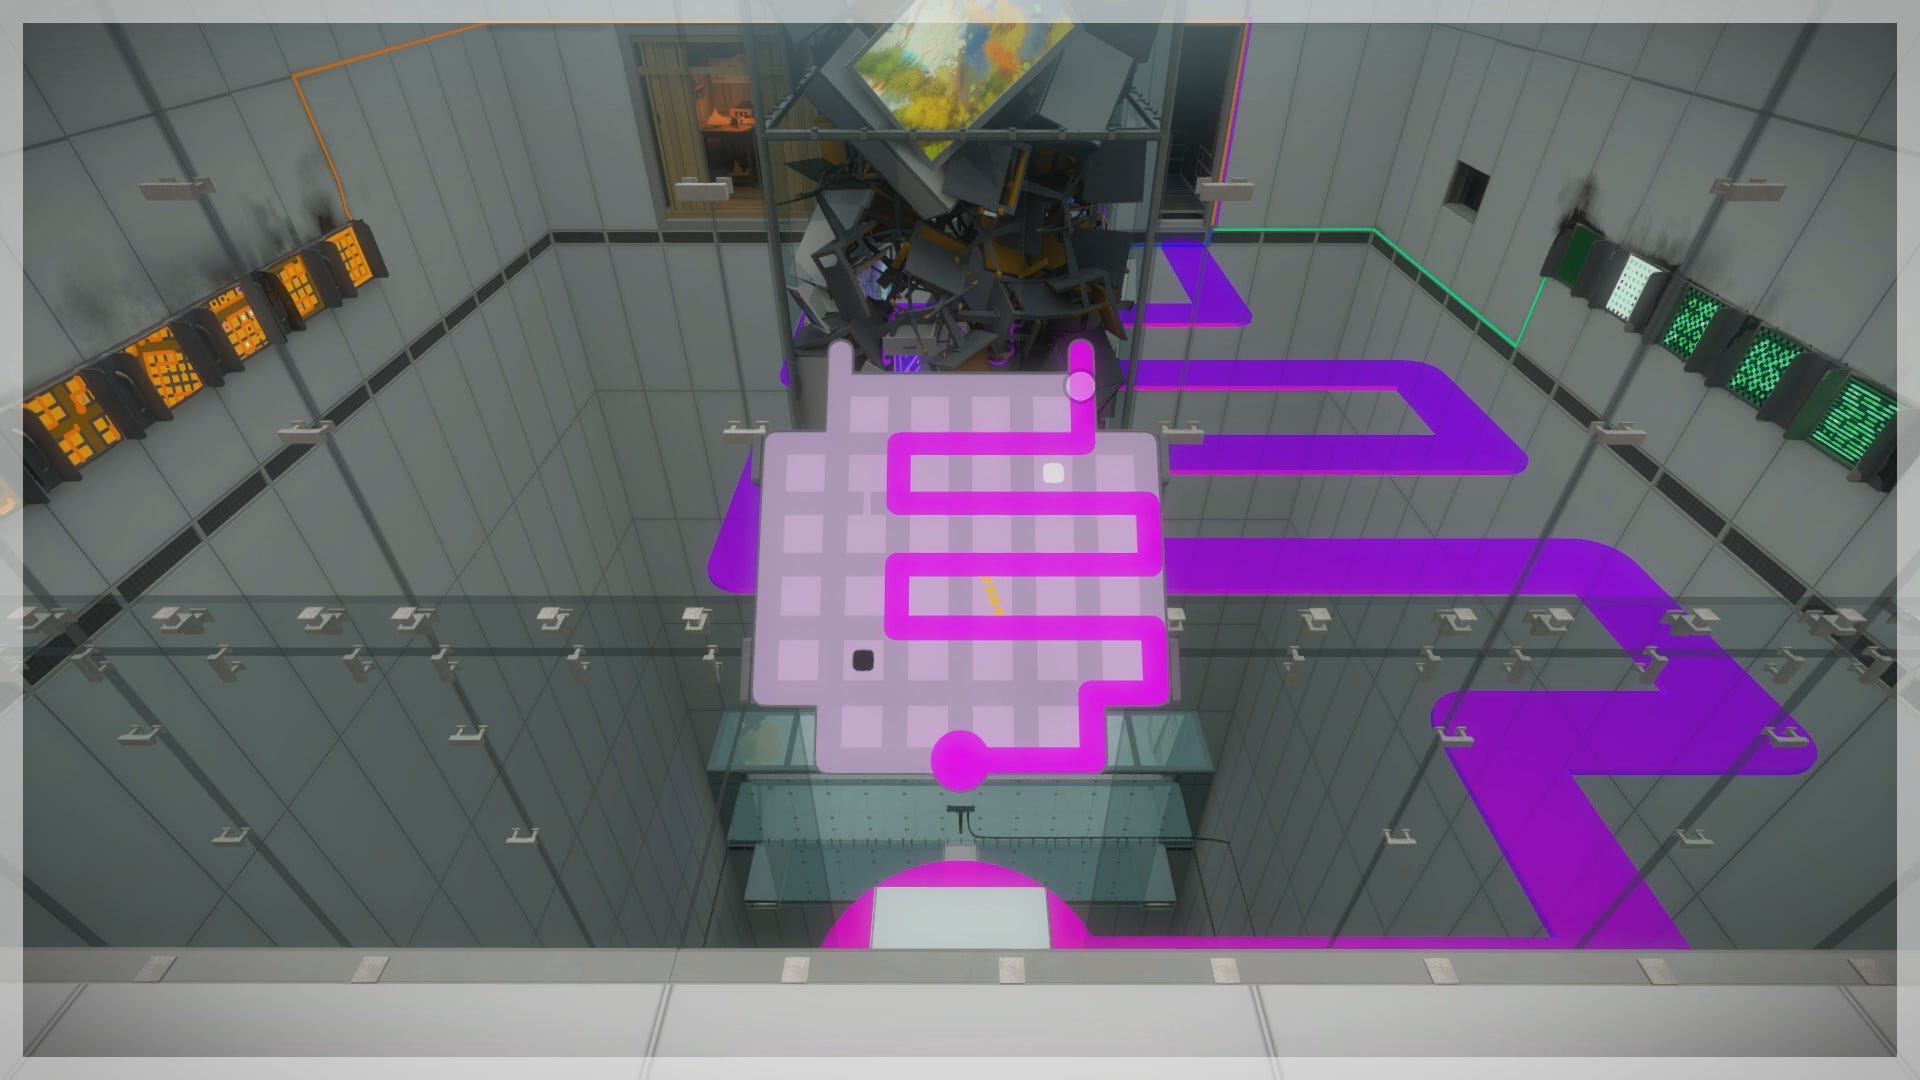
Descend the staircase into the Mountain down to the first chamber. There will be a lot of back-and-forth in this room, so please bear with us.
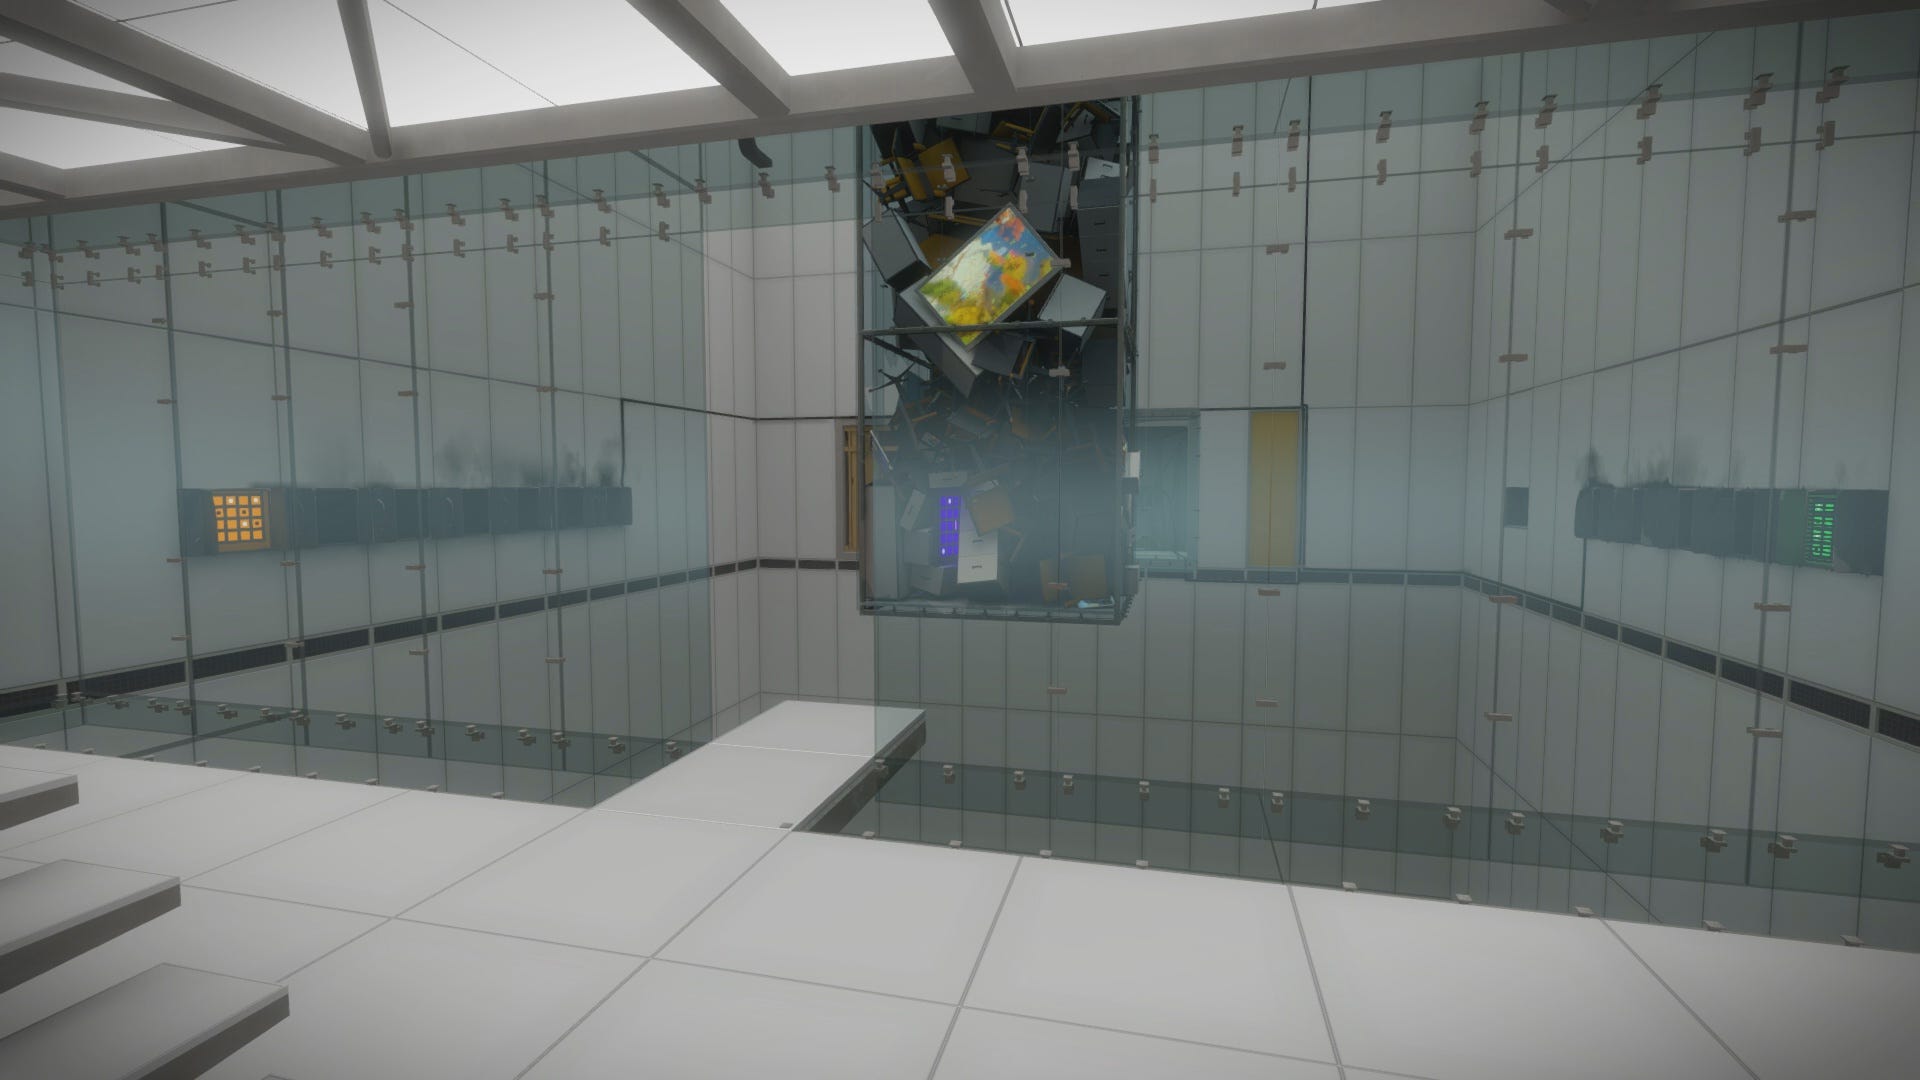
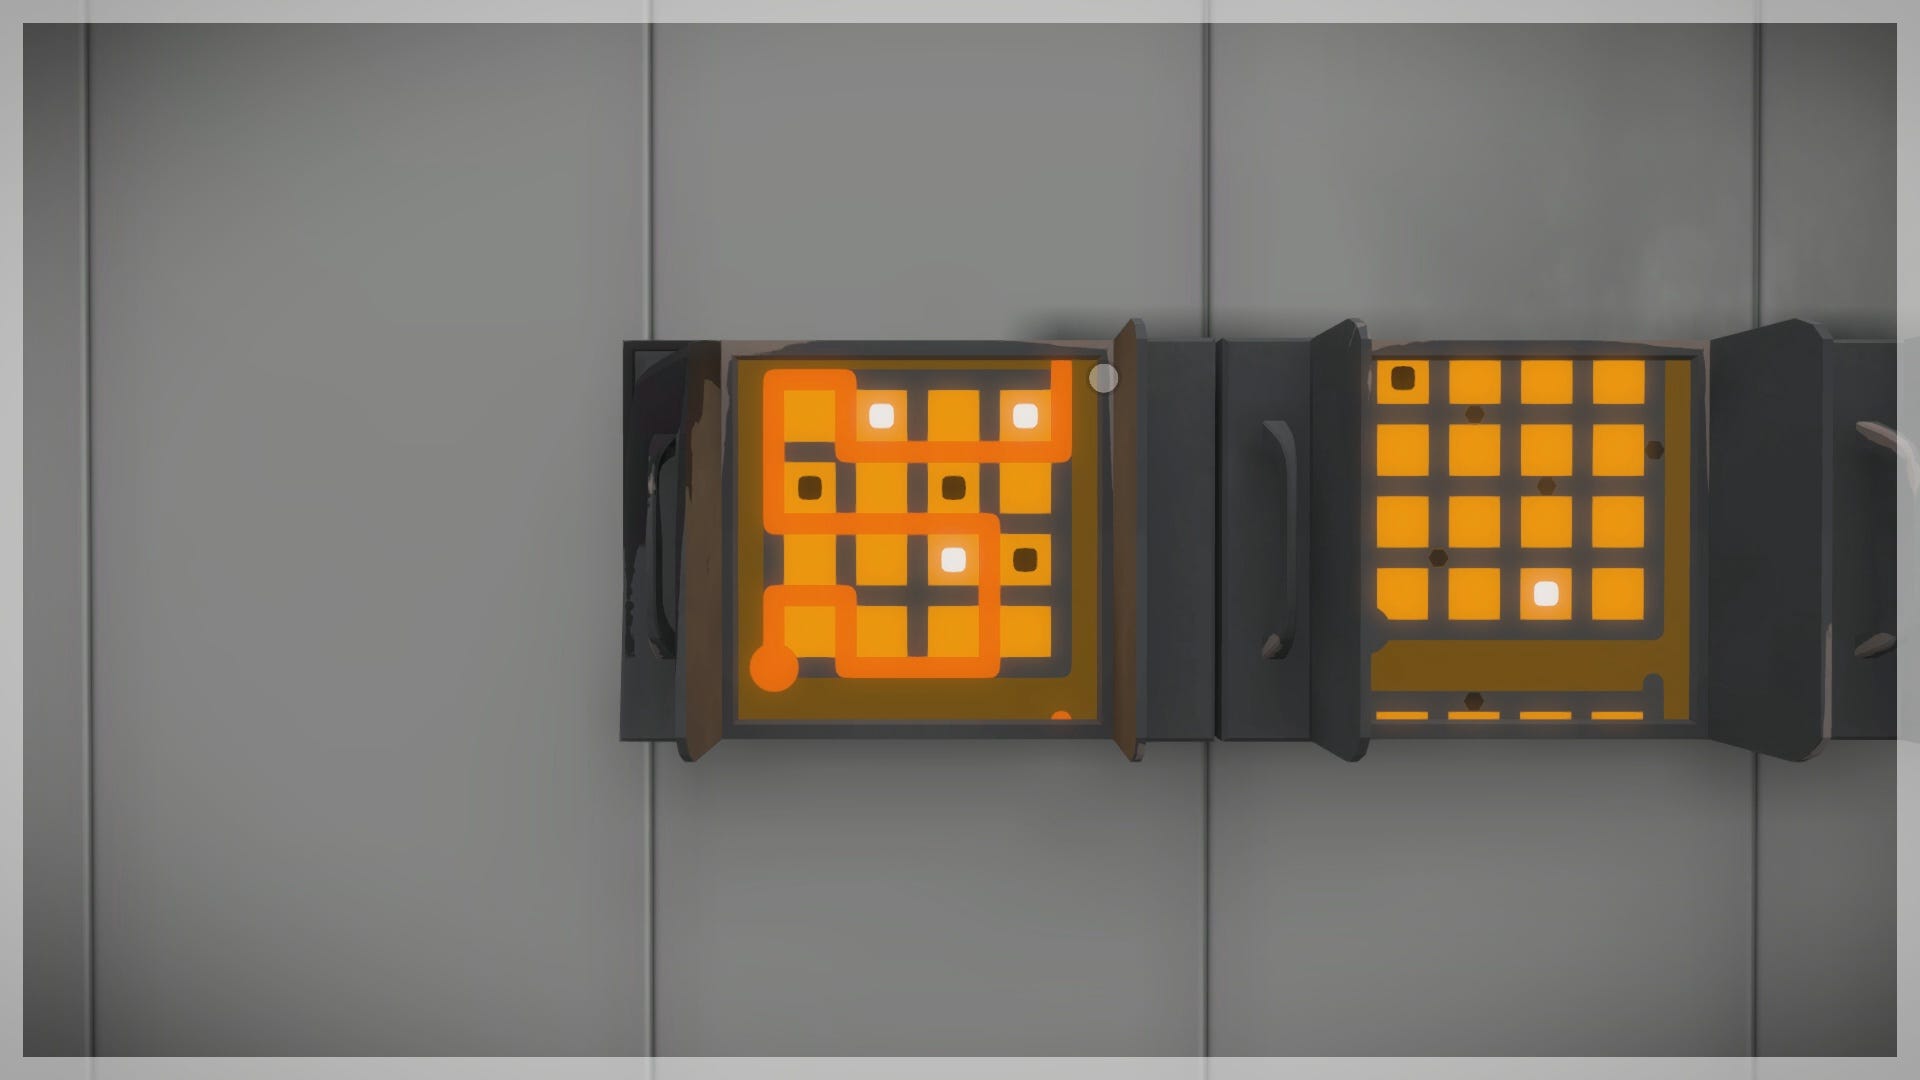
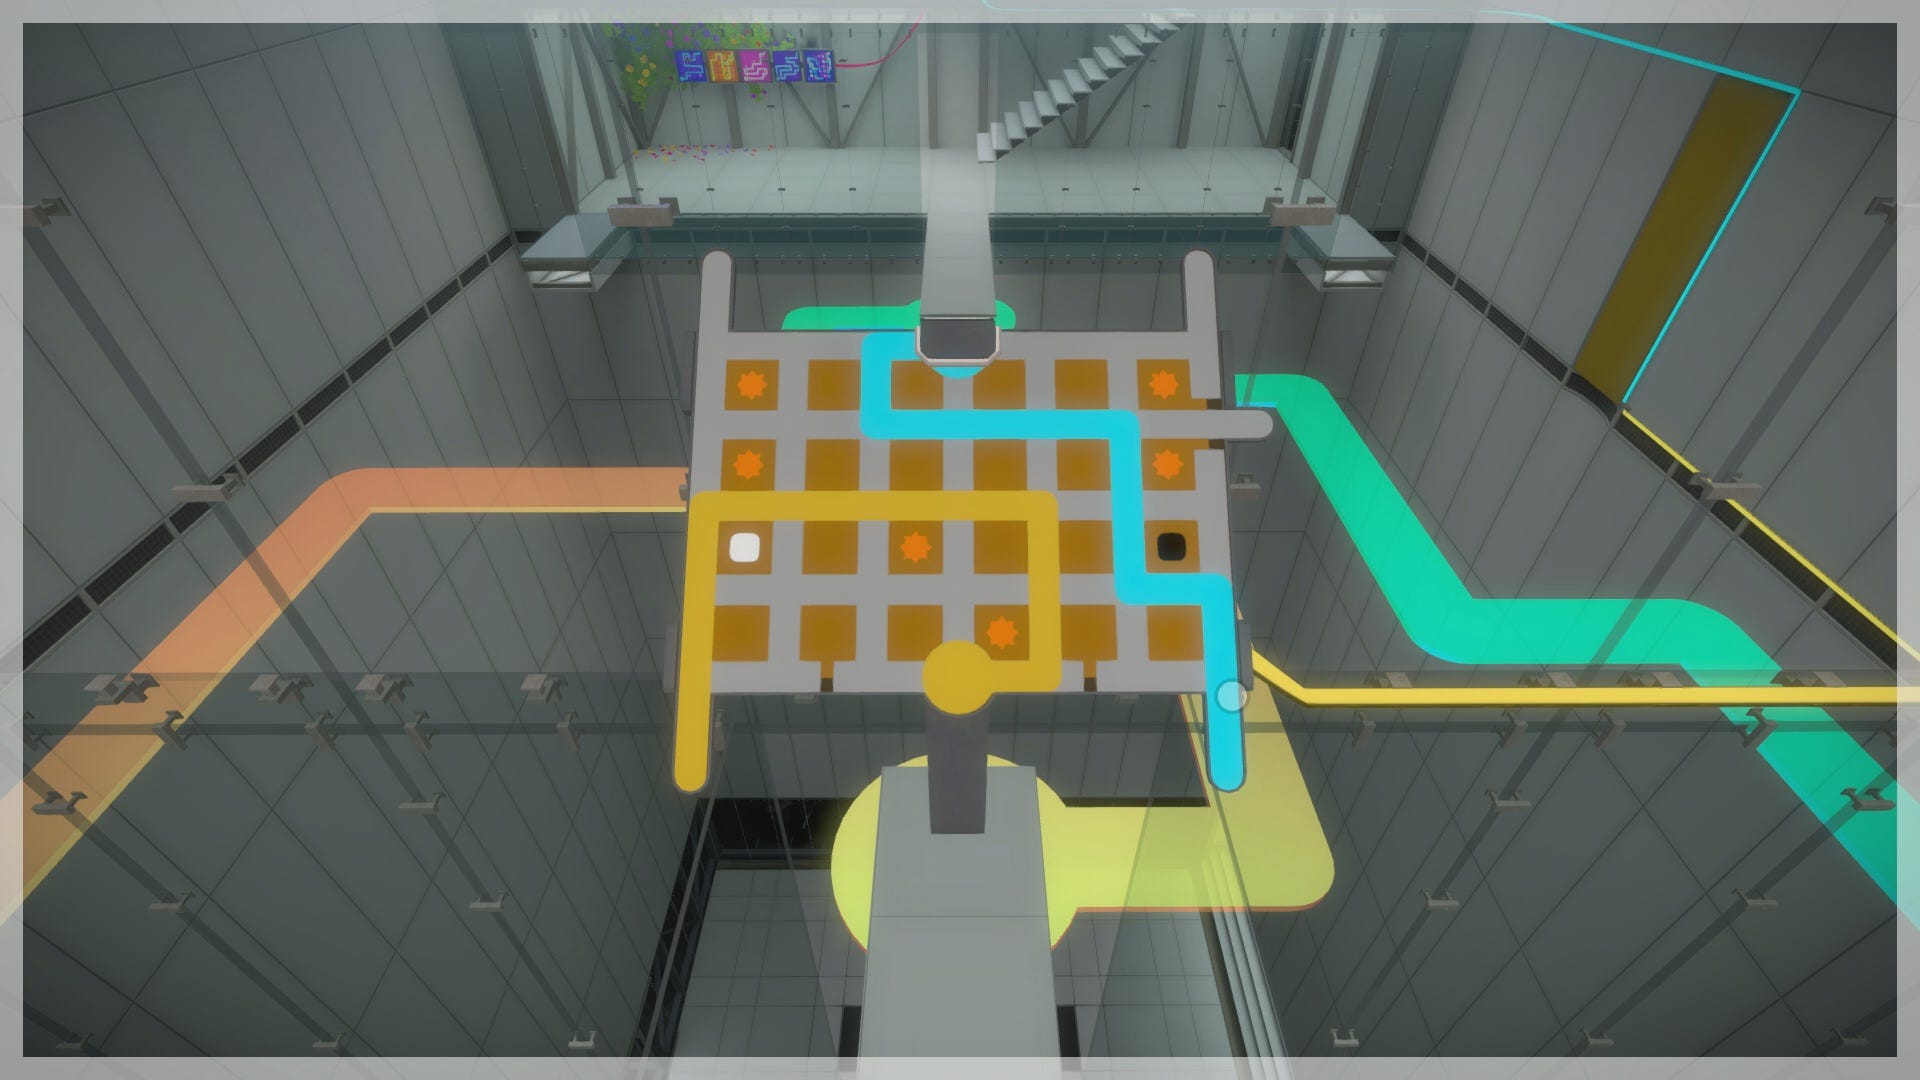
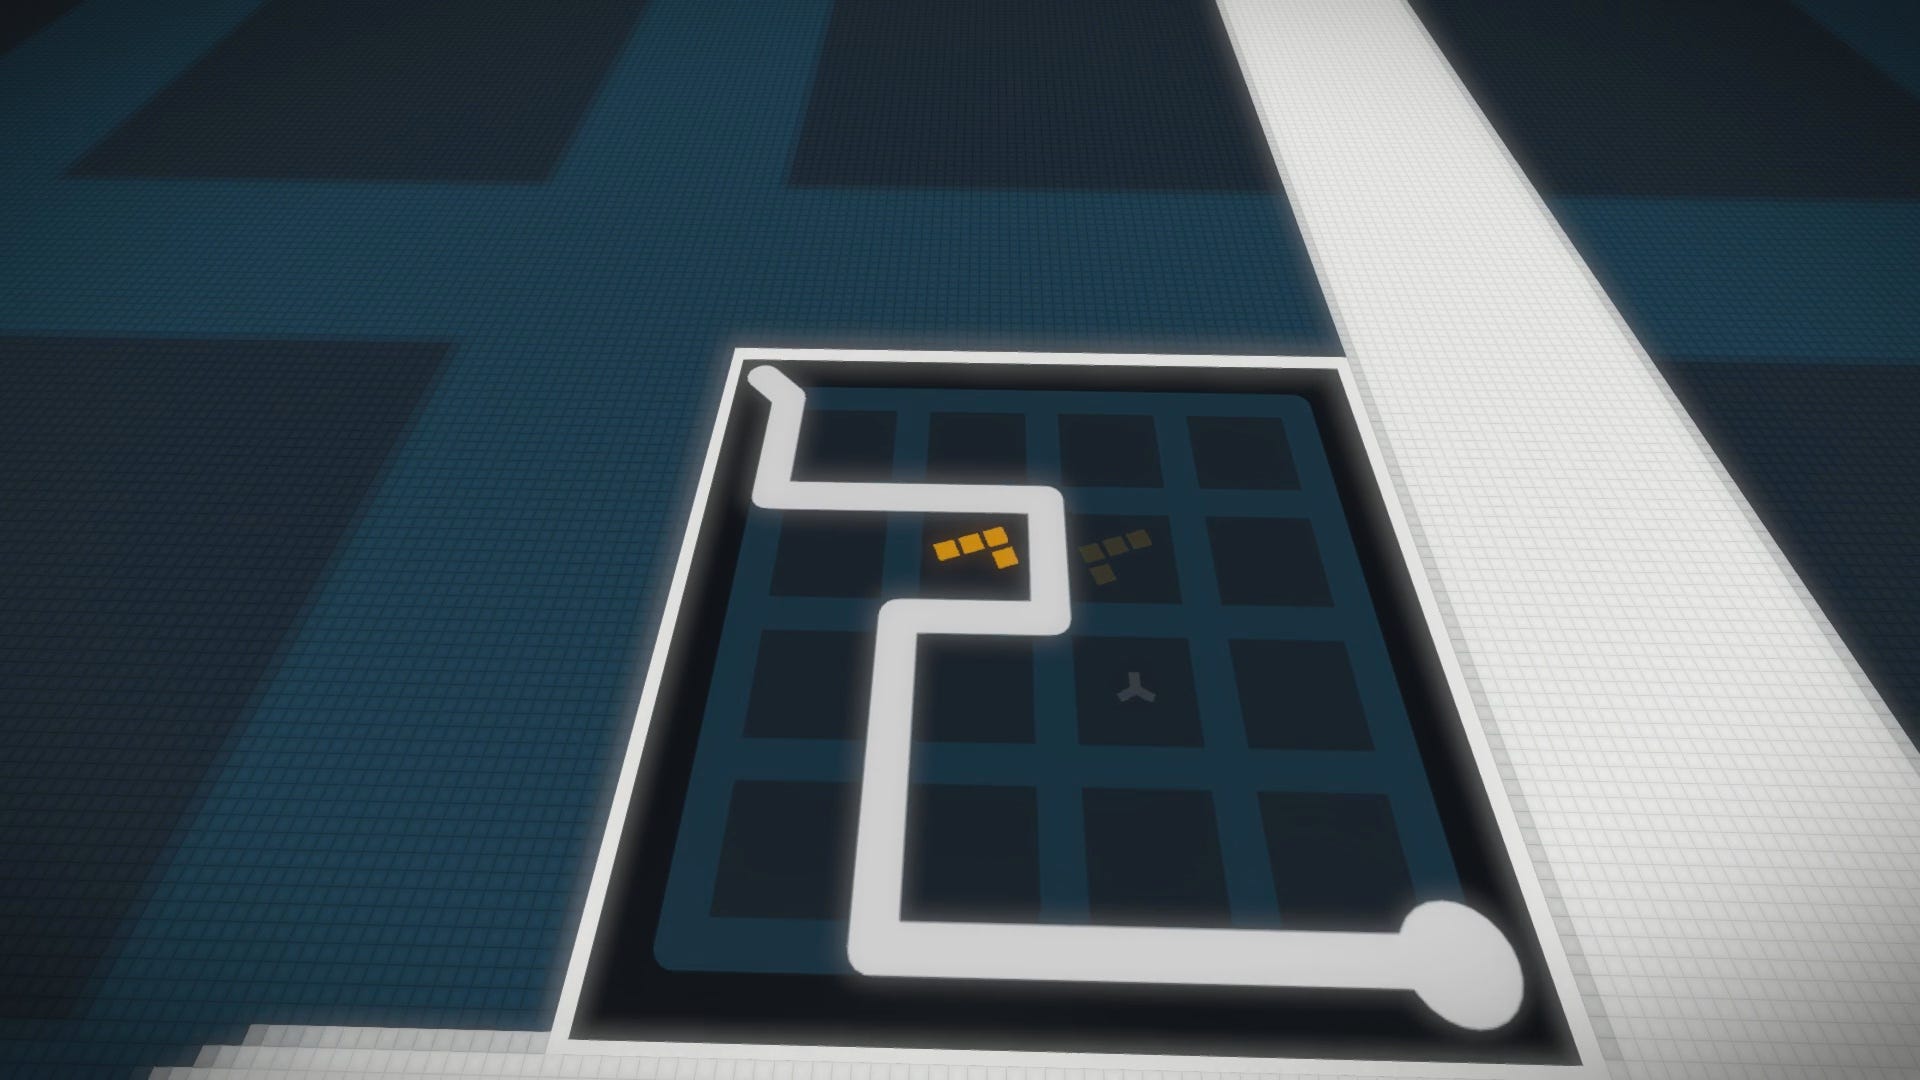
Go upstairs to the second level and input the solution below on the puzzle panel. As you draw the solution, a walkway will simultaneously form within the empty chamber in the center.
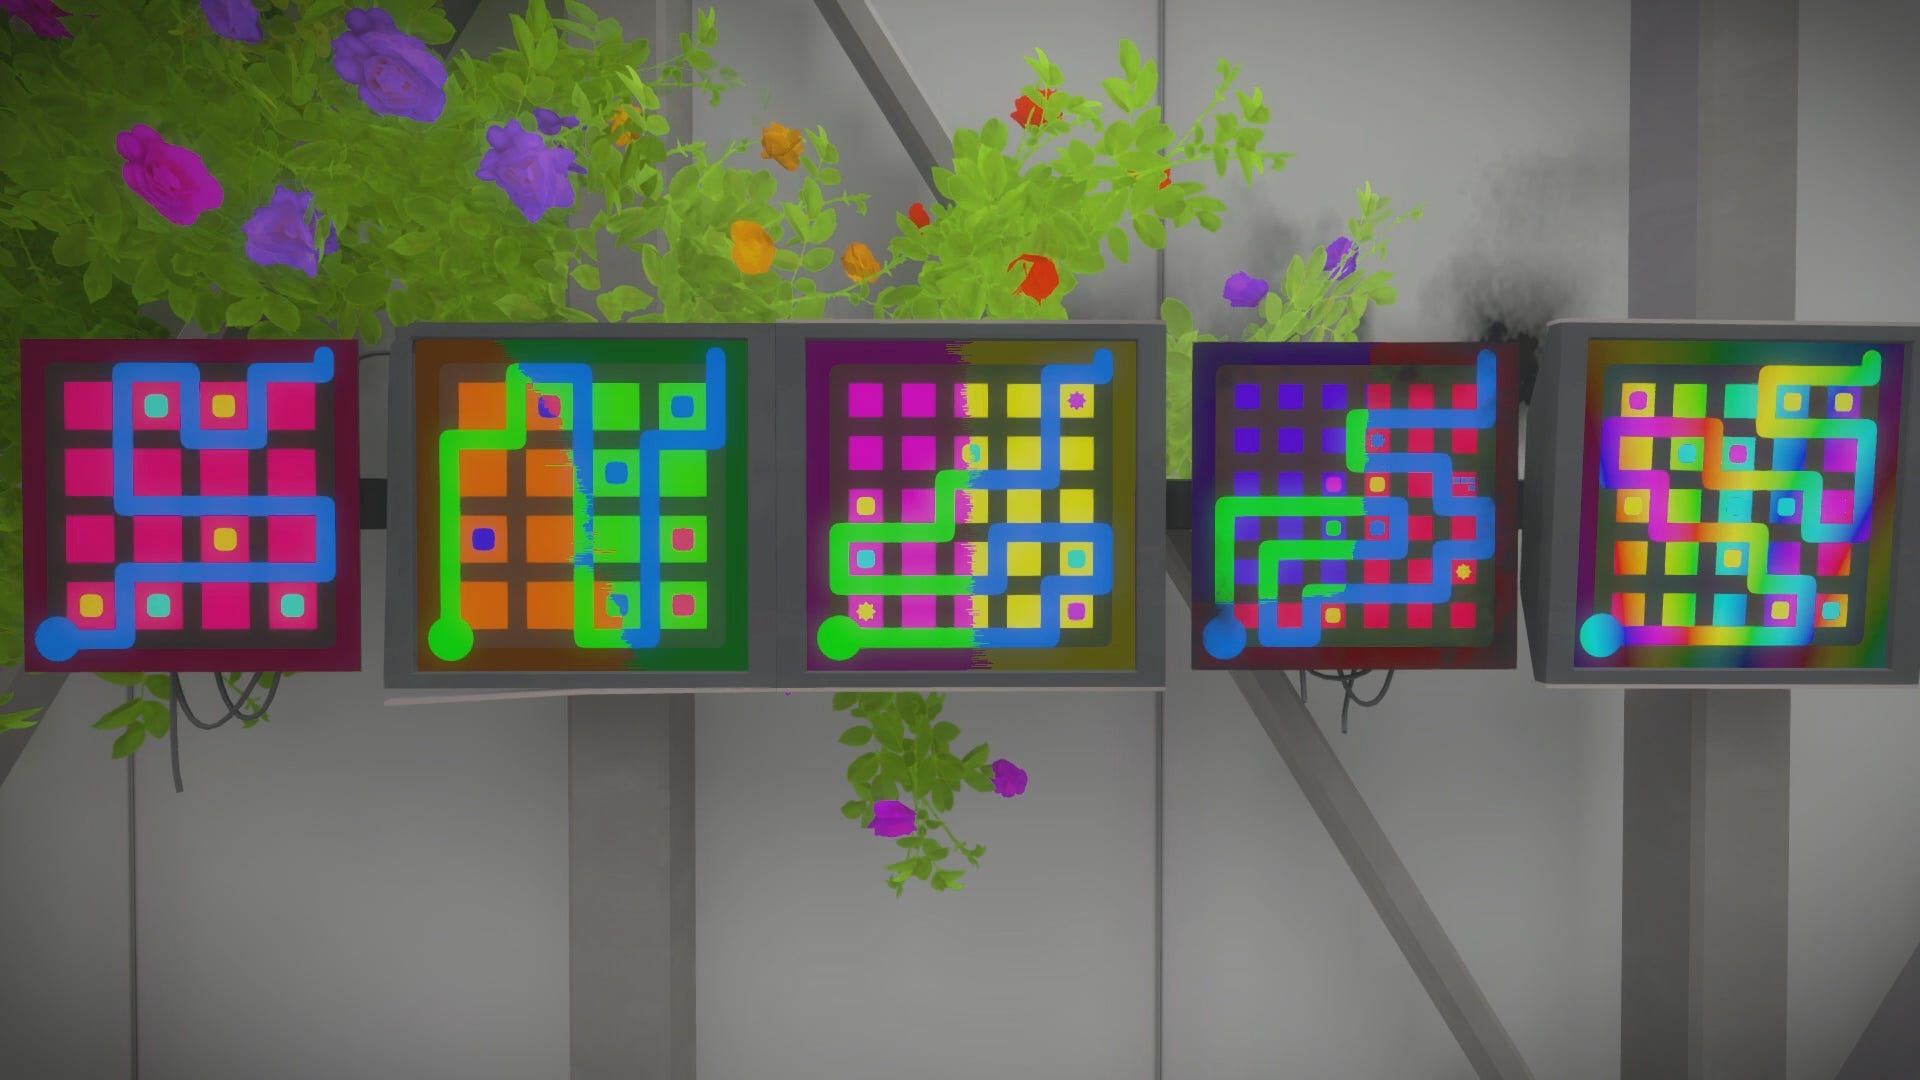
Head downstairs and walk onto the new walkway in the chamber. Begin the series of yellow puzzle panels on the wall. These puzzles seem fairly simple, but it’s their orientation that makes them challenging. As you proceed through the puzzles, the panels will begin to shift and move as you attempt to draw your solution.
Note that you must begin each panel by placing your cursor in the bottom left corner where the starting point would be, not where it actually is on the panel. We have provided our solutions for you below, but ultimately the ability to solve these puzzles comes down to your own personal dexterity.
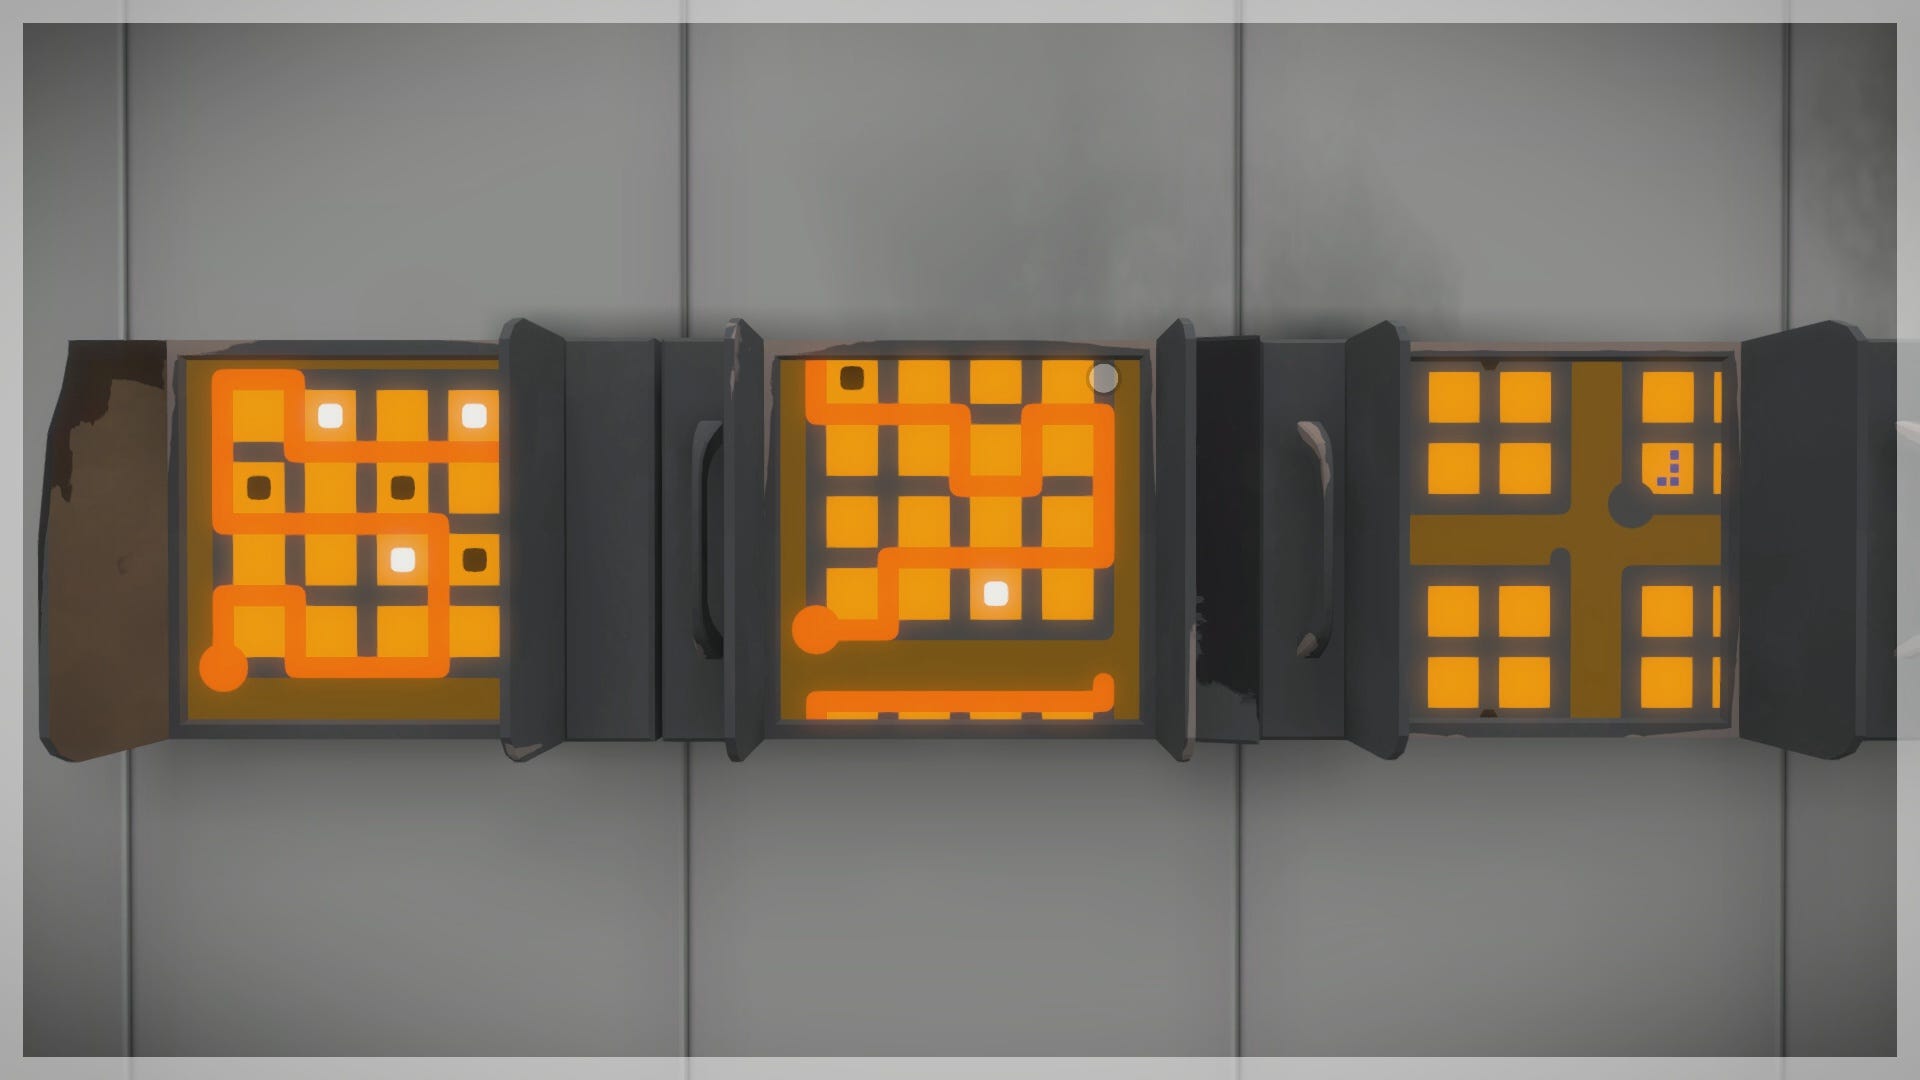


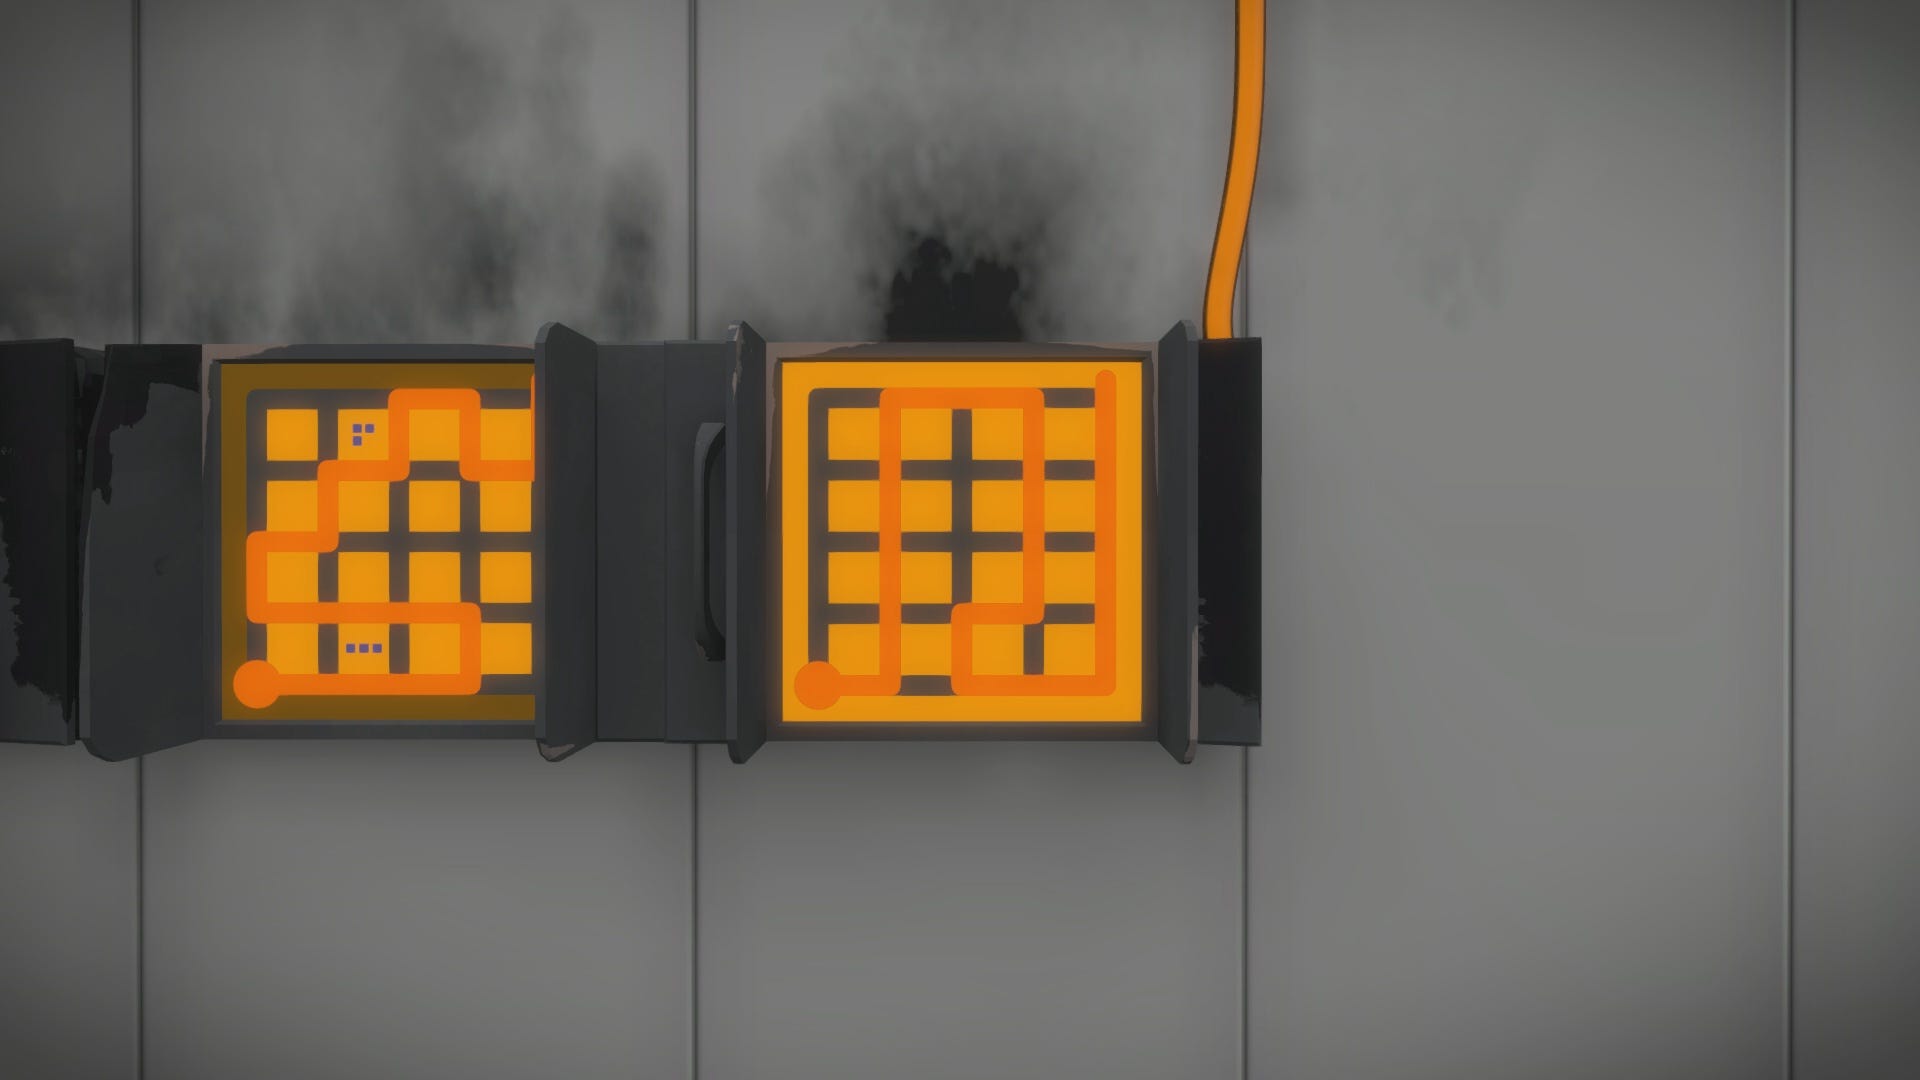
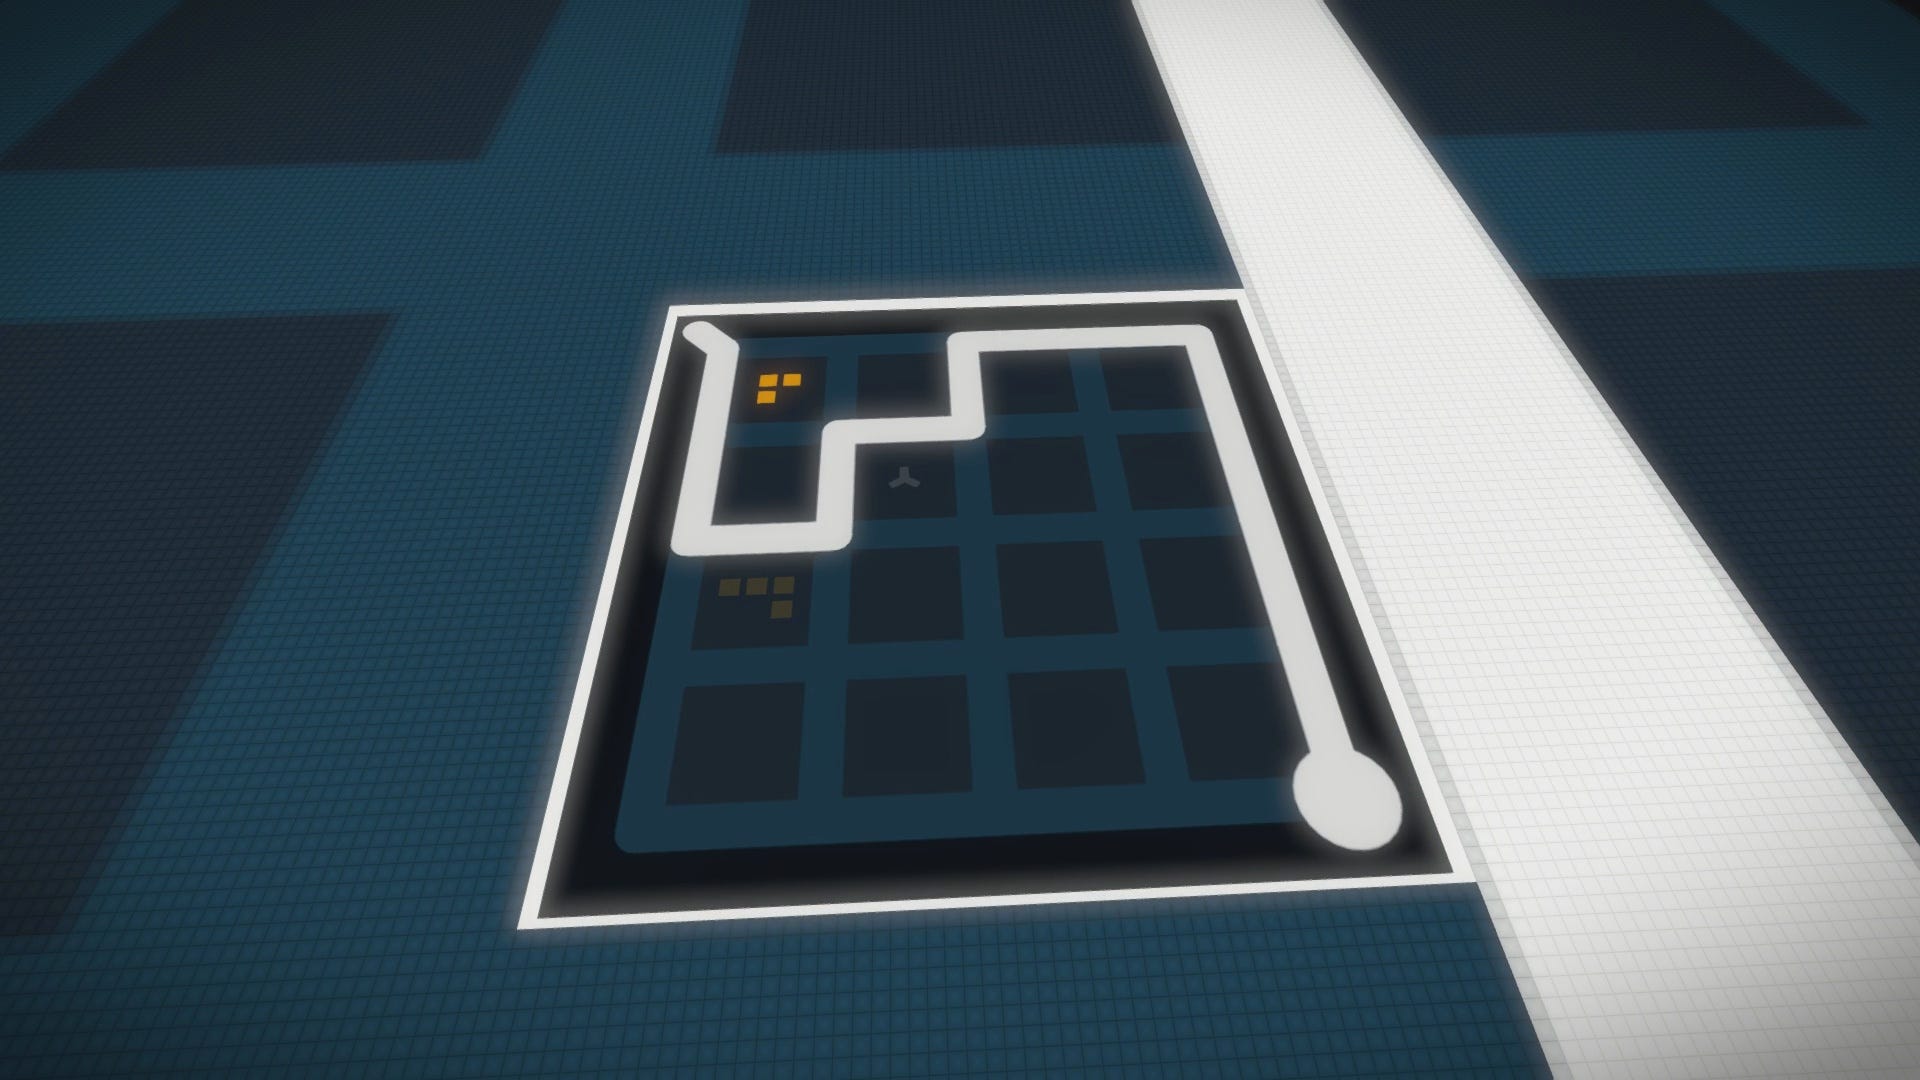
Return to the room and draw a new solution on the puzzle panel upstairs. This new path will allow you to solve the green panels on the right side of the chamber, as well as some panels in the center.
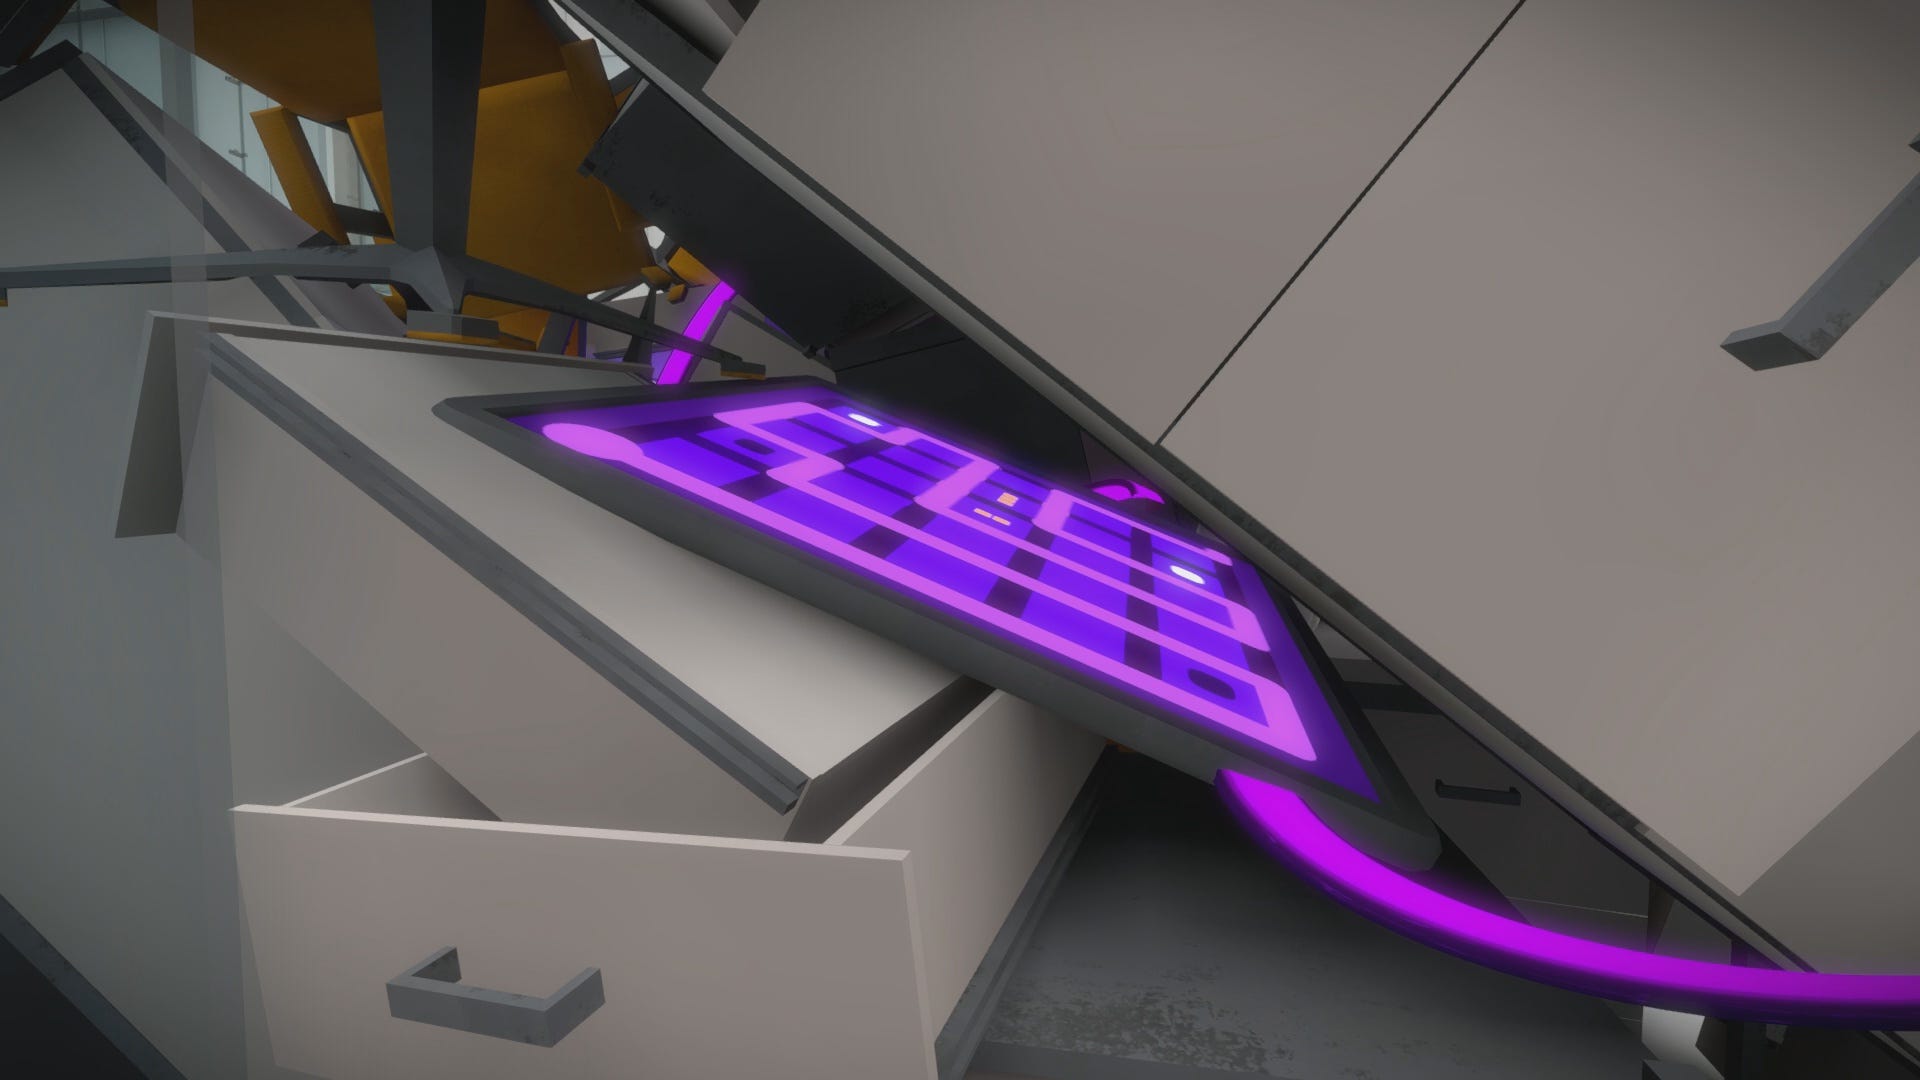
Walk onto the path and approach the debris in the center. There is a purple puzzle panel wedged in between the debris straight ahead of the door. Solve the panel using our solution below.

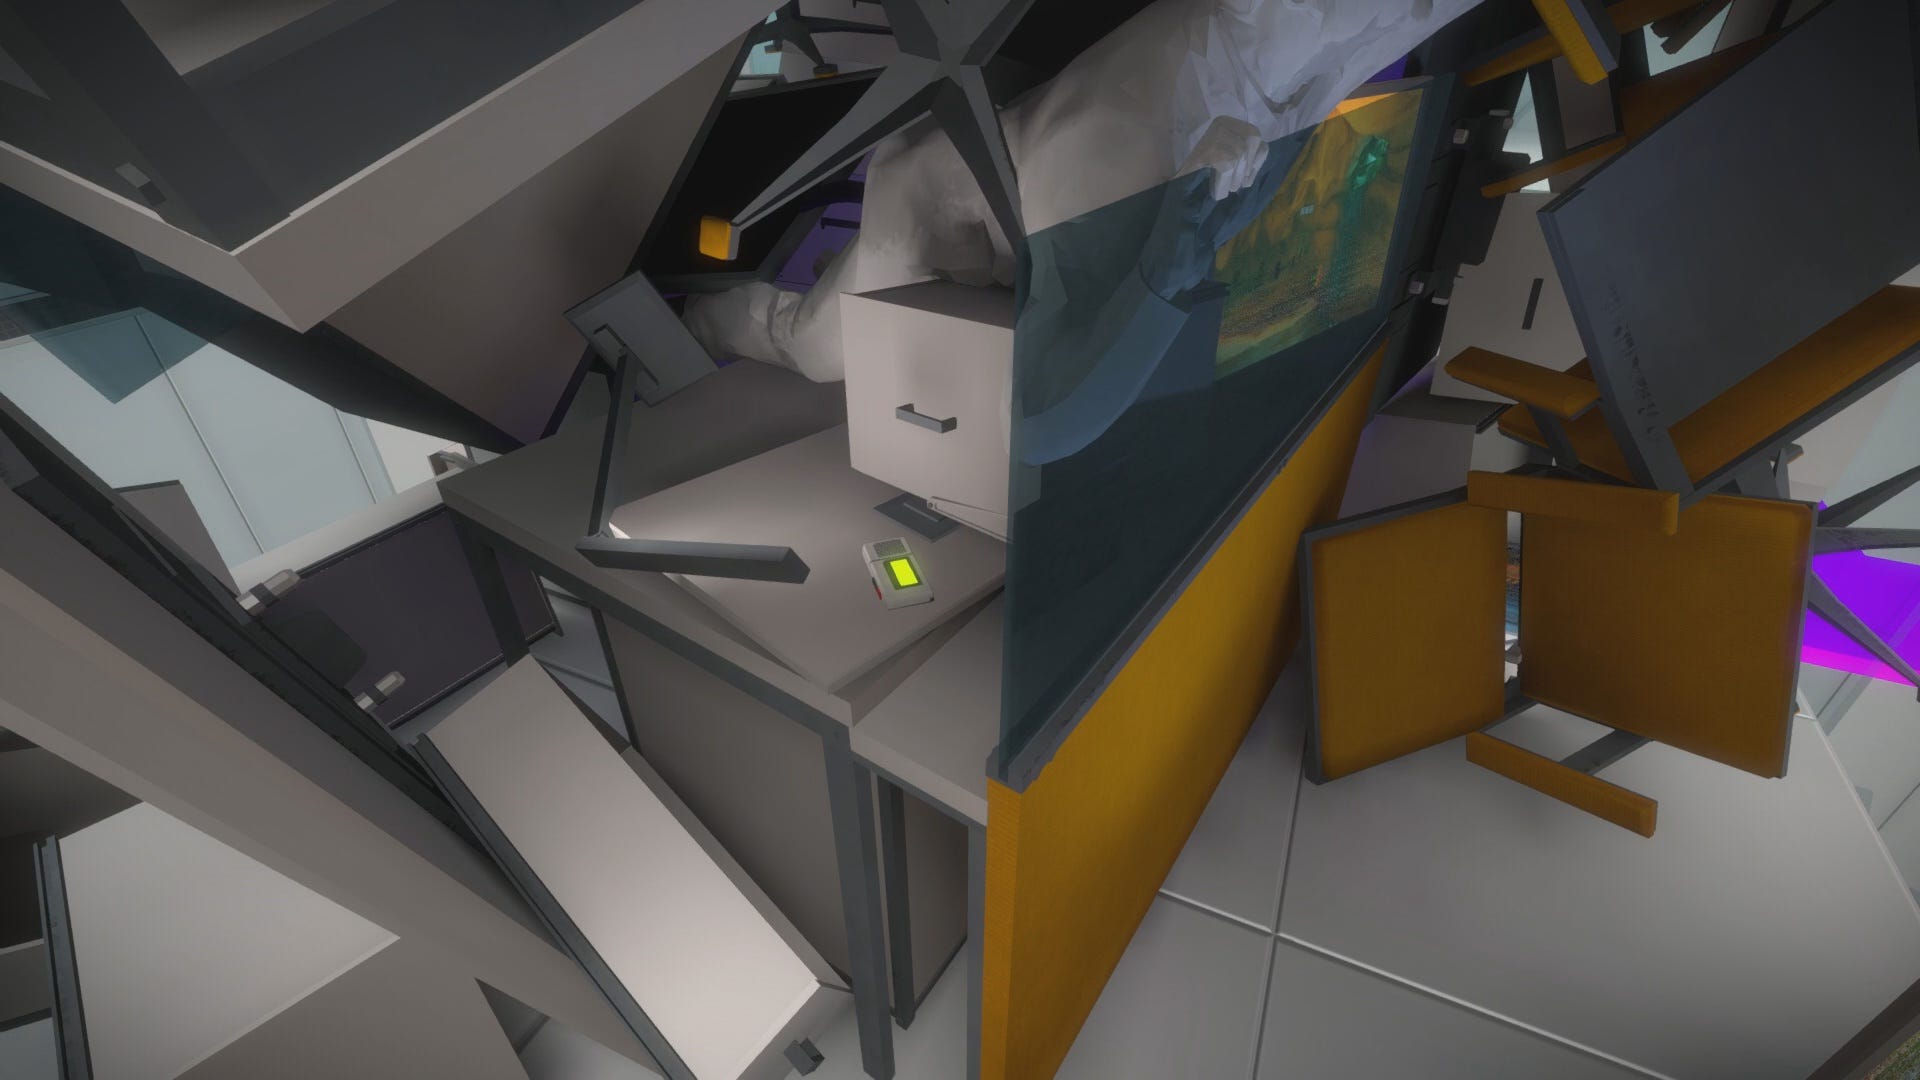
Pass around the left corner, and walk in between the debris to reach the path on the other side. Make sure to turn and collect the audio recording off of the desk in the center of the debris before continuing.
Follow the path to the other side of the debris, and solve the second purple panel wedged inside. Consult our solution below if necessary.
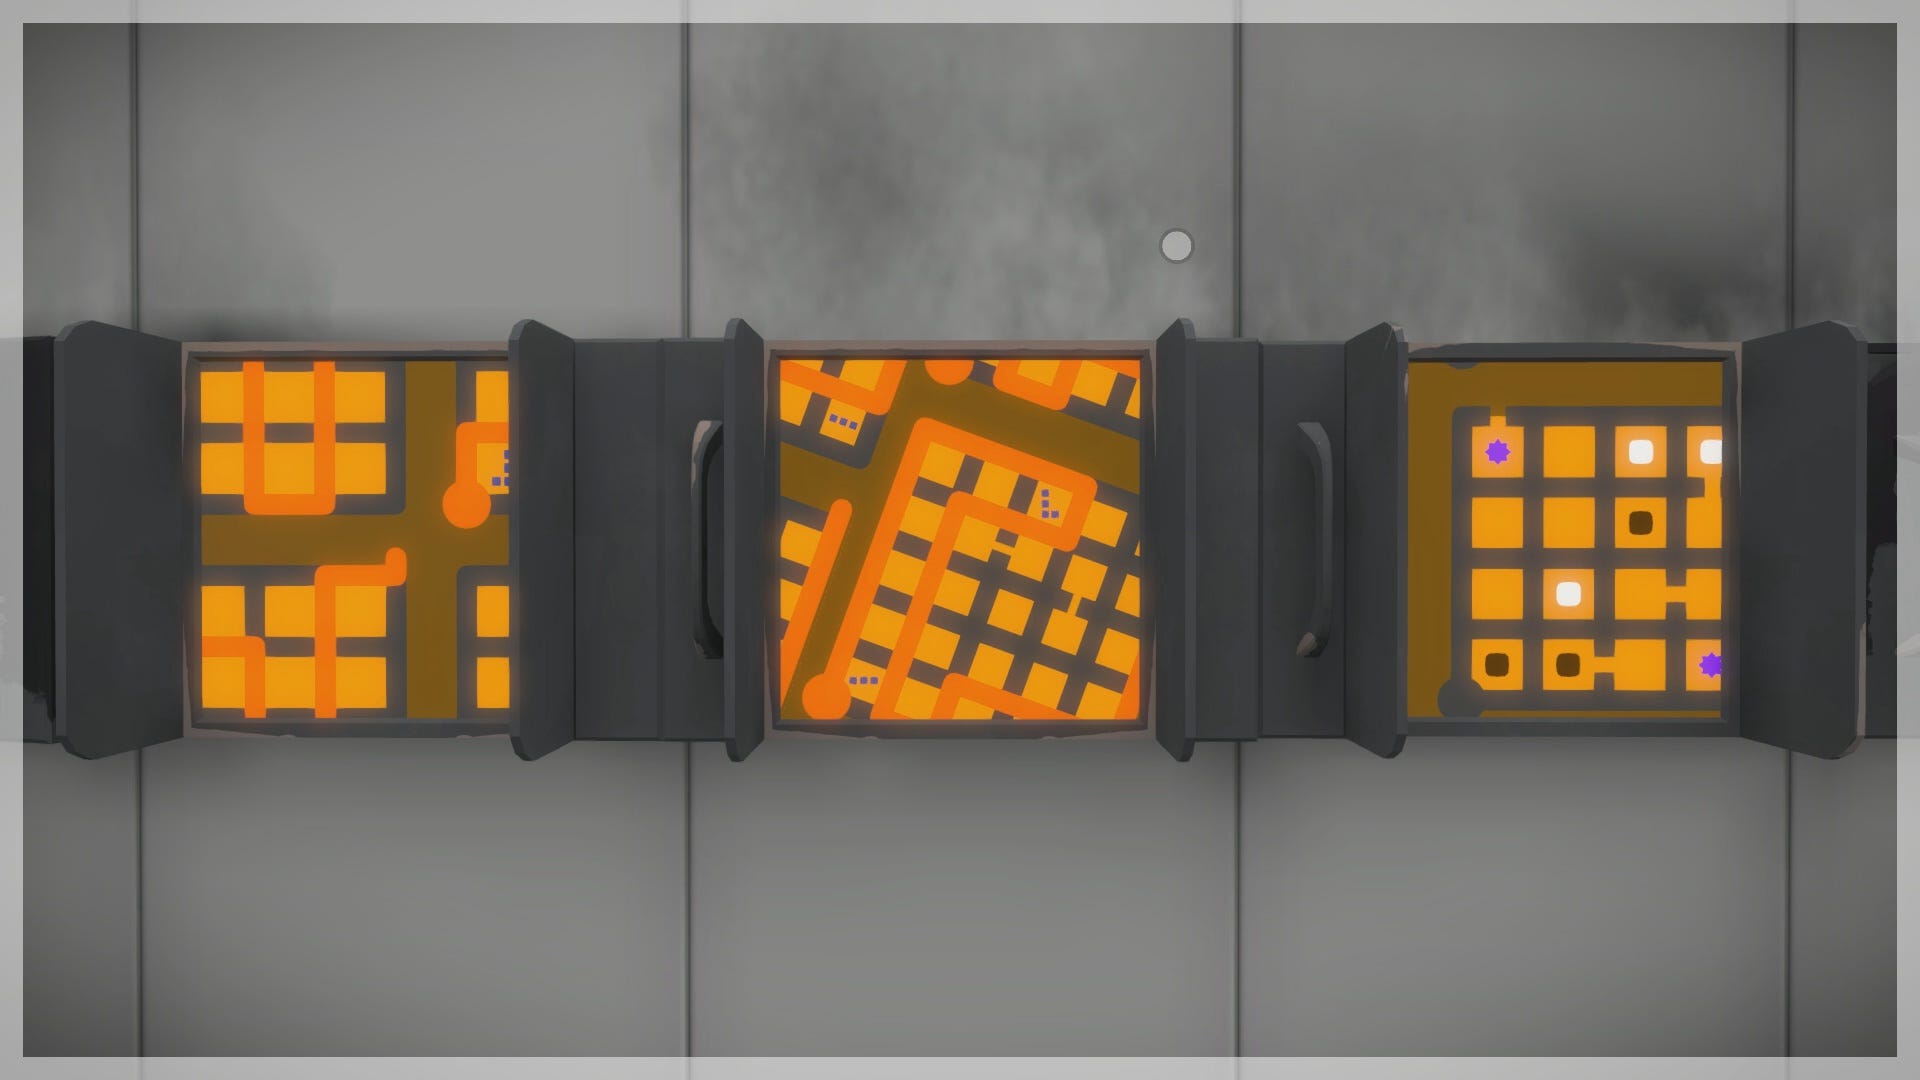
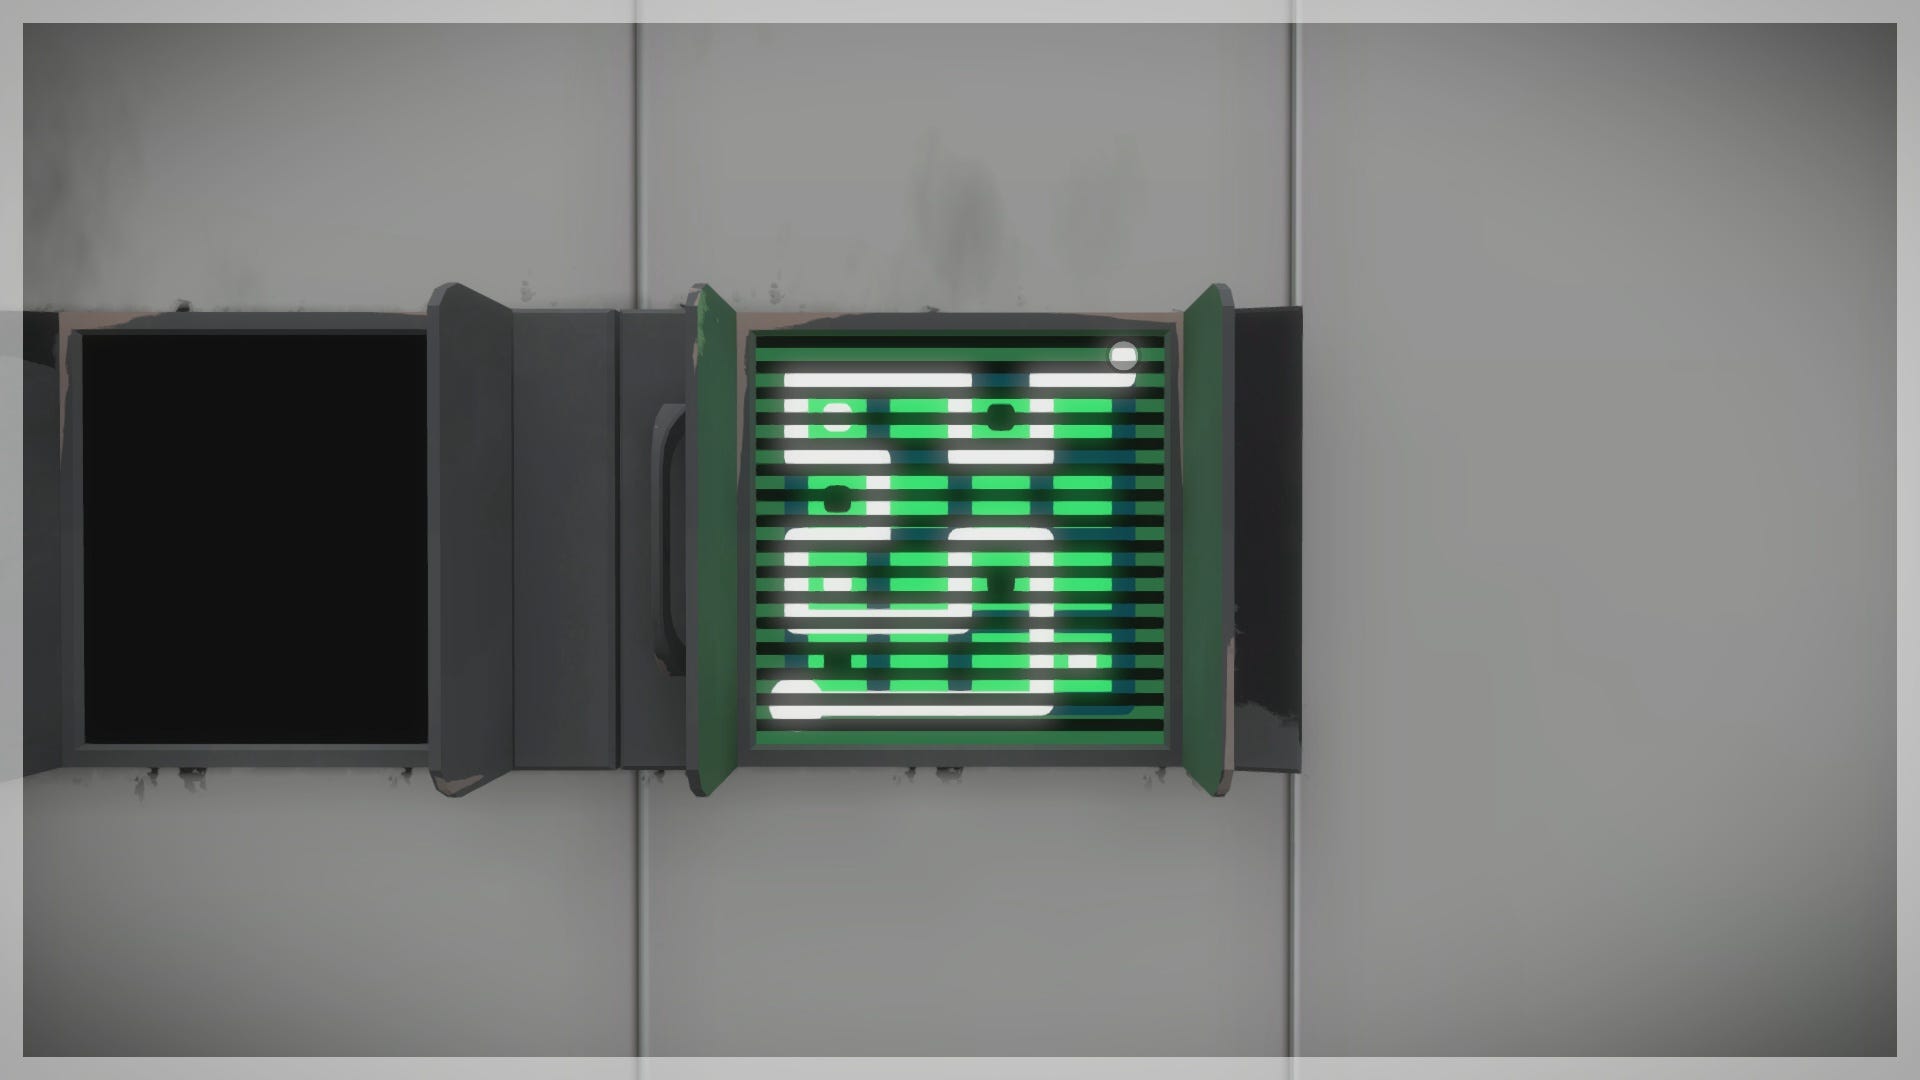
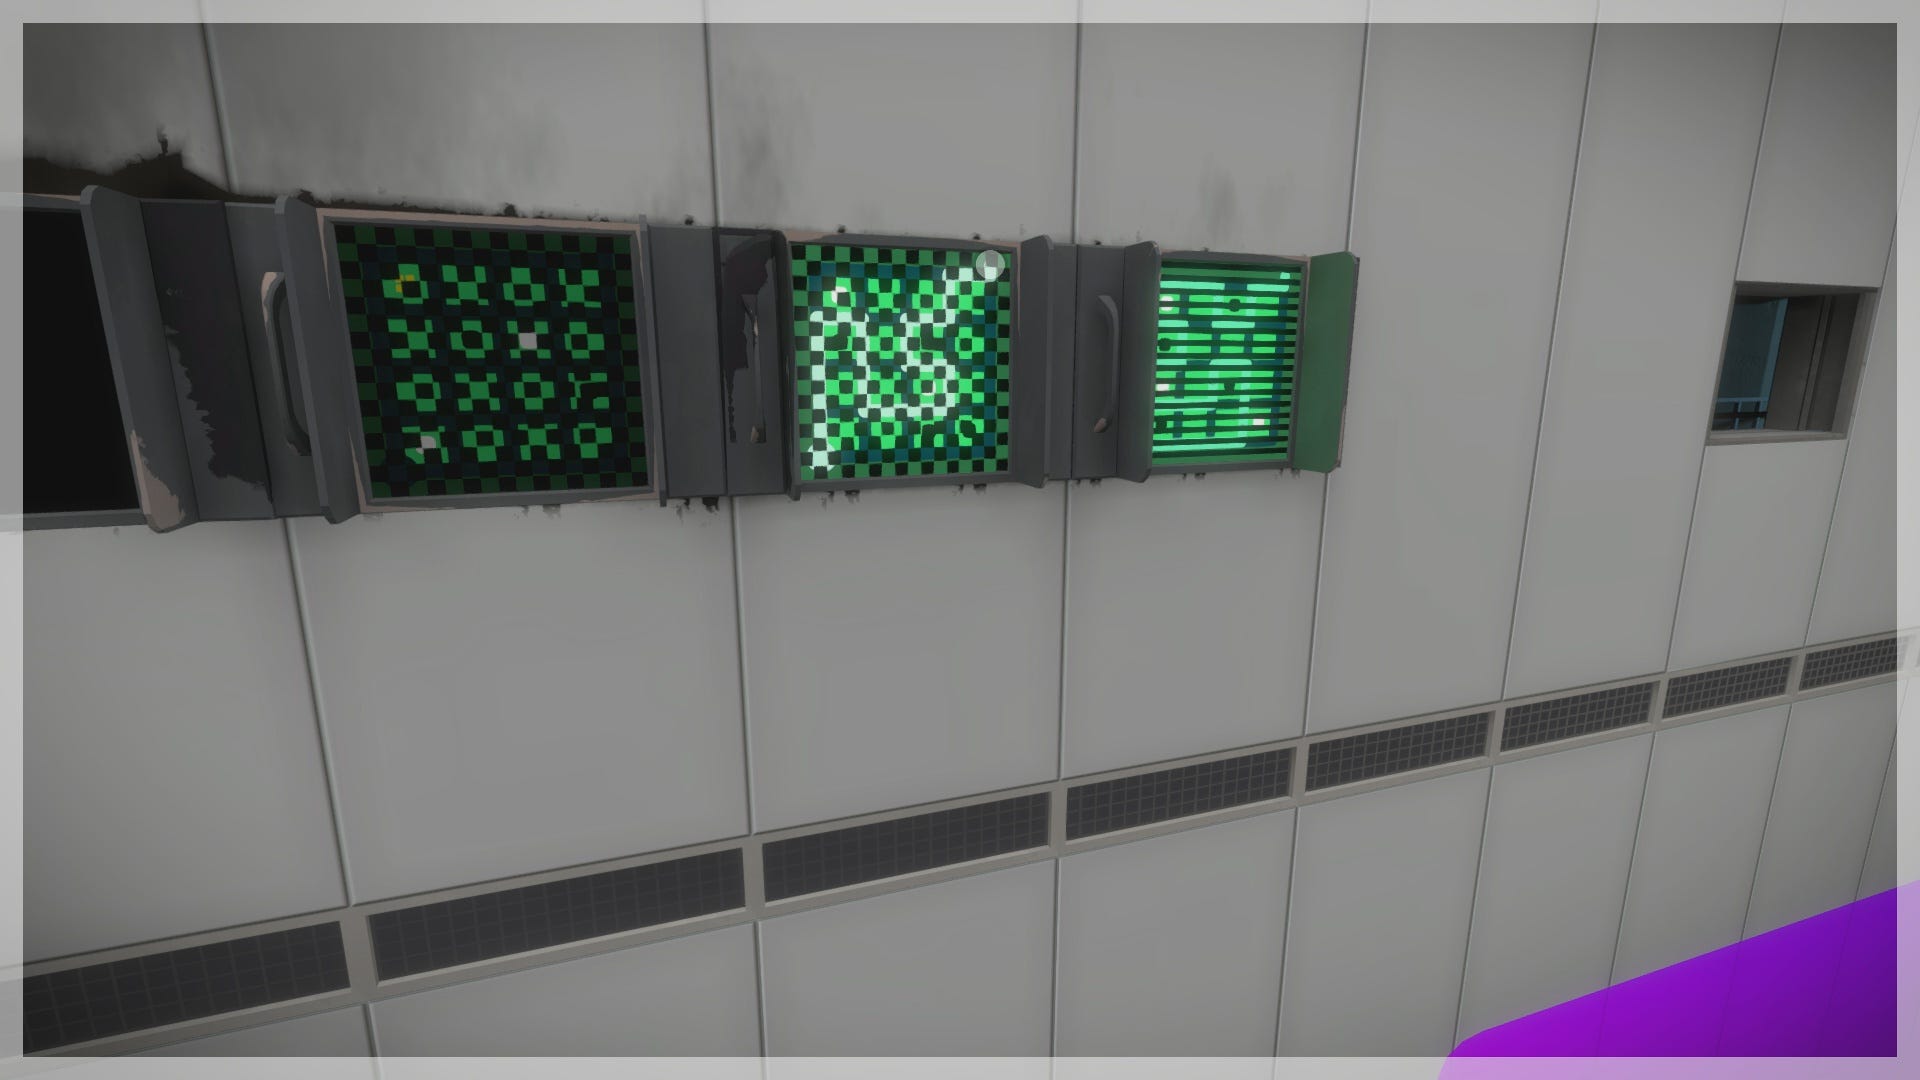
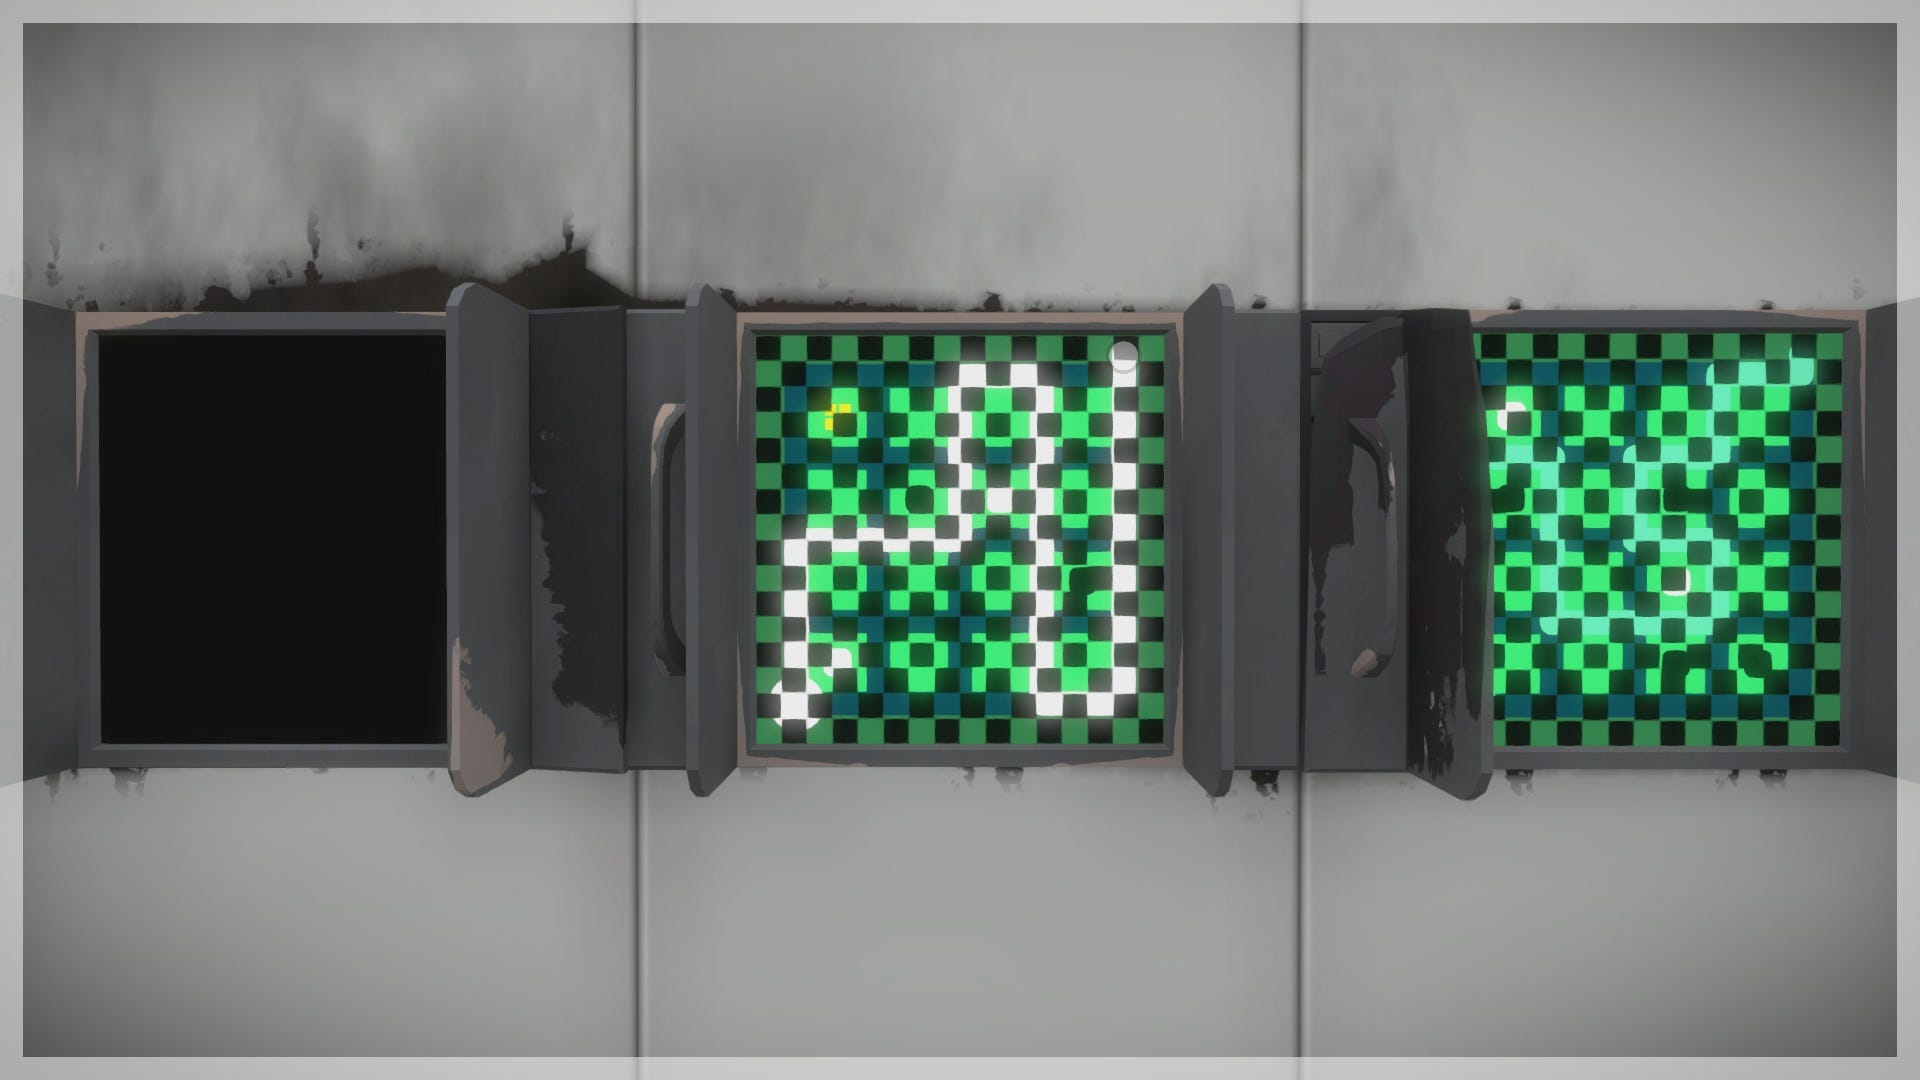
Now, go ahead and solve the green puzzle panels on the wall. These panels each have some sort of blatant obstruction blocking your view, making it difficult to make out the necessary elements on the grid. Do your best, but remember that our solutions are here to guide you if needed.

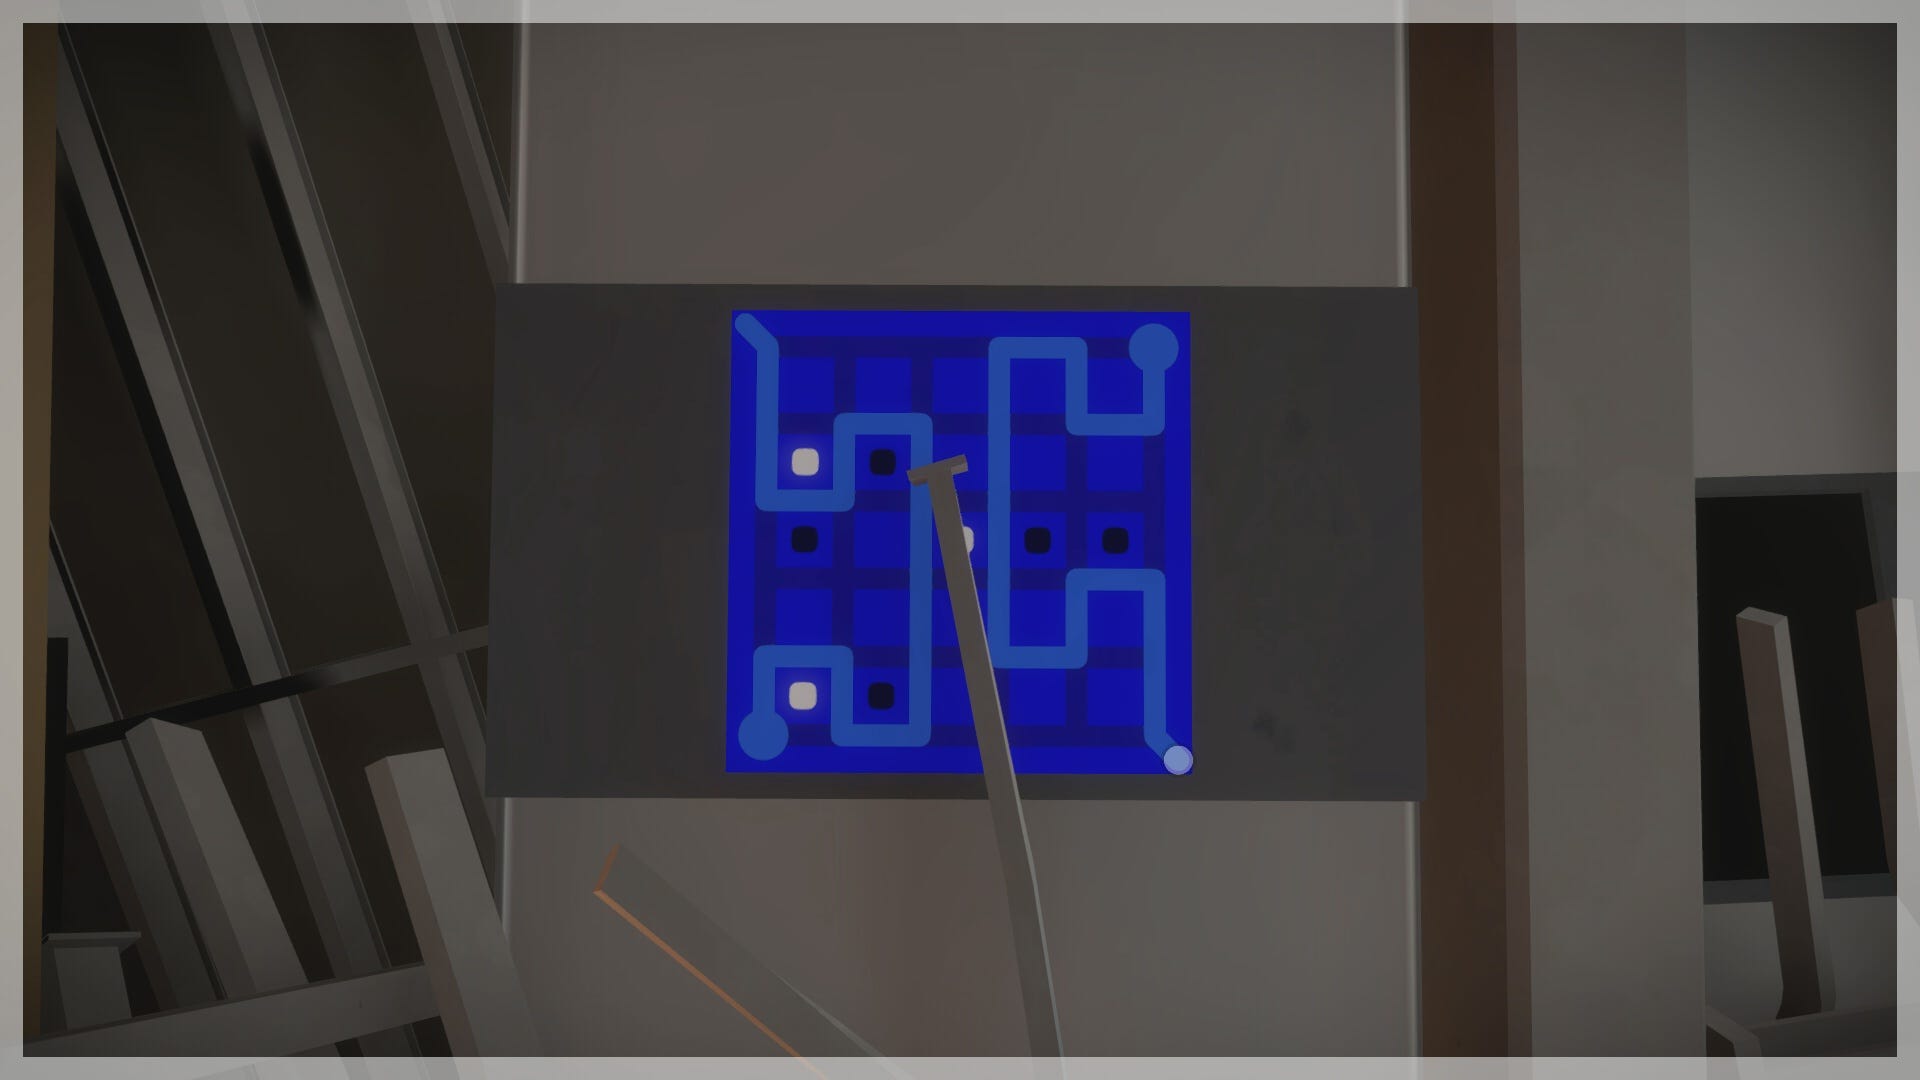
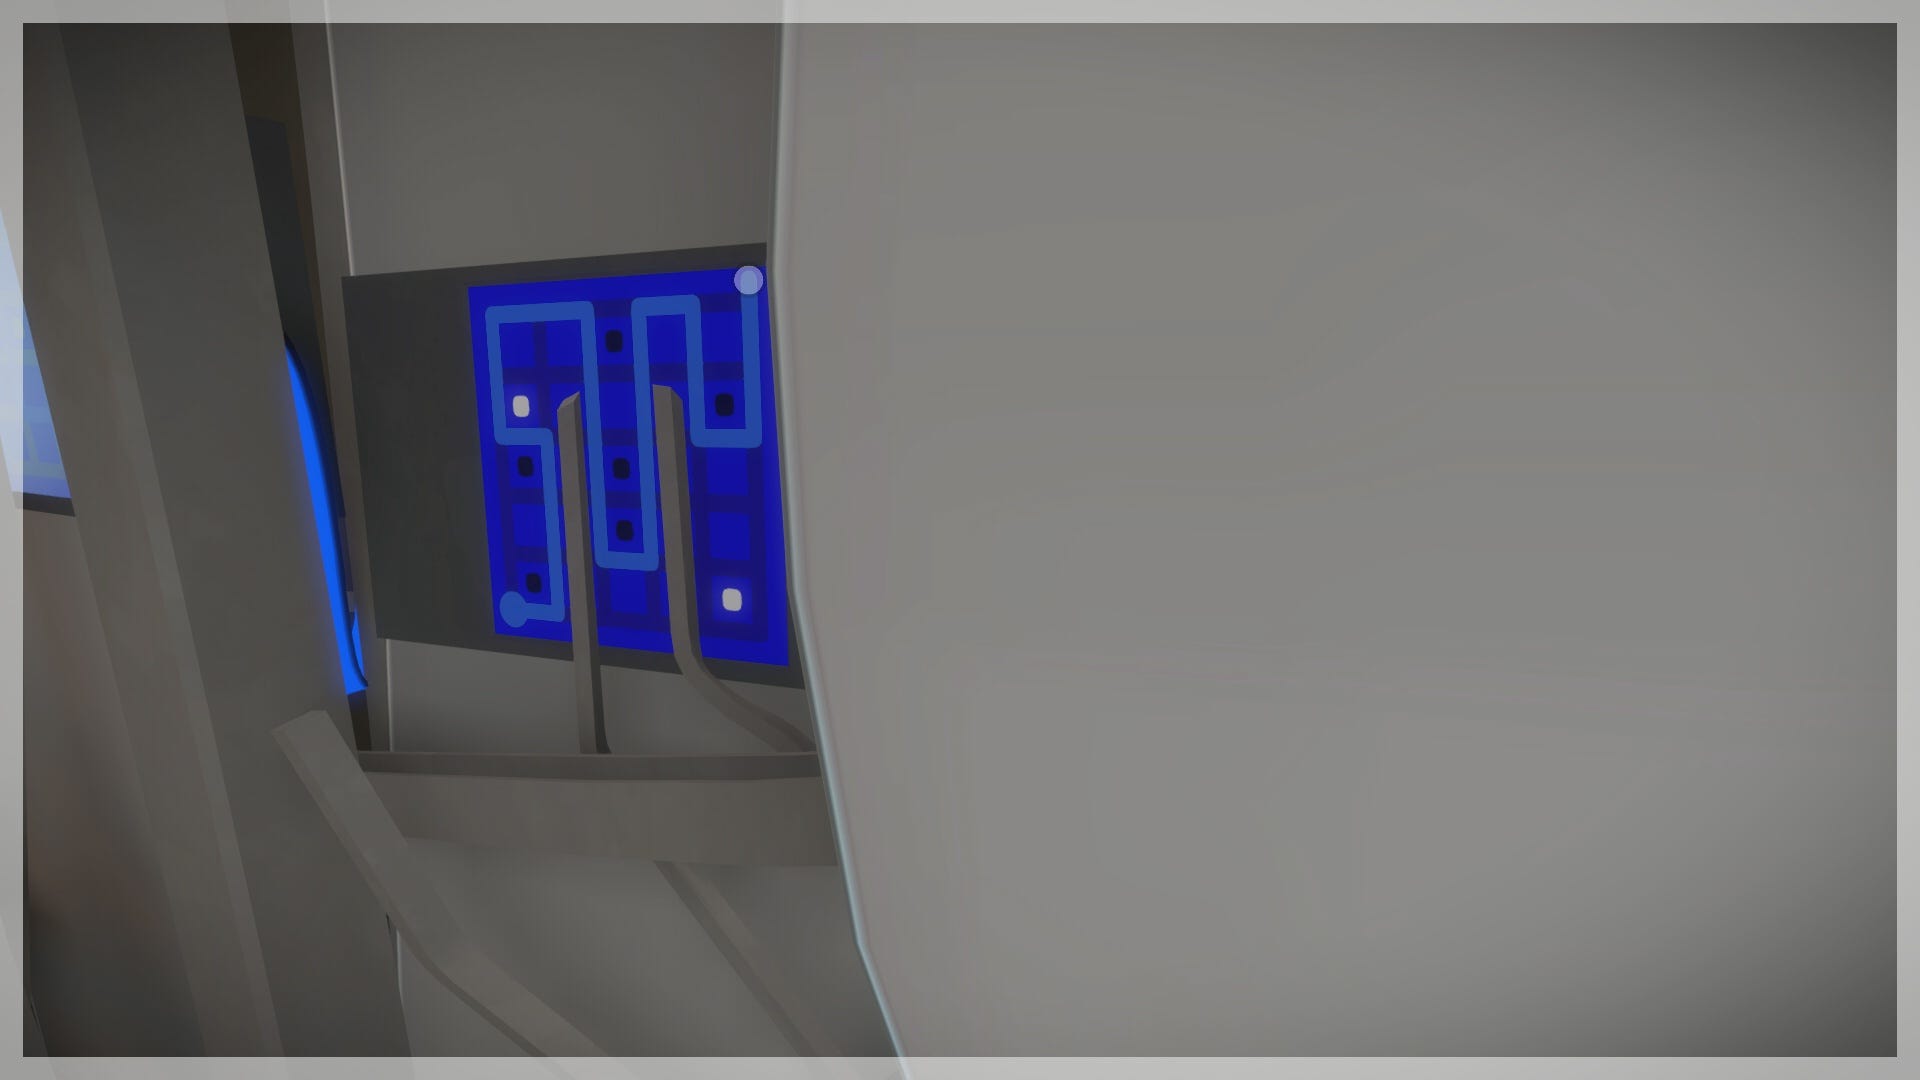
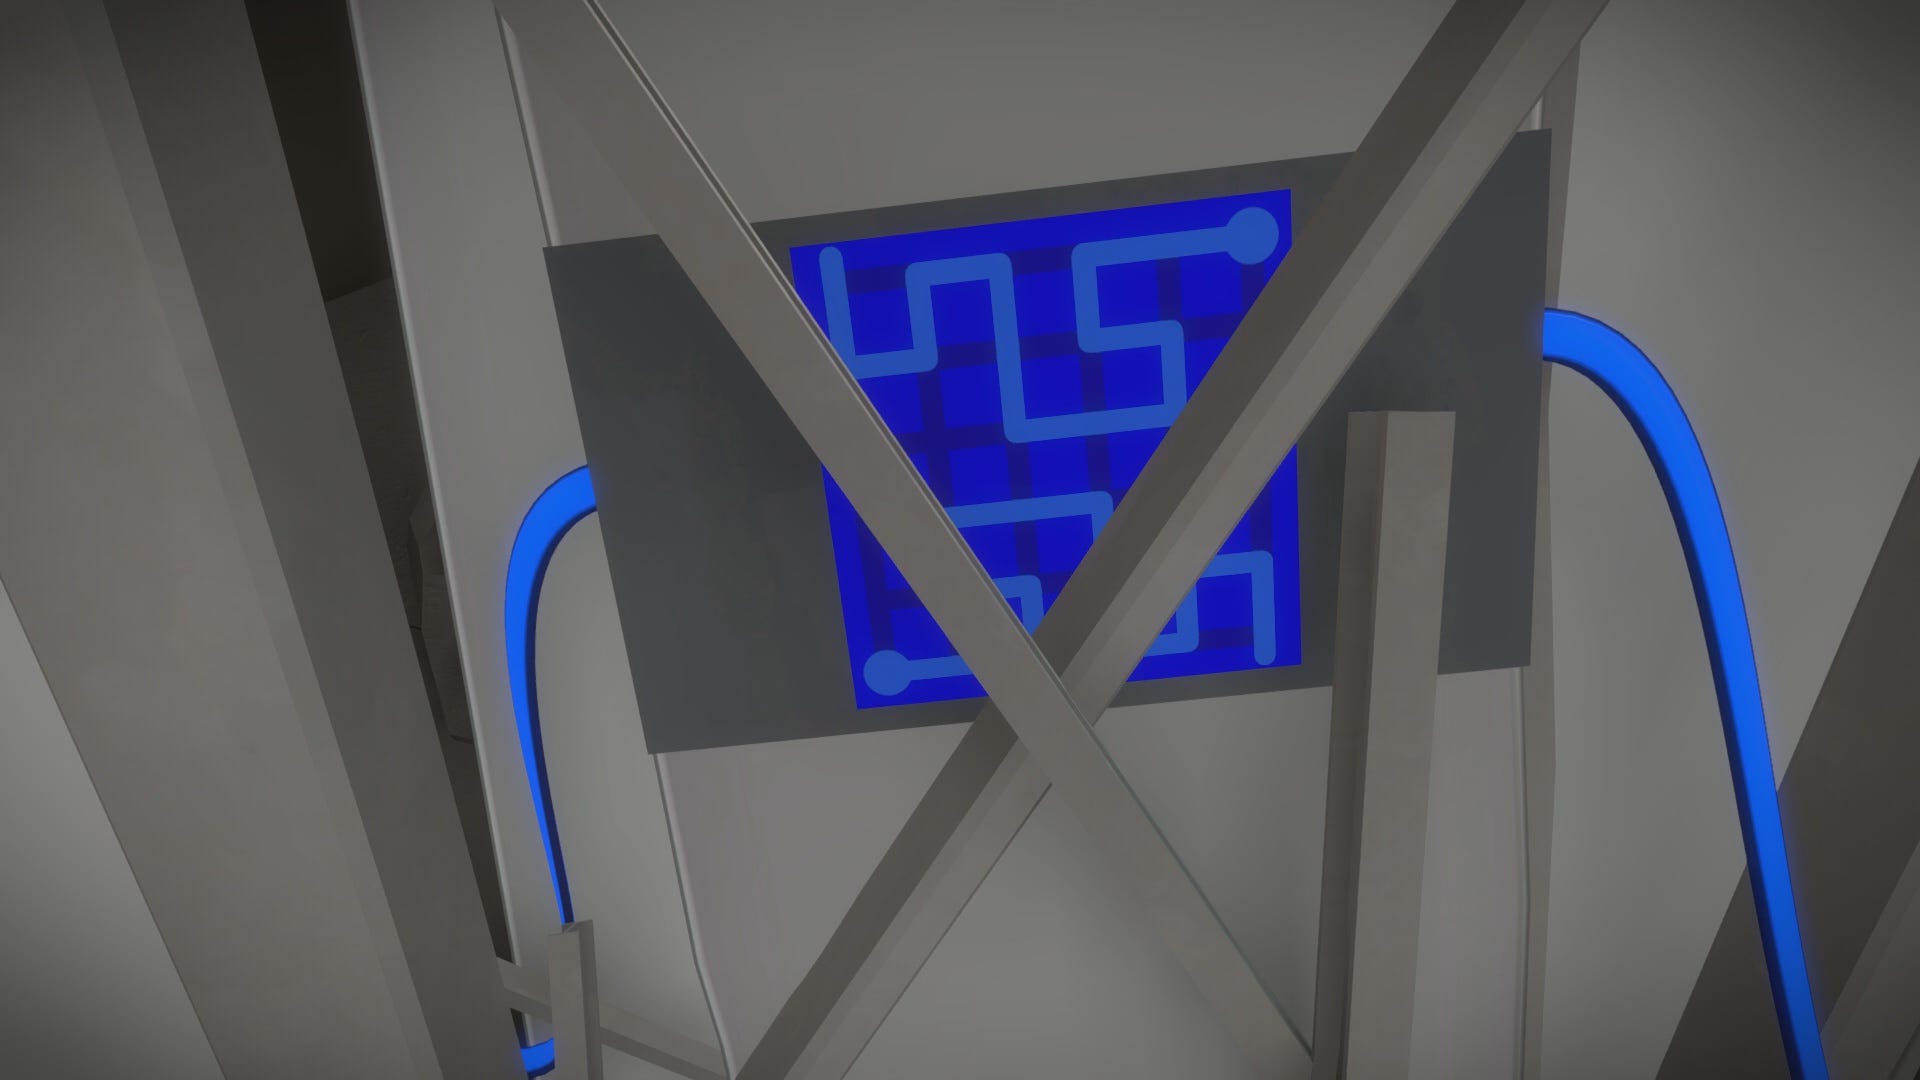
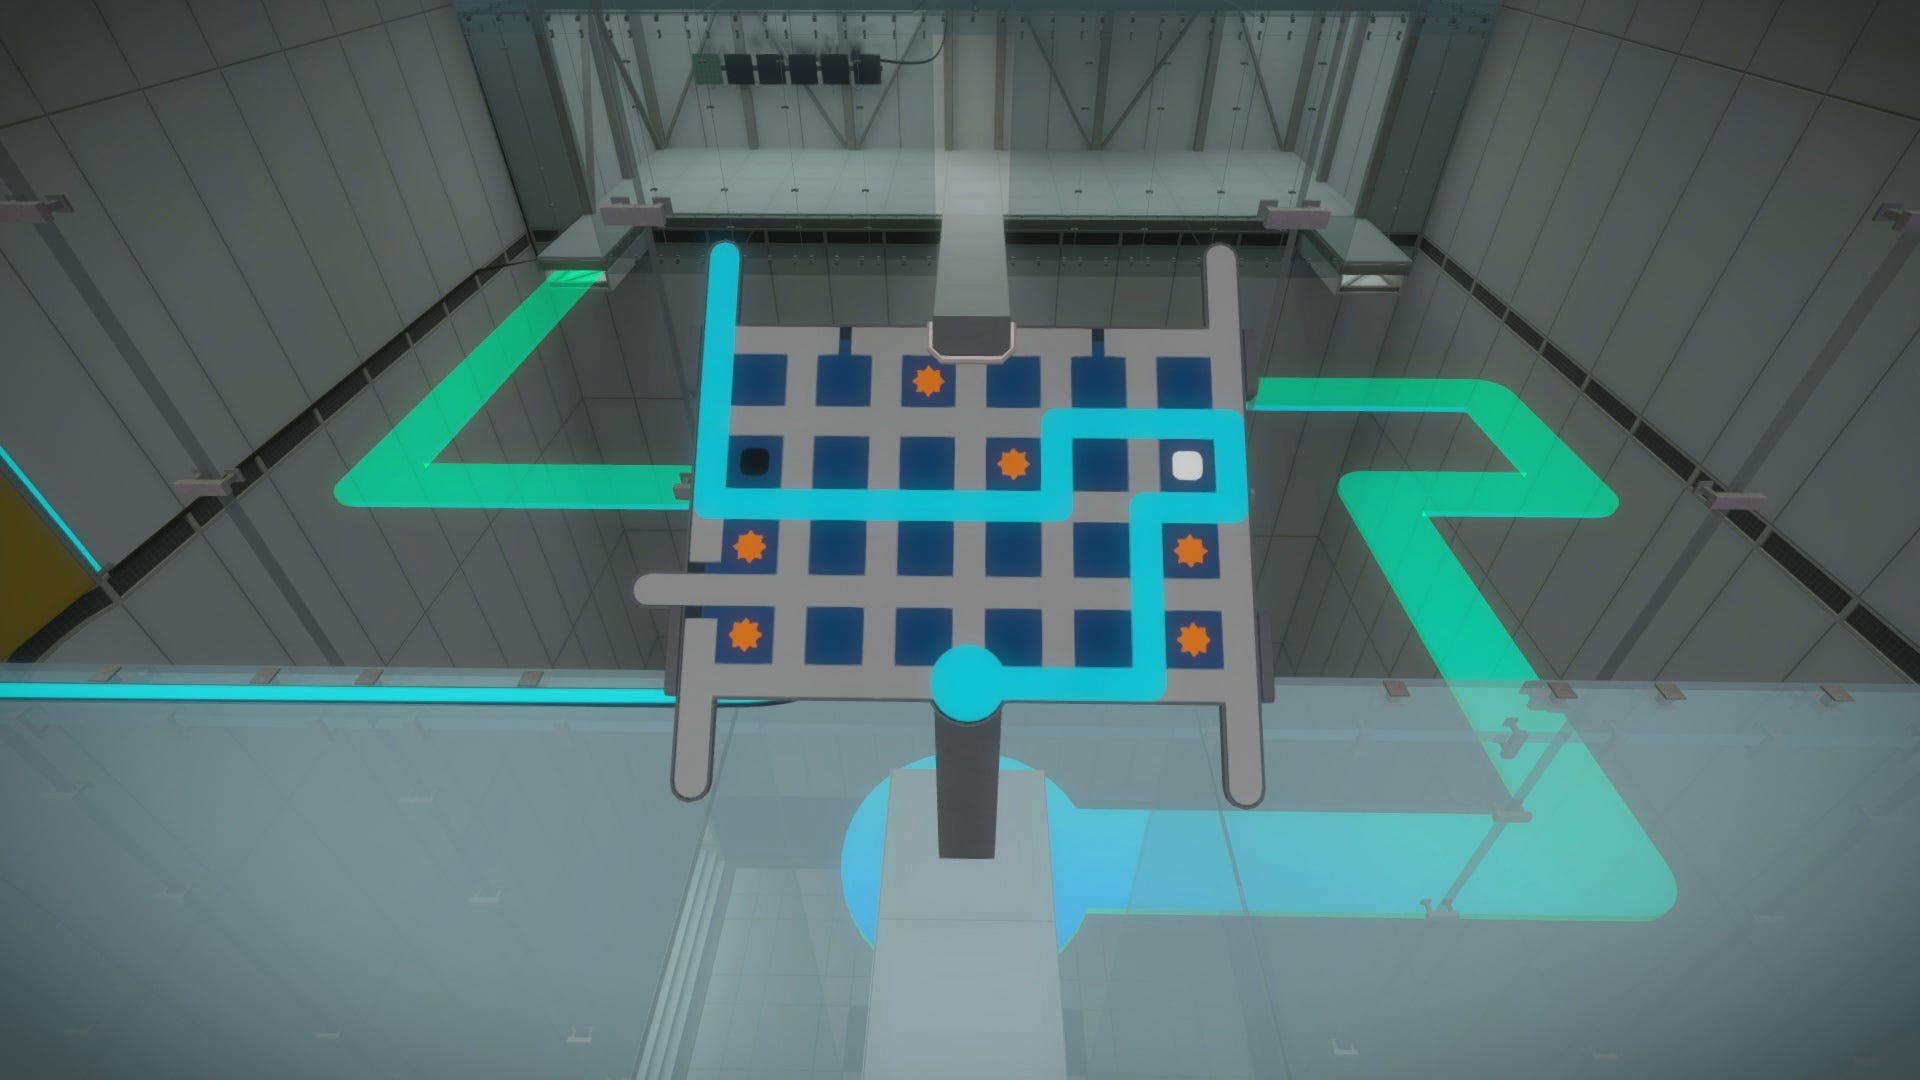
Now follow the path to its endpoint and enter the doorway on the opposite side fo the chasm. Solve the three blue panels in this room.
The blue puzzle panels in this next chamber have obstacles blocking sections of the grid. Different aspects of the grid become visible depending on where you stand. Try these for yourself, or check out our solutions below.
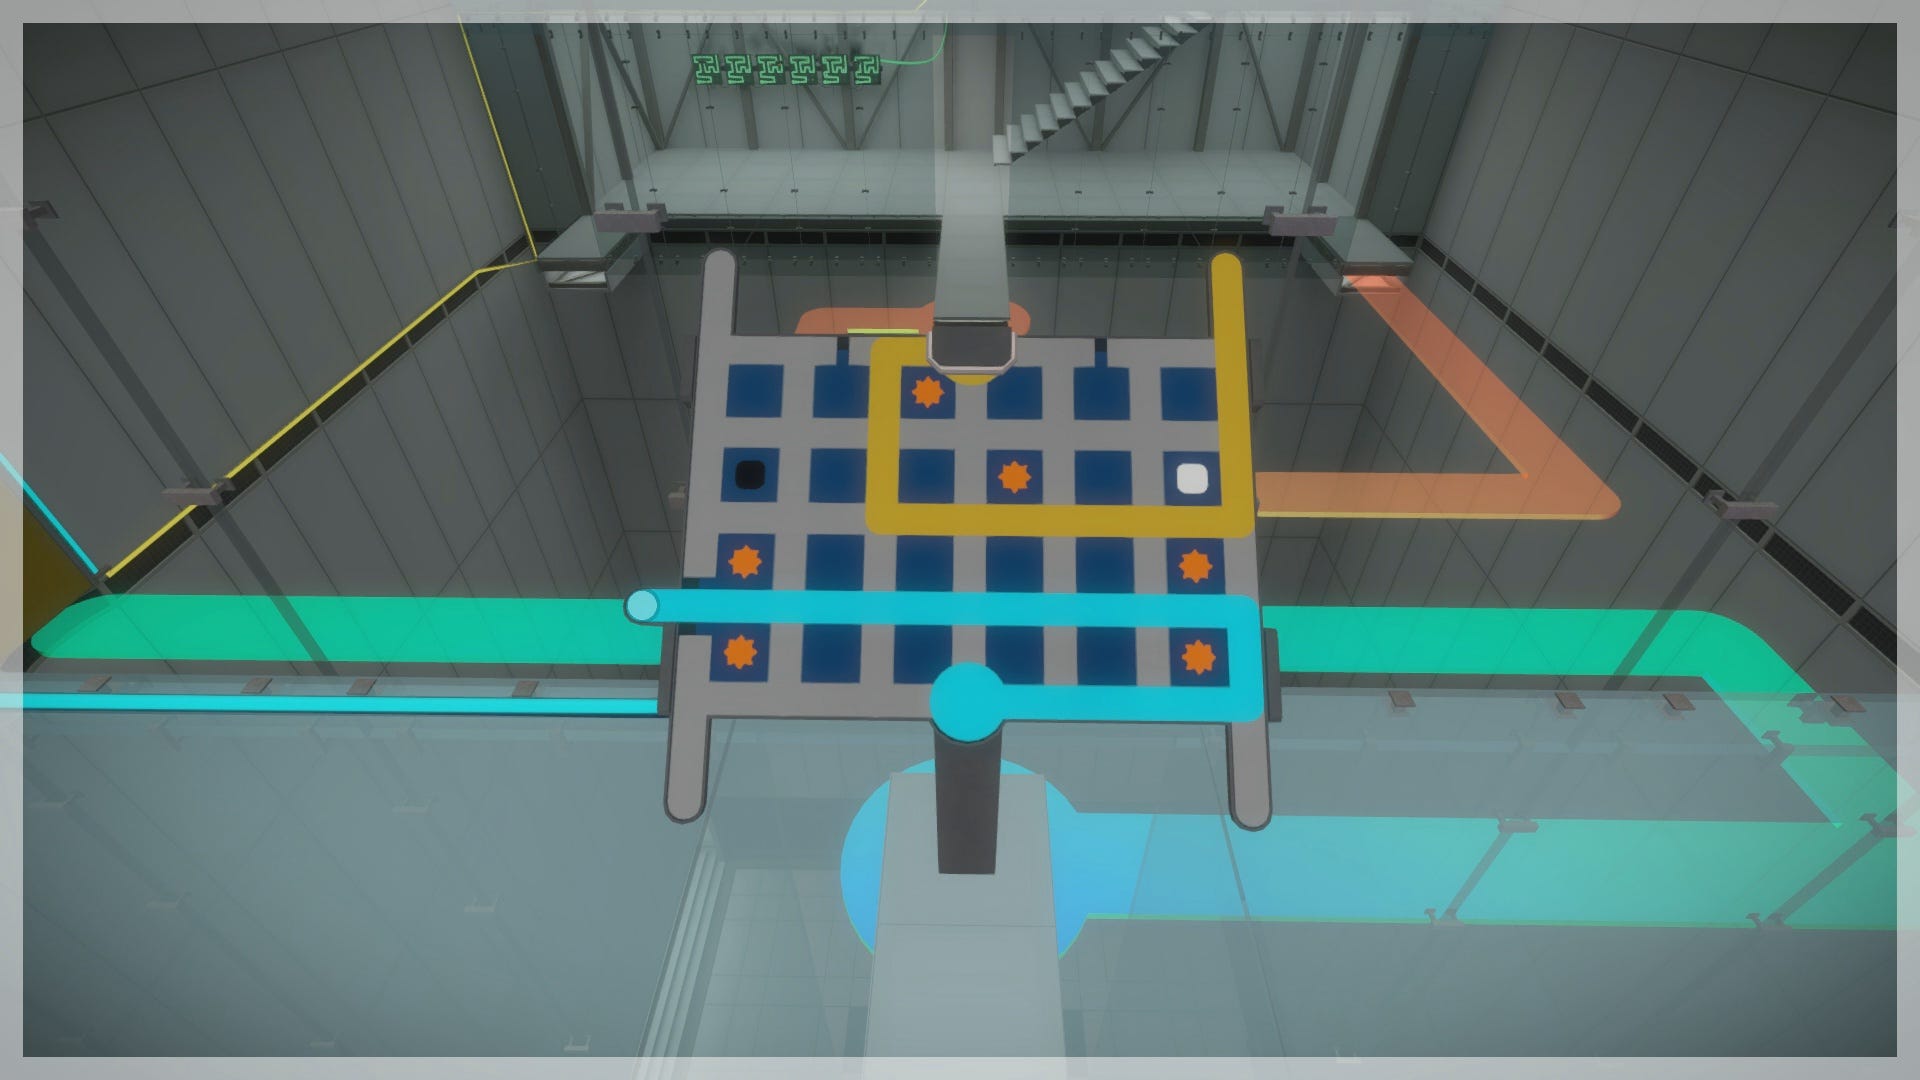
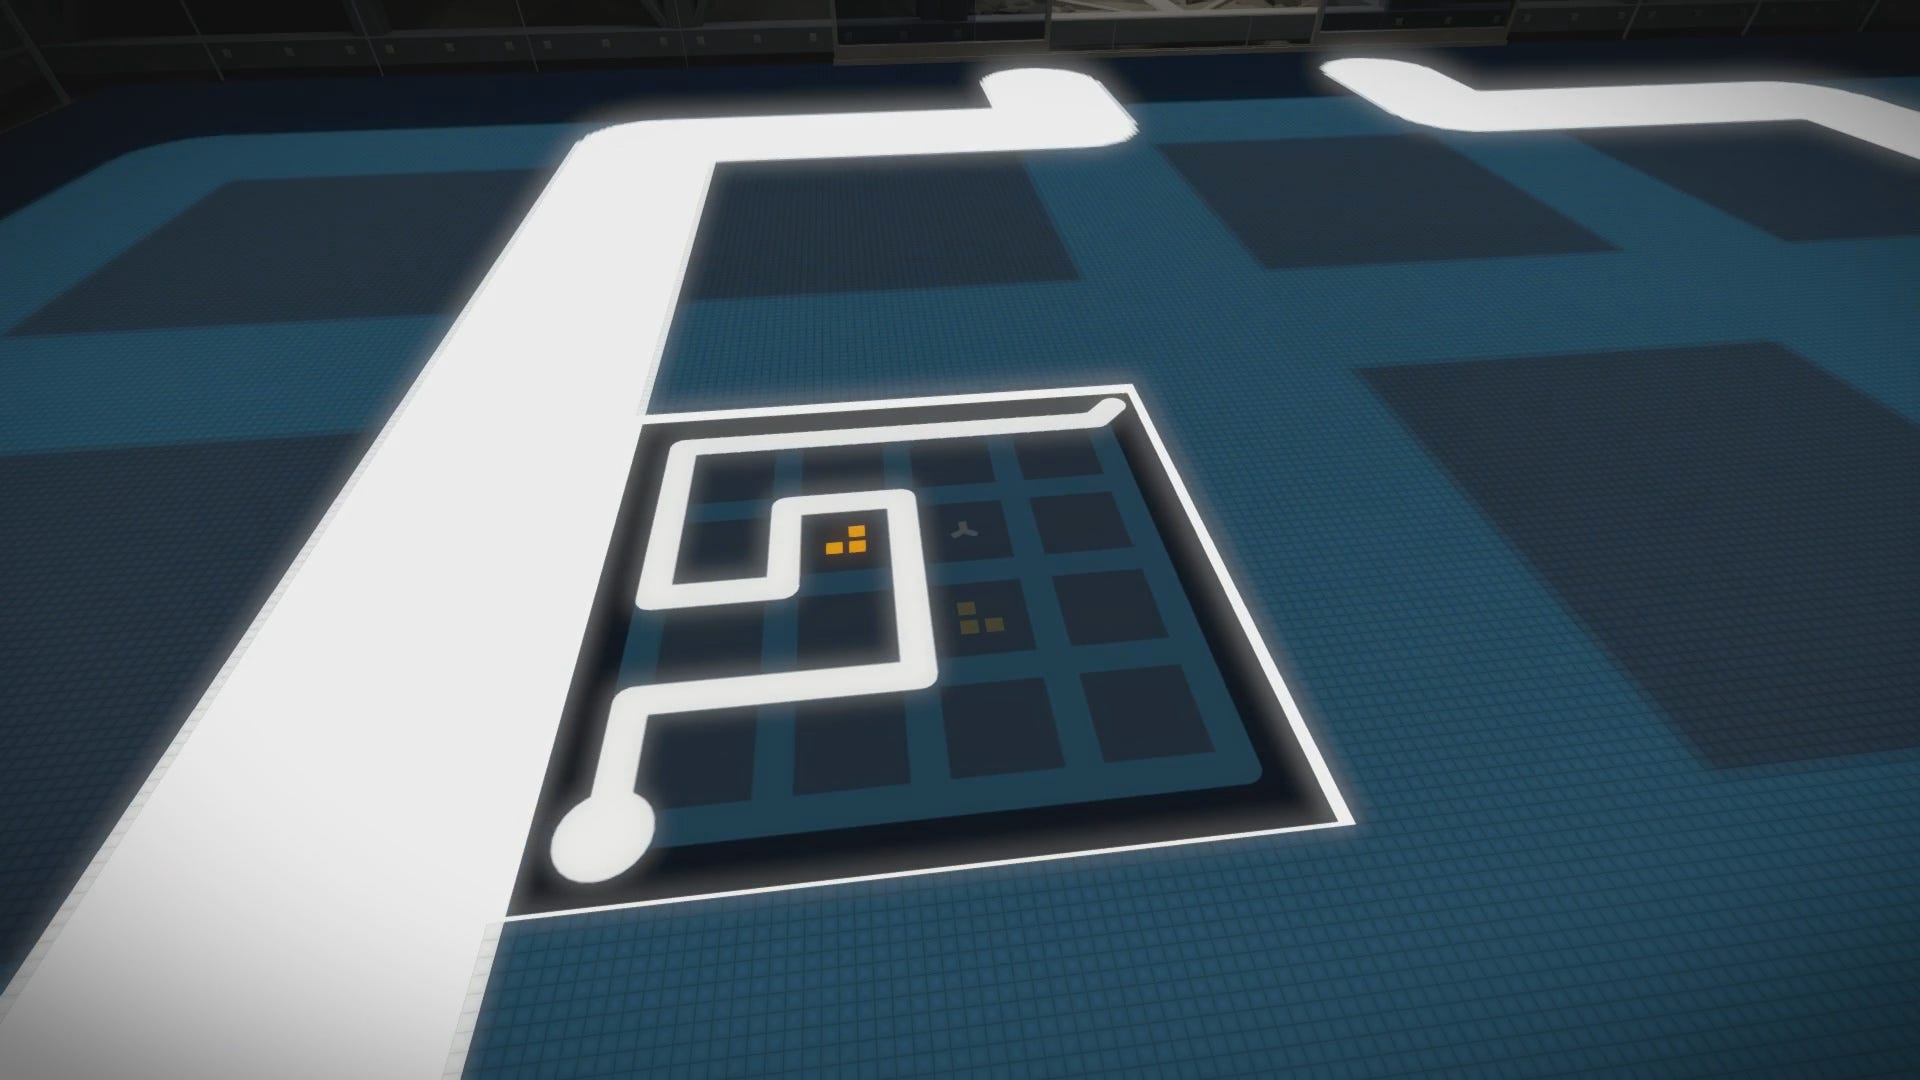
The main doorway on the opposite side of the chamber should now be open. Return to the upstairs panel one more time to input the solution below, then walk along the path to enter the doorway.
As you descend further into the Mountain, you will reach another bright white chamber. Start by solving the series of psychedelic panels just past the staircase on the far right wall. These panels will constantly shift between different colors. Don’t let the colors trip you up; just use our solutions below.
Head upstairs and input the solution below into the puzzle panel. Similar to the previous chamber, your different drawings will create pathways across the chasm.
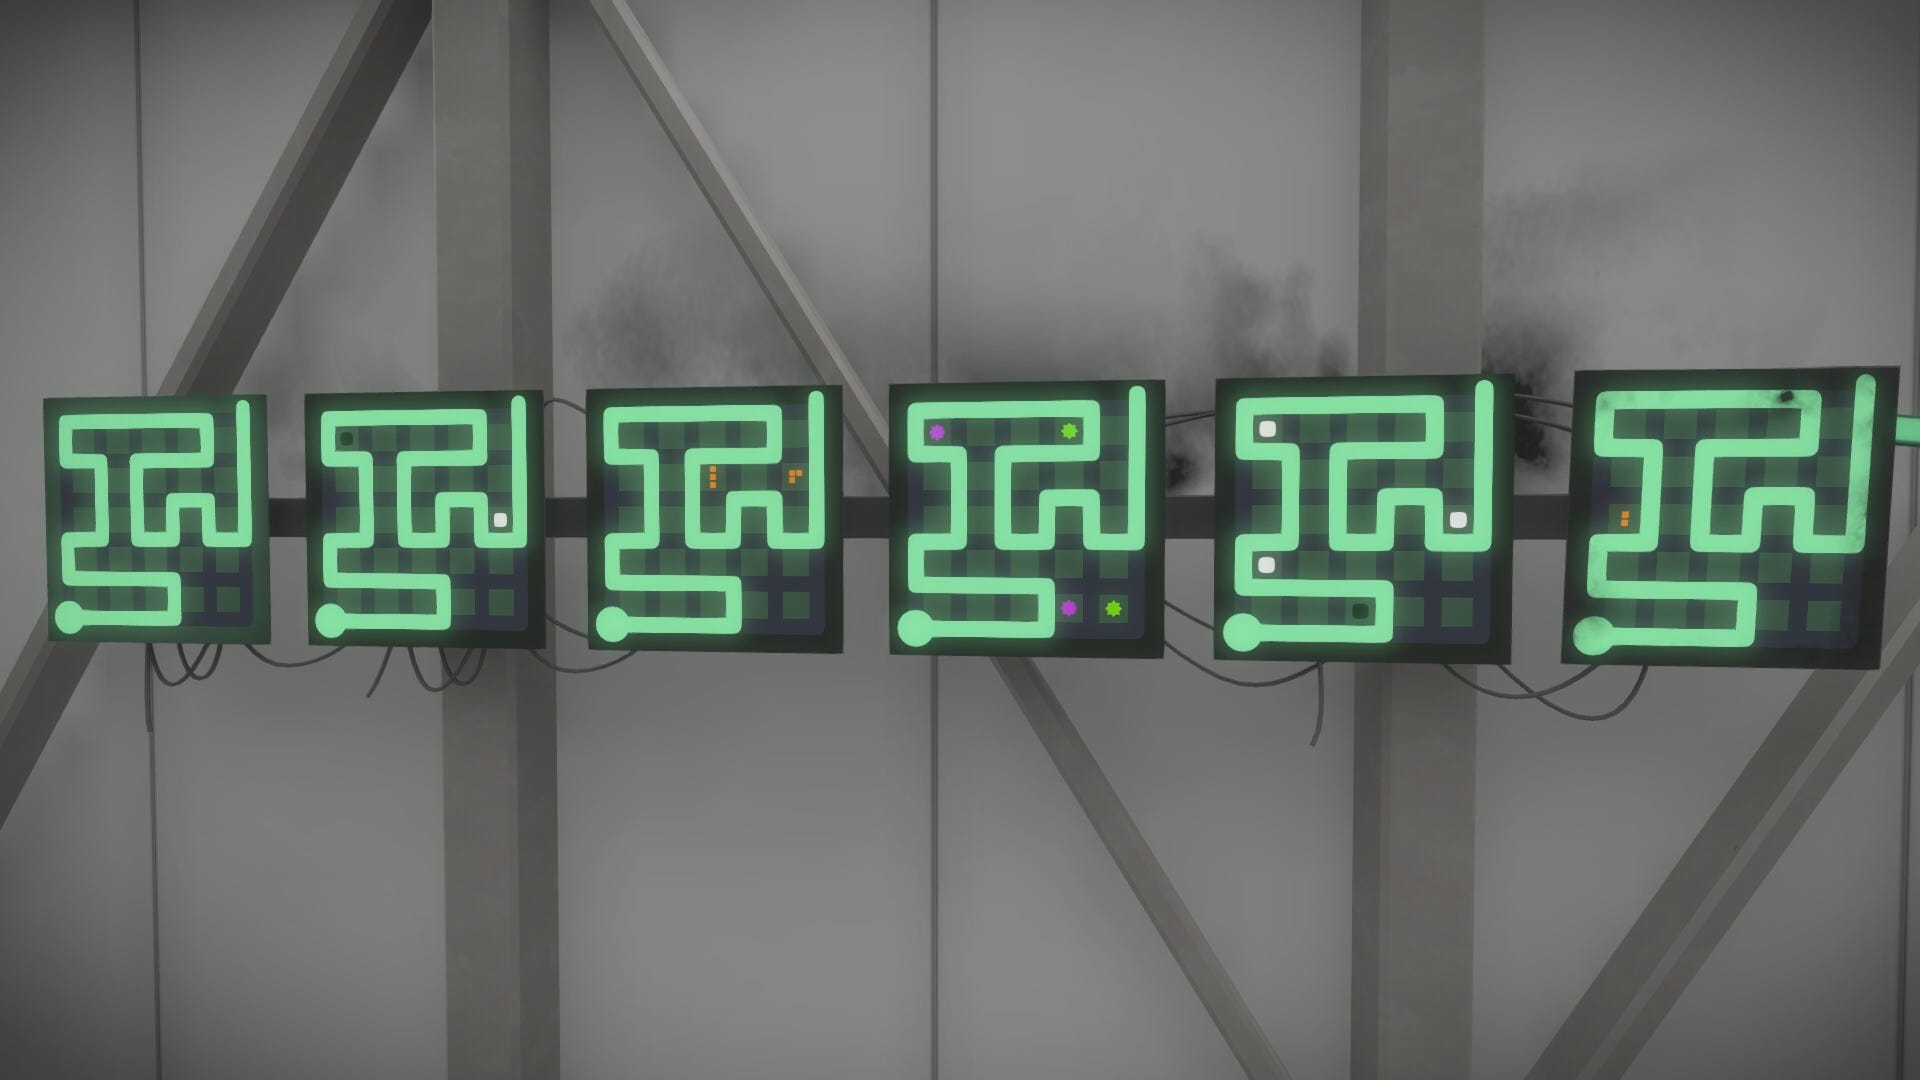
Use the path to cross the gap and reach the room on the other side, then proceed to solve the six puzzle panels on the wall. The first panel is easy. However, as you solve each subsequent panel, your solution must satisfy the panels before it. You can manually solve one panel at a time if you wish, or you can just use our solution below. It is guaranteed to work for all six panels at any time.
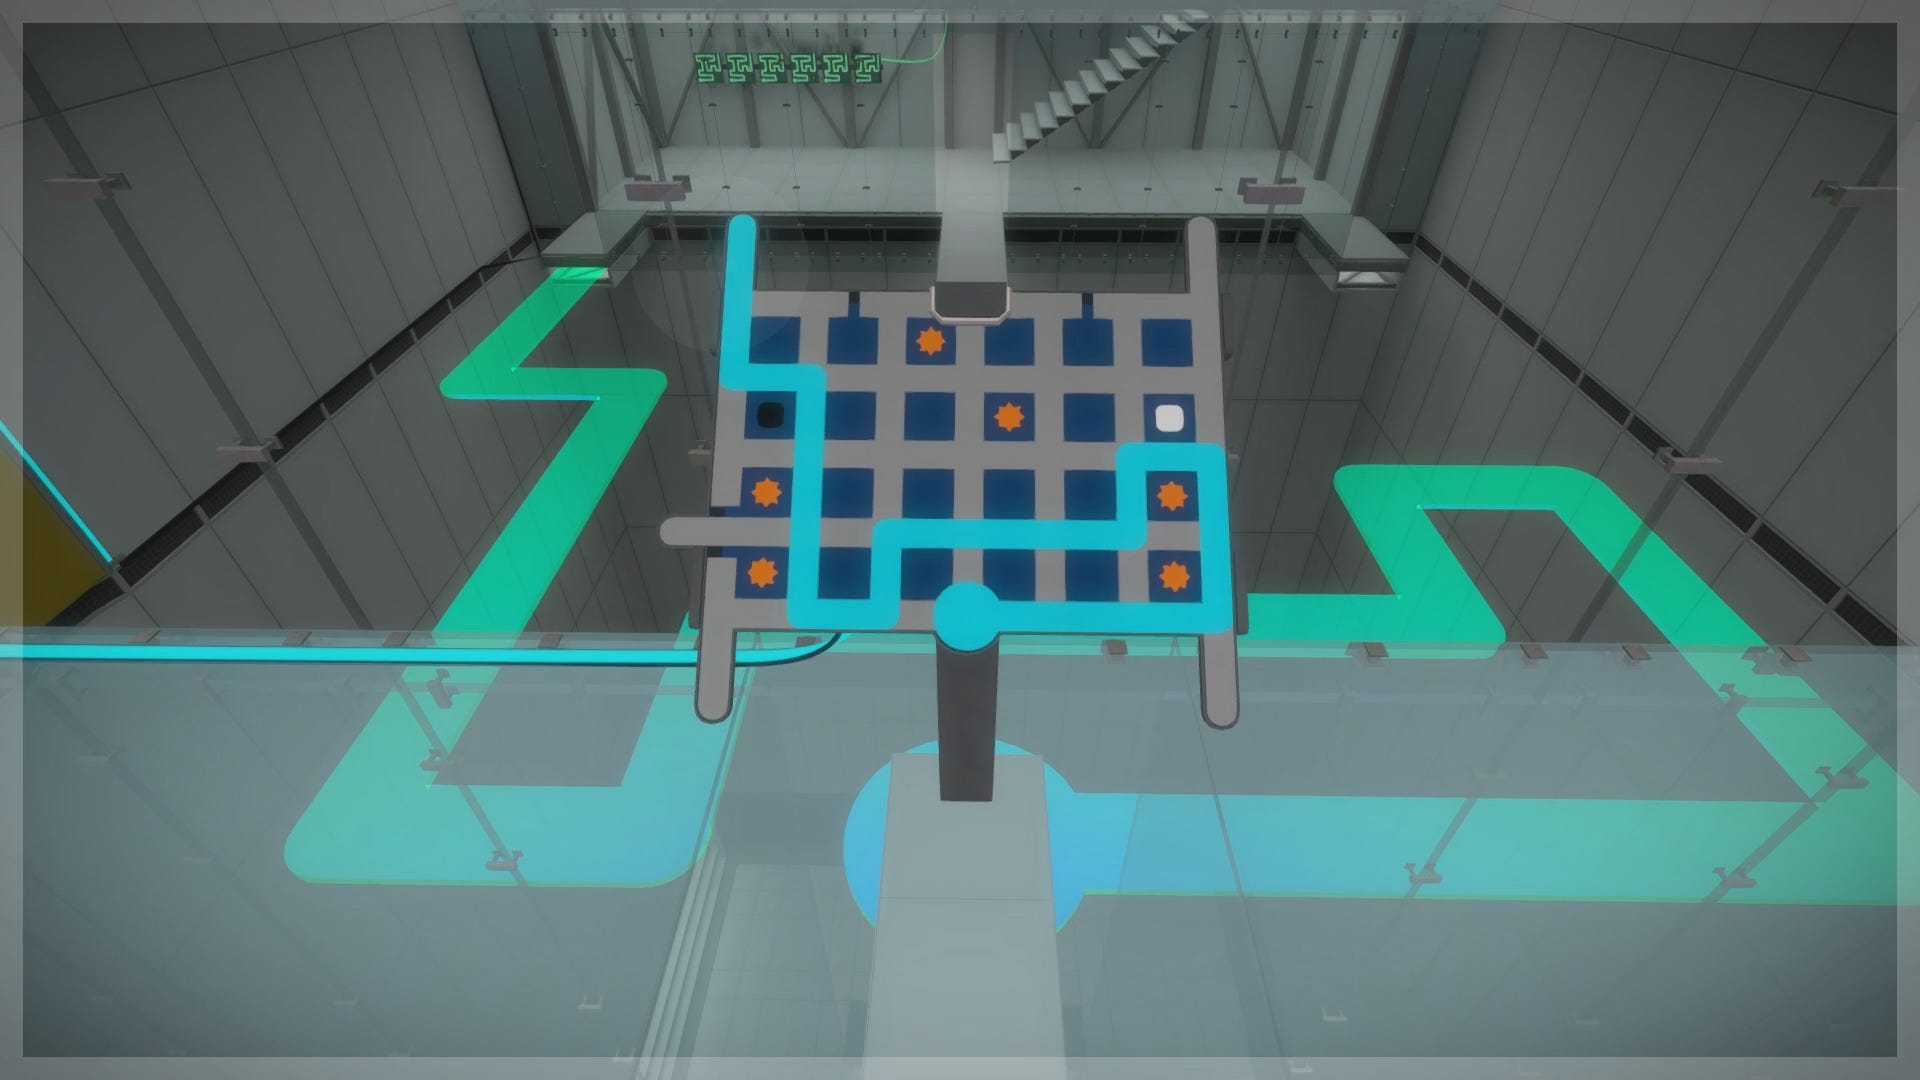
Now, prepare for a bit of back-and-forth between the two rooms. If you went upstairs in the six-panel room, you likely noticed the puzzle panel that contains the solution from the opposite side. Your goal is to draw two sets of pathways on the same grid that can allow you to reach the main doorway in the chamber.
The challenge comes from having to run back and forth between the rooms to edit the paths accordingly. Follow our instructions below to ensure you can escape this chamber. There may be a quicker series of solutions to reach the exit, but we can only show you what worked for us.
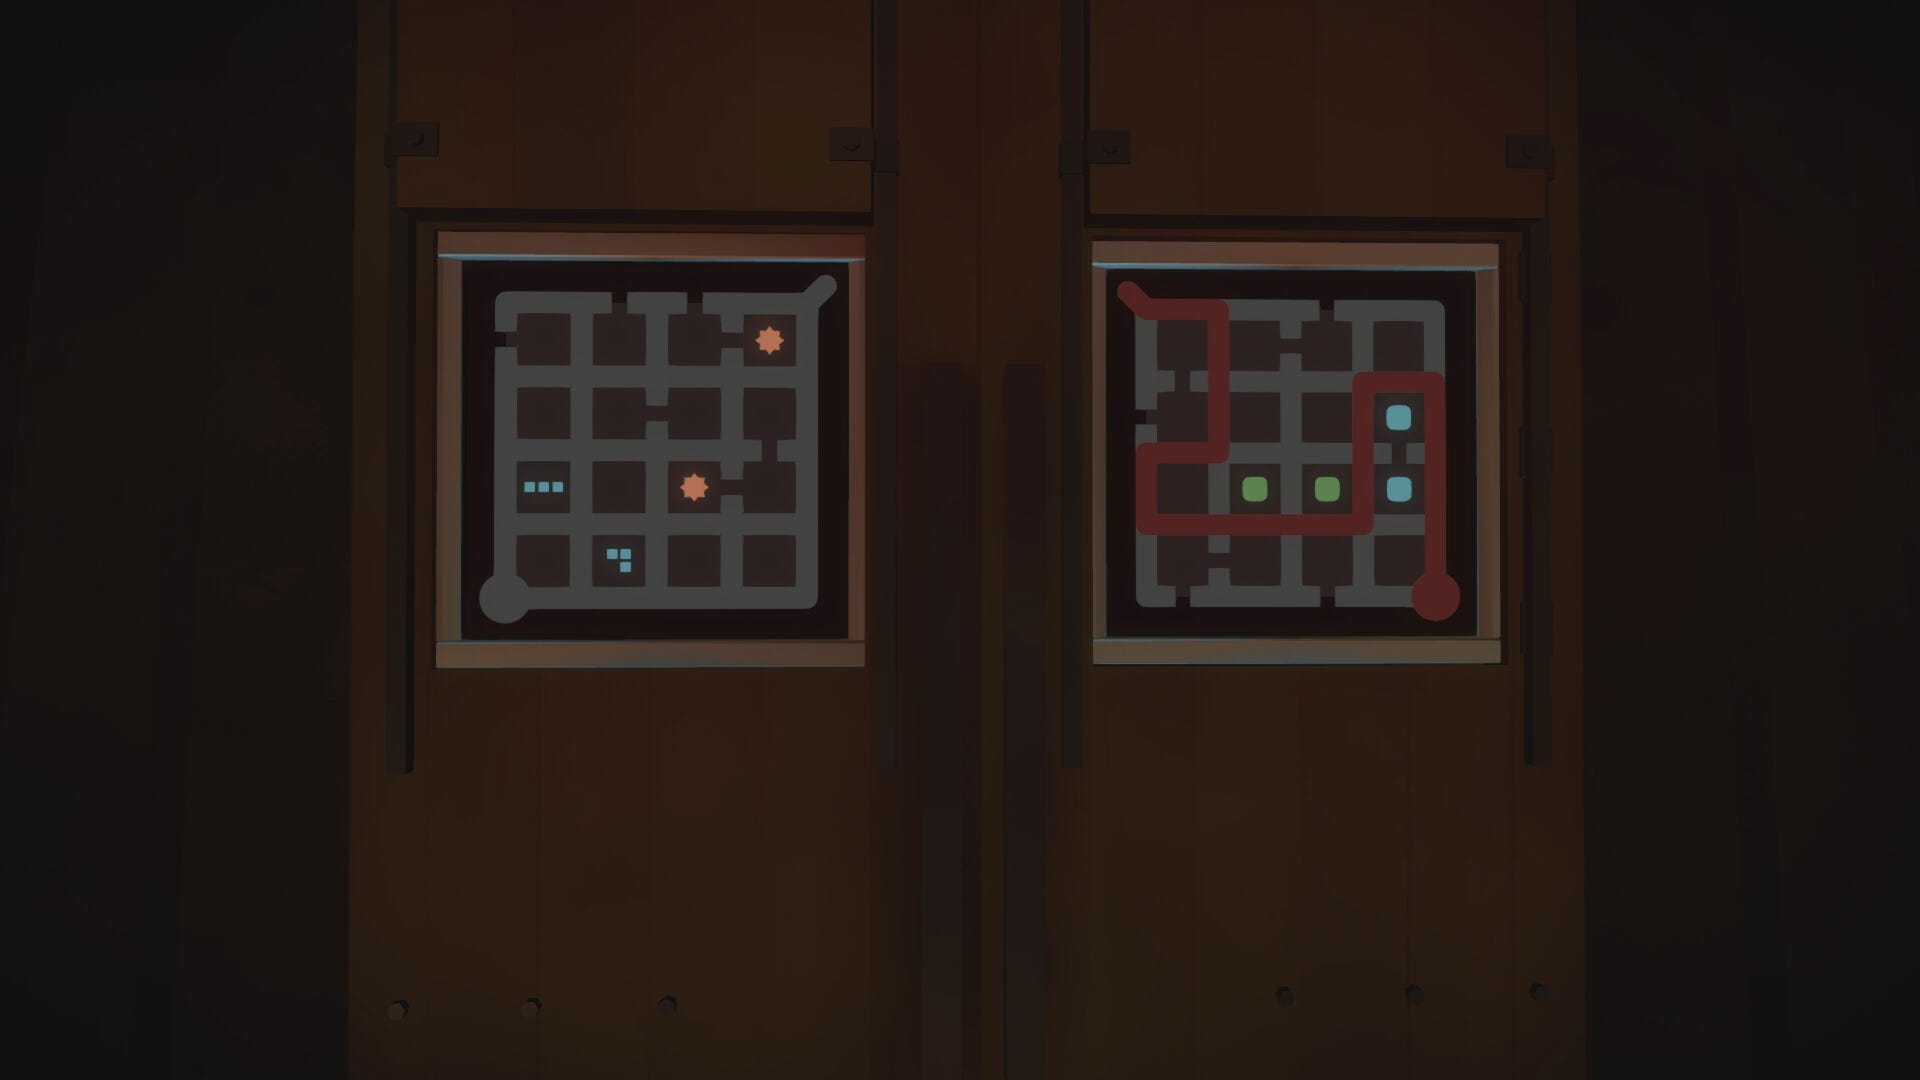
Return to the room with the flowers, and draw the blue solution below on the upstairs puzzle panel. Then, walk back to the six-panel room and draw the yellow solution below on the upstairs puzzle panel.
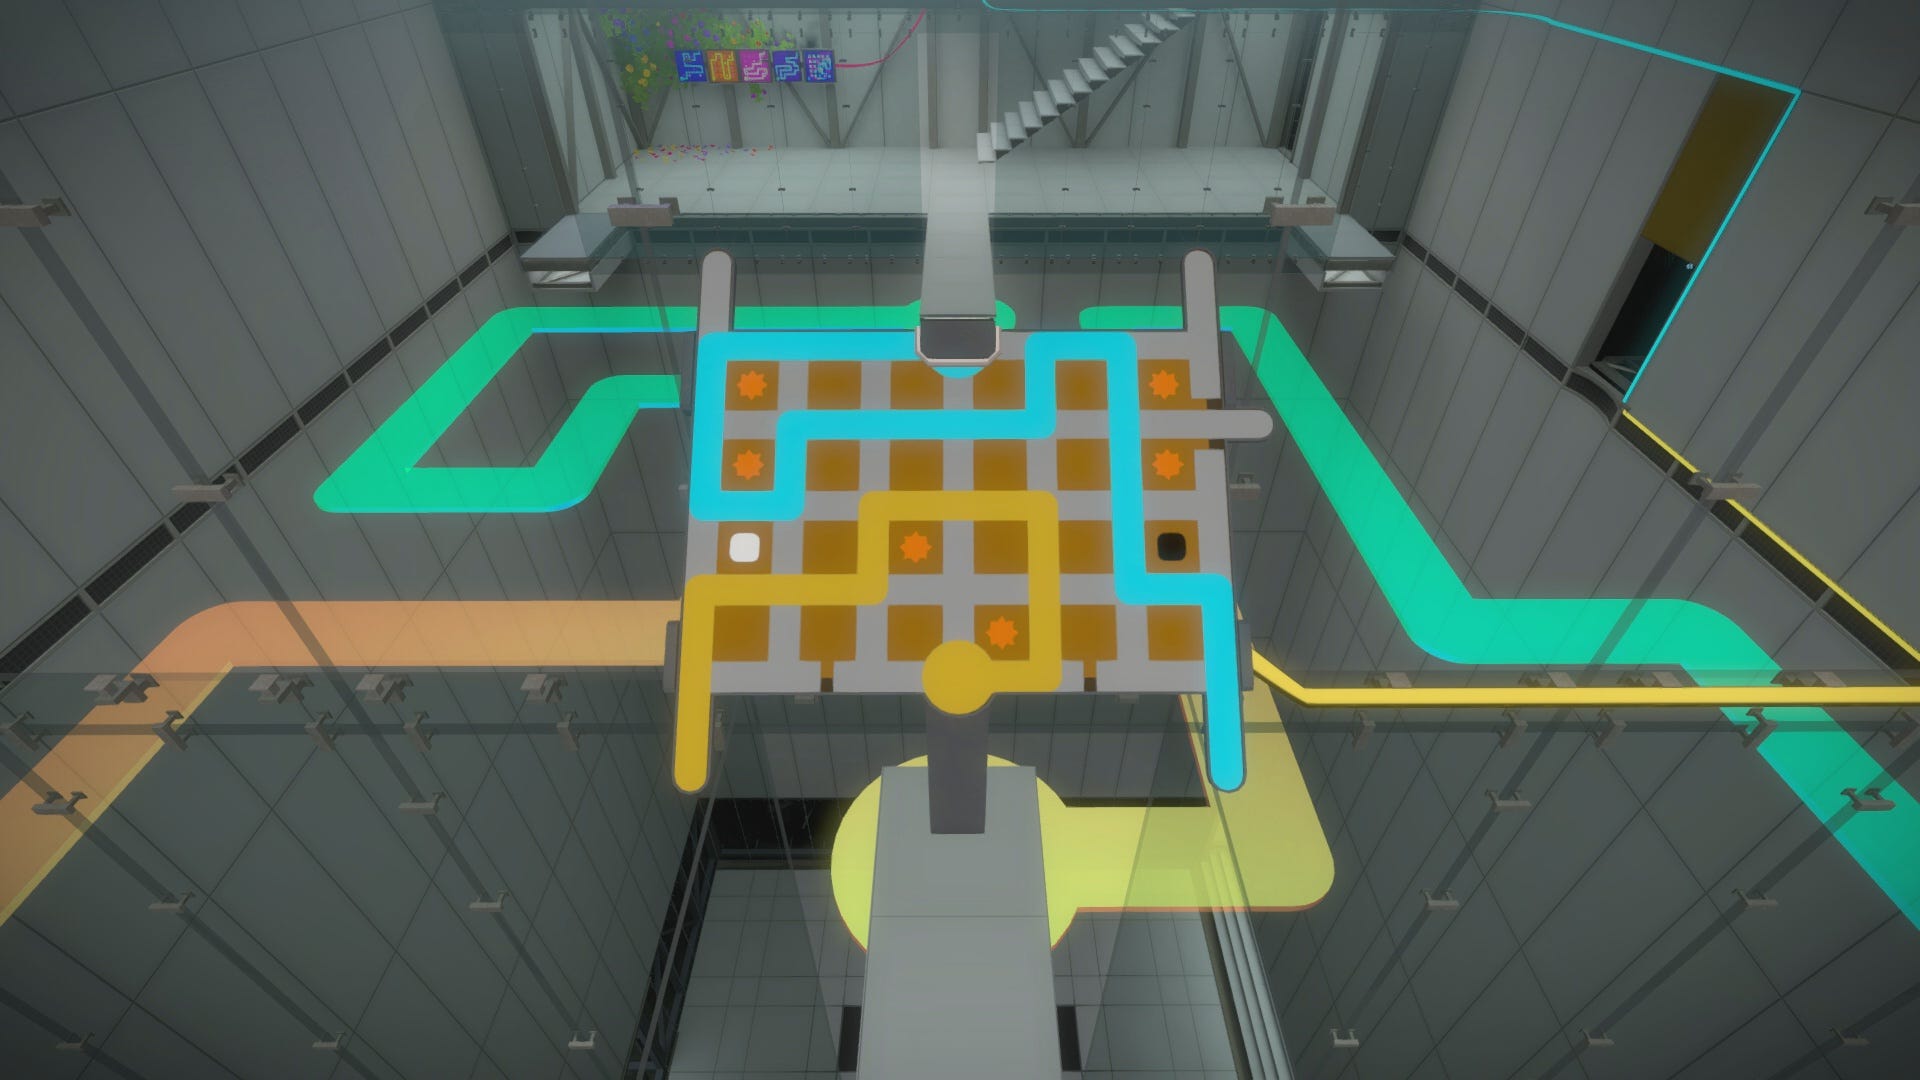
Go back to the flower room, and draw the blue solution below on the upstairs panel. Then, return to the other side and draw the yellow solution on the upstairs panel.
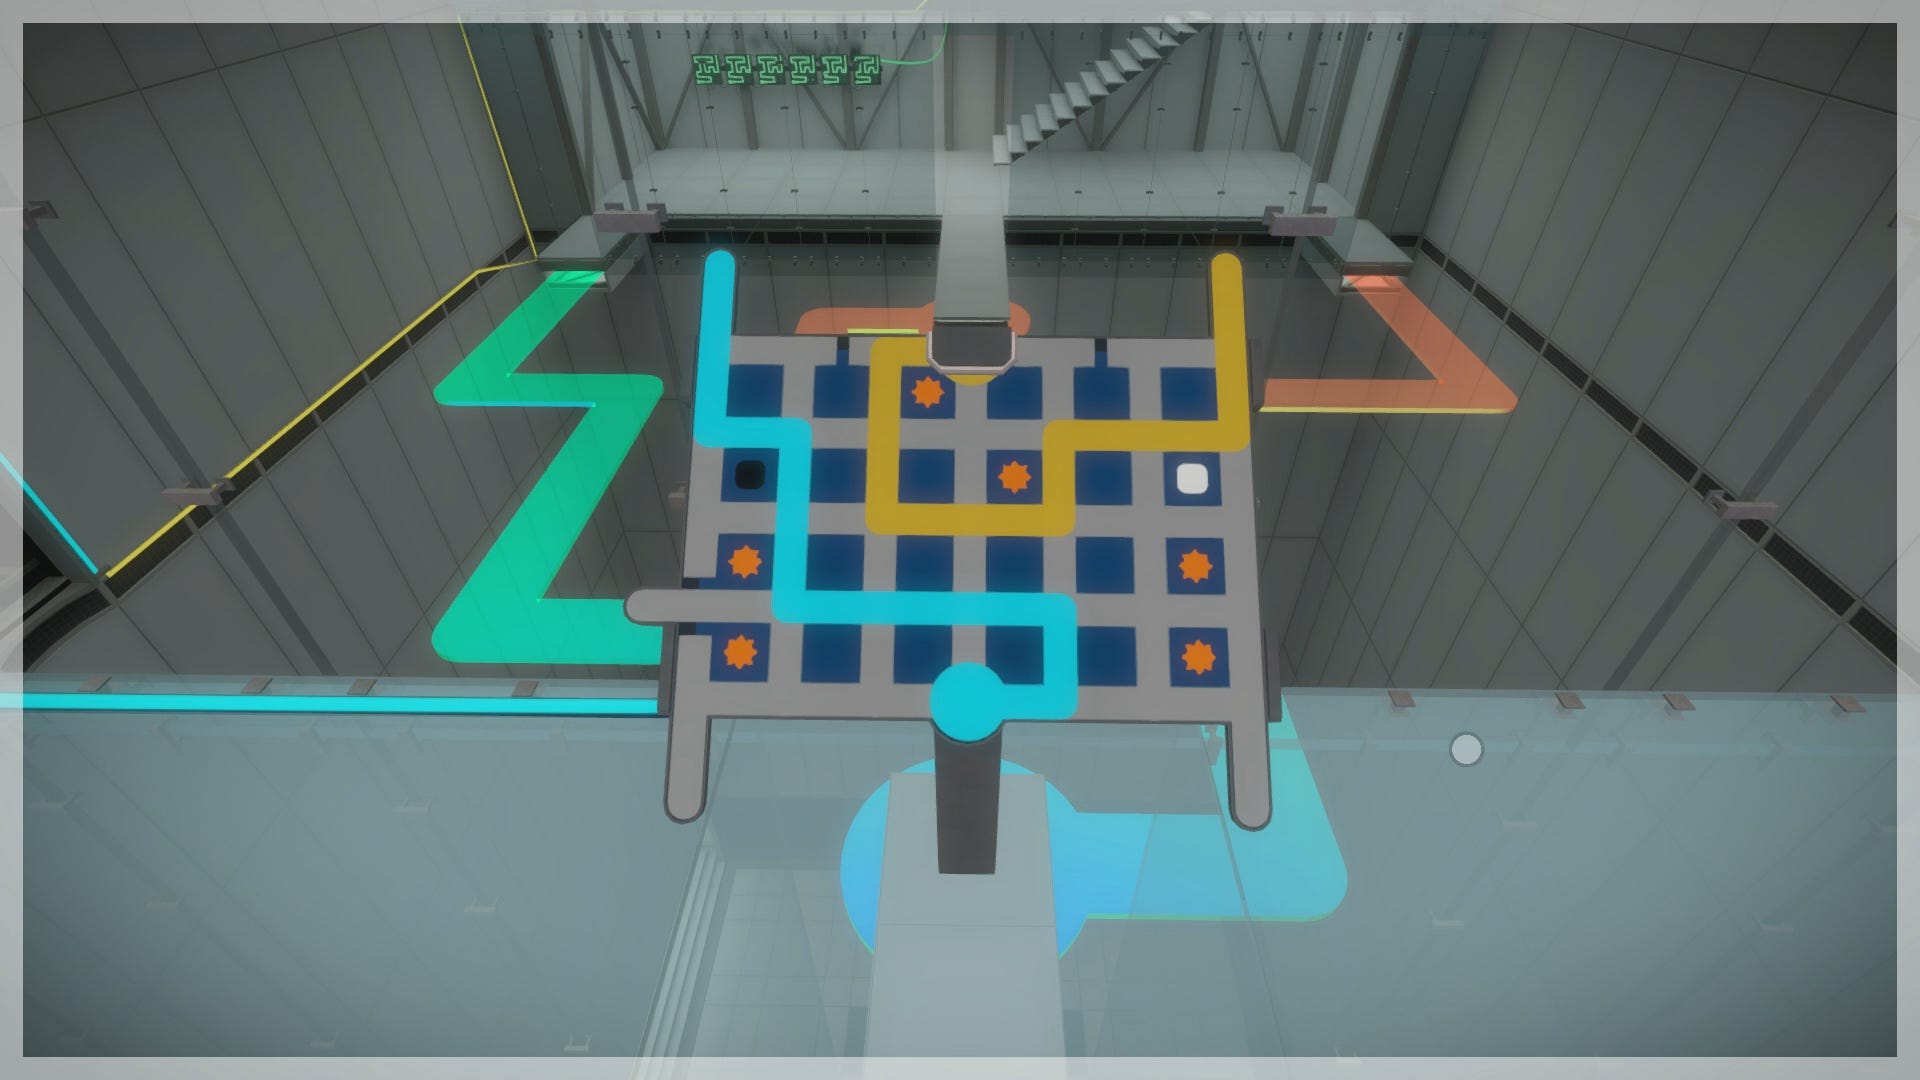

Go back to the flower side and input the first blue solution below on the upstairs panel, then return to the other room to input the new yellow line on the panel.
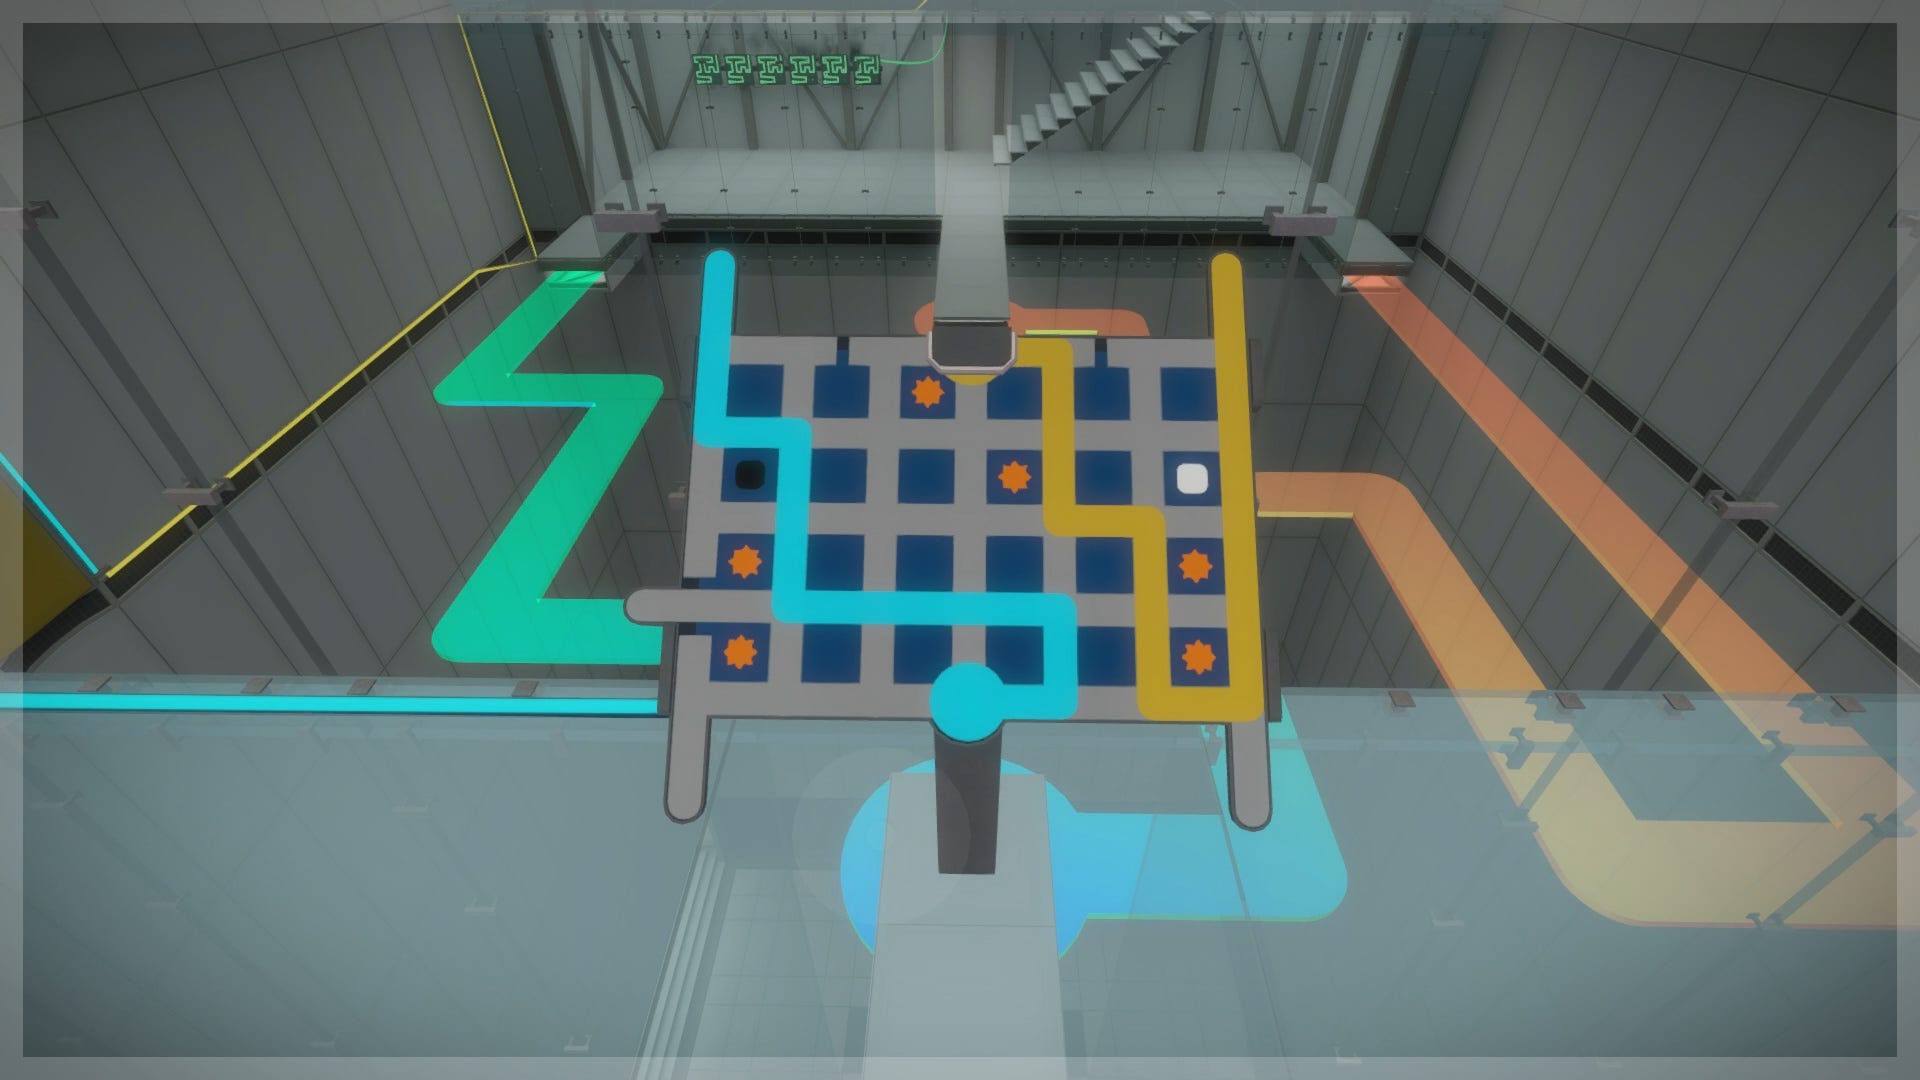
Finally, go back to the flower room one last time and input the last blue solution below into the panel, allowing you to reach the main chamber door.
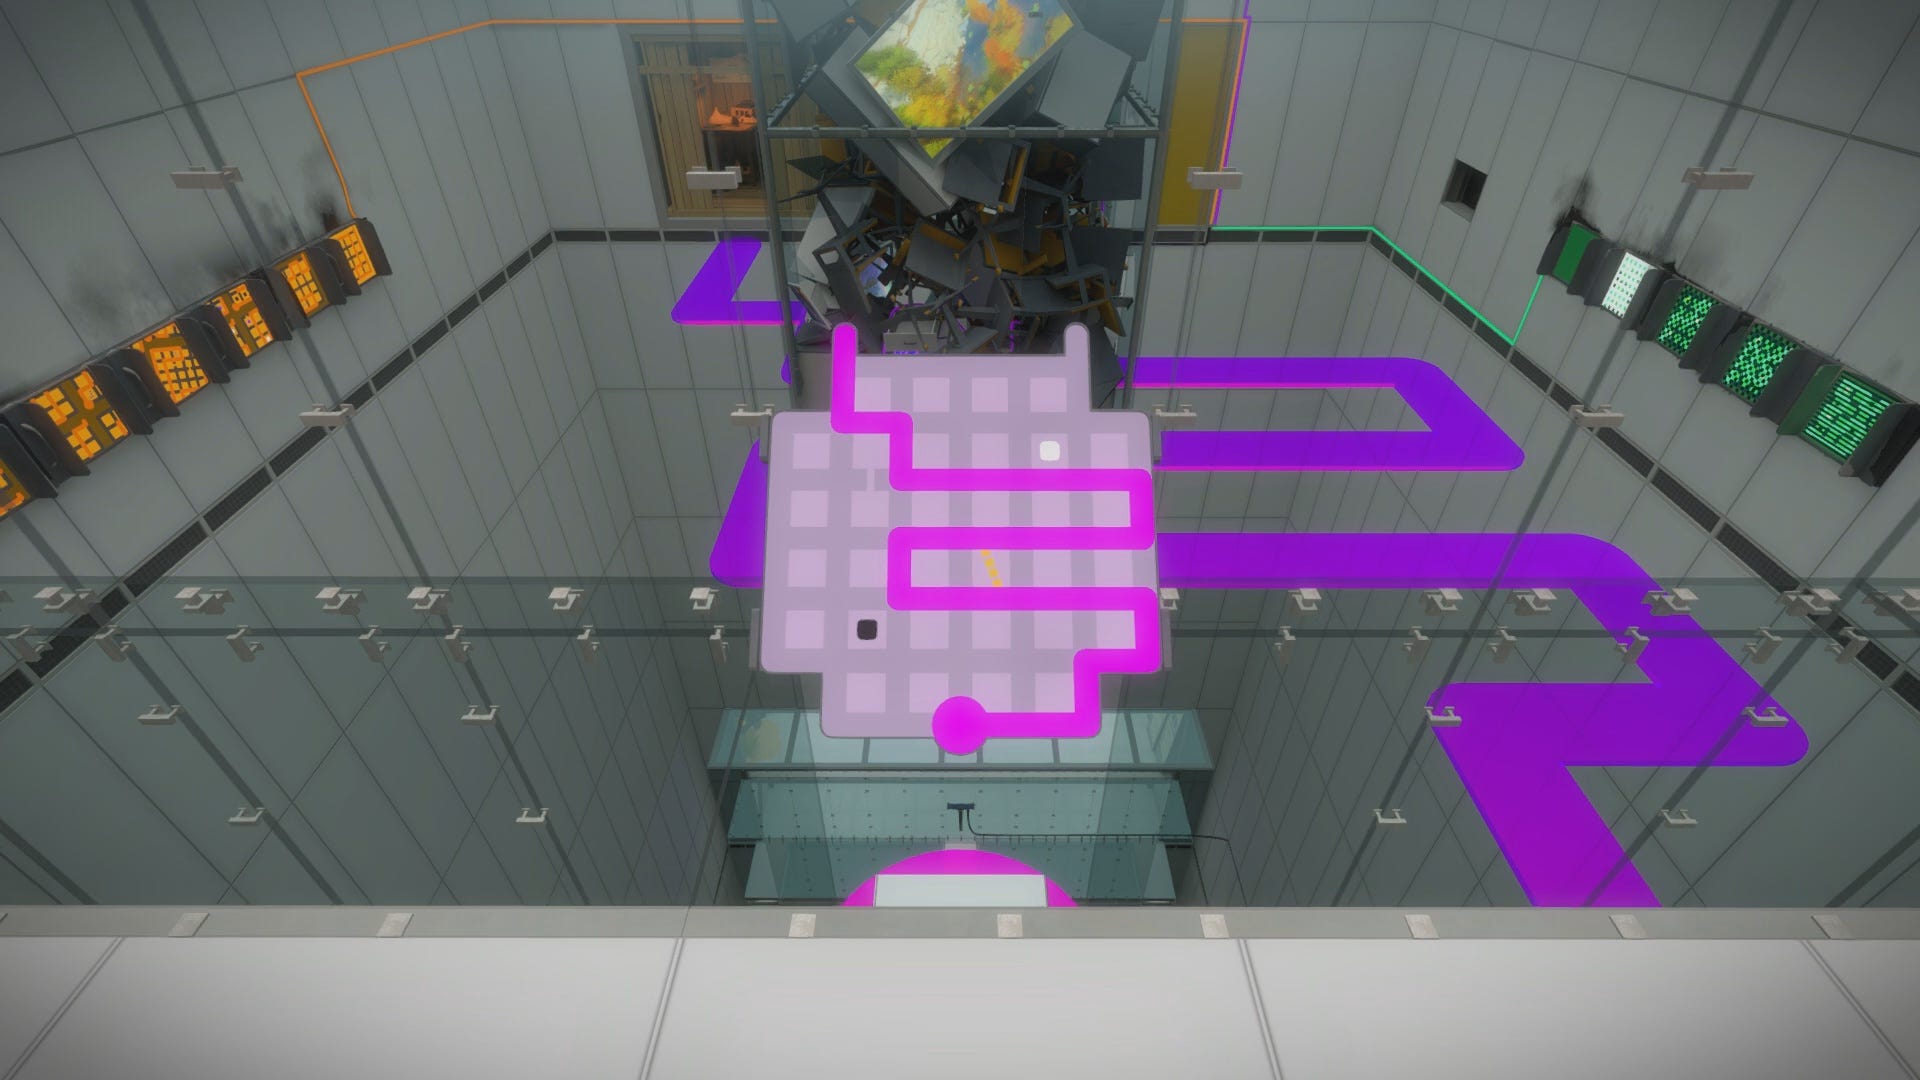
Enter the doorway and activate the elevator to descend further into the Mountain. You will now be on the ground floor of the central chamber.
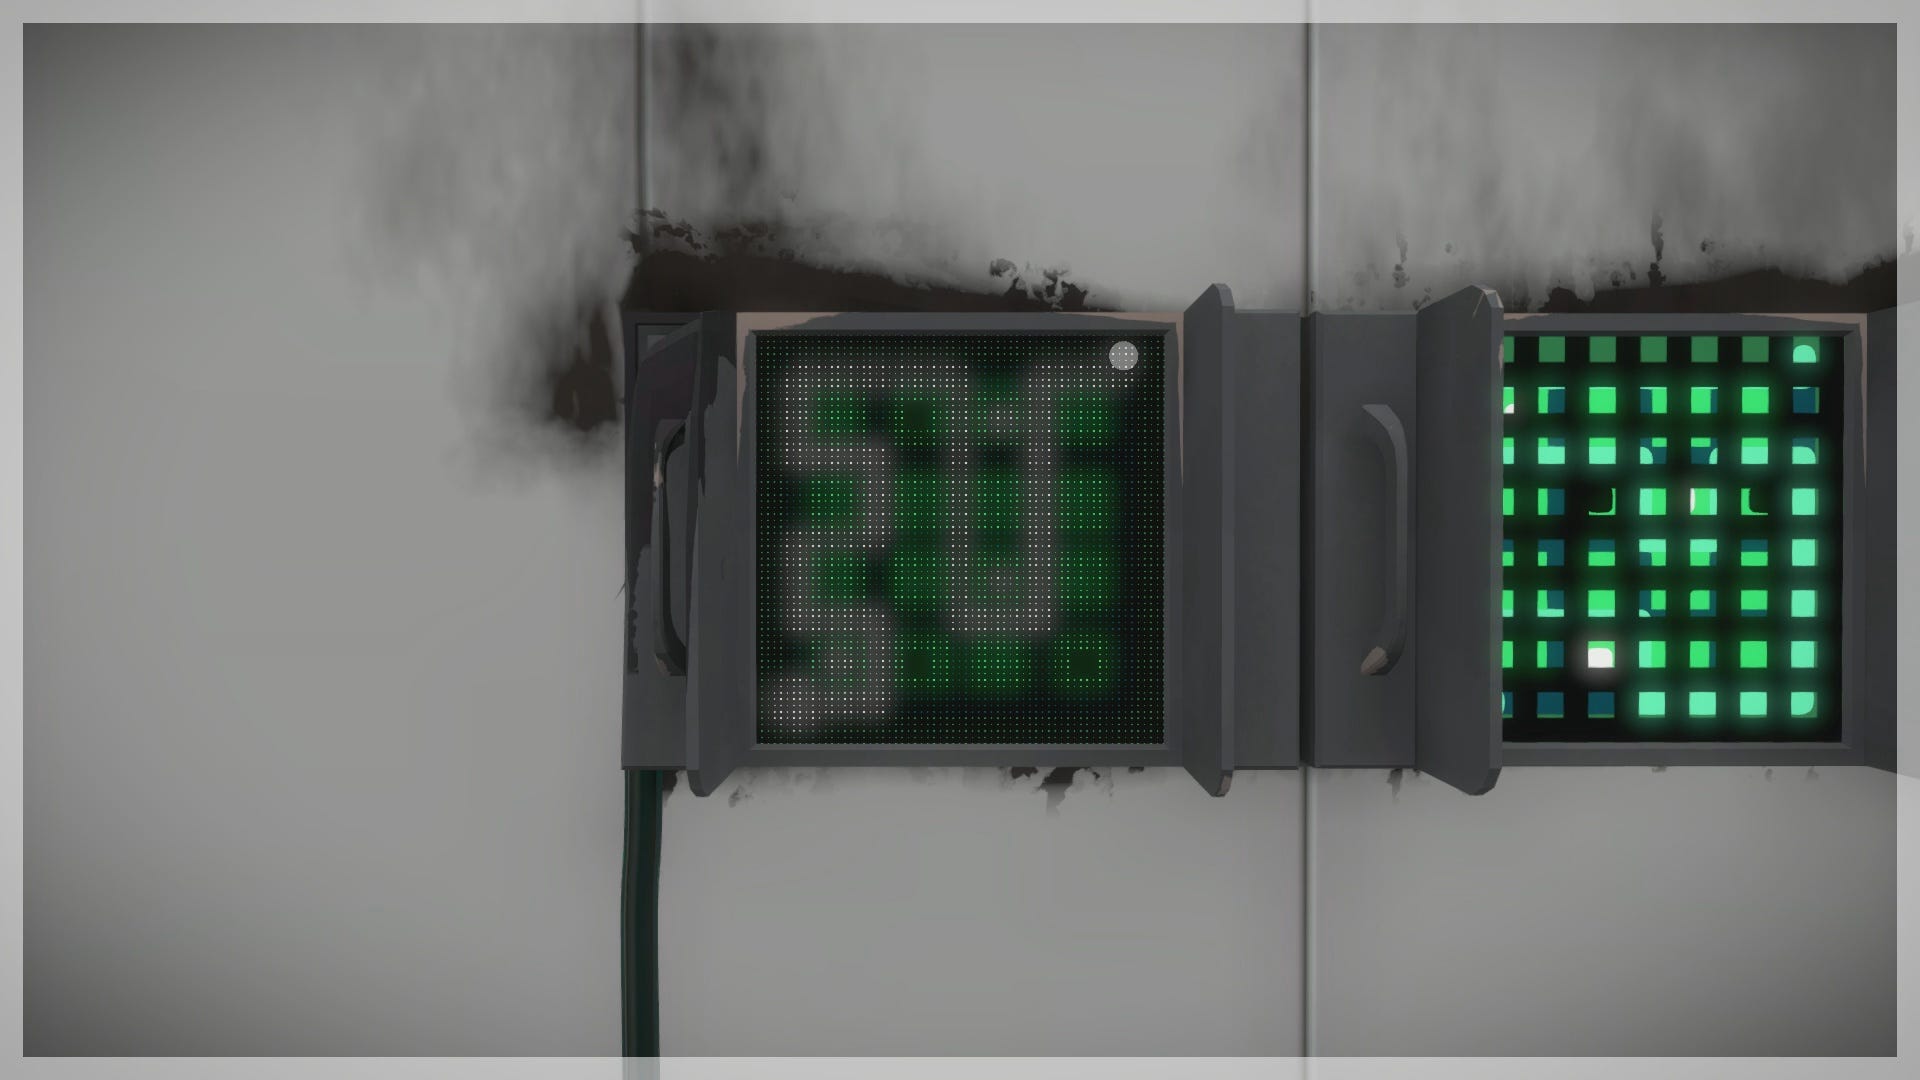
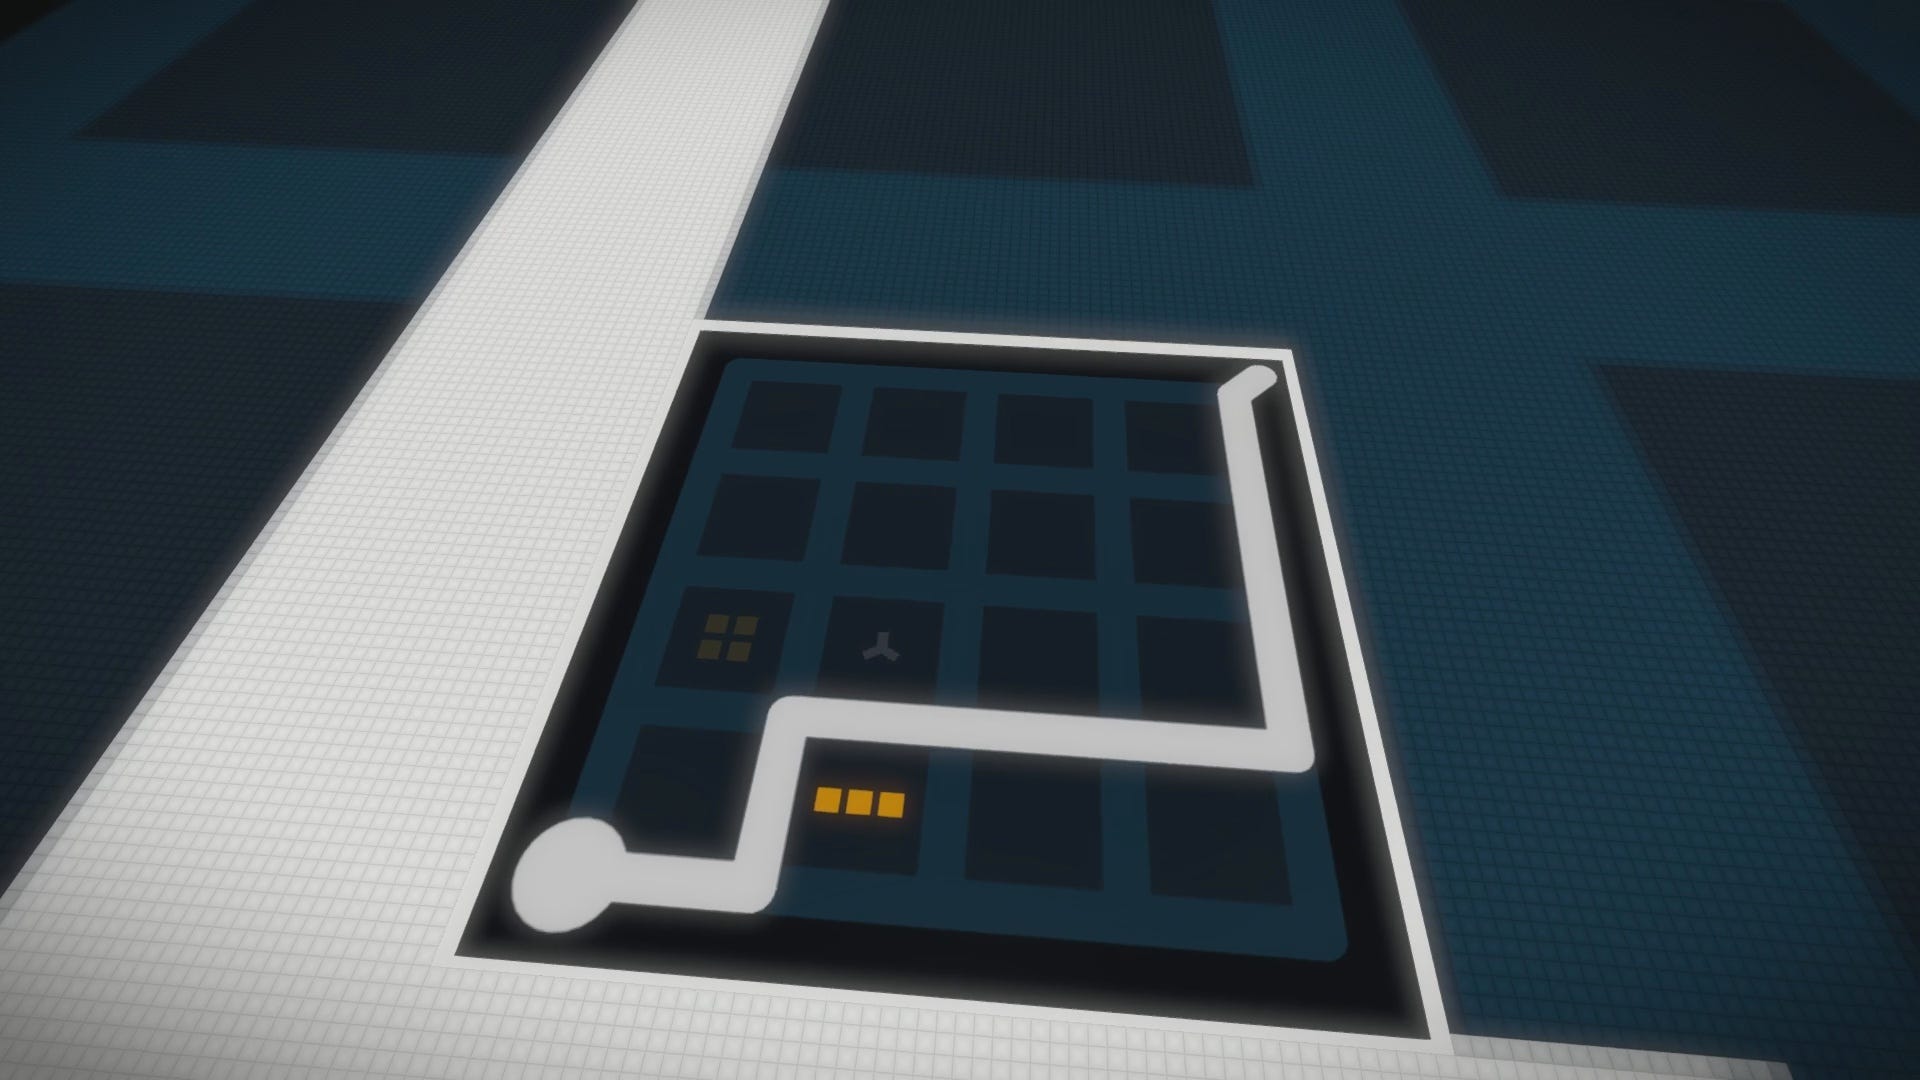
There are four elimination puzzles on the floor that include two Tetris shapes. The Tetris shape you choose to eliminate in each panel will affect the larger puzzle within the room. If you want to avoid the hassle, just use our solutions for the four panels below, then solve the large symmetry puzzle accordingly.

The next two puzzle panels on the door ahead are not only timed, but they are also random. As you approach the door, you will have a few seconds to solve the puzzles before the wooden flap closes. When the flap closes, the panel will change to a completely different puzzle, with the same general mechanics as the previous panel. If you solve a panel, it will remain unchanged while you solve the other panel. Once you solve both, the door will open.
Unfortunately, this means we cannot provide you the solution, as our panels will be different from the ones you receive. Try to be quick when solving the panels, and may the odds be in your favor.
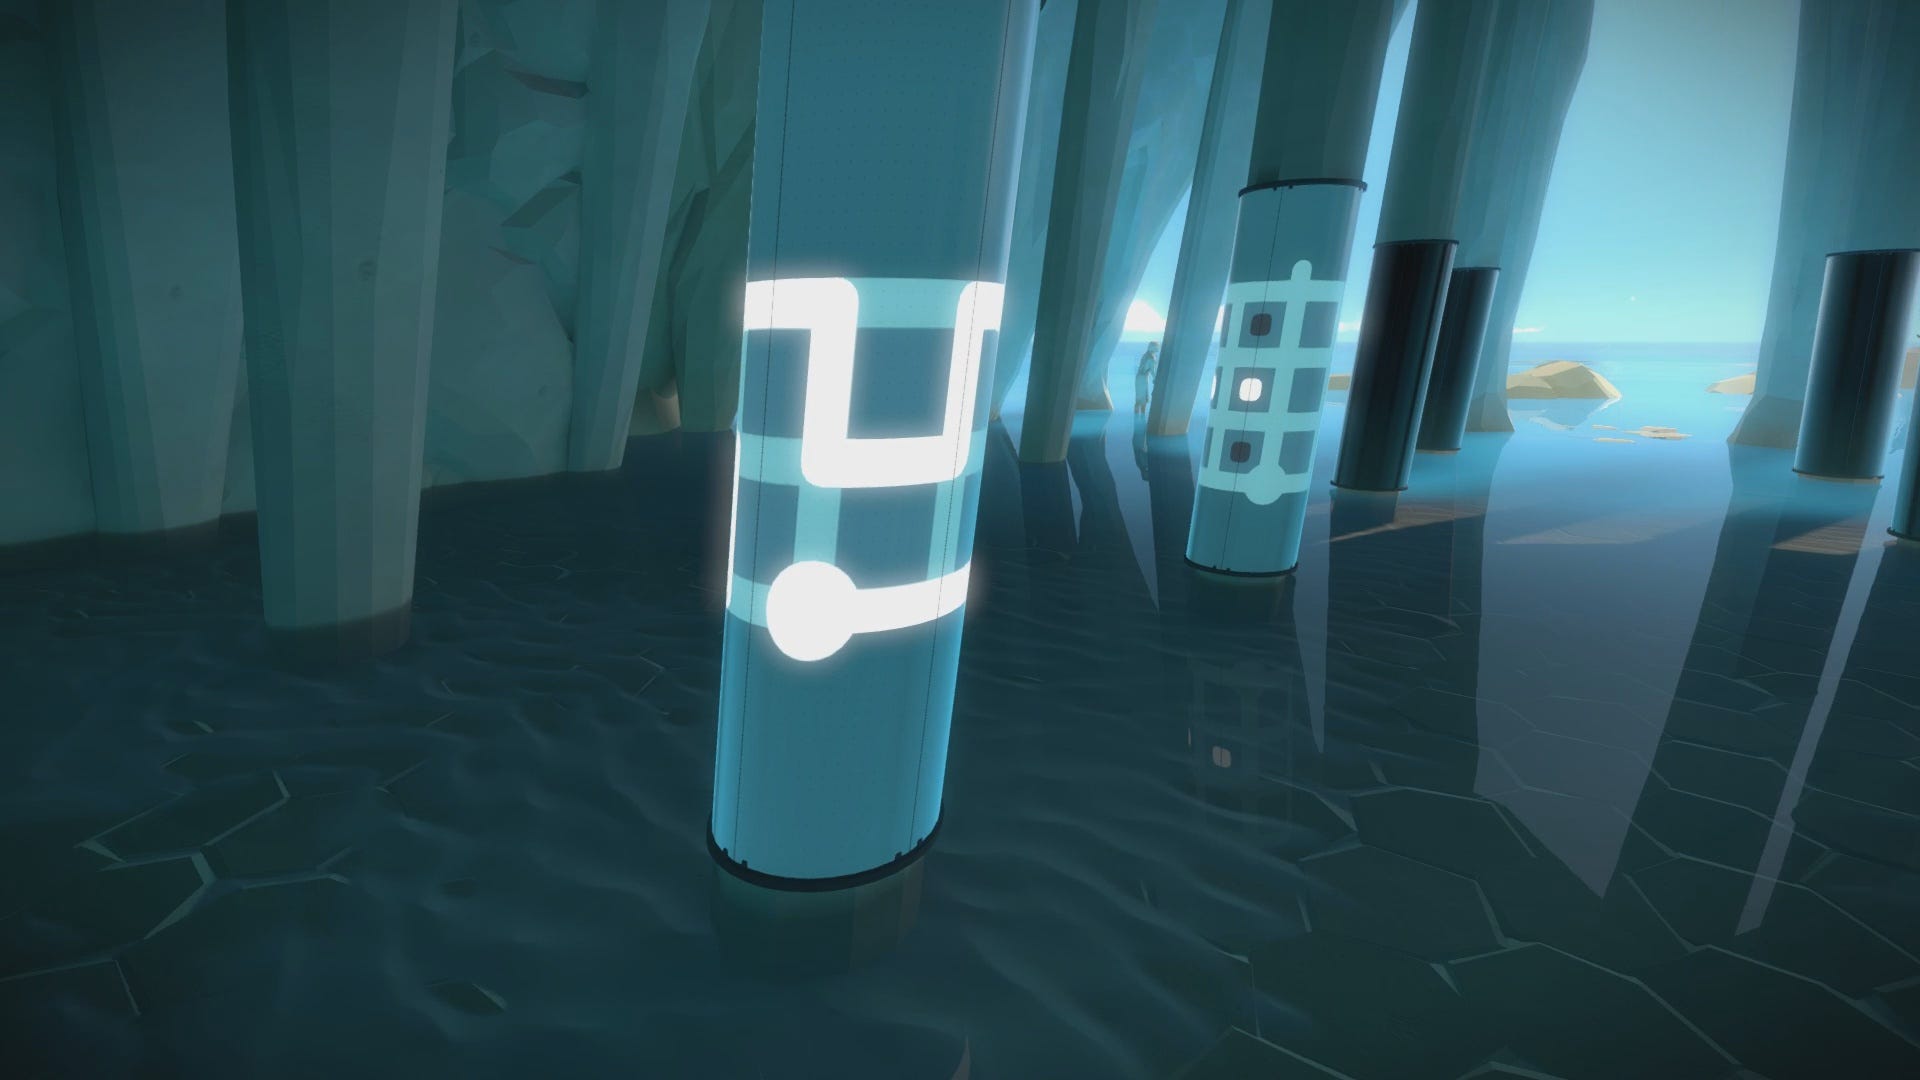
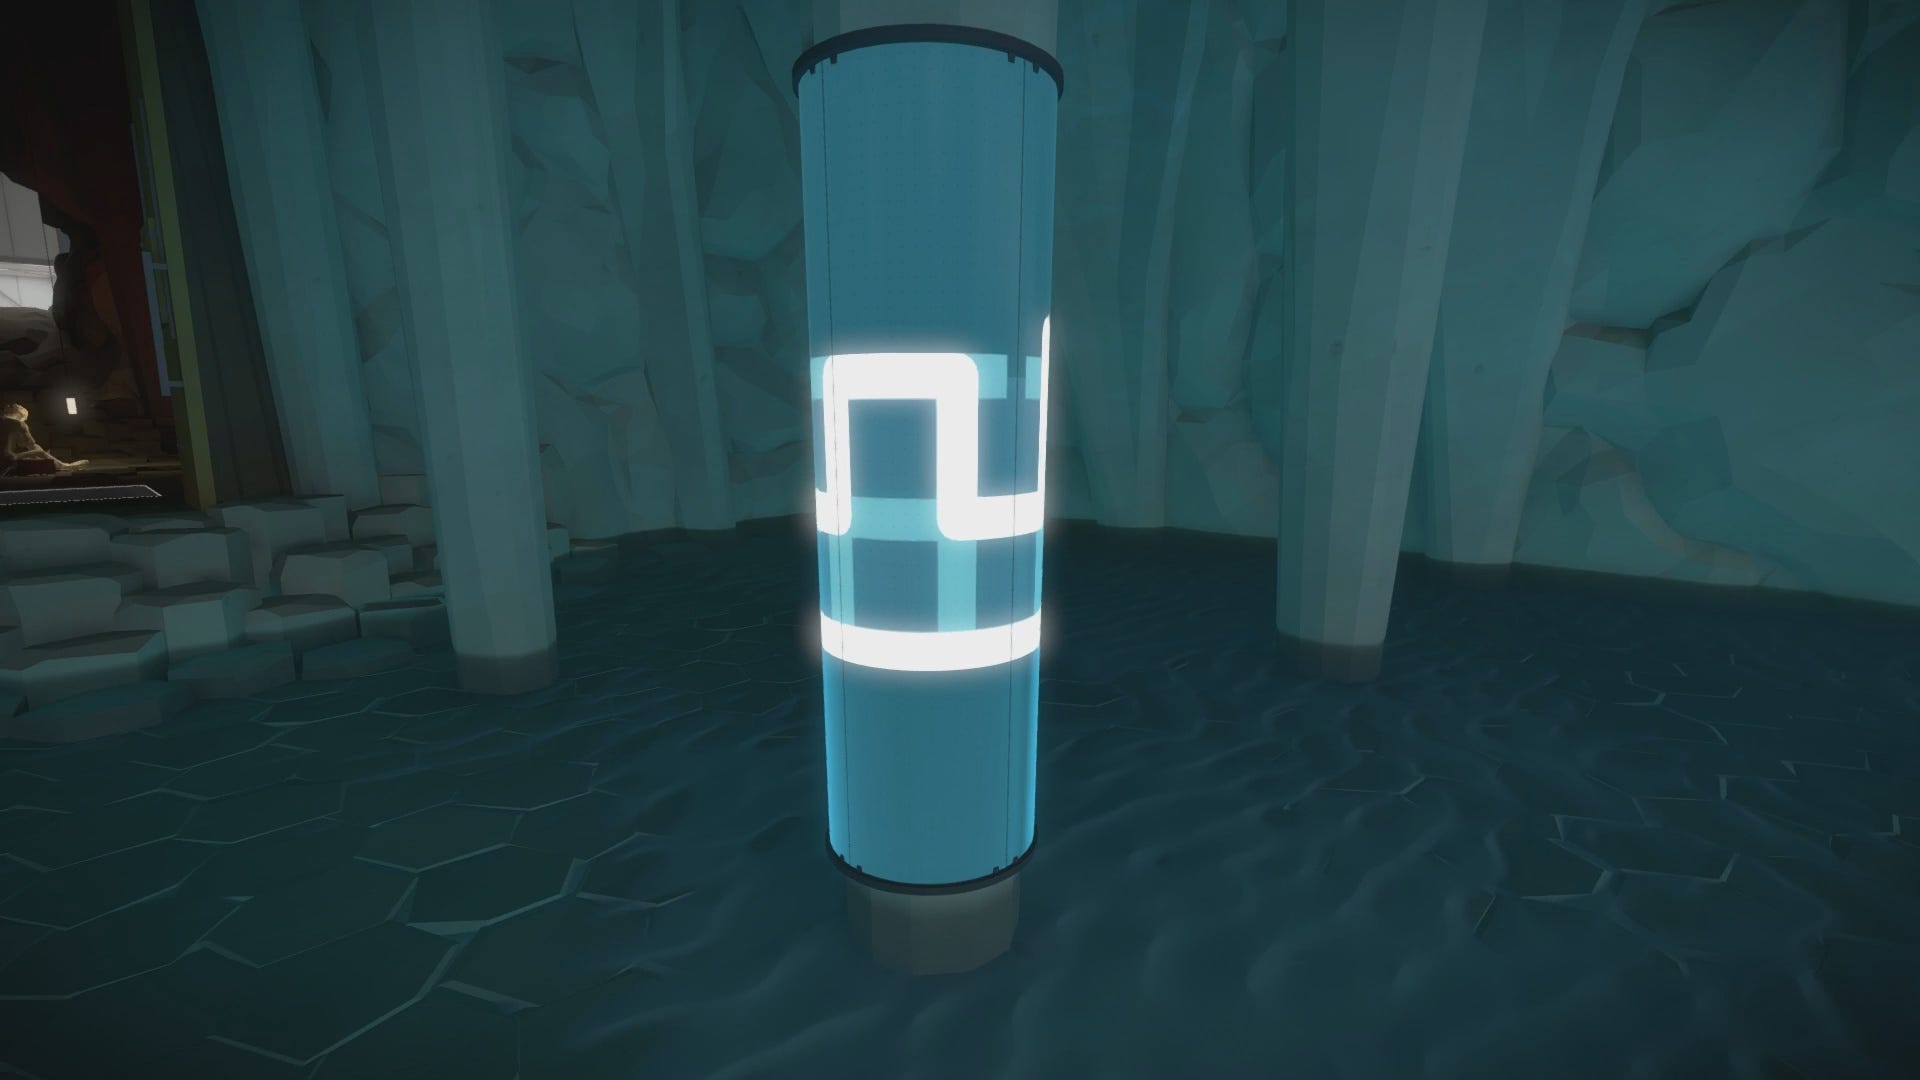
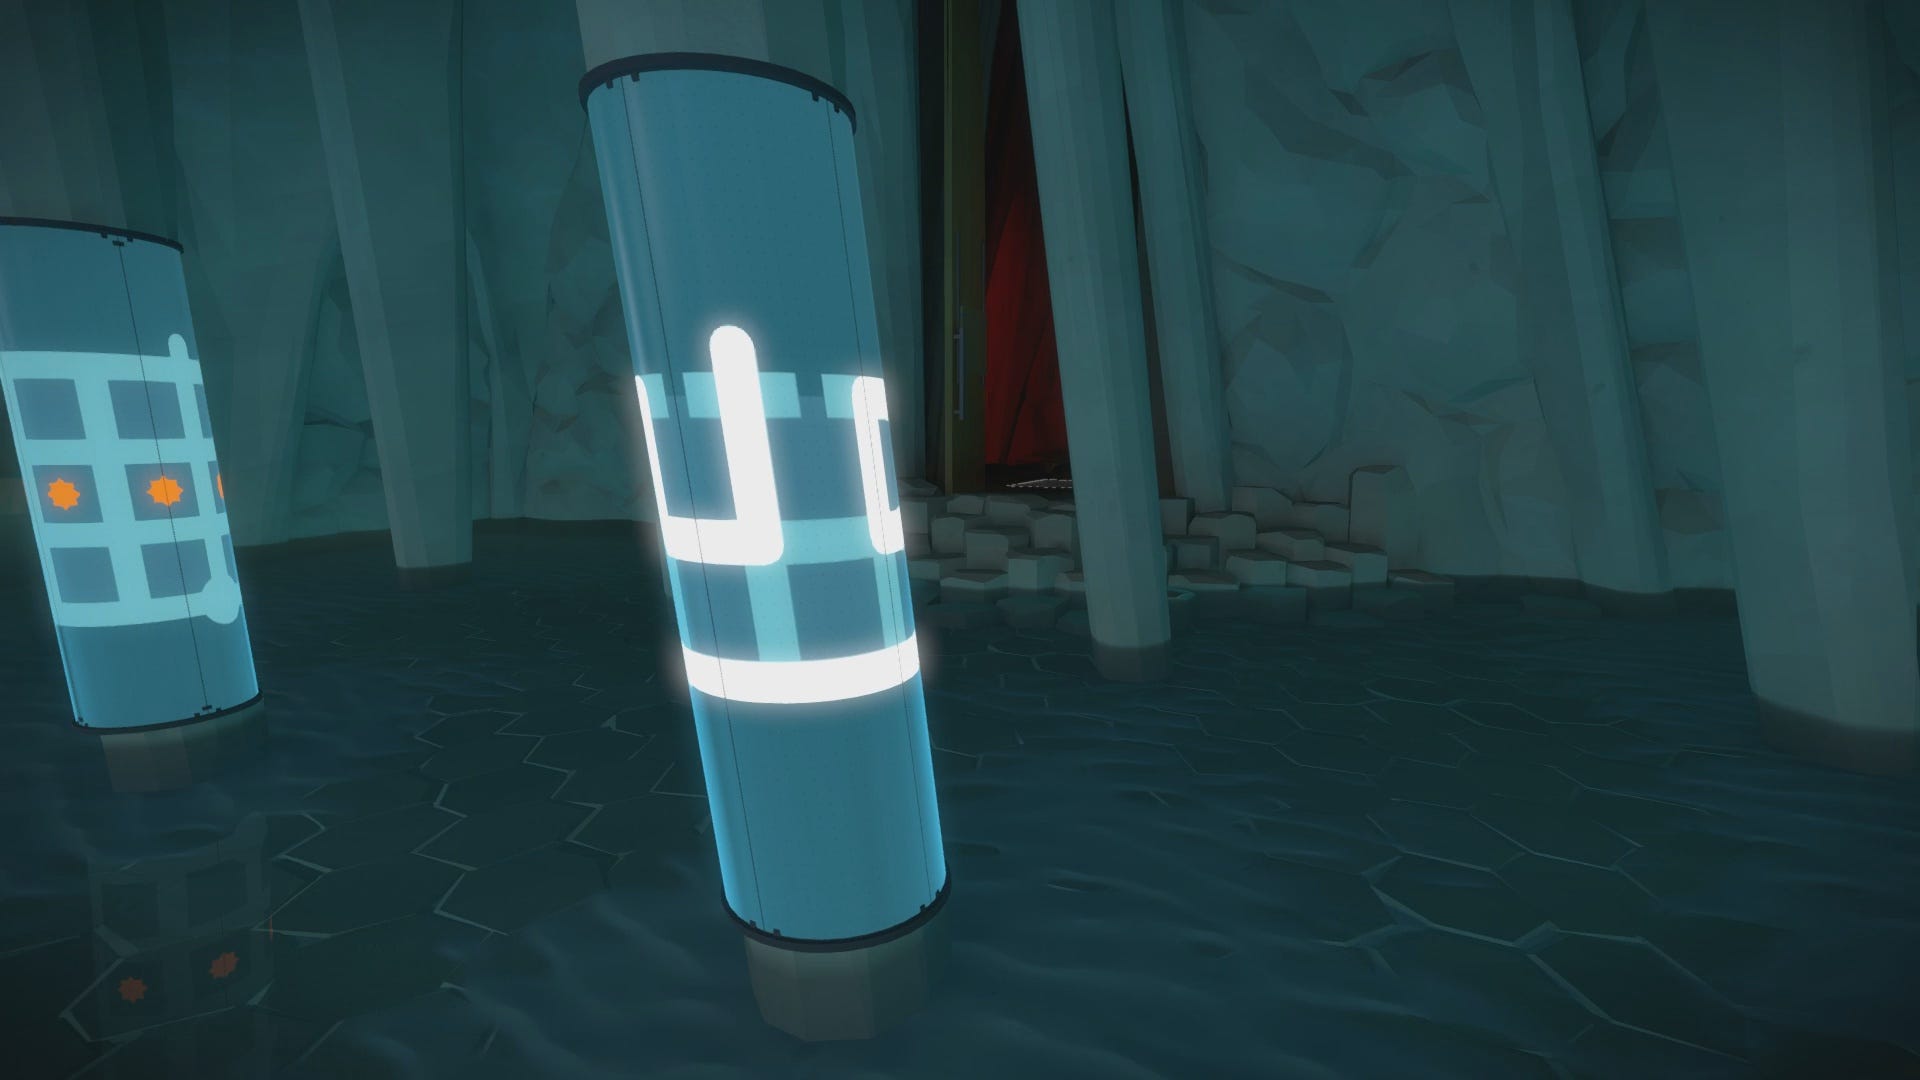
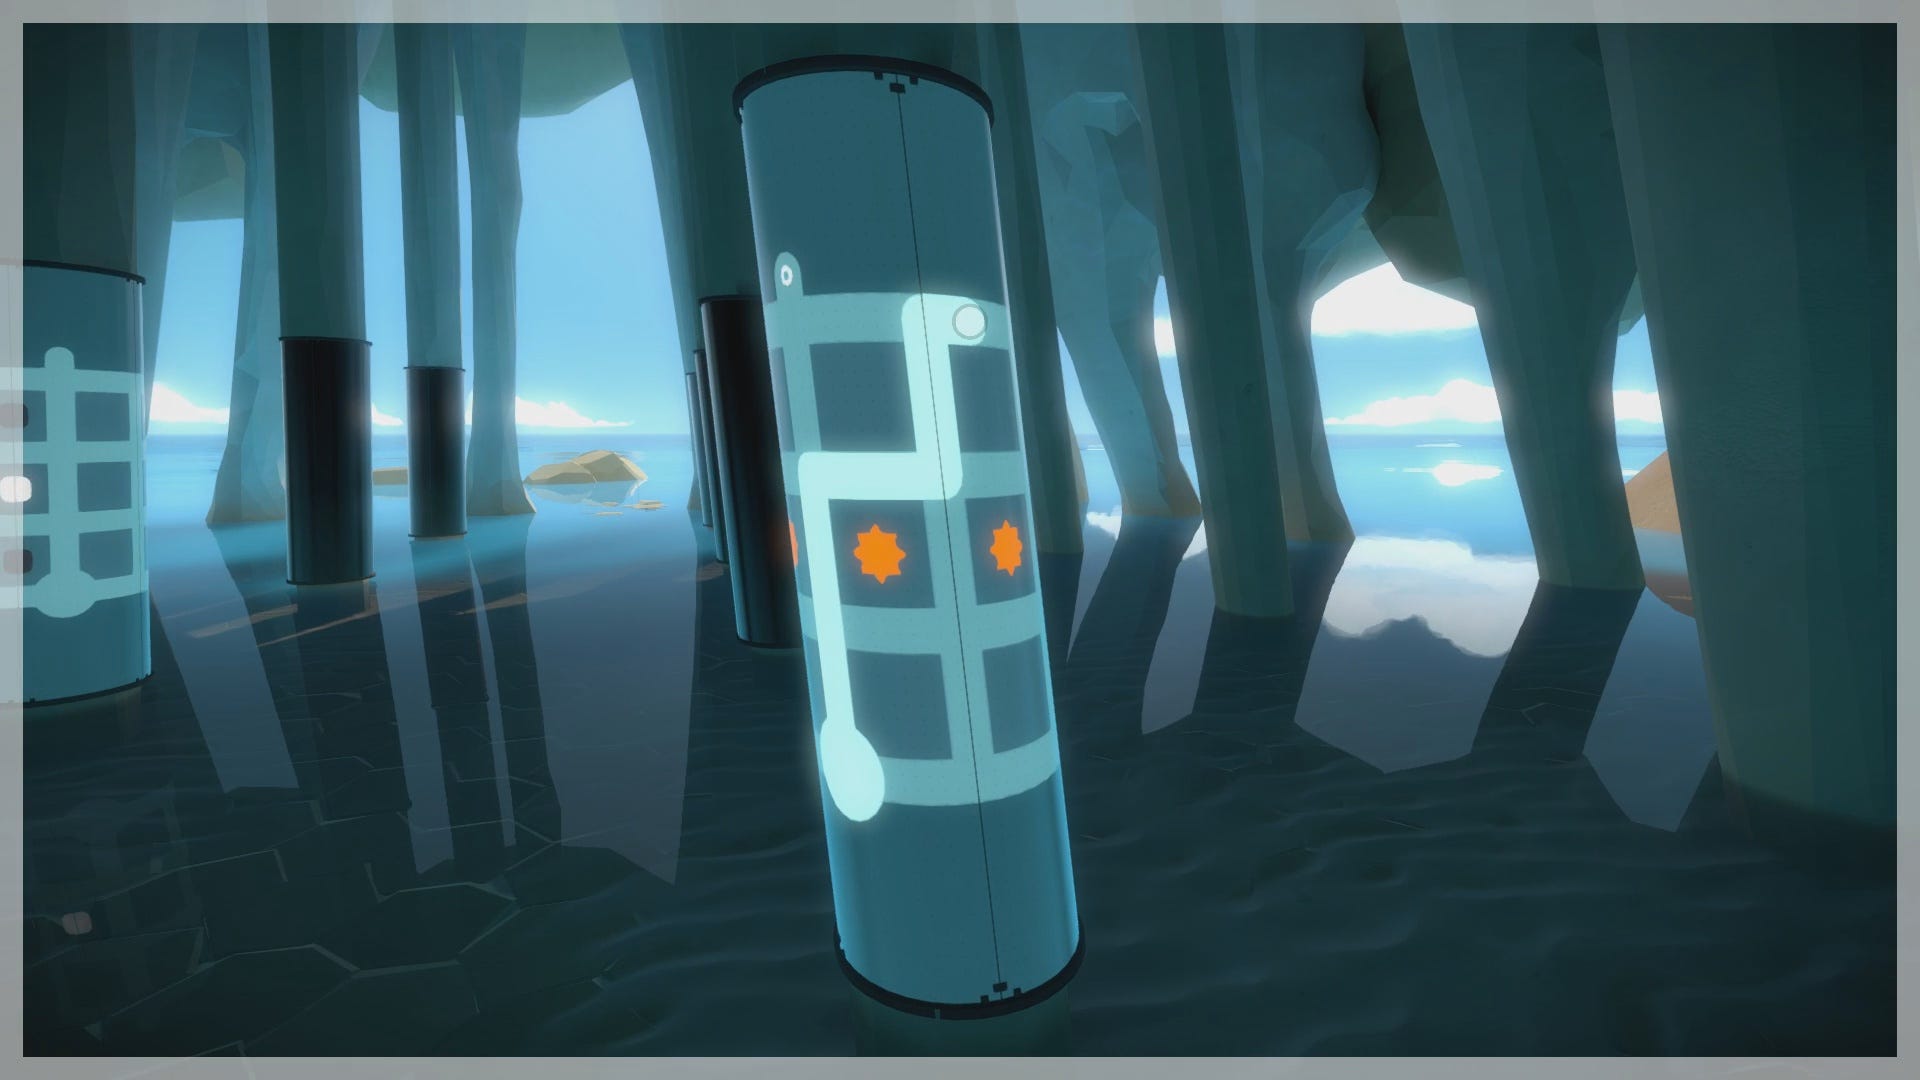
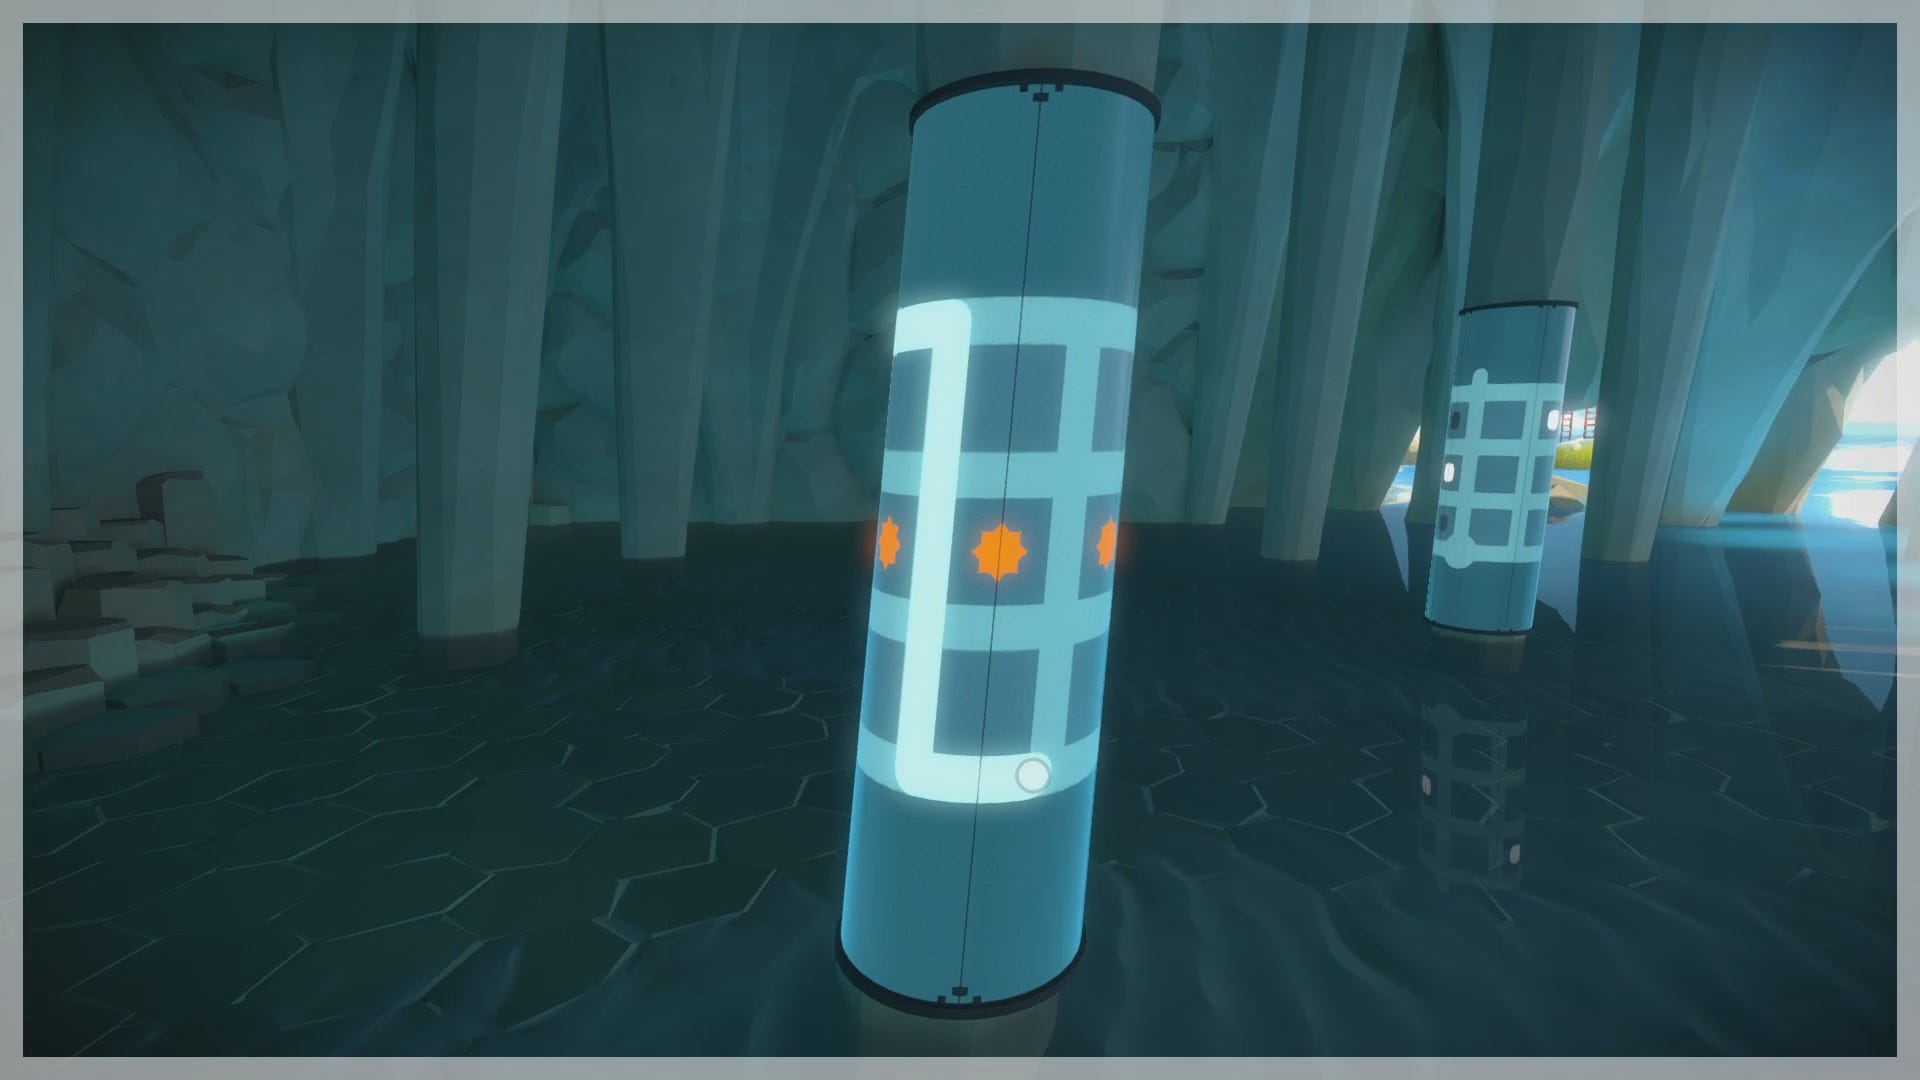
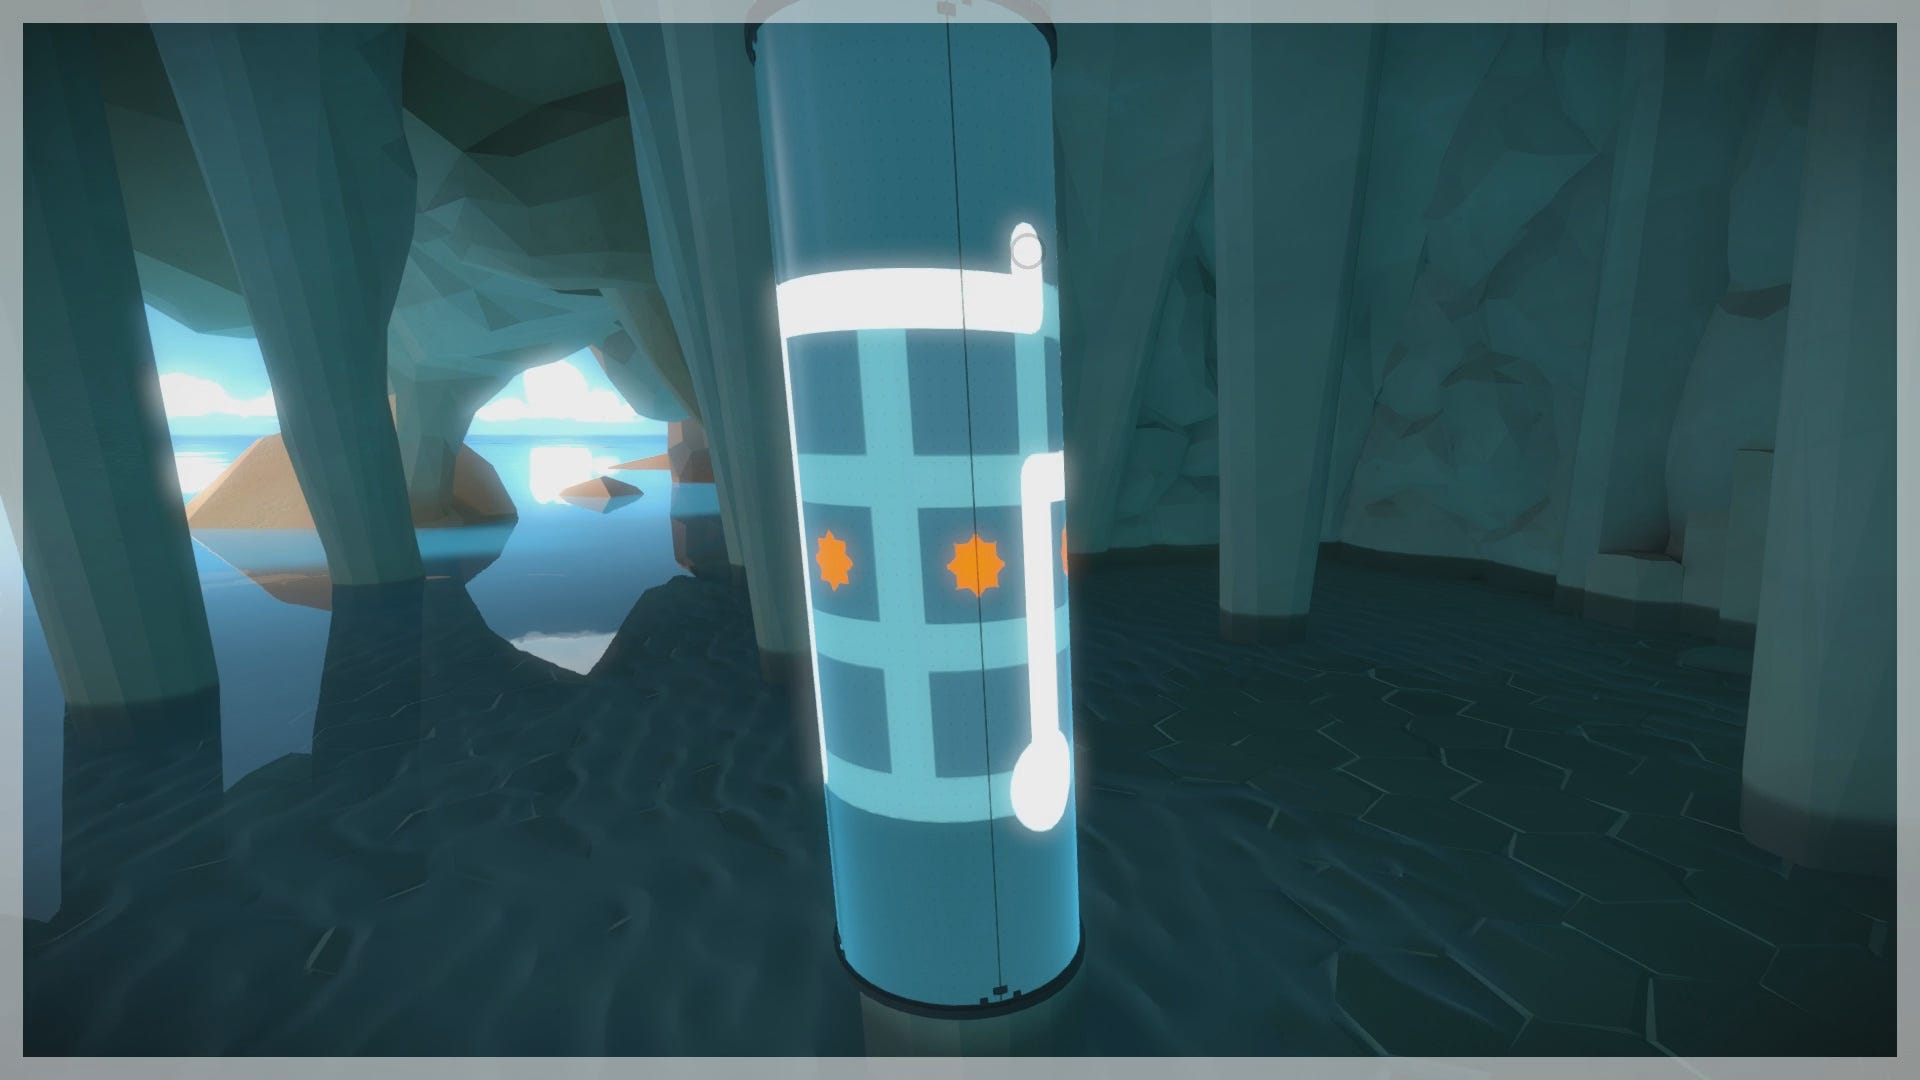
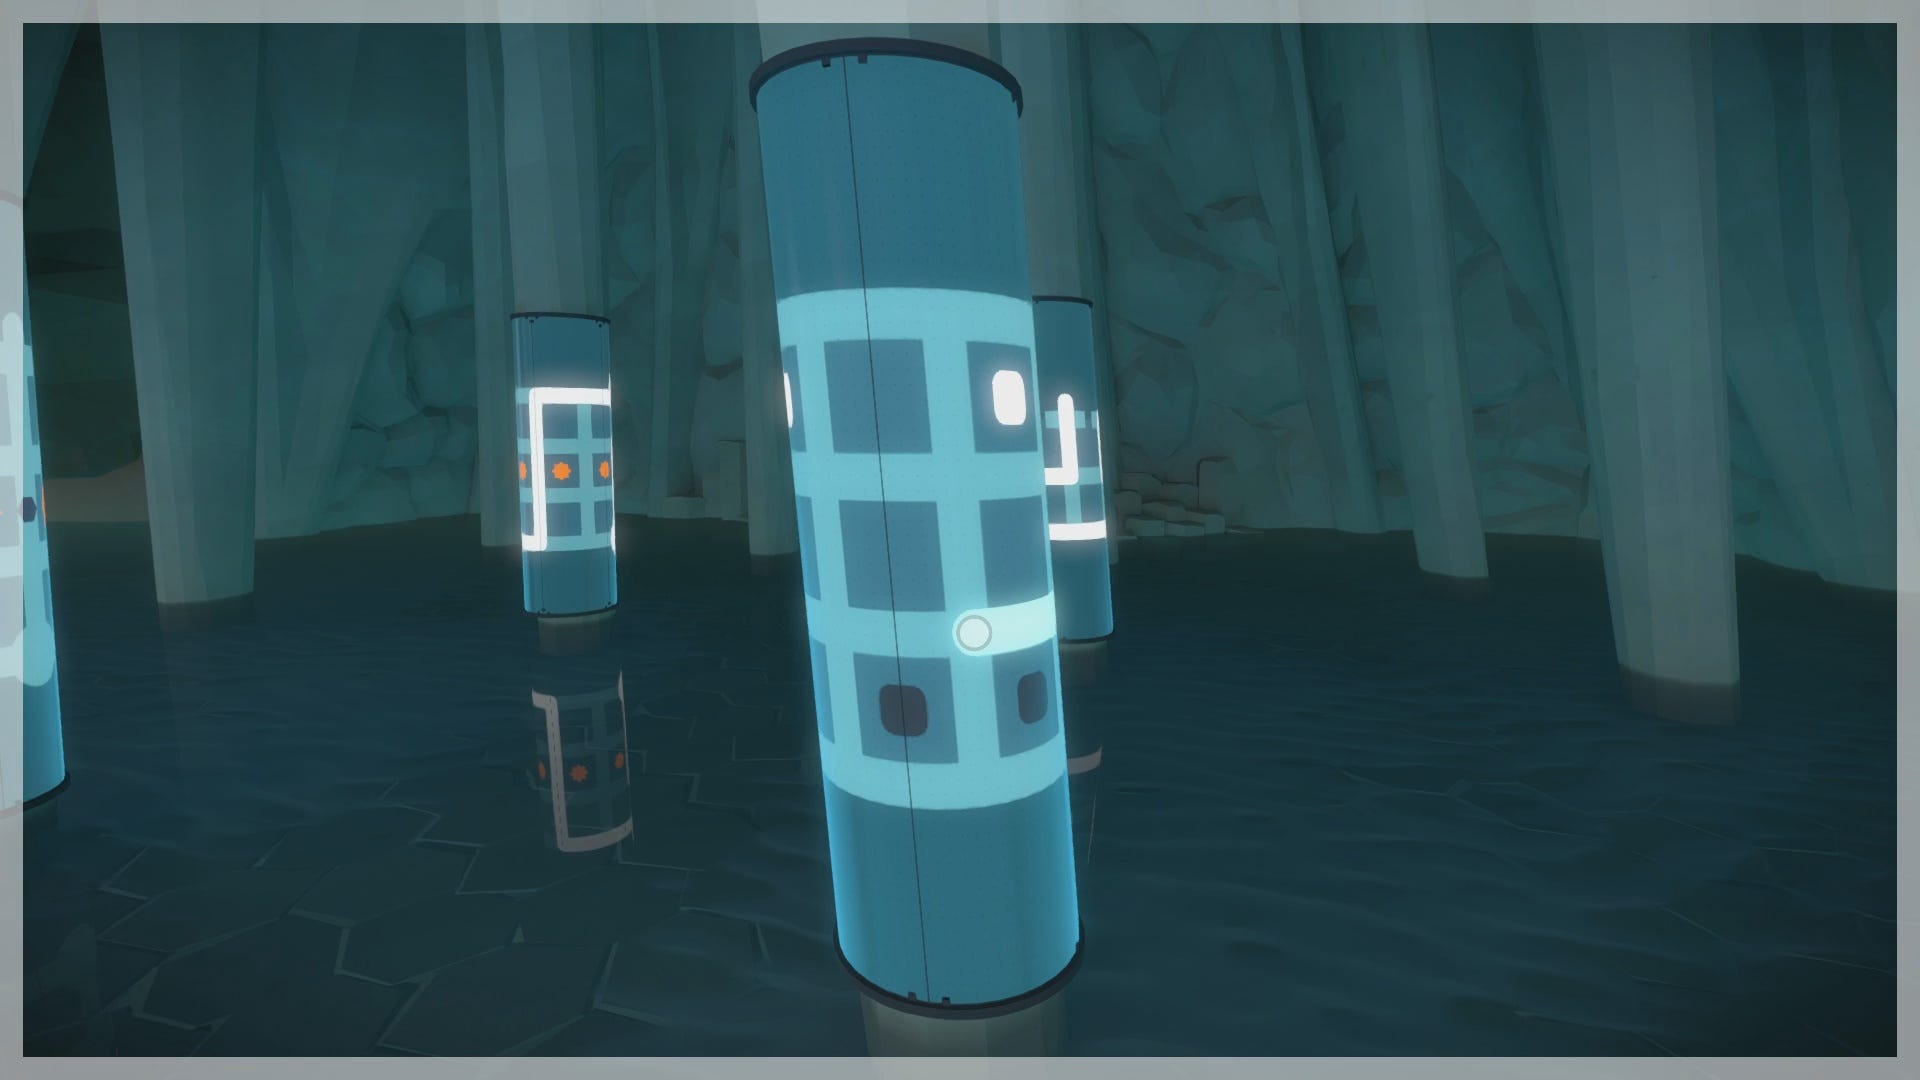
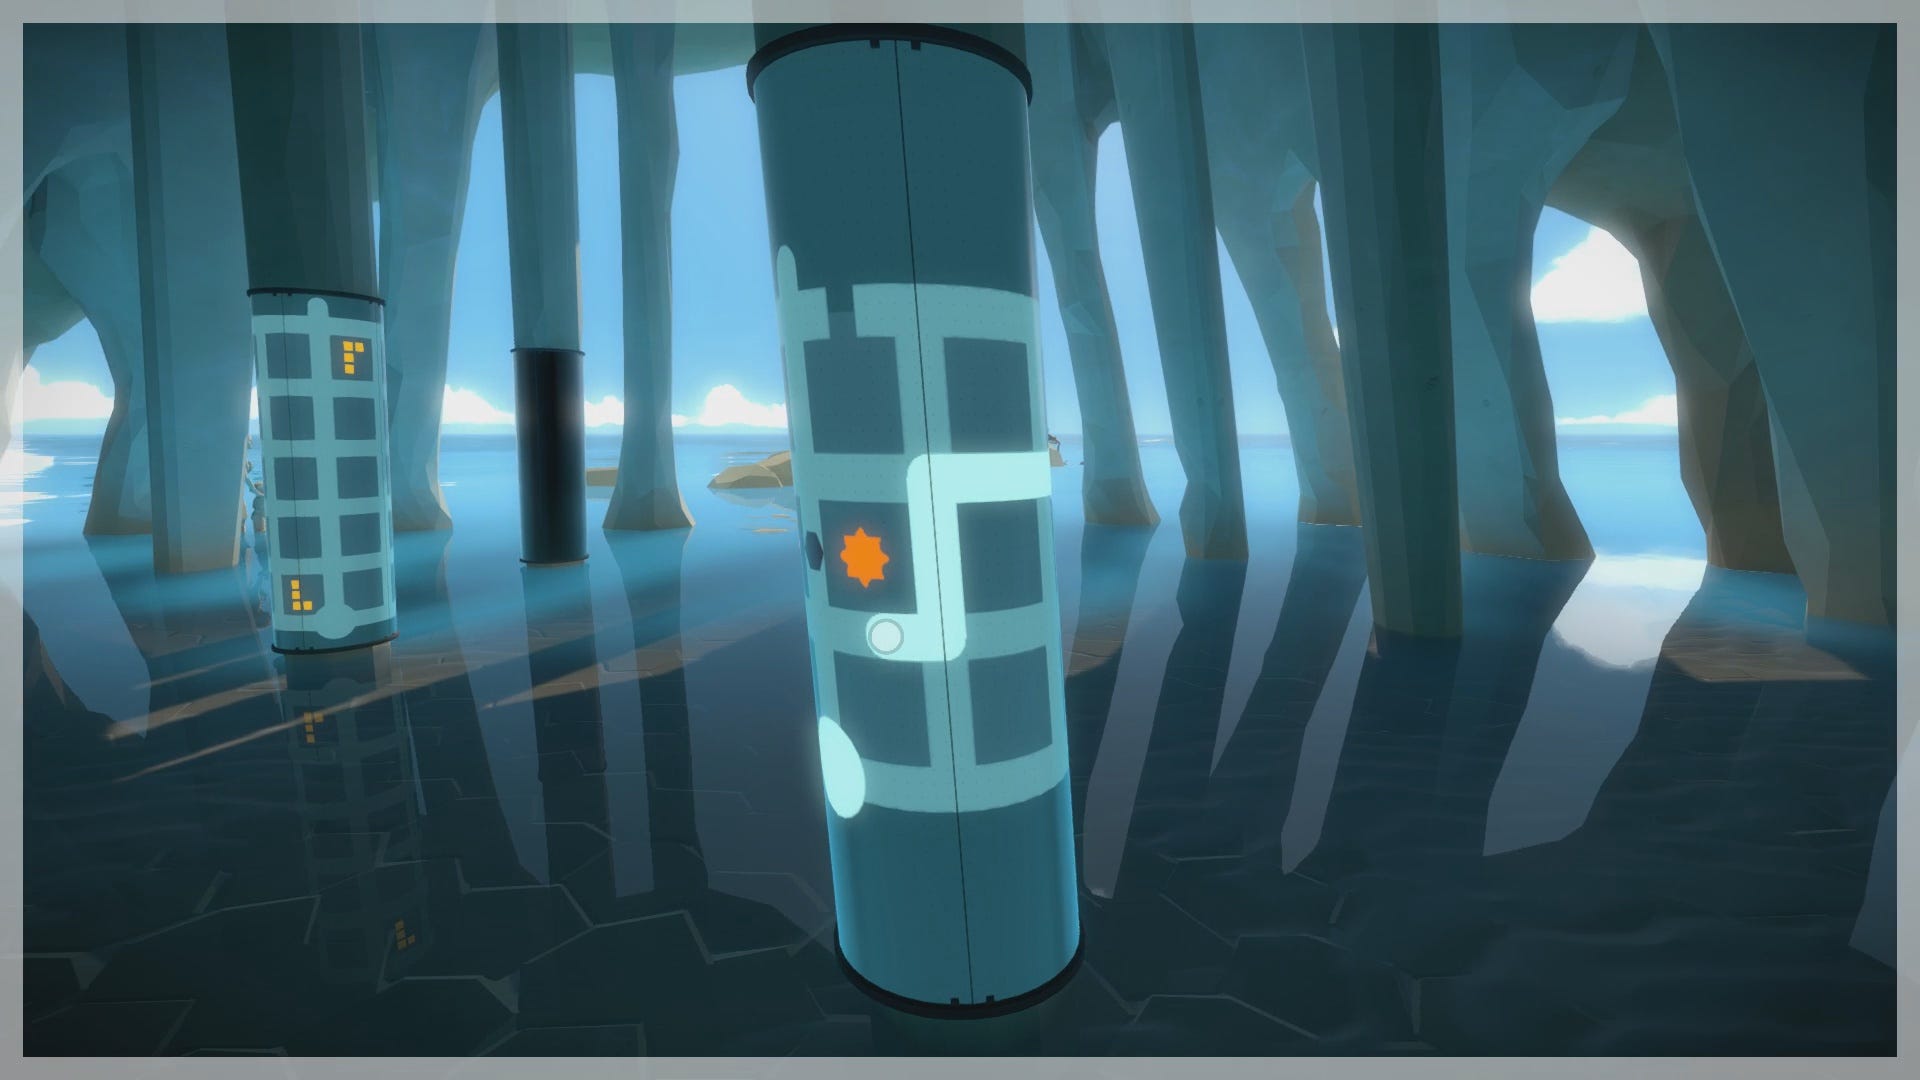
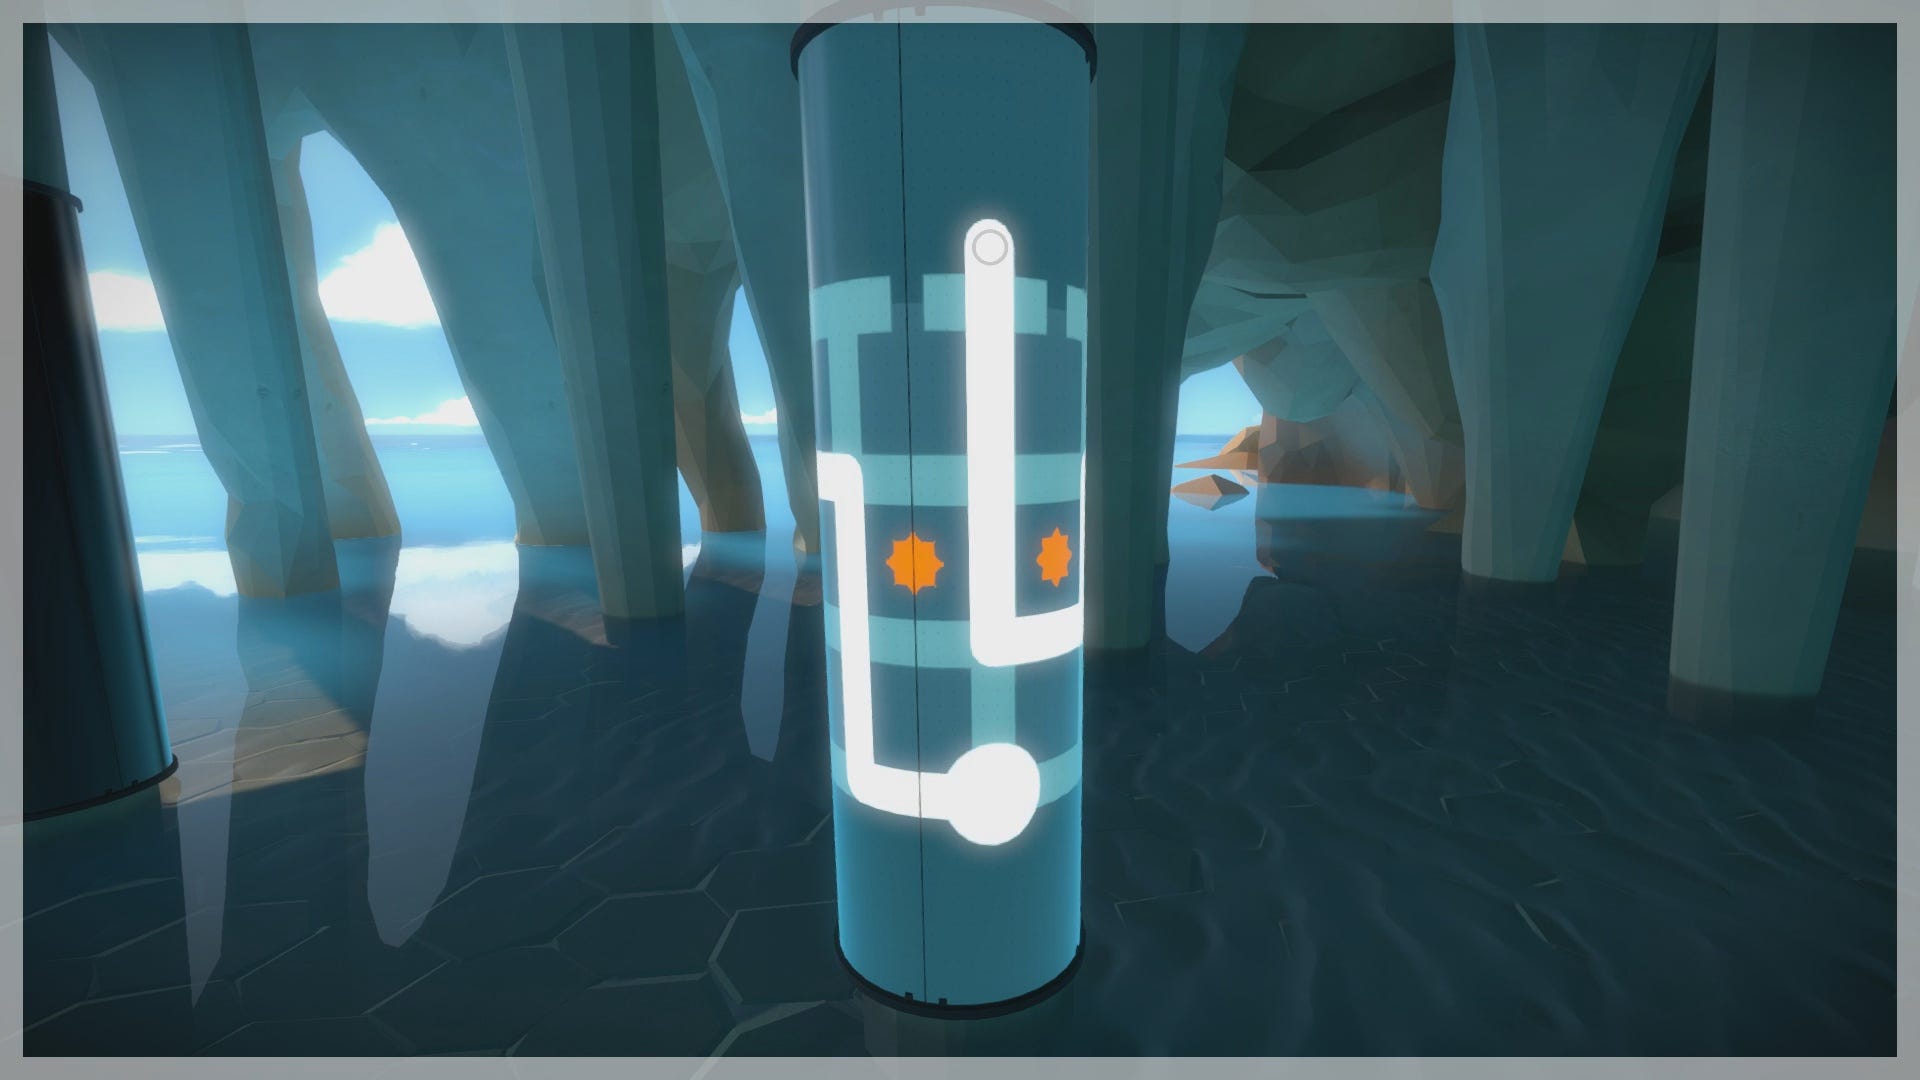
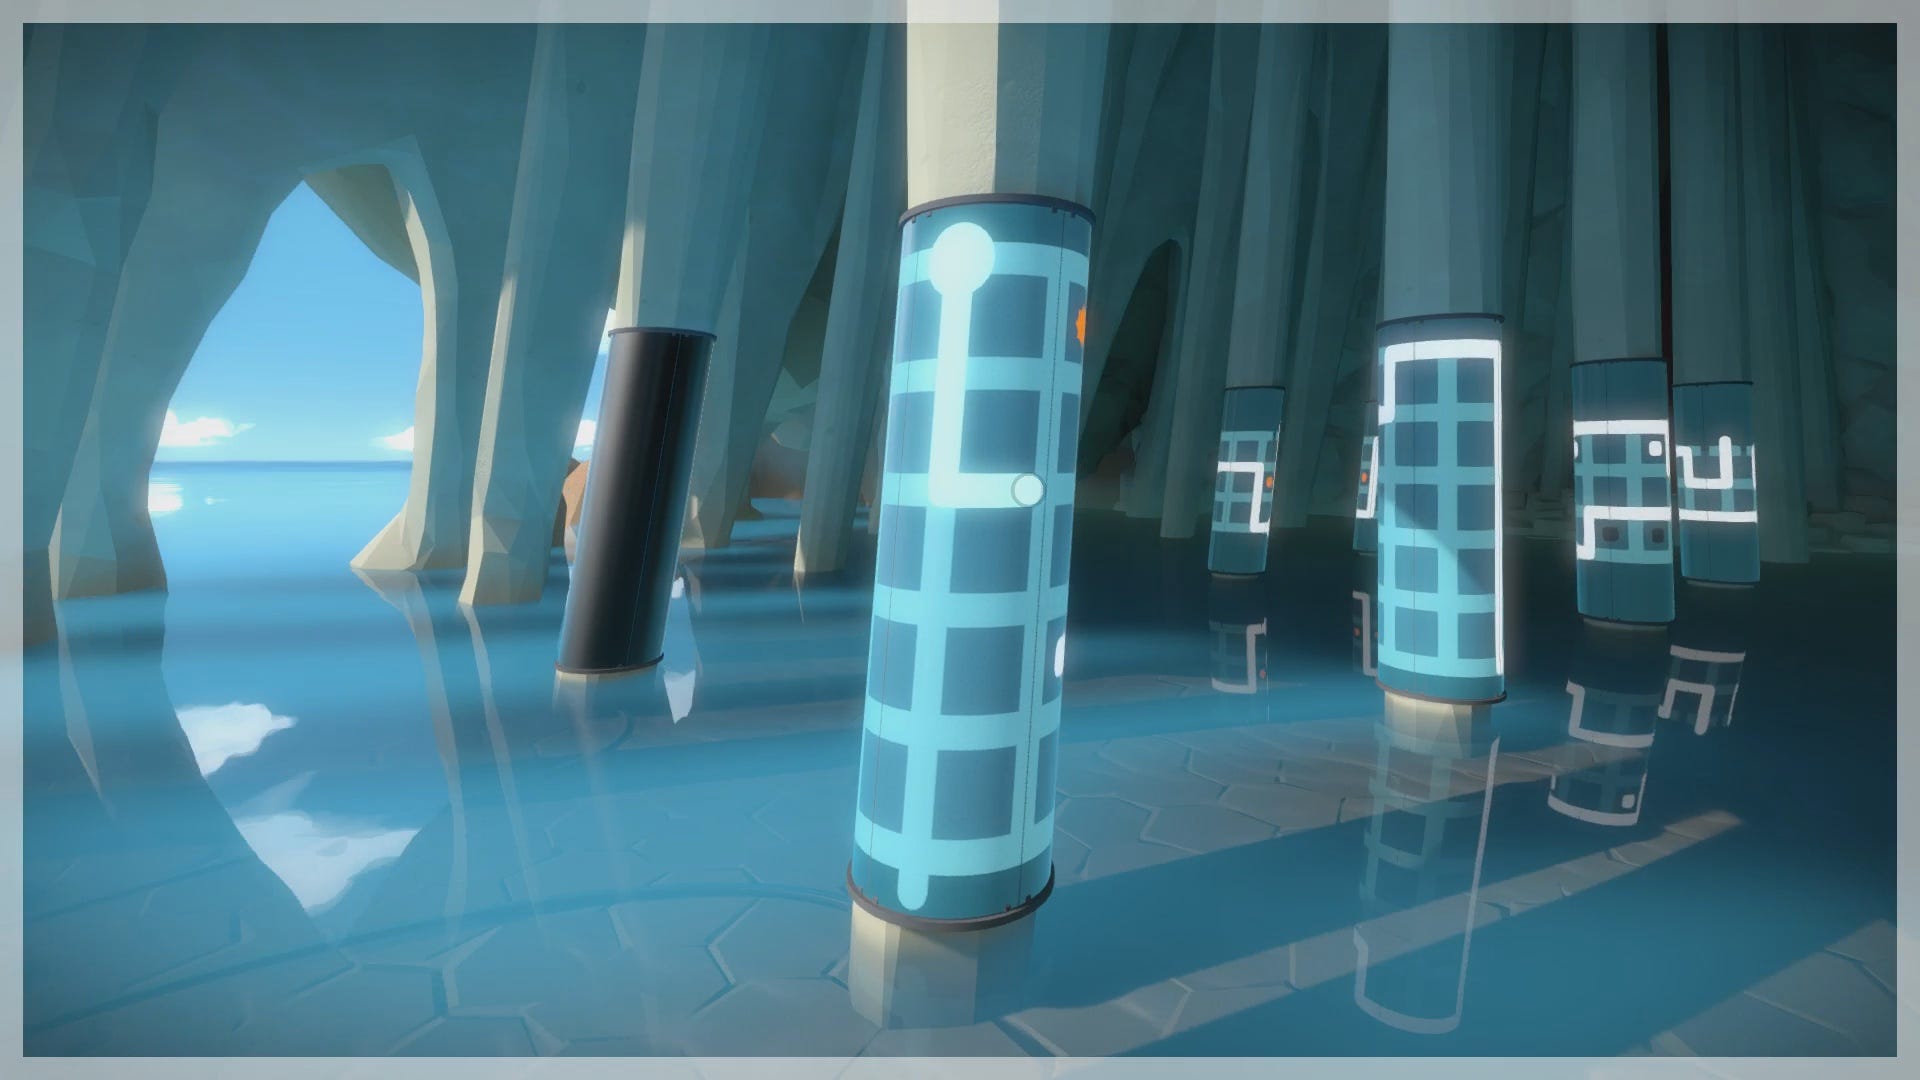
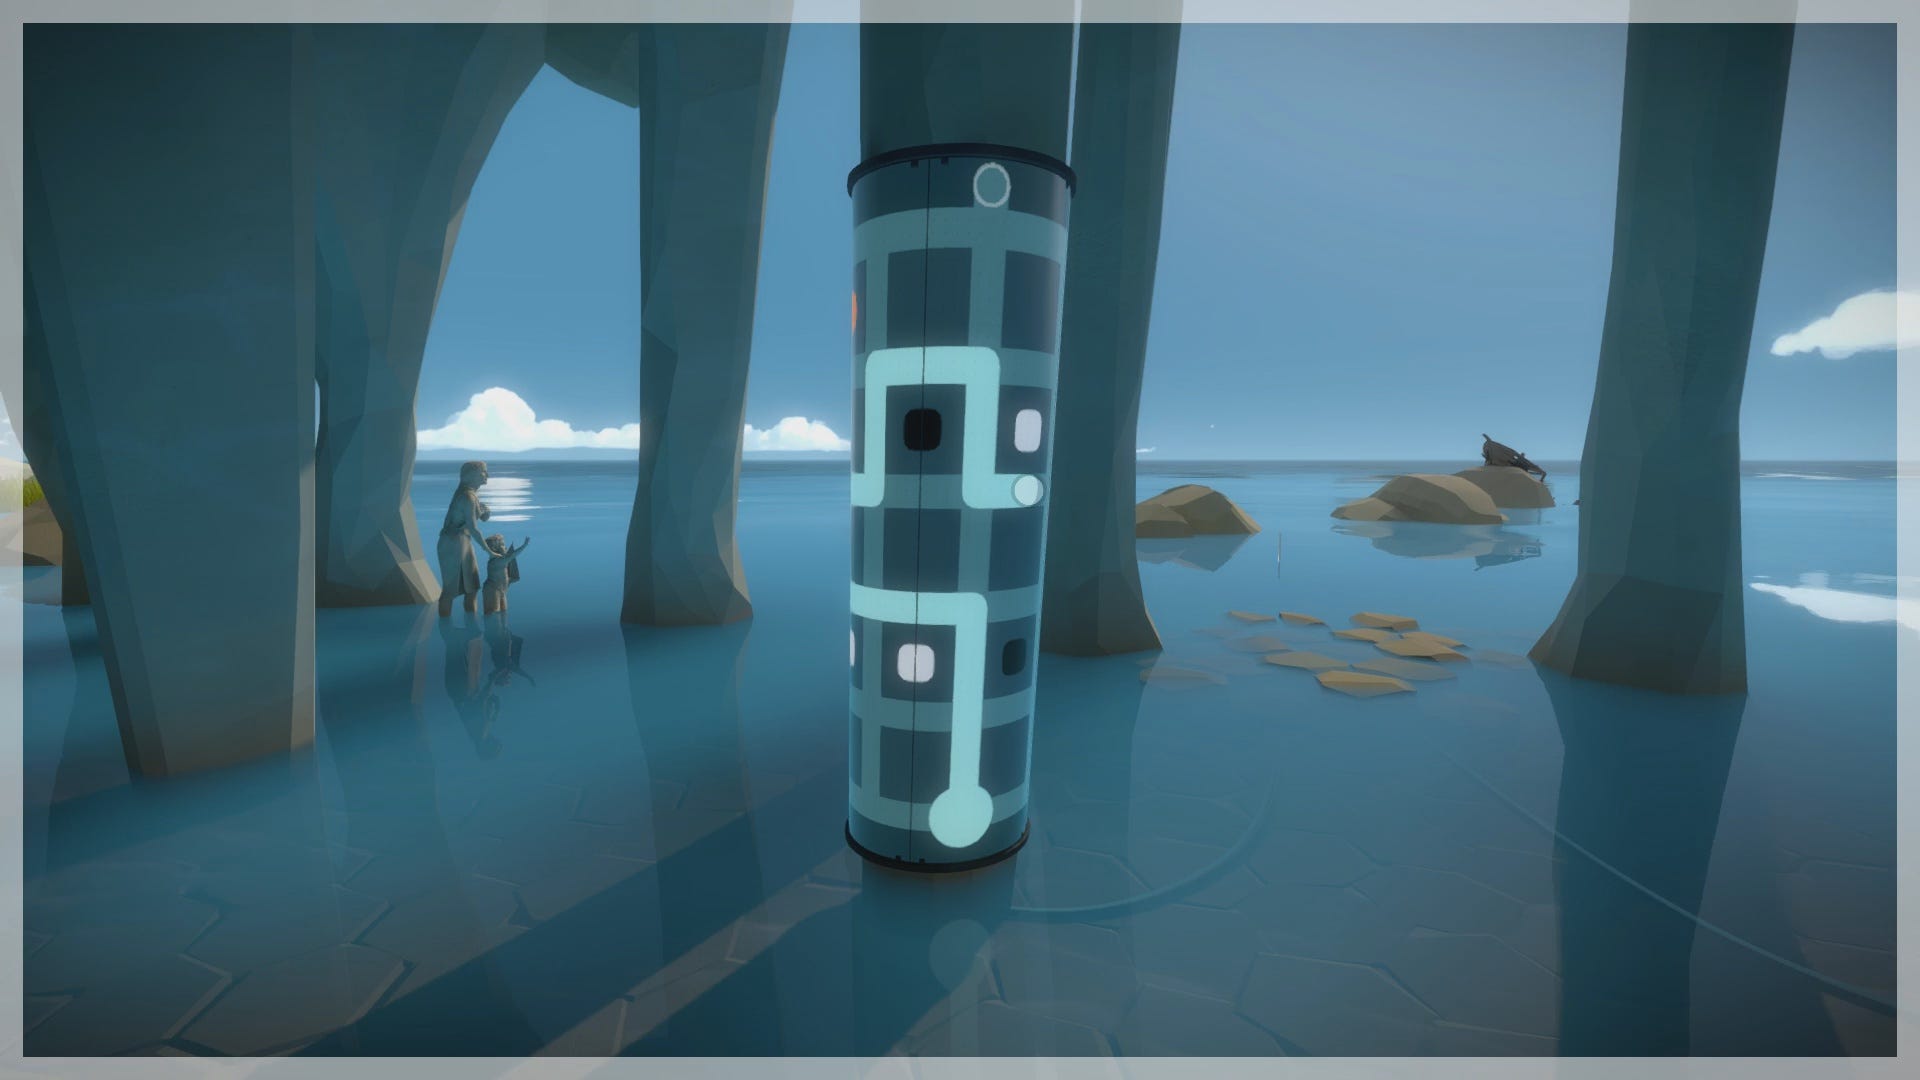
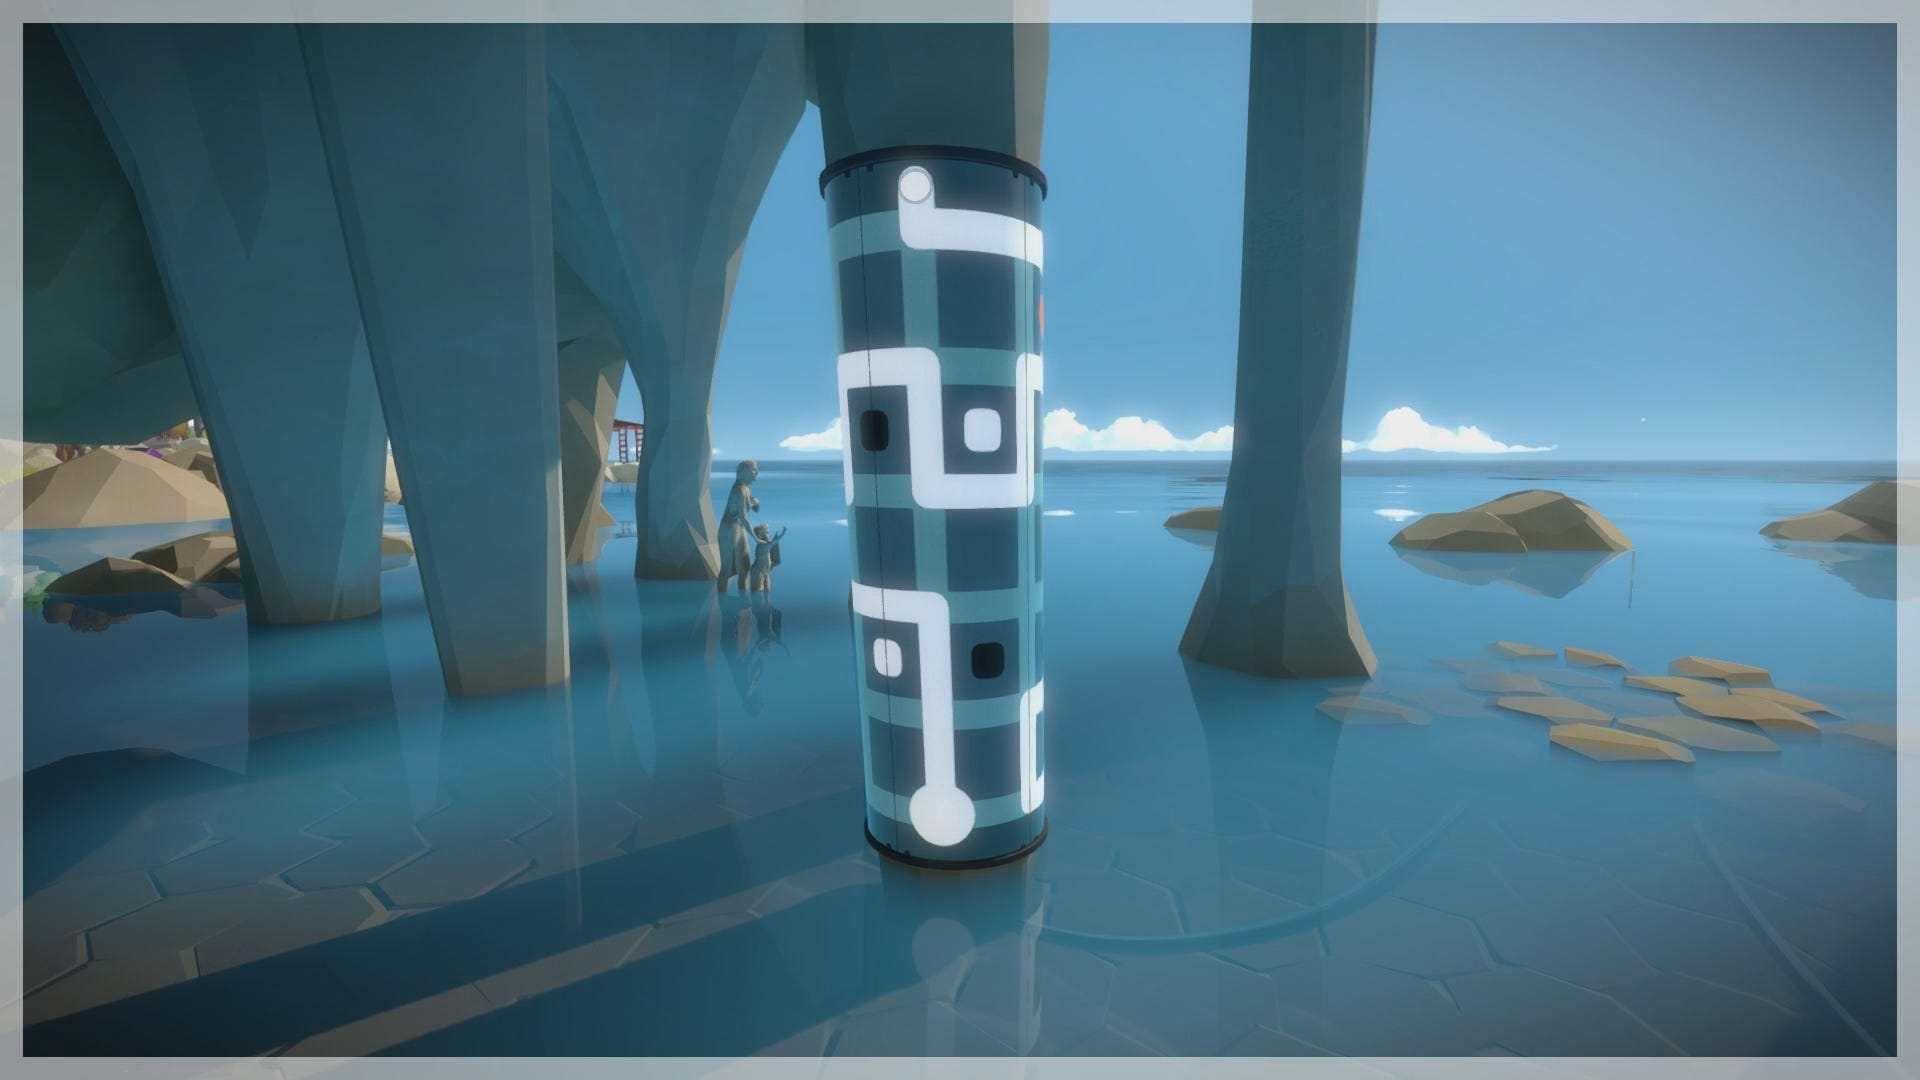
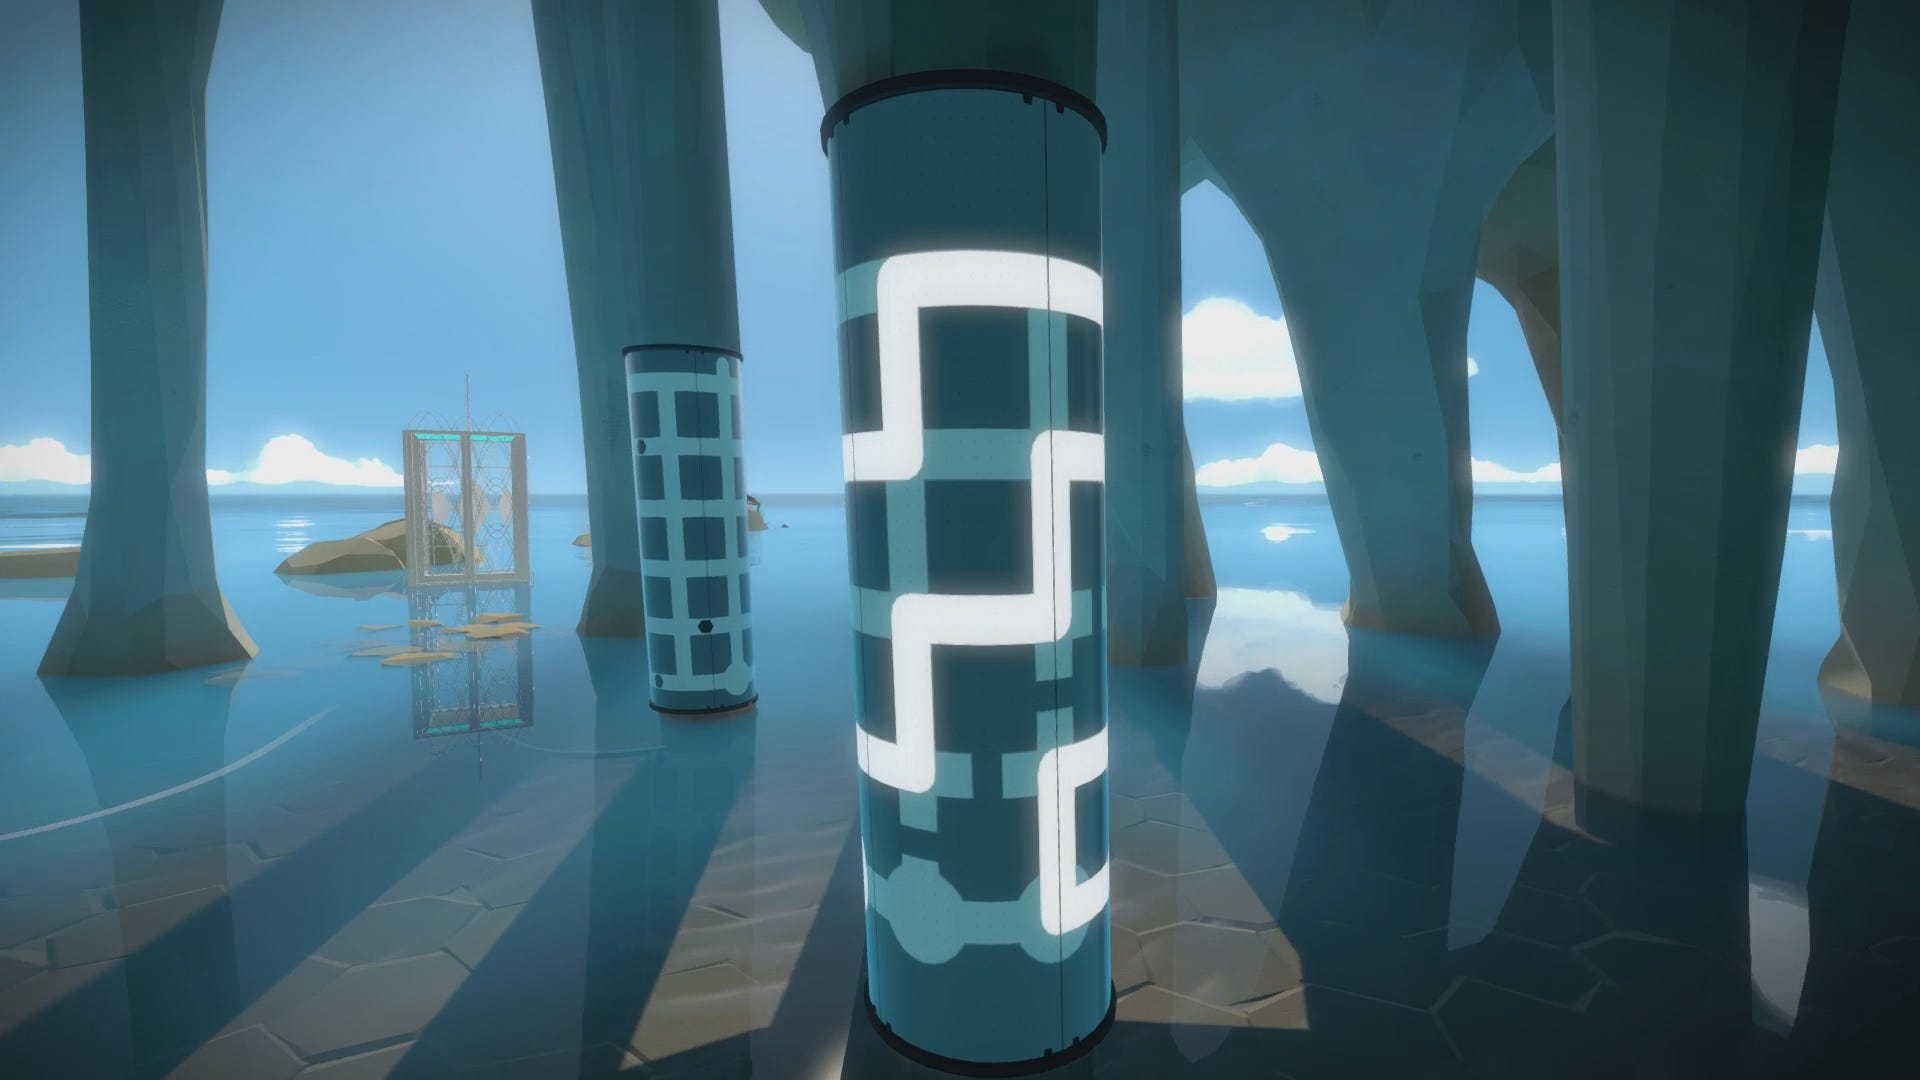
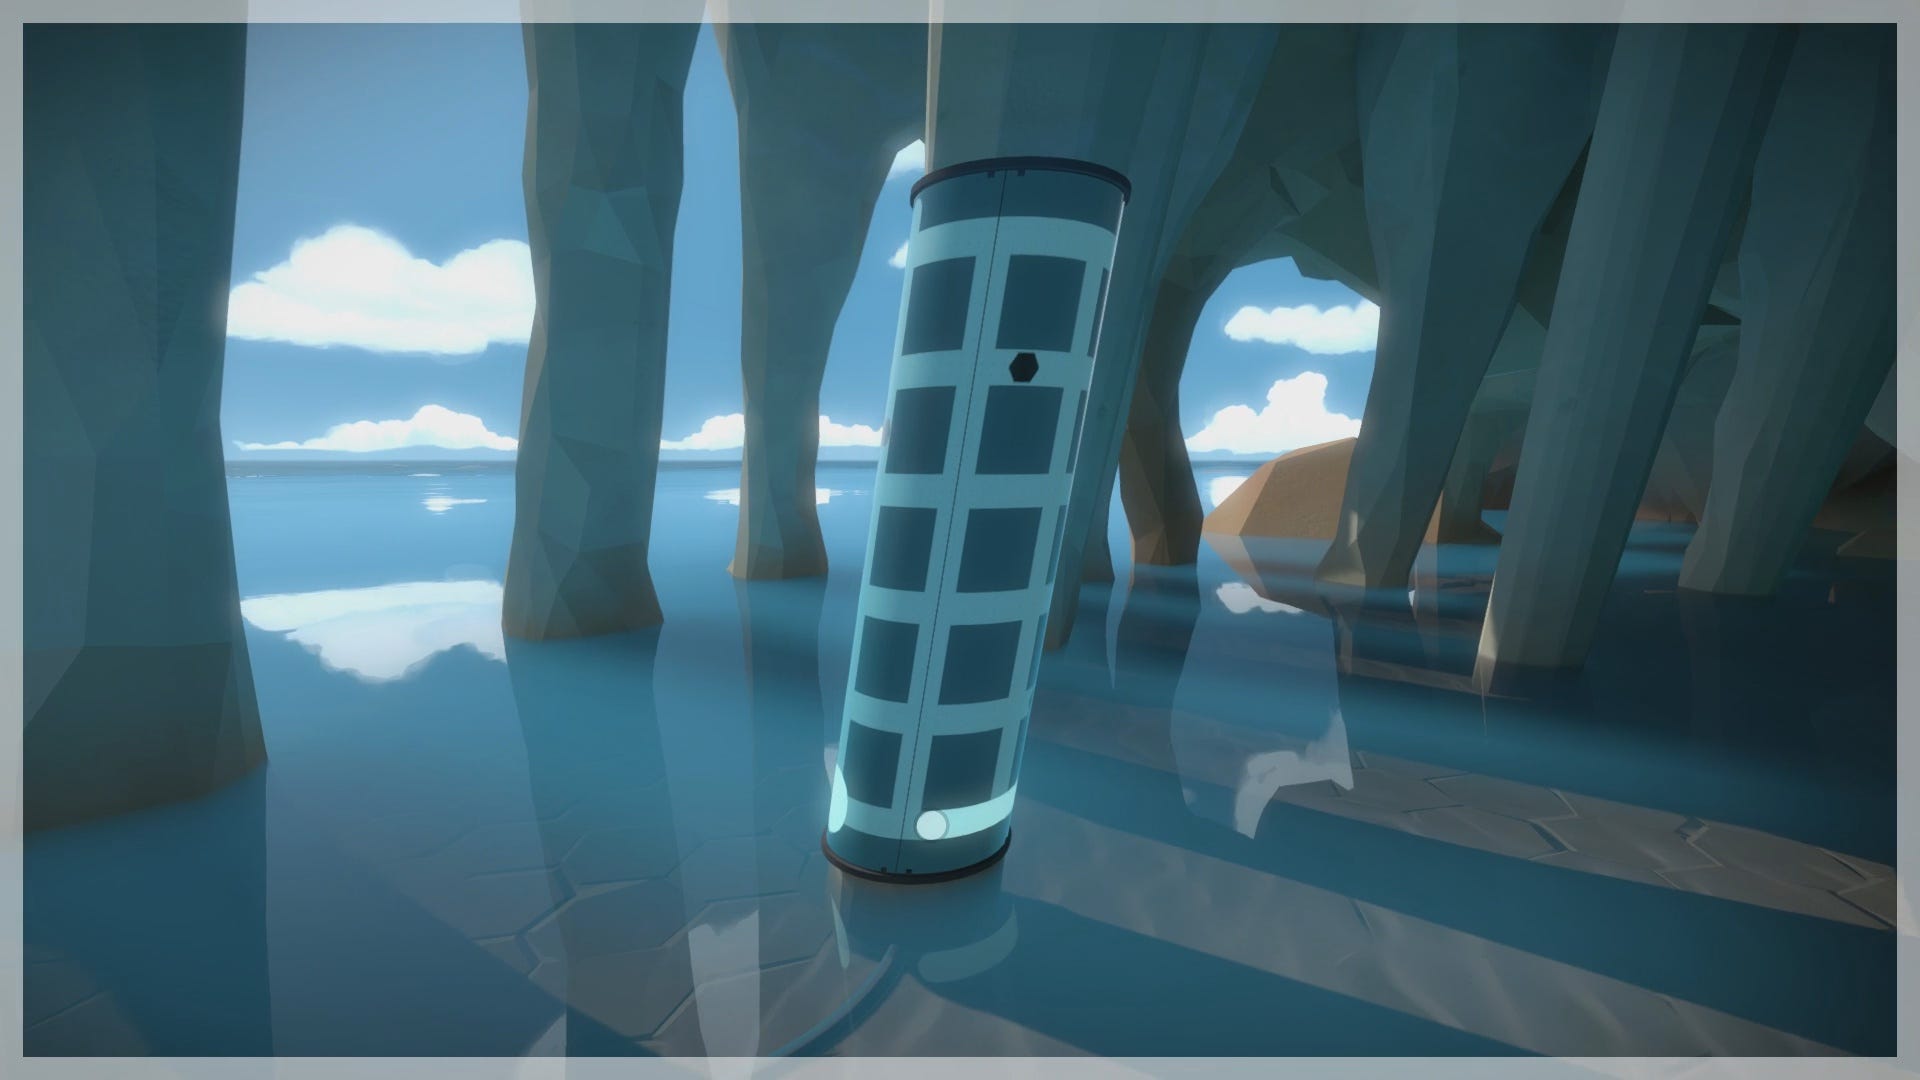
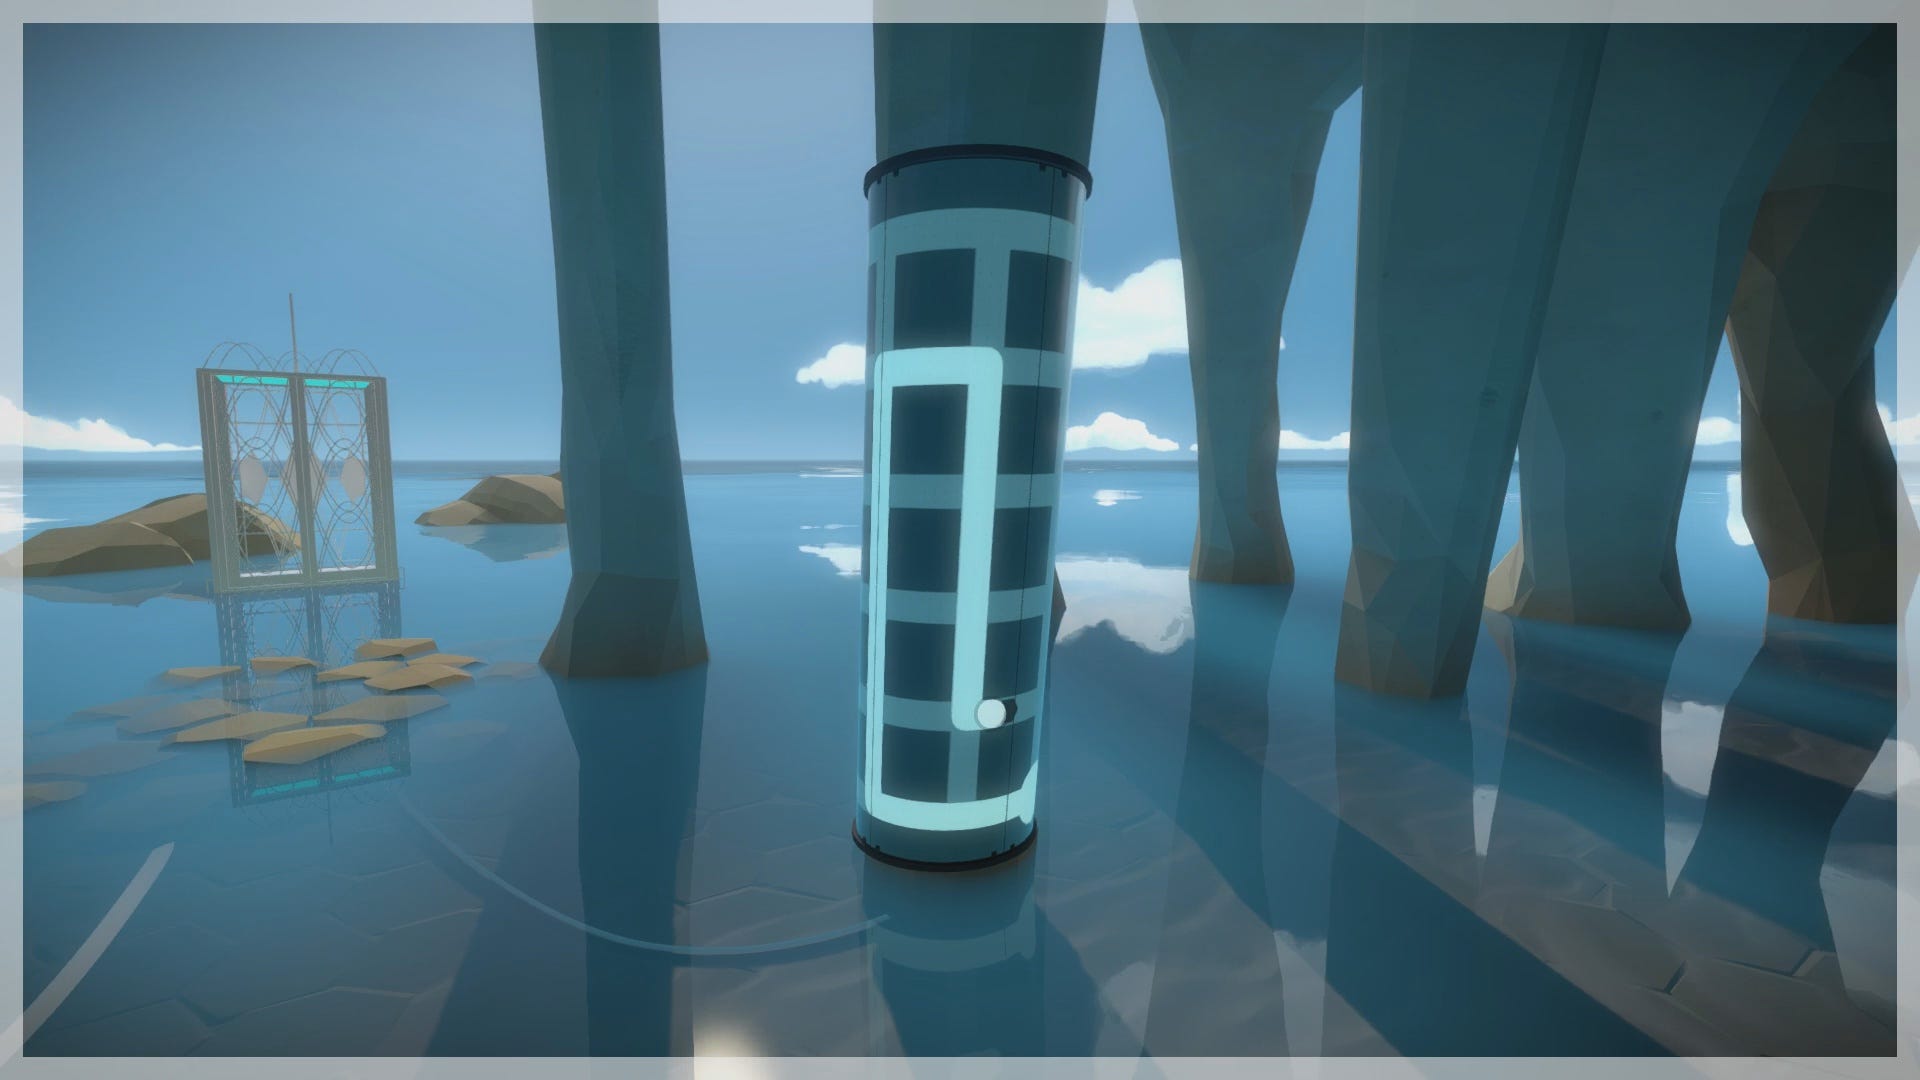
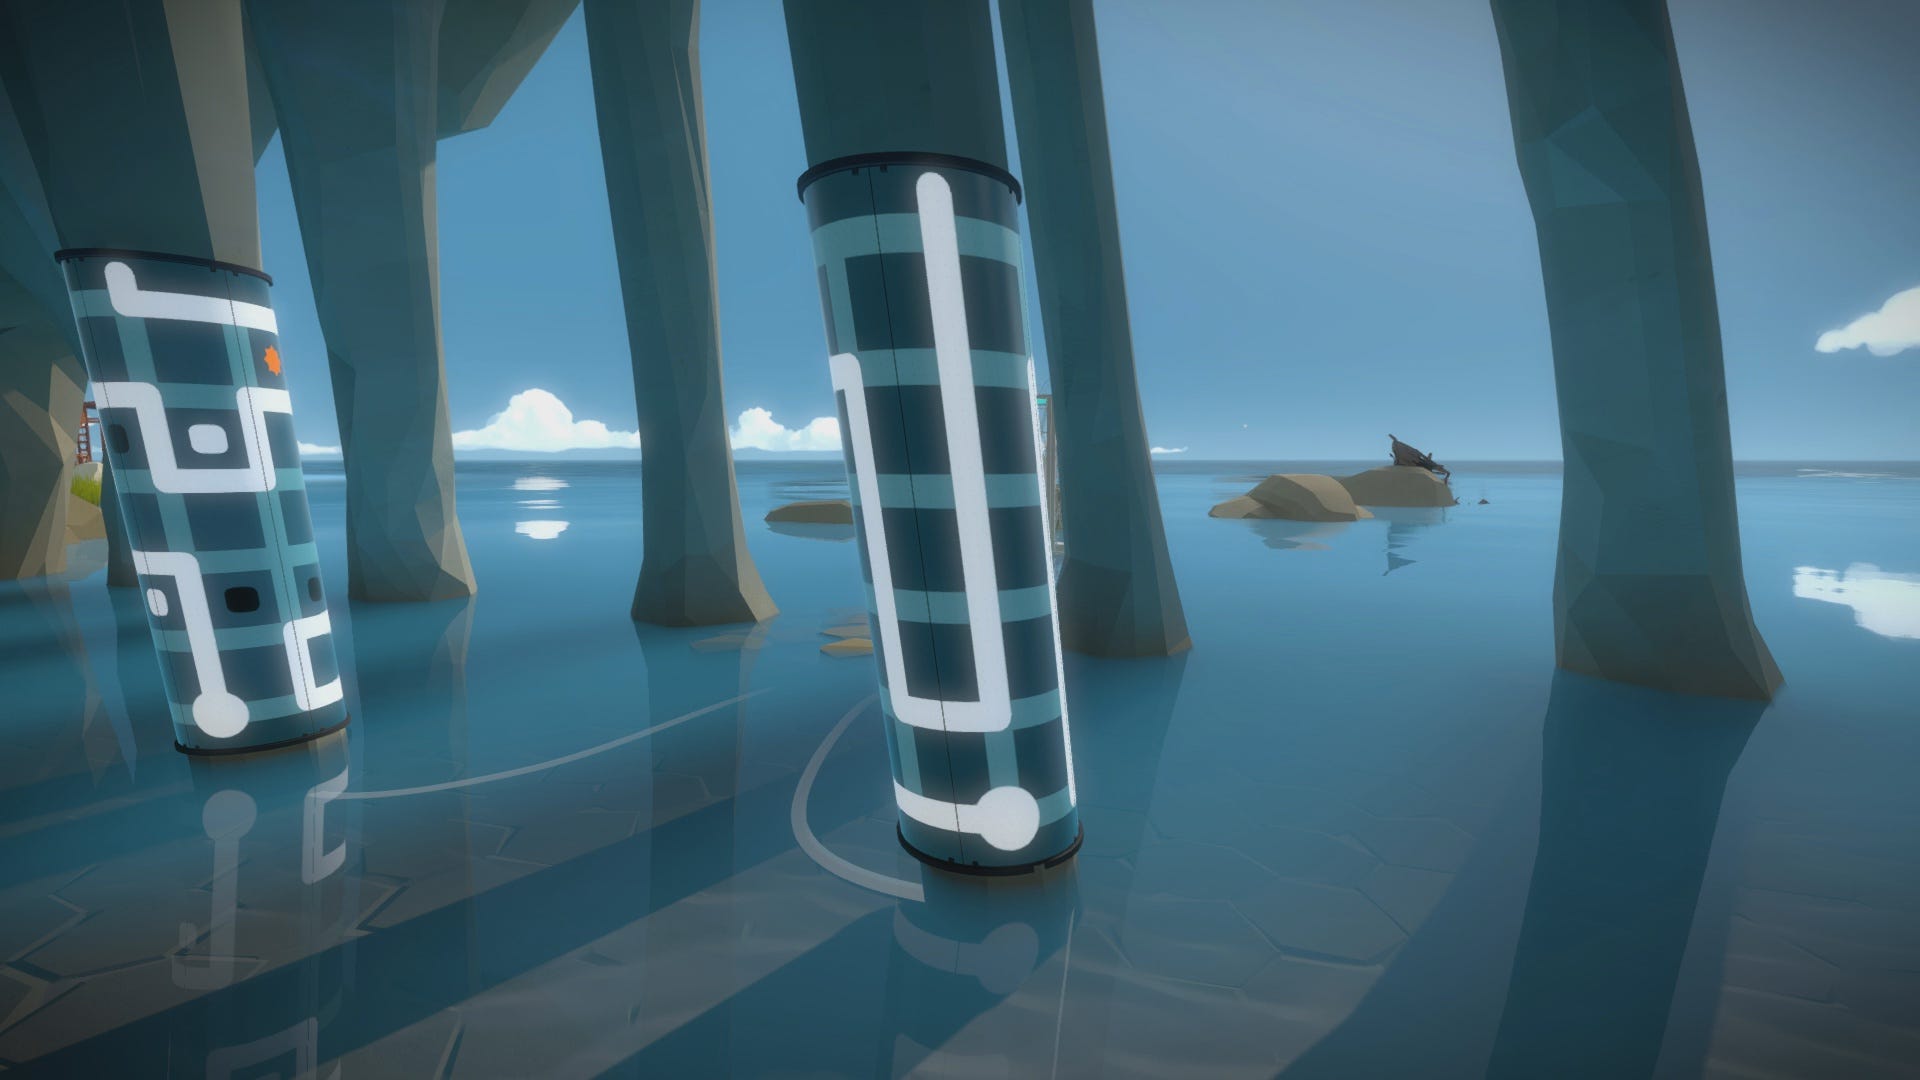
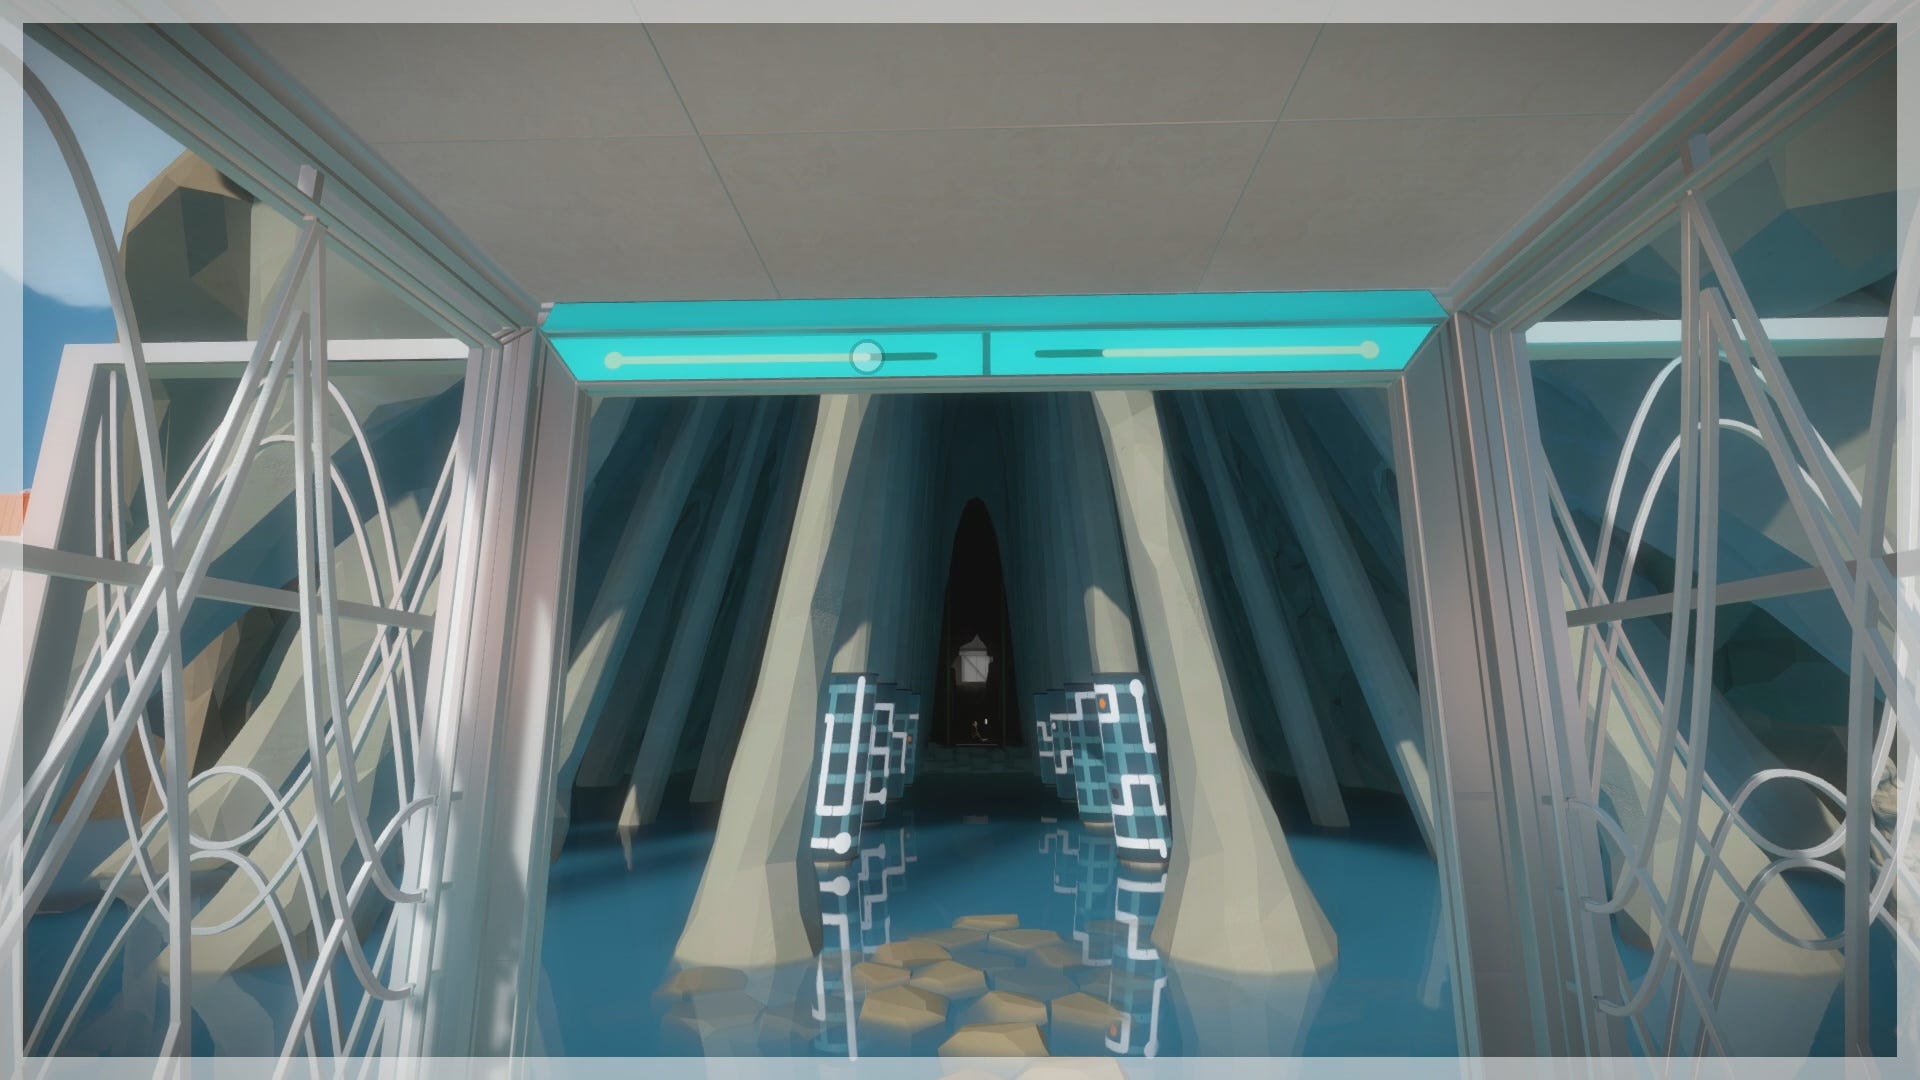
You’re in the final stretch. Ahead you’ll find several puzzle panels wrapped around cylindrical columns. Since it’s difficult to accurately show each completed panel, we’ve provided multiple images to help explain each solution.


When you’re ready, enter the elevator and solve its simple line panels to initiate the final sequence, concluding the game. Congratulations! We hope you have found this guide helpful, and have enjoyed your journey through The Witness.

- Page 1: The First Puzzle and General Tips
- Page 2: The Symmetry Puzzle
- Page 3: The Desert Ruin Puzzle
- Page 4: The Monastery Puzzle
- Page 5: The Keep Puzzle
- Page 6: The Shady Trees Puzzle
- Page 7: The Marsh Puzzle
- Page 8: The Quarry Puzzle
- Page 9: The Jungle Puzzle
- Page 10: The Town Puzzle
- Page 11: The Bunker Puzzle
- Page 12: The Treehouse Puzzle
- Page 13: The Mountain Puzzle (Game Ending)