Bloodborne: Cathedral Ward and Old Yharnam
Our Bloodborne guide continues through two new environments to the Blood-starved Beast boss battle.
Bloodborne only gets tougher from here on in. Killing this second boss and earning more Insight has changed things around the place; NPCs have new things to say if you chat with them again - visit Hunter's Dream to talk to your friend upstairs, for example.
Return to the Tomb of Oedon lamp, if you wandered off to Hunter's Dream. Before you use the Oedon Tomb Key Gascoigne dropped on the gate ahead, look for an opening in the fence in one corner of the balcony on the edge of the arena. You can squeeze through here and drop down to a rooftop in the graveyard to grab a Red Jeweled Brooch - another weapon upgrade. This item can be given to the child looking for its mother (it gave you the Tiny Music Box), but there's no known reward.
You can easily drop down and circle back up the boss arena, where you should pass through the gate you can now unlock. Go up the flight of stairs and turn right through the narrow opening to reach a room with a ladder in the corner. Climb up and read the note on the table, then open the chest to get a Blood Gem Workshop Tool, which can be used at Hunter's Dream to fortify weapons with Blood Gems). Take the stairs by the chest and open the door to enter the next area.
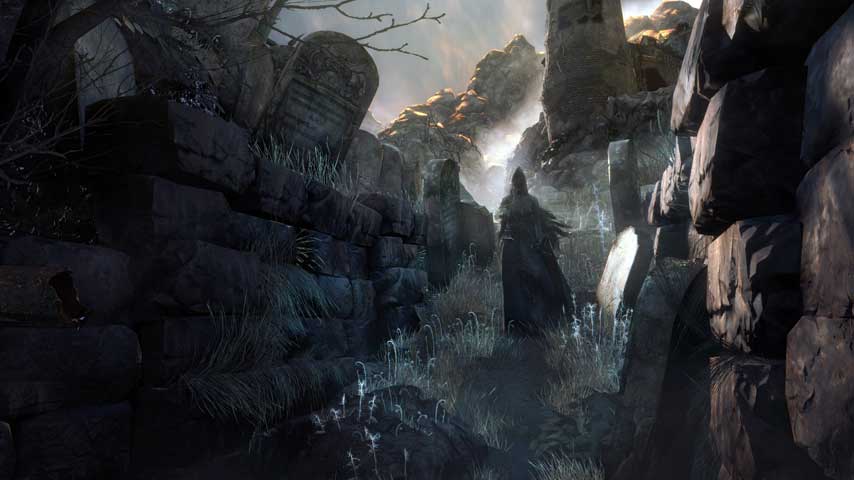
Cathedral Ward
After watching the cutscene, activate the lamp ahead. Speak to the NPC (look behind you!) at least twice; make sure you've heard everything she says. We'll take a short detour back to the Central Yharnam lantern now, so warp there. Don't worry! We'll be back soon.

Central Yharnam
If you've forgotten where the frightened NPC is:
From the lantern, take the gate on the left the side with the coughing window (chat with him again, he gave me a flamethrower at this time). Pass down the flights of stairs on the left, watching out for the Henchman, then run through the room with the Wheelchair Blunder (if you didn't unlock the door, you'll have to go around, past the two Brick Brutes). Follow the path straight on to the area with all the Hounds, then further on over the bridge to the single Hound. Knock at the nearby lit door with a red lantern, and tell the person behind about the chapel. Return to the Cathedral Ward lantern.
Cathedral Ward
Speak with the NPC here once more to receive a gesture.
Move on past the lantern into the next room. Take the door to the left - wave to your NPC friend! - and move into the Graveyard. You'll meet Gravekeepers here; be wary, they're not just glorified Henchmen. They're generally pretty slow to aggro, and you can sneak up on the more distant one for a Charge Attack and Backstrike combo.
There's a corpse behind a tree here with some nice gear - a Top Hat, Hunter Garb, Hunter Gloves and Hunter Trousers. Don't hang about putting it on; leg it away before a portal opens and horrors pour out. Not kidding. The top hat looks awesome but this gear isn't as good against the Blood-straved Beast as the set you can buy for 2,500 Blood Echoes in Hunter's Dream.
Also in the graveyard is another corpse with six Blood Vials. Grab 'em, and then take the path to the left, where the second Gravekeeper was. Take the stairs down to meet a bunch of Henchmen and a Hound. On the far right of this area are two corpses, with two Coldblood Dew items and four Molotov Cocktails.
Don't go into the church yet. Go up the left hand stairs, bracing yourself for attack from two Hounds. There's also a rifleman Henchman at the top. Once they're all down, take the door to the right, then the next doorway on the right to use a lever. Search the nearby corpse for a Madman's Knowledge.
Backtrack and take the other doorway, opposite the one you came in by. Go down the stairs on the right and do not attack friendly NPC Alfred; instead agree to all his demands to receive three Fire Papers and a new gesture.
Go back and enter the church - the room below the lever. There's a new staircase here which you uncovered by using it. Don't take it yet; kill the nearby Henchman and take the Madman's Knowledge.
Go down the secret stairs and grab the Tempering Blood Gemstone on the left. Light your torch before you go through the next doorway; a Netherbeast lurks in the room at the end of the dark, curving stairs.
Go down the stairs and then take the ladder further down, then go up the stairs behind you and grab the four Antidotes, which you will definitely want later. Head back down two flights of stairs and into the next room to activate the Old Yharnam lantern. You can break some pots to collect three Pungent Blood Cocktails, but what you want to do after that is go read the note on the large door, and then head through.
Old Yharnam
This area is optional, and if you want to come back to it later, you can earn a couple of rare rewards. If you proceed now, you will upset Djura, a Hunter who guards this area, and will not be able to befriend him. If you want to stay on his good side, skip to the Vicar Amelia boss battle in the Cathedral Ward. You'll need to explore the area on your own, as our walkthrough of that area presupposes you have access to an area only accessible after the Blood-starved Beast is killed.
As you enter Old Yharnam and walk down the stairs you'll be advised to leave, but unless you want to sit around twiddling your thumbs, ignore it and continue on with the game. Head to your left, avoiding the fire and being wary of the Walking Beasts that cross the bridge ahead. The beasts are this areas's grunts, but they're devastatingly quick and will dodge your attacks. Spend some time getting to know their moves - that dodge! - before you risk facing a group.
Anyway, that threat assessed, there's a corpse with six Blood Vials nearby. Cross the bridge and face three more Walking Beasts, then head to the far left side to face a Hooded Beast, a slower variant, which is guarding two Coldblood Dew items.
Opposite this area you'll find a set of stairs. Don't go down: look left to see another Walking Beast on the wall. Take it out, then follow around the left side of the building before the stairsto find two Blood Stone Shards on a corpse at the end of the path. Two more Walking Beasts will likely aggro on you and come running up.
Now go back and take the stairs down, ignoring the warning voice again. There's a huge pack of Walking Beasts and Hooded Beasts here, which you should be very careful about picking off individually to avoid getting mobbed. If you make it to the statue in the middle, you'll be rewarded with praise, at which point you should hide behind the statue to avoid being shot.
Wait for a pause in the gunfire and then leg it to the stairs on the right, moving down onto the balcony and around to shelter inside. Take the opening that leads into a building to your left to face a Hooded Demon. It's just a Hooded Beast with big boy pants on, so don't be too worried; you got this. Unfortunately, you need to move very quickly, because you'll come under fire again, so don't hang about.
Inside you'll see a corpse with three Antidotes. Head through the doorway on the opposite side to the gunfire and collect the Blood Stone Shard from the body on the balcony here. Back inside, make your way very, very carefully through the doorway in the other corner. See those Walking Beasts? You do not want to fight them here. Not only is this room open to gunfire, the pots will explode if hit by it. Use a Pebble to lure the closest one back to safety and dispatch it, then use a Molotov to ignite the pots and bring the other Beast to you. If it doesn't come over, try hitting the next set of pots - but dash back into the safe room as soon as you lob the Molotov.
Once you've cleared the room, run to the corner of the balcony with the corpse. Quickly grab the three Antidotes there, then break for the opening on the left, legging it over the wooden bridge and into the alcove filled with Crazed Crows. The corpse they're pecking at has two Blood Stone Shards.
Don't linger; get down the path to the next building, where you'll be attacked by two Walking Beasts and a Hooded Demon. Normally if you don't move forward after the Hooded Beast break it, it won't aggro, and you can kill the two Walking Beasts in the bottleneck of the door. Once they're down you can grab an Antidote. The small room to the right has a Bloodtinge Gemstone.
Go out the main door, back into gunfire range. Run for the left side of the planter full of trees; when you draw level you'll be safe - well, as safe as you can be when three Walking Beasts and a Hooded Beast are attacking you. Run back to the last room if you get freaked out.
Another Hooded Beast and Walking Beast await you along the wall as you circle the planter. Once they're down look for a statue in the opposite corner of this area, with an item near it - don't be ricked! Another Hooded Beast and two Walking Beasts are waiting for you. You'll be safe from gunfire while you battle them behind the statue. Grab the Coldblood Dew before you make a run for it.
Next time the gunfire pauses, you want to run straight towards its source and down the stairs to the right. Stop when you hear moaning. There's some rickety wooden stairs leading to an elevated section here, and there's a Hunter up there. If you go up, the watcher on the roof will shoot you again, so instead cat and mouse him onto the stairs and kill him there. This is a hard fight, so take it seriously. He drops six Bone Marrow Ash.
NEW: If you run to the far left corner of the platform the Hunter hangs out on, you can drop down quite a long way to small triangular courtyard below. Enter the very dark building through the nearby door to fight two Hooded Beasts, one Hooded Demon and a metric s**t ton of Walking Beasts. Once they're all dead, collect the Blood Gem and Frenzied Coldblood, then head up and along the balcony to grab the Charred Hunter attire set. Go out the small door to fight two more Walking Beasts, but be careful - you're exposed to gunfire here. Climb the steps to return to the Hunter's platform.
There's no point going up the stairs; when you're done go back down and around the building and look for a ladder. There's another Hunter at the top of these ladders but it's best to come back for him when we circle back around and can surprise him. Go past to the next door.

Bloodborne guide: Old Yharnam to Blood-starved Beast
Some of the Beasts from here on in can inflict Poison. Make sure the gear you're wearing has high Poison resist - you'll ned it for the boss, too.
There's a Hooded Beast above you as soon as you enter; use a Pebble to lure it down quietly. Pass the doorway on the right and go to the far end of the room to battle a Hooded Beast and Hooded Demon. There are three Antidotes in the far right corner.
Take the stairs to the left and take the first door on the right. There's a Hooded Beast here you need to kill really, really quickly because it's almost certain you'll aggro the big pack of Walking Beasts and Hooded Demons waiting down the next flight of stairs.
Once you're safe, grab the two Blood Stone Shards on the far side of the balcony. Head down the stairs then, picking off any Hooded Beasts which remain.
When you get down to the bottom level, look in the alcove on the right to find one Hooded Demon, which is guarding a Madman's Knowledge. Once you have it, you can head back upstairs and go through the doorway you haven't passed through yet - we ignored it on the way in. Cross the wooden scaffolding and head for the far left, then drop down two levels (one at a time!) and look behind you for a Coldblood Dew.
On the far side of the catwalk, you can drop back down to the bottom floor. The altar on the left can be searched to reveal two Ritual Blood Holy Chalice items. Go down the corridor behind the altar and then down the stairs on the left, taking out the Crazed Crows on the balcony to retrieve two Blood Stone Shards. Head back up the stairs and back the other way; at the end of the walkway you'll find six Blood Vials.
Enter the room to the right of the last item drop and use the ladder to get up to the next floor. There's a gate here you can unlock to open a shortcut back to the second Hunter, whom we will deal with later. For now, go back down and take the remaining path between the ladder and where you came from.
There are three Walking Beasts lurking in the room ahead. Don't waste an item on them, just turn the volume up, walk in slowly, then leg it when you hear them approaching so you can fight them where you can see 'em. Once they're dead, look in the corner of the room for an Imp. It's not hostile but will leg it as soon as it can. They're hard to kill, but if you manage it you'll score three Blood Stone Shards, which is worth it.
Go down the stairs on the left to take on two Netherbeasts. Once they're down, look in the corner by the stairs you entered by collect two Pungent Blood Cocktails. Take the path in the far corner to collect another two Blood Stone Shards by a dead end.
Returning to the previous room, take the right path and cross the bridge, then take a left. Kill another Netherbeast (it might be clinging to the wall above you, on the second building), then go around the corner to pick up six Beast Blood Pellets.
Back across the bridge, head onwards down the path and watch for a Netherbeast ambush from the door of the building on the right. This building is full of treasure; rejoin us past the italics if you're not keen on collecting it now.
Enter the building and pick up the Antidote. Continue inwards and watch for the Walking Beast who attacks immediately from the stairs on the left. Head up the stairs once it's dead, and go through the first doorway on the left. Another Walking Beast awaits you on the right, guarding the two Blood Stone Shards in this room.
Go further up the stairs, skipping the next door on the left. At the top are two Fire Papers. Go back down to the door you passed, enter and turn left to go up some wooden stairs. At the top of the ladder you'll find here is another Coldblood Dew. Drop down and you'll be back at the starting zone, but look for a break in the parapet where you can drop down onto a caffold with an Imp. Take it out quick, then search for a nearby Blood Stone Shard.
We need to get further down, so drop down to the next roof, look for a battered corner of the roof, then drop down twice more, carefully ensuring you hit just one level down. Follow the path around until you encounter two Hooded Beasts. You can grab a Hunter's Torch near here. Once you've got it, look for a gap in the railings near where you dropped into this area. Drop, then drop again, and you should be near the stairs again. Go back inside and walk down to exit the building.
Take the path to the right. There's a smoky walkway to your immediate left with a Hooded Demon lurking within. There's a Netherbeast nearby, so be sure you're not going to be interrupted by one while you engage the other.
Go around the corner and search for ten Quicksilver Bullets near a ramp. Go up the ramp and look down the stairs to the left - see the Imp? It'll be running, so be fast. Back up the top you'll see two Bold Hunter's Marks.
Go down the stairs, but as soon as you get close to the end, move to the far right side and stick close to the fence as you advance towards an item. A Hooded Beast will foolishly attempt to ambush you, but you were ready: you'll kill it and grab the Coldblood Dew. Look for another sneaky Hooded Beast just past the next tree.
Go back to the stairs you entered this area on, and go around the fire to the left side. There's a Coldblood Dew here near some boulders. Once you've got it, hunt down the last Hooded Beast near the dead tree ahead.
The stairs ahead lead to the Blood-starved Beast boss battle. Are you ready?
Back to Bloodborne guide and walkthrough.