Alien Isolation guide: mission 10
Where’s Admiral Ackbar when you need him?
Alien Isolation guide mission 10 - The Trap - Get to the Airlock
Not the chopper. The airlock.
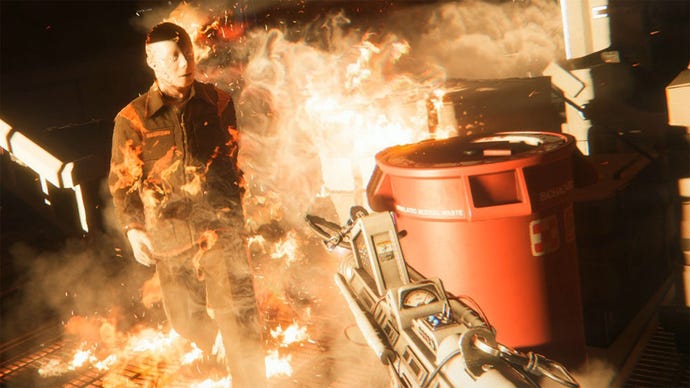
Collect the Flamethrower
The flamethrower and some handy items can be found in the room at the start of the mission. Leave nothing behind, then move out.
Go to Lorenz Systech Spire
Sweep the rooms for supplies before you leave the area, then when you’re ready, leave via the corridor next to the save station.
Retrace your steps through this area. When you reach the Towerlink Transit System sign, turn left, following the signs, then right and down the staircase, to Towerlink 02 where you can call the transit to Lorenz Systech Spire.
Get to Lorenz SYS/TECH Spire
Ramming that ojective home for the more forgetful players out there. Exit the transit, then head up the stairs to the left, marked ‘Lorenz Systech Lobby’.
Get to the Server Hub
Pop through the door that leads to Security and the Lorenz Systech Lobby. Go left and back to the room where you met those nice, friendly people from earlier in the game that wanted to kill you. As you proceed into the room, you’ll bump into a couple of people without murderous designs and after this encounter, take the stairs up to the right, go right again and carry on until you happen across the door to Tech Support that will be on the left-hand side of the corridor.
Go down 3 sets of stairs to reach the area marked Tech Support. There’ll be some stairs to your right here, so head up those and into the Tech Support HQ booth where you can use the Sevastolink terminal to access Door Control and select Open Door.
Seal off the Stairwell
Watch out for the android pootling around, dealing with him however you see fit, then make your way to the Server Hub Reception. Head up 2 sets of stairs, then go right and into the doorway marked ‘Seegson Security’ and ‘Tech Support’. Use the Sevastolink terminal to open the cells then knock yourself out pillaging the place.
Happy in the knowledge that you’ve taken everything that isn’t nailed down, leave Seegson Security the way you came, and turn right just before the stairs. Follow the cables to device at their source and initiate lockdown. Cordon off the path to Lorenz Systech Lobby by using the Maintenance Jack on the door to Seegson Security.
Whip out your flamethrower to greet your Xenomorph guest and use it to frighten it off. When your Motion Tracker backs up the fact that it has indeed fled, exit the room and head back to the stairs.
Carry on to the top floor, through the door up here and initiate lockdown at the mechanism on the left, spewing cables.
Lock Down Server Hub Reception Corridor
Keep the flamethrower to hand throughout this mission to chase away the Alien should it rear its smooth, shiny head and of course, utilise your Motion Tracker.
Go back to the stairs and down 1 level. Override the door mechanism next to the door to the Server Hub Reception, and when it’s open, use the Sevastolink terminal at the desk to get the password for the audio folder (7789).
Activate Ricardo’s Override Command
Use the password to listen to the audio log, then choose Bypass Program in the Shared folder to gain access to the Utility folder, where you can choose to Initiate Lockdown.
Lock Down the Server Farm
When you’re done at the terminal, go through the door to the Server Farm on the left, watching out for a wandering android. Go through the door on the left and down the stairs beyond to find a Noisemaker on a table and a save station. Now turn right and head through the door in front of you, then up a set of stairs before goind down another set of stairs. There is a corridor on the left-hand side of this room that leads to Sevastopol Servers and this is where you want to go next.
Head down the corridor and use your Security Access Tuner to open the door to Server Control, where you’ll find some loot and juice for your flamethrower. Now bust out the Security Access Tuner again to gain Administrator Rights and open up the surounding doors.
Escape the Server Hub
Retrace your steps once more, through the Server Farm and then the door to Server Hub Reception that should now be open.
If, for some reason, it isn’t open, you’re one unlucky sod. But don’t admit defeat just yet! There’s a route around. There’s a door at the bottom of a small staircase marked ‘Server Fam’. Nip in here, take the door on the right and use the Access Rewire on the wall to get rid of Door Access and activate the Air Purifaction. Now head through the door in front of you, turn right and remove the brace with your Maintenance Jack to find yourself at Server Hub Reception.
Right, now that we’re all present and correct, make your way to the stairwell, go down 2 levels and through to Tech Support. Carry on through here and up 2 sets of stairs to the Lorenz Systech Lobby.
Take Elevator to Gemini Exoplanet Solutions
In the lobby, take the stairs to your left that will lead to the elevator and select Gemini Exoplanet Solutions as your next destination.
Restore Access to Distribution
Exit the elevator and save your progress at the save station. Leave via the door on the left, take the stairs to the right, through the door and into the hallway. At the end of the corridor, enter the door on the left.
In this room is an android, motion scanners and a corpse that will relinquish an upgrade for your Cutting Torch. Grab this off the body, then use the Cutting Torch on the panel on the door next to where the android is, behind the glass, to expose a lever. Use the lever to open to door.
Take care of the android now you’re no longer separated by a sheet of glass, before using the Sevastolink terminal to Reinstate Distribution Systems.
Find the Breakers to Bring Gemini Facility Online
Leave the room via the door you entered, tun left and enter the door here. At the end of the hall, turn left until you reach the door to the Depot, where you’ll need to use the Emergency Override to gain access.
Keep to the left and scoot on up the ladder along here. Follow the corridor and subsequent rooms all the way to a room with a locked door that needs the Maintenance Jack to open it. Before you do so, reset the breaker at the wall, completing the Trigger the Analysis Lab Breaker Switch objective. Now use the Maintenance Jack on the door (or retrace your steps) and head back down the ladder.
Keep to the wall on the right, through the door marked ‘Enrichment Laboratory’ and turn left into the hallway. At the end of the corridor, climb up, turn left and follow the route into a room at the end, on the right.
Take the door on the left in here and once the motion sensor moves from the door close-by, head through it. Sweep the room for goodies then leave via the other door, keeping left until you stumble upon a breaker. Reset the breaker to complete the objective Trigger the Decontamination Room Breaker Switch.
Initialise the Distribution Conduit
Retrace your steps back to the corridor with the motion sensor, then enter the door opposite. Once you’ve poked around for supplies, enter the Maintenance Shaft Access, turn left and follow the shaft through to a hallway. Proceed to the end of the corridor and go through the door on the right by the Depot sign.
Use the Sevastolink terminal in the centre of this room to Initialise the Distribution Conduit, then choose Service Request. Both of these commands are in the Utility folder, where pretty much everything is located in these terminals. Now pull the lever by the terminal to Stabilise Energy Flow. Pull a second lever around to the right of the centre of the room to do the same again.
Take the Freight Lift to Project KG348
Leave the room through the Distribution door across from where you came in, turn right and enter a second door marked ‘Dustribution’ to the left. Go down 2 sets of stairs, being sure to pick up the map on the way, and through the Quality Control door. You can call the freight at the wall on the right in here.
Once you’ve done this, you can access a hatch to the left. Clamber inside and follow it to the left. You’ll want to pop out into the second room on the left, where you’ll find an alarm blaring.
Go past the stairs, into the Lobby and hop onto the elevator that you can take to Project KG348.
Access the Project KG348 Research
Exit the elevator and take the door to Reception on the right, through this area and the door in here without a sign above it. Now there are signs galore, directing you to Project KG348. Proceed towards it and use the PlasmaTorch on the barred door when you come across it and are presented with the option to do so. Once you’re in, take the map before moving on.
Restore Power to the Lab
Head down the ladder, take the door to the left, follow the hallway to the right and trough another door. Move around to the right, past the Analysis Lab corridor until you reach a room where someone was a bit too heavy handed with the wattage of the light bulbs. In the glare, you’ll spot some stairs to the left that lead to the Synthesis Lab. Follow them into a room with a save station and another circuit breaker that needs to be reset.
Activate the Primary Alarm System
Pop back down the stairs, turn right and follow the corridor around to the to the left. Enter the open door on the right-hand side of the corridor and use the Security Access Tuner in the centre of the room to power up the console. You may be set upon by an Alien at this point, but you should still have your flamethrower to hand after our earlier warning, so spray it flames to get rid of it.
Escape the Lab
Leave the room, turn right and follow the corridor around to the left again until you reach a door that will trigger a cutscene.
Get to the Airlock
Make your way back to the corridor and head around to the right to refresh your objective.
Pressurise the Airlock
Walk up to the Airlock, hit the button on the left and wait for it to pressurise. While you’re waiting, prepare to fend off an Alien until your objective update once again.
Get to the Airlock
It’s open! Get inside pronto and watch the ensuing cutscene. Now carry on into the next room and select the Change option to complete the mission.
Head back to our Alien Isolation guide for the rest of the walkthrough.


