Dark Souls 2 Walkthrough Part 3: Heide's Tower of Flame
After defeating the Last Giant, we take you through Heide's Tower of Flame and the battle with the Dragonrider.

Firstly you need to head back to Majula and open the locked door next to the hut next to the Blacksmith. Inside the chest you'll find a Short Bow. Speak to the Blacksmith.
You now have the key to the large rundown house so head over there and unlock the door. Inside you'll find a Pharros' Lockstone by a pile of books. Go down the hallway to the left, turn left and go up the stairs. The room on the left has a chest with three Titanite Shards and three torches. Go back and left at the foot of the stairs, down another set of stairs and fight the skeleton at the bottom.
There's a Estus Flask Shard just ahead, then make your way through the doorway on the left. Inside there's a coffer with a Soul Vessel. Go back outside the house and head for the building that looks like a church. Go downstairs and through the hallway to the right and down a winding staircase. At the bottom pull the lever and go through the open door and up the stairs to the right.
You are now in Heide's Tower of Flame.
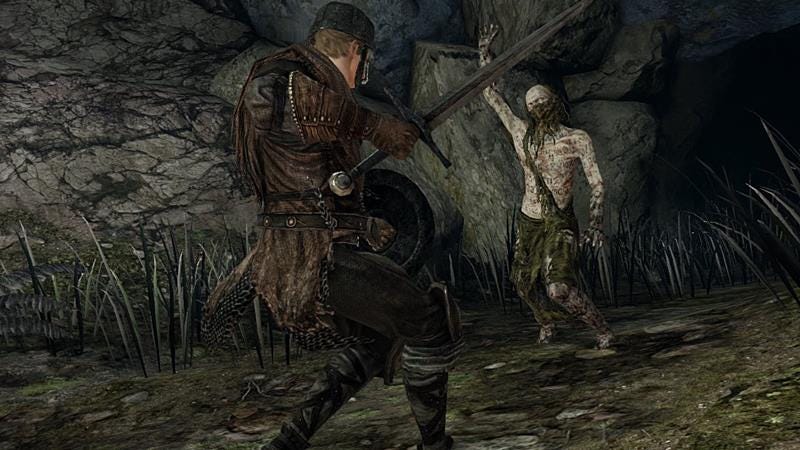
Enemies in this area are a lot tougher than the Forest of Fallen Giants. Now enemies will not respawn after they've been killed, even after death or visiting a bonfire. Go down the walkway and fight the first enemy, staying close to avoid vertical attacks. Move to the right and behind him to avoid his second attack as he swings horizontally. He'll swing horizontally a third time in the opposite direction so stay behind him, shifting to the left.
So you're running to the right to avoid the first attack, staying on his right but moving behind him to dodge the second attack, then shifting to his left but behind him to avoid the third attack. Now counter with your own attacks until he starts to repeat his own attack pattern.
Down the path to the right you'll find another bonfire to spark up. Go up the stairs and fight the second enemy. This is harder still as this guy varies his attacks even when you stay close to him. He'll either use two horizontal swings and a vertical swing, or a bunch of one or two vertical swings.
One good technique is to stay close to the enemy and in front of it, so it uses vertical attacks that are easier to dodge left or right. Either way, if you wander to far left or right it will start using horizontal attacks, which are much harder to deal with.
Between its swinging you can hit it once or twice before moving. If you see a horizontal attack coming, just roll away from it and wait for the next couple of attacks before attempting to trigger the vertical attacks.
Once this second enemy is dead, go up the end of the walkway and you'll find a Soul of a Nameless Soldier and Human Effigy. Go back up the stairs and there's a Lloyd's Talisman on the right of the door. That third enemy you see won't attack you unless you provoke it.
If you keep going forward you'll come across a circular area where there are three more enemies. You can run to the doorway to the left and you'll find two more enemies and a Divine Blessing, but you'll have to come back out again as it's a dead end. Head to the doorway on the right, fight the enemy guarding it, and through there you can follow a path to the area below. On the right is a chest that holds Rubbish (!). Again, don't start fighting this enemy, just tempt it away from the mist and run through once it's out of the way.
Boss Battle: Dragonrider
Reward: Dragonrider Soul
Be warned: the first attack will knock you off the platform to your death. Whenever the Dragonrider lunges with his spear it will knock you back and you'll fall off the platform to your doom if you're too close to the edge. Stay around the middle of the platform, any further back is a big risk.
Dragonrider uses two main attacks. He lunges forward and uses a two-part horizontal sweep attack. Horizontal attacks don't deal as much damage, but two hits one after the other isn't exactly a tickle, either.
The best technique is to stick to this guys back like glue. Always stay on his back. Stay there and none of his attacks will give you any trouble. Depending on the weapons you have equipped you'll be able to get one-to-four hits in between his attacks and your movement. But as always, err on the side of caution.
We found that magic attacks do the most damage, which includes weapons that have magic properties. Normal weapons will work but they're not nearly as effective.
Once the Dragonrider is dead move through the doorway opposite where the mist was and head up the stairs. Set the bonfire ablaze and speak with Licia if you want to learn about healing spells called Miracles.
Now head across the room, down the stairs and through the doorway, down some winding stairs and around the bottom of the stairwell to find the Monastery Charm. Through the next doorway you'll encounter two more enemies that, again, can be avoided. Go straight and you'll find a bundle of items; a Human Effigy, Dark Torches, the Soul of a Proud Knight, and an Old Knight Halberd.
Head through the doorway in the room you just passed and down the stairs. There are more enemies but again they can be avoided if you just head straight through the doorway, turn right and down the hall. There's a lift here, so use it to move down to the next floor. Go through the doorway, through the water and into the hole in the wall.
Now just make your way through the rocks and light the bonfire and speak to Lucatiel. Then go through the cave and you're into No-Man's Wharf.
Back to Dark Souls 2 complete walkthrough.