Dark Souls 3: The Ringed City walkthrough - Earthen Peak Ruins optional loop

Take down that angel, explore a poison swamp and battle a desert pyromancer in this optional Dark Souls 3: The Ringed City area.

This section of our Dark Souls 3: The Ringed City walkthrough explores a totally optional area.
This path is the way you're "supposed" to get to the first boss, The Demon Prince, but it's much harder than the cheesy way we took in the main fork of the walkthrough.
It's worthwhile having a poke around in here though, either before you proceed to the next area or after you've done everything else. There's an NPC battle, some great loot, and a chance to take down that damned angels that would have bothered you if you've been exploring this area.
If you don't want to do this, feel free to totally ignore it. If you want to, know that it kicks off part way through the Earthen Peak Ruins to Within Earthen Peak run; if you don't know how to get to the tunnel leading to the swamp area, head on over to that article to get the scoop.
We really recommend doing this loop after you've fallen down the root system on the cheesy route; if you get frustrated you can just get on with things, and getting rid of the middle of the three angels makes it much easier to navigate the upper root system when you're exploring later.
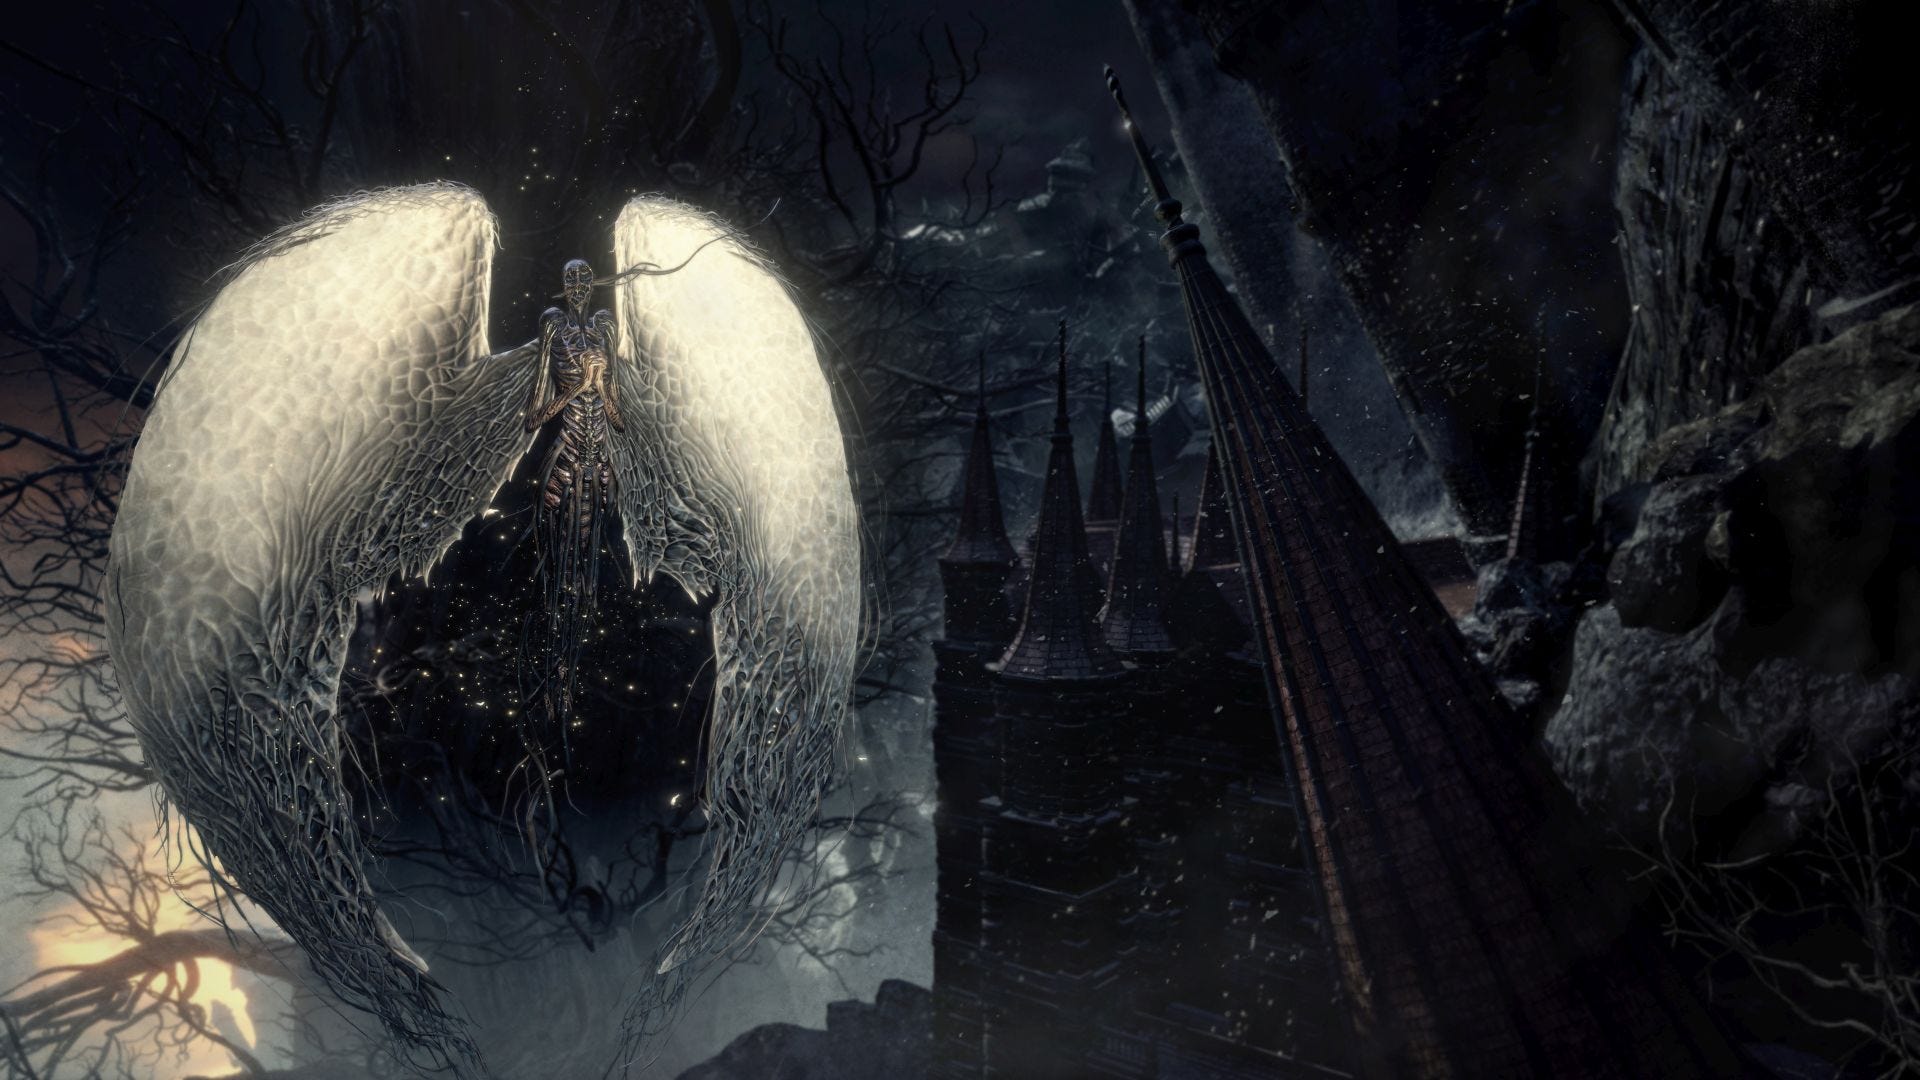
Take down the Angel in the swamp
Start at the Earthen Peak Ruins bonfire and head to the stone ruin where you shelter from the angel. Advance down the tunnel and stop before dropping down. There’s a thief waiting below, whom you can snipe – and should, because things get very hairy down there.
As with the area around Earthen Peak Ruins, there are heaps of treasures here we won’t be stopping for until we take down the guardian angels, so bear that in mind if you’re tempted by something.
So in this next area, you’re not only exposed to the fire of an angel, but this one has a new trick. If you see golden light coalescing around you, move, soldier; you’re in a high concentration of curse, and if you stay still it’s an instant kill. You need to move between areas of shelter from the projectiles, but also be ready to run back to another shelter point if the angel begins cursing.
Also, ah ha ha: there’s a toxic swamp. Remember how we all realised that it was easier just to live with toxicity and poison and just cure it on the other side of a swamp traversal rather than try to prevent it, at which point it stopped being much of a challenge? Yeah, well, with an angel firing on you, that strategy falls apart.
Update: as of the latest Dark Souls 3 patch, the Hidden Body sorcery will allow you to sneak past angels - and they deal out less damage than before. Phew!
There are mushroom beetles in the broken house just ahead, guarding some purple moss clumps.
If you dare risk the angel’s projectiles, make a dash to the back corner where the exposed item glow yields the Desert Pyromancer Gloves.
Whether you grab that item or not, ignore the other glow for now (way too risky) and instead return to the broken house. Peer out in the opposite direction from your drop into this area, and turn the camera left to see an item glow on a tree root. Your next goal is the shady spot under this root, where the angel’s attacks can’t hit you. Before you run over, use Spook or even better equip the Slumbering Dragoncrest Ring.
Now what you want to do here is run under the root but stop just inside it, and wait for the angel to do a curse attack – if it’s going to. Don’t run away; just move a few metres out of it so it doesn’t hit you. As this is happening, a Harald Legion will be rising out of the muck and heading for you, but you must be calm. Run over to the nearby stone pillar and circle it, keeping well back (the Harald Legion's attacks can go through it), and as long as you keep line of sight broken and are silent, he will quickly forget you. You’re safe from the angel here, too. You can cheese the big guy with arrows or duel him around the pillar; remembering to keep reapplying Spook if you’re cheesing, or sound will prevent his resetting to patrol mode. Don’t be alarmed by the fact that the Harald Legion does one melee attack at the pillar after you ping him; he will reset, I promise. You can even ping him from the front, and you should, as it does way more damage.
With this hazard down, return to the shelter of the roots and move into the cave. Turn to see a group of mushroom beetles near an item glow. Snipe them, even if you’re confident in fighting them, because it’s a trap. When you go over there, you’ll find another large group of mushroom beetles behind the stone pillar, and also that you’re exposed to the angel’s projectiles again…! It’s manageable, but far less dangerous if you’ve taken out one group already. Throw a firebomb or two into the second group if you can do so safely. The item in the back of the cave is a Soul of a Weary Warrior.
There’s one other area of this cave to explore, which is totally optional – and, if you have died a few times, won’t even be there. See, in the back corner of this cave there’s one Harald Legion guarding Titanite Slab - but if you died a few times around the Earthen Peak Ruins bonfire, Lapp has already killed it for you, retrieving the item. (If you collect the item before Lapp gets it, he'll give you another random loot item from this area, until they're all gone.)
With that done, it’s time to move on past the angel. First, stand behind your nice safe stone pillar and look up, almost directly at the angel, to spot a thrall hanging from a root. May as well deal with it now.
Next, keep the camera on the angel so you can move into cover behind the vertical root without it seeing you. What you have to do now is sprint to that tree root you can see leading upwards and get around the curve to take shelter behind the windmill.
This isn’t easy and if you find you can’t time it well (I personally was spotted by the angel immediately on every attempt), you can run just behind the root to begin with, accepting a probable poison status and using estus to counter any damage taken so far. This will break line of sight and the angel will cease its barrage and begin to use curse. Immediately run out and use those few extra seconds curse grants to make it around the root.
Once around the windmill you are safe, so take a deep breath and drop down to another root below.
Ahead of you you’ll see a rocky tunnel; avoid it for just a minute. Instead, look at the rooftops just to the right of the tunnel entrance and climb onto those form the very edge, without aggro’ing the tunnel itself. Just walk on over the rooftops, using the root as shelter from the angel. There’s a thrall in the valley between two peaks.
At the edge of the rooftops drop to another root, then use this root to cross to the next set of rooftops. Even before you drop down to the roof, look left to spot the angel’s body. Thank goodness that’s over!
With the angel gone you can explore the swamp area. First, head back down to the root system to collect a titanite chunk on a root poking out over the swamp, back towards the little house you sheltered in earlier.
Next, you want to drop down from the second root to land on the rocky area. Before you do, peer down to spot and snipe the Harald Legion; he takes extra damage in his weird foggy head. He may eventually move too far from his starting position for sniping, but if so, just drop down on the rocks as far from him as you can and sneak up the ramp to stand behind him. From this distance you should be able to hit him enough times to finish him before he makes it to you.
When it’s safe, grab the Harald Curved Greatsword from the body in the swamp. Follow the rocky ramp right to the end to kill a thrall and grab a Homeward Bone.
Desert Pyromancer Zoey and upper root system
Next, head up the roots and this time enter the rocky tunnel.
A thrall with one of those nasty swords is waiting for you in the cave at the top, but it gets much, much worse: two thrall with fire swords and the NPC Desert Necromancer Zoey are also up here. They come strolling out after a few seconds, so don’t hang about thinking you are safe at last and taking notes for your stupid walkthrough or anything.
Zoey is a real pain. She uses (and drops) the Flame Fan pyromancy, which she drops, as well as standard issue big fireballs. Up close you must watch for her rapid firey slashes as well as the much quicker if shorter ranged whip-like attacks. You should make the two thrall a priority before tackling her, which can be difficult enough. When Zoey is dead you can grab the Desert Pyromancer Hood and some prism stones from along the tunnel.
With both angels done you can explore the root system on the far side of the rocky tunnel; you will want the cat's ring or Spook here, just in case. First, scan the right side as you walk out onto the upper roots to find a lower one you can drop to. At the base, under the join, is some twinkling titanite. You can walk to the far end of this root to drop back on the first one.
From this root, you can drop relatively safely down onto the rooftop area on the opposite side of the swamp, which seems to be the “proper” way to reach the Within Earthen Peaks bonfire. There is one last item up here, in that windmill hollow, but I haven’t figured out how to get to it; even with Cat’s Ring the fall kills me. Any ideas, comment massive?
Loot tidy up
At (the much safer) ground level, the Desert Pyromancer Skirt is at the back of the area, under the root system you’ve just been exploring, in a patch of poison swamp surrounded by mushroom beetles.
Nearby you can climb onto yet another root system. At the far end is an item glow, but beware the thrall waiting to ambush you on the right side. The item is the Ring of Favor +3. About halfway along the root, drop down to grab a titanite chunk.
There’s a soul of a weary warrior slap bang in the middle of the swamp, but be wary of the Harald Legion who rises if you approach it.
At the unexplored end of the area, a little parliament of mushroom beetles is guarding a Loincloth. Face back towards the middle then look right to spot another mushroom beetle in the swamp; the item glow nearby is another titanite chunk.
That’s it, really. Wasn’t it nice to stick it to the angels, though?