Dishonored 2 M04: The Clockwork Mansion part 2 - Clockwork Mansion

The Clockwork Mansion unfolds around you in this stunning Dishonored 2 mission. Don't get caught in the gears!

Key items and objectives
- Eliminate Kirin Jindosh
- Rescue Anton Sokolov
- Ghost Between the Cogs (special action)
- Hidden Repository (special action)
- Flawless Extraction (special action)
- Painting: The Blood Topology of Grim Alex
- Painting: I Look Upon the Craftsman
- Painting: Light Along the Inverse Curve
- Blueprint: Conductive Filaments
- Blueprint: Slug Splintering Wedges
- Bonecharm x 3
- Rune x 1
General layout and tips
The map above shows the layout of the Clockwork Mansion; here's a zoomed-in version.
The mansion isn't as confusing as it seems at first; it only switches between two configurations, and the "back corridor" areas remain fixed. Your goal is to travel from the entrance through the inner workings of the mansion to a central elevator area allowing you access to both the laboratory, where Jindosh is, and the Assessment Centre, where Sokolov is. Sokolov must be carried to the exit, alive.
Walkthrough
Look, this isn’t as confusing as it’s supposed to be. Remember each room only has two shapes, and that the back corridors don't change, and you'll soon understand how it all fits together.
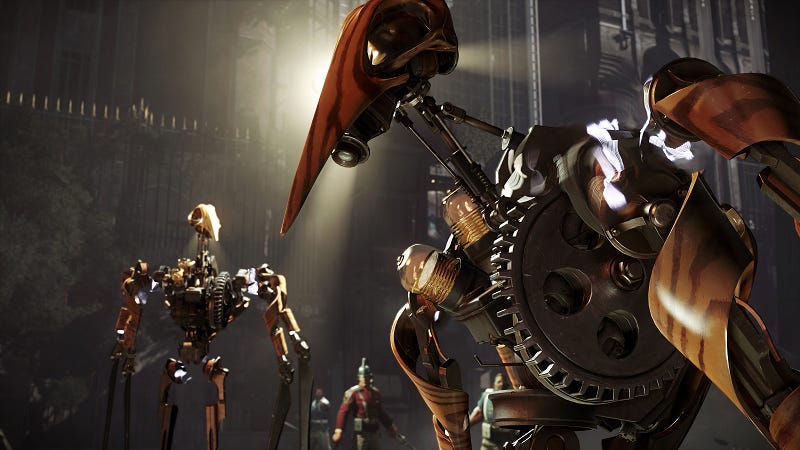
Be wary of the clockwork soldiers: the can see behind as well as in front, but they have very little peripheral vision and never look up unless prompted. They don't count as kills so feel free to take them out. They're difficult to take down without explosives, but can be rewired to attack each other and the mansion guards. Stun mines are especially effective against them, destroying them in one hit.
- Ghost Between the Cogs special action
This special action (and associated trophy) seems very finicky. From what we understand, to achieve it you must not alert any guards, speak to Jindosh at the glass doors at the start of the level, touch down on any "internal" (wooden) floor, or use any further configuration levers after the first one. You'll have to zip into the back corridors with that first lever pull and make your way to the laboratory to knock Jindosh out using only the available set paths before going for Sokolov. This is really hard to do on your first visit (and all the time, to be frank) so it's best left for a second playthrough, or maybe you want to play the mission then reload an old save and try again. As if all that weren't enough: judging by Arkane's comments, it looks like this special action might only be possible if you've never had a single alert in the game so far. I'll continue with the walkthrough assuming you want to play the level without this special action.
These first two rooms are safe. Grab Audiograph: A Welcome and a Warning and Document: Clockwork Soldiers Sold at Auction off the reception desk as you pass. In the next room, grab some minor loot from a cabinet on the left, then pull the lever to transform the mansion - you can sneak off into the inner workings of the house right now by leaping into gaps here, but it’s a dead end and won’t score you anything tasty.
The clockwork soldier that appears isn’t hostile, but don’t try to move to the room between the staircases or it’ll nab you: go up the stairs instead, and search the display cases - grab the rewire tool if nothing else. Make a save now, because you have two choices: approach the glass doors and chat with Jindosh, or leg it into the back rooms of the mansion.
If you chat with Jindosh he triggers a transformation and adds two extra hostile clockwork soldiers to this area, which is horrible. Whether you speak to Jindosh or trigger the first house transformation yourself, the goal is the same - getting into the back corridors - so I suggest doing it once for the story content, then reloading your save and legging it without chatting to him.
There are three back corridor areas accessible in this initial starting area. There's a seeming dead end right under the entrance, a dead end right near the glass doors where you can disable the nearby wall of light, and the one we actually want to get to: with your back to the glass doors, it's on your right at the end of the galleries. It's actually accessible from the dead end near the entrance, too.
Explore the corridors until you find two pairs of windows, two on each side of a sign pointing to the dining room. Wait a moment and an elite guard will patrol away. Let her go, then cross the corridor and grab Document: Instructions to Staff from the noticeboard; the nearby clockwork soldier won’t alert unless you attack it or the guards discover you. Wait for the guard to come back and ambush her, then go through the door she was patrolling through. Grab the Jindosh Mansion map from the wall.
Go back the other way, past the inactive clockwork soldier. There are two possibilities here:
- The guards bring an arc pylon up into the music toom, so you can't venture into the centre of the room just yet.
- There is one extra, patrolling elite guard in the music room addition to those described below, and you need to hide your bodies carefully.
Facing the inactive clockwork soldier with your back to the map room, start by nabbing the elite guard from the corridor on the right to get him out of the way. Go back to stand against the clockwork soldier; your next goal is a room to your left, across the arc pylon area of effect. You can either zip over there or just go back out to the back corridors and walk around. Collect Book: Sokolov Technology and the New Age and the Umberwood Snuff Box loot item.
Now we want to get to the room opposite. If there's no arc pylon in your world, take out the two elite guards. If there is, you can either deal with the one elite guard at a distance and then zip across the arc pylon area to the safety of the far side, or you can go back into the back corridors and explore right to the end to find a billiard table. If you climb up on it and then further into the ventilation shafts, you can cross over to the far side and drop down in several places.
On the other side of the music room slash arc pylon death zone is the waiting room and an atrium. There's a guard sleeping on a bench in the atrium and two civilians in the waiting room itself. Deal with them all and grab the key from the bench by the guard to unlock the nearby door. Loot the coins from the fountain, loot the civilians for coins and Document: Invitation letter from Jindosh, and check the office for minor loot.
Exit the waiting room on the atrium side and pull the configuration lever. This sends the waiting room away and brings down an office of some kind. Grab Blueprint: Conductive Filaments and Document: Letter to Amado Foundry off the desk, then bring the waiting room back.
Take the elevator in the music/arc pylon room down to the bottom floor. There are two guards who patrol near the elevator. The little hatch above the door is a good place to perch while you work out how to get them. Be careful not to attack them or leave their bodies in the corridor to the right (facing out the elevator doors) or the two civilians nearby may spot them. Do your future self a favour and hide the bodies well.
Go around the corner into the kitchen and sneak past or silence the two civilians mentioned earlier and collect Document: Sokolov’s Needs. Continue right around and you should come to the waiting room; if not, pull the lever to make it appear. Go through and pull the lever again to send it away, and while it is moving, crawl into the gap between the two floors. You should have access to another hidden area; otherwise, hit the lever in here to move to the right level. You'll find a body infested with bloodflies, where you can grab Document: Last Words and a bonecharm. Explore further along to find the whale oil powering the arc pylon and shut it down. Open the hatch and enter the the elevator shaft, to drop back down to the bottom floor.
G back to the waiting room and cross through to the other side to deal with the elite guard who patrols towards you from the walkway on the right. Go to the end of this walkway and search the small room for Document: Oracular Order Divided and, in the drawer of the desk around the corner, a bonecharm.
Go back to the waiting room and look for a screen in the corner; knock it down to move past it. Collect Document: Empress Delilah’s Secret along with some minor loot. Go down the stairs and grab Document: Conditioning Sokolov to unlock the non-lethal ending.
We could get Sokolov now, but it's easier to take him out of the mansion if Jindosh is eliminated first. Leave here for now.
Return to the music room slash arc pylon zone and decide whether to climb up the elevator shaft by way of the platforms or ride the elevator itself; in either case you don't want to be standing in the lift when the doors open on the top floor because there may be two elite guards waiting for you. Zip up through the ceiling hatch and go out the front hatch if you ride up.
In Jindosh’s bedroom you can grab Document: Letter from Duke Abele and a rewire tool as well as some minor loot. Go to the edge of the balcony and look right to see an air con unit you can climb to. Now look further right to spot a platform - use the pipes or Blink/Far reach to it, then open the small hatch. Inside, take the lift to the laboratory.
You can be spotted from above in here; don't let that happen. Advance by hugging the right wall, taking the corridor - this’ll get you away from the clockwork soldiers. Collect the Document: An Unfinished Letter on Legacy from the small room you come to; there’s also a rewire tool in one of the cupboards. Take the door further down this corridor to collect Painting: I Look Upon the Craftsman, Document: Clockwork Army Timetable and some minor loot.
Pull the lever in here and the bath spins away. Collect Audiograph: Persuading Sokolov from the new room, then pull the lever again so the bath comes back. Stand by the bath and pull the lever so you can ride around. Go through the door on the left into the hall and collect Document: On Bakers and Electroshock from the far end. Ride the bathtub area back around to its original position. Now pull the lever again to bring in the alternate room, and pull the lever yet again to ride it around to the third room in this bizarre little set up.
Be careful of a possible patrolling clockwork soldier around here. Loot the room, then look for a tiny workroom off in one corner by an inactive clockwork soldier. Enter this room and press the red button near the floor to sink into a secret area. Collect the black bonecharm and incidentally complete special action Hidden Repository, I think. It didn't always work for me but I can't think where else I went that was hidden.
Now return to the lab - it's time to take down Jindosh.
Eliminate Kirin Jindosh
Sneak very quietly and carefully around the room until you reach the electroshock machine. There are two control panels just a few steps from the electroshock machine, towards the centre. Carefully avoiding the clockwork soldier’s attention, nip forward and activate Optics on one and Anatomy on the other. This brings a rune to the surface you can grab momentarily, and incidentally powers the electroshock machine.
While the segments are moving, hop down to the level below. Grab the maintenance key (and some ammo) and open the door. This gives you easy access to all the levels of this area. We're ready.
If you want to kill Jindosh, this really is not very hard - get up on the ledge running around the walls of the room and drop a bolt through his head from a distance. The clockwork soldiers won’t see you up here, although Jindosh may if you're not careful.
Non-lethally is much harder: you’ve got to get to Jindosh, have him unconscious, grab him, and get away with his body (Far Reach or Blink, probably) before the clankers get you.
I found this pretty much impossible, so I cleared out both clankers with sticky grenades first. I hid above the elevator and when one patrolled up I smacked it. Jindosh and the other one came running over, and when Jindosh left the other one stuck around a bit, so I nabbed him too. The second one took two hits to kill, presumably because my first grenade was off target slightly, but he patrolled back eventually so I just had another go. I wish I’d thought of this strategy an hour earlier. Anyway, with both clankers down it’s easy to sneak up on Jindosh; Far Reach/Blink will help.
Put the unconscious Jindosh in the electroshock chair and pull the lever for the non-lethal elimination. but however you deal with Jindosh, you can then enjoy some well-earned loot and finish the mission.
Grab Painting: Light Along the Inverse Curve and Document: Note to Kirin Jindosh from Kindosh’s desk area. Open the cabinet doors on the outside edge of the desk for Blueprint: Slug Splintering Wedges. On the lower level, grab Audiograph: Winning Anton Over, Document: Powering the Electroshock Machine, Document: Letter from Delilah, and the rune from earlier if you didn't grab it already.
Use the lever on the lower level to open a path right back to the starting area.
Rescuing Sokolov
Return to the Assessment Chamber area, go down the stairs and pull the lever to open the door to a maze. Every time you step on a pressure plate in the maze, it switches between two configurations. You need to stand on a pressure plate for a few moments till the transformation is complete, or it reverses, which can mess you up.
To achieve special action Flawless Extraction, you need to do this bit without ever alerting the clockwork soldier in the maze, which is tricky. Keep Far Reach/Blink handy and remember it can't see sideways. It has a very narrow line of sight so use the narrow diving columns to your advantage. If you have a stun mine or a rewire tool, try to take it out without an alert.
Here’s how I did it: step in and activate the first transformation, triggering Configuration A. As soon as possible, Far Reach or Blink forward and right to avoid the patrolling clockwork soldier. Step on the square you come to, switching into Configuration B.
This opens the central corridor, where there’s a pressure plate covered by boards. You need to break the boards and step on the pressure plate underneath them, but the noise will bring the clockwork soldier running - so maybe lob a bolt into the boards from a distance, then back off and let it calm down and patrol away.
Make sure the clockwork soldier is out of the central corridor, then get in there yourself and stand on the plate to open Sokolov’s cell. Collect Painting: The Blood Topology of Grim Alex and Document: Note to Anton Sokolov, then speak to Sokolov.
When the scene ends, pick up Sokolov, then escape the maze (again, without detection). You need to get out of the central corridor then switch into configuration B via any pressure plate - preferably that first one you used in here, since you know your way from there (hopefully). And, of course, do this without being detected by the clockwork soldier.
Two fresh guards will come out the elevator, but they’re easy enough to evade because you can use the waiting room as a lift while they move past the elevator, or vice versa. Return to the music room (the arc pylon, if present, should be inactive) and go right back to where you got the map. The doors here open right onto the entrance lobby depending on your configuration.
One to three clockwork soldiers stand between you, depending on whether Jindosh was alerted to your presence and eliminated before you rescued Sokolov.
If there's just one, just throw some stuff around or whatever, then grab Sokolov and sneak on by. Three is trickier; you'll probably have to take them out. In both cases you might want to use the back corridors to get out to a higher level so you can move around more freely; stash Sokolov out of sight of the clanker while you do this.
I dealt with the clockwork soldiers with stun mines. I dropped a line of them on the stairs and let the clankers run into them one by one after I pinged them with crossbow bolts to trigger a search. Make sure they’re some distance apart or one clanker might set them all off at once. If you don’t have stun mines you’ll probably have to use grenades or something, and risk an alert.
However you manage it, carry Sokolov to the door and exit. When he's in the carriage, ride all the way down to Lower Aventa.
In some circumstances there’s a unique encounter awaiting you outside the station: three witches. They’re very difficult to put down non-lethally if you end up in a fight with them, so non-lethal players should put Sokolov down in the upper floor of the station and sneak out the back door. Get up high so you can spot the three witches. Zip over and choke the one sitting on the guard kiosk, then use fair means or foul on the other two - Domino and a sleep dart, Shadow Walk, whatever. Loot one of the three for Document: Mission Letter from Delilah.
Exit out the back door of the station and use the rooftops to zip away so the few remaining civilians don’t freak out about Sokolov over your shoulder. Return to the sewers and speak to Meagan to end the level and return to the Dreadful Wale.