The Witness - The Marsh Puzzle Solution
Images and solutions for every puzzle in The Witness in this complete walkthrough and puzzle guide.
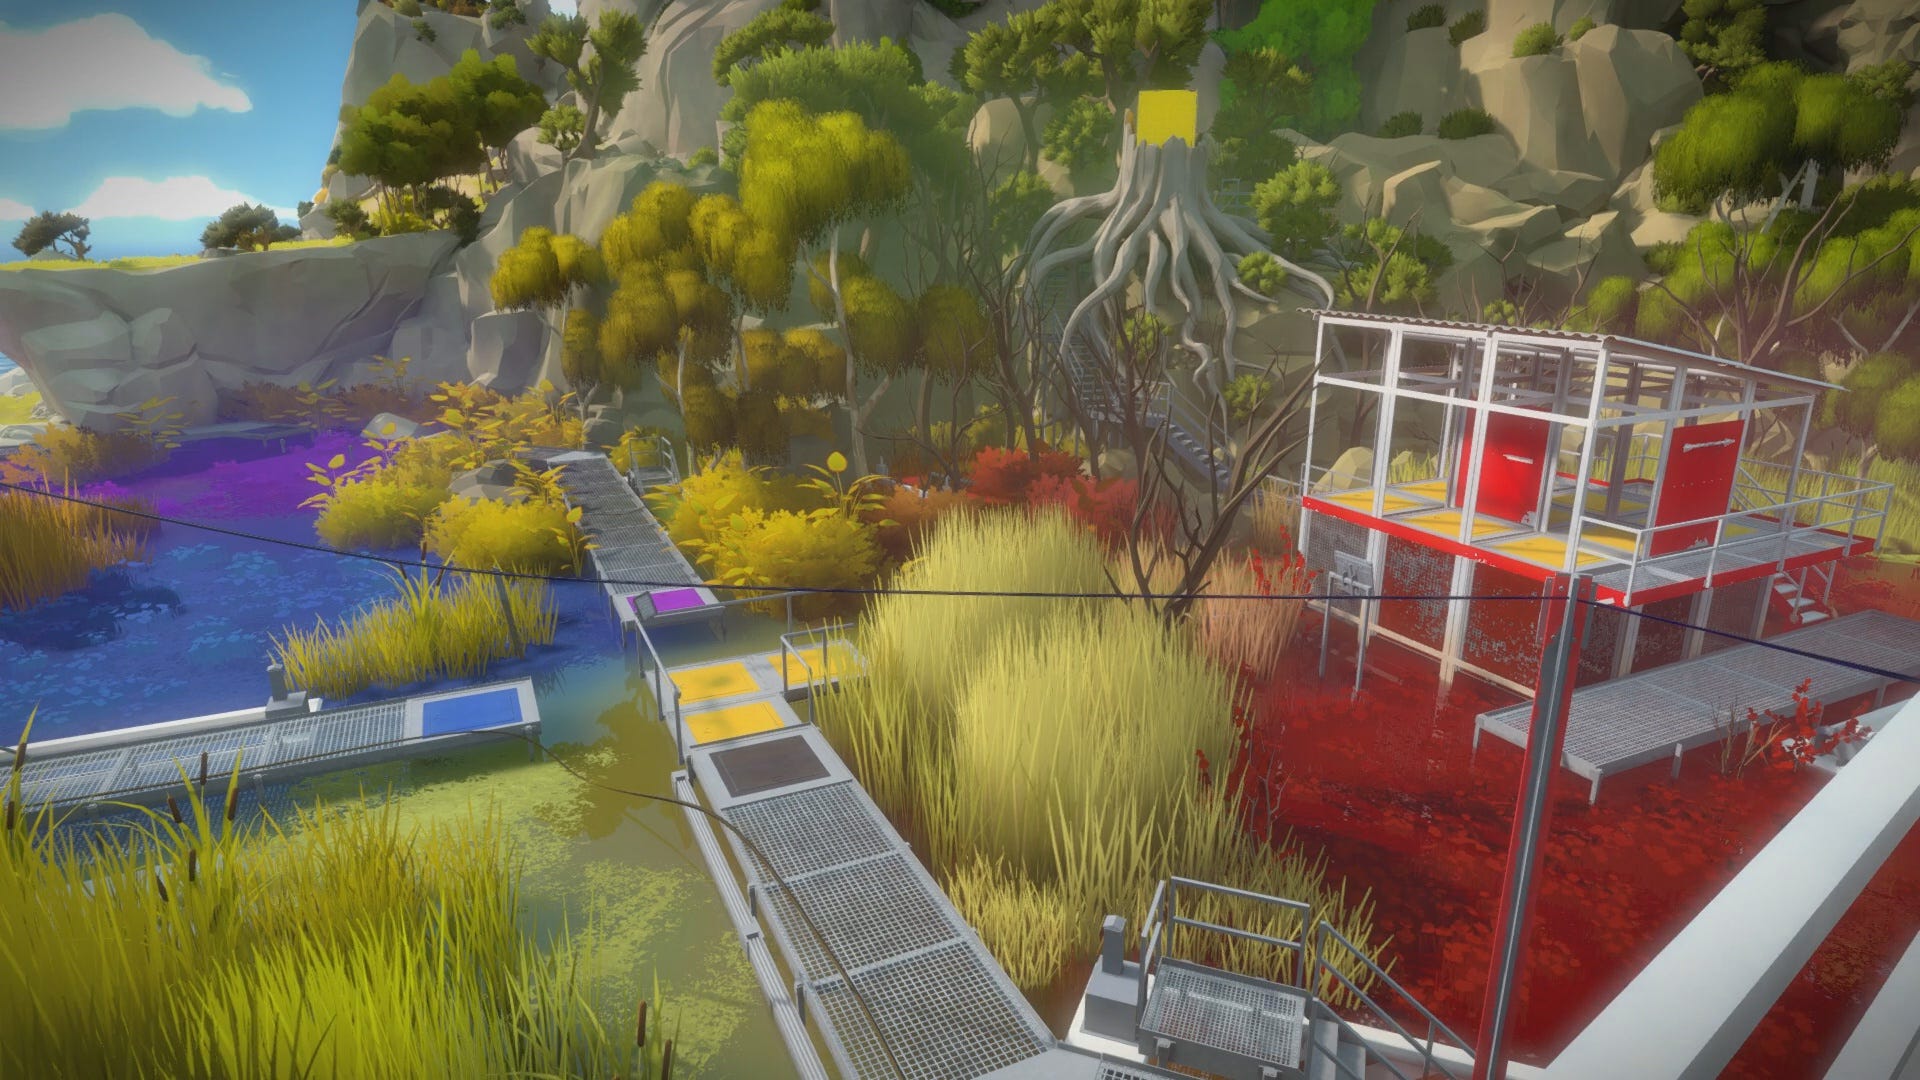
The Marsh Puzzle series in The Witness involves Tetris-inspired puzzle patterns in a color coded swamp. Since this puzzle type is found elsewhere throughout the game, it's best to practice using this puzzle series before branching out to some of the more complex Tetris puzzles. To locate the Marsh, walk past the back side of the Monastery through the open field. You will find the colorful marsh at the base of the mountain that connects the light beams. Begin by solving the single square puzzle to open the first gate. This Marsh Puzzle Solution Walkthrough will tell you all you need to know.
The Witness - The Marsh Puzzle Solution Walkthrough
The reason these are generally referred to as the Tetris puzzles are due to the Tetris shapes you must create on the puzzle graph. Each puzzle panel will contain one or more Tetris shapes within its squares. The goal is to section off these shapes while also creating the general shape of the Tetris piece using the drawn line itself.
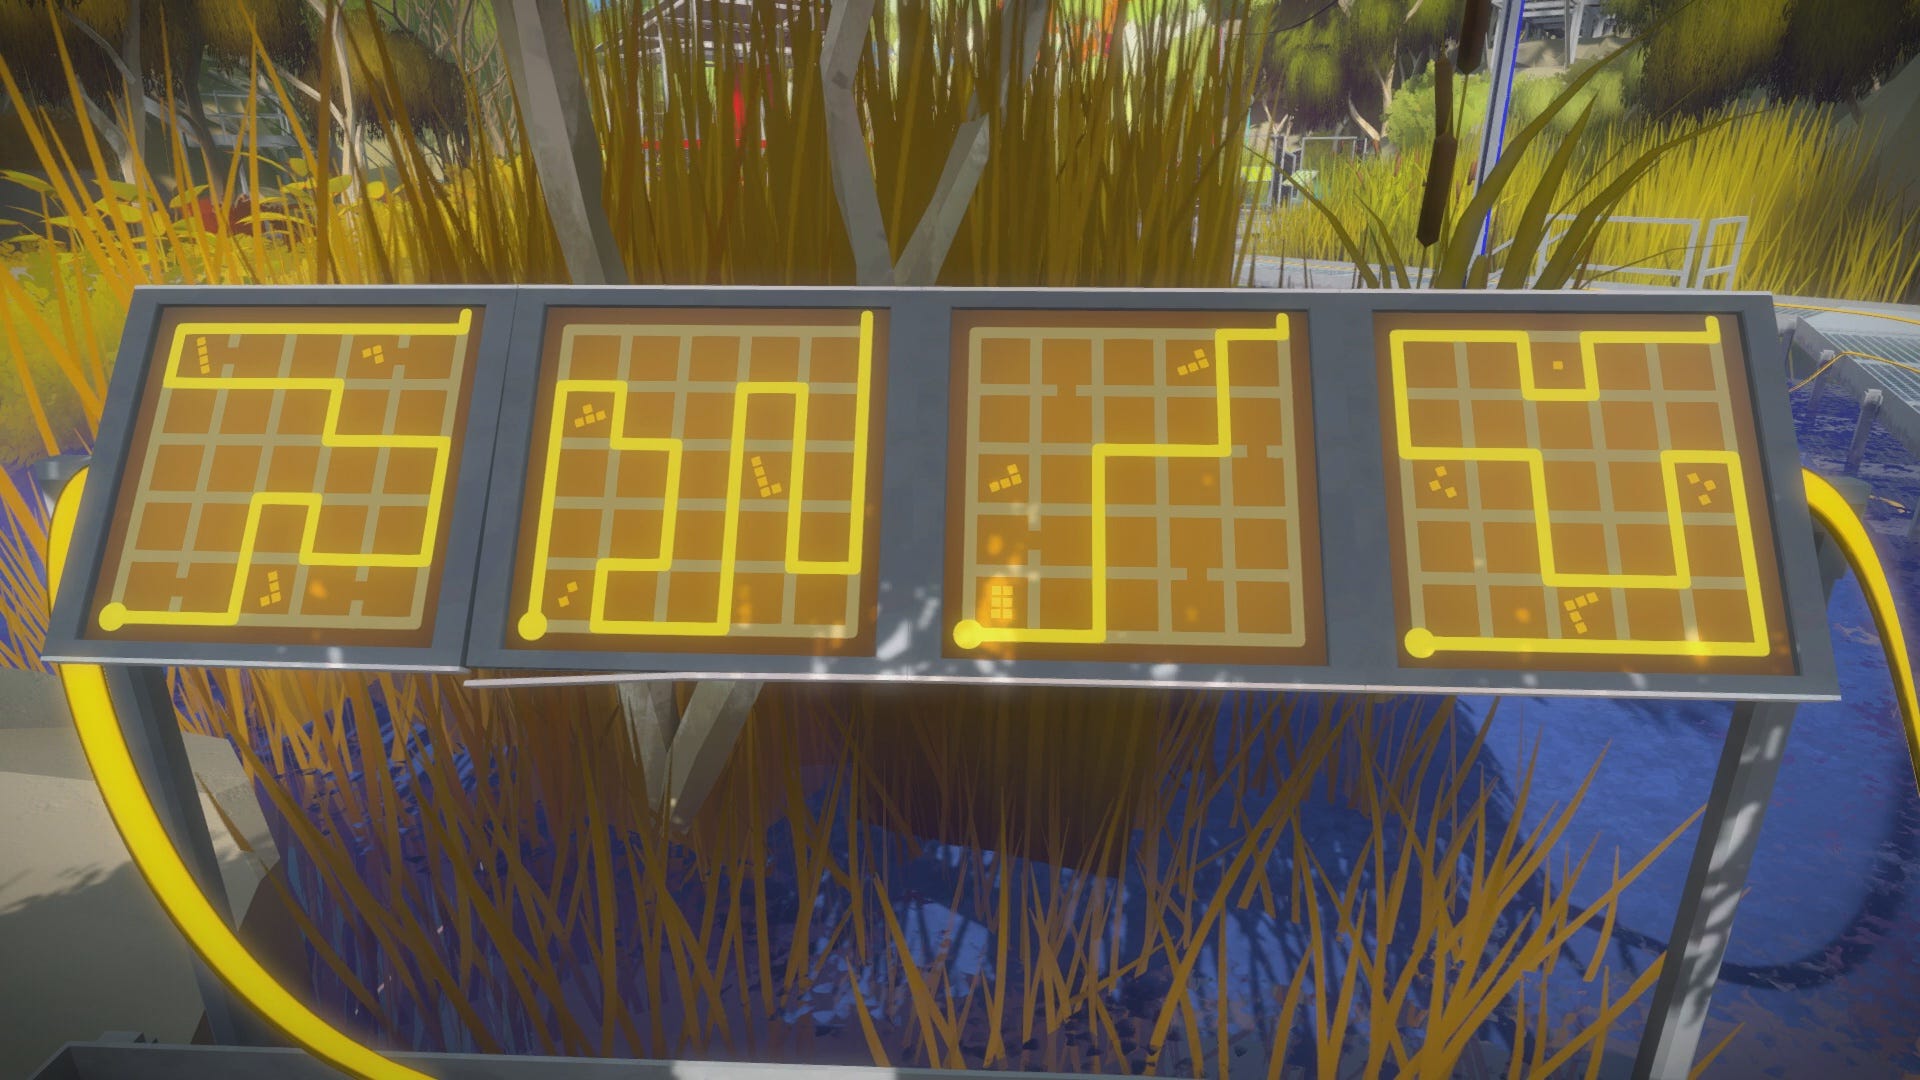
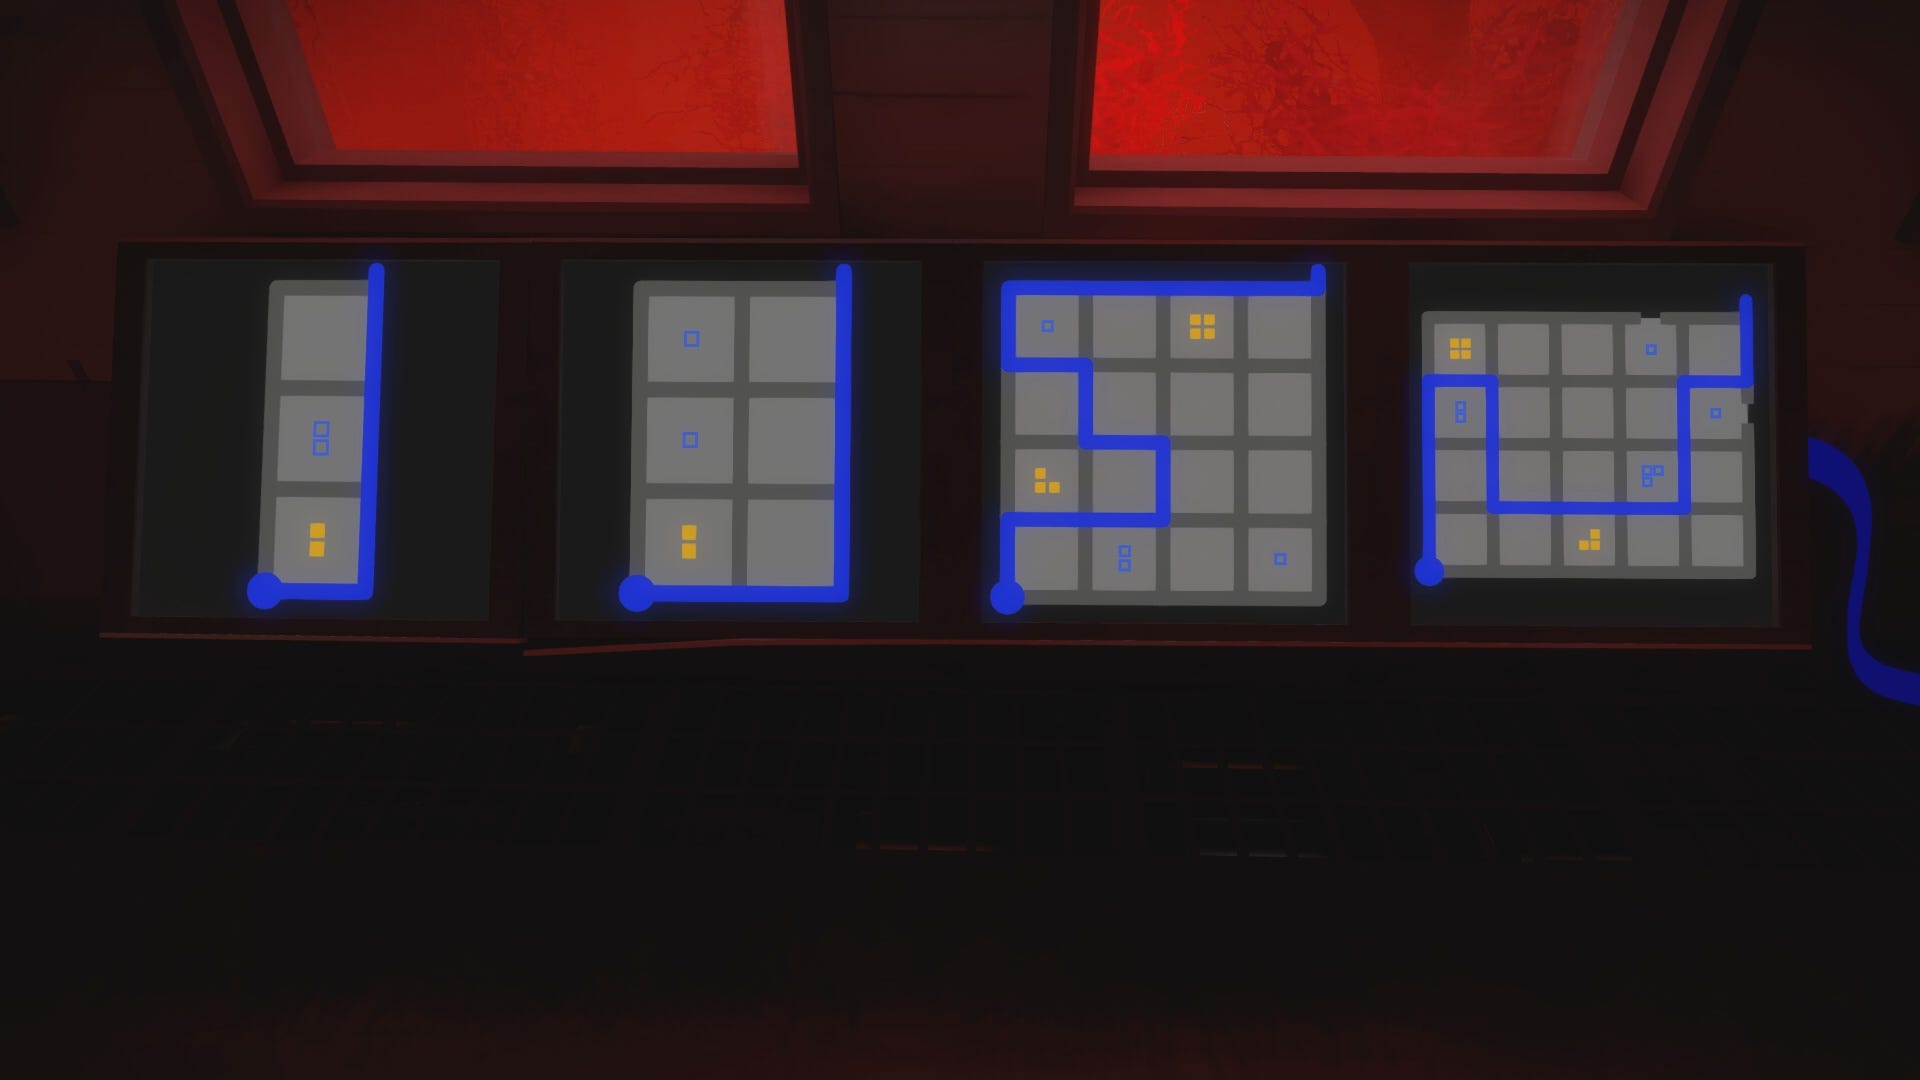
The first six puzzles are found just to the right of the gate entrance, starting from the right panel. Their solutions are shown below. These will introduce you to the basic concept of the Tetris puzzles. Notice how each of the solutions are drawn in the shape of the featured Tetris piece, while also sectioning off the piece within the outline.
The next set of puzzles are located on the back side of the first panel set. These puzzles will include two shapes, both of which must be sectioned off like before. Count the number of blocks used in each Tetris shape to figure out how many blocks to include in the final outline. As usual, broken paths on the graph must be avoided when drawing your outline.
It is important to note that the blocks you section off for one shape cannot also count for another shape at the same time. For example, if you create an L-shape using three blocks, a square Tetris shape in the same outline must be composed from different blocks.
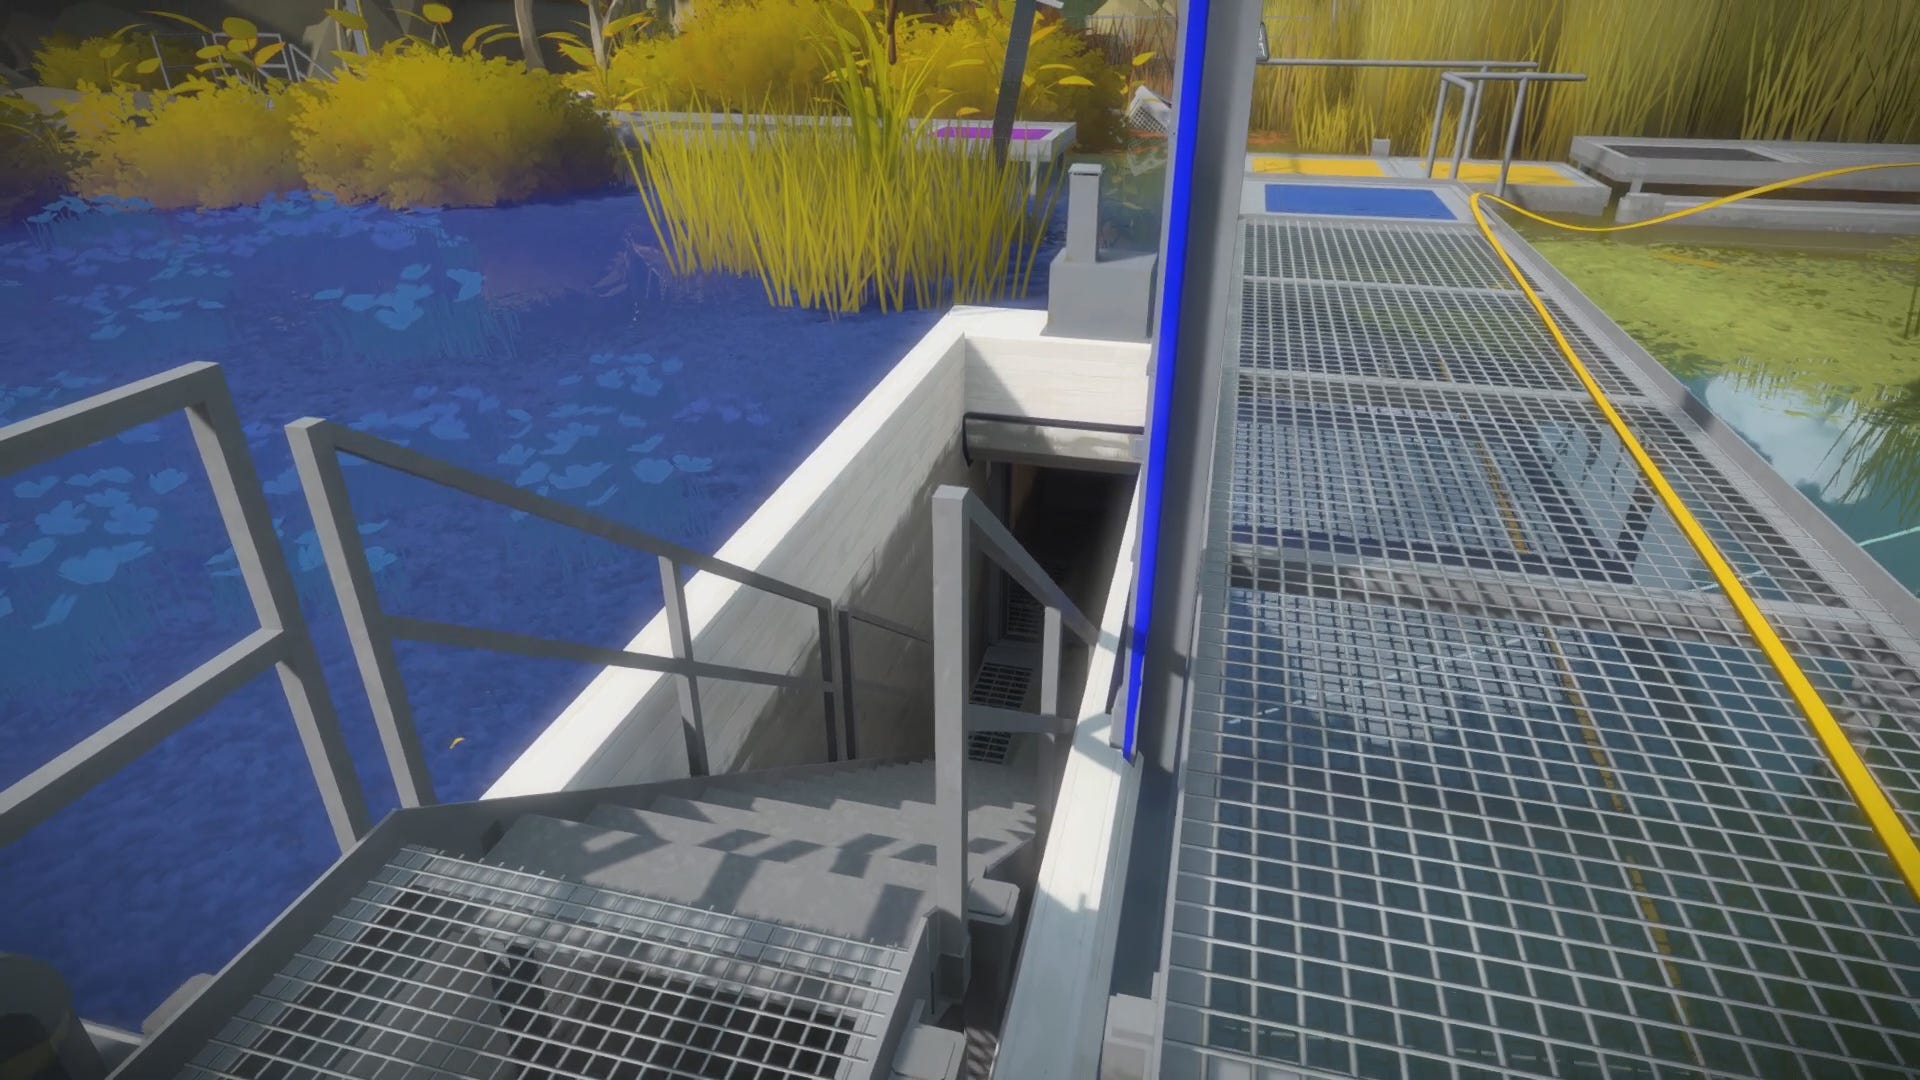
Once you complete the first two sets of puzzles, follow the illuminated wire towards the small bridge. To solve the panel on the bridge, consider the shape of the yellow platforms beneath your feet. This is your clue to the solution. The correct solution will cause the middle section of the bridge to move, connecting you to the other side. Likewise, drawing the inverse of the solution will allow the bridge to return from the other side back to where you started.
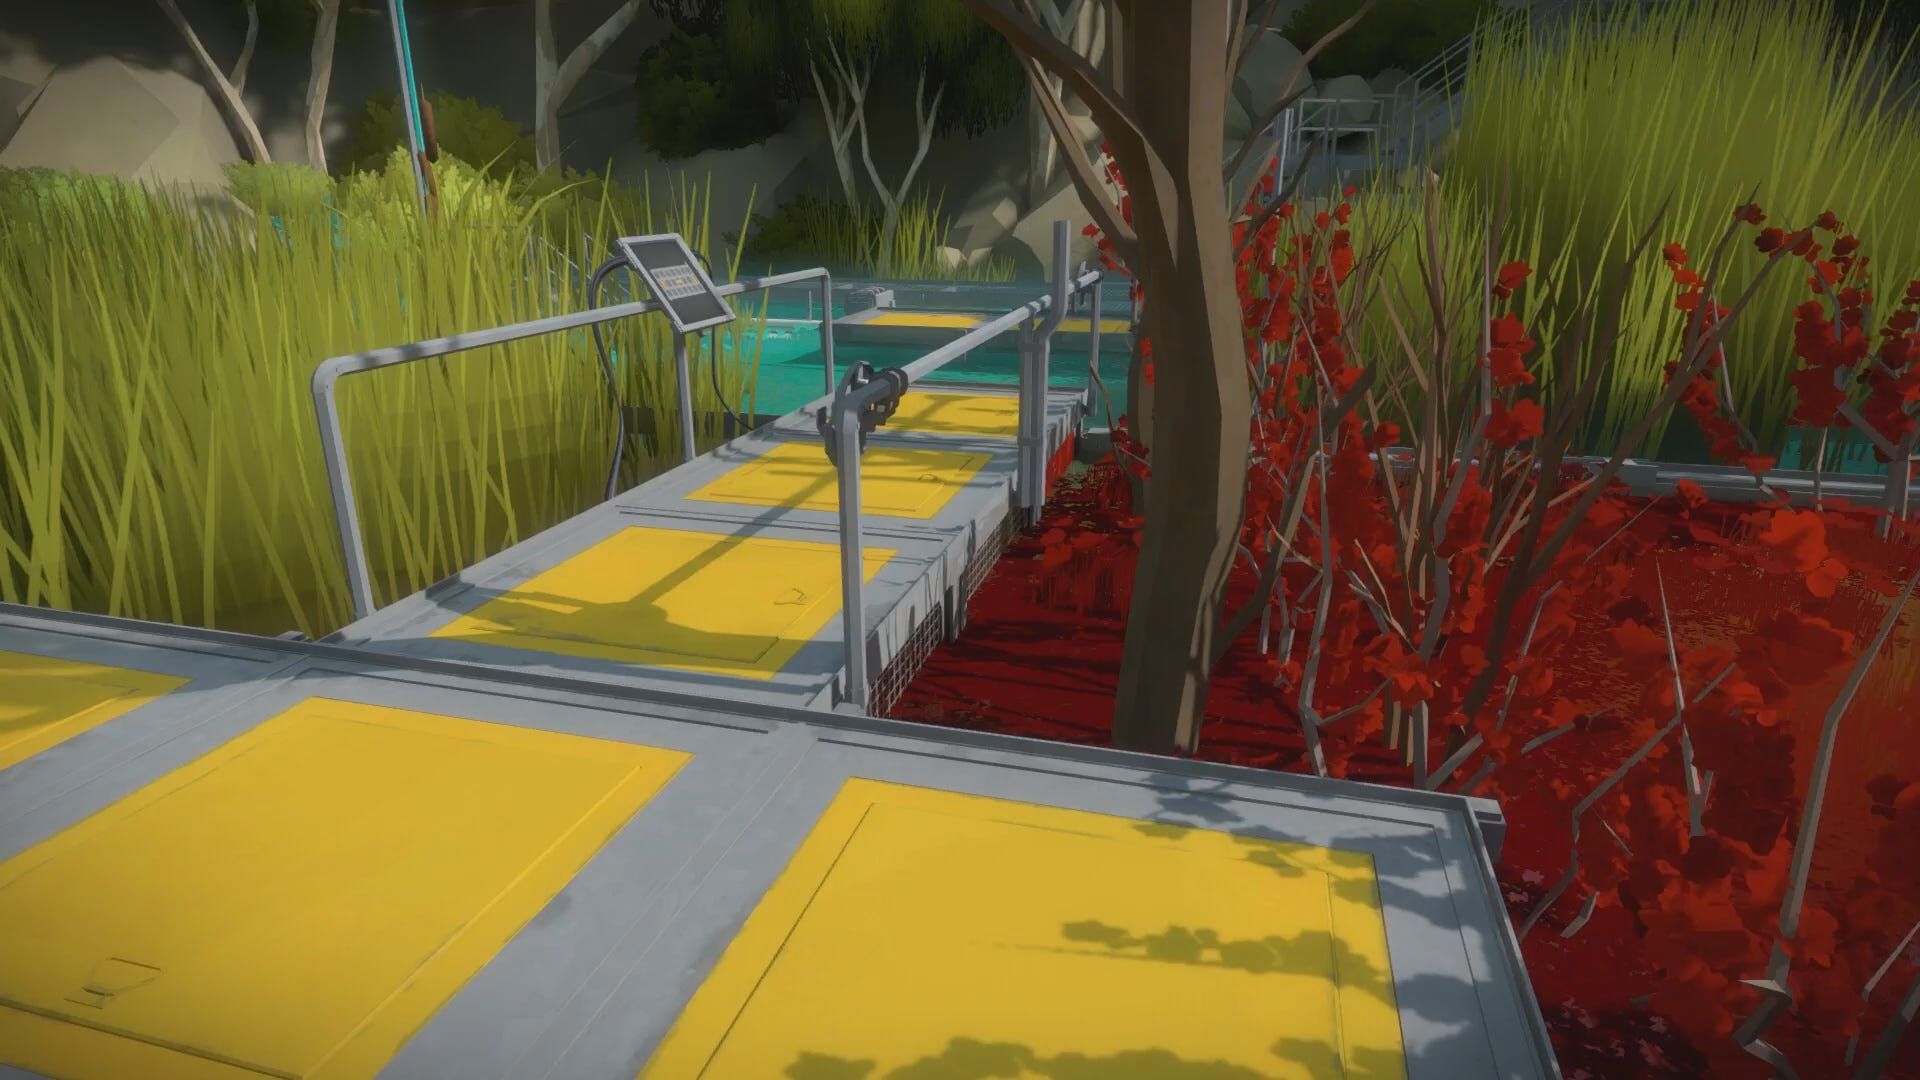
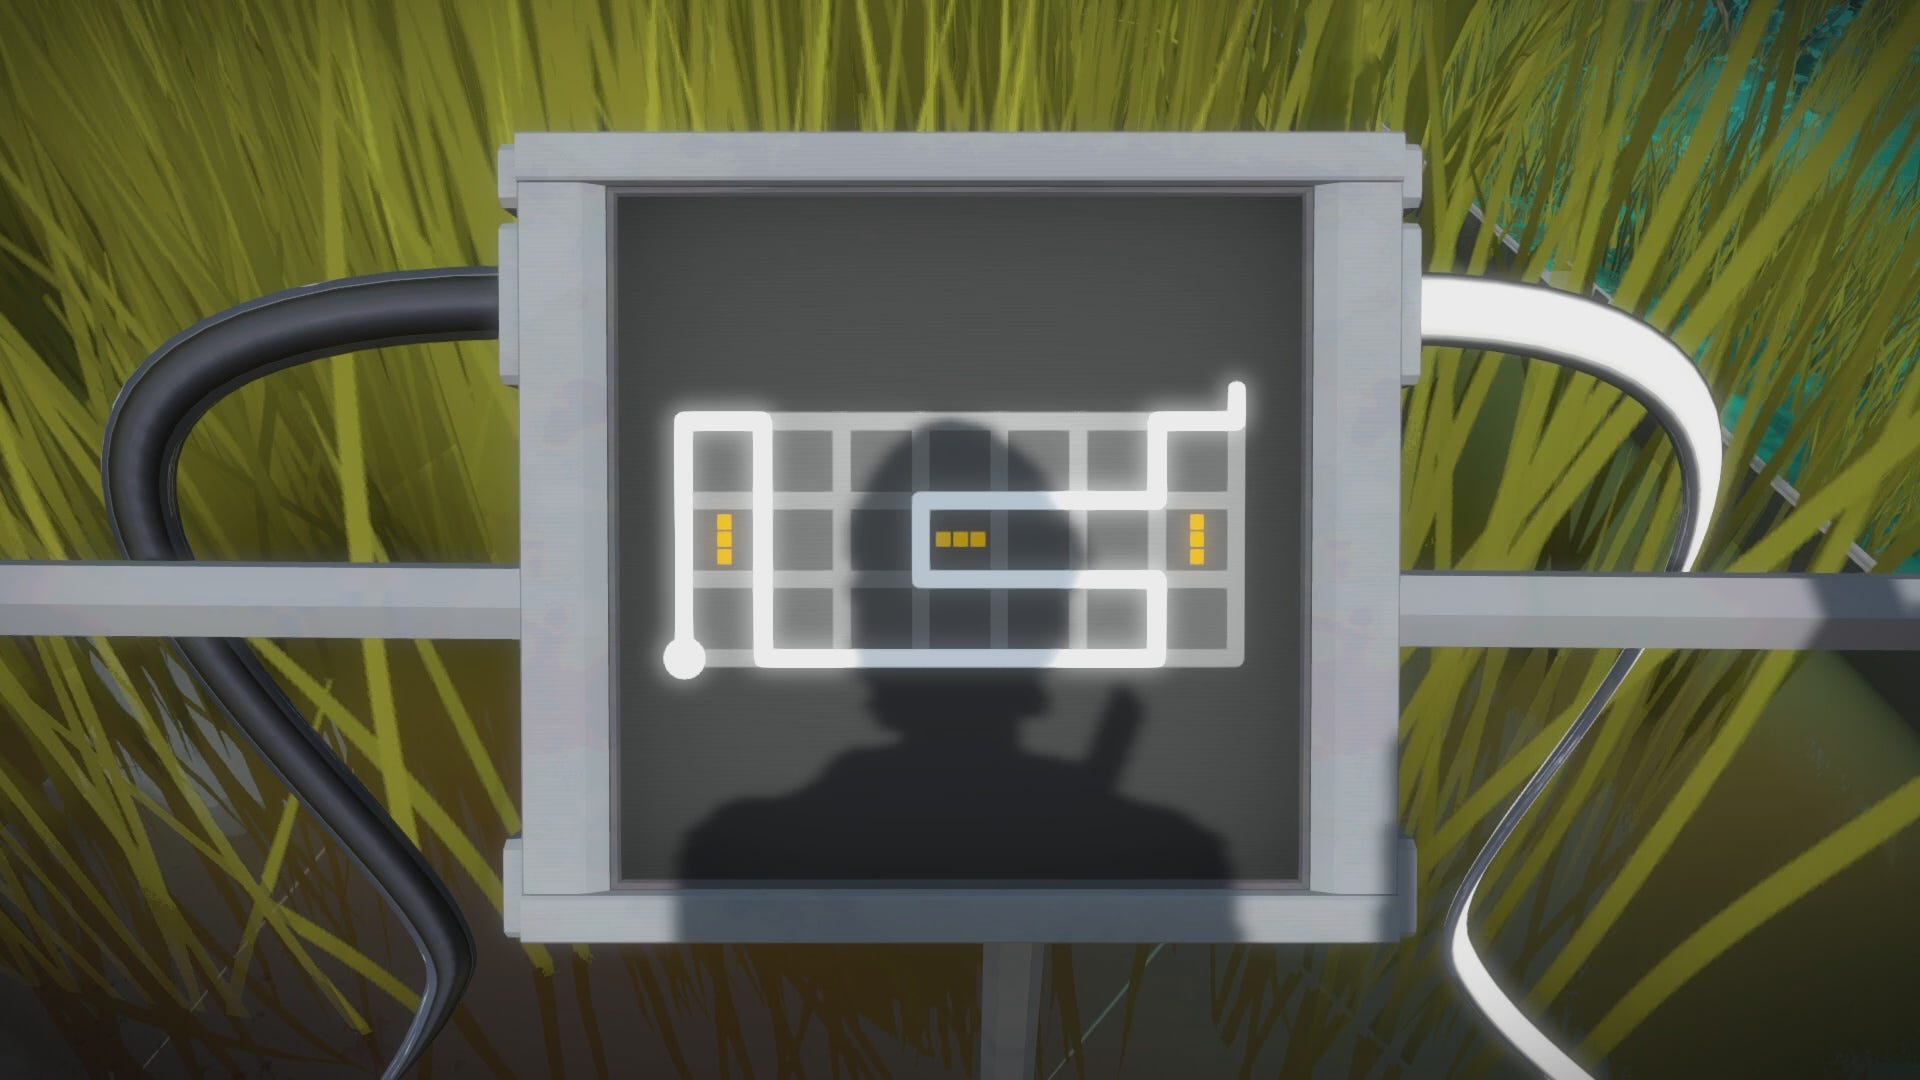
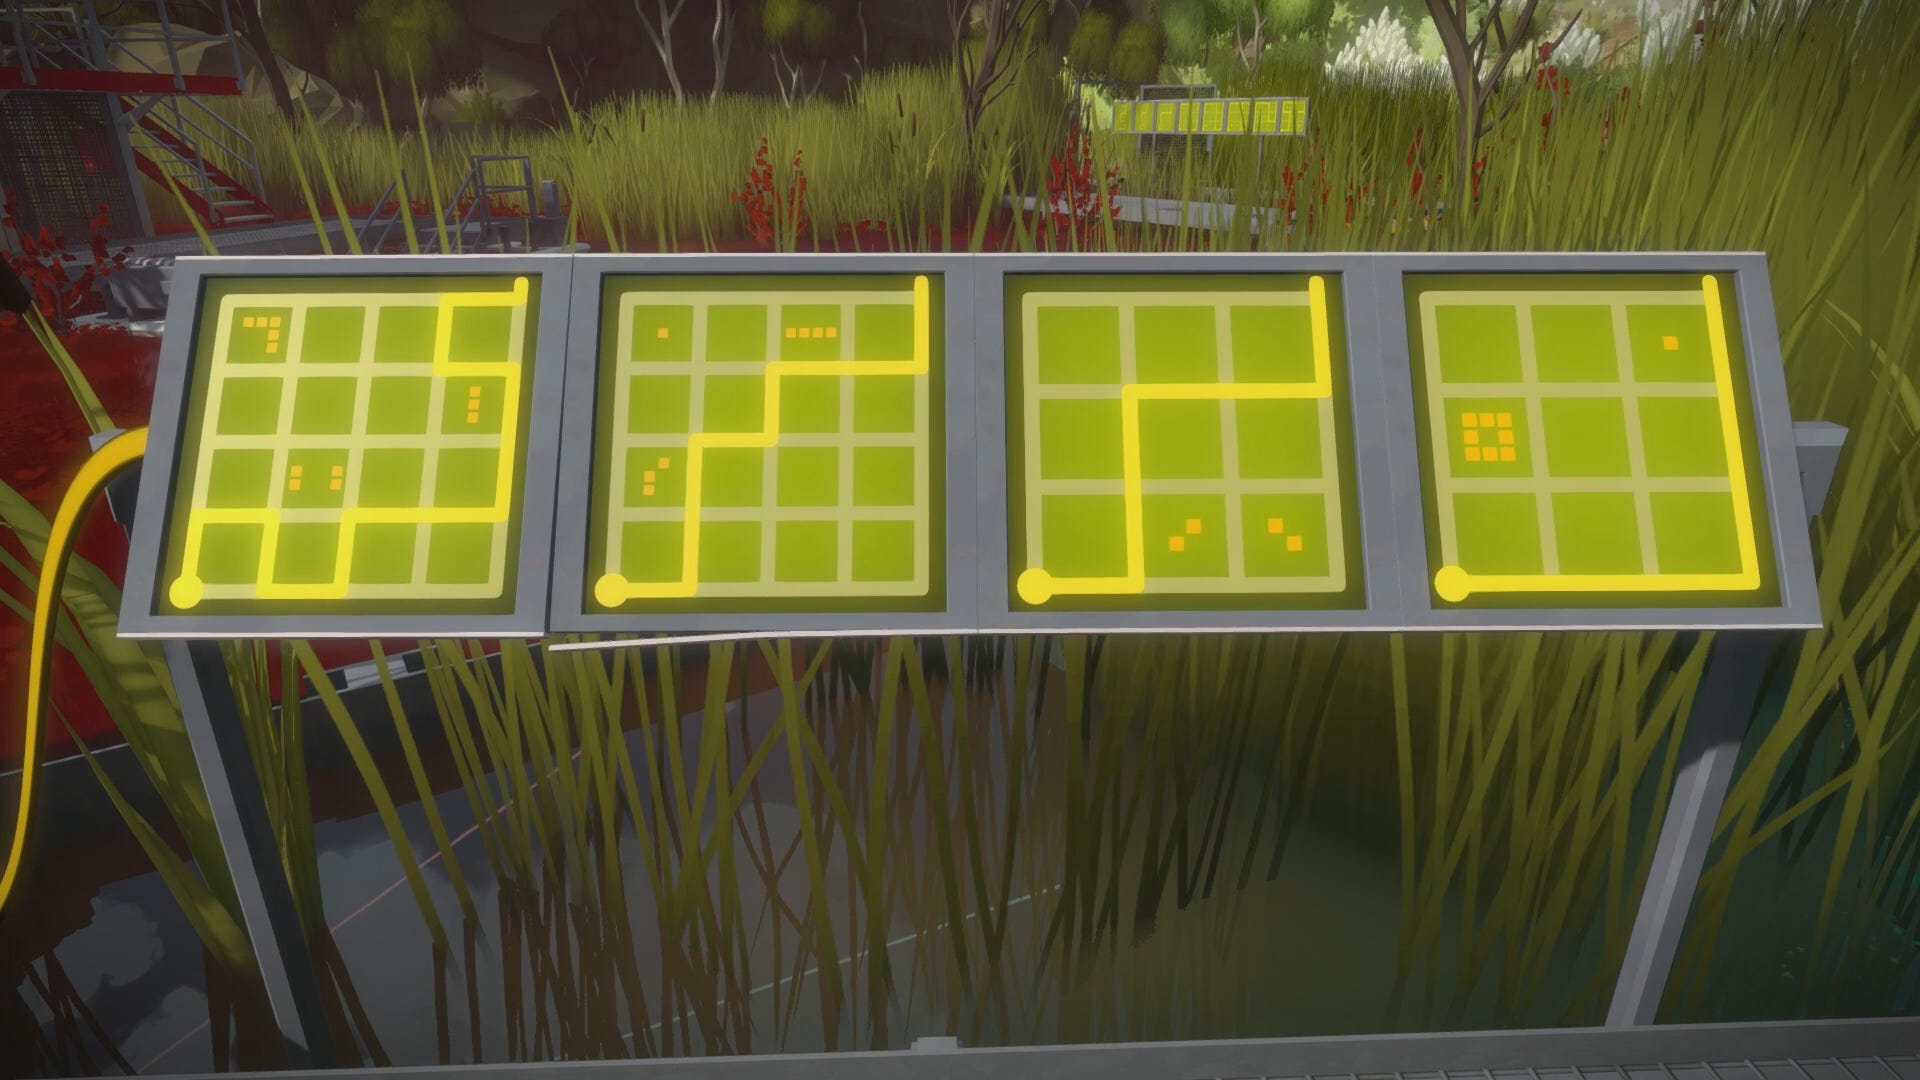
There are three paths to take when you reach the other side of the bridge. Two of the paths are blocked, so the only option is to climb the metal staircase ahead. The four puzzle panels at the top of the stairs contain multiple Tetris shapes that must be sectioned off together in a single outline, without using overlapping blocks. Focus on sectioning off the correct number of blocks, rather than replicating the exact shapes themselves.
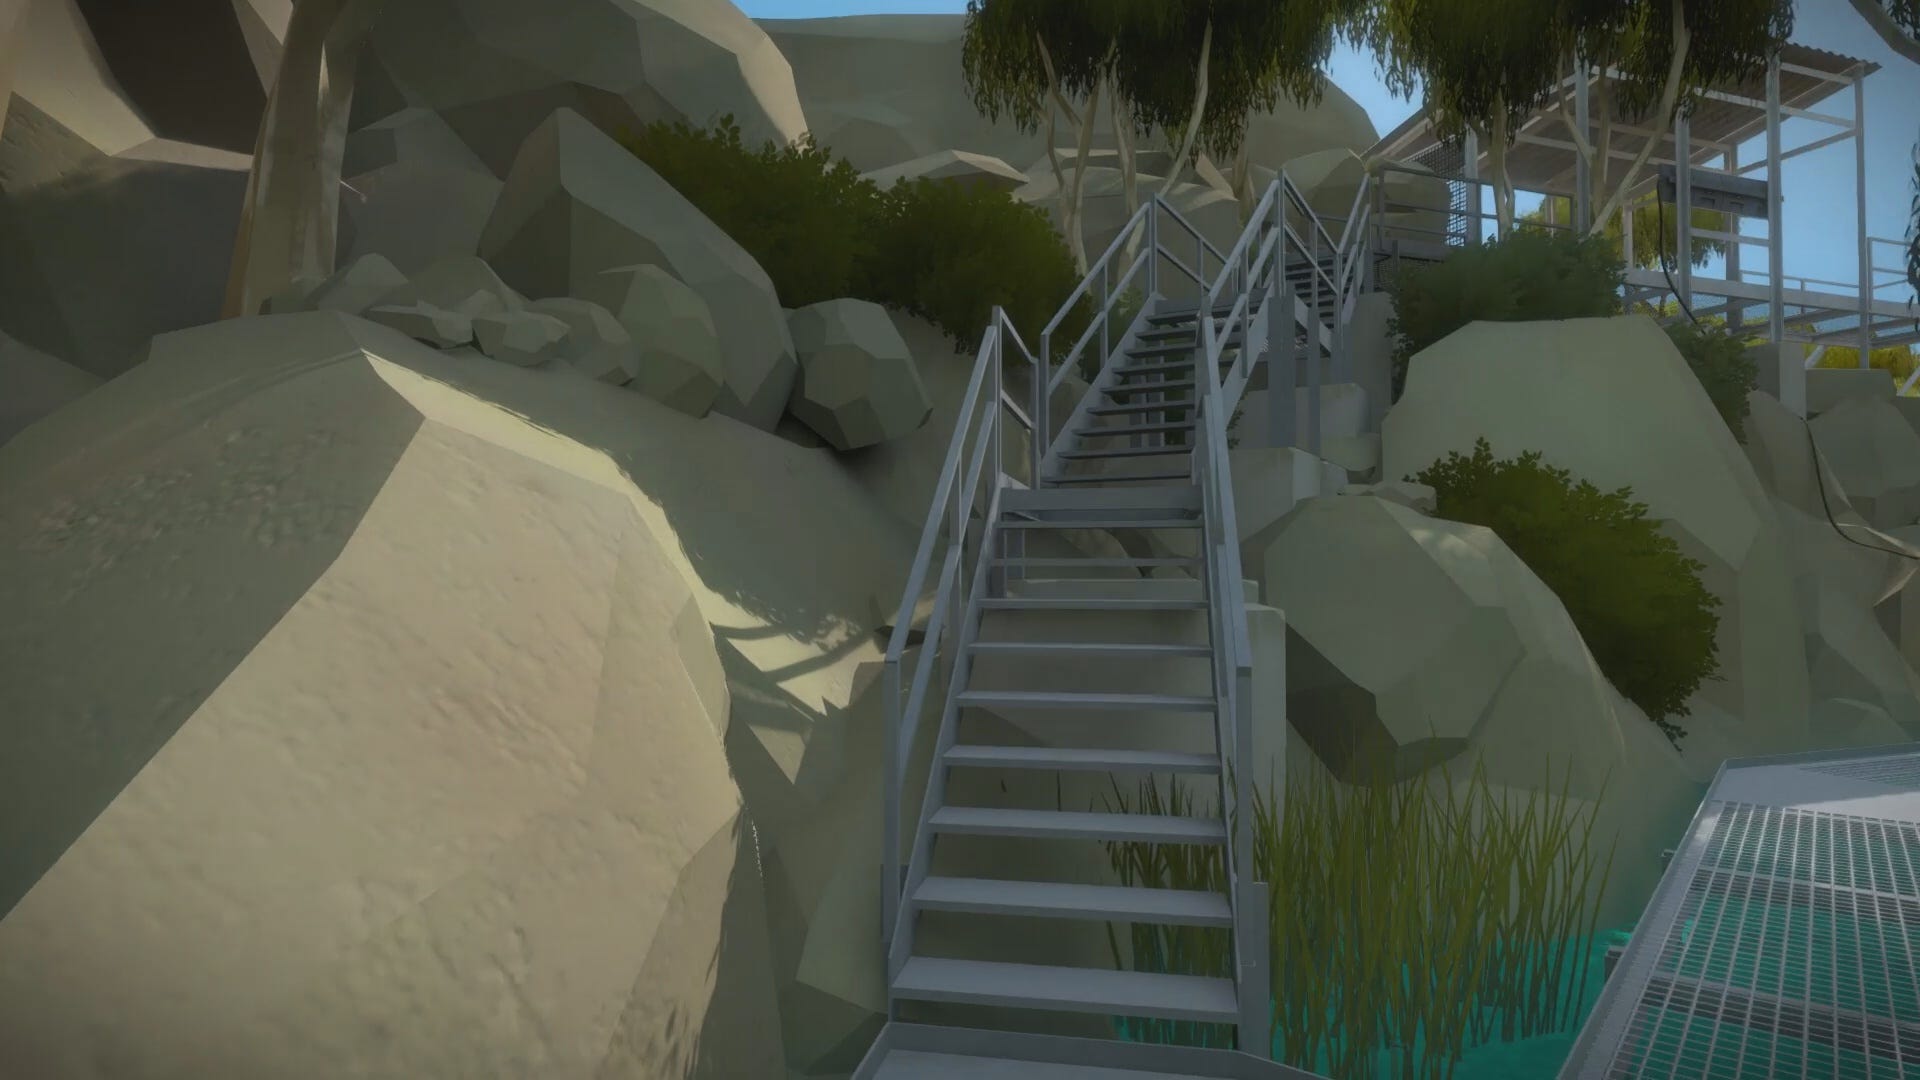
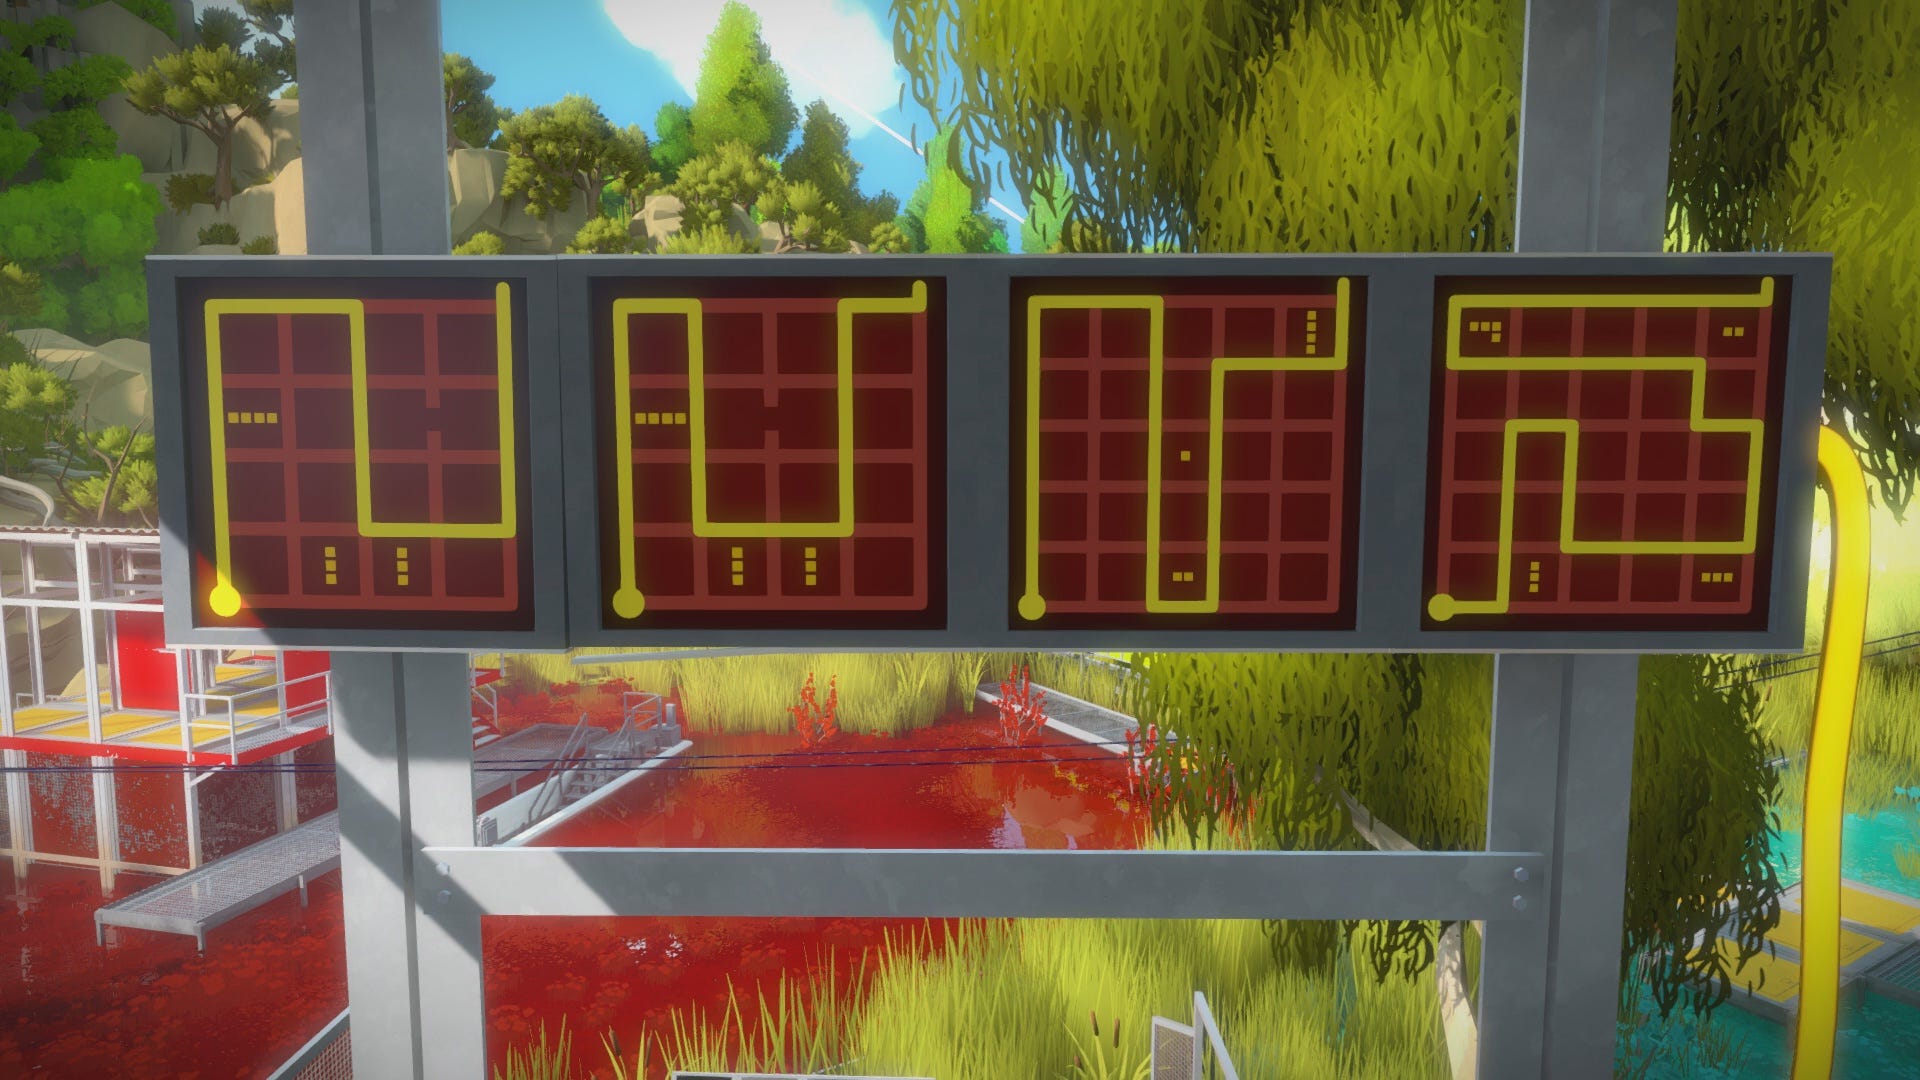
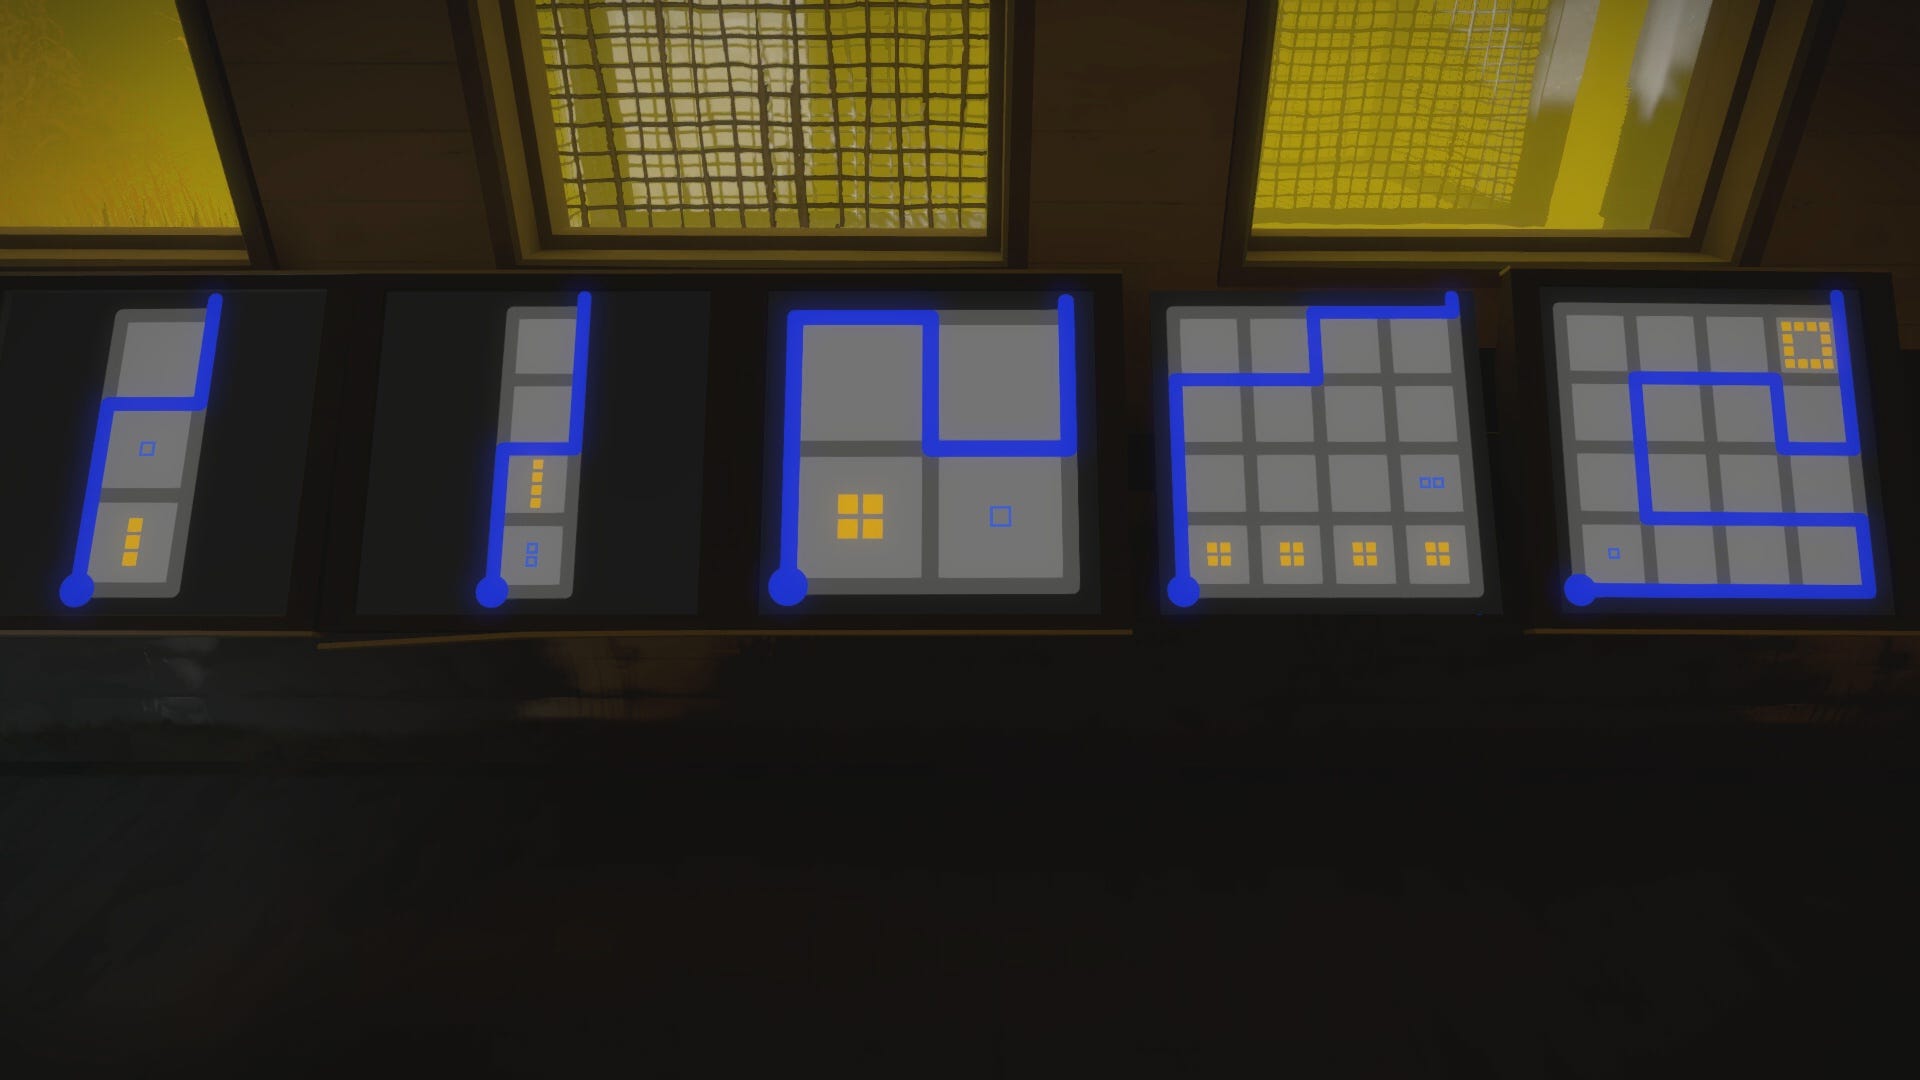
Solving the four panels at the top of the stairs will unlock the gate below on the first level. Head back down the stairs and hang a left to solve the next puzzle set. Starting at the right panel, you will notice that this set contains shapes that are somewhat different from the typical Tetris shapes from before. To solve these puzzles, you must consider the total number of blocks included in each shape to determine the amount to be sectioned off. If you need a hint, peek at the solutions in the image below.

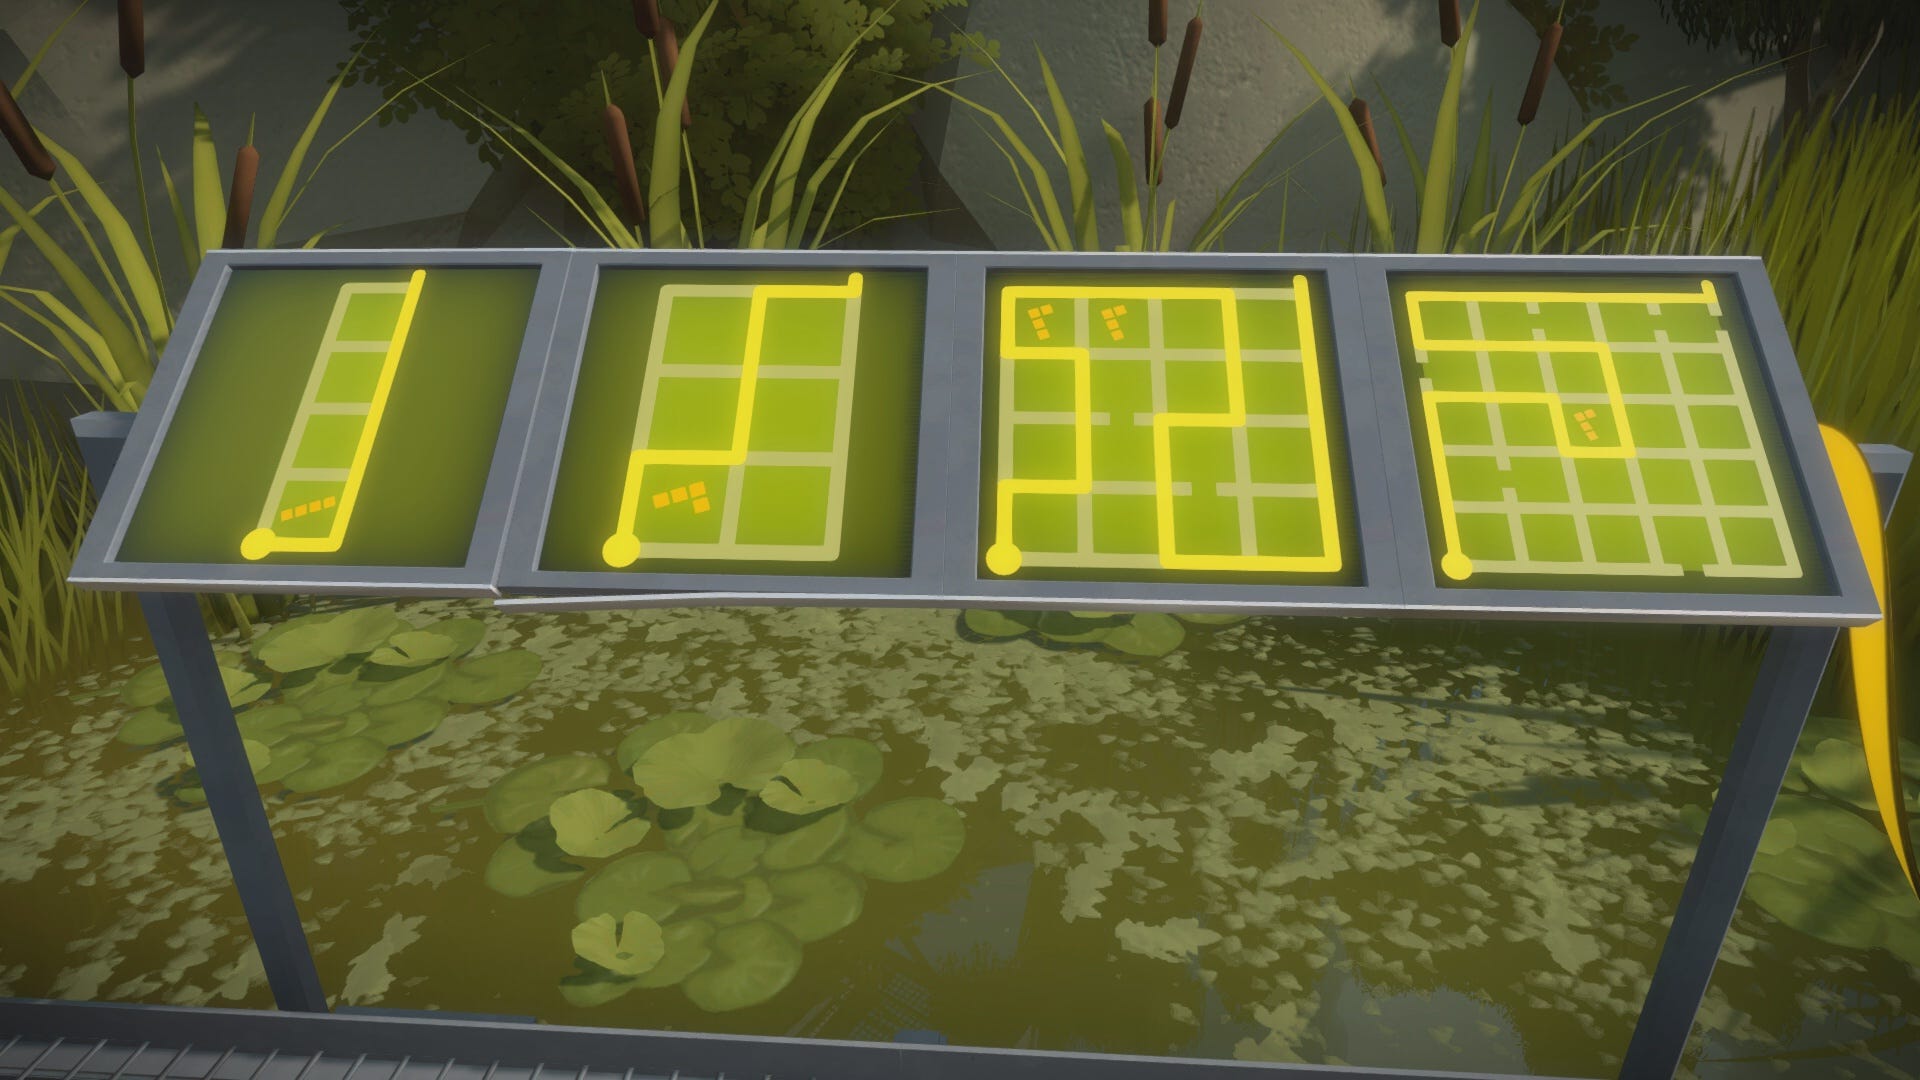
Follow the wire to the next puzzle set along the path. These puzzle panels involve the same concepts as before, except this time the Tetris shapes are slanted, seemingly to throw you off. Solve these puzzles as you did the previous sets, keeping the outline shape and total block number in mind.
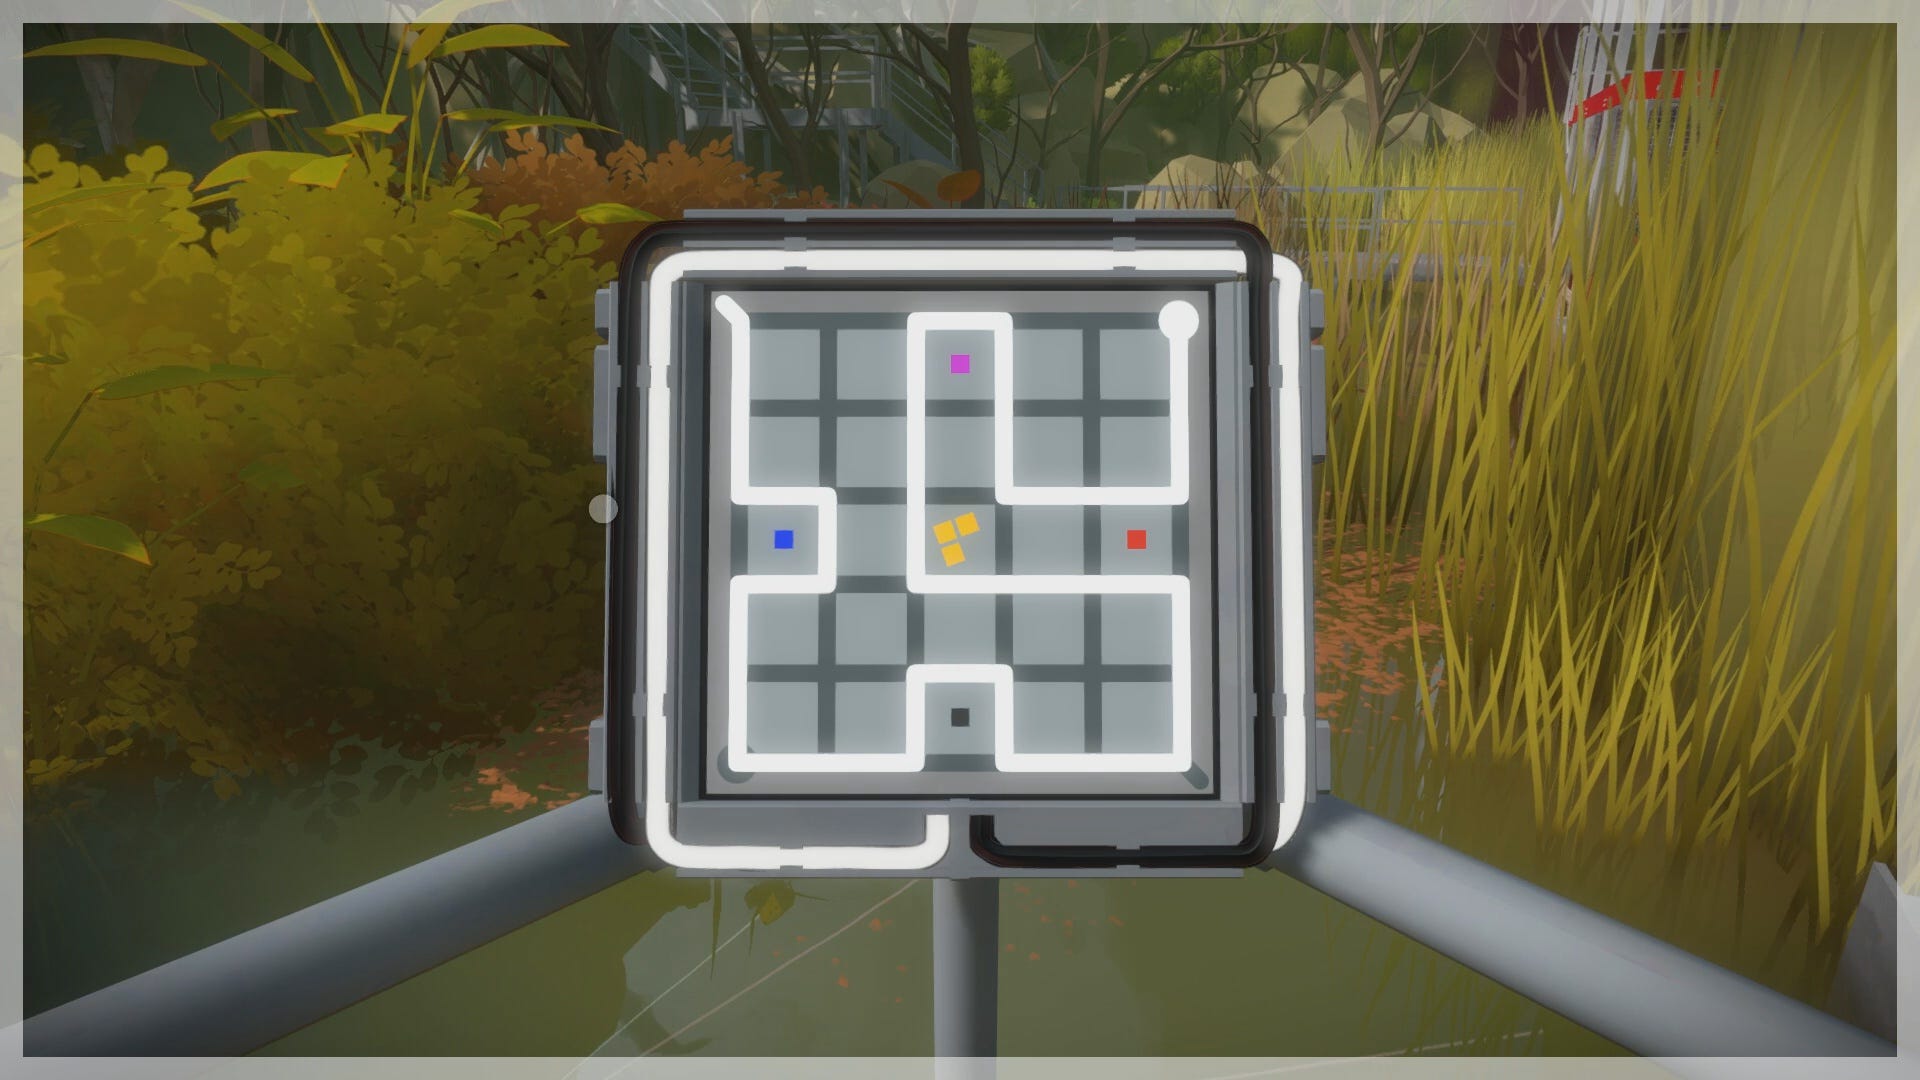
Proceed to the L-shaped platform ahead. This platform will rotate depending on the outline drawn on the panel, allowing you to access the adjacent color-coded paths. First, rotate the platform toward the blue walkway by sectioning off an L-shaped segment on the panel graph, isolating the other two colored blocks. Your solution should look similar to the one below.
Walk along the blue path to the next puzzle set. These panels involve isolating multiple slanted shapes. Count and section off only the number of blocks in the shapes, making sure not to include unnecessary blocks in your outline.
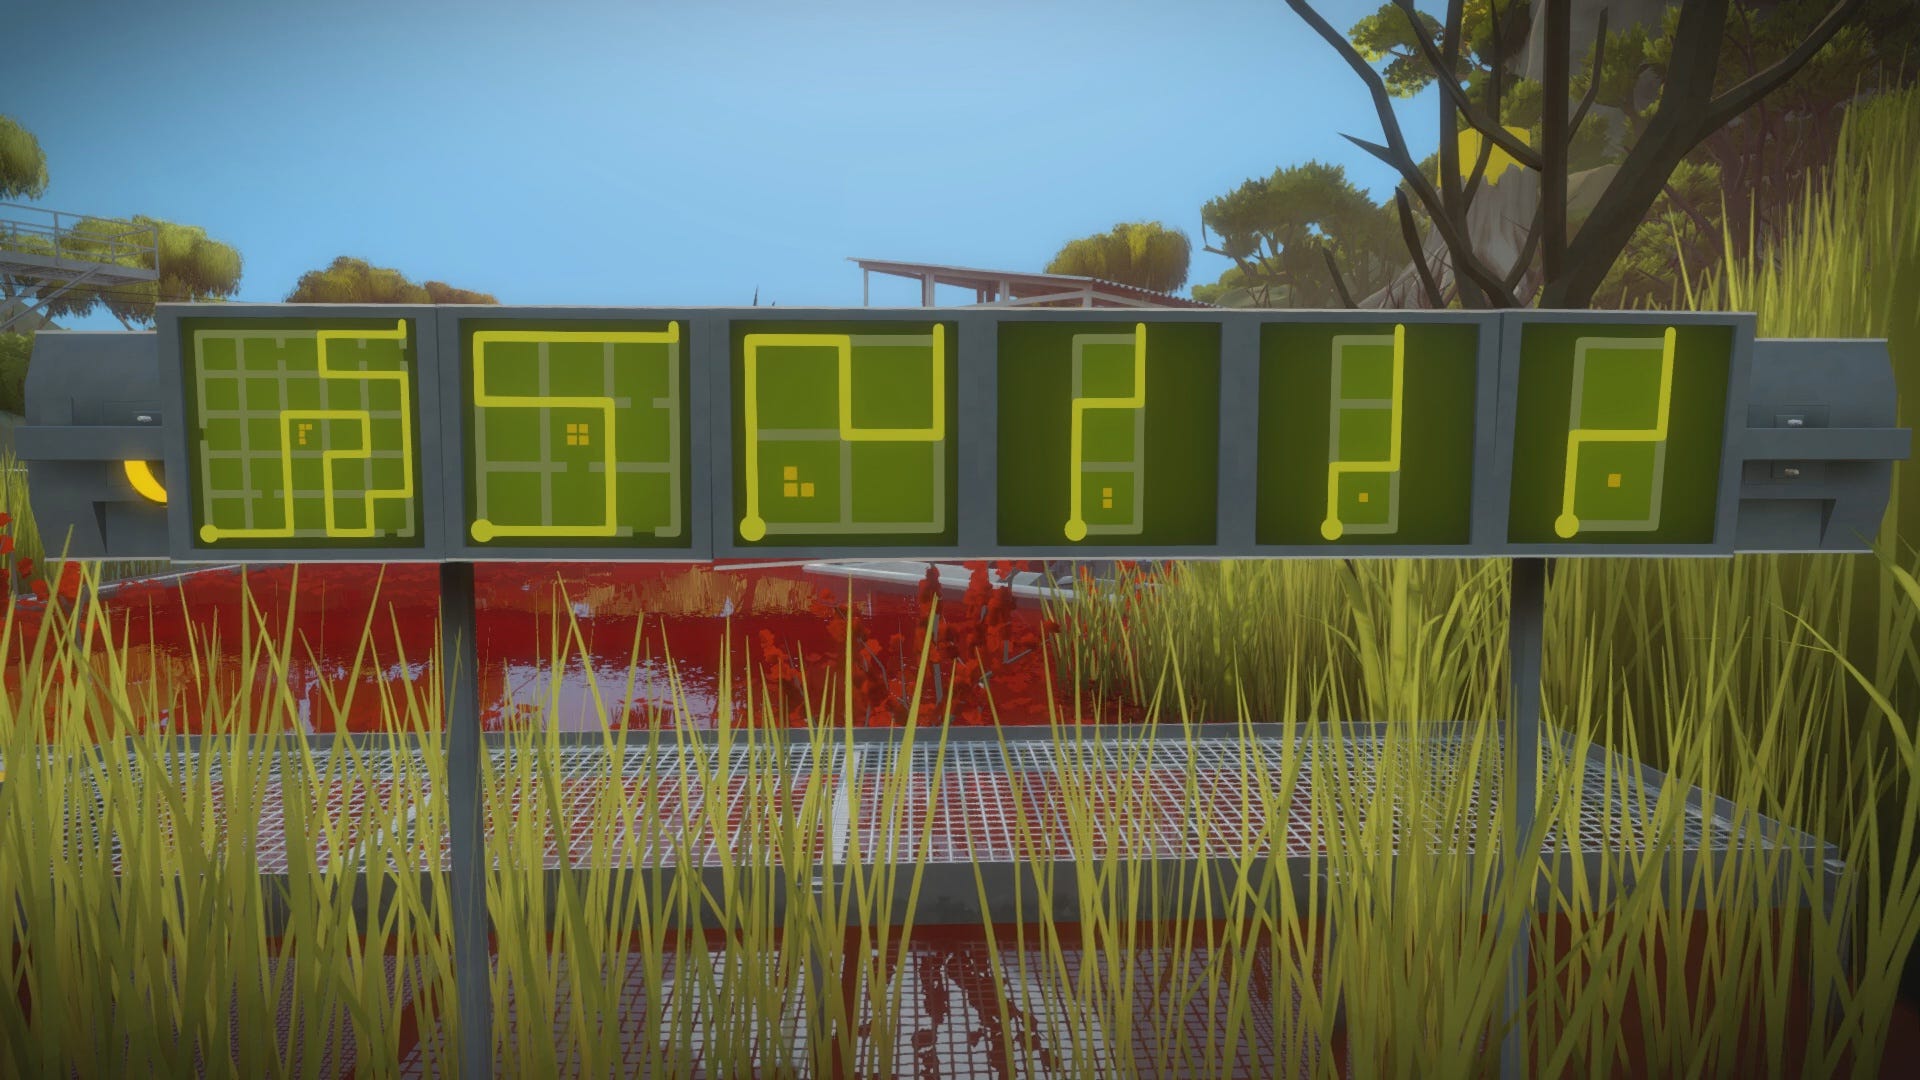
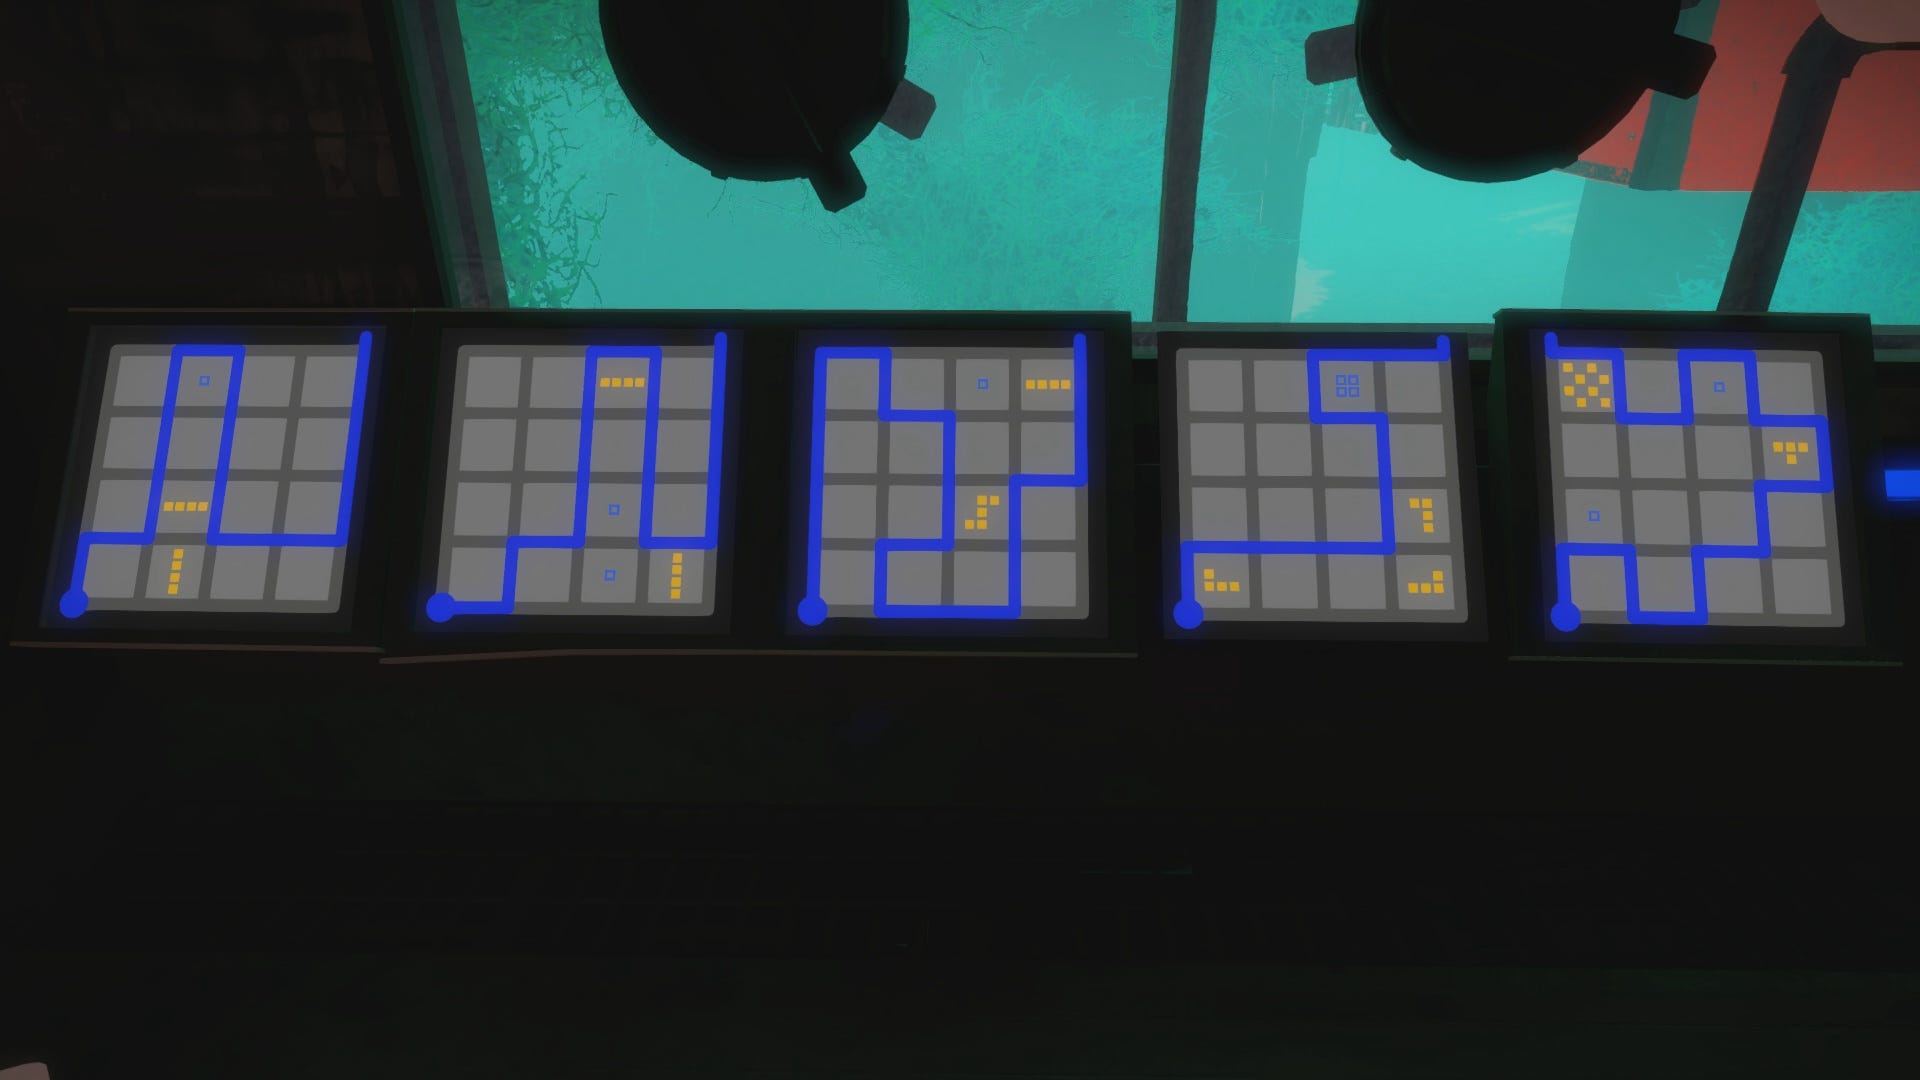
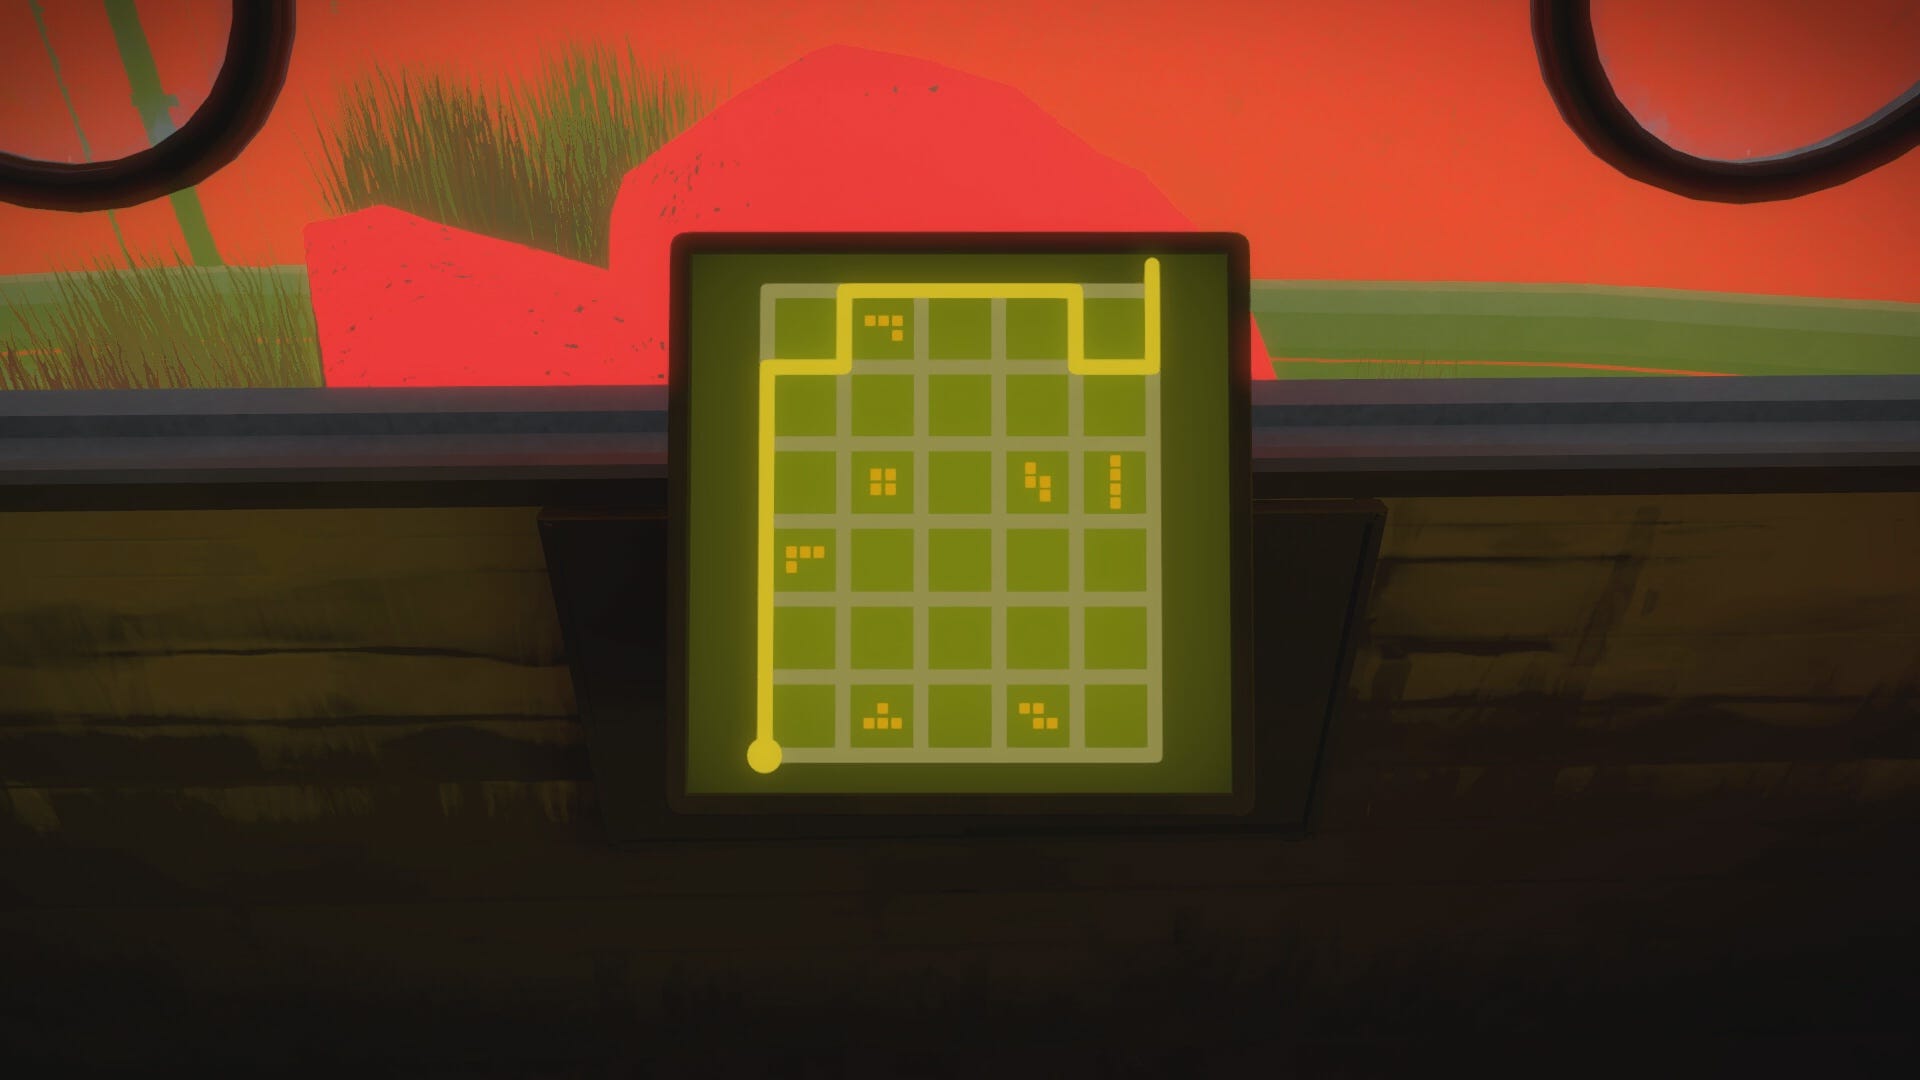
Solving the puzzle set grants access to the stairwell leading below the blue section of the Marsh. Head down the stairs to solve the panels below. On this set of puzzle panels, the blocks now contain hollow blue squares along with the yellow Tetris shapes. These hollow blue squares indicate the number of squares you must subtract from the yellow shapes when drawing the solution. For example, the first panel shows a 3-square yellow shape, and one hollow blue square. Subtract one square from the yellow shape to draw a final outline that sections off only two blocks. The solutions are below.
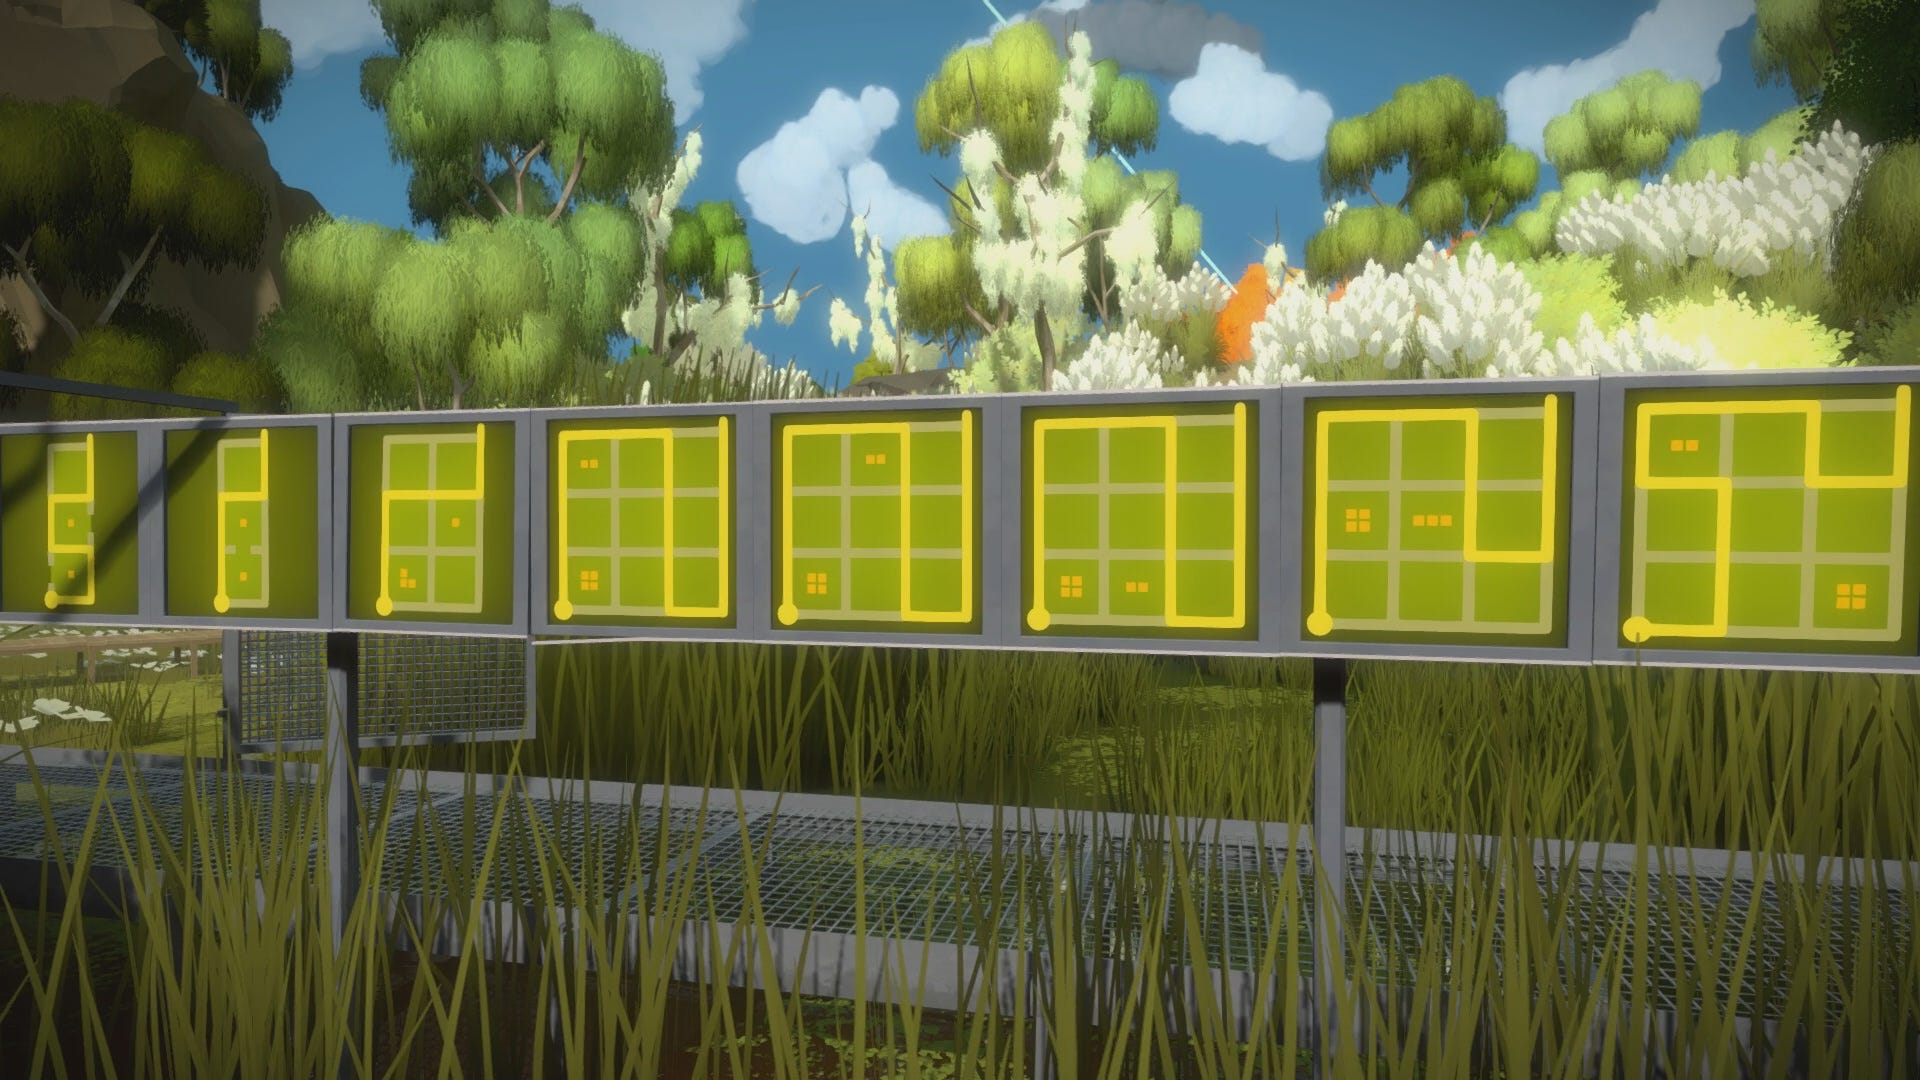
Return to the surface and follow the wire back to the bridge where you began. Descend the stairwell into the teal section of the Marsh. One panel is already complete, as it was drawn using the solution from an earlier panel. Continue on to the puzzle set, starting on the left. This set builds upon the subtraction concept, using multiple Tetris shapes and hollow blue squares for added complexity. Here's the solution below.
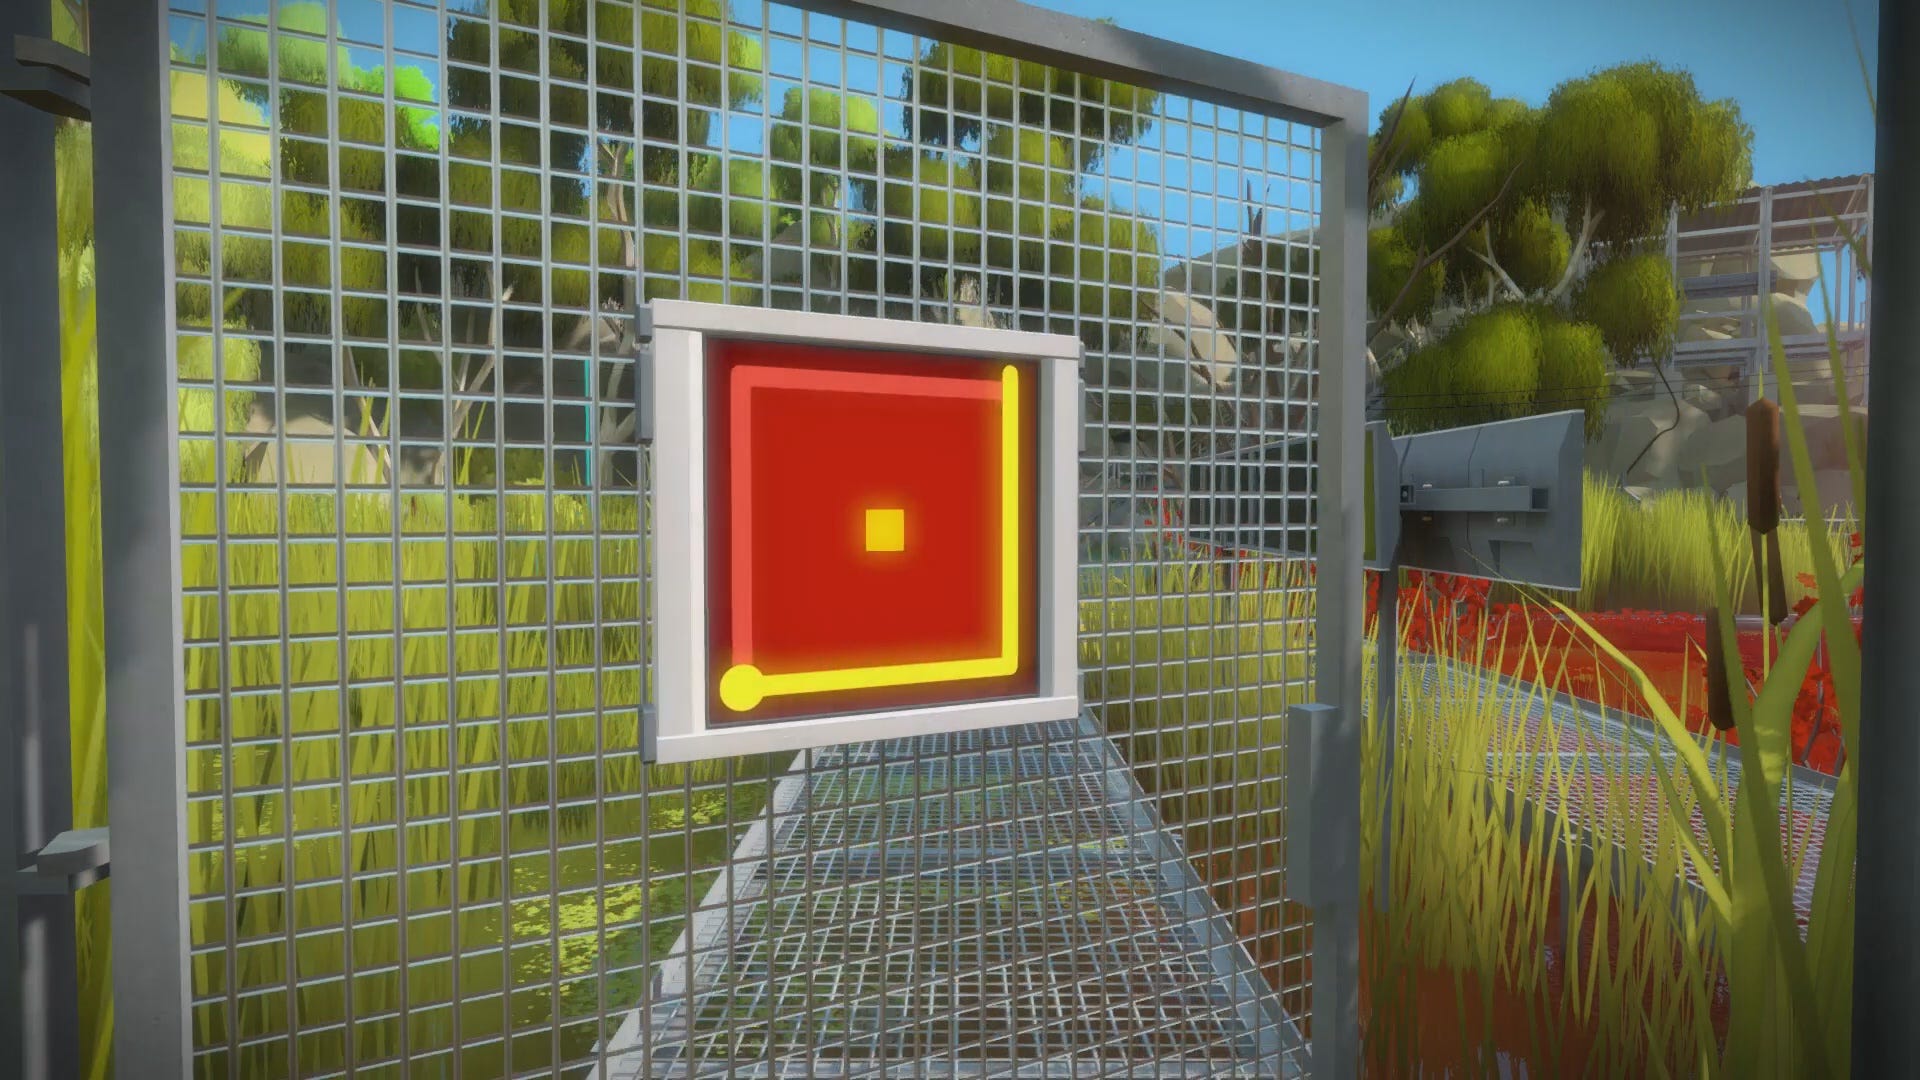
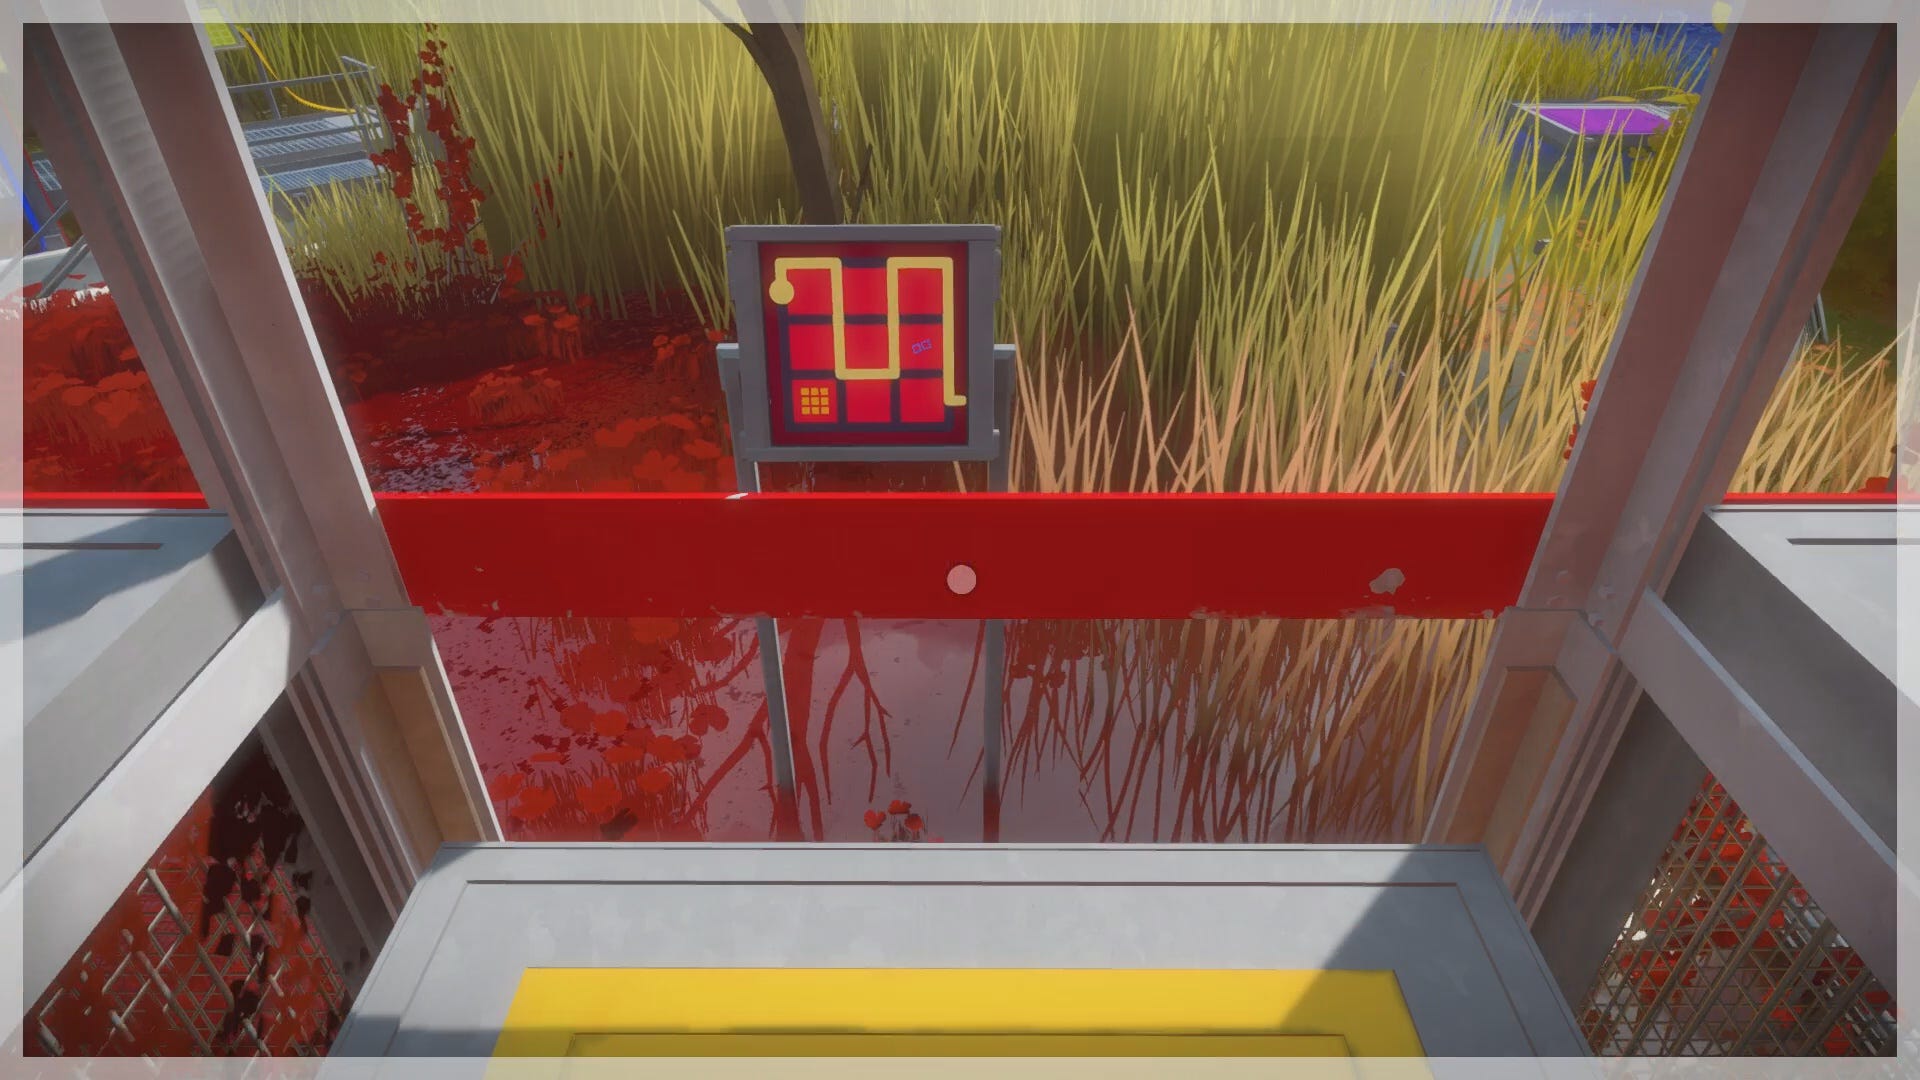
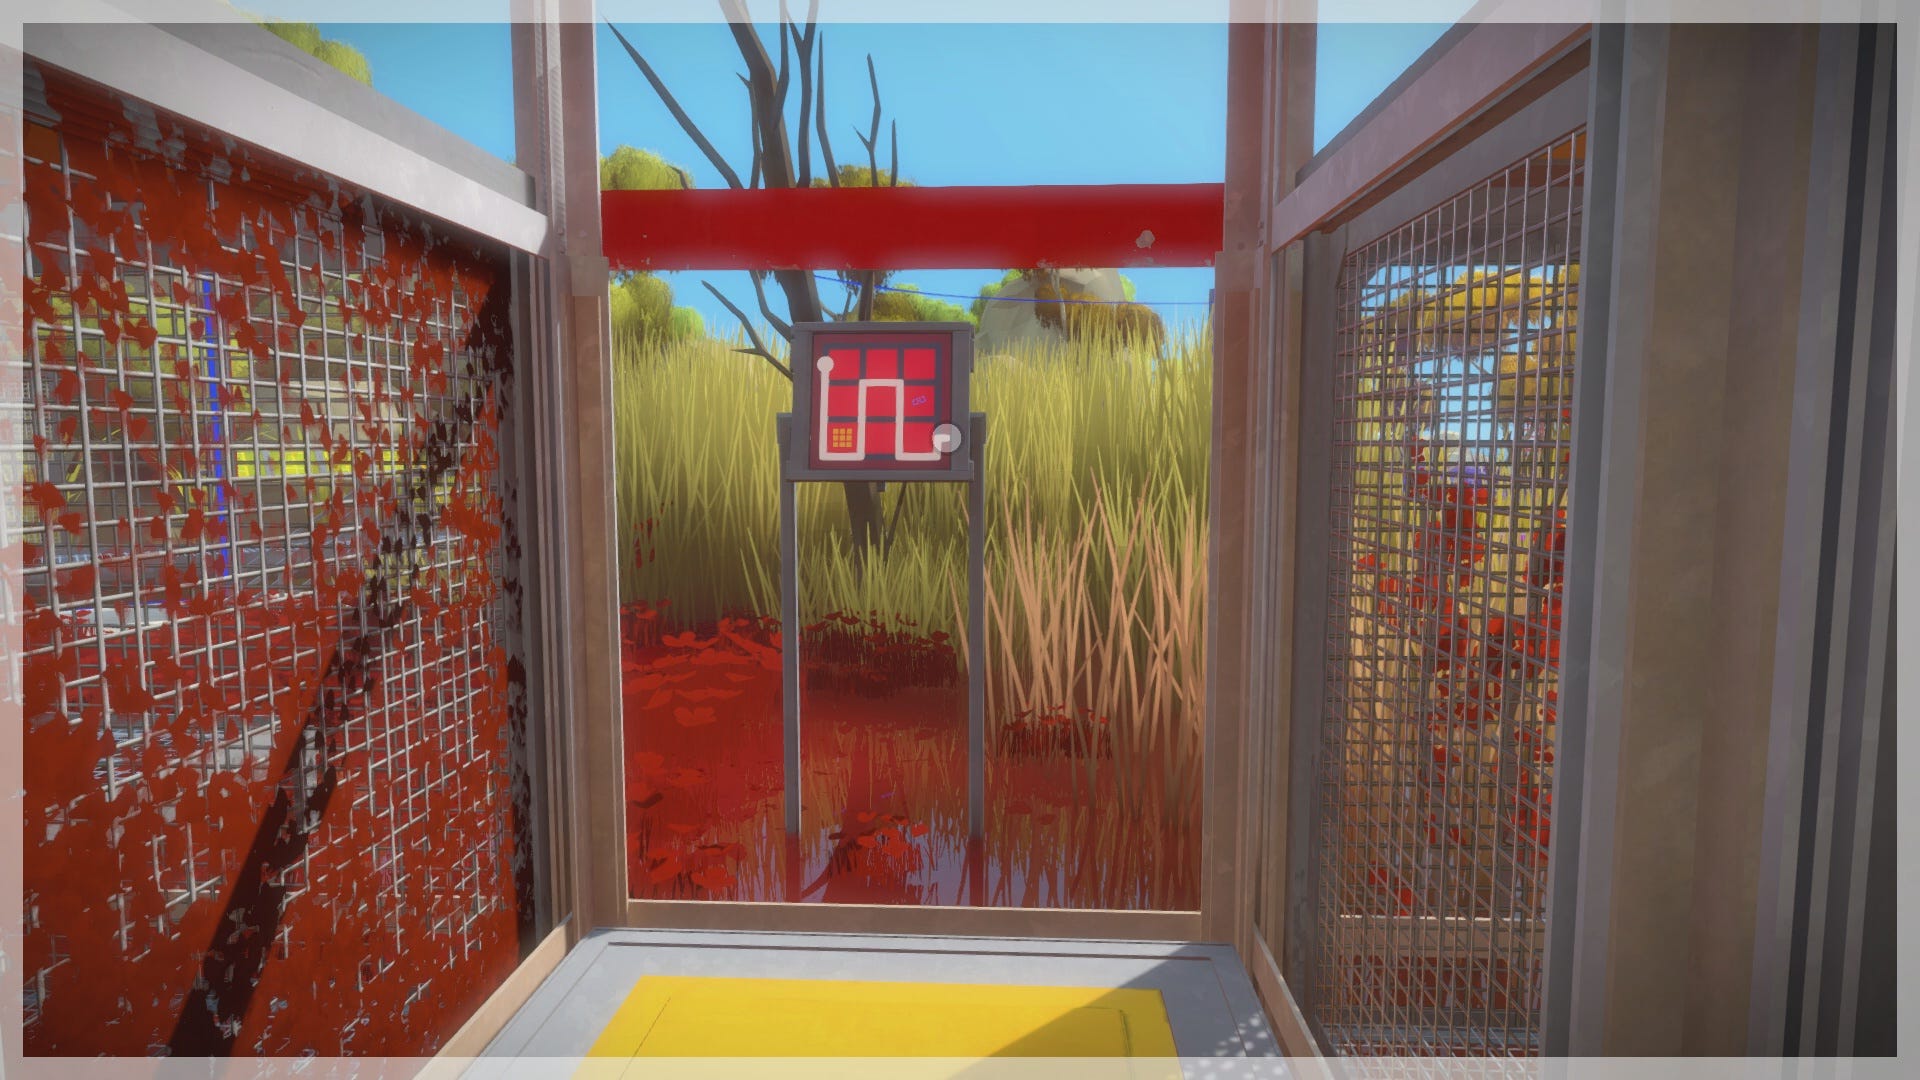
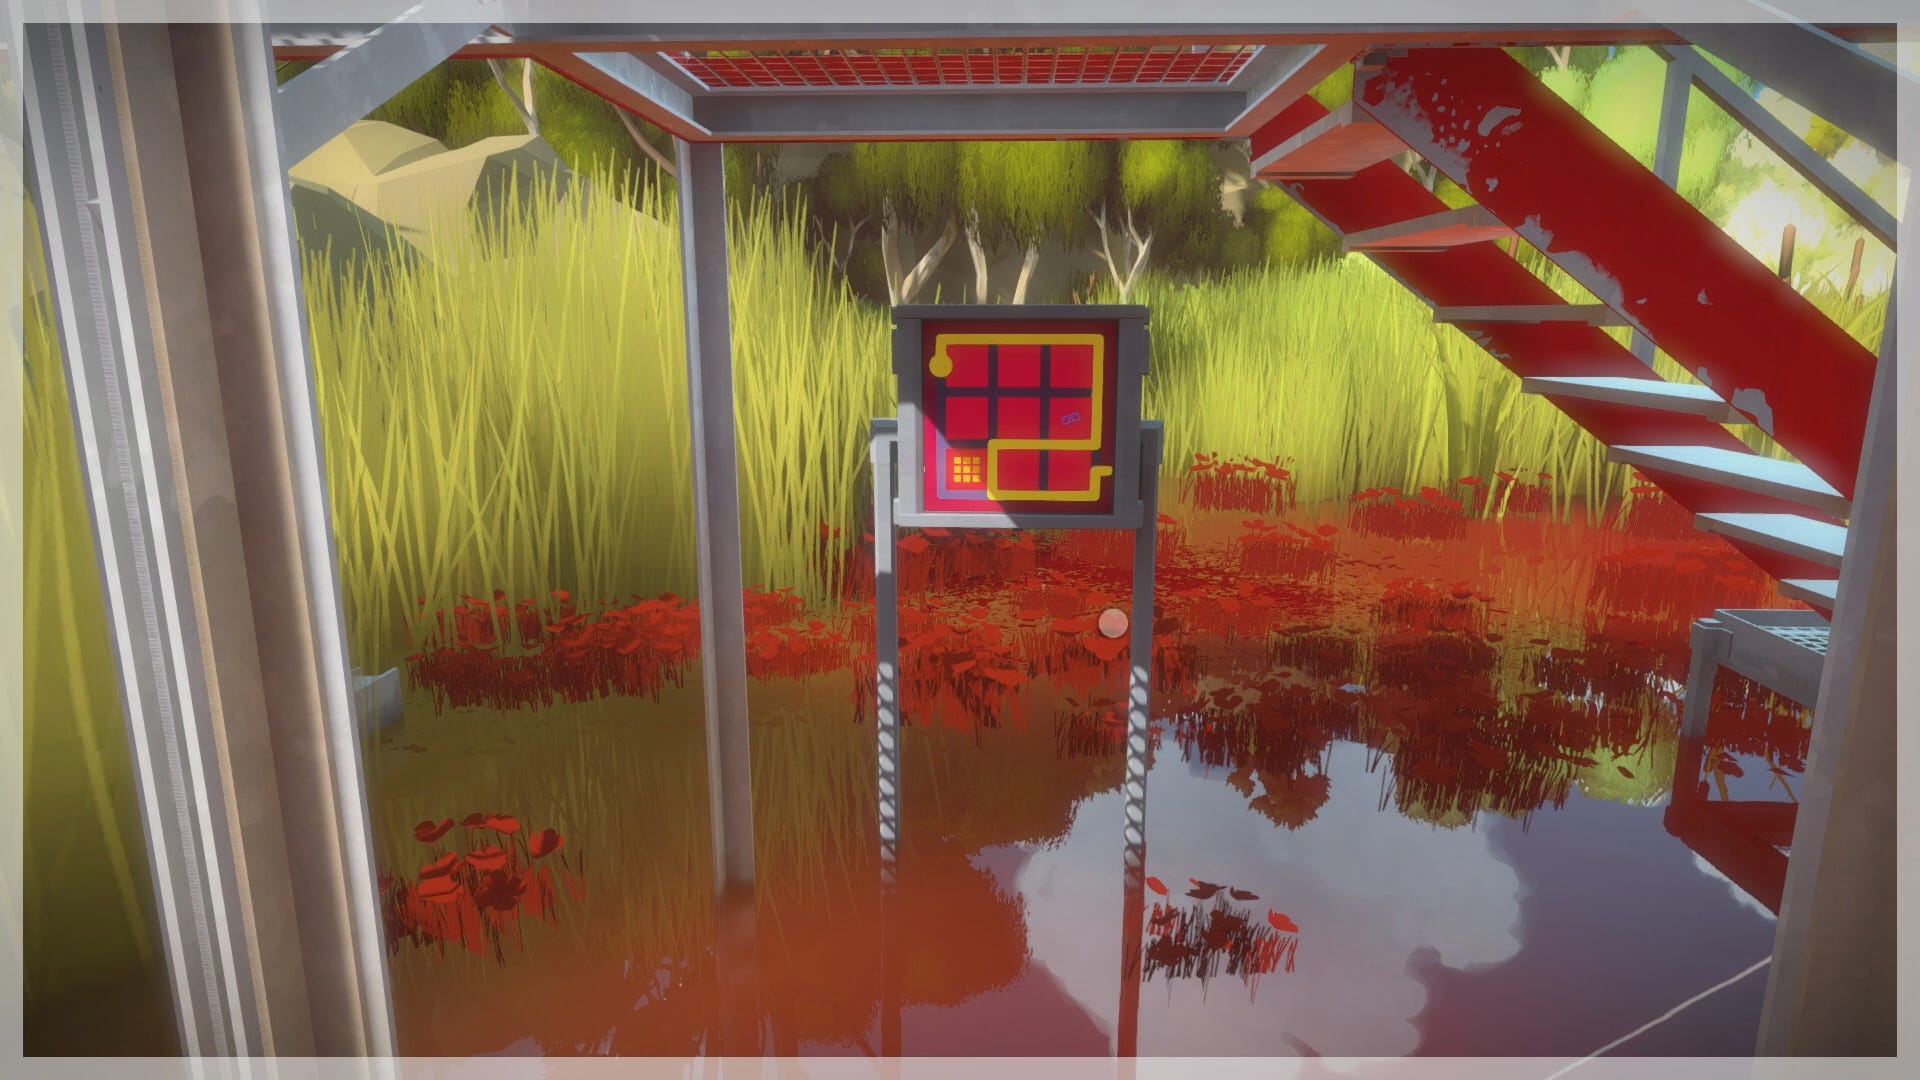
Return to the surface, and backtrack through the metal gate once more. Head down the stairwell into the red section of the Marsh, and solve the next puzzle segment starting from the left. Solving this series of puzzles will open a new door to the final puzzle segment of The Marsh.

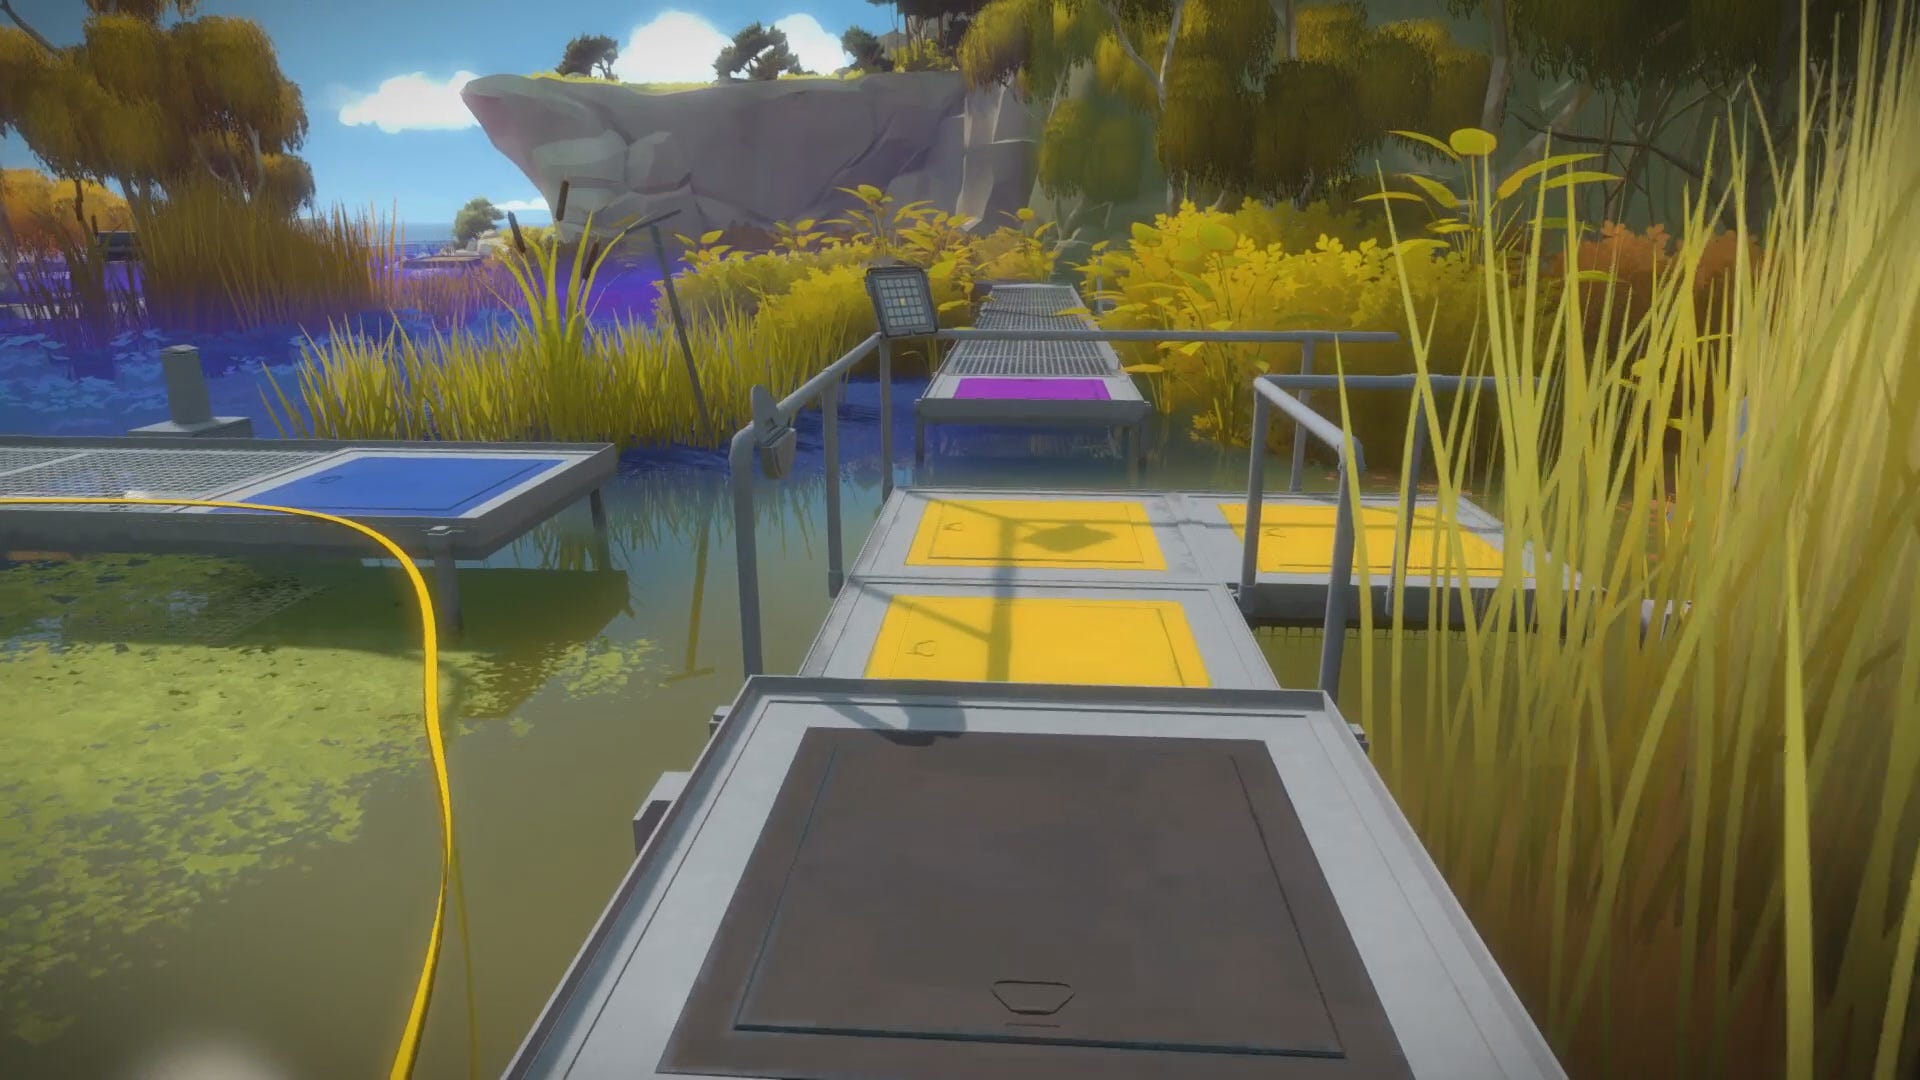
Continue from the underwater chamber in the red Marsh section to reach the platform puzzle. To solve this puzzle, you must raise and lower a series of platforms based on the criteria on the puzzle panel. Due to the shapes on the panel, there are specific patterns that must be drawn to activate the platforms appropriately. Test it out for yourself. If you need help, follow the guidelines below.
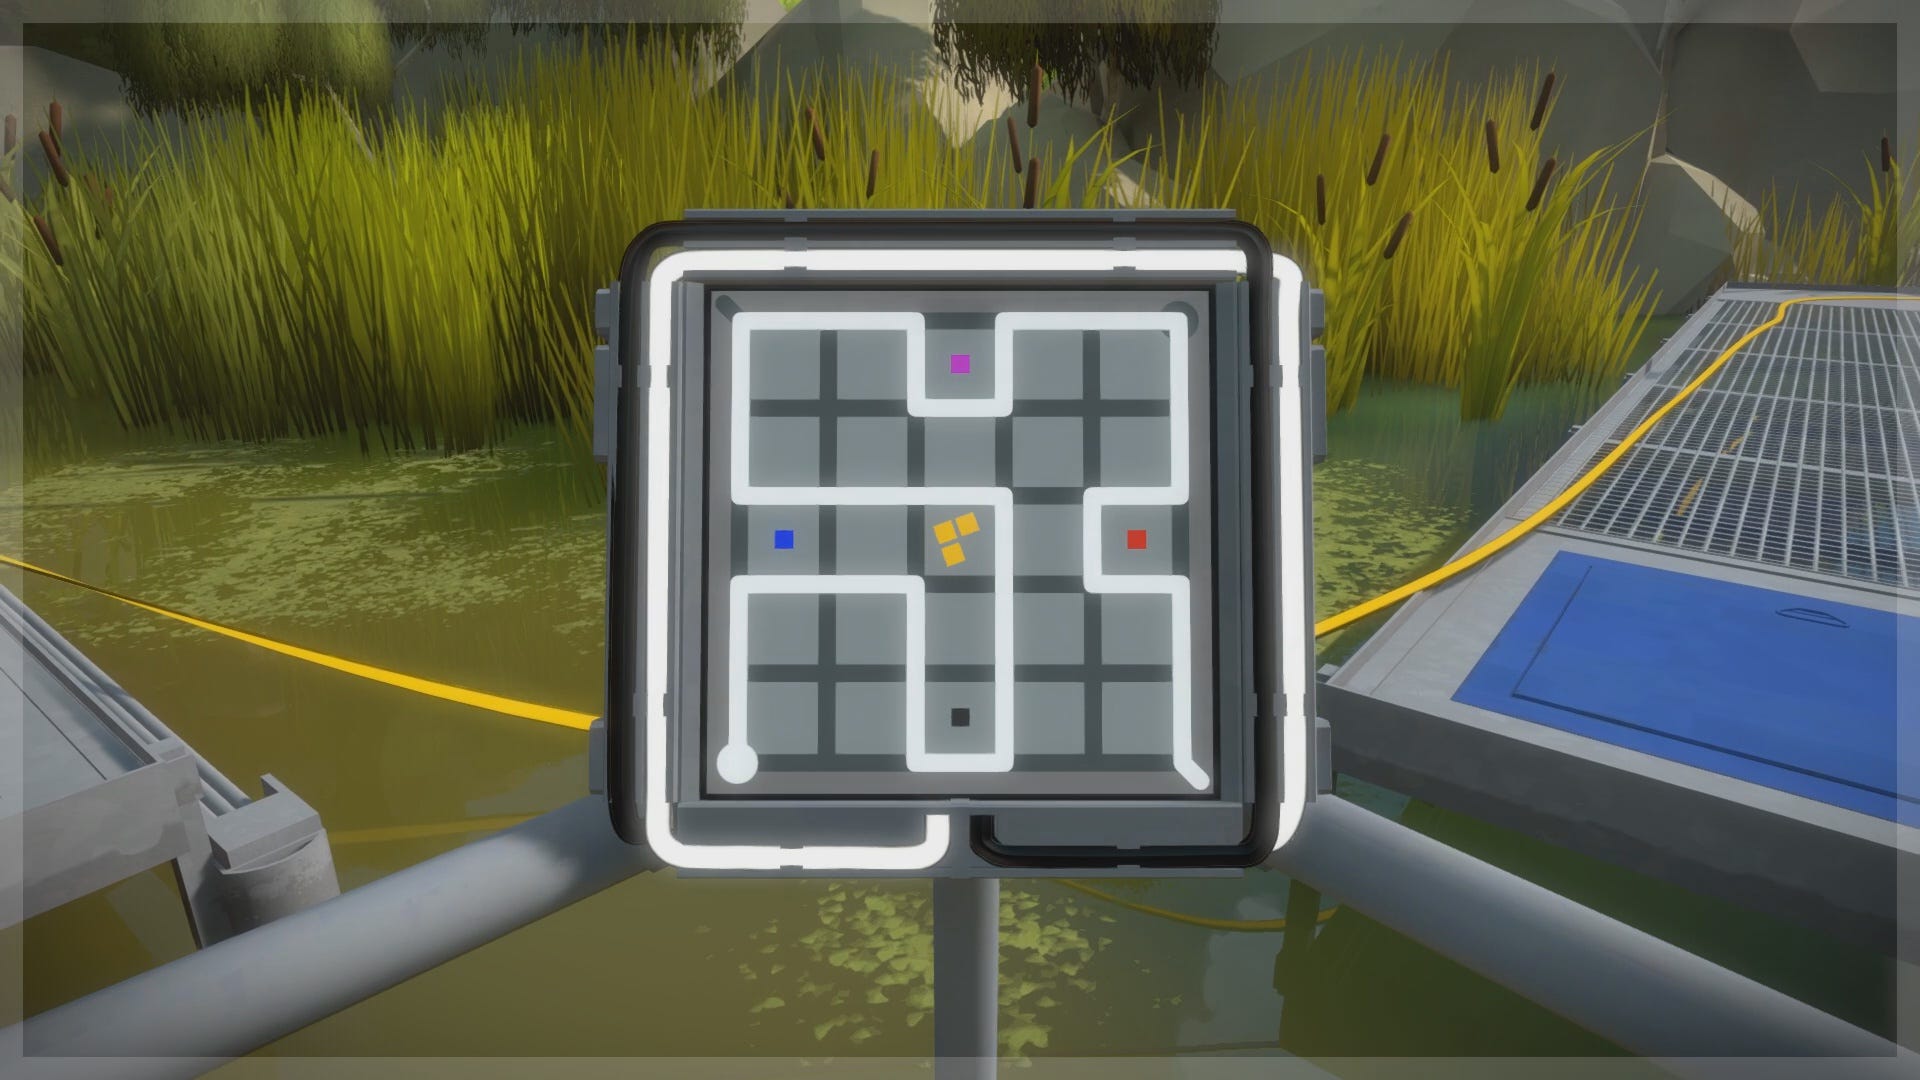
First, stand on the center platform on the back side of the wall, on the edge furthest from the staircase. While standing on the top-center platform, draw the pattern below on the puzzle panel. This should cause two center platforms to lower, including the one you're standing on.
Step backward onto the platform in the very center, away from the puzzle panel. Draw the pattern below, causing the platform behind you to lower. The center platform should still be lowered as well.
Turn around to step onto the newly lowered platform, and face the other puzzle panel. Draw the pattern below to lower the final platform, revealing the path up the hill.
Now, all you need to do is follow the footpath up the hill to reach the beacon puzzle. Solve the line puzzle to activate the Marsh light beam.

The Purple Section
You may have noticed that The Marsh Puzzle can be completed without finishing the purple section of the marsh. While this is the case, you may still want to backtrack to solve this puzzle and retrieve the collectible from the underwater room.
Start by heading back to the L-shaped rotating platform near the center of the Marsh. Draw the pattern below to rotate the platform to gain access to the purple puzzle. As you enter the room, collect the audio recording behind the containers on the floor, then solve the puzzle panel using the solution shown below.
Get on a Boat!
At the end of the walkway in the blue section of The Marsh, there is a simple line puzzle at the end of a dock. Solve the puzzle to summon a boat from the depths, and use the boat to navigate around the island.
- Page 1: The First Puzzle and General Tips
- Page 2: The Symmetry Puzzle
- Page 3: The Desert Ruin Puzzle
- Page 4: The Monastery Puzzle
- Page 5: The Keep Puzzle
- Page 6: The Shady Trees Puzzle
- Page 7: The Marsh Puzzle
- Page 8: The Quarry Puzzle
- Page 9: The Jungle Puzzle
- Page 10: The Town Puzzle
- Page 11: The Bunker Puzzle
- Page 12: The Treehouse Puzzle
- Page 13: The Mountain Puzzle (Game Ending)