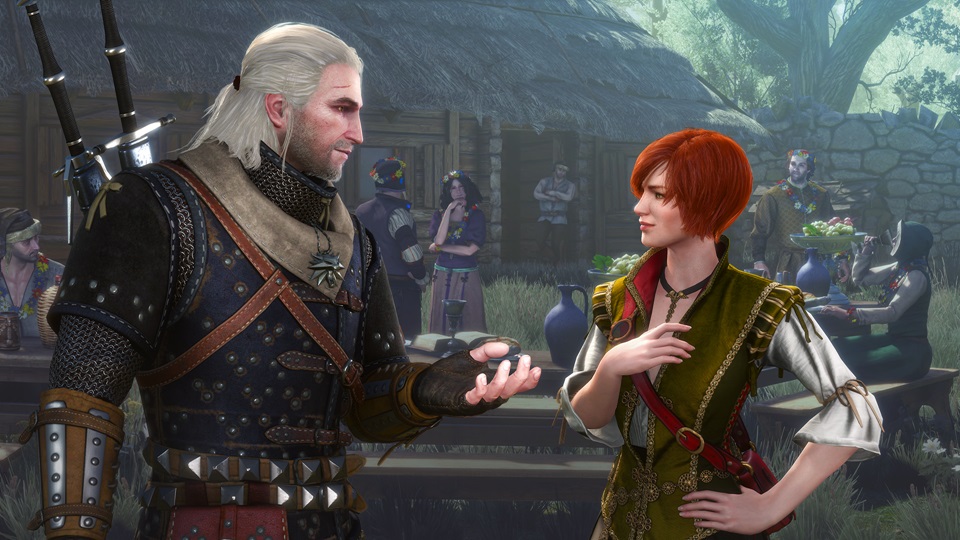
The Witcher 3: Hearts of Stone main quest walkthrough
Geralt has reason to dislike Olgierd von Everlec, but there's more to Gaunter O'Dimm than meets the eye. What will you do?
This page, part of our The Witcher 3: Wild Hunt guide and walkthrough and The Witcher 3: Hearts of Stone guide and walkthrough, takes you right through the main story quest of the first DLC, Hearts of Stone.
The Witcher 3: Hearts of Stone begins when Geralt reads the notice board at the Seven Cats Inn near Novigrad. The adventure that follows is lengthy, convoluted, and completely stand-alone. It's also pretty tough, with nastier enemies than most you will have encountered in your career, and some quick and hard choices to be made.
But the rewards - and the story - are worth it. Our walkthrough won't go into exhaustive detail on ever location and random encounter (you're a grown-up and can follow a waypoint) but will take you through from woe to go, noting likely side quest points, highlighting the best loot, and never missing an opportunity to play Gwent.
One top tip is to get the Ofieri runecrafter quest done before you start the main story, assuming you have the 5,000 gold needed to kick it off; his gear will be very useful in the battles ahead. Additionally, if you pick up the quest From Ofier's Distant Shores from the nearby merchant before you start you'll find you collect many of the needed items as you progress. Let's get going.
Evil’s Soft First Touches
You begin this quest by visiting the Von Everec estate after reading the board at the Seven Cats Inn. You’re sent to Oxenfurt to dispatch a monster in the sewers.
Save before entering this dungeon, as you may find yourself outclassed by the enemies you meet and realise you need to level before tackling the expansion. You’ll encounter Shani in here; be sure to choose positive dialogue options if you want to romance her later. There's little else of note in the dungeon - lots of trash loot, a linear path, and then the boss fight.
How to beat the Toad boss fight
Potions, consumables like Golden Oriole and abilities that strengthen you against poison are helpful here, but make sure you’ve also got plenty of health consumables on hand. Cursed Oil helps and the Toad does not like Northern Wind bombs.
Igni works fairly well against the Toad, especially if you have the burning chance variant equipped, as it’ll do damage while you get out of its way. Otherwise, Thunderbolt’s never a bad idea.
Be conservative; hit once or twice and roll far away. The Toad has multiple ground pound attacks which can stagger you. Try to keep to one side or behind it – it’s not easy, the way it jumps around – to avoid its poison spits and tongue attacks.
After the fight, you awaken on a ship. You’ll encounter a limited time decision in the dialogue with the guards. There don’t seem to be any consequences to this choice but the correct option is the third one.
How to beat the Olfieri mage
You’ll face a tough battle when you make landfall. The best tactic is to keep your distance and pick off the easy enemies first, then get the guy with the shield, using Aard to stagger him quickly, before going for the mage. You need to stay very mobile to avoid the magic constantly spammed throughout the fight, so keep rolling.
Meet with Gaunter at the indicated location at midnight – meditate if necessary – and then return to the Von Everec estate to advance the story. There are now two possible quests to pursue. Both of them kick off in Oxenfurt where you’ll want to be next, but only one ends there, so I recommend kicking off Dead Man’s Party first by visiting Shani.
Dead Man’s Party
This is a fun mission. After talking with Shani in Oxenfurt, meet her at the crypt (remembering to be nice to her if you want to initiate a romantic encounter later). Apply spectre oil to your silver sword before descending. Search the crypt thoroughly for some nice loot - mostly coins - before equipping the Censer and filling the room with incense smoke. When you activate the fount in the round central chamber you’ll have to battle half a dozen ghosts at once.
Converse with the remaining ghost for a while and you’ll find you’re off to a party. Your conversation choices here may affect your chances with Shani, so try to balance letting her know your feelings while remaining respectful.
After talking to the happy couple you can engage in various merrymaking activities. You can play cards, fetch a boot out of a lake (use Witcher senses and collect everyone’s shoes, if you like), herd some pigs into a pen (for best results don’t use Signs here), fetch back a fire eater who has gotten lost in the woods, juggle for the crowd’s entertainment, attempt to woo a woman, drink with two different groups, dance with Shani, optionally dance again and finally flirt with two different women. You also need to speak with Gaunter. Watch the capping ceremony to end this part of the mission.
How to romance Shani
If you’d like to complete Shani’s romance mission, A Midnight Clear, be sure to say that you can stay a little longer after the wedding ends. Pretty easy to complete if you’ve been pleasant and respectful so far; just look for a rowan tree in one of the three search zones and bring her some of its blossom as a gift, instead of a drink. Be honest about your intentions to lover her and leave her, and you won’t find her uninterested.
Whether you romance Shani or not, report back to Olgierd in Oxenfurt. Be sure to challenge him to Gwent while he’s here, if that’s your thing, then head onto his second mission.
- Next: Assemble a crew and complete a heist in Open Sesame.
- Back to The Witcher 3: Hearts of Stone guide.
Open Sesame
This mission includes some very valuable loot and keen story material. Bring a couple of thousand gold with you for best results.
Start by visiting the Borsodi auction house; a bit of chatter at the door and an old friend will arrive to help you gain entry.
Inside you can optionally choose to speak to three of Vivaldi’s friends; it’s really worth doing so. Save before you approach each one. The Countess will sell you Viper School diagrams as well as some alchemy recipes; be sure to buy them all as they’re very reasonably priced. Afterwards, go onto the balcony and search for her earring for some worthwhile extra dialogue that will inspire her to help you out later.
The newly rich gentleman will challenge you to Gwent, offering a pretty decent cash prize. Offer to share your take with Vivaldi if you like. When you speak with the art snob, tell him you know a bit about art and then choose the portrait of the merchant; he’ll give you a hot tip for the auction. You can share this with Vivaldi or capitalise on it yourself.
In the auction, you can bid or not as you choose and depending on your finances. If you didn’t speak with the Countess you’ll find yourself stuck with a useless item. Unfortunately, you don’t get what you came for no matter how you approach the dialogue afterwards, but you’re soon approached with an interesting offer.
Before you meet the stranger at the herbalist’s hut, pick up the Without a Trace secondary quest from a notice board; the quest giver is at your next destination so you can save a bit of time.
The stranger will task you with assembling a crew for a heist, as well as reducing guard numbers, so you have three quests to complete.
Open Sesame: Safecracker
You can choose which of the two potential members you want in your crew for this one. I went with the lockpick located within an easy walk of the Herbalist’s hut. You have several options as to how to convince his guards to let him go; be prepared for a fight if you can’t pay up, use Axii, or win at Gwent. Gwent is, of course, the VG247 approved method, and will quickly and easily resolve this quest.
Open Sesame: Breaking and Entering
Again, you can choose which of the two potential members you want in your crew. I went with Eveline. To convince her, you only need to agree to appear in her show; it’s a simple matter of shooting five apples held by one of her colleagues. The foot is the trickiest one, but it’s not a difficult challenge. Be sure to visit the merchant in the camp before you leave; he sells Gwent cards and will reward you with one of the new cards if you beat him at a match.
Open Sesame: Witcher Seasonings
This quest is pretty easy; open your Alchemy menu and scroll down to the Quest section at the bottom to craft the necessary potion. The ingredients are commonly available but go back to the herbalist’s hut if you’re missing something.
Head to Oxenfurt. Approach each of the three search zones in turn, and use Witcher senses to spot two red audio markers. Approach, still using Witcher senses, and listen. The third set of guards reveal the location of the chef you’re after. Go there during daylight hours.
If you have Axii at a high enough level equipped you can convince the cook to help you for free; otherwise, you’ll need a wad of cash. With that done, it’s time to complete the heist.
Open Sesame (continued)
Meet back at the herbalist’s hut. In the ensuing conversation, you can choose to head straight to the heist immediately or make your own way there; it doesn’t matter much but gives you a chance to save before you start the operation.
Once inside the tower, make a save file – there are lots of important choices ahead. Use Witcher senses to spot an important store note in the first room, then descend the stairs. When you head down the second flight you’ll encounter a fight; there doesn’t seem to be any way to avoid this or to prevent the alarm being triggered.
You now have to make several choices in rapid succession. Agree to help the stranger by negotiating with the guards for best results. You can get through this encounter without having another tiresome fight by first asking the guards to leave, then asking for a wagon. When asked what kind, say anything will do. This will prevent the guards from rushing in to attack, and please the stranger. Whatever happens, one of your team members will leave.
The remaining three continue downwards. As you pass through the storage rooms use Witcher senses and look carefully for notes on desks; you can learn some interesting stuff down here. Save again when the vault door opens; you’ll drop into a pit and have to fight some spiders.
Inside the first room of the vault, avoid the door and circle around collecting all the treasure – your purse will be a lot heavier after this night’s work, and there are plenty of items that can be broken down for crafting materials like gem dust. You may want to save again before proceeding to the next room.
When you finally enter the heart of the vault you’ll have multiple dialogue choices to make. You get what you need no matter what you do, but one important note is that if you want to get out of here with the stranger alive it’s best not to hesitate by saying you want to stay out of the two men’s affairs.
After the fight, you’ll have to deal with whichever of the two men is alive. If it’s the stranger, you’ll have to negotiate for your prize, and if it all goes wrong, you’ll have to kill him to get it. Choose the calmest, polite dialogue options to get out of there with him alive.
Before you take the ladder down to the secret tunnel out of the vault, search every treasure and loot box. There’s some very valuable stuff in here, and most importantly, one of the Viper diagrams.
Once you make it outside, return to Olgierd to end the quest. If you’ve done both of his first two tasks, you’ll be able to ask him extra questions and see an additional scene where he gives you the third task.
- Next: Explore Olgierd's estate, and history, in Scenes from a Marriage.
- Back to The Witcher 3: Hearts of Stone guide.
Scenes from a Marriage
Head back to the Von Everec estate and be ready for battle. After chatting with the man outside, enter and search all the indicated zones to be prompted to check the back yard. Before doing so, approach the front door and look for the missing thief. Follow the blood trail around the manor until you encounter a cutscene.
When you move a little further into the yard you’ll trigger a boss fight.
How to beat the Caretaker boss fight
Quen is some help here, but most other signs are useless. Relict Oil is a major aid, as ever you can always fall back on Thunderbolt.
This guy’s big and slow but has a painful weakness – his back. Roll or dodge to the side and behind him, so you can avoid his short attack combo. Be wary of the way his swings curl around his body, as you might not be out of range after a single dodge.
When his weapon is glowing, roll further away; his final attack in the combo will cast an area of effect which will stun you, causing you to miss your real opening. As soon as you see it glow on the ground, roll back in and behind him – the effect vanishes instantly and the Caretaker will pause momentarily to gather his strength, allowing you to score multiple critical hits on his back. Roll away as soon as he twitches, as the same area of effect stun triggers when he raises his weapon again.
Once you get his health about a third of the way down he’ll start summoning minions. These shades go down quickly but spawn in huge numbers. I found it best to unlock the camera and keep an eye on the Caretaker to avoid his attacks as I ran around hitting the adds; they die so easily and attack so slowly you don’t even need to look at them. Then, when the Caretaker did his combo, I rolled in and wailed on his back again just as I had during the earlier phase of the fight. It only took a few rounds.
When the battle is over, don’t rush into the manor. There’s a treasure chest nearby you should plunder, and if you search the grounds you’ll find a hairbrush you’ll need later.
The path inside the manor is always linear. There’re plenty of loot containers but most of them are just junk. Head into the parlour for a little scene with a wraith of some kind. Be sure to loot the treasure chest in here, which has some good stuff, and grab the sketch journal from the table before proceeding.
The ceiling caves in as you enter the central hall but you won’t be hit unless you sprint in. There’s not much in the dining room so take the stairs up, walking to avoid an attack at the very top. Enter the study and go out the door to the balcony, circling around to the next room. Prepare for a fight before exiting; you’ll meet the wraith in the gallery.
How to beat the Wraith from the Painting boss fight
This can be tough if you’re under-levelled. Apply Spectre Oil, obviously. Unlike most wraiths, this one isn’t wary of running right into your Yrden traps, but be aware that this is a real sword fight; signs and potions aren’t the answer.
The trick here is parrying and waiting for an opening; don’t just hack away or the wraith will return the favour, and it has more health than you. You must bide your time and attack precisely when it leaves you an opening.
There are paintings on either side of the gallery and the wraith will frequently leech extra life out of them; as soon as you see the green glow, quickly untether the camera and run over to slash the indicated painting to put a stop to that bullshit.
Once the wraith is down you have a clear run at the bedchamber. Before approaching the figure on the bed, pick up the portrait on the far side of the room, and collect any loot you want. Once you examine the body, you’ll be taken outside.
You want the search zone near the easel; examine it to trigger the next scene. During the ceremony you must choose something to say and place one of the items you’ve collected. I chose to mention Iris’s art and place her sketchbook, which seemed to work out well.
In the mysterious new world you’ll be transported to, watch out for arachnomorph spectre enemies, as well as patches of buzzing light that drain your health fast. Approach the central fountain and search around for a cup on the ground; place it in Iris’s hand to continue.
You’ll then battle multiple arachnomorph spectres include a giant one; this is easy to beat if you back it up against a hedge, though, as its speed is its greatest asset.
Once the path is clear, head inside the manor and follow the linear path through the rooms. In the dining room you must light several candles and the fire to trigger the scene, after which you’ll fight a human-shaped spectre. In the bedroom, find the bloody towel and place it by the washbowl. In the studio, take the bowl of fruit and the goblet, and arrange them on the table in this order from left to right: grapes, goblet, apple.
There are half a dozen human-shaped spectres in the gallery. Once they’re down, continue to the study. You need to pick up some candles and chalk, then examine the pentagram on the floor. Save your game, then place the candles on the circle outside the pentagram to continue.
When you are trapped in the fire, run to the painting in the corner and examine it to escape; look for the blue-ish stream of particles to guide you to its location in the room. You’ll then face a new hazard. As soon as you have control, run towards the manor and slightly right; instead of going up the stairs to the door, look for the open hatch to the cellars.
Safe inside, move onto another frozen tableau. Pick up the mug and the contract; the mug goes with Olgierd and the contract with Iris’s father. Moving on to the dining room, find the small bowl, the large bowl and the food platter; it should be obvious which belongs to the cat, the dog and the Caretaker.
Now save your game. In the final room, examine the letters on the table to begin a tough fight.
Hot to beat Iris Von Everec’s Worst Nightmare boss fight
This is not easy. The trick is to make sure there’s only ever one baddie attacking you at once. Immediately roll away from the active creature and once you’re at a safe distance, take one of the passive bodies down with a few heavy hits. Repeat until there’s only one left, at which point it’s safe to close the gap and start duelling. When you see black smoke as the enemy's spirit passes into a new body, wail on the new one; it will take a few seconds to start attacking, and with luck you'll have it dead before it fully wakes.
Be wary of these enemies; they hit very, very hard and can take out almost your whole health bar in one solid swing. When battling the active creatures, as opposed to the passive ones, use fast strikes, not heavy blows.
Do not allow multiple bodies to come to life simultaneously if you can help it. If you don’t have the strength to take the dummies down in a few hits even when using Thunderbolt, use Quen liberally and try to duel your way through it. Good luck!
Once the fight is over only dialogue remains of this quest. I don’t think it matters what you say, but I said Olgierd is not happy, and asked for the rose. Once you have that in hand, it’s time to end Olgierd and O'Dimm's contract.
- Next: the story comes to a climax in Whatsoever A Man Soeth
- Back to The Witcher 3: Hearts of Stone guide.
Whatsoever A Man Soeth
Back in Oxenfurt, enter the inn to trigger a lengthy scene. When this is over you have a new destination, but first, go visit Shani if you want to know a bit more about what you’re getting into.
If you do decide you want some extra context, which I recommend, follow Shani to the academy. Once she goes inside, leave via the bridge gate, dive into the river, and swim to sure. Follow the walls around to meet her, battling a few Drowners on the way.
How to enter Master Shakelock's house
Inside the academy, you'll have to fight four witch hunters, including one with a crossbow. Once they're down, knock on master Shakelock's door. He won't answer, so turn around and look directly behind you for a ladder. Climb it, follow the path around to a second ladder, and finally jump off the roof to the next balcony. Use Aard to shatter the door and gain entry.
Shakelock is on the ground floor. You can obtain the key to the front door from him when your conversation ends. The best way out of the academy is back across the courtyard you entered by and straight through the watchtower on the walls; there's a treasure chest in here you should grab.
Now we're off to the final confrontation. The nearest signposts are Beken and Toderas. Your waypoint will lead you into a dark cave; you may want to use Cat or a torch to get through this. Ignore your HorsePS when it freaks out and insists you leave the way you came; just keep climbing higher into the cave, jumping the gap when necessary, to emerge on a cliff outside. Save before you step out into the light if you want a backup.
O'Dimm and Olgierd will face off; you can and maybe should opt to intervene and try to save the troubled man. In any case, you'll be transported into a nightmare land where you must hunt down the demon who has you trapped.
How to find Master Mirror
The riddle isn't too tricky and, well, the answer's in the mission prompt - it's a mirror. Still, getting there isn't easy, as there's a strict time limit.
To start with, don't stop for anything. Don't stop for loot; don't stop to ave anyone; don't investigate anything; don't even fight monsters. Just keep sprinting.
Your goal is the house with the red windows which is visible from almost everywhere on the map, but the winding, switchbacking paths and various pits don't make it easy to get to. Your best bet is to use the mini-map to find paths, and reorient yourself when you reach a junction. You may fail a few times if you're not to hot on in-game geography, but you'll soon come to recognise the shape of things.
Once you reach the house, make sure you have full health, then sprint in the front door and down the long corridor down the stairs. You can't avoid the fall but try to roll to minimise damage. Approach the nearby mirror so it shatters, then forget about running around looking at the others. Instead, pass the first tempting set of stairs and climb into the fountain in the centre of the map.
Use Witcher senses to highlight points of interest. Examine the floor and Geralt will remark that there was water here, once. Now examine the back wall for him to comment that he can hear water on the other side. Use Aard to break the wall, and - well, spoilers.
Well done, Witcher! You've successfully completed the main quest of Hearts of Stone. There's heaps of other content out there, though, so why not return to our The Witcher 3: Hearts of Stone guide?
