Destiny guide: how to beat Skolas’s Revenge in an hour
It is now possible to run the Prison of Elders level 35 arena in about the same time it takes to assemble your evening’s Raid team. Many Guardians died to bring us this information.
Destiny: how to beat Skolas’s Revenge in an hour
Good news for all of you chasing the Laurea Prima emblem, stuck on what is potentially the most challenging (some might say harrowing) goal that Destiny has to offer. If you’re yet to acquire the Bane of Skolas Triumph, defeating Prison of Elders on Hard difficulty, prepare to end him.
It used to take an entire night to defeat the traitor Kell in less than a minute, which was every bit as ridiculous as it sounds. It was also extremely tedious, demoralising and ultimately disappointing – easily the worst activity in Destiny since broken Crota (and broken Atheon before that). Mercifully, Bungie addressed the Skolas situation with Hot Fix 1.2.0.3. Mainly, his health is almost halved to make up for the lack of elemental burn, levelling the playing field for a fairer crack of the whip.
Cutting to the chase, Skolas is pretty much the same fight every week now that the unpredictable elemental burn factor is gone. And since the preceding five rounds are also set in stone, Guardians have perfected a plan that – if executed without fail – occupies around one hour, the whole thing.
Who and what to bring
We’re going to assume you’ve put a good number of hours into playing Destiny, so the following list of requirements will be within reach of most teams. Your ideal fireteam should be one of each class: Defender Titan, Sunsinger Warlock, and Bladedancer Hunter subclasses maxed out.
For the Titan, it will greatly benefit the team if you have the Helm of Saint-14 for use on Round 4. Hunter, you’ll be glad to have brought Don’t Touch Me gauntlets for your pivotal role in general. Warlock and Titan armour configuration should push Intellect as high as possible. The same is true for the Hunter whose Strength also needs a huge boost to have melee on fastest available recharge. The Hunter’s Bladedancer subclass is focused on invisibility, armour and agility from start to finish. The Warlock’s Sunsinger set-up also remains unchanged from Fireborn and Radiant Skin. Titans have Ward of Dawn with Blessing of Light at the ready for self preservation and one key tactic in Round 4.
Everyone should bring an endless supply of Heavy Ammo synth, and level 365 weapons that would include any or all of the following:
- Primaries: Vision of Confluence, Fatebringer, Word of Crota, Fang of Ir Yût, Oversoul Edict
- Specials: Swordbreaker, Found Verdict, Blackhammer, The 4th Horseman, Icebreaker
- Heavies: Gjallarhorn, Hunger of Crota, Truth or any 365 RPG with tracking. Corrective Measure
ROUND 1: HIVE (Exposure, Brawler)
Kill ’em all! Round 1 is a straightforward shooting spree, best managed from the far left sheltered platform as you exit the airlock. Solar is king here, and for the sake of speed feel free to unload Gjallarhorn rockets from this safety spot while chipping away with Vision of Confluence. Thrall minions rushing your position fall swiftly to melee strikes owing to the Brawler modifier. Think of Round 1 as a warm up. This is nothing.
ROUND 2: VEX (Grounded, Airborne)
Destroy Mines. Again, you’re mostly defending the far left corner of the map from the entry point. Word of Crota is very effective against the Vex, as is Truth. We mentioned Corrective Measure in the load-out options because it can swiftly clear a pathway through the tunnels if necessary. Reserve Supers for waves two and three, because these are show-time for the Hunter. At the end of wave one, keep one or two enemies alive so that the Hunter can reach the far side of the map (heading right from the airlock). This is because one of the Splinter Mines appears in a central position that’s near impossible to target from the opposite corner. A cautious Hunter marksman should take this down with ease. Rinse and repeat for wave three.
ROUND 3: CABAL (Catapult, Arc Burn)
Mines must be dismantled. Or death! This is a game of distraction and devastation. Again it’s the Hunter placed in a vulnerable spot for waves two and three, which is on top of the tower at the right-hand side of the map as you pile into the arena. The other two guys operate from the far left corner from behind the parapet, in view of the elevated walkways.
The Hunter holds firm throughout waves two and three, ready to rain rockets and Arcbolt grenades onto the Cabal forces entering from the door below-right of his position. After dealing with these, rockets aimed into the centre of the room help to thin out the deadly Psions, whose Psionic Blasts are a one-hit kill. From this position the Splinter Mine that appears directly below is dismantled without having to drop down beneath it. When the Splinter Mine in the central position appears, Stalker invisibility means a short hop across the way, keeping Vanish in reserve if things get too hot.
Meanwhile the Warlock and Titan can take responsibility for the Splinter Mine that appears on the nearby walkway, also chucking as many rockets as possible into the fray and being sure to hop over Psionic Blasts. The Titan’s Blessing of Light bubble is obviously handy, and doubly so if wearing Helm of Saint-14 that blinds enemies who enter. Remember you’re still not immune to Psionic Blasts!
ROUND 4: FALLEN (Specialist, Juggler)
Eliminate Critical Targets. The spotlight is on your Defender Titan here, and the biggest time-saving method of the entire drive. If you have the Helm of Saint-14, rounds two and three are over almost as soon as they’ve begun. One Fallen Captain emerges to stalk the map, from the first door you meet running right from the airlock. The Ward of Dawn Blessing of Light goes up directly outside this door, and the Captain walks right out into it. He is instantly blinded, becoming an easy target for shotgun blasts ideally from Found Verdict or The 4th Horseman. They’ll down him in seconds but prepare to give chase in case he stumbles out of the bubble – this is also why Blessing is better than Weapons.
Be aware that the round three Captain sends a decoy out before him, who you deal with in the same way while using the ‘blind bubble’ tactic. This second guy is a pain to deal with while using the fall-back option, which basically requires the fireteam to bombard the exit with rockets from close by. In this second scenario, the Titan my still raise the Ward of Dawn to assist the others, while the Hunter may wish to hang fire while invisible before revealing his/her position upon pulling the trigger.
ROUND 5: FALLEN (Trickle, Small Arms)
Round five is an all-out assault on the Pilot Servitor boss, mainly handled from the platform at the far right corner upon exiting the airlock (and where you’ll soon defeat Skolas). The two barriers on this platform provide the perfect cover for the small fireteam, eating up a surprising amount of splash damage. Make sure you’ve all got max rockets with the cool-down on zero before taking this on, because you’re mainly bombarding the Pilot Servitor with all that you’ve got. It is also possible to snipe at him using Black Hammer to save a lot of time – a Titan bubble placed dead centre of the platform provides additional cover, again a tactic that returns for Skolas.
It will get too hot for comfort on this far-right platform, requiring individuals to run a circuit around the arena, clockwise from left to right, to avoid dying and holding things up quite significantly. Some teams like to run together. We’ve found this isn’t necessary. The task here is straightforward: focus on the Servitor, while clearing the adds and not the other way around. Take responsibility for your own health here and you’ll all be fine. And now it is time…
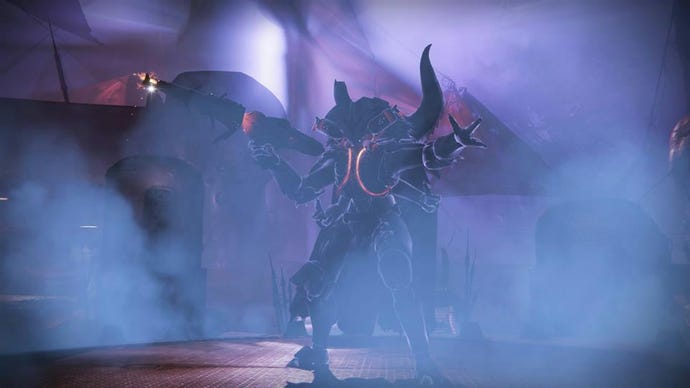
BOSS: SKOLAS
The modifiers on Skolas change each week, so you cannot prepare for this other than praying for Small Arms that boosts damage from primaries. A couple of obvious points to make before running out: have max rockets with zero cool-down on the Heavy Ammo synth, and make sure your Supers are fully charged. Sleepiness or nerves can make you forget either/or and it is such a pain in the ass.
Killing Skolas is straightforward. This runs literally like clockwork as long as everyone sticks together and sticks to the plan. And it begins with the one of you running slightly ahead of the others as you all exit and head to the far-left corner of the arena. The front-runner’s job is to shotgun the invisible servitor that’s waiting near the door at the bottom of the stairs leading to a platform. Taking this out weakens its healing bond with Skolas, at which point all three of you aim rockets at Skolas from the platform above him. You’ll manage four each at most before dropping off the platform, escaping the encroaching minions, continuing the clockwise circuit to the platform you defended in Round 5.
Here’s where the tactics we use differ most dramatically from other methods you may have seen. For the duration of the battle, the platform found at the far-right of the map from the entrance is where you stay no matter what. There is guaranteed cover and any revives are within easy reach.
The Hunter plays the most important and daring role, but the others are no less valuable. The routine is basically to shoot the adds until most if not all are cleared, and only then target Skolas. Remember to use both barriers to their full advantage at all times, seriously do not forget this. Also, place a Titan’s Ward of Dawn with Blessings of Light in the centre with enough room to peak out.
After clearing his way, the Hunter goes in search of a second ghostly servitor while invisible himself. It is more often than not hiding within the aircraft fuselage, but can be sometimes seen hovering beneath the safety spot. Don’t sweat it. Just take your time because it may not be an ideal scenario. The Hunter just needs to communicate with the team in case they are better placed to fire a couple of rockets instead. Otherwise, point-blank shotgun blasts again to weaken the bonds.
The Hunter returns to ‘base’ and after this second barrage Skolas’ bonds break completely, meaning that he’s now vulnerable at all times. Don’t hit him hard yet, just take down the adds in readiness for stage three. If you don’t quite manage to break the bonds, go in search of the servitor again.
Skolas is now at 65 percent health and very p**sed, casting Devouring Essence upon one player at random. This is a poison effect that lasts exactly 30 seconds, and must be passed around the team to prevent anyone from dying. One player takes the poison with 10 seconds remaining, at which point the previous player is immune for 35 seconds, unable to save the next guy in the chain. If you have the poison, keep an eye on the timer, and shout out as it reaches 10 seconds. You’re dealing with this until Skolas crumbles, designed as a distraction, but you’re fine if you keep watching the clock.
The next time you target Skolas he should drop to below 50 percent health, which triggers more adds and a series of three Splinter Mines to dismantle. Only do this after the Hunter has handed off the poison, however, because his next job is crucial. As soon as the mines are in play the Hunter goes invisible and dashes to the far corner of the map in case this is where the first mine appears. The safest route is clockwise left to right, though it is faster to drop off the right edge of the platform then head more directly across. The other mines are in the centre, also the Hunter’s job, or directly above your safety spot. The Hunter should think fast and choose wisely, practice makes perfect.
You are now on the home straight, repeating the above strategy to take Skolas’ health down below 25 percent after clearing away most of the minions. In a perfect run, landing all your rockets, he’ll die just before the final round of Splinter Mines causing all other enemies to vanish. Be prepared to tackle these as before, however, just in case. Even in the latter scenario just keep cool because IT IS DONE.


