Bloodborne: Yahar'gul, Unseen Village to The One Reborn
Our Bloodborne guide takes us back to a place that no longer strikes fear into our hearts the way it used to.
Bloodborne has enemies that send you to Yahar'gul, Unseen Village before you're ready, so it's understandable if you have a horror of it. Luckily this time you're ready to face its terrors. Don't even worry about it.
However, before we go there, we have some tidying up to do back at the Cathedral Ward - I know, I know; you're sick to death of that place, but there's some treasure there to collect and round out our exploration. Skip the next section if you can't be bothered, but otherwise, make sure you've lit the Lantern in Yahar'gul, Unseen Village, then head back to Hunter's Dream and on to the Grand Cathedral Lantern.
NEW: This is a great place for a detour to return to previous places and see what has changed with the coming of the blood moon. Visit The NPC window at the Central Yharnam Lantern, for example, to find out Gilbert's fate. Return to the NPC window where you got the Music Box to deliver the bad news about the girl whose ribbon you found; go away a bit after chatting and and come back for an immediate update. Visit Iosefka's Clinic and go into her inner sanctum; she'll no longer attack you, but can be killed for a rare item. At the Cathedral Ward, your friends may have new things to say.

Cathedral Ward
Head out of the Grand Cathedral - mind your old friends the Gravekeepers, although they might not be there, depending on your progress to date - and take the left path after the first set of stairs, opposite the path to Hemwick Charnel lane. Go down the stairs and walk over to the nearby tree. Look down to spot a Frenzied Coldblood, but don't drop down and grab it yet - let's clear out the baddies. Go right, but climb onto the rooftop just before the stairs. There are two Crazed Crows waiting for you. If you go onwards down the stairs you'll then meet a Hunter and Shock Hunter.
Your best bet here is to sneak up so you only aggro the Shock Hunter and not his friend. Pull him away and face him alone; he's very easily interrupted, so as long as you back off from his attacks when you get low on stamina you shouldn't have too many problems. Once he's down, look for cover - there's a well and some trees which you should use to shield you from the Hunter's firearm; he's much tougher, with a lot more HP and very quick dodges. Like Papa Guacamole, he's easiest to kill by dodging one of his attacks and then counter-attacking. Don't worry; these guys are unique enemies, like all Hunters, so you only ever need to do this successfully once. Now backtrack and drop down to grab the item we left before. Yay!
Down the bottom here, check out the doors on the far left; you won't hear anything but screams. Continue along the path on the right to battle a Death Dealer (possibly); try not to get dragged back to Yahar'gul, Unseen Village, but you know what to do if it happens. It's easiest to fight if you pull it back to the area where you fought the Hunters.
Back where the Death Dealer was standing, you can see a ledge lower down; drop down a few times along the ledges to surprise two Henchmen with rifles, then grab a Twin Blood Stone Shard. This is much easier than approaching from the other direction, where you'll have to fight two Cleaver Brutes while the Henchmen fire on you. This way, you can take the Brutes down with ease at your leisure. There are two Imps by the second Brute, so go for them before you take him down.
Once everything is dead, move onwards into the building ahead. There are three Lead Elixirs to collect, then keep going forward to loop back around and go back to the starting room. Make your way back to the Yahar'gul, Unseen Village Lantern.
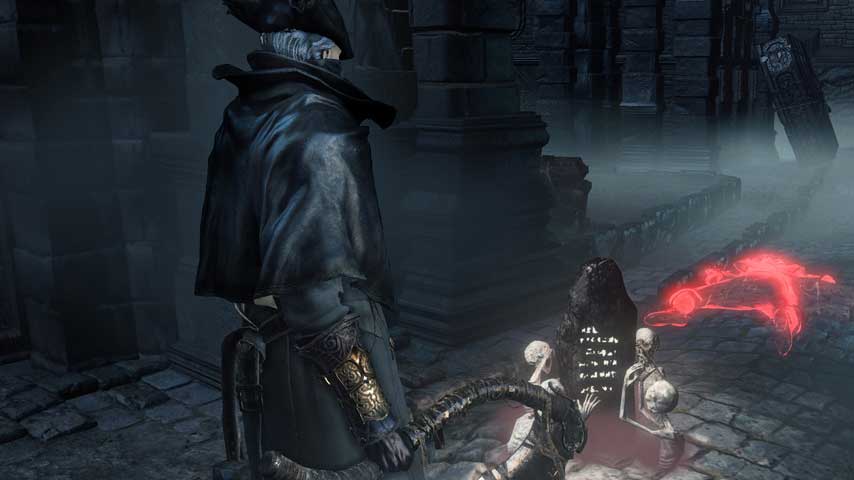
Yahar'gul, Unseen Village
Alright, here we go: welcome to frustration city. There are Sinister Bell-ringer Women everywhere here. They don't open you to invaders, like they can elsewhere; instead, they cause enemies to respawn around them. Oh yes. I know. You're gonna be okay though, I promise - just don't hang around in one area after you've cleared it out, and never, ever go AFK. (If you find all this too hard, skip down to the next mention of a Lantern for a shortcut.)
Hold the god damned phone. Turns out throwing knives work really, really well on Bell-ringer Women. Fill your inventory up and snipe them from afar whenever you can see one but not get to her immediately.
Go down the narrow stairs and take the lie of the land. There's a mob of Henchmen on a broad set of steps here, but don't kill them yet. This is a very dangerous area - as well as a second group of Henchmen, the stairs are guarded by a Giant Being. You might have seen these before, or at least their portals, which cause Frenzy status and transport you to a place we do not want to go. If you just run on down those stairs hacking and slashing, s**t will go south, fast - and the baddies will respawn so fast you'll be totally screwed.
Sneak past the Henchmen and go right, grabbing a Blood Stone Chunk from the corner. (If you've been following this walkthrough strictly, this may be the first one of these you find. Be aware that these are much, much rarer than Shards and Twin Shards, so save them for when you're sure you want to keep a weapon - at least for now.)
Now go down the narrow stairs nearby and go around the corner to the left. There's a Wheelchair Blunder waiting to surprise you on the left in this area, and a Henchman up the stairs; kill 'em both and grab the Iron Yahar'gul Helm from the middle
Okay, now we start working on the big, nasty set of stairs. The best way to navigate this nasty little sequence is to pull as many Henchman away from the stairs as you can and kill them there - probably about three. After that, you'll be able to dash down the stairs to the building at the bottom, then head right and up the stairs as quickly as you can; kill the Bell-ringer Woman here. Then go back and kill the rest of the Henchmen while avoiding the Giant Being the whole time.
Now that we're clear, let's grab some sweet stuff. Enter the first cell on the upper level and grab a Bolt Damp Blood Gem. Go back downstairs, then through the door on the left. Go down the stairs ahead, then look for a break in the wall you can pass through to a small area
You'll be ambushed by a Henchman, so prairie dog to lure him out, but as soon as he's dead, look in the cell to the right for the Bell-ringer Woman.
You'll have to head towards the end of the hall to find the entrance to her cell, fighting a Brute along the way. Try to move it all the way down the end of the hall so you're out of aggro range of the first Henchman when he respawns. Around the corner you'll find an Heir Rune.
Go around the nearest cell and open the door. There's a Wheelchair Blunder and a Henchmen here, but go after the Bell-ringer Woman at the top first. Kill the others, then look around for a Frenzied Coldblood, then open the door near where the Bell-ringer Woman was to open a shortcut.
There is a set of Bolt Papers to one side of the stairs from the previous area; you can see them if you climb half way up and peer over the side. You can get there by dropping off the nearby ledge, but you'll then have to fall down into the next area; this is the courtyard full of Old Hags found "straight ahead" path in the next paragraph.
Alright, down to the lower level, through the doorway and down the next set of stairs. Move to the right to reach two possible paths: straight ahead or up the stairs to the left. Straight ahead is a deadend with a great item, but it's optional, so if you prefer to go up the stairs, skip the italics ahead.
Move forward, staying wary of the Old Hags in the courtyard; these are as dangerous as the Crazed Hags you've fought before, so try to take them out one at a time. Move on and head down the stairs on the right, go around the corner, running to avoid the portal, cross the bridge and go into the next building. A Brute will attack you as you enter, so backpedal to pull him out rather than fight him with his friends.
Go back inside and go around the cell to the left, sneaking up on a Wheelchair Blunder with an auto gun. All you have to do now is take out one last Brute and open the chest to get the Tiny Tonitrus. It's likely your enemies will have respawned unless you're super fast, which - and I say this with love - I doubt very much. Fight your way back to the junction.
Head up the stairs. There's a bunch of Old Hags and a Giant Being waiting for you; the latter will shoot lasers at you, but you can use this, because it also hurts enemies. Watch for the initial tracer shot, which is harmless and shows where the laser will hit. Dodge out of the way. It's not too hard once you get the timing right. As you move up the stairs, there's a Blood Stone Chunk just under a small structure. Grab it if you're confident in your speed and the enemies around you. Make a dash for the stairs in the middle of the other side of the area and into the building, where you'll be safe and can activate the Yahar'gul Chapel Lantern.
If you find the trip from the initial Lantern too difficult, you can actually run through it. Spring down the broad stairs, jinking to avoid all the Henchmen, then run past the Bell-ringer Woman to the stairs outside. Hid and wait for the Henchmen to give up and go away. Go part way up the stairs and take the gap in the balustrade. Fall down into the courtyard below and sprint to the bridge on the left. Jog forward, dodging any Old Hags who aggro, and sprint down the big stairs, dodging the lasers. The next Lantern is just inside the building ahead. Now let's never speak of this again.
Now that you've made it to the first Lantern, you can optionally open a new area. What you need to do is return to the area at the top of the stairs, dodging the laser and Old Hags, and look for a tiny gap in the fence to your left (in direction of travel, backtracking from the new Lantern). Drop down - many of the Hags will follow, so deal with them first - then enter the building. There's a Brute to your right, but it's easier to fight him on the ground, so ignore him and run forward, dropping into a cage. Grab the Upper Cathedral Key from the body, kill the Brute when he drops down, then open the cage door. Run through the opening to your right and follow the path up and around the stairs to get back to the first courtyard of Old Hags, whence you can make your way back to the second Lantern. Alternately, just die or use a Hunter's Mark.
Speed will be of the essence in this section. Leave the building by the obvious path, and kill the Imp, then have a look around. There's a tiny set of stairs leading up to a courtyard with a Giant Being hanging over it. Don't go up these. Instead, go to the end of the path and take the second set of stairs on the right - the larger one. A Hound will come for you around the corner; once it's down, move on immediately to battle another Hound. Quickly get back to the first set of stairs which you skipped before, and get to the end of the platform as quickly as possible. There's a spot here where you can drop down on a Henchman and grab a Frenzied Coldblood.
Drop again, and go left as soon as you get to the stairs to find the Bell-ringer Woman in the corner. If you smack her down quickly, you'll stun the nearby Brute and two Henchman, allowing you to get in a bunch of damage on the Brute (Backstrike!) before a third Henchman turns up and complicates things further. If he doesn't aggro (lucky you), you can fight him when you move slightly forward. If all else fails, run back up to the top and wait for everyone to forget about you.
Push forward and you'll be ambushed by a Hunchback on the left, guarding eight Blood Vials. Open the door and move cautiously into the building ahead. See the broken Lantern? Explains why the Hypogean Gaol is out of order. As for why, well - head slowly to the right, down the stairs.
Here you'll face a tough battle - three Hunters. As ever, use your noggin, and by noggin I mean "legs". Leg it backwards all the way to the Lantern: with luck, only one will follow you. You can repeat this on the second one so you never have to fight them together.
All three are pretty tough. One has a Stake Driver (ouch), the next has a Threaded Cane (urgh) and the third has a Cannon and
Go on through the next door. There's a new enemy ahead of you - a Skull Plant - but before you experience its many and varied delights, go right and unlock a shortcut to an optional boss battle. Go down the hall and the stairs and search ahead and in the corner for a Frenzied Coldblood and a Twin Blood Stone Shard, then unlock the door. This leads to the Darkbeast Paarl. For the purposes of our walkthrough we'll come back to him later, but if you want to try him now, stick with us through another paragraph for a quick way back to this boss door.
Assuming you decide to finish exploring first, go back up the stairs and around the corner, then up the next flight of stairs where a rifleman Henchman awaits you. Once he's down, you can move on and up the stairs to kill the Bell-ringer Woman. Hooray! No more respawns! Head back downstairs and then right, killing a Henchman before taking the lift. This opens a shortcut to the Yahar'gul, Unseen Village lantern. (See? If you're gonna try Darkbeast Paarl, now's a good time - if you want to co-op it you should definitely do it before we fight The One Reborn, as I'm not sure you'll be able to afterwards).
Go back down the lift and follow the path to the right. Just before the next staircase, take a right and battle two Henchman, including a rifleman, before grabbing the nearby Frenzied Coldblood. Now go to the right and down the next hallway, killing an Imp that flees before your might. Go up the stairs and open the door at the top; this is another shortcut.
Now we want to go back to where the path branched off; look for the glowing corpse, which you should not touch, as it will damage you. The stairs down here lead back to that Skull Plant, but we'll do that later. First go the opposite way and peer down the left path for a second Skull Plant you can do a sneak attack on. It's immune to stun, so dodge away as soon as you've done your Charged Attack on it to avoid the counter attack. Fighting these guys is a pain, so stay at a safe distance and wait for the long recovery time after its flop attack. Once it's dead, you can grab two Blood Stone Chunks and five Bolt Papers. Worth a little battle, for sure.
Back on the main path, move forward to see a group of Skull Plants at the end of the path. You can get the item beyond them, but as soon as you go near the carriage ahead you'll be ambushed by a lone Skull Plant, so go very, very slowly and very, very carefully to make sure you get that one alone and out of the way first. It drops a Blood Stone Chunk, which is nice.
Use Pebbles to draw one Skull Plant at a time away from the group and take them down individually (tif the pack aggros, just leg it back to the Lantern, seriously). When they are all dead, you can get the Tonitrus at the end. This weapon does Bolt damage and scales pretty well with Arcane, although not as well as Ludwig's.
Go back the way you came and head towards that lone first Skull Plant. Kill, and take the items it was guarding - the Black Hooded Iron Helm, Yahar'gul Black Garb, Yahar'gul Black Gloves, Yahar'gul Black Trousers and three Madman's Knowledge items. Go up the stairs on the left and then look left to spot a Frenzied Coldblood. Now you can move forward along that main path again. I hope you consider it worth the battling.
In this area, the Bell-ringer Woman is on the far side, which is a pain, so move quick to avoid respawns. For starters, watch out for the rifleman Henchman on the bridge above, then peek around for the Skull Plant on the left. Go up the stairs behind it, ignoring the Frenzied Coldblood for now as you run away from the Skull Plant. Keep going along the stairs to the bridge and kill that Henchman, then cross the bridge to fight your first Undead Beast. Don't stress; it's a Netherbeast in big boy pants.
There are six Blood Vials you can pick up on the left after you cross the bridge. Go up the stairs on the left and avoid the bath thing in the middle of the room; it's a teleporter. Go through the doorway on the left and go across the bridge to finally, finally reach the Bell-ringer Woman and another Henchman.
Phew; now it's worth killing the horrid Skull Plants and collect all the goodies. Go back to the first bridge but instead of crossing go left, right to the end of the hallway, then go down the stairs and left to take out a rifleman Henchman and another Undead Beast at the very bottom. Once they're both down, grab the Tempering Damp Blood Gem.
You have a choice now; you can go through the hall and into the open and battle some Skull Plants from earlier, which you can fight if you didn't before. Or not; you can ignore them altogether and go back up the stairs.
We'll take the teleporter now. Once you reappear, go outside and kill the two Hounds, then go right, moving quickly down the stairs to kill the Imp. Once its down, go further down the stairs and around the corner, killing an Undead Beast and grabbing the Blood Stone Chunk. That's all. Go back through the teleporter and make your way back to where the Bell-ringer Woman was to take a ladder down. Turn left and pick up the Madman's Knowledge.
Stop here if you need a break; if you pass through this area to the far end you'll trigger a cutscene and the battle against The One Reborn.
Back to Bloodborne guide and walkthrough.