Dark Souls 2 Walkthrough Part 13: Shaded Woods
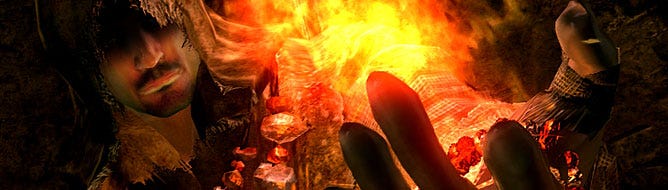
Walk through the winding woods and pick up items on your way to a showdown with Scorpioness Najka.
Firstly, head right towards the Forest of Fallen Giants. In the ruins you’ll find Benhart who will inform you of the statue in the building ahead. You’ll need to use a Fragrant Branch of Yore to bring the statue to life.
Now speak with Rosabeth for a Prism Stone and she’ll open a pyromancy store if you continue the conversation with her. Trade armour with her and she’ll set the store up permanently in Majula.
Now pull the lever previously blocked by her and brace for an ambush. Take the enemies down like the scum they are.
Step beyond the door and wait for it to close, then open it again and both doors will open. You can now speak to Benhart who will teach you the joy gesture. Nice.
Okay, in the next room there’s a door on the far right that contains a coffer with an Estus Flask Shard. Behind the door on the otherside is a bonfire - light it up, then go upstairs, jump over the left side and take down the enemy and grab the Soul of a Proud Knight and Human Effigy in the second door.
Jump over and fight another enemy in the first door and an enemy standing beside a Broadsword through the second door. Pull the lever near the entrance at the bottom of the stairs which opens both doors, then go up and through the doorway to follow the path to the shaded woods.
There are two enemies to kill ahead and a Falchion. Keep moving and kill the two enemies quickly before being attacked from above by two more. Go forward and up the hill to teach those two enemies a lesson and be rewarded with a Pharros' Lockstone.
Head down the path to a clearing where you will fight another three enemies, then go left to take out another enemy and light a bonfire. There are three staircases here, so go up the stairs on the right to talk to the man at the top, then through the doorway through the fog.
The fog is a pain as it makes it hard to see and lighting a torch won’t help. Keep a shield up at all times and hug the left wall. You’ll reach a clearing where you can circle out to the right for a Fire Seed, then continue to hug left until you reach stairs and away from the fog.
Fighting in the fog is really hard. As soon as you see an outline target them and strike and then follow their health bar. You’re pretty much blind at this point but there are Lifegems and souls around here. If you’re brave you’ll find some decent items but be prepared for some brutal deaths.
If you’ve had enough of the fog go up the stairs on the left, through a room, up a ramp and walk to the end of the platform for a Radiant Lifegem. Head back down the last ramp and light the bonfire behind it.
Go to the end of the platform and jump down where you will see an opening in the right. Roll immediately after jumping through the window into the darkened room. Go up the path to the room on the right and beat down the enemies and pick up the Twinkling Twilight.
Beyond the door at the end of the small room you’ll find a Soul of a Brave Warrior and three Firebombs. Now go back outside across the wooden bridge and to the main platform. Stay on the left wall as you go down the platform underneath the chest and go through the opening and turn left. Be careful to steer clear of the cursed jars - smash them to avoid being cursed.
Kill the three enemies but avoid hitting the frog. Head into the structure on the right and down the ramp to break open barrels for a Soul of a Brave Warrior and a Pharros' Lockstone. Go through the opening and to the left you’ll find a Dark Scythe. Jump to the small ledge. There’s a large scorpion here which you can either kill for a Second Dragon Ring or you can talk to it using the Whispering Ring and make it an ally.
Head through the opening in the corner, down the corridor and kill the enemy in the rooom. Grab the torch then back to the area where the large frog is.
Melee fighters can kill the frog by standing in front of it but moving to the side as it prepares to spit gas. Block any incoming attacks and counter with a couple more hits. The frog deals massive amounts of damage. Keep blocking and countering with two or three attacks until it’s worm food. You now have a Petrified Dragon Bone.
Make you way to the far left corner and up the stairs for a Pharros’ Lockstone and Soul of a Brave Warrior. Now go back to the open area and go left.
Kill the enemy here and take the Lifegem but don’t step on the wood or you’ll fall into a room and be ambushed. Carry on down the path to fight another enemy and then into the ruins and up the staircase. At the top is a Soul of a Brave Warrior and a Skeptic's Spice. Now go back down and through the door on the right to find the mist that leads to another boss battle, this time with Scorpioness Najka.
Boss Battle: Scorpioness Najka
Reward: Scorpioness Najka Soul
Do not hang around - attack the boss while she’s stuck. If you stay at a distance she’ll use magic on you. Get a couple of hits in before she breaks free but be careful, if you’re too close you’ll take some damage.
She uses melee attacks that come as a three-hit combo: two mandible attacks and a spear attack. Block the two mandibles, evade the spear and then counter. If you’re fighting from a distance her magic attacks are fairly easy to evade.
Whenever you see her tails wiggle, back off. If they catch you your health will drain. When both her tails are stuck in the ground she’s more open to attack. Also be aware of stone on the ground and stand on it when she disappears into the sand. If you stay on the sand she’ll come up underneath you and kick your ass.
Her combo attacks don’t differ and you can also hack off those tails but if you do she’ll use more magic. If you’re not good at dealing with magic, just keep hitting her in the body rather than the tails. Once Najka’s dead go through the doorway and up the stairs to the Door of Pharros.
Dark Souls 2 walkthrough: a complete guide to all locations and bosses.