Battlefield 4 single-player walkthrough – Kunlun Mountains (mission 5)
Get your complete walkthrough of Battlefield 4's fifth mission below, including all dog tags and assignments.

Battlefield 4 single-player walkthrough - Kunlun Mountains (mission 5)
Dog Tags
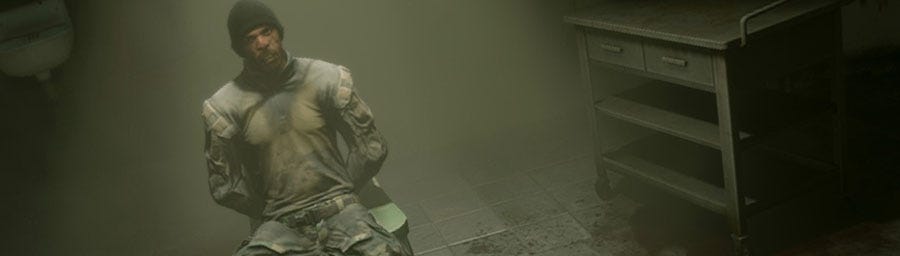
- Cage Fighter - In a cell during the breakout.
- Freedom at any Cost - Inside the loading bay, on an electrical box on the second floor.
- Shaw-Shanked Redemption - Under the tram platform in the tram bridge encounter.
Assignments
- Unlock G36C: 5,000 points
- Unlock AUG A3: 7,000 points
- Unlock CZ-3A1: 11,000 points
- Unlock Shank: Complete Kunlun Mountains
Walkthrough
We begin with a cut scene. Irish and Recker have been taken hostage and are being tortured by the Chinese. Irish is defiant and tells his captors that he's going to kill Hannah for her betrayal. It would seem that her "husband" is actually Jin Jie who was previously thought to be dead. Recker is electrocuted and passes out. When he wakes up there's a familiar face from the Battlefield 3 campaign there to greet him. Dima alive and wants to break out.
Escape
Just follow Dima as he leads the escape effort. After he points out the tower in the center of the prison head down the stairs and take out the guard with the Shank. Make sure to grab the shotgun he drops. The goal here is to head up the stairs to the lookout post in the middle of the room. Be careful not to get spotted by the search lights. If you're having trouble avoiding them, just shoot any guards in your way and head up the stairs. Take out the guard at the top of the stairs and the one left over in the control room. Hit the switch to let all the prisoners out of their cells. You're surrounded by guards below you. Use the control room for cover and aim at the lights on their weapons. Once the last guard is down follow Dima to the elevator.
Keep trailing Dima until you find a Chinese guard laying a beating on Irish and punish him accordingly. As Irish and Dima talk about Pac, hit up the Weapon Crate and arm yourself with all of your favorite toys. Start taking out the guards in the next room and continue north towards your objective. There's several rooms to the right and left of the corridor if things get too hot. Jump on the elevator and hit the switch.
When the elevator ride is over start eliminating the opposition in front of you. There's a Weapon Crate for you to stock up and swap out anything you don't want. Head east and you'll reach a loading bay. It is highly suggested you take the catwalk on the left side to make your way through the room. Just keep taking the bad guys down and moving up slowly. Don't forget your grenades, they are quite possibly the best weapons given to you. Be sure to pass over dead bodies to refill when there aren't any Weapon Crates nearby.
As you reach the end of the loading bay the doors close, locking you in. Dima can fix it but he needs you and Irish to cover him. Head into the control room and grab the M320 HE and Claymores. Lay some Claymores outside but don't worry about them too much. When the waves of enemy soldiers start to attack, stay inside the control room. There's a Weapon Crate there giving you unlimited grenades and M320 HE ammunition. Use this to devastate the opposition. Surprisingly, just when you kill the last Chinese solider Dima opens the gate!
Crawl under the gate to get hit in the face with the butt of a rifle. Hannah is back. Luckily for you she is back on your side again and kills the two soldiers attacking you. Irish and her have a few words before Dima breaks things up and gets the group moving forward.

Reach the Tram
Once you're outside hit up the Weapon Crate and grab a sniper rifle if you have it. Your objective is to the north west. There's no magic formula here, just start killing people. Rather than run up use the ample cover and pick as many off as you can with a rifle. Once the numbers are thinned out, move up and clean up the leftovers.
Just before the bridge there is a Gadget Stash on the left hand side. Arm yourself with an RPG and use it to take out the vehicle on the opposite end. Move across the bridge and take cover in the buildings on the left. At some point a pesky enemy soldier will start to bombard you with a grenade launcher. He's on the right side up the road a little ways. Once he sticks his head out take him down with your rifle. There is plenty of other opposition along the way so keep moving from cover to cover and taking them out. Be sure to use the target marking system to call out enemy positions to your squad.
After you clear out the base of the ramp that leads to the tram, one last wave of soldiers will come at you. Retreat back down the ramp and let them come to you. When the area is clear load into the tram. It's all cut scenes and scripted events from here. If you watch closely, just as the mission is ending you can see Dima fly out of the tram. When the dust settles you find out that Hannah and Irish survived but after two campaigns of Battlefield, Dima is dead. At least he died free.
Head back to get the rest of our Battlefield 4 guide.